two sugar bugs

  • About
  • Recipes
  • Coffee Talk
  • come say hello
    • Contact
    • Privacy Policy
menu icon
go to homepage
  • About
  • Recipes
  • Coffee Talk
  • Come say hello
  • Work With Me
    • Instagram
    • Pinterest
    • YouTube
  • subscribe
    search icon
    Homepage link
    • About
    • Recipes
    • Coffee Talk
    • Come say hello
    • Work With Me
    • Instagram
    • Pinterest
    • YouTube
  • ×
    Home

    Easy Vanilla Cupcakes

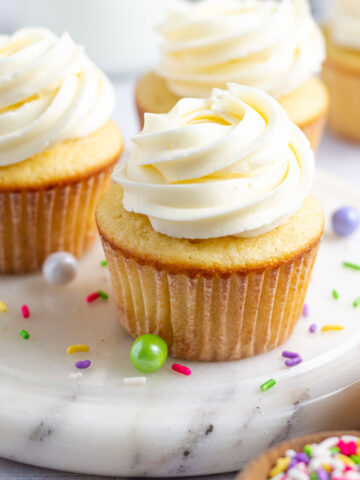
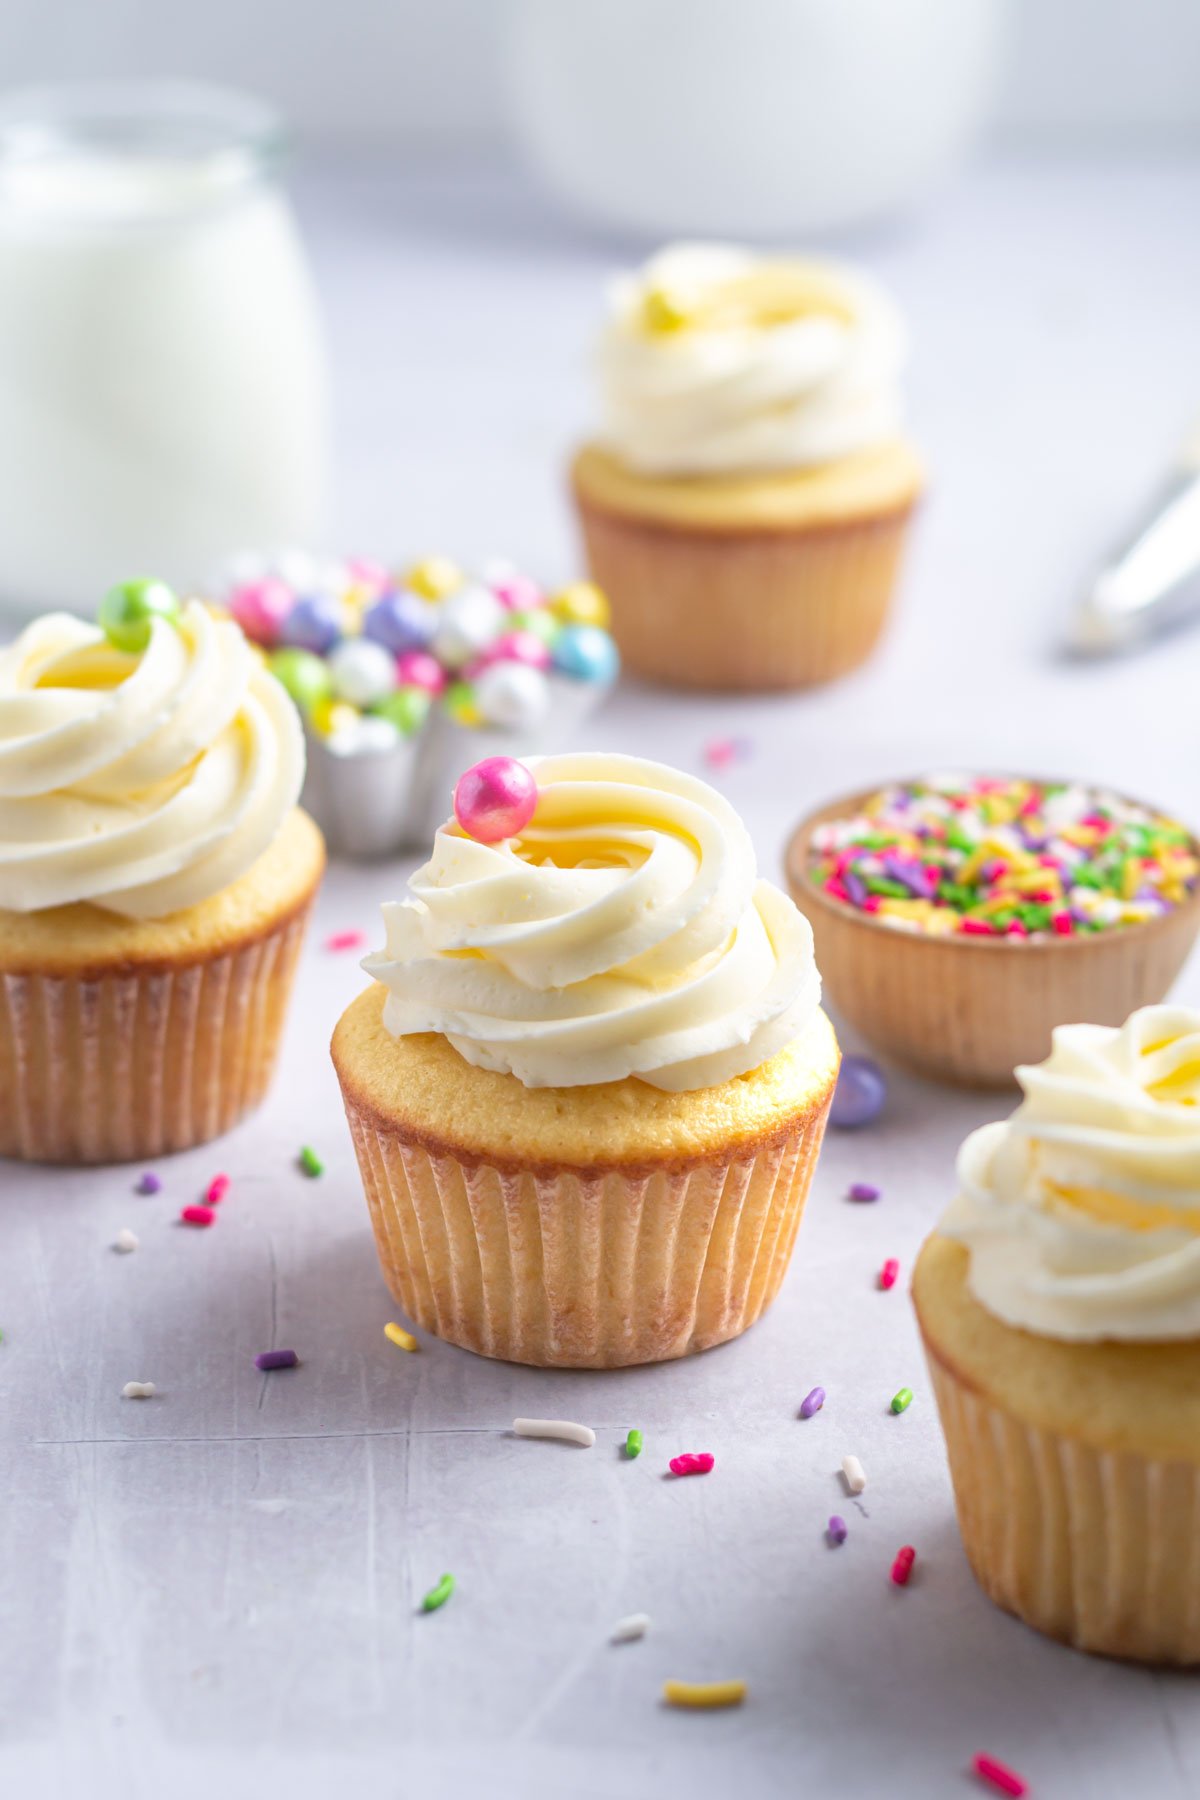
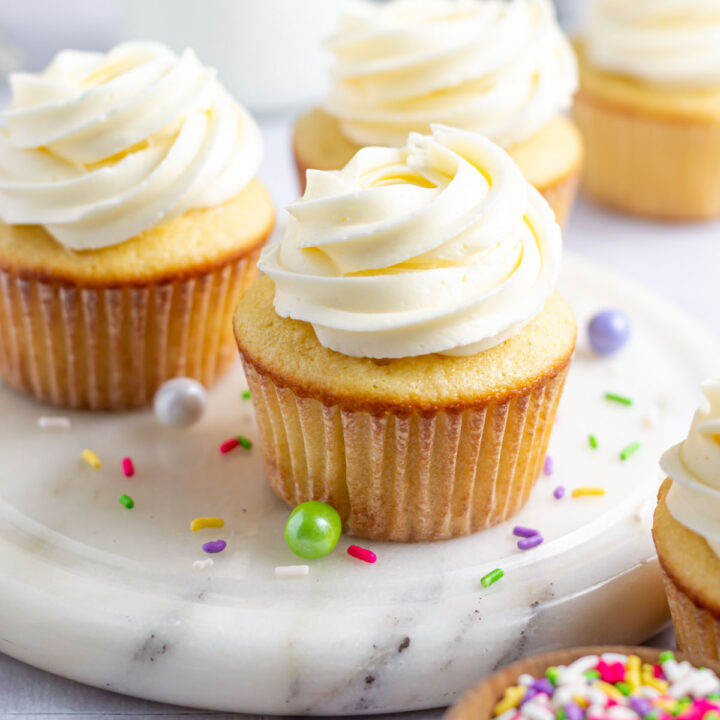
    easy vanilla cupcakes with vanilla buttercream swirls

    Easy vanilla cupcakes are a classic homemade recipe. They are soft and tender, made with simple ingredients and require no mixer. Fluffy, moist and quick to make, you'll be calling them the BEST vanilla cupcakes!

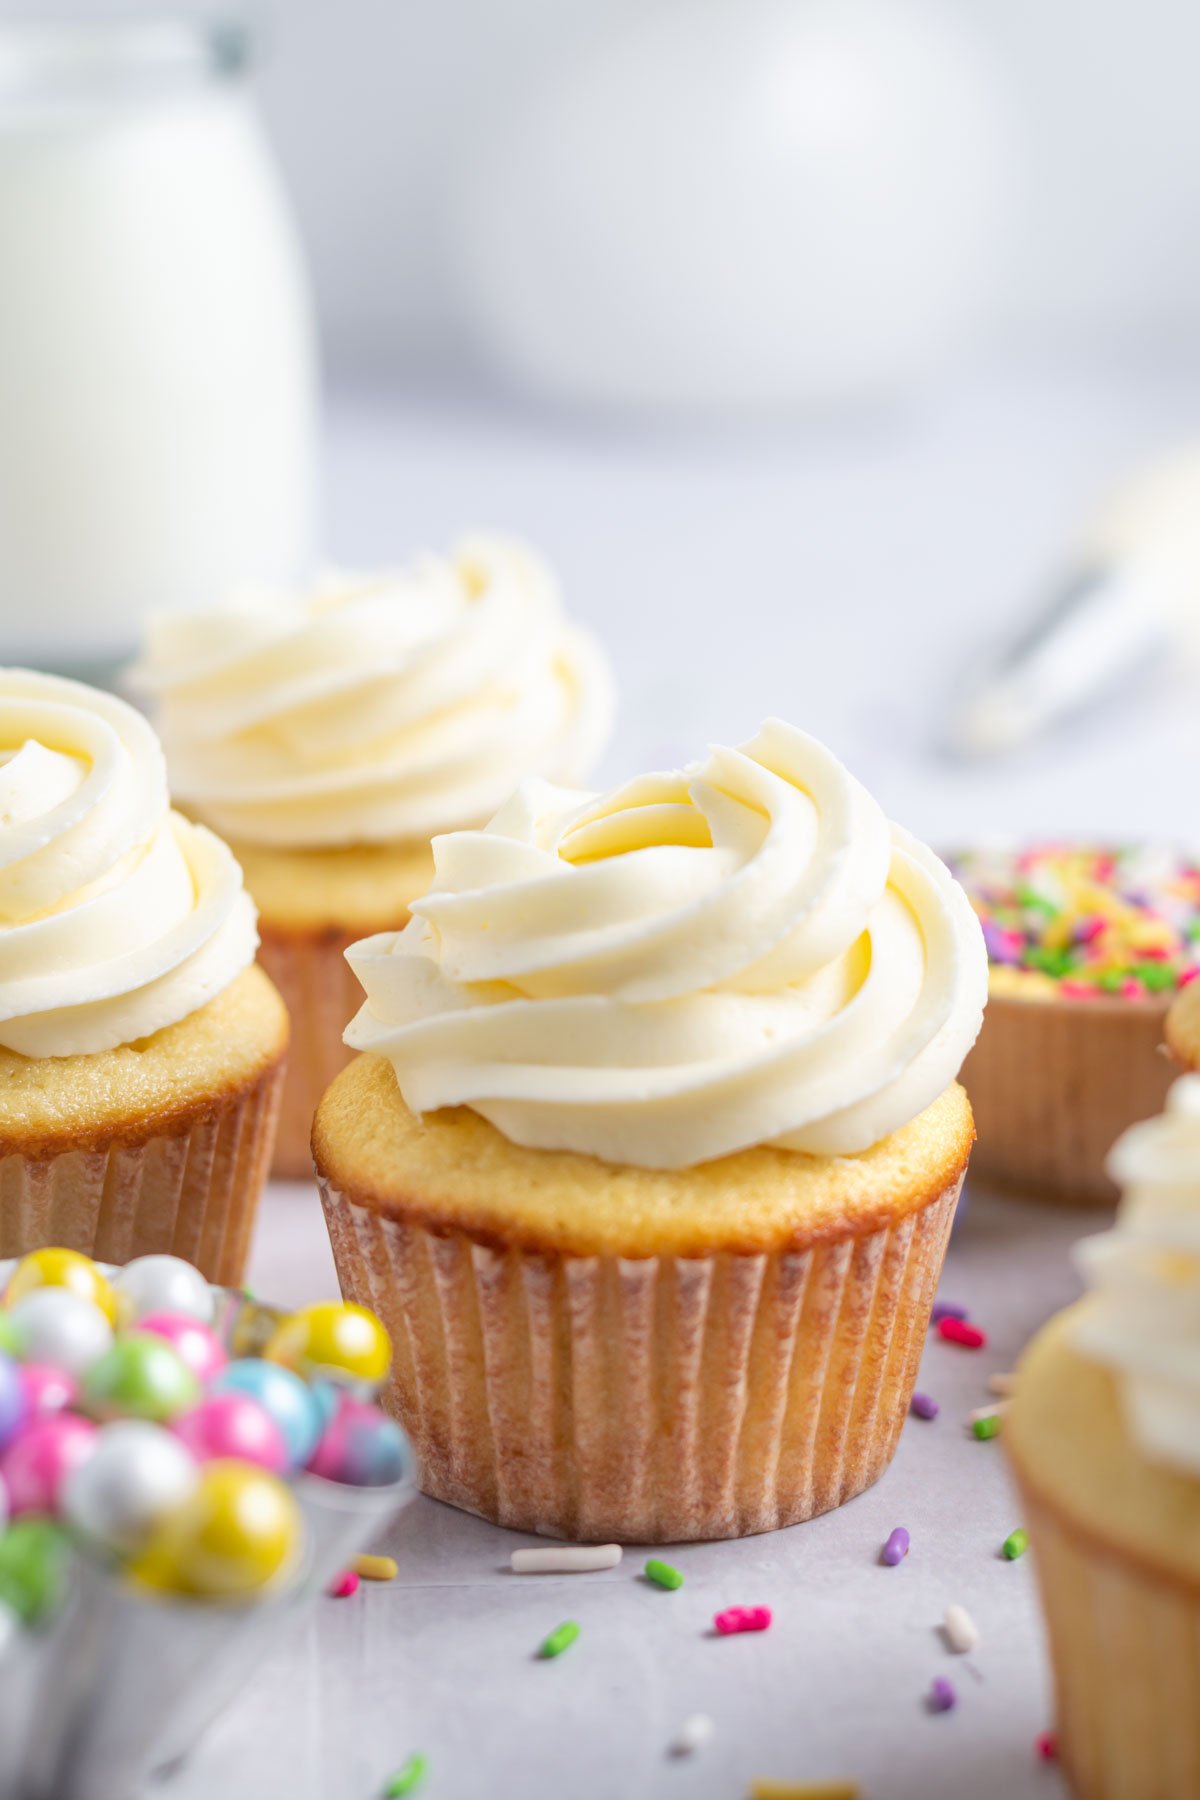
    Easy vanilla cupcakes with vanilla buttercream and sprinkles

    Disclosure | This post may contain affiliate links. As an Amazon Associate I earn from qualifying purchases.

    These incredible vanilla cupcakes are a classic dessert! I enjoy cupcakes for their individual size, portability and the endless options to decorate and customize them.

    I've been making this simple vanilla cupcakes recipe for years and it's always a winner. A blog reader also shared that she did a taste test with four different blogger's vanilla cupcake recipes and this recipe was the winner.☺️

    If you are craving other flavors of cupcakes; try my almond joy cupcakes, homemade lemon cupcakes or white chocolate cupcakes.

    This post was originally posted in December of 2018 and has been updated with new photos and helpful information. The recipe remains the same.

    why you'll love these classic vanilla cupcakes

    • Quick and easy to make ~ the from scratch batter comes together quickly with melted butter and two bowls. No mixer needed. Easy for kids to make too!
    • Simple ingredients ~ made without cake flour, no oil and no buttermilk. I bet you've got all the ingredients in your kitchen right now.
    • Make them your own ~ go classic with a chocolate or vanilla buttercream. Or maybe you want to go with raspberry filling or lemon frosting. The options are endless!
    • Yields 12 cupcakes ~ no need for an extra muffin pan!
    • Perfect for birthday parties, baby showers, weddings or holidays like Mother's Day, Easter, Valentine's Day or Christmas.
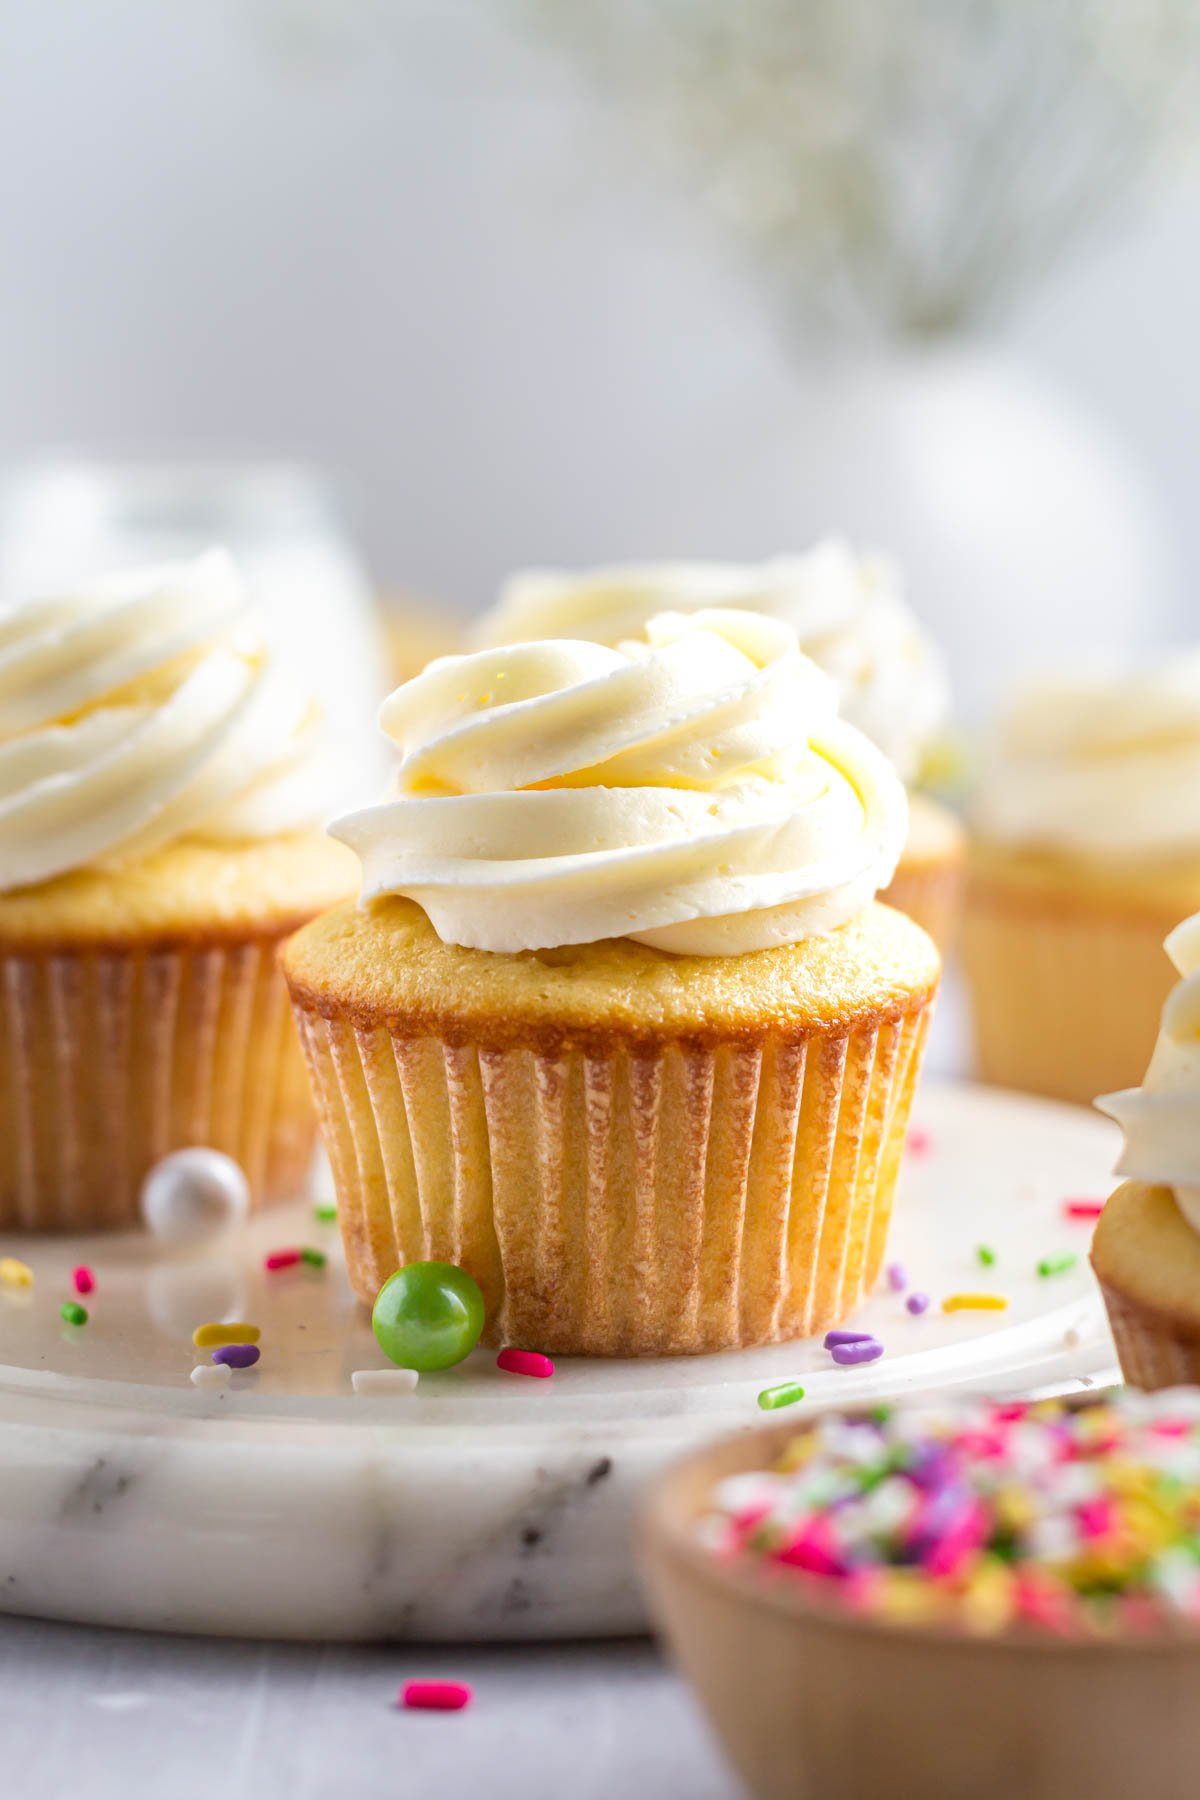
    easy vanilla cupcakes swirled with buttercream and topped with colored sprinkles

    simple ingredients needed

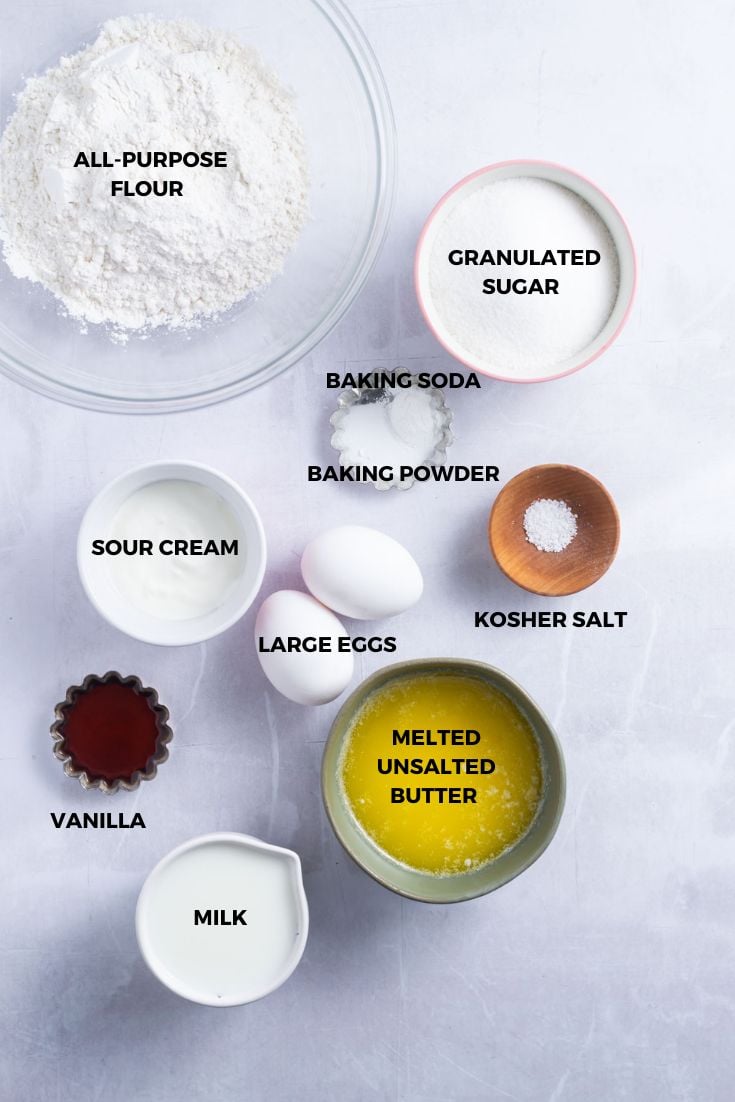
    Please scroll to the printable recipe card at the end of this post for the full list of ingredients and baking directions.
    cupcake ingredients
    • All-purpose flour ~ adds structure. If not using a kitchen scale, be sure to use the spoon and level method. {Fluff the flour in the container, then spoon it into your measuring cup and level it off with the back of a knife}.
    • Baking powder and baking soda ~ add some height to the cupcakes.
    • Kosher salt ~ helps to balance the flavors. 
    • Granulated sugar ~ brings the sweetness.
    • Eggs ~ 2 large eggs needed. Having the eggs at room temperature will provide the best results.
    • Sour cream ~ making cupcakes with sour cream brings extra moisture by working to shorten the gluten strands in the flour, which results in a tender and soft cupcake. For the best cupcakes, use full fat sour cream and bring it to room temperature. 
    • Vanilla ~ adds a nice burst of flavor to the cupcakes. For the best vanilla cupcakes, use pure vanilla extract. You can also use vanilla bean paste or vanilla powder {substitute for the same amount of vanilla}.
    • Milk ~ brings moisture to the baked cupcakes; I use 1%, but 2% or whole milk also work. Having the milk at room temperature will give you the best cupcakes.
    • Unsalted butter ~ brings richness to the cupcakes. The butter gets melted and slightly cooled before adding to the cupcake ingredients. If you only have salted butter, leave out the kosher salt.

    To quickly bring the sour cream and milk to room temperature you can do quick {10-15 second} bursts in the microwave. Stir in between each burst and be careful NOT to heat them up, as this can change their structure.

    cupcakes with milk and bowls of sprinkles in the background

    how to make cupcakes without a mixer

    Melt the butter and set aside to cool slightly. Preheat the oven to 350°F and prepare a 12 count muffin pan with cupcake liners. Set aside.

    In a medium bowl, whisk together the all-purpose flour, baking powder, baking soda and kosher salt. Set aside.

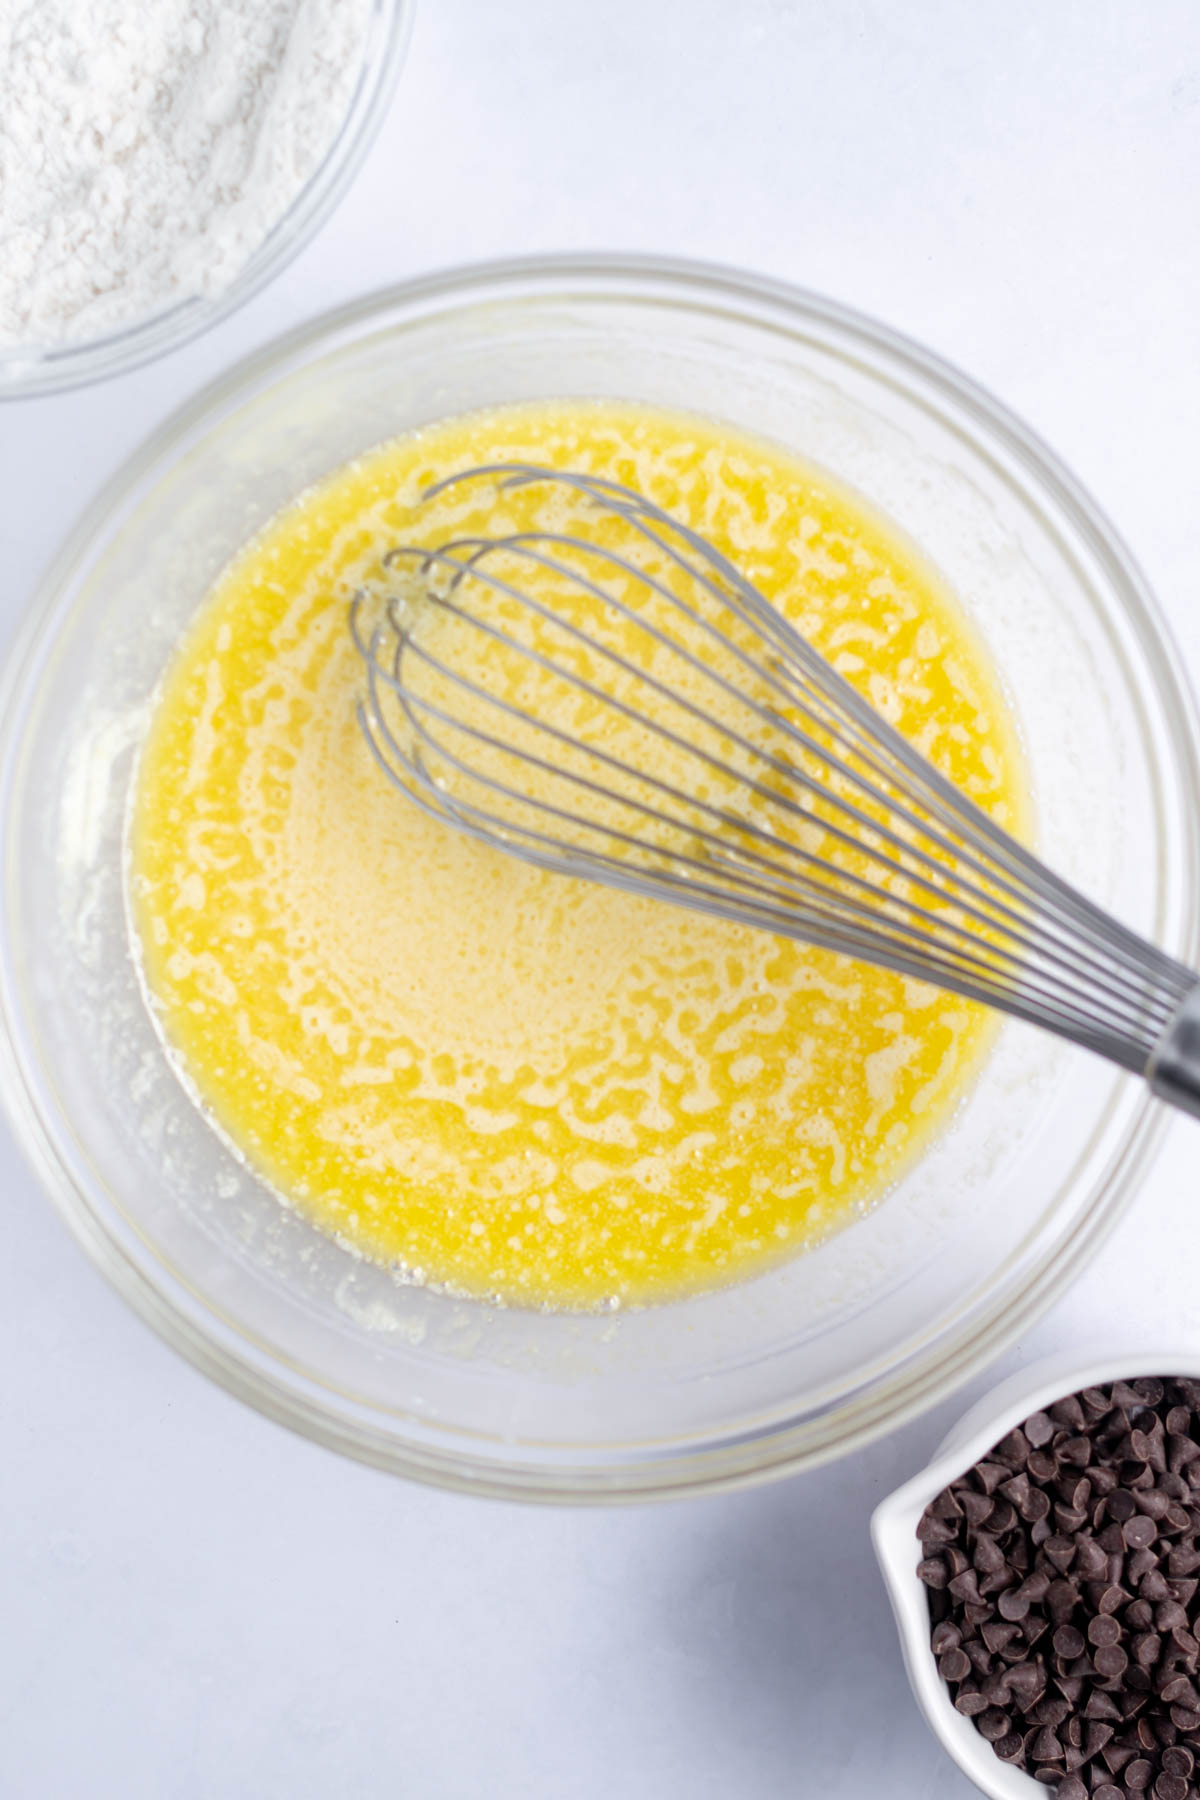
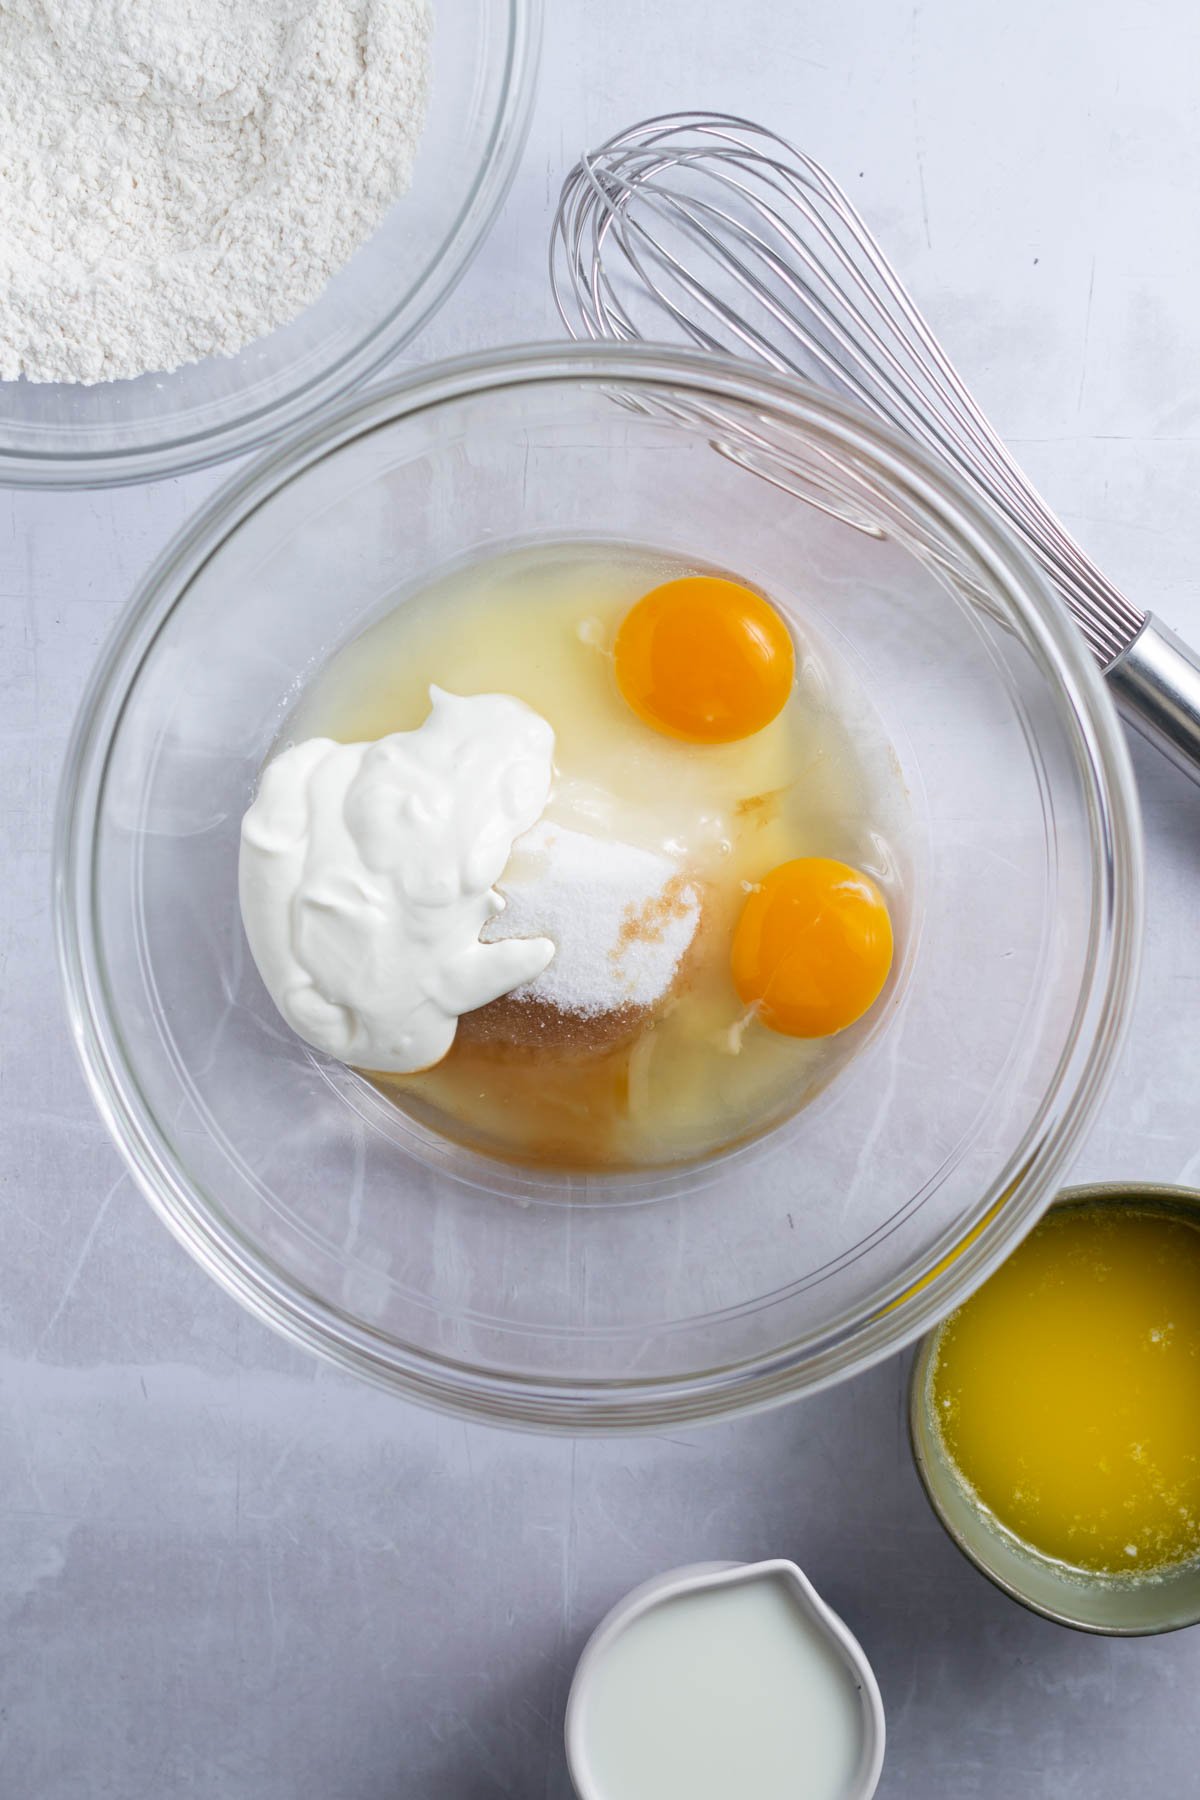
    In a large bowl, whisk the granulated sugar, eggs, vanilla and sour cream until well combined. Then whisk in the milk and once combined whisk in the melted and cooled butter.

    eggs, sugar, sour cream and vanilla in a mixing bowl
    Whisk together the sugar, room temperature eggs and sour cream and vanilla.
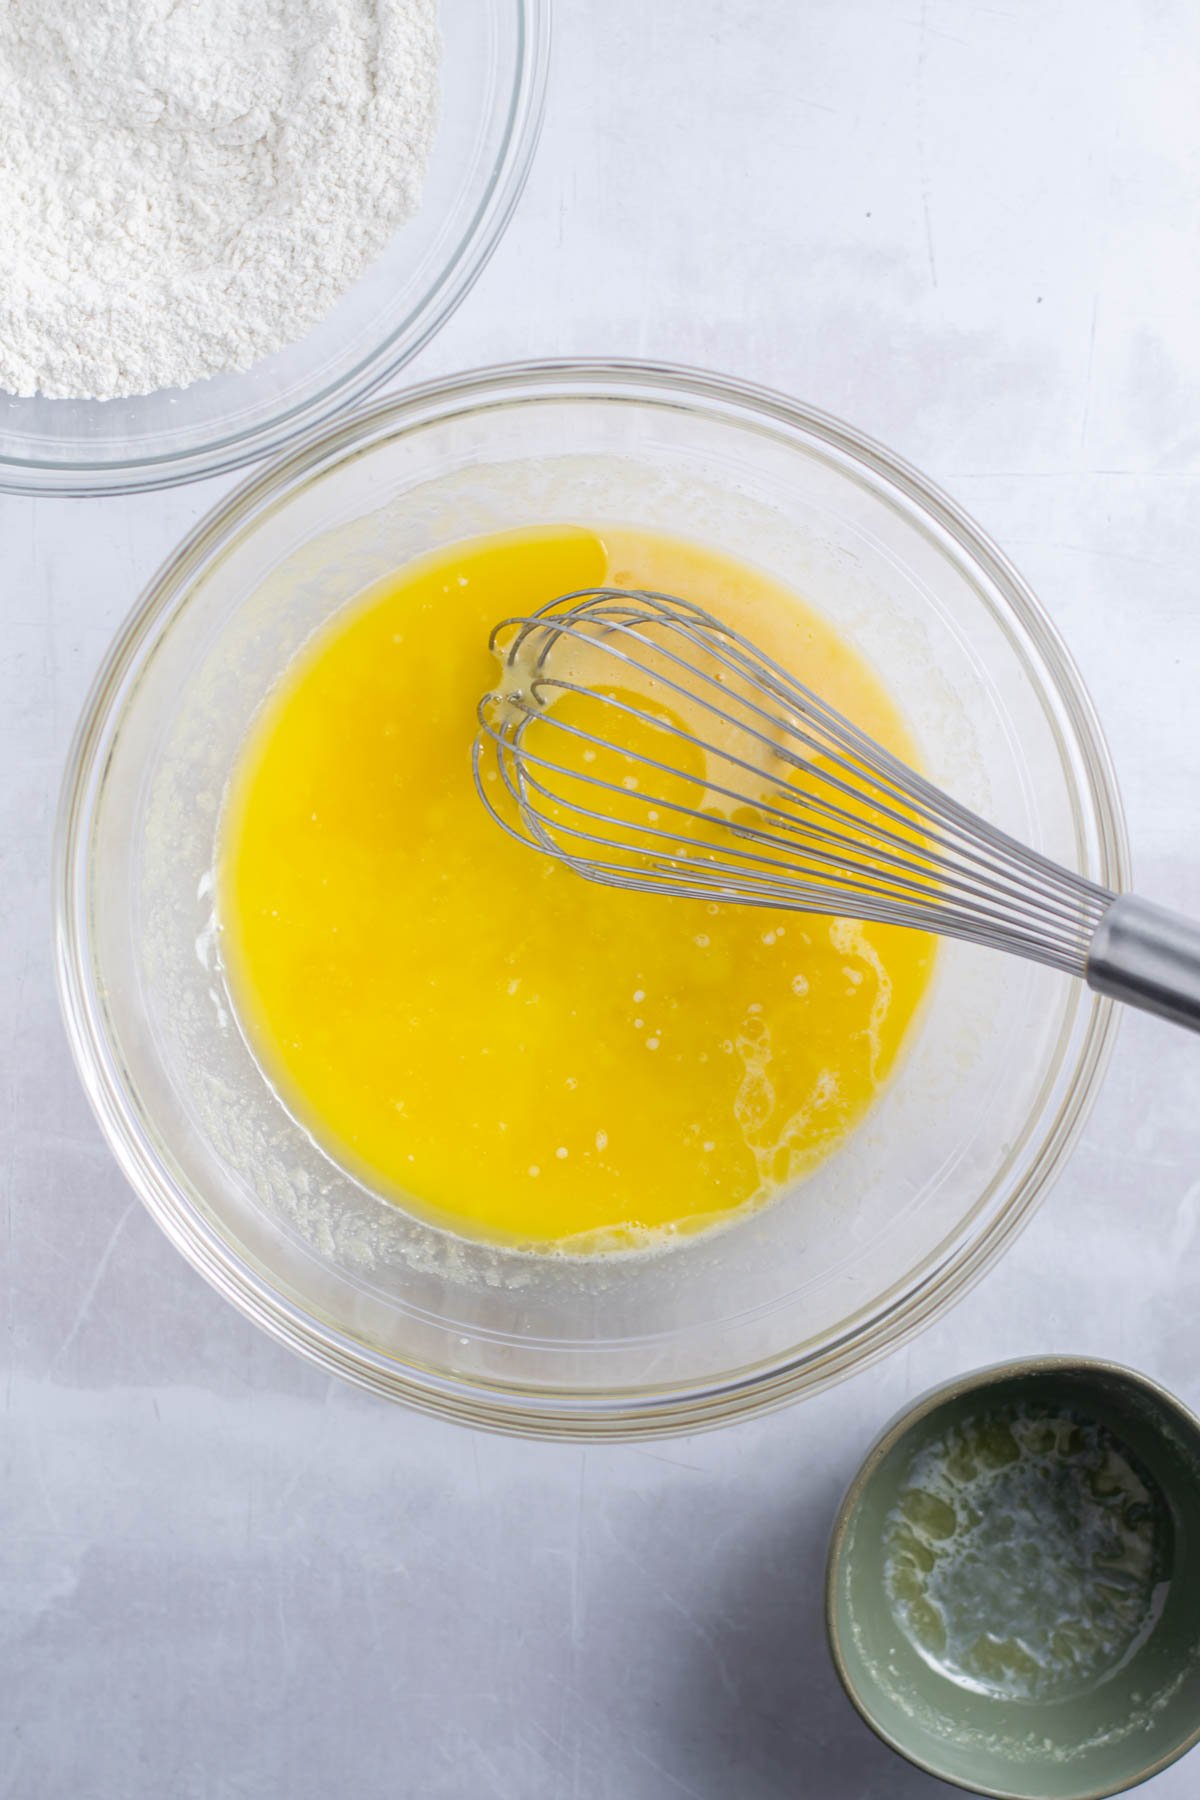
    wet ingredients mixed in a bowl
    The wet ingredients after the melted butter has been added in.
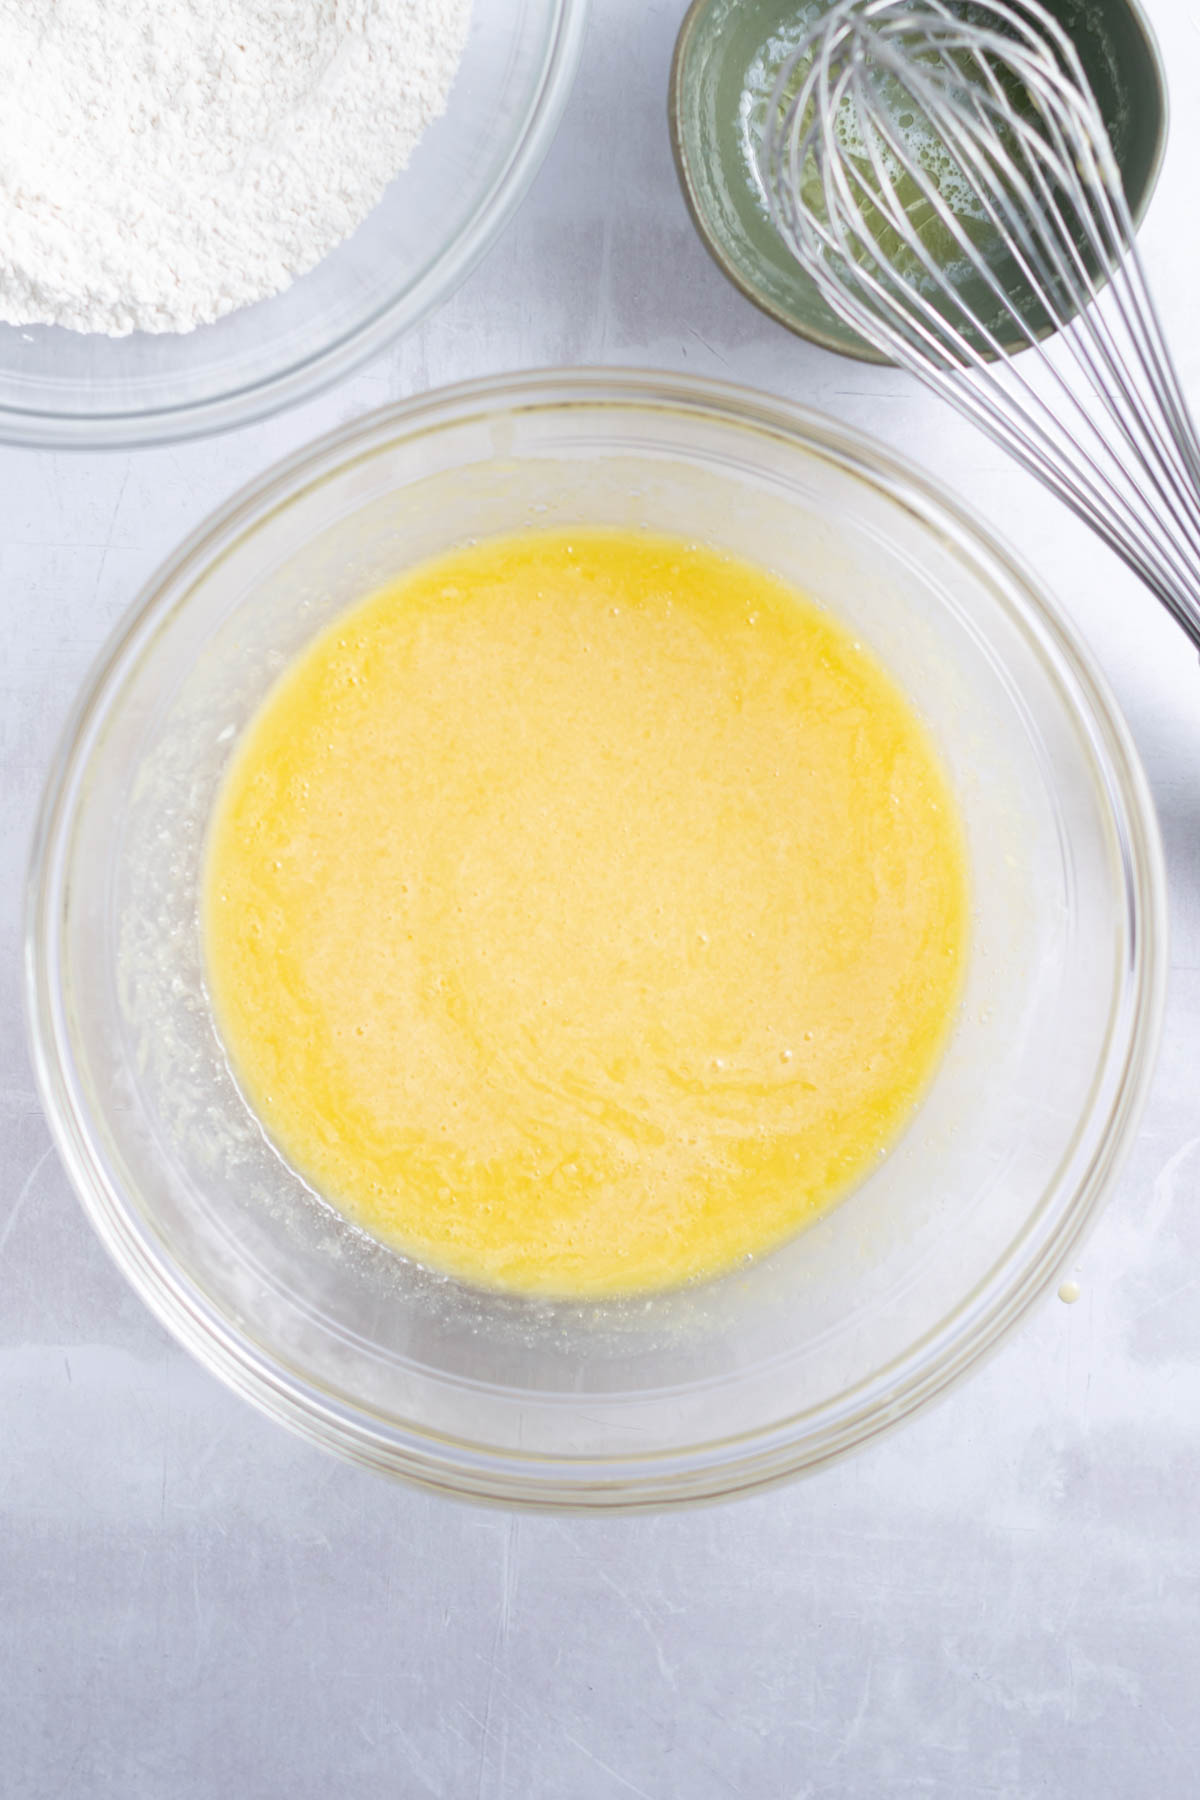
    All the wet ingredients mixed in a bowl for easy vanilla cupcakes
    Add the milk after all the other ingredients are combined.

    Add the flour mixture to the wet ingredients and mix until just fully combined. The batter is on the thick side.

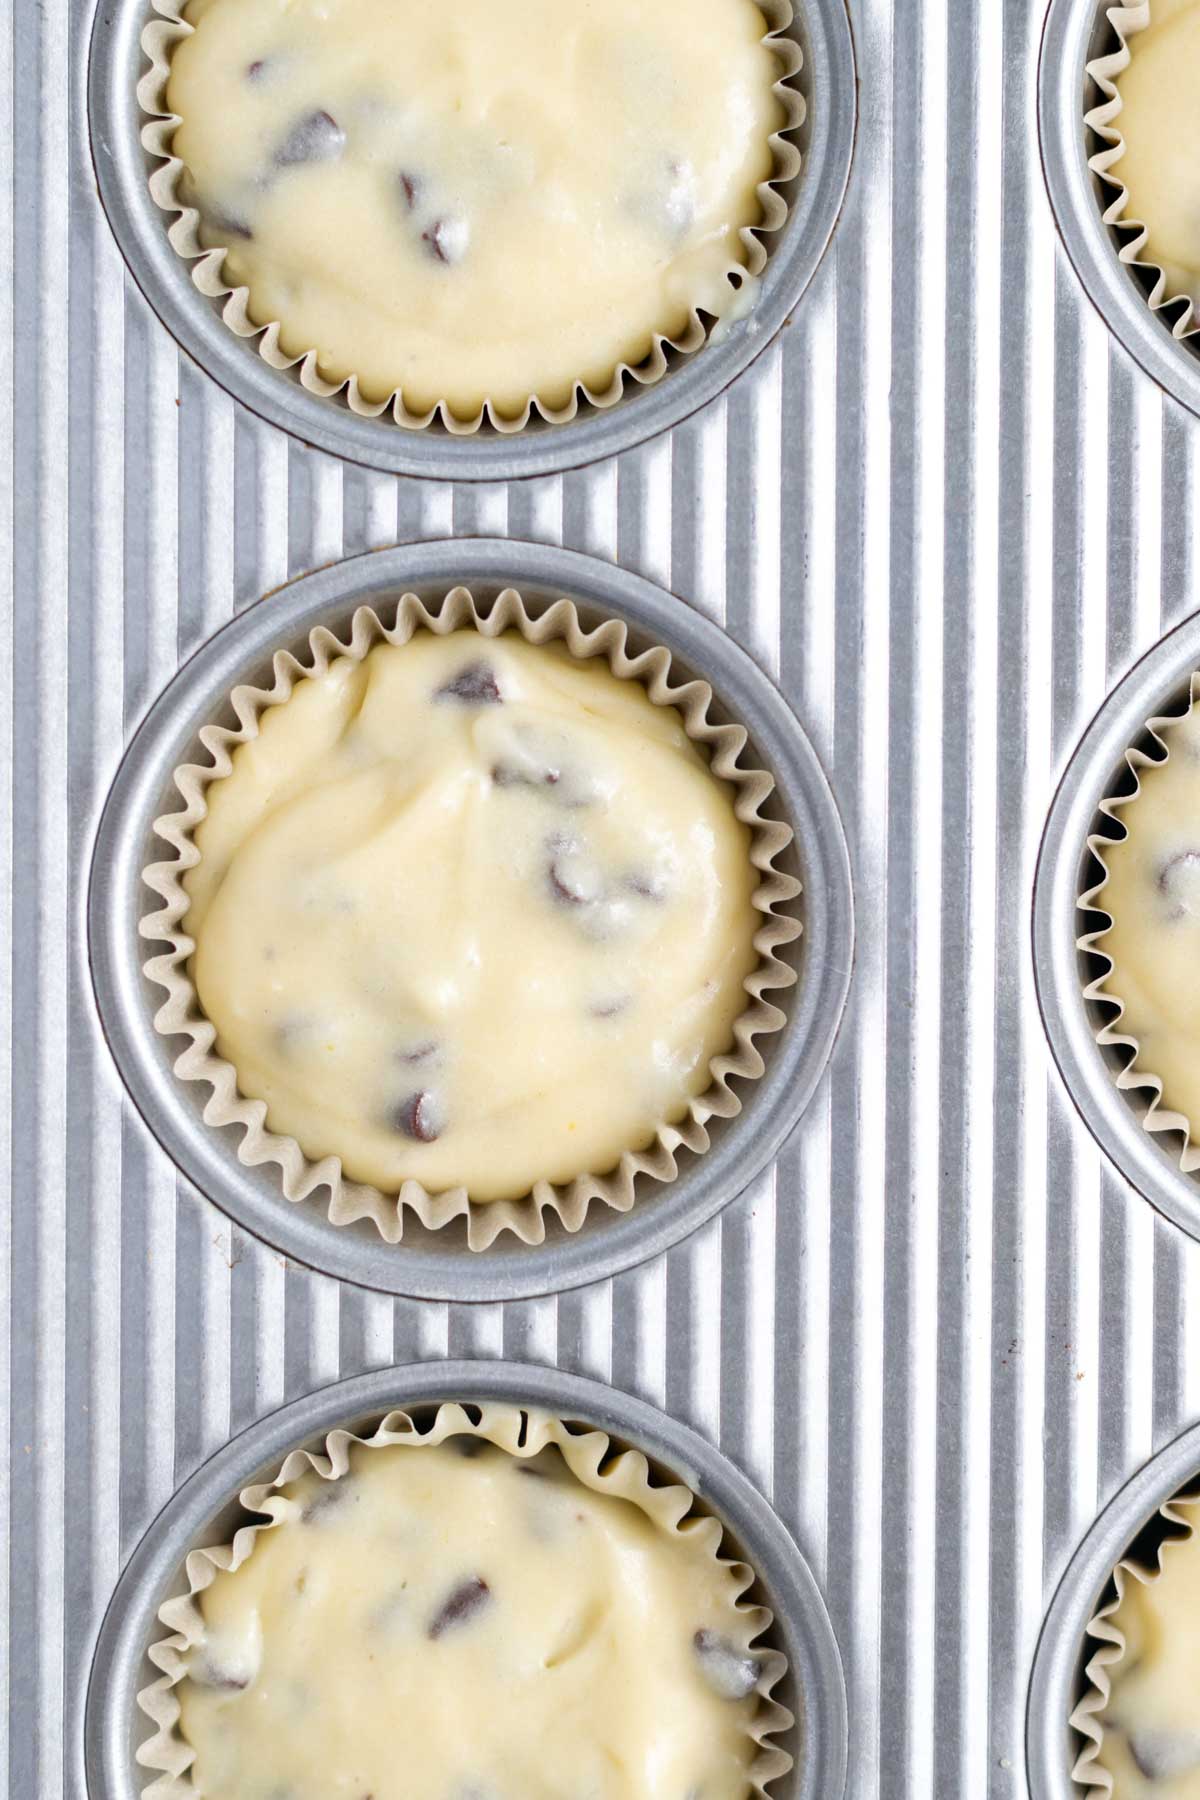
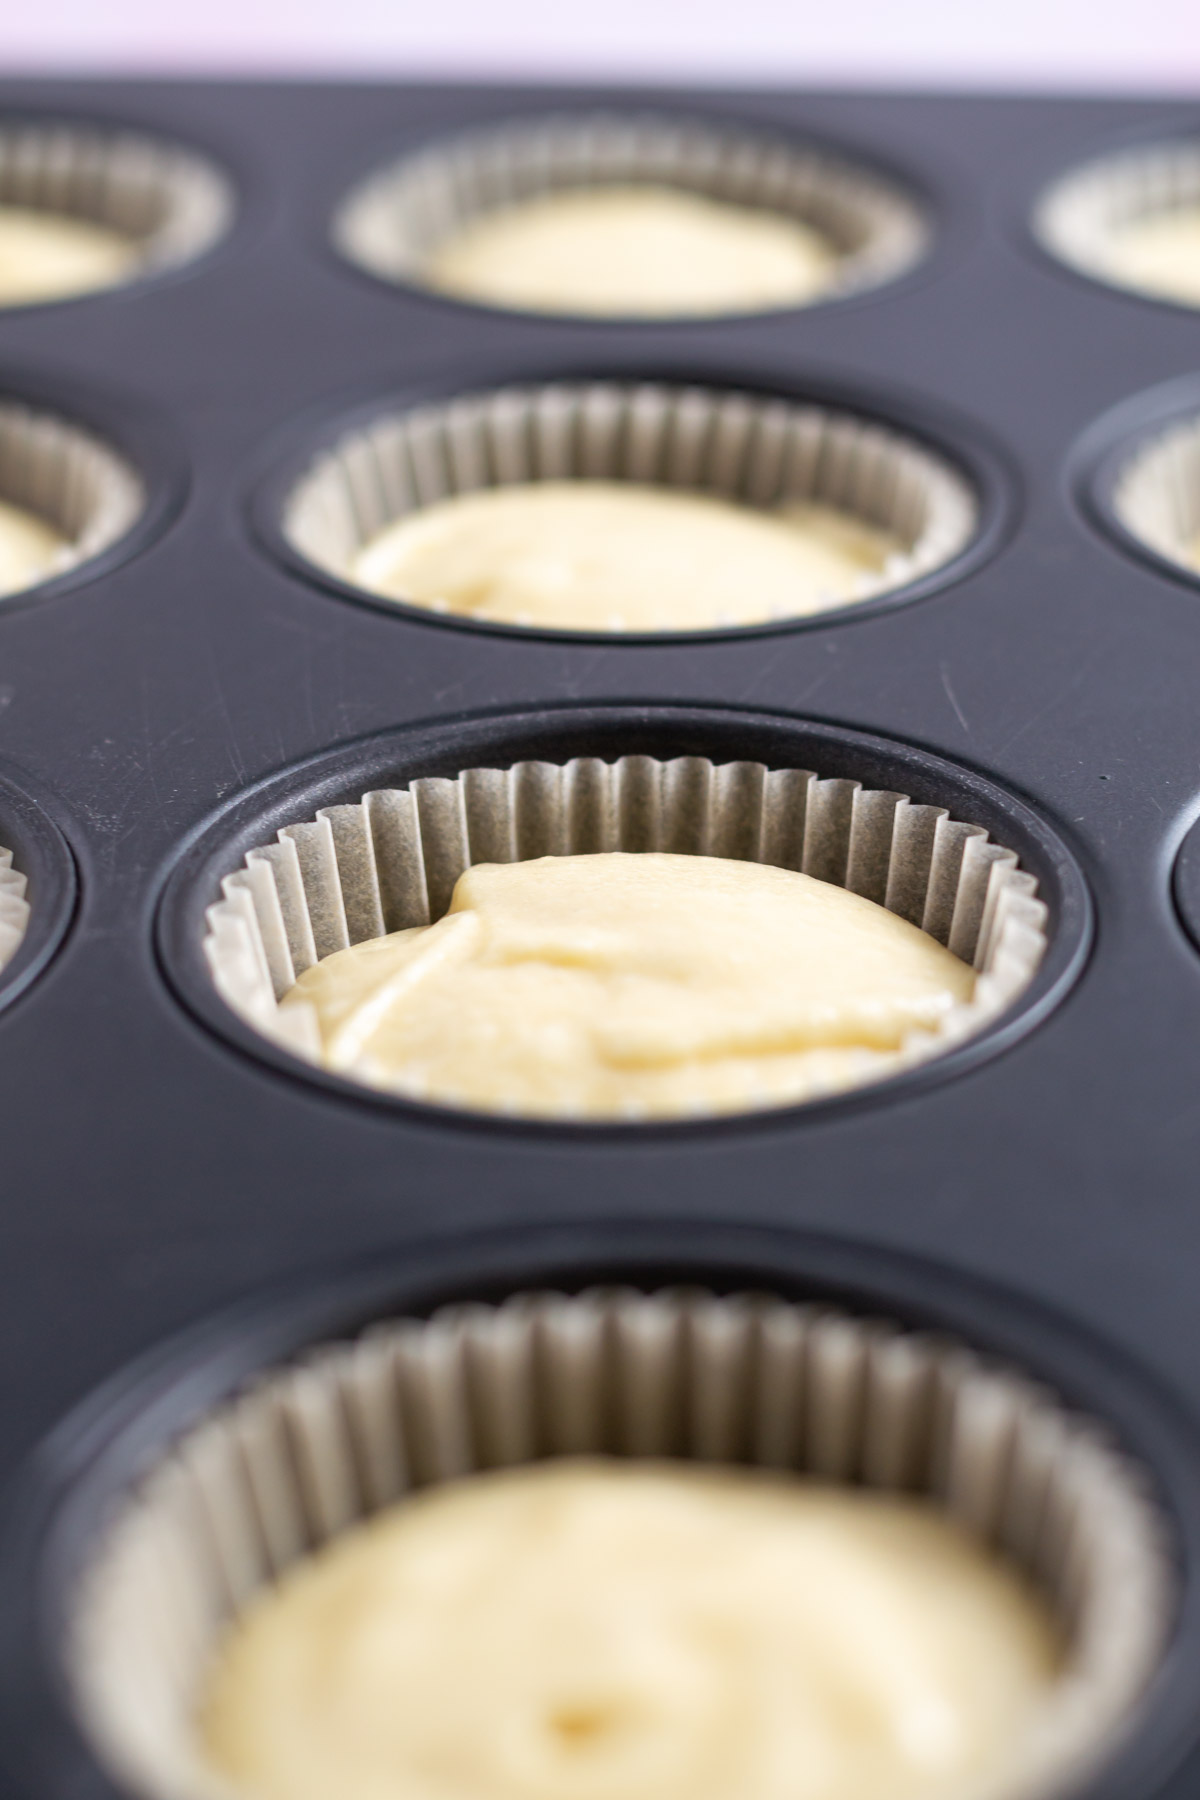
    Divide the batter evenly between the 12 cupcake liners. They will be about ⅔ full. Bake for 16-20 minutes or until a toothpick inserted in the center comes out with a few moist crumbs.

    cupcake batter in liners
    Fill the cupcake liners about ⅔ of the way full.
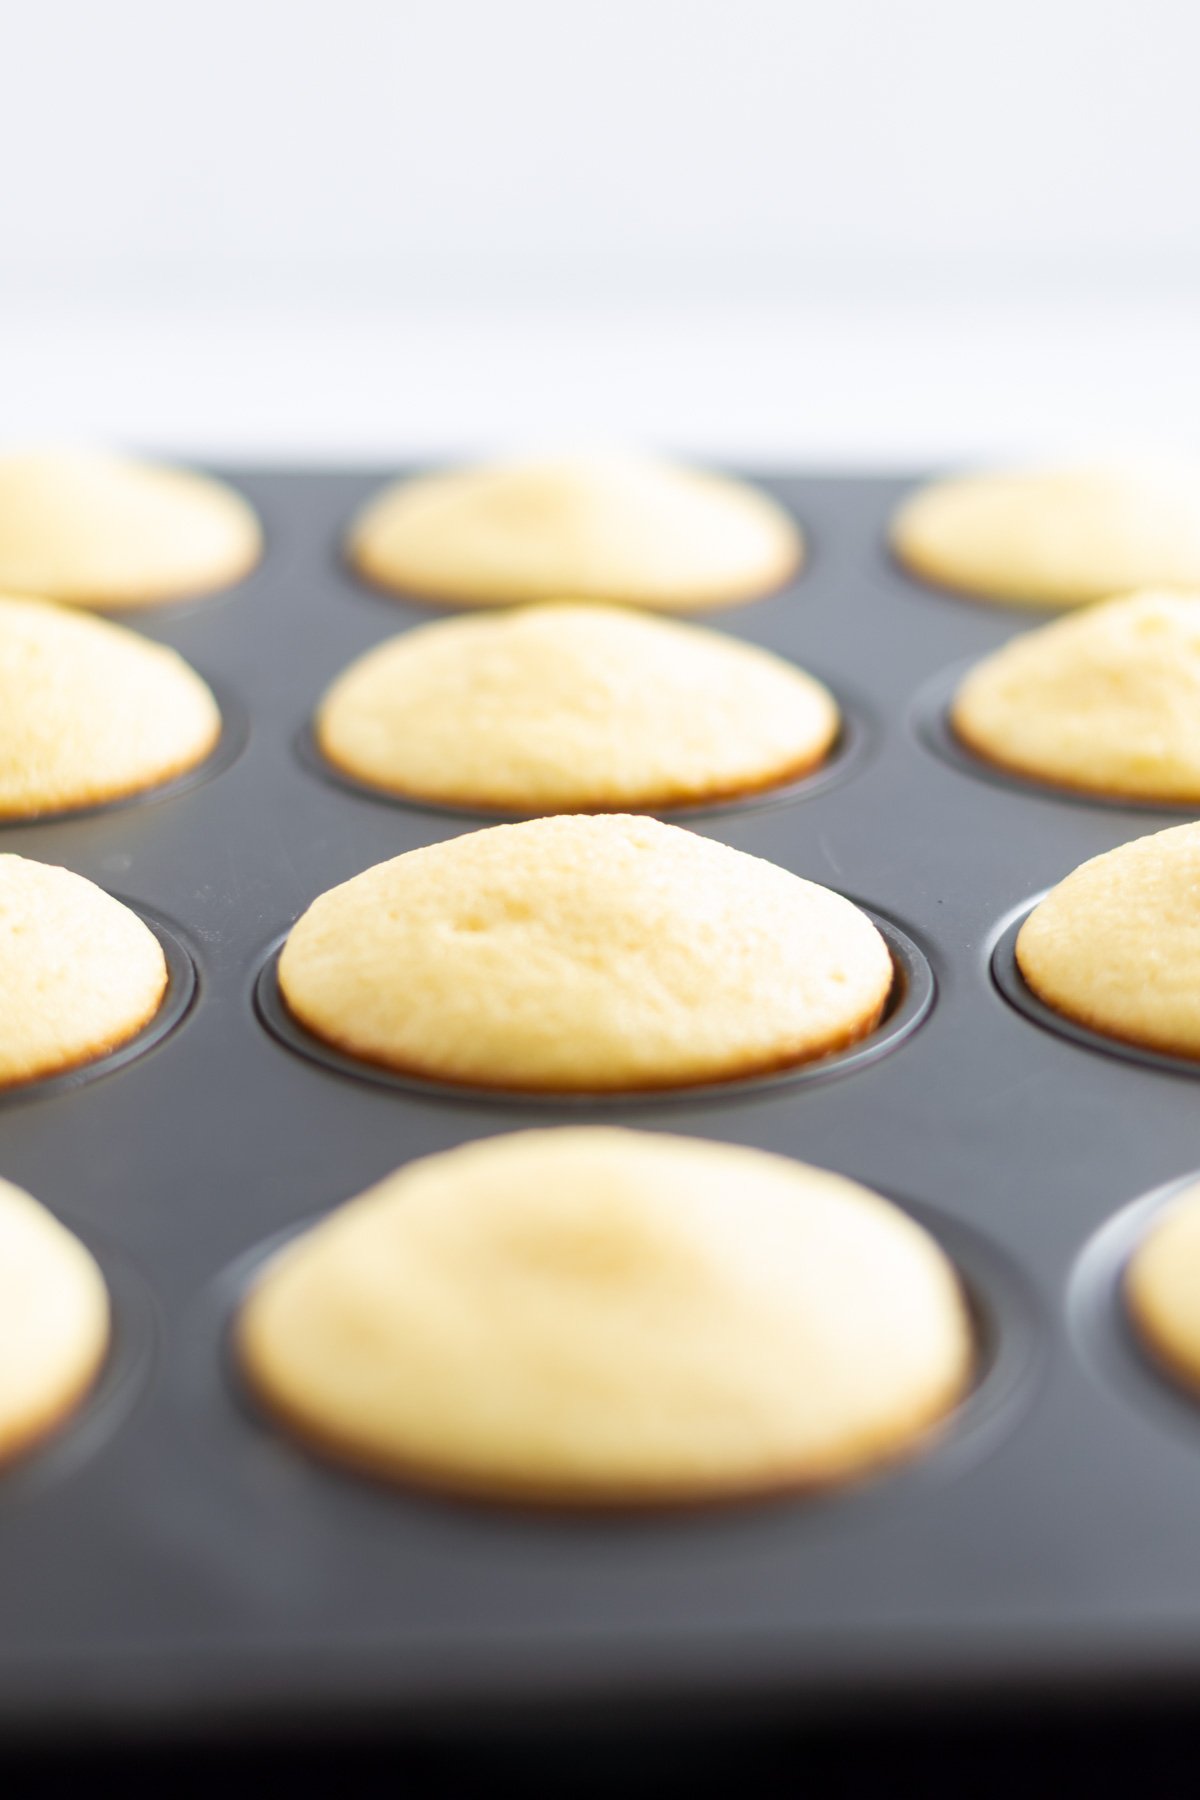
    baked cupcakes in a muffin tin
    The cupcakes right after they come out of the oven. The tops will fall slightly as they cool.

    what frosting goes with vanilla cupcakes?

    • Vanilla Swiss Meringue Buttercream {from Pink Velvet Cake}
    • Lemon Buttercream Frosting
    • Vanilla American Buttercream
    • Not Too Sweet American Buttercream {from Vanilla Snack Cake}
    • Chocolate Swiss Meringue Buttercream
    • Easy Cookie Butter Buttercream Frosting
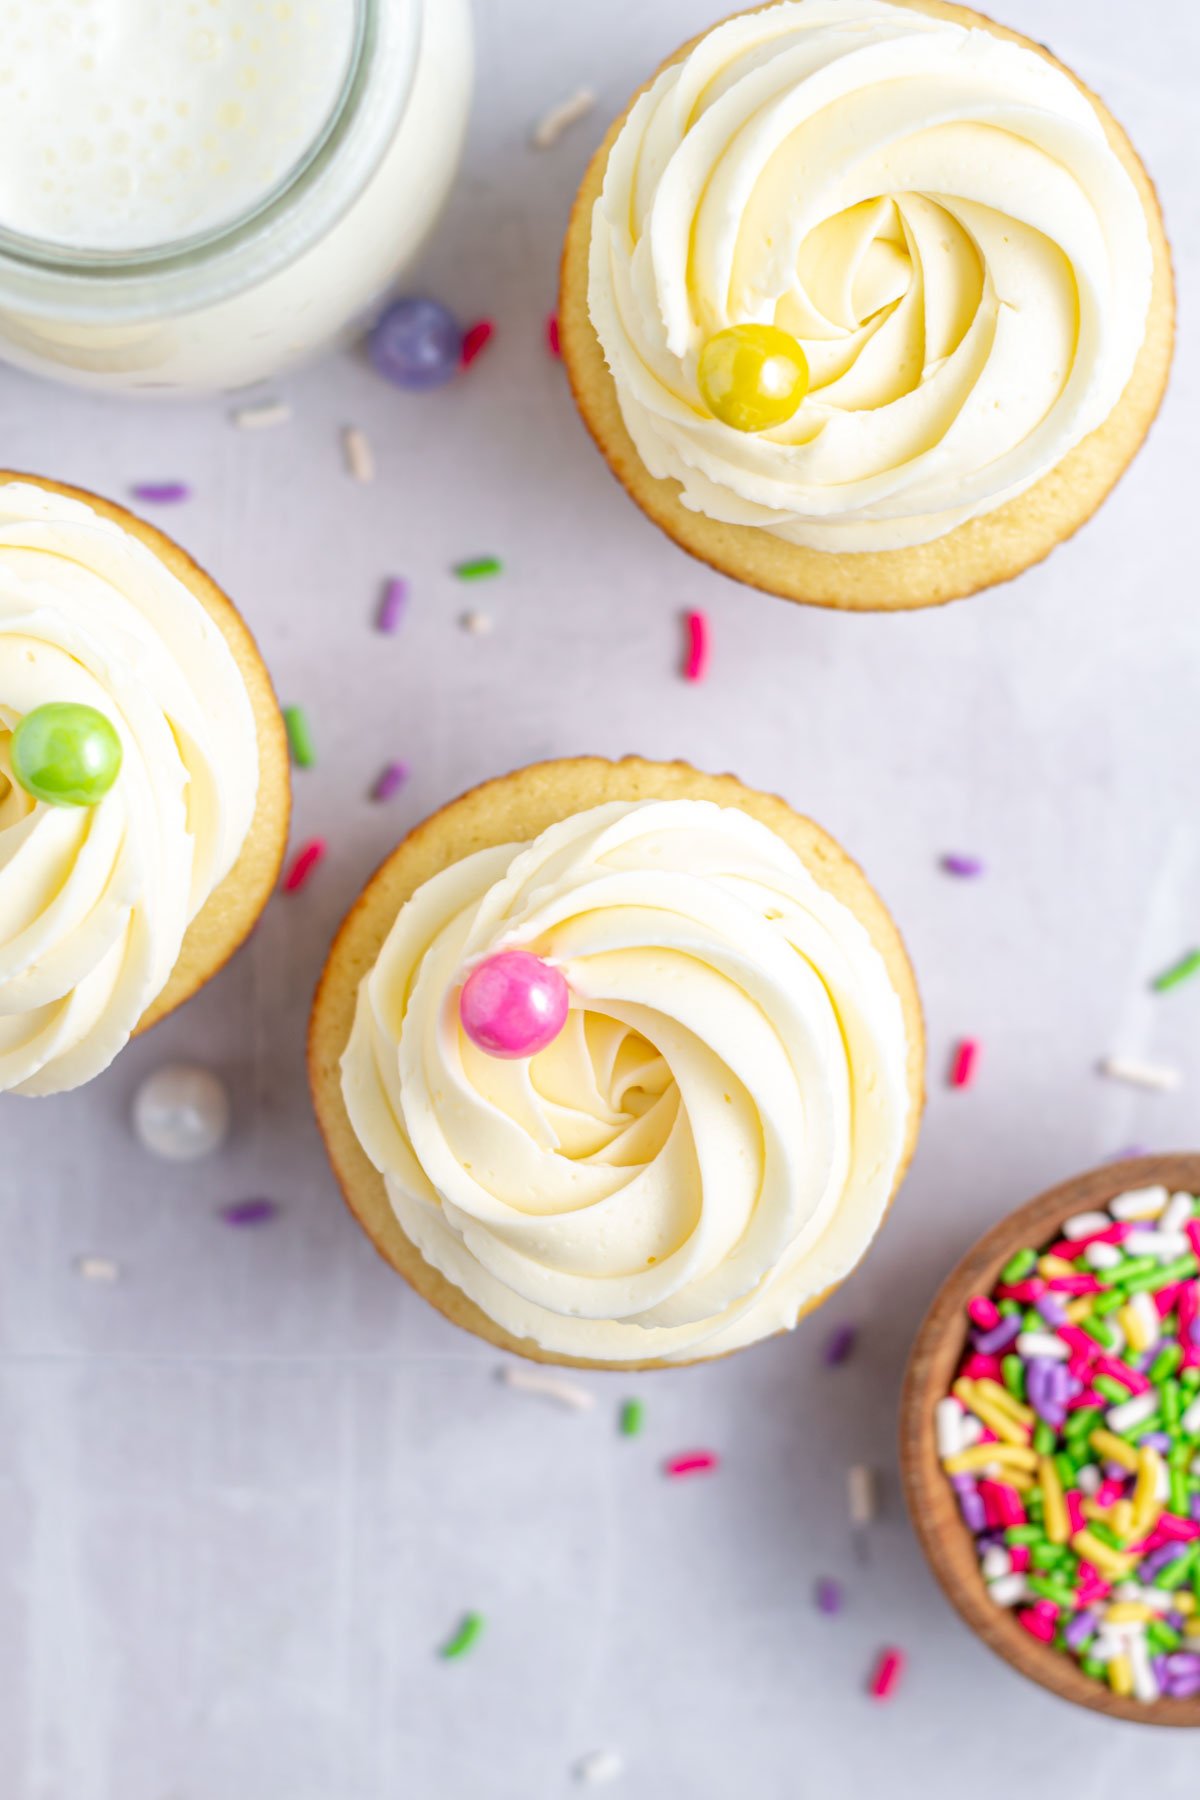
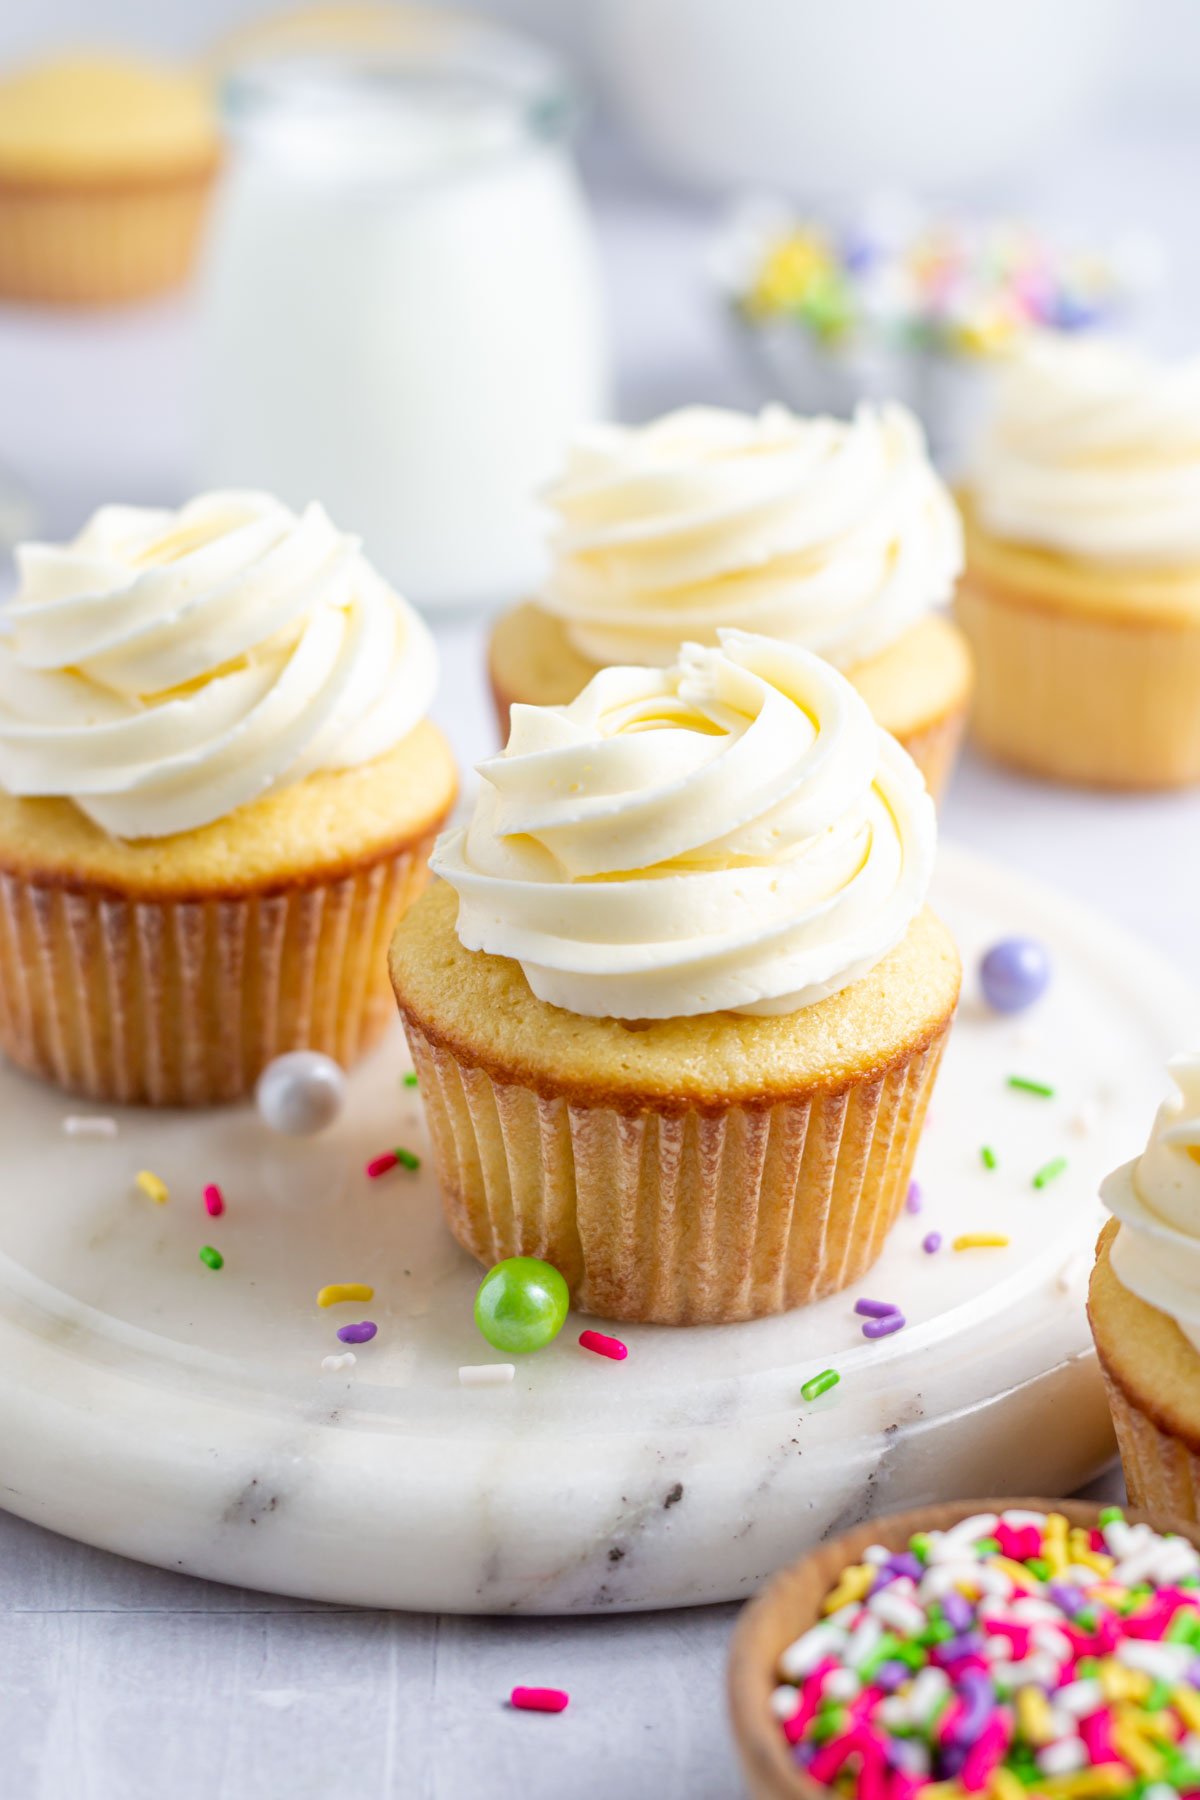
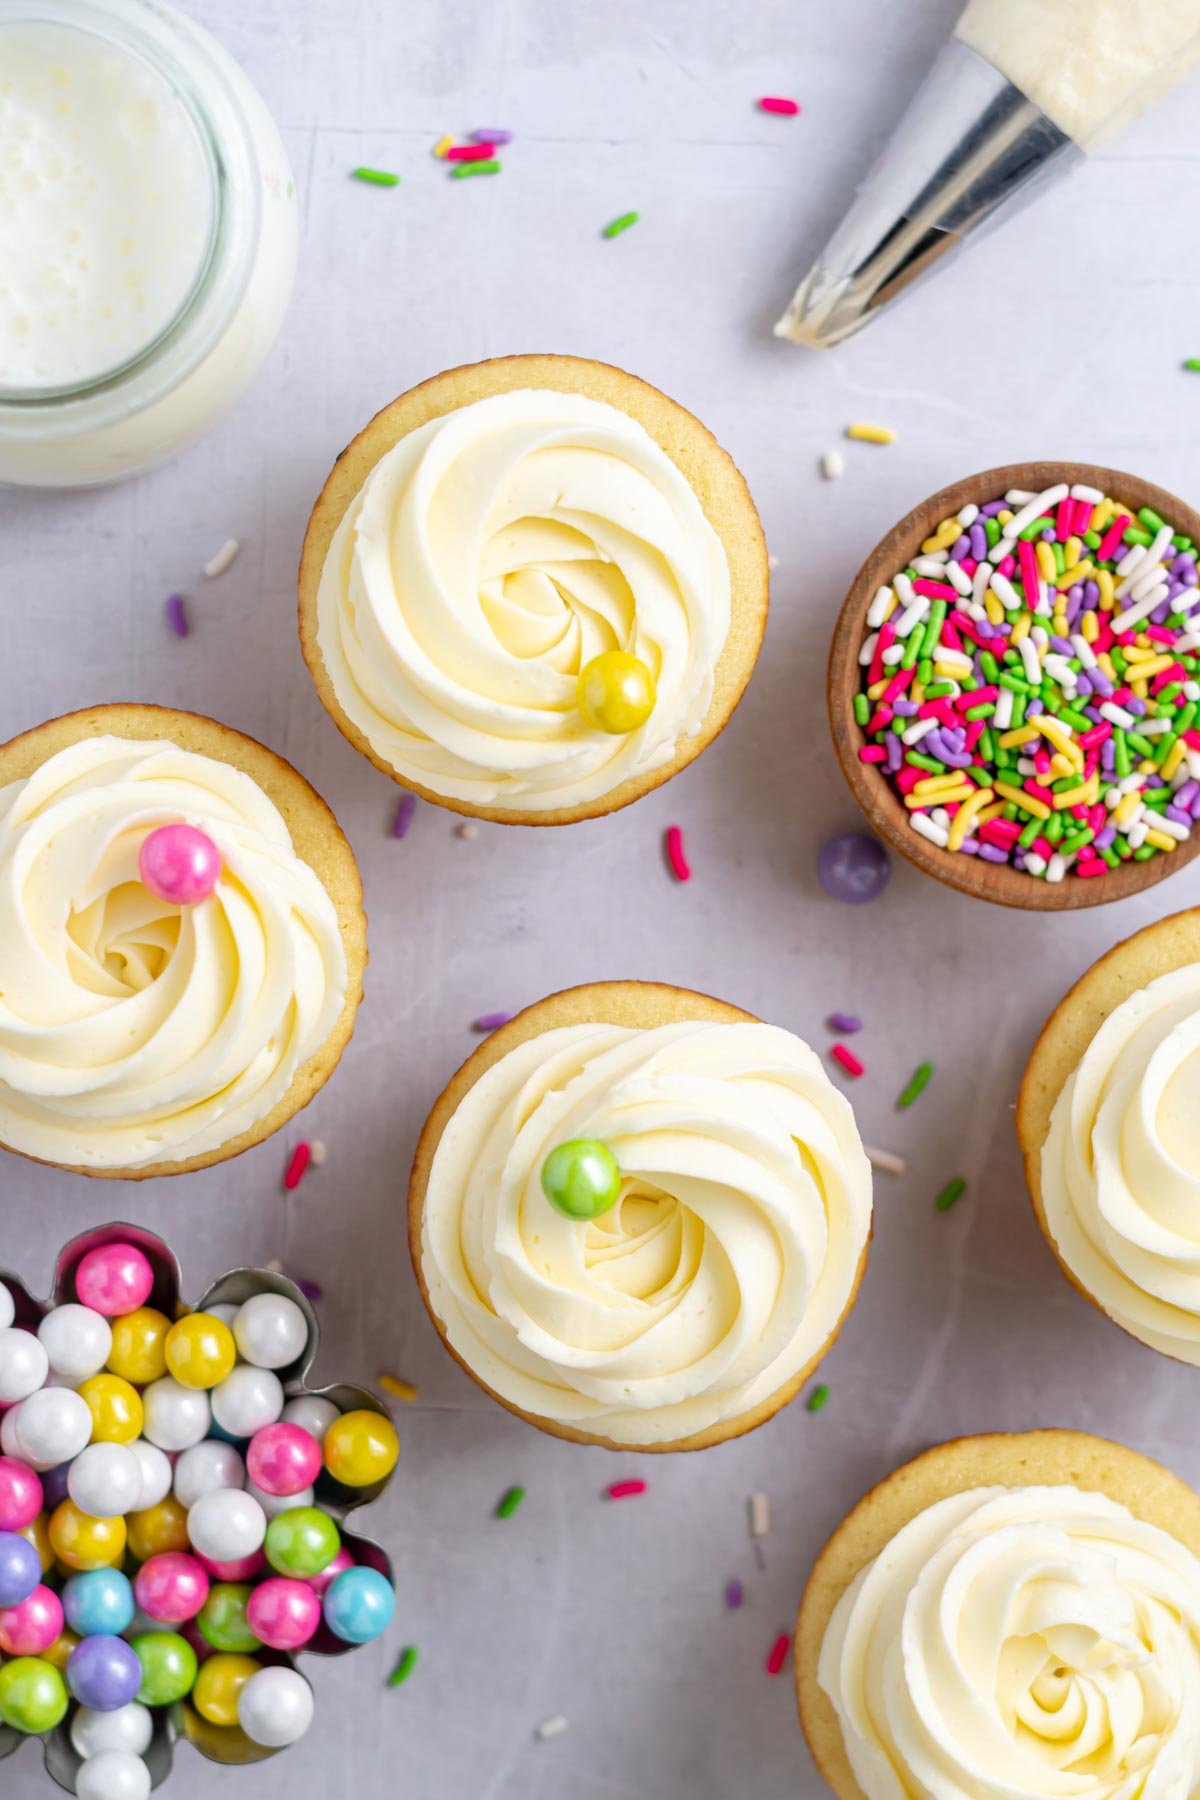
    cupcakes with buttercream swirls

    decorating ideas

    Let the cupcakes cool completely before frosting them! If you want a trick for how to cool cupcakes quickly, see this cupcake recipe post.

    Sprinkles, fruit, crushed freeze dried fruit and candy can all work to decorate your cupcakes. If you want to fill them with fresh strawberries, try these strawberry filled cupcakes.

    A Wilton 1M, Wilton 2D or Wilton 8B are my favorite tips for decorating cupcakes.

    When piping swirls of buttercream frosting, use even pressure the whole time. I start in the middle of the cupcake and create a circle around the cupcake. You can stop there and have a rosette or keep building with smaller circles on top of each other until you reach the height you want. Release the pressure when you reach the end and lift the bag away.

    Remember to pin this recipe to Pinterest! Use the button on the recipe card or the share buttons on the side or bottom of this page.

    pro tips for the best cupcakes

    Use room temperature ingredients. Depending on the temperature of your kitchen you will want to pull out the milk, sour cream and eggs about 2 hours before baking. {My kitchen is on the cooler side, so I usually go 2-3 hours before baking}.

    I've been making this vanilla cupcake recipe for years and have cheated and not brought my ingredients to room temperature. This will work, but for the BEST texture I highly recommend bringing the cold ingredients to room temperature.

    Use the best ingredients you can afford. Vanilla cupcakes are a lot like sugar cookies in that they are created with simple ingredients. If you can splurge on a good butter and pure vanilla extract you will get the best vanilla flavor.

    Don't over mix the batter. When cake and cupcake batter is over mixed, it creates a more dense cake crumb. We are going for fluffy and moist!

    Use good liners. These Paper Chef liners are my very favorite and the only brand I use in my kitchen. {not sponsored, just a fan!}

    Use a cookie or ice cream scoop to get even amounts of batter into each liner. This helps the cupcakes to bake uniformly.

    For the best, moist and tender cupcakes, don't over bake them. Remove them from the oven when a toothpick or cake tester comes out with just a few moist crumbs.

    vanilla buttercream swirls atop cupcakes

    frequently asked questions

    Can you make cupcakes ahead?

    Yes! The freezer is your best friend when wanting to bake easy vanilla cupcakes ahead of time. Allow the cupcakes to cool completely, then store in an airtight container in the freezer for up to 3 months. Let the cupcakes defrost, then decorate them.

    I often will bake cupcakes the day before I need them. Then I freeze them overnight to lock the moistness in and decorate them the day I am serving.

    what is the secret to moist cupcakes?

    I think the biggest secret is not over baking them. It is better to err on the side of under baking them; look for a few moist crumbs on your toothpick instead of a clean toothpick when checking for doneness.

    The best vanilla cupcakes are also made with sour cream, which helps them stay moist.

    how do you make fluffy cupcakes?

    Start with room temperature ingredients! This allows the batter to come together better. Then be careful to not over mix the batter; leaving air bubbles in the batter will allow them to expand better in the oven resulting in a soft and tender, moist and fluffy cupcake.

    why are my cupcakes dry?

    Dry cupcakes are often a result of too much flour or over baking. A kitchen scale will ensure that you have the correct amount of flour; this is the scale I use.

    See the note above on moist cupcakes for how to check for when your easy vanilla cupcakes are done baking.

    how to store

    Vanilla cupcakes can be stored at room temperature in an airtight container for 2-3 days. They can also be stored in an airtight container in the refrigerator, but they will be more prone to drying out.

    The cupcakes can be frozen in an airtight container for 2-3 months. Allow them to defrost at room temperature before serving. I freeze mine with buttercream all the time!

    Easy vanilla cupcakes with a glass of milk and sprinkles

    Remember to snap a picture and tag me on Instagram if you make these Easy Vanilla Cupcakes. It warms my heart to see you bring these recipes to life! Thank you for being here and happy baking!

    more vanilla desserts to enjoy

    • Homemade Vanilla Snack Cake
    • Strawberry Vanilla Cake
    • Cherry Shortcake with Vanilla Biscuits and Vanilla Whipped Cream

    If you make this recipe {or any recipe!} from two sugar bugs please come back and leave a review and a ⭐️⭐️⭐️⭐️⭐️ star rating.  I read every comment, and I LOVE hearing from you!

    Yield: 12 cupcakes

    Easy Vanilla Cupcakes

    easy vanilla cupcakes with vanilla buttercream swirls

    Easy vanilla cupcakes are a classic homemade recipe. They are soft and tender, made with simple ingredients and require no mixer. Fluffy, moist and quick to make, you'll be calling them the BEST vanilla cupcake recipe!

    Prep Time 15 minutes
    Bake Time 20 minutes
    Total Time 35 minutes

    Ingredients

    cupcakes

    • ½ cup unsalted butter, melted and slightly cooled (113g)
    • 1 ½ cups all-purpose flour (188g)
    • ½ teaspoon baking powder
    • ¼ teaspoon baking soda
    • ¼ teaspoon kosher salt
    • 1 cup granulated sugar (200g)
    • 2 large eggs, room temperature
    • 2 teaspoons pure vanilla extract
    • ¼ cup sour cream, room temperature (60g)
    • ½ cup milk, room temperature (120mL)

    Instructions

    1. Melt the butter (½ cup/113g) and set aside to cool slightly.
    2. Preheat the oven to 350°F and prepare a 12 count muffin pan with cupcake liners. Set aside.
    3. In a medium bowl, whisk together the all-purpose flour (1 ½ cups/188g), baking powder (½ teaspoon), baking soda (¼ teaspoon) and kosher salt (¼ teaspoon). Set aside.
    4. In a large bowl, whisk the granulated sugar (1 cup/200g), eggs (2 large), vanilla (2 teaspoons) and sour cream (¼ cup/60g) until well combined. Then whisk in the milk (½ cup/120mL) and once combined whisk in the melted and cooled butter (½ cup/113g).
    5. Add the flour mixture to the wet ingredients and mix until just fully combined. The batter is on the thick side.
    6. Divide the batter evenly between the 12 cupcake liners. They will be about ⅔ full. Bake for 16-20 minutes or until a toothpick inserted in the center comes out mostly clean.
    7. Allow to cool completely before frosting.

    Notes

    I highly recommend having your ingredients room temperature!! You can skip this step, but the batter won't come together as smoothly and the baked cupcakes won't be as soft and fluffy.

    Cupcakes can be stored at room temperature in an airtight container for 2-3 days. They can also be stored in an airtight container in the refrigerator, but they will be more prone to drying out.

    The cupcakes can be frozen in an airtight container for 2-3 months. Allow to defrost at room temperature before serving. I freeze mine with buttercream all the time!

    Nutrition Information:

    Yield:

    12

    Serving Size:

    1

    Amount Per Serving: Calories: 218Total Fat: 10gSaturated Fat: 6gTrans Fat: 0gUnsaturated Fat: 3gCholesterol: 55mgSodium: 92mgCarbohydrates: 30gFiber: 0gSugar: 17gProtein: 3g

    The nutrition information is an estimate only and may not be entirely accurate.

    Did you make this recipe?

    Please make my day and PIN to Pinterest and share a photo on Instagram ~ making sure to tag @twosugarbugs! THANK YOU!!

    © Tasia
    Cuisine: American / Category: Cakes and Cupcakes

    Orange Creamsicle Cookies

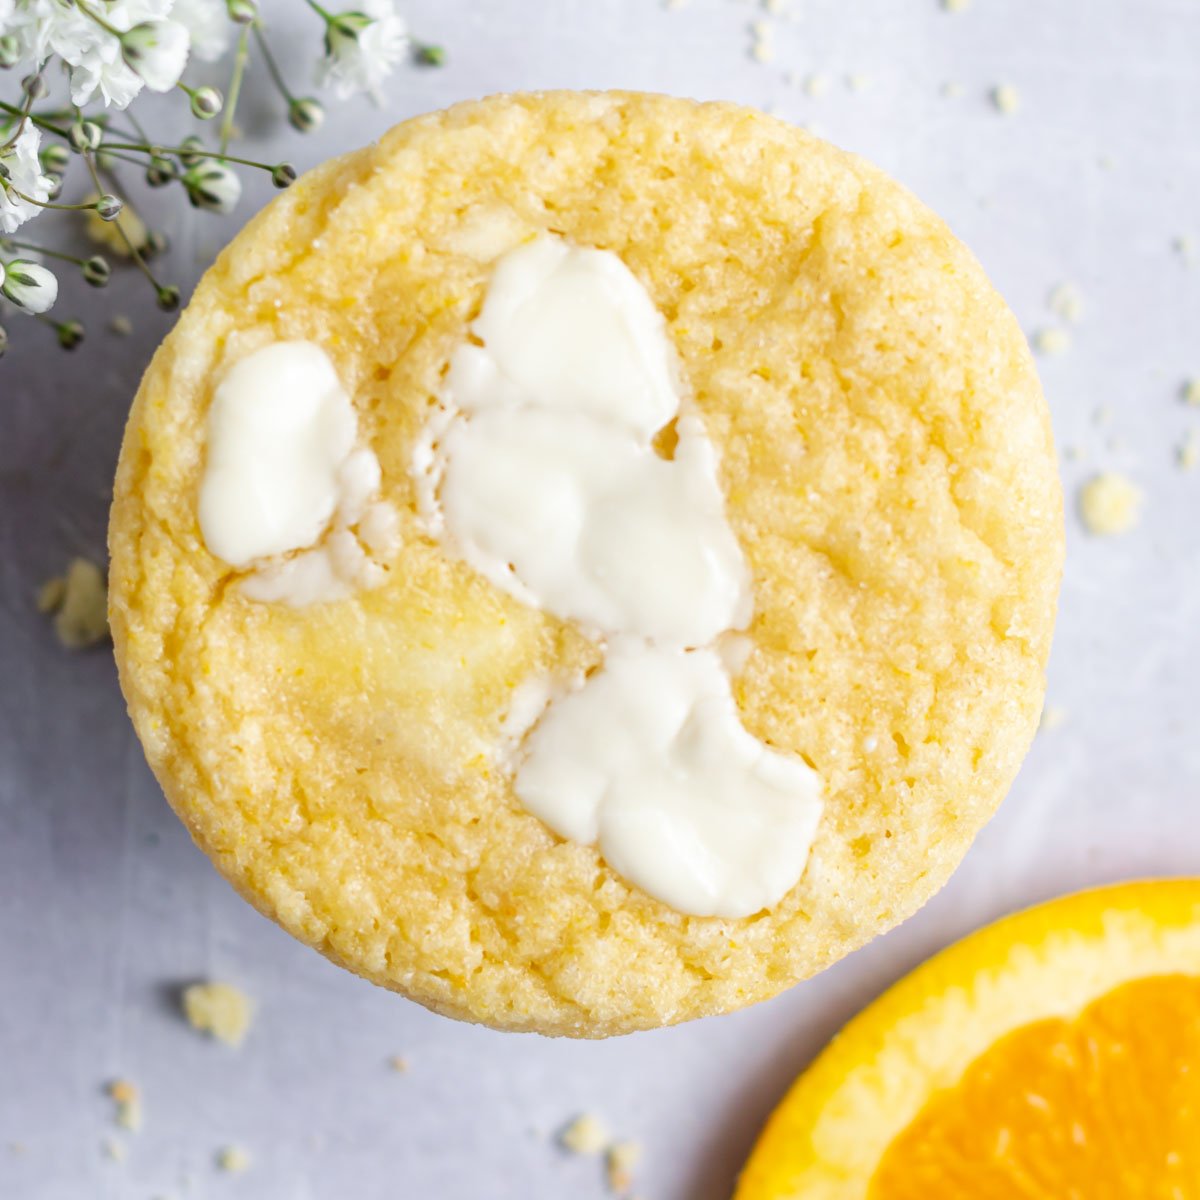
    cookie with an orange slice and flowers

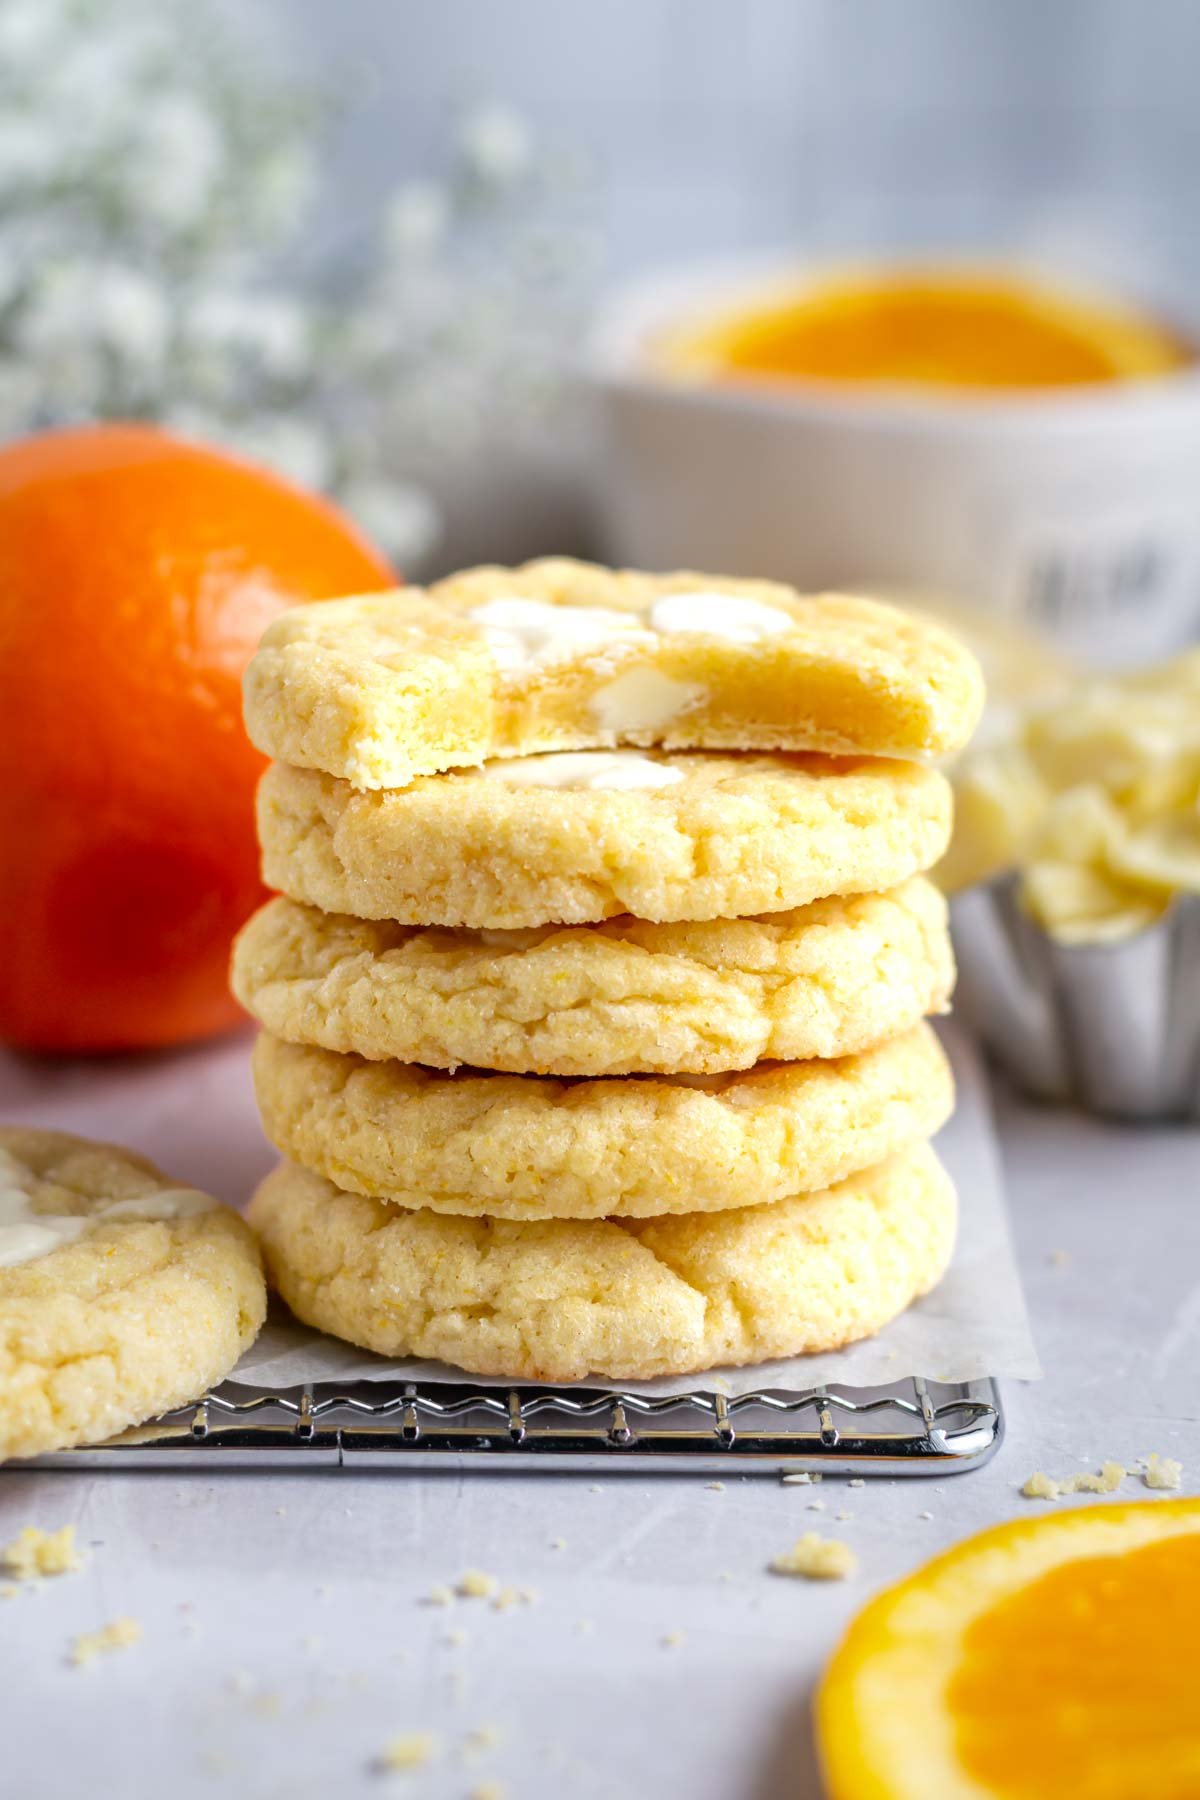
    The BEST soft, chewy orange creamsicle cookies flavored with orange zest and white chocolate. You'll love this EASY sugar cookie recipe made with cold butter and cream cheese because they have that nostalgic popsicle taste!

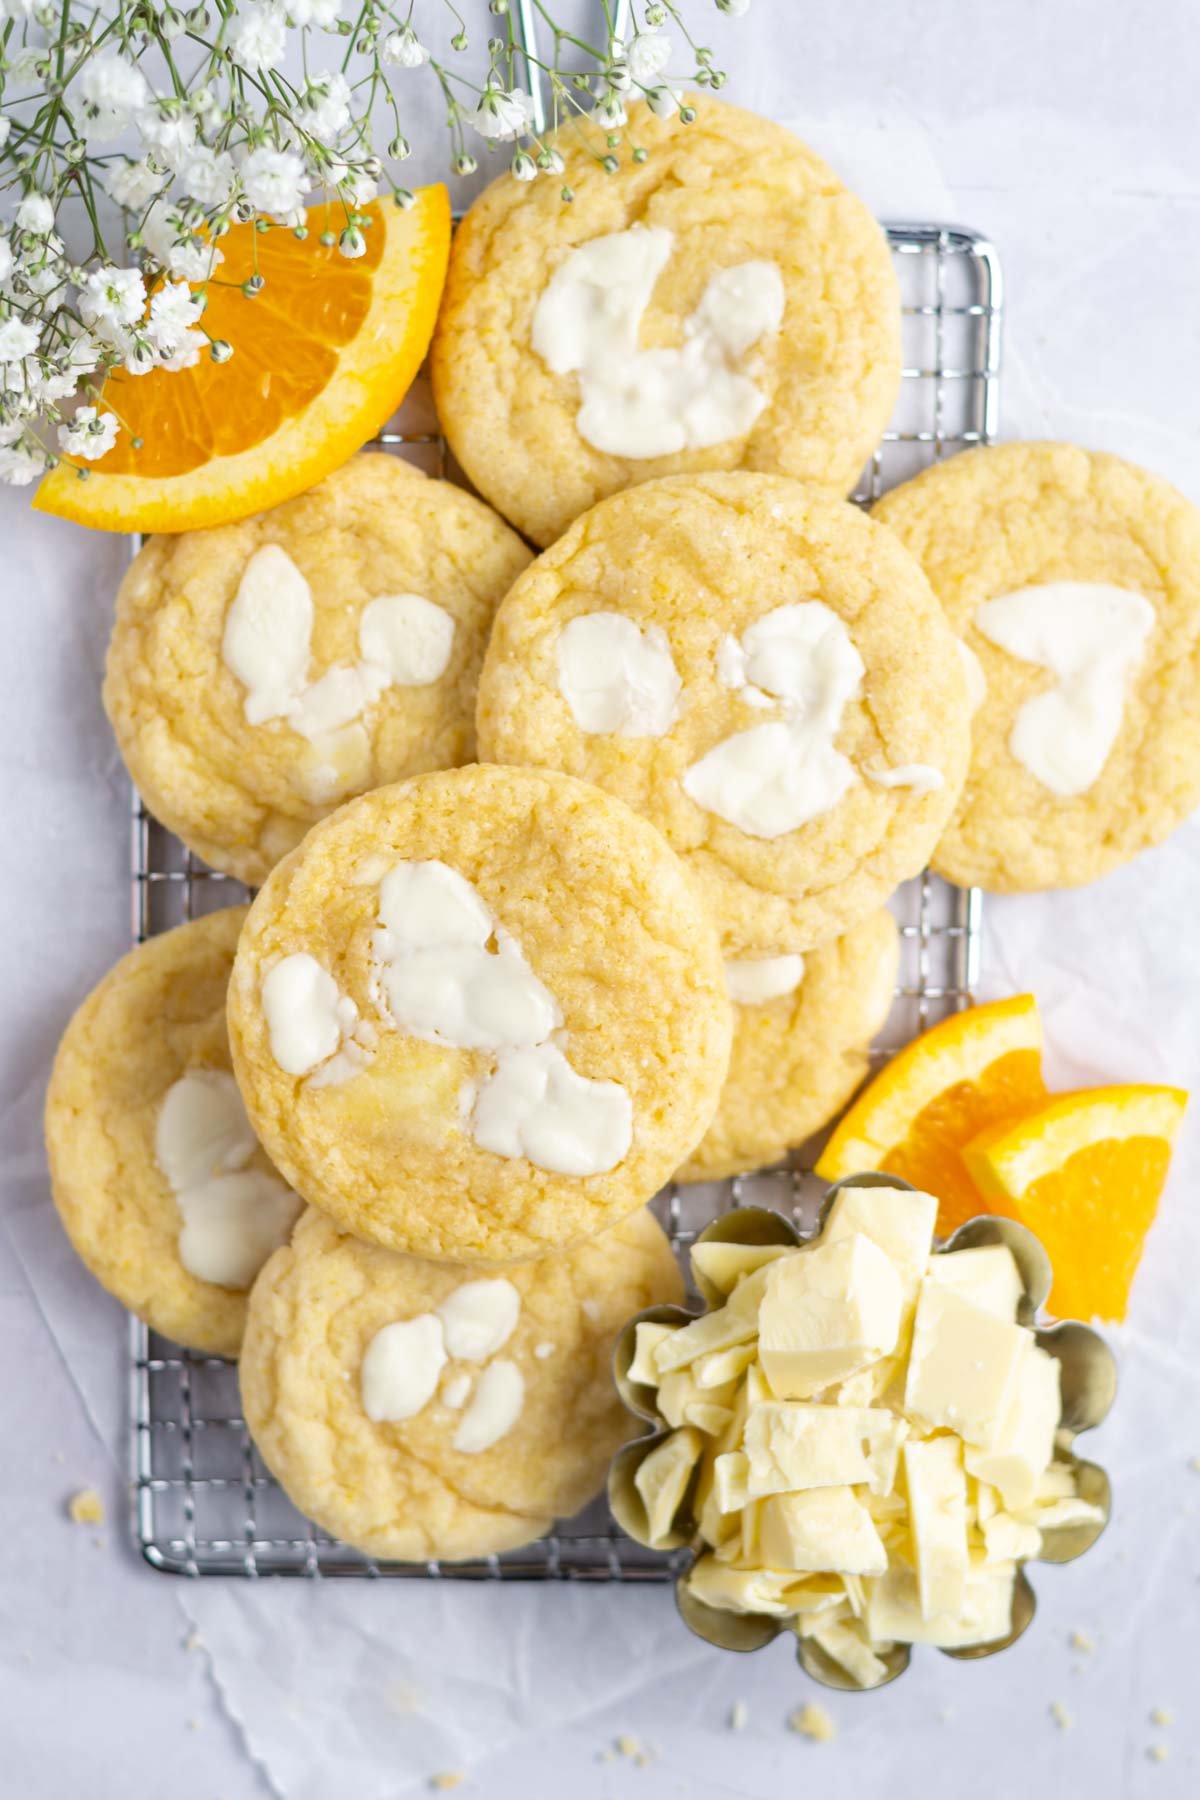
    cookies on a cooling rack with orange slices and white chocolate

    Disclosure | This post may contain affiliate links. As an Amazon Associate I earn from qualifying purchases.

    Orange creamsicle is one of those flavors that takes me straight back to childhood! I'm old enough to remember the individual ice cream cups that came with a wooden spoon, but my girls associate the flavor with popsicles.

    I know you are busy like me, so I'm back with another cookie recipe that uses cold ingredients and requires no chill time. Perfect for those of us that need a cookie now! To create this recipe I started with my popular sprinkle cookies recipe and gave it a few tweaks.

    For other nostalgic cookie flavors, try my pop tart cookies and iced molasses cookies.

    why you will love this easy cookie recipe

    • Uses cold ingredients!
    • Made from scratch without a cake mix! The orange creamsicle flavor comes from orange zest, orange juice, vanilla and white chocolate.
    • A food processor makes the dough come together quickly {see the recipe card below for using a mixer instead}.
    • NO CHILL time!
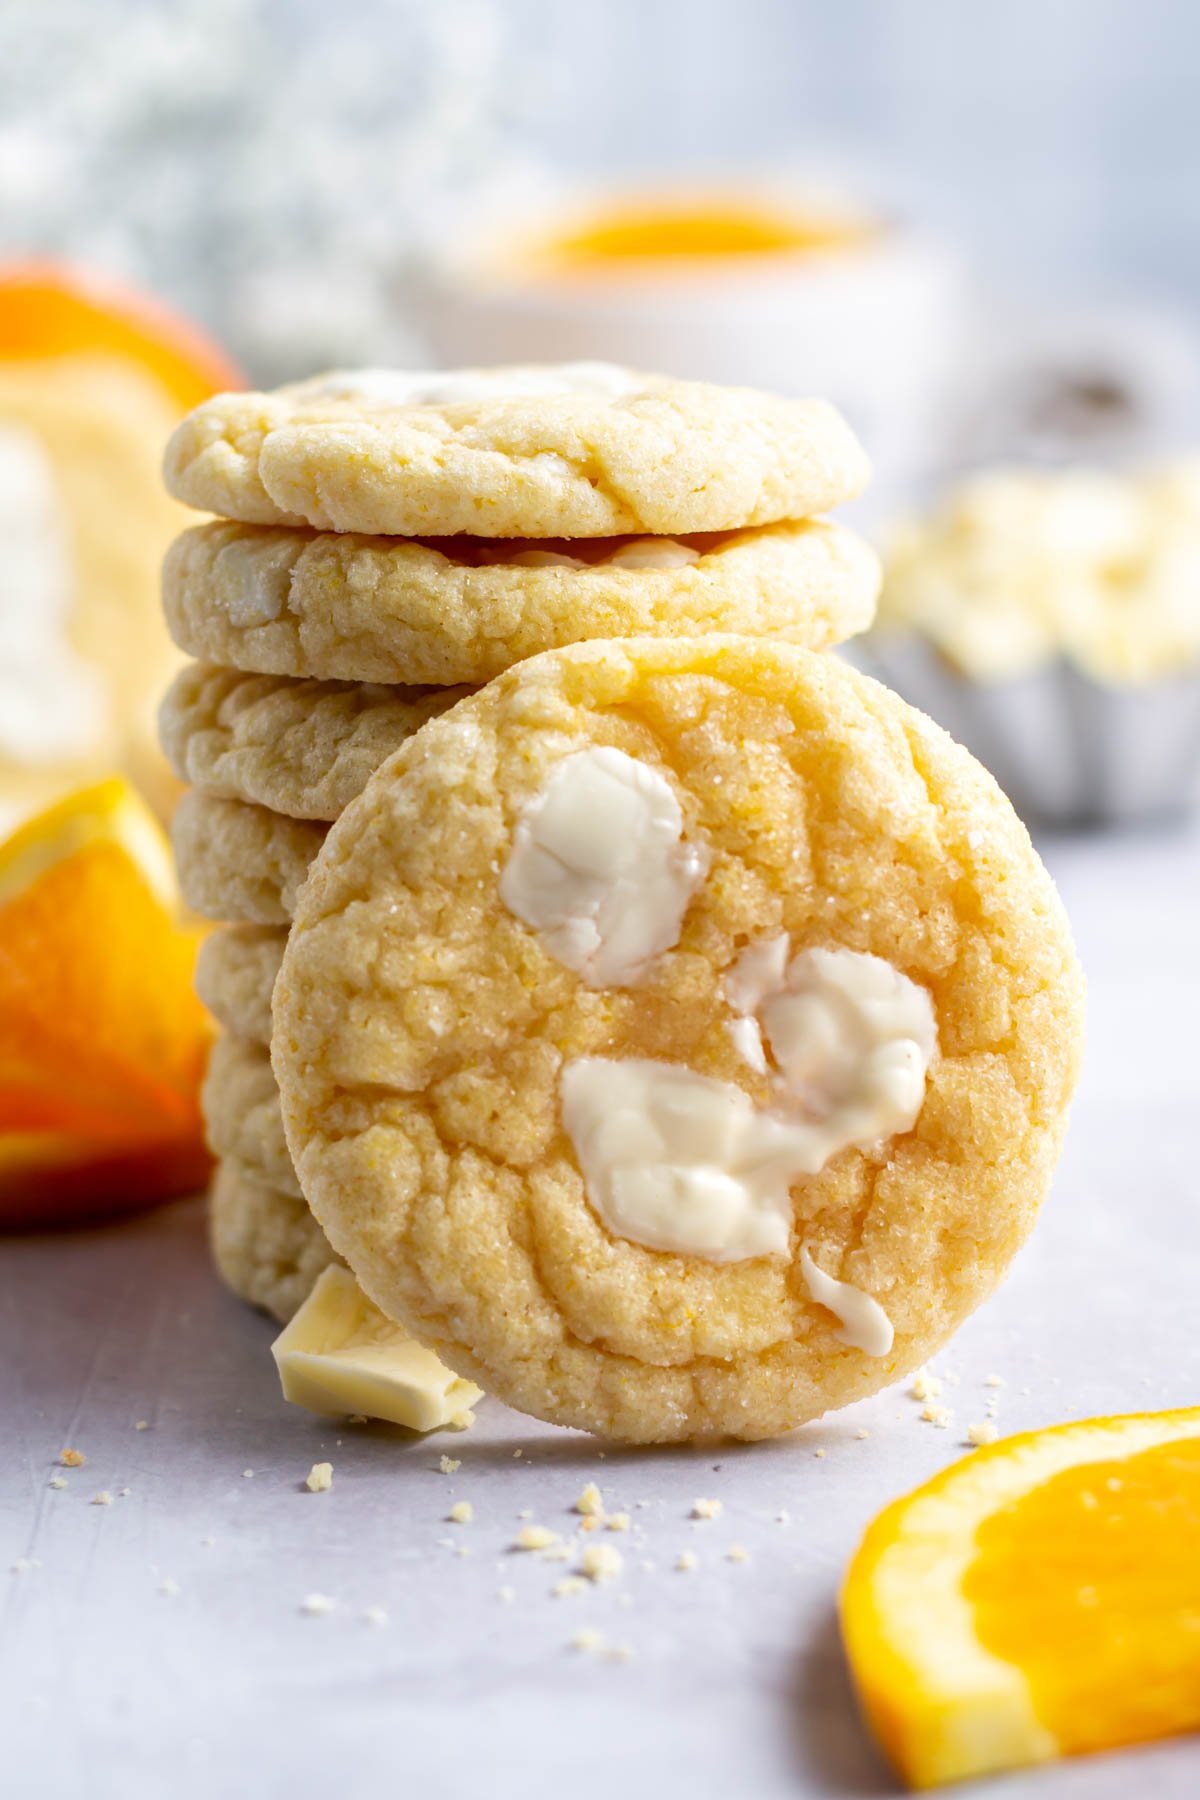
    stack of orange creamsicle cookies with one missing a bite

    ingredients and substitutions

    Please scroll to the printable recipe card at the end of this post for the full list of ingredients and baking directions.

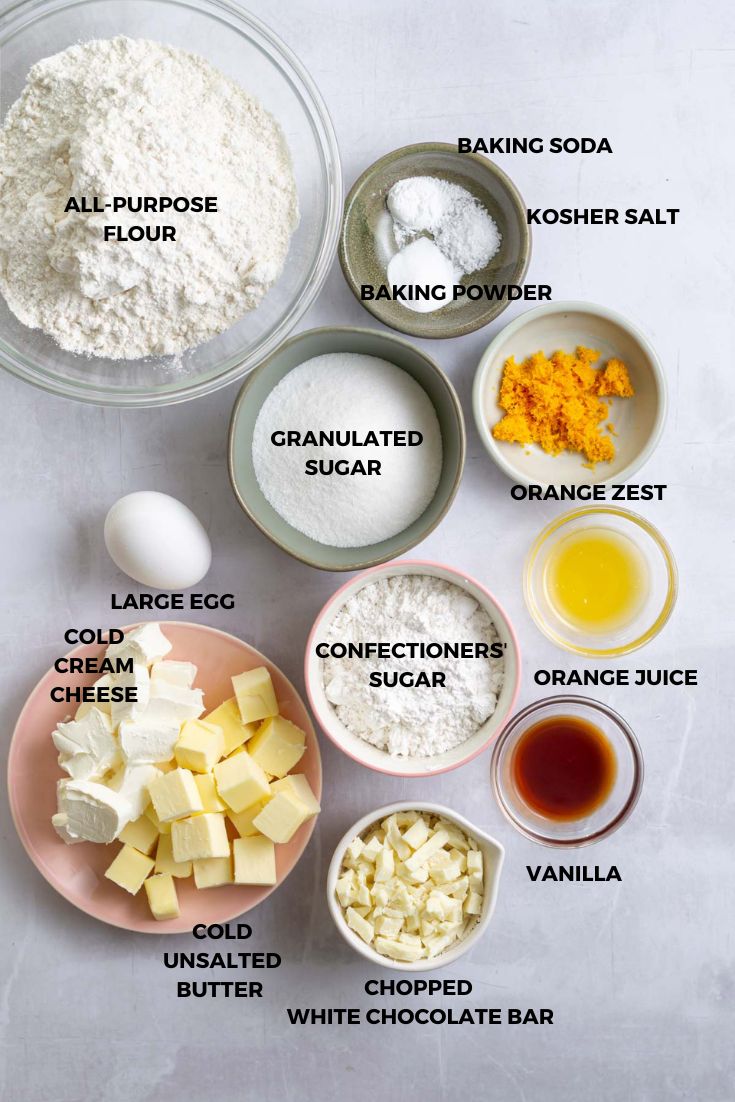
    ingredients for orange creamsicle cookies
    • All-purpose flour ~ use your favorite brand. If you aren't using a kitchen scale, be sure to spoon and level your flour. {Fluff the flour in the container, then spoon it into your measuring cup and level it off with the back of a spoon}
    • Baking soda and baking powder ~ gives a little lift to the cookies.
    • Kosher salt ~ helps to balance the flavors; if you only have table salt, use half the amount.
    • Granulated and confectioners' sugar ~ bring the sweetness, softness and structure to the cookies.
    • Orange zest ~ be sure to zest your orange first. I use one large naval orange which yields about 1-2 tablespoons of zest. My microplane zester is my fave.
    • Unsalted butter ~ use your butter COLD and cut it into small cubes.
    • Cream cheese ~ the cream cheese adds softness to the orange creamsicle cookies, the cream cheese is also used COLD and cut it into small cubes too. You will want to use full fat cream cheese for the best cookies.
    • Egg ~ one large egg is needed, this can also be cold. The egg helps to bind the cookies together.
    • Orange juice ~ I just juice the orange after it's been zested. This is my favorite juicing tool.
    • Vanilla ~ vanilla is a big part of the flavor of these cookies, I recommend a pure vanilla extract.
    • White chocolate ~ the white chocolate also brings a big part of the flavor, I use a Lindt baking bar or chop up a block of Callebaut white chocolate. Chop it small and you will mix some into the dough and top the cookie dough balls with a few small pieces too.

    how to make these orange creamsicle sugar cookies

    Start by preheating oven to 375°. Prepare baking pans with parchment paper or silicone baking mats. Set aside.

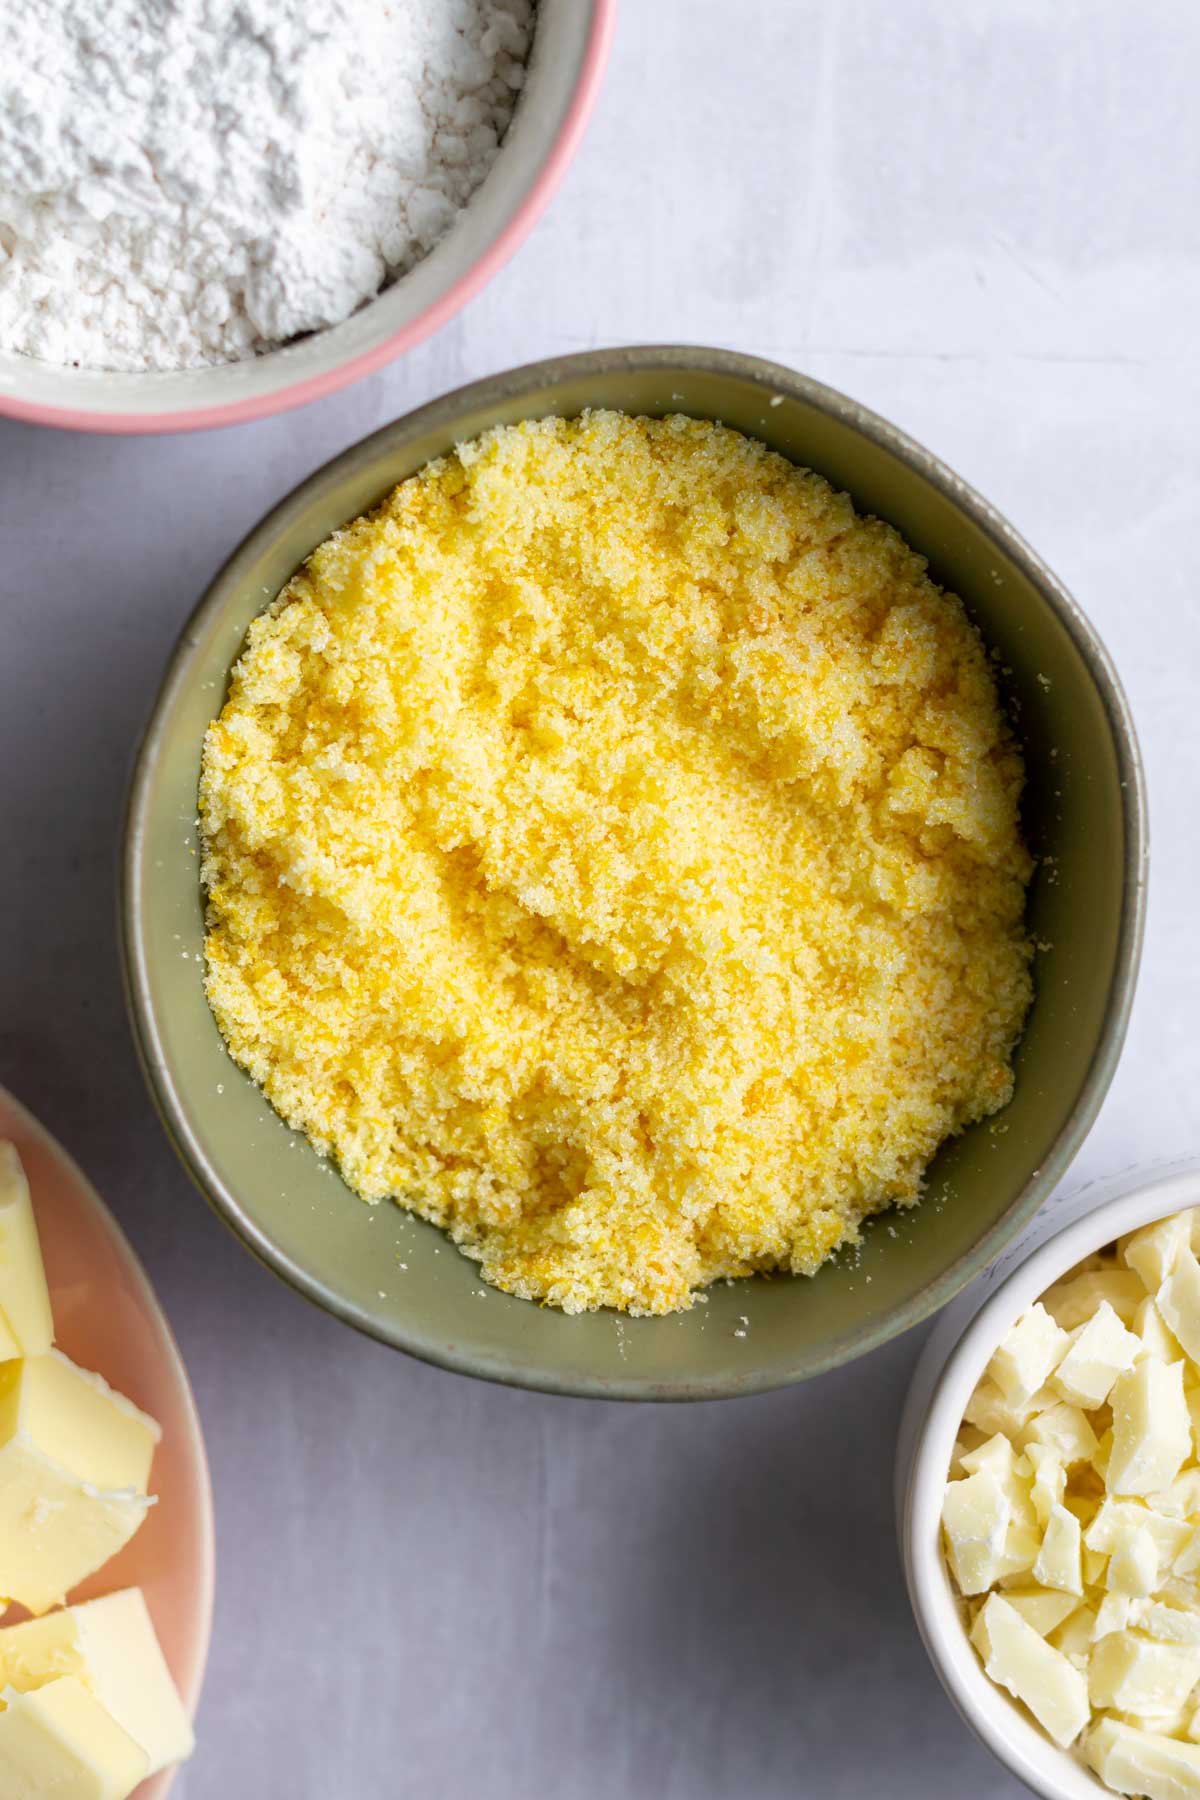
    Now take the orange zest and use your clean fingers to work the zest into the granulated sugar. This helps to enhance the orange flavor.

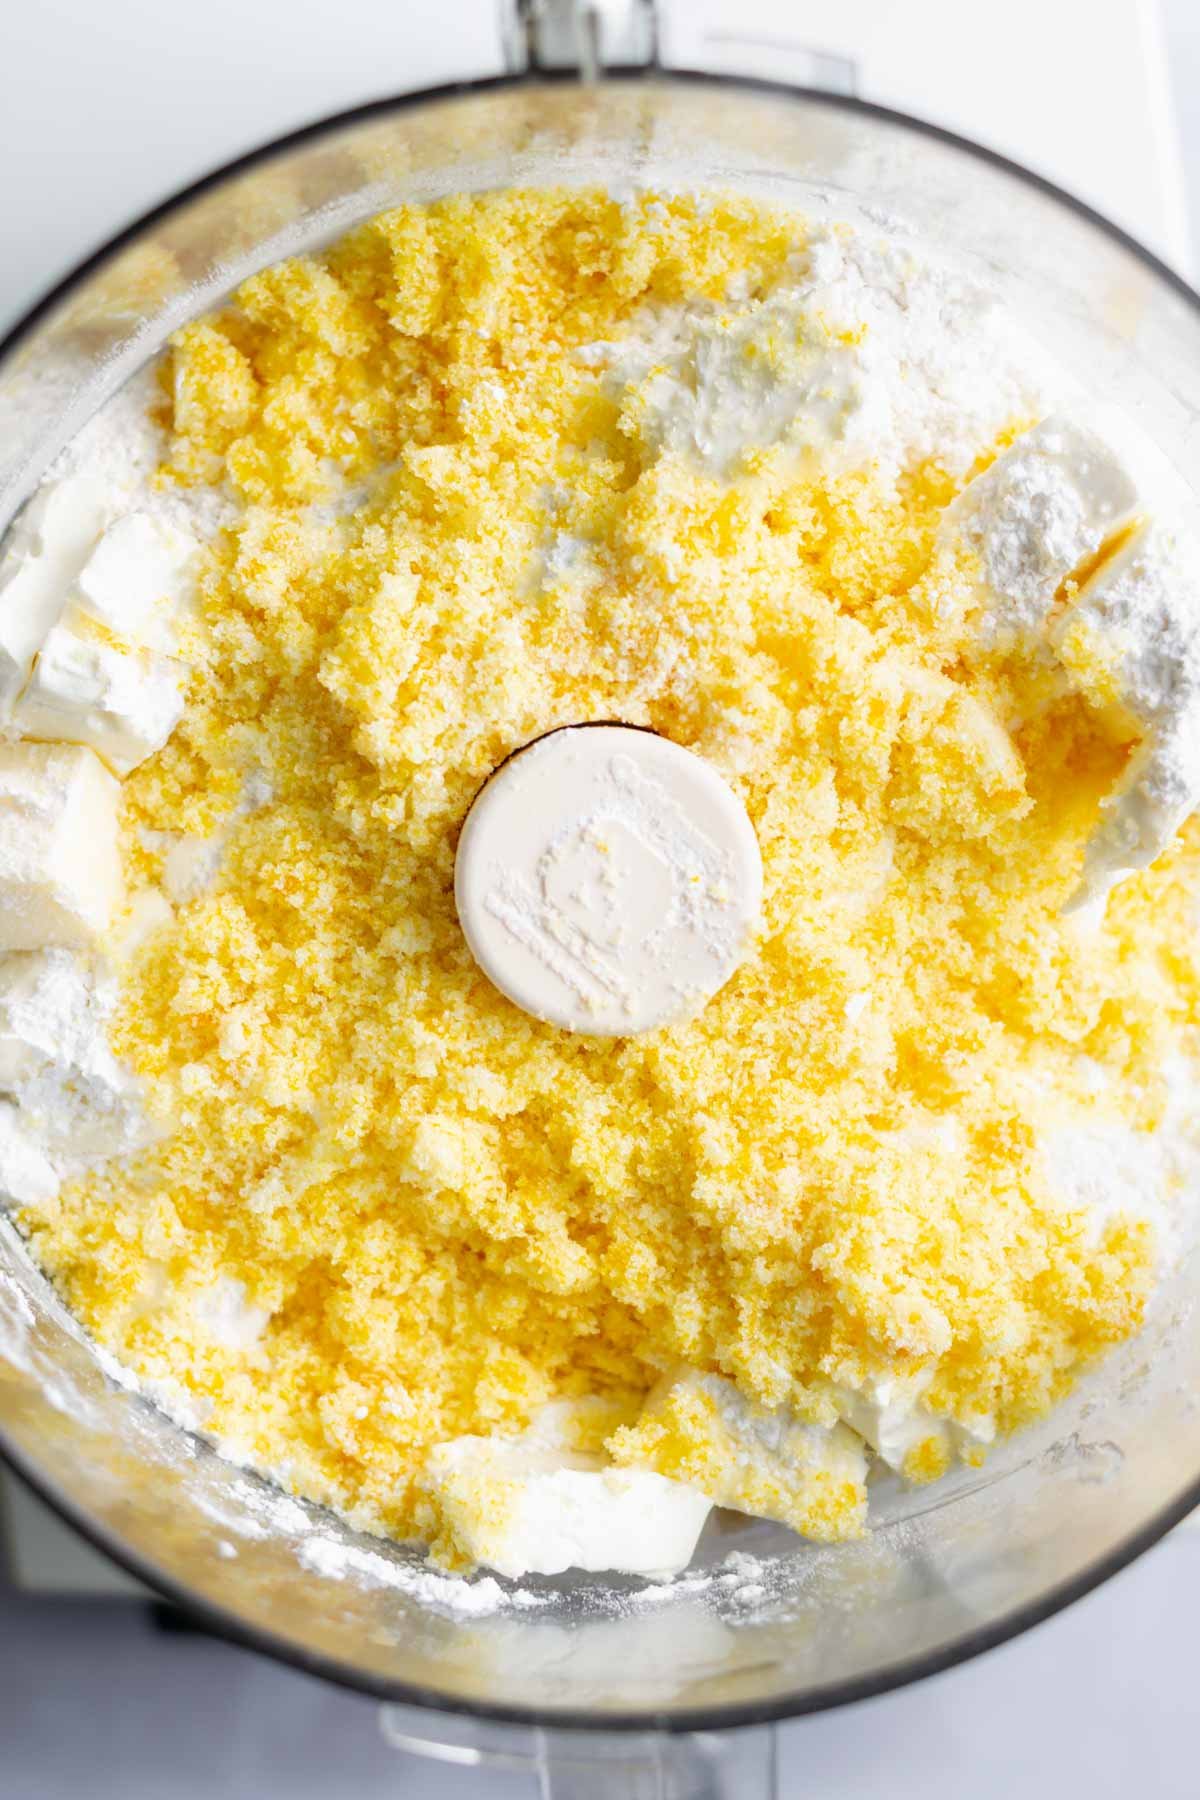
    Then place flour, baking soda, baking powder and kosher salt in the bowl of your food processor. Pulse a few times to blend. Add the cold butter cubes, cold cream cheese, orange granulated sugar and confectioners' sugar to the flour mixture.

    orange zest worked into sugar in a bowl
    Use your clean fingers to work the orange zest into the granulated sugar.
    orange sugar, butter and cream cheese added to a food processor bowl
    Add the sugars, and cold butter and cream cheese on top of the pulsed flour, salt, baking soda and baking powder.

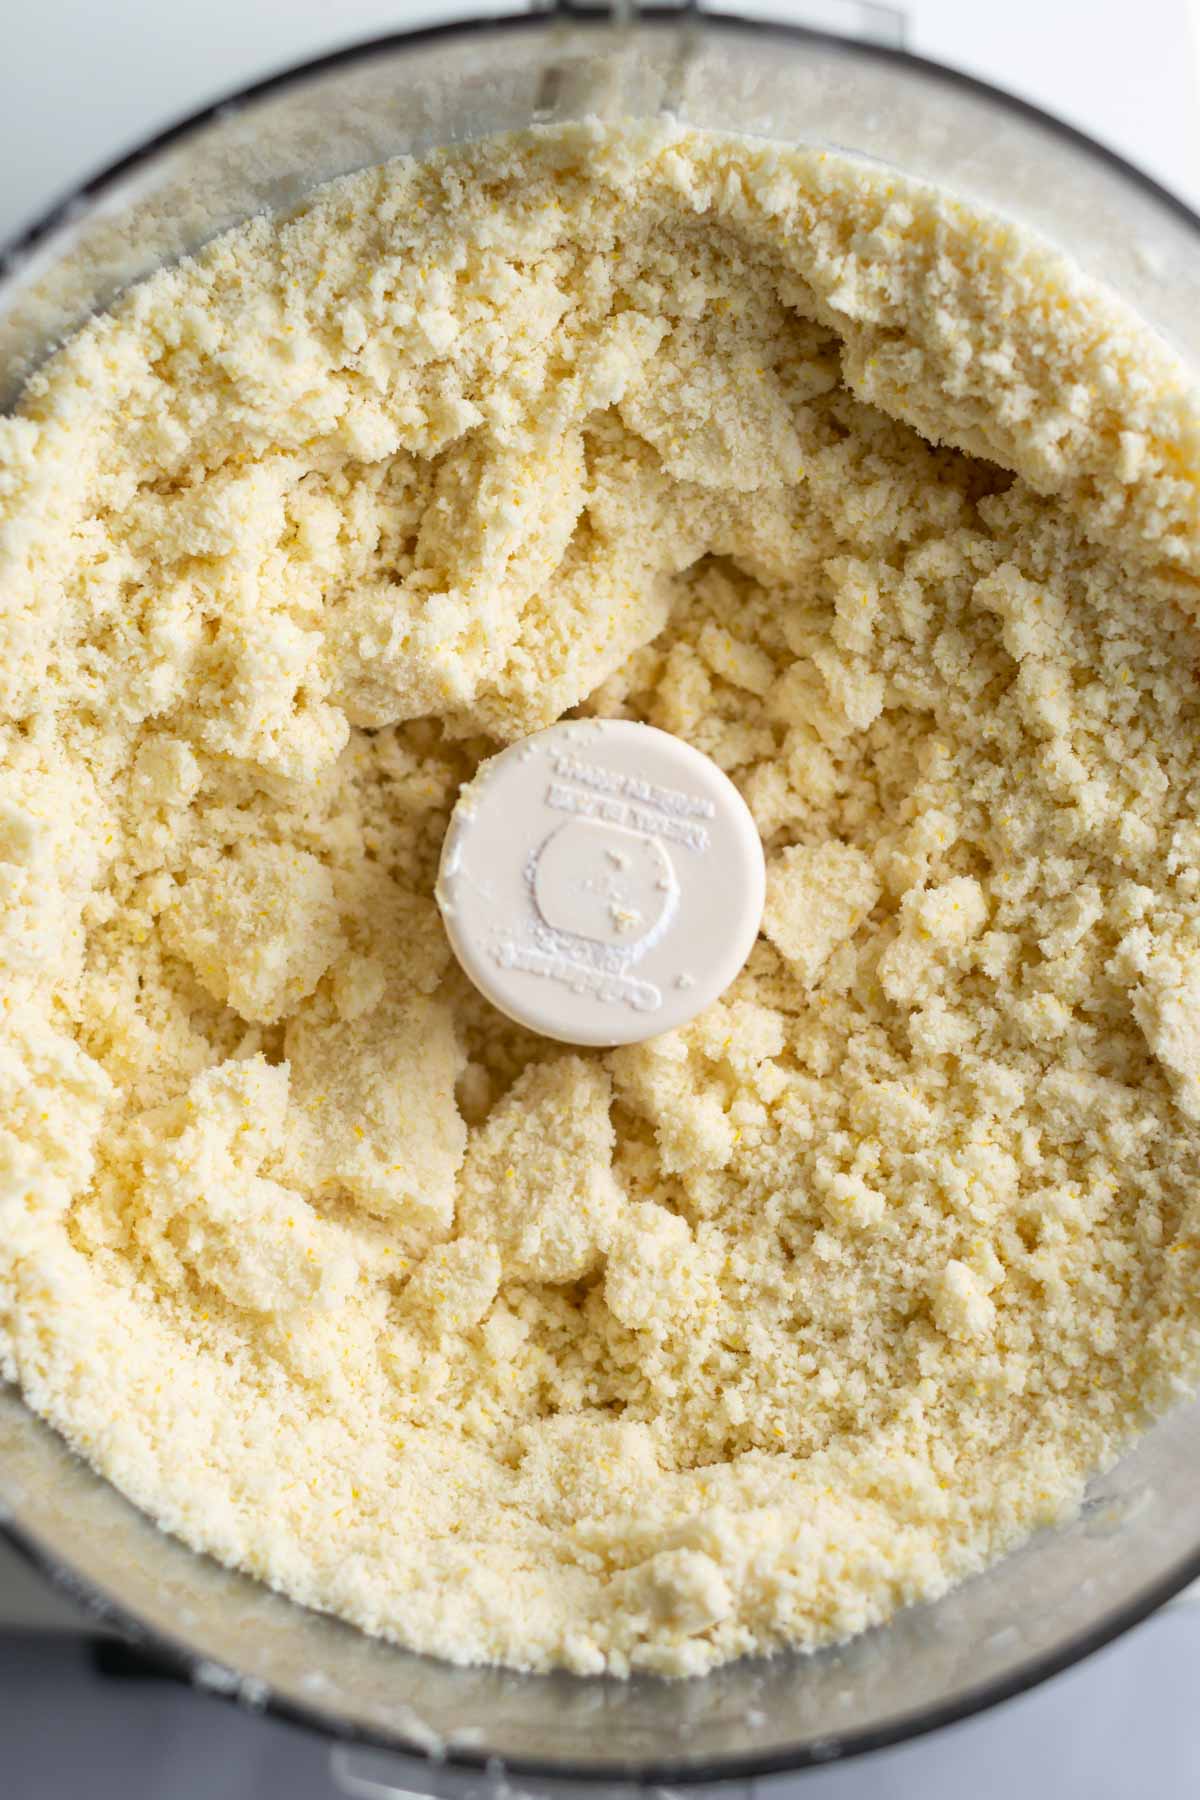
    Pulse until the mixture becomes sandy in texture. Now add the egg, vanilla and orange juice and pulse a few times. Then add ¾ of the chopped white chocolate and pulse until the dough comes together.

    cookie dough processed to look like wet sand
    The dough looks like wet sand after the cold butter and cold cream cheese have been added in.
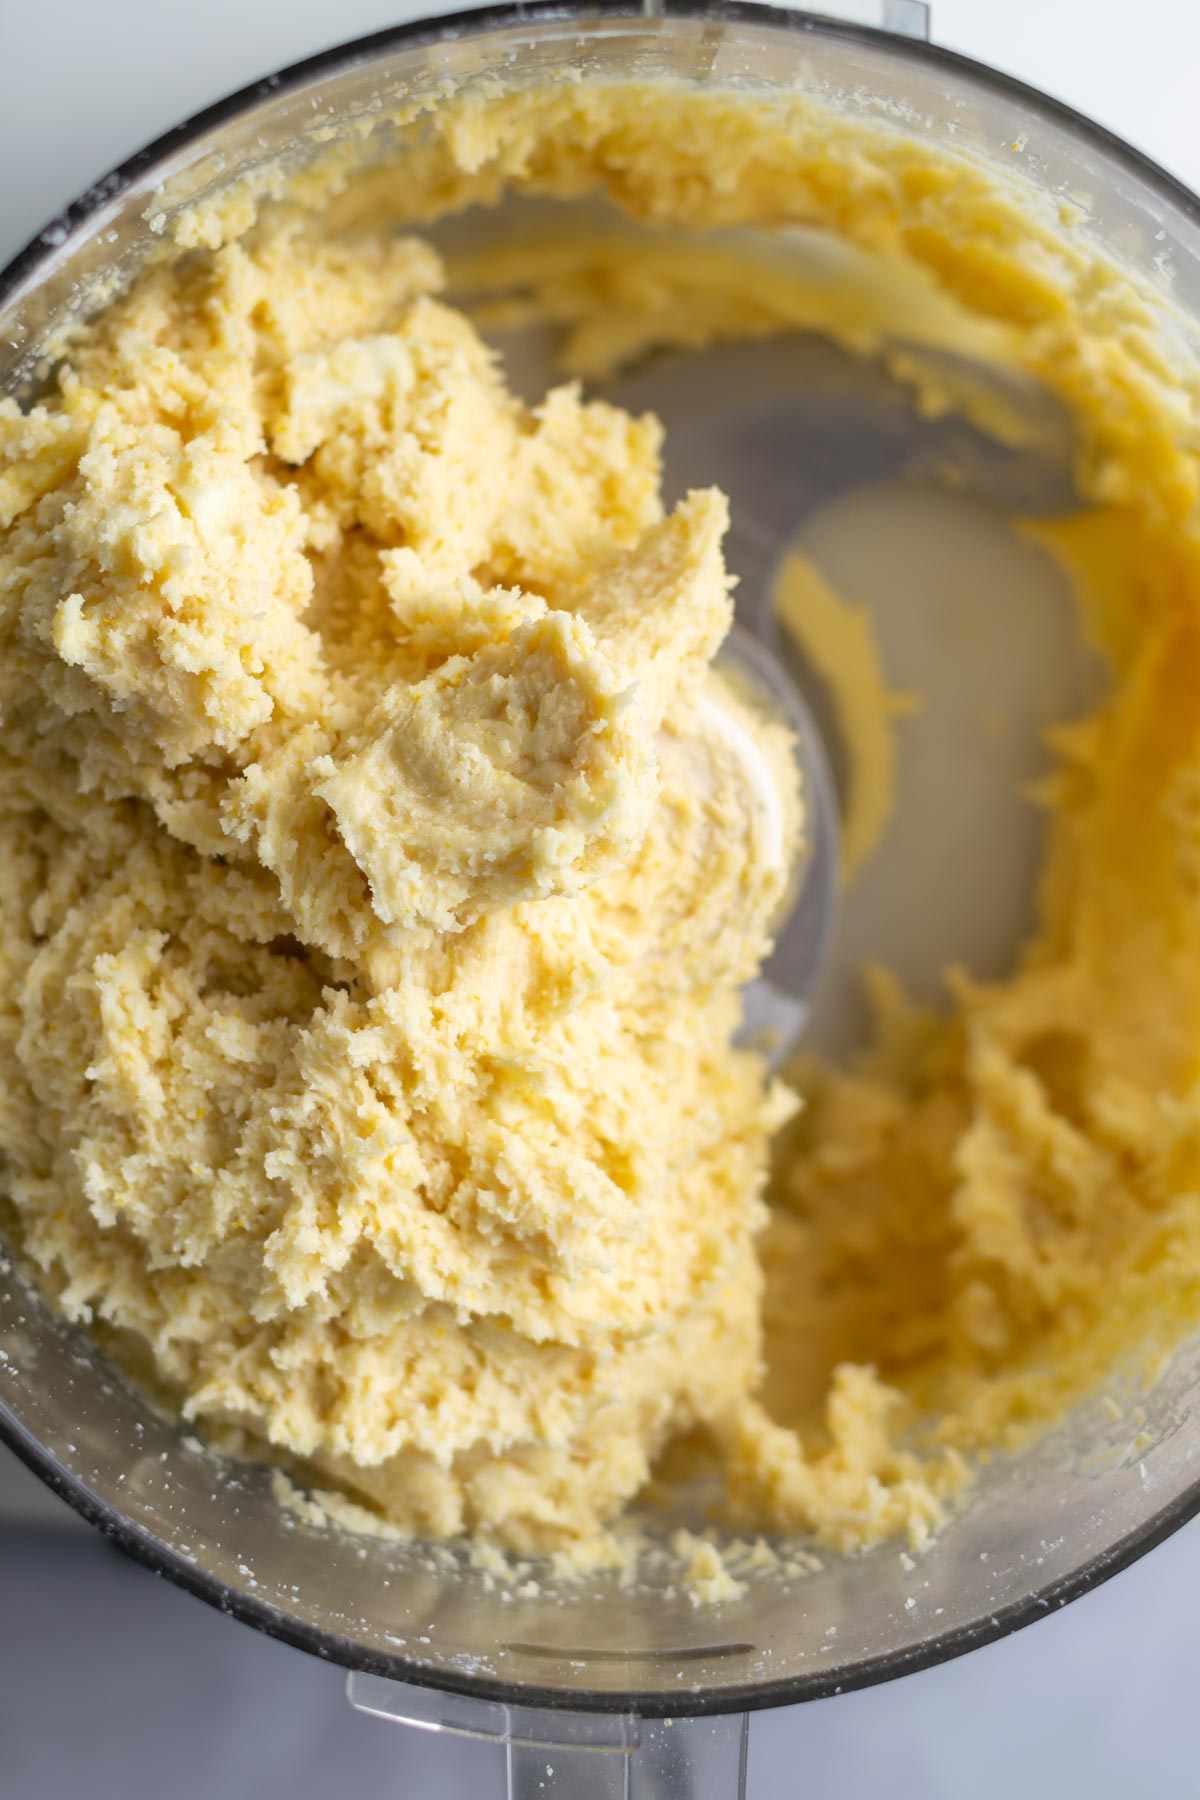
    orange creamsicle cookie dough in a food processor bowl
    The dough will ball up to mostly one side of the food processor when it's ready.

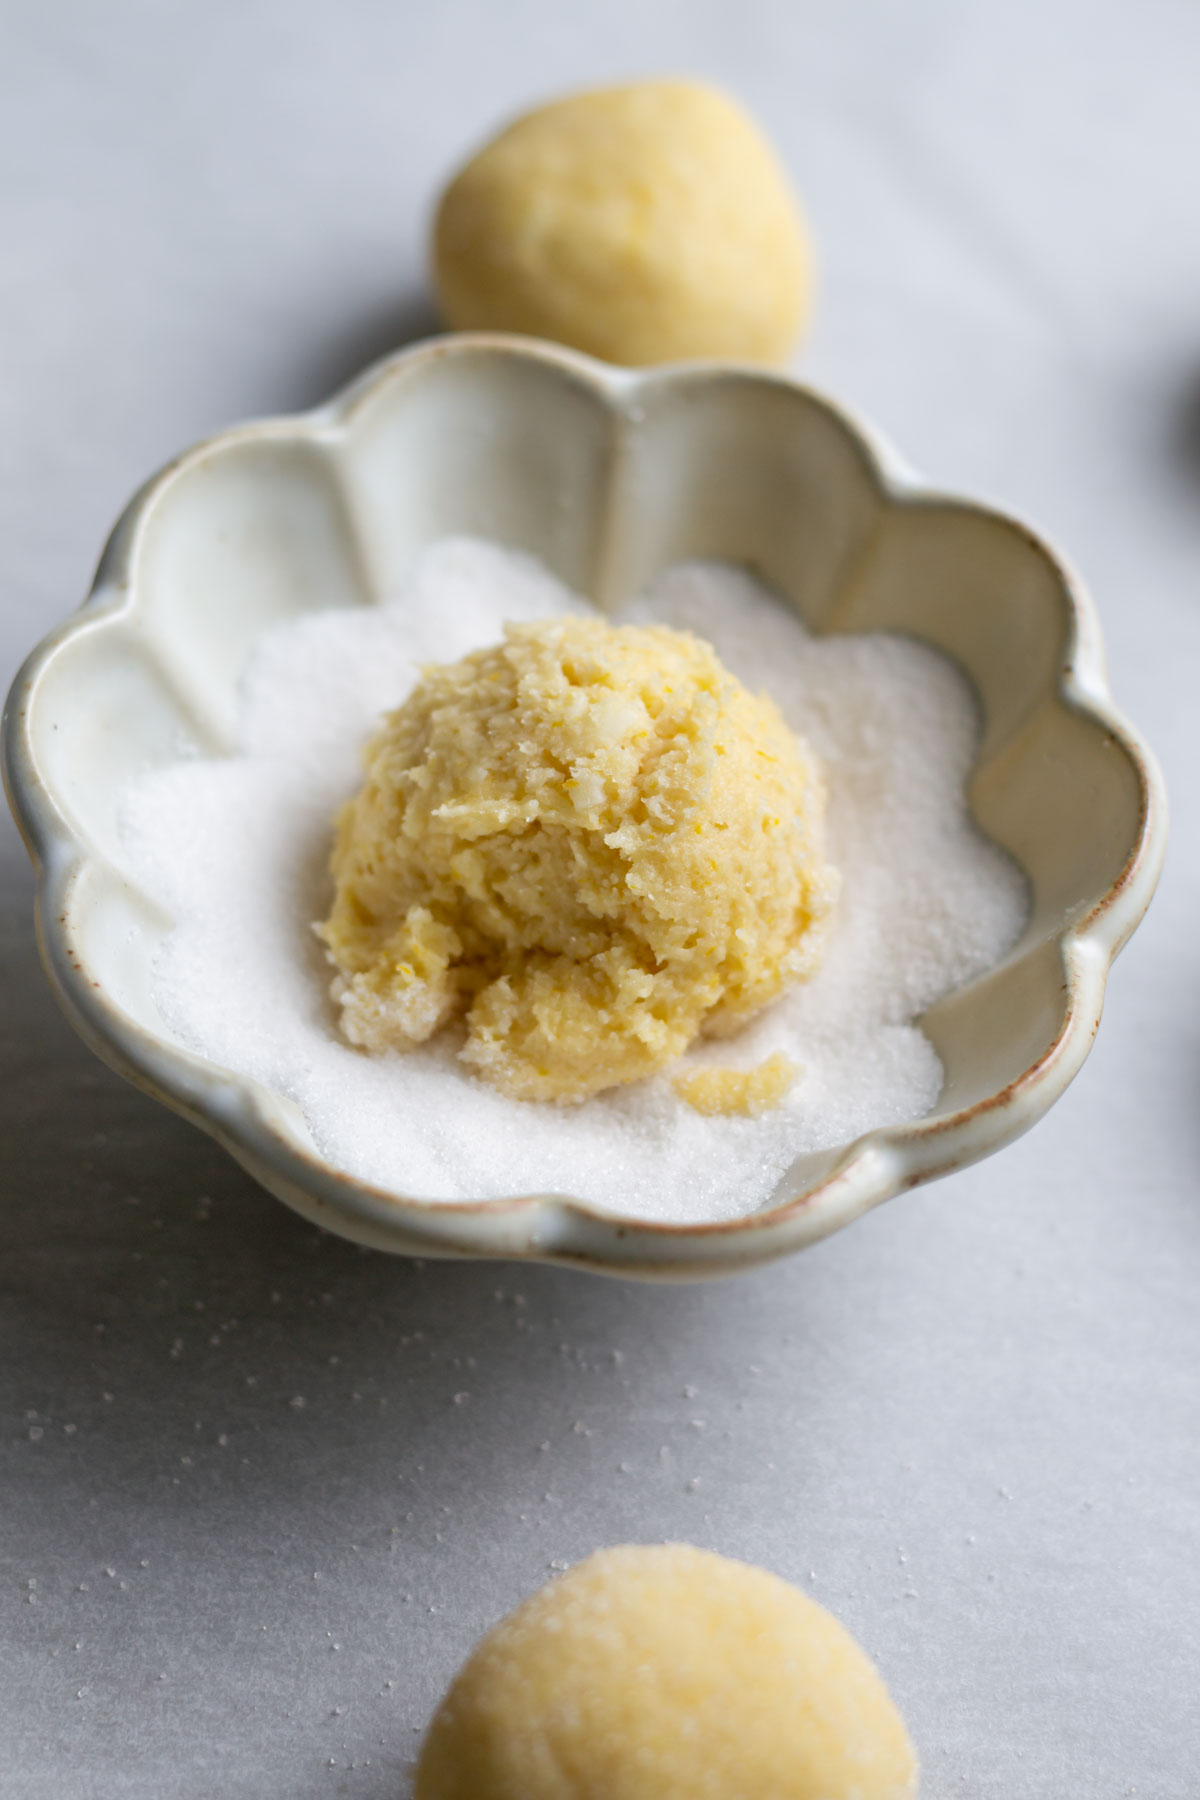
    Roll dough into 1 ½ tablespoon balls and then roll in the extra granulated sugar.

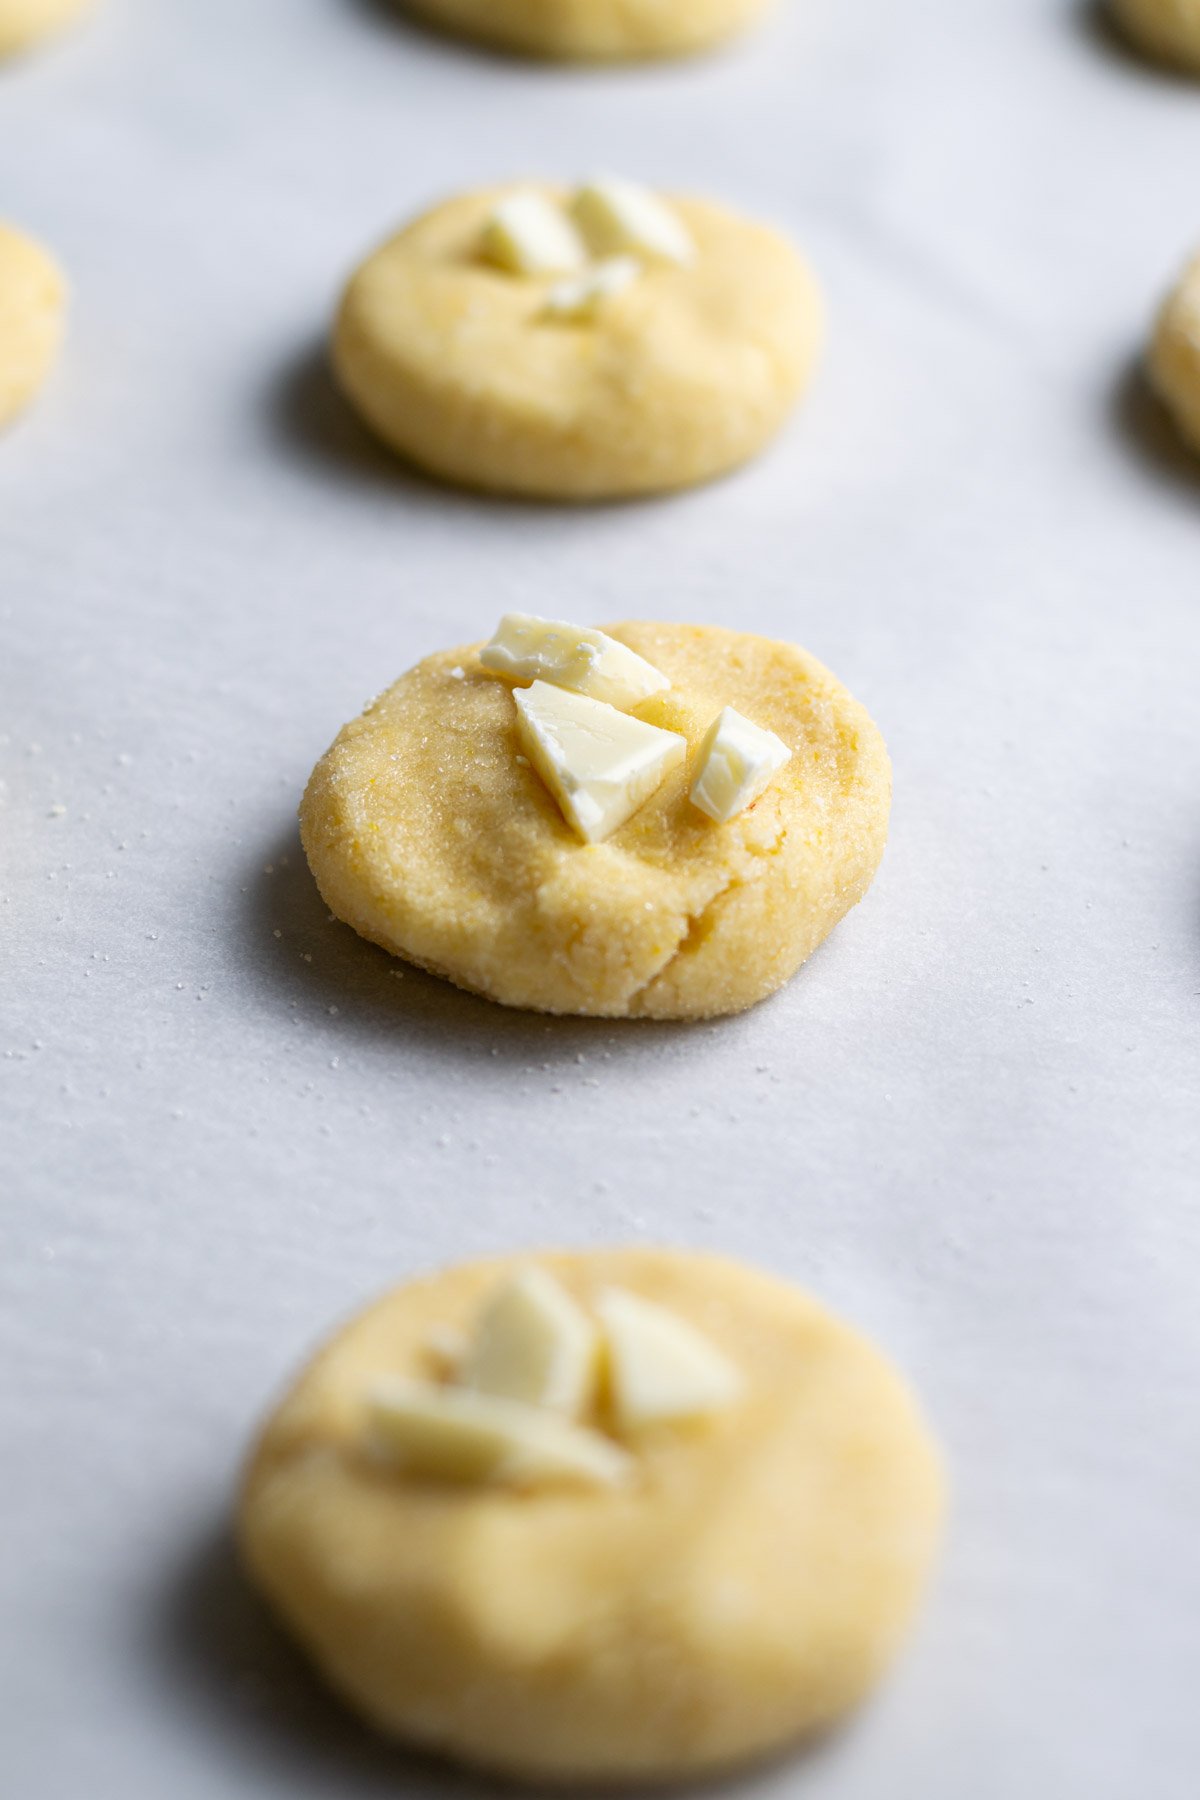
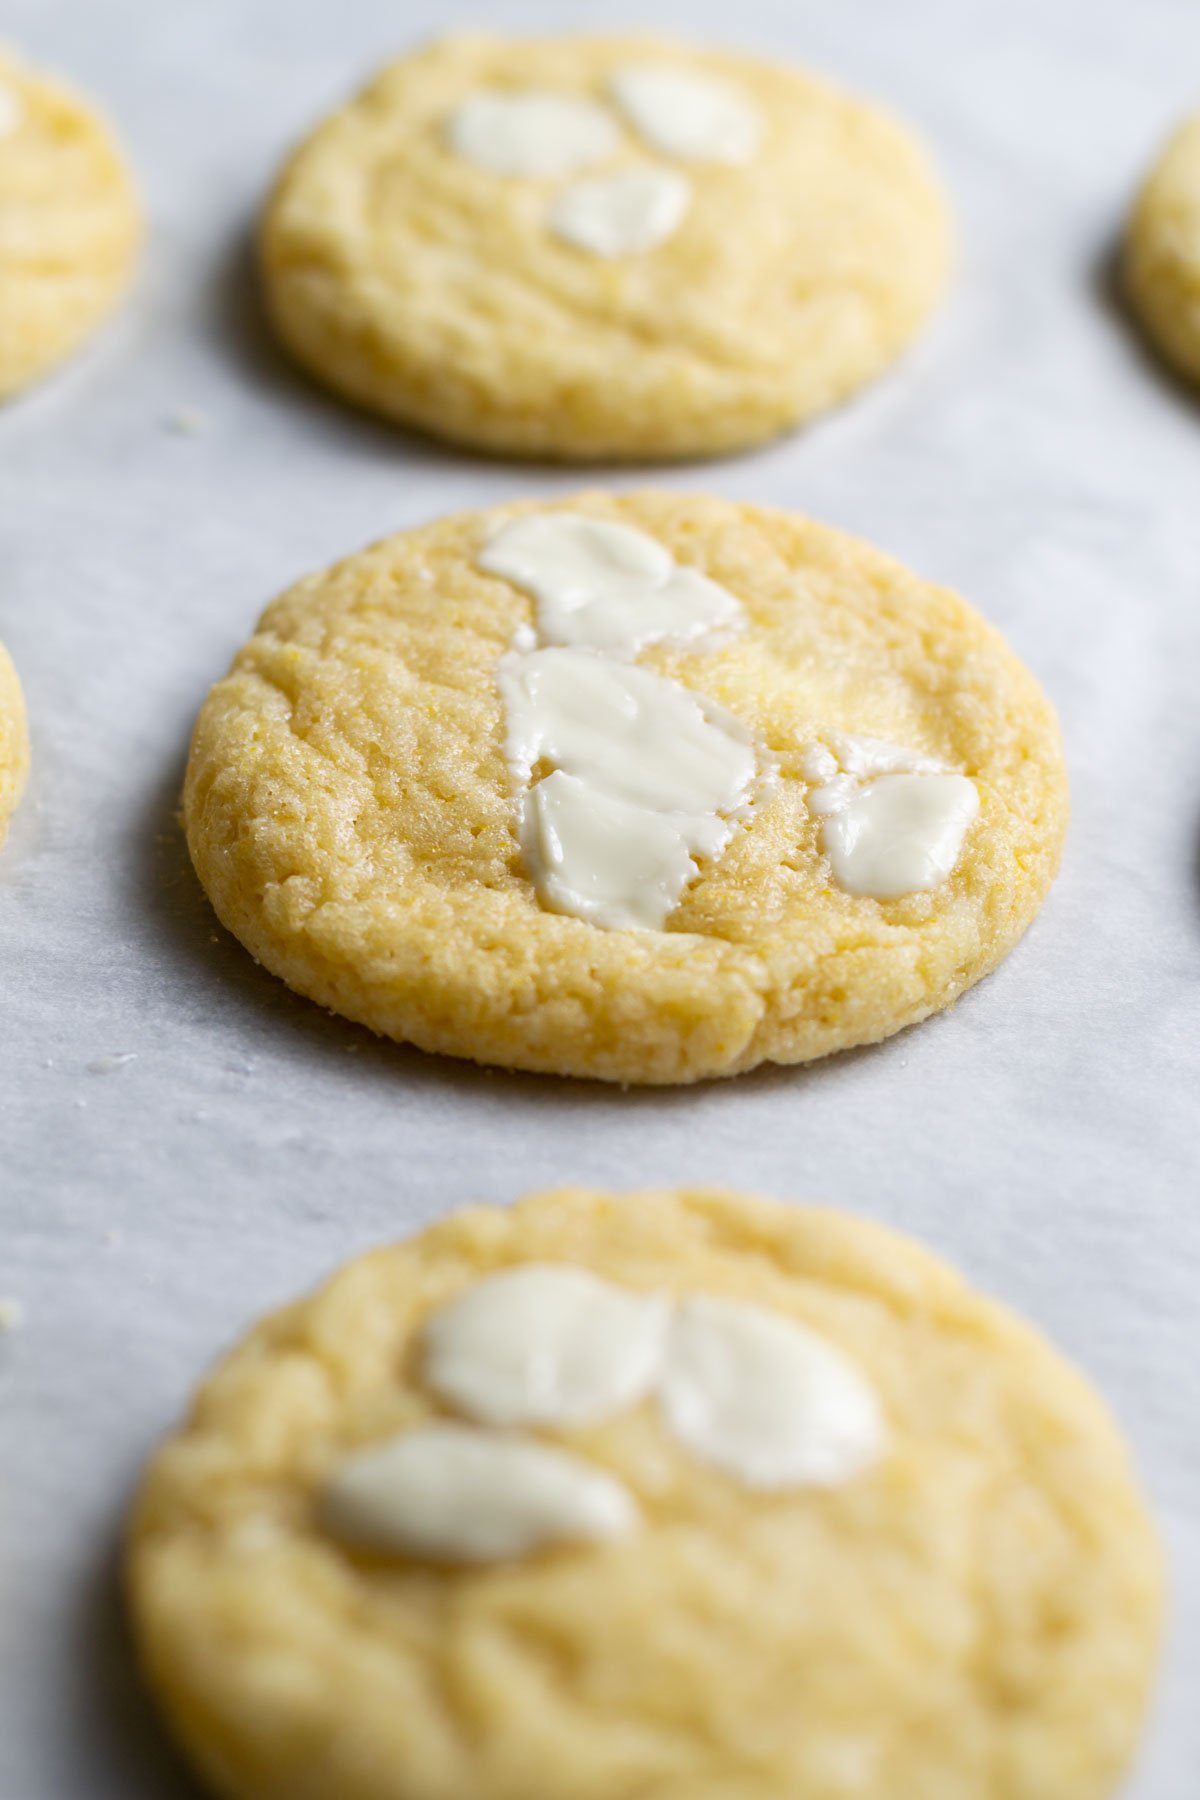
    Place orange creamsicle cookies on prepared baking pans, spacing 1-2 inches apart. Use the bottom of a glass or flat bottom measuring cup {or your clean hand} to flatten the cookies to between ¼ and ½ inch tall. Add a few pieces of the remaining white chocolate bar on top of each cookie.

    Bake until the edges are set and they look slightly under baked. If the cookies aren't as flat as you would like, wrap the pan against the counter or stove top and few times to deflate them while they are still hot. Allow to rest for 2 minutes on the baking pan. Then transfer to a wire rack to cool completely.

    cookie dough ball in a bowl of sugar
    orange creamsicle cookie dough with white chocolate pieces on top
    baked cookies on parchment lined baking sheet

    orange juice versus orange extract

    Orange juice is not nearly as strong as orange extract. Since you are already zesting an orange, just juice it for the orange juice needed in the recipe. Between the orange zest and the juice, you get the perfect orange flavor. This is my favorite tool for juicing oranges, limes and lemons.

    If you are tempted to use orange extract, start with a ¼ to ½ teaspoon, but you'll find that the orange flavor with just the zest and juice is really all you need.

    cookie with an orange slice and flowers

    tips for the best orange sugar cookies

    • A food processor is your best friend for this recipe. This is the updated version of my 25+ year old Cuisinart food processor. If you do not have a food processor, see the recipe card below for how you can use a mixer instead.
    • Use COLD ingredients! Ya'll are busy like me so this one takes next to no planning ahead.
    • Try not to overwork the dough, when it balls up on the food processor, it's ready! Overworked dough = tough cookies. We are going for thick, soft and chewy.
    • After you've rolled the cookies, use the bottom of a flat cup or a clean hand to slightly flatten the cookies. Then press some pieces of the chopped white chocolate on top of the cookies before baking them. I like the finished look of the cookies best when the chocolate pieces are placed close together so they form a puddle of melted white chocolate.
    • If the orange creamsicle cookies are puffier than you would like once you remove them from the oven, you can drop the pan on the counter or stove top a few times right after you take them out of the oven. This helps to deflate them.

    other flavor variations

    If you've tried my lemon white chocolate cake or lemon white chocolate cookie ice cream, you know how magical the lemon creamsicle flavor is too. Feel free to substitute the orange zest and juice with lemon.

    I haven't tried it, but I bet if you substituted the orange with lime you'd get a key lime flavored cookie. Please let me know if you try this variation!

    Remember to pin this recipe to Pinterest! Use the button on the recipe card or the share buttons on the side or bottom of this page.

    frequently asked questions

    can you make cookies with cold ingredients?

    Yes!! Most of my easy cookie recipes with cold ingredients use a food processor. It does all the hard work for you. Since the ingredients are cold to start with, no chill time is needed before baking the orange creamsicle cookies.

    can I use white chocolate chips instead?

    You could, but I highly recommend chopping up a white chocolate bar. White chocolate chips are designed to hold their shape when they are baked. A white chocolate baking bar will melt into the cookies giving them a softer texture and more evenly distributed flavor.

    do I have to use white chocolate?

    To achieve the orange creamsicle flavor, yes, white chocolate is needed.

    I haven't tested this cookie with a dark chocolate, but I suspect it would yield that classic chocolate orange flavor, if that's more your thing.

    how to store

    Orange creamsicle cookies will stay fresh in an airtight container at room temperature for up to 4-5 days.

    The sugar cookies also freeze well for up to 3 months. Allow the cookies to cool completely and then store in an airtight container or zip-top bag in the freezer.

    orange creamsicle cookie with orange slices

    Remember to snap a picture and tag me on Instagram if you make these Orange Creamsicle Cookies. It warms my heart to see you bring these recipes to life! Thank you for being here and happy baking!

    more no chill cookies to bake

    • Sprinkle Cookies
    • Cherry Almond Cookies
    • White Chocolate Raspberry Cookies
    • Chocolate Sprinkle Cookies

    If you make this recipe {or any recipe!} from two sugar bugs please come back and leave a review and a ⭐️⭐️⭐️⭐️⭐️ star rating.  I read every comment, and I LOVE hearing from you!

    Yield: 24 cookies

    Orange Creamsicle Cookies

    cookie with an orange slice and flowers

    Soft, chewy orange creamsicle cookies flavored with orange zest and white chocolate. NO CHILL cookies made with cold butter and cream cheese that have that nostalgic popsicle taste!

    Prep Time 15 minutes
    Bake Time 8 minutes
    Total Time 23 minutes

    Ingredients

    • Large orange, zested and juiced
    • ½ cup granulated sugar (100g)
    • 4 ounce white chocolate bar, chopped small (114g)
    • 2 ½ cups all-purpose flour (313g)
    • ½ teaspoon baking soda
    • ½ teaspoon baking powder
    • ½ teaspoon kosher salt
    • ½ cup unsalted butter, cold and cubed (113g)
    • ½ cup (4 ounces) cream cheese, cold and cubed (114g)
    • ¾ confectioners' sugar (90g)
    • 1 large egg
    • 1 tablespoon pure vanilla extract
    • 1 tablespoon fresh orange juice
    • ¼ cup granulated sugar, for rolling(50g)

    Instructions

    1. Preheat oven to 375°. Prepare baking pans with parchment paper or silicone baking mats. Set aside.
    2. Zest the orange then squeeze out the juice you need. Now take your clean fingers and work the orange zest into the granulated sugar (½ cup/100g) and set aside.
    3. Chop the white chocolate (4 ounces/114g) into small pieces and set aside.
    4. Place flour (2½ cups/313g), baking soda (½ teaspoon), baking powder (½ teaspoon) and kosher salt (½ teaspoon) in the bowl of your food processor. Pulse a few times to blend.
    5. Add the cold butter cubes (½ cup/113g), cold cream cheese (½ cup/114g), orange granulated sugar (½ cup/100g) and confectioners' sugar (¾ cup/90g) to the flour mixture. Pulse until the mixture becomes sandy in texture.
    6. Add the egg (1 large), vanilla (1 tablespoon) and orange juice (1 tablespoon) and pulse a few times. Then add ¾ of the chopped white chocolate and pulse until the dough comes together.
    7. Roll dough into 1 ½ tablespoon balls and then roll in the extra granulated sugar (¼ cup/50g).
    8. Place cookies on prepared baking pans, spacing 1-2 inches apart. Use the bottom of a glass or flat bottom measuring cup (or your clean hand) to flatten the cookies to between ¼ and ½ inch tall. Add a few pieces of the remaining white chocolate bar (about 1 ounce) on top of each cookie.
    9. Bake for 8-9 minutes until the edges are set and they look slightly under baked.
    10. If the cookies aren't as flat as you would like, wrap the pan against the counter or stove top and few times to deflate them while they are still hot. Allow to rest for 2 minutes on the baking pan. Then transfer to a wire rack to cool completely.

    Notes

    If you don't have a food processor, you can mix the dough in a regular mixer. Let the butter and cream cheese soften a bit and you may have to chill the dough for a short while (30 minutes or so) until it's a consistency you can work with. Follow a typical cookie method; cream the butter/cream cheese/sugar, add the egg/vanilla, followed by the dry ingredients.

    If using table salt, reduce the salt to ¼ teaspoon.

    Cookies will stay fresh in an airtight container at room temperature for up to 4 - 5 days. They also freeze well for up to 3 months.

    If you are more of a visual learner, I've included a video of how to make sprinkle cookies, which uses the same technique with just a couple of ingredient changes.

    Nutrition Information:

    Yield:

    24

    Serving Size:

    1

    Amount Per Serving: Calories: 153Total Fat: 6gSaturated Fat: 4gTrans Fat: 0gUnsaturated Fat: 2gCholesterol: 19mgSodium: 75mgCarbohydrates: 23gFiber: 0gSugar: 13gProtein: 2g

    The nutrition information is an estimate only and may not be entirely accurate.

    Did you make this recipe?

    Please make my day and PIN to Pinterest and share a photo on Instagram ~ making sure to tag @twosugarbugs! THANK YOU!!

    © Tasia
    Cuisine: American / Category: Cookies

    Oreo Cinnamon Rolls

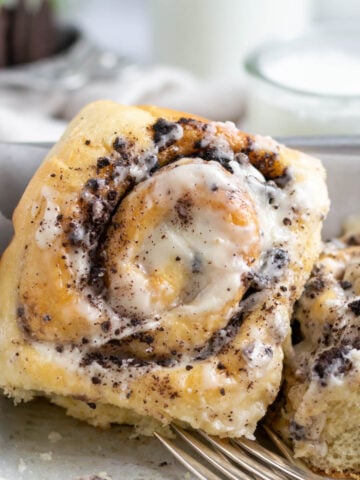
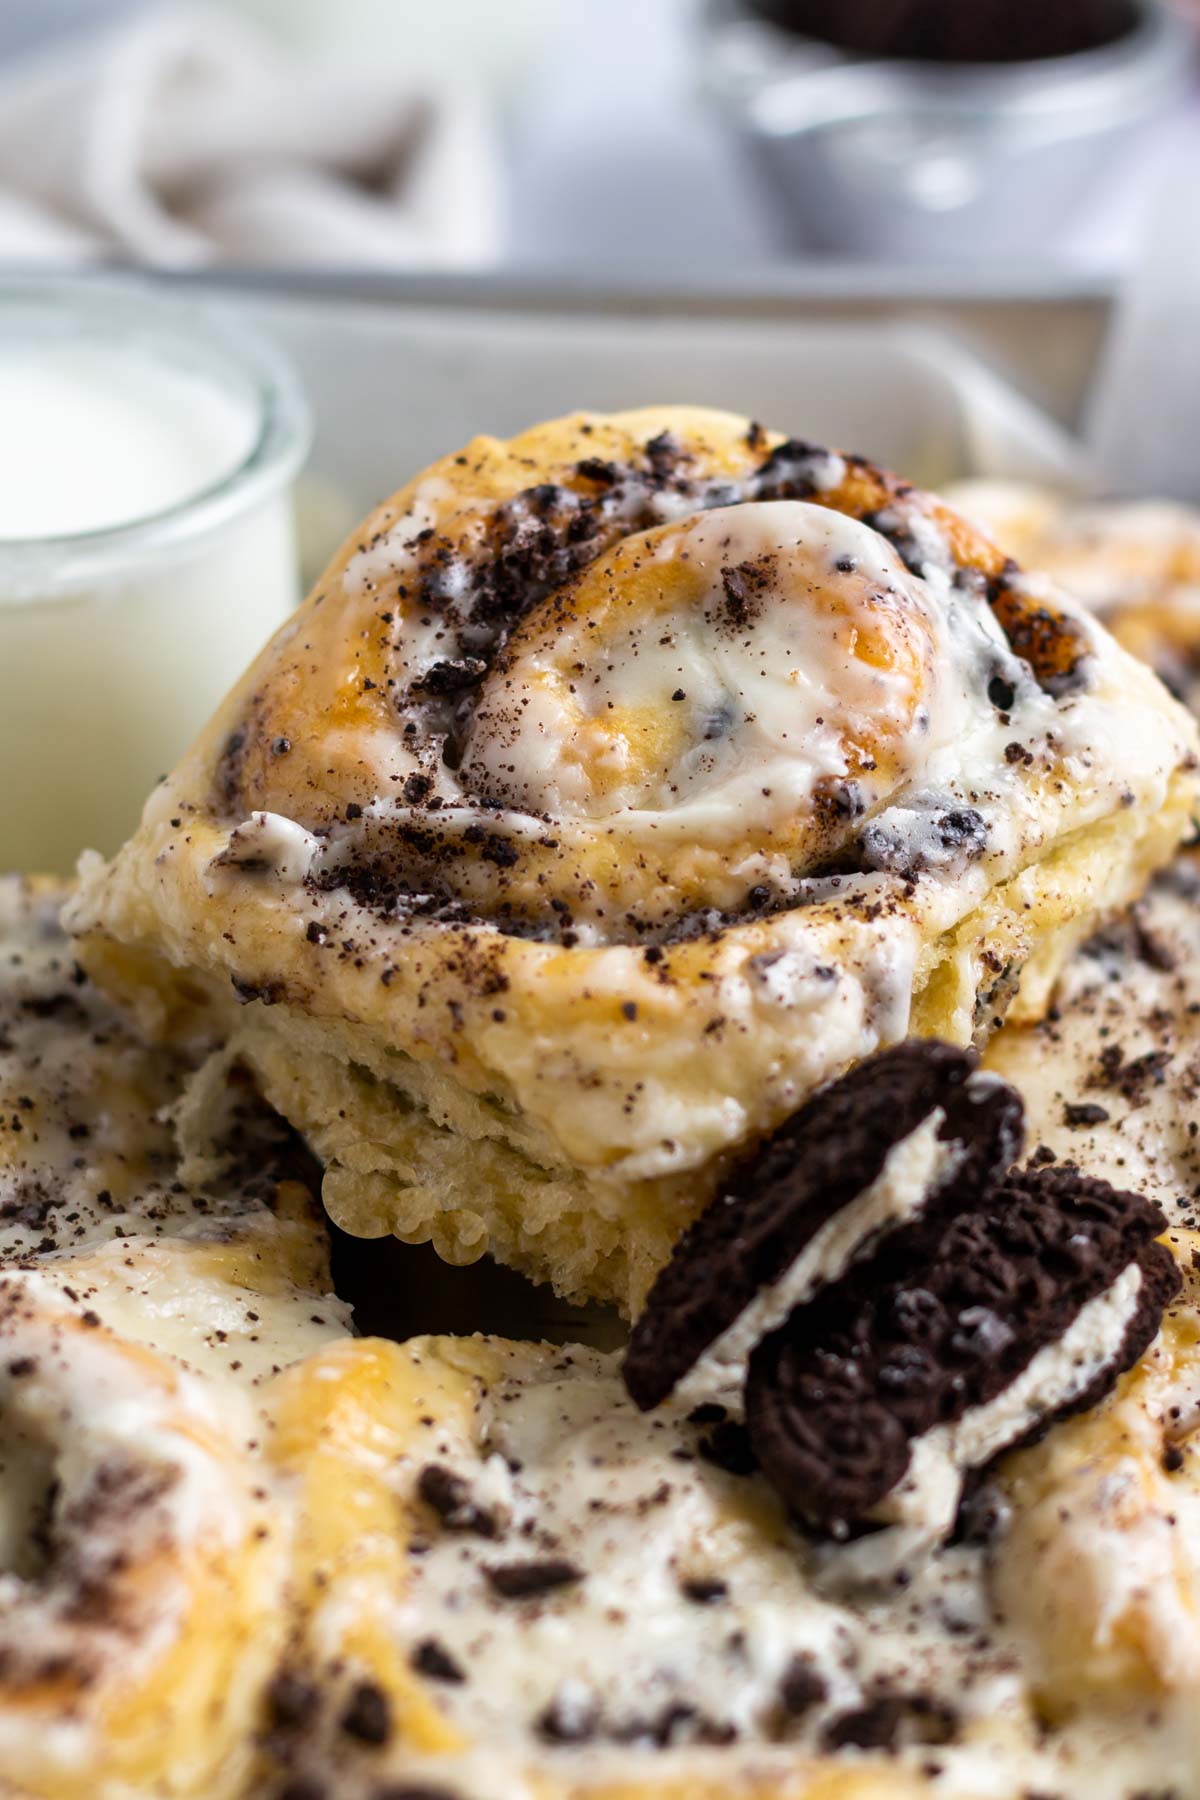
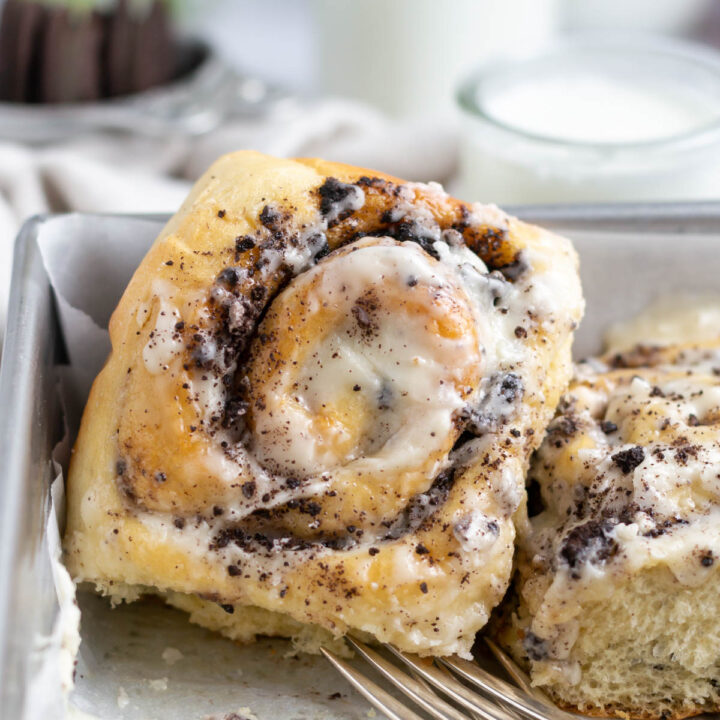
    oreo cinnamon rolls with forks in a baking pan

    Gooey Oreo cinnamon rolls are classic cinnamon rolls filled with chocolate sandwich cookies. The easy recipe has that cookies and cream taste you love and is iced with a simple vanilla glaze. You will also love the overnight, make ahead option for these Oreo stuffed buns!

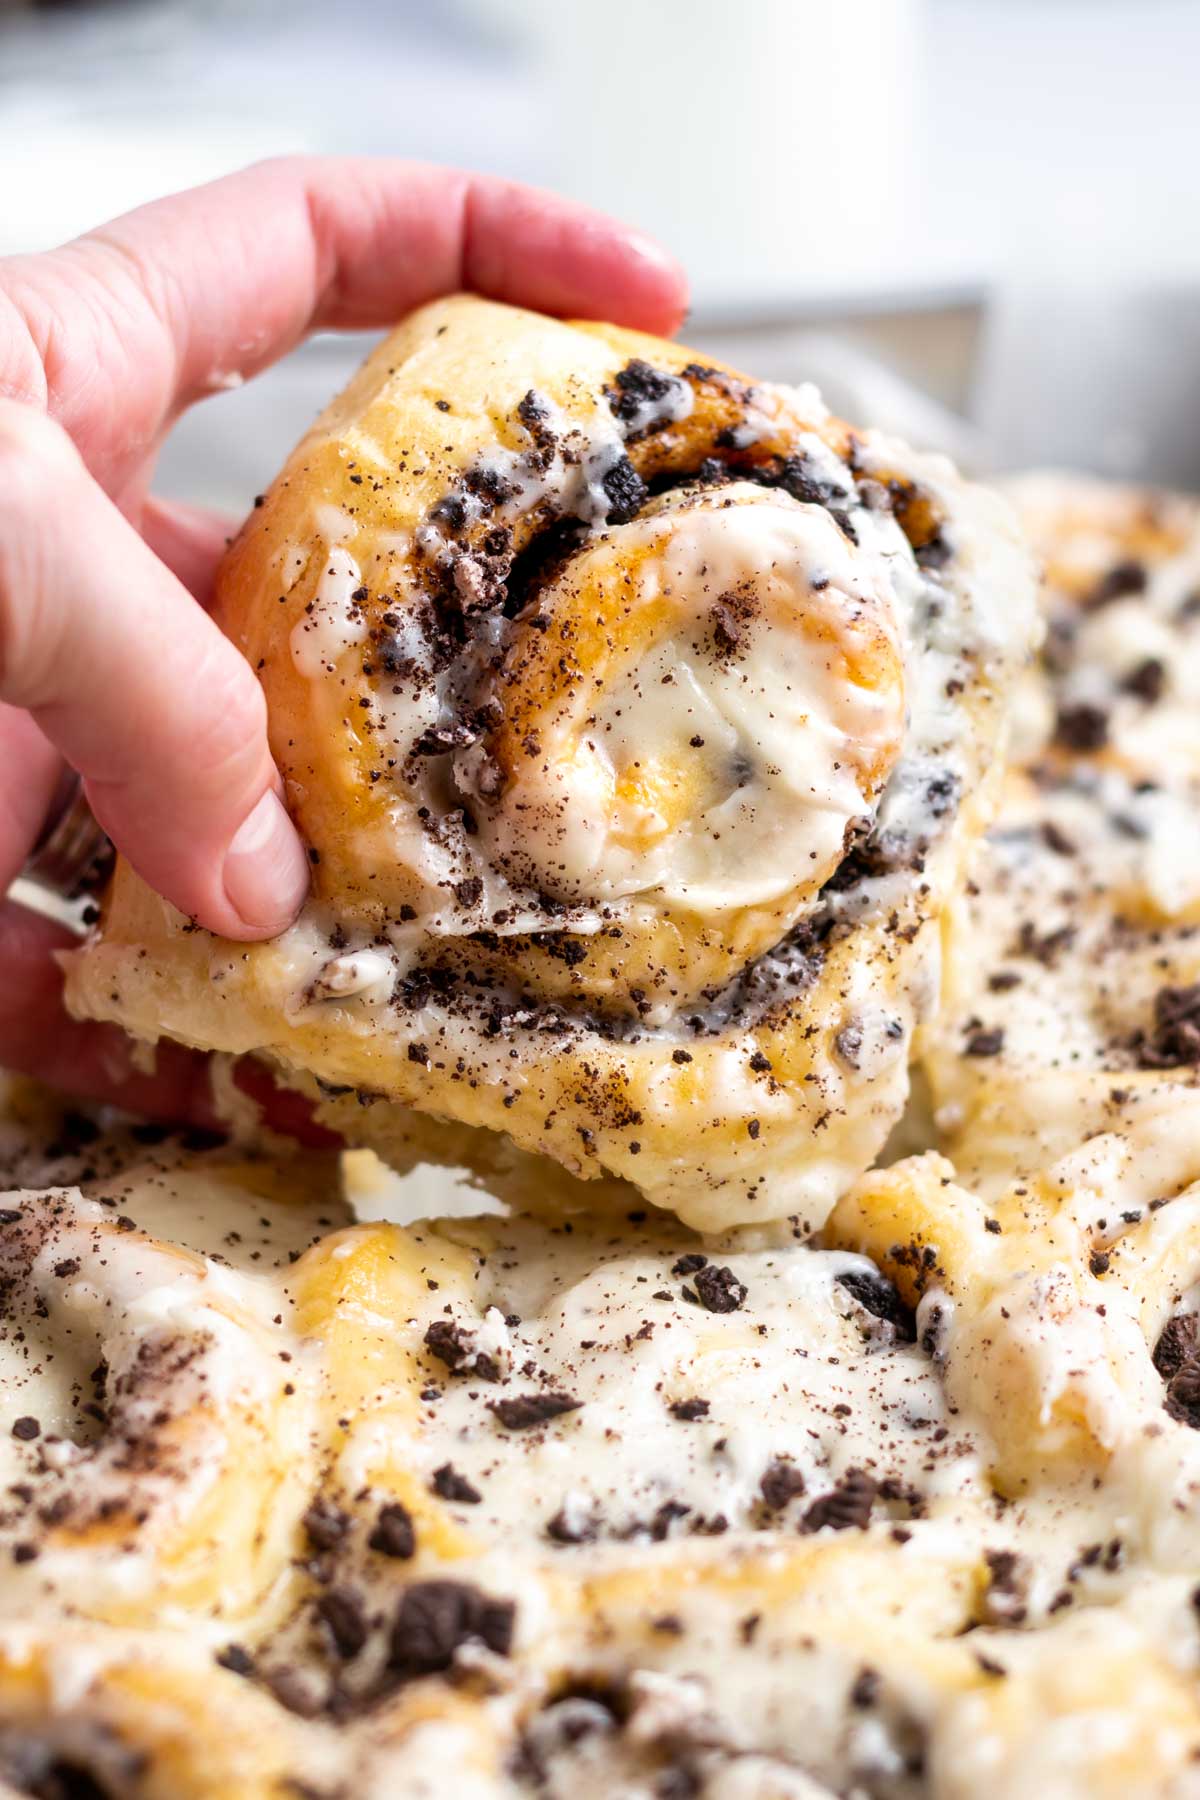
    hand grabbing an oreo cinnamon roll

    Disclosure | This post may contain affiliate links. As an Amazon Associate I earn from qualifying purchases.

    Oreo cinnamon rolls are an Oreo cookie fan's dream breakfast. They are the cookies and cream treat you never knew you needed; soft, gooey buns, glazed with an easy icing and topped with more sandwich cookies.

    This recipe doesn't fit into my healthy category, but instead is indulgent and perfect for breakfast, a celebratory brunch or a holiday morning like Easter or Christmas.

    If you are craving other twists on the classic cinnamon roll, try my funfetti cinnamon rolls recipe, apple cider cinnamon rolls recipe, chocolate swirl bread rolls or small batch cinnamon rolls.

    why you will love these oreo stuffed buns

    • Soft and fluffy ~ the dough is made with bread flour, kefir {or milk} and melted butter, which all add to the softness of the homemade rolls.
    • Cookies and cream flavor ~ the use of crushed chocolate sandwich cookies {like Oreos} brings that classic cookie flavor you love.
    • A "breakfast" that also doubles as dessert!
    • Overnight option ~ I don't know about you, but making cinnamon rolls the morning you want to serve them means a lot of time in the kitchen. These Oreo cinnamon rolls can be prepped up to the baking stage and then stored in the refrigerator overnight.
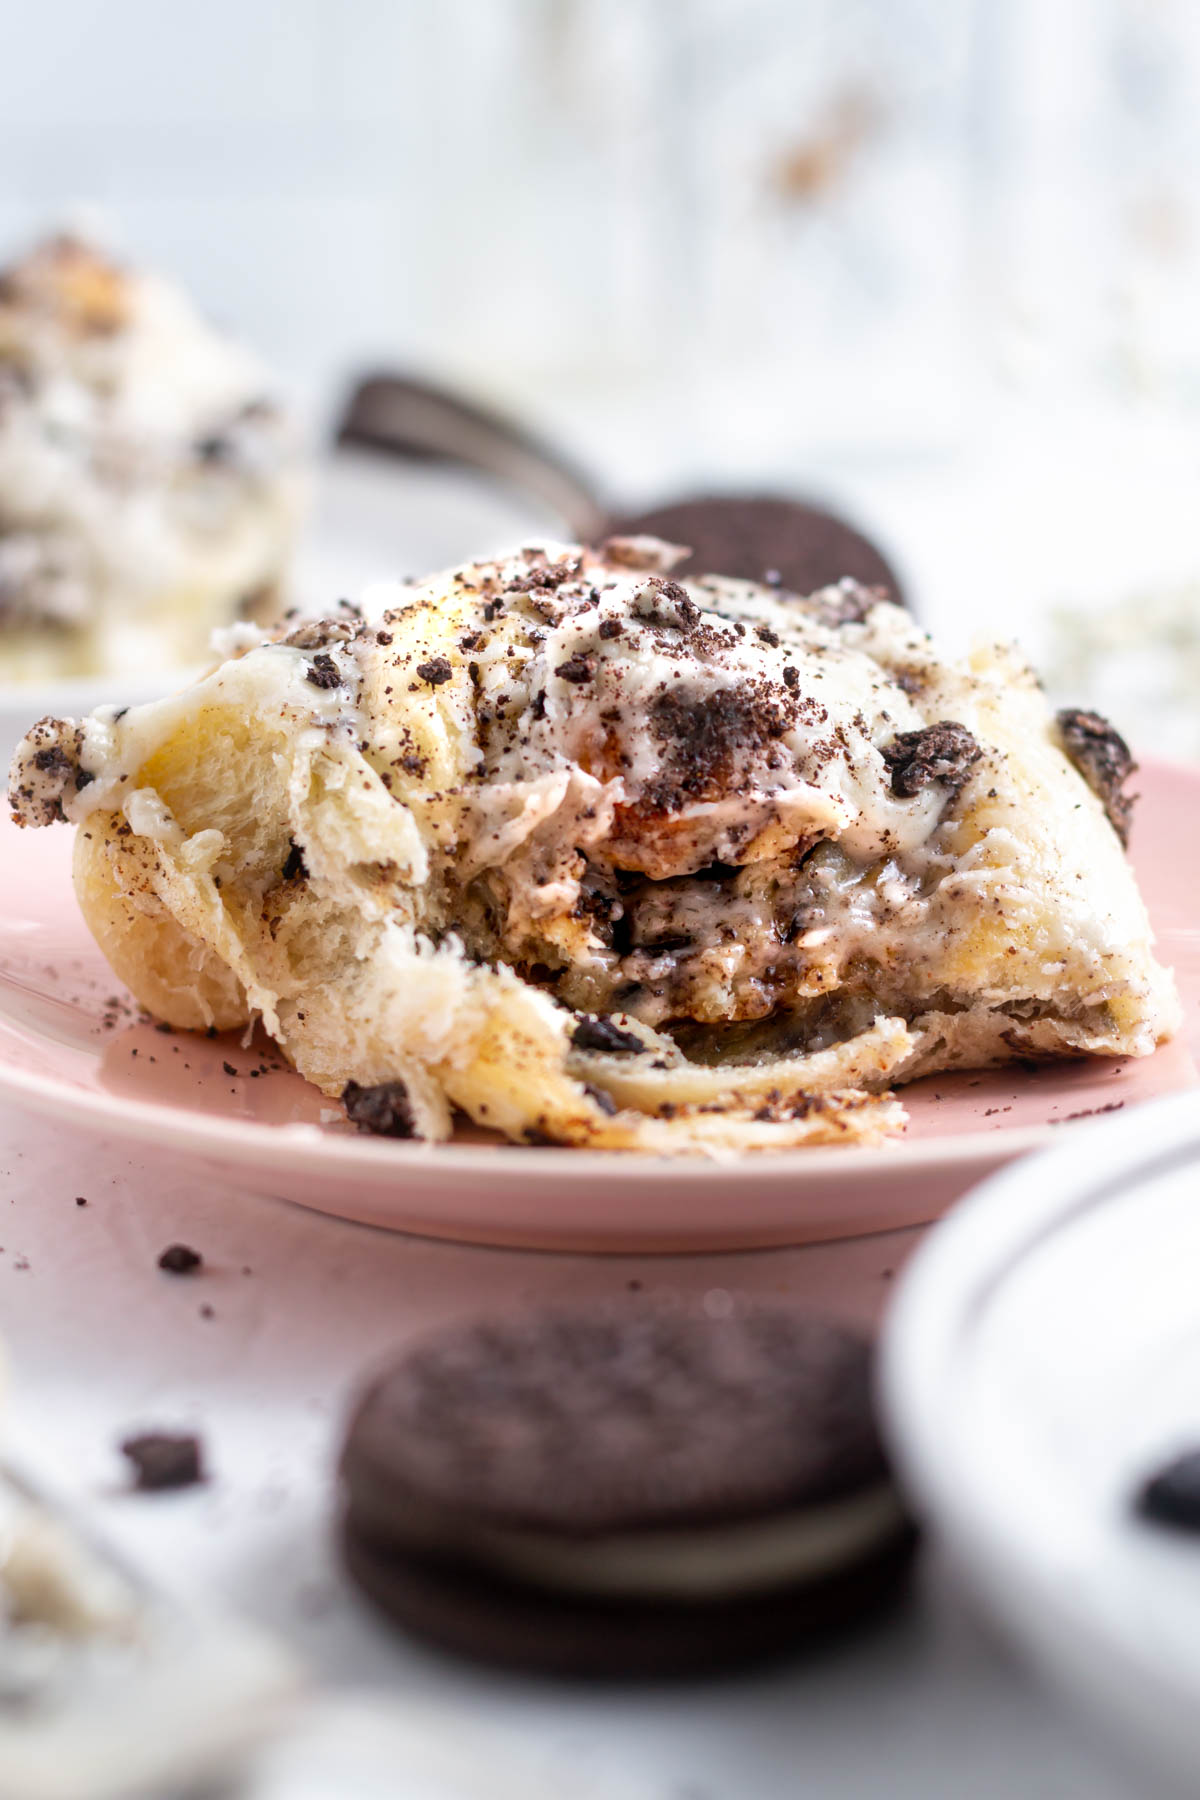
    oreo cinnamon roll on a plate

    ingredients and substitutions

    Please scroll to the printable recipe card at the end of this post for the full list of ingredients and baking directions.

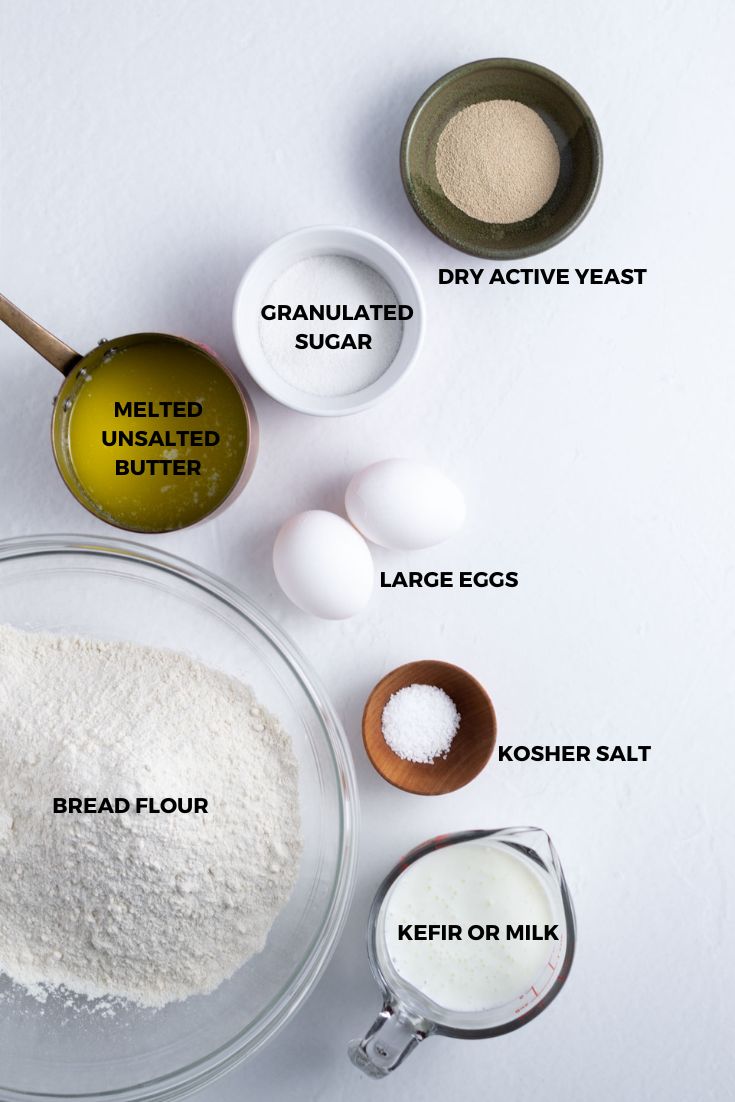
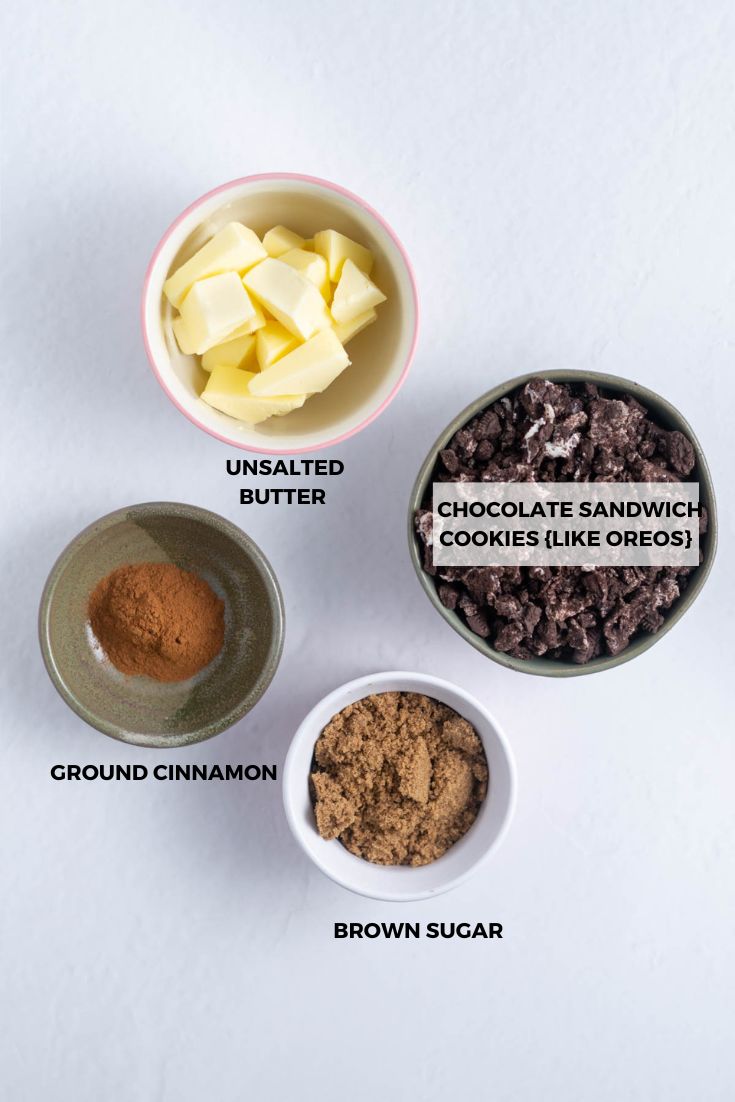
    ingredients for oreo cinnamon rolls
    ingredients for oreo cinnamon roll filling
    • Kefir ~ I love the slight tang, protein and softness that kefir brings to these rolls. Buttermilk, whole milk or 2% milk will work as well.
    • Dry active yeast ~ this is the magic ingredient that gives the Oreo cinnamon rolls their soft and fluffy texture.
    • Granulated sugar ~ brings a tiny bit of sweetness and helps to activate the yeast.
    • Bread flour ~ adds moistness and softness to the classic rolls, if you have it I highly recommend using it. {King Arthur Bread Flour is what I use}. I've also tested this recipe with all-purpose flour and it works fine. See notes in the recipe card for the correct amount.
    • Kosher salt ~ if you only have table salt, start with half the amount.
    • Large eggs ~ 2 are needed, they should be room temperature.
    • Unsalted butter ~ gets melted for the rolls. If you only have salted, omit the kosher salt. You will want room temperature butter for the filling and easy vanilla icing.
    • Ground cinnamon and brown sugar ~ for that classic cinnamon roll filling. If you prefer a more Oreo flavored filling, omit the cinnamon and replace it with cocoa powder. Unsweetened, Dutch or black cocoa powder will all work.
    • Oreo cookies ~ needed for the cookies and cream flavor! I love Back to Nature's chocolate sandwich cookies and Trader Joe's Jo Jo's are also a good substitution.
    • Confectioners' sugar, vanilla and milk {not shown} ~ needed for the icing.

    Pro tip ~ to quickly bring eggs to room temperature, place them in a bowl of warm tap water for 5-10 minutes.

    how to make gooey cinnamon rolls

    This recipe starts with a homemade dough made with yeast. I made this recipe with my KitchenAid mixer, but I do like making this dough by hand as well {see this recipe for step-by-step directions for making without a mixer}.

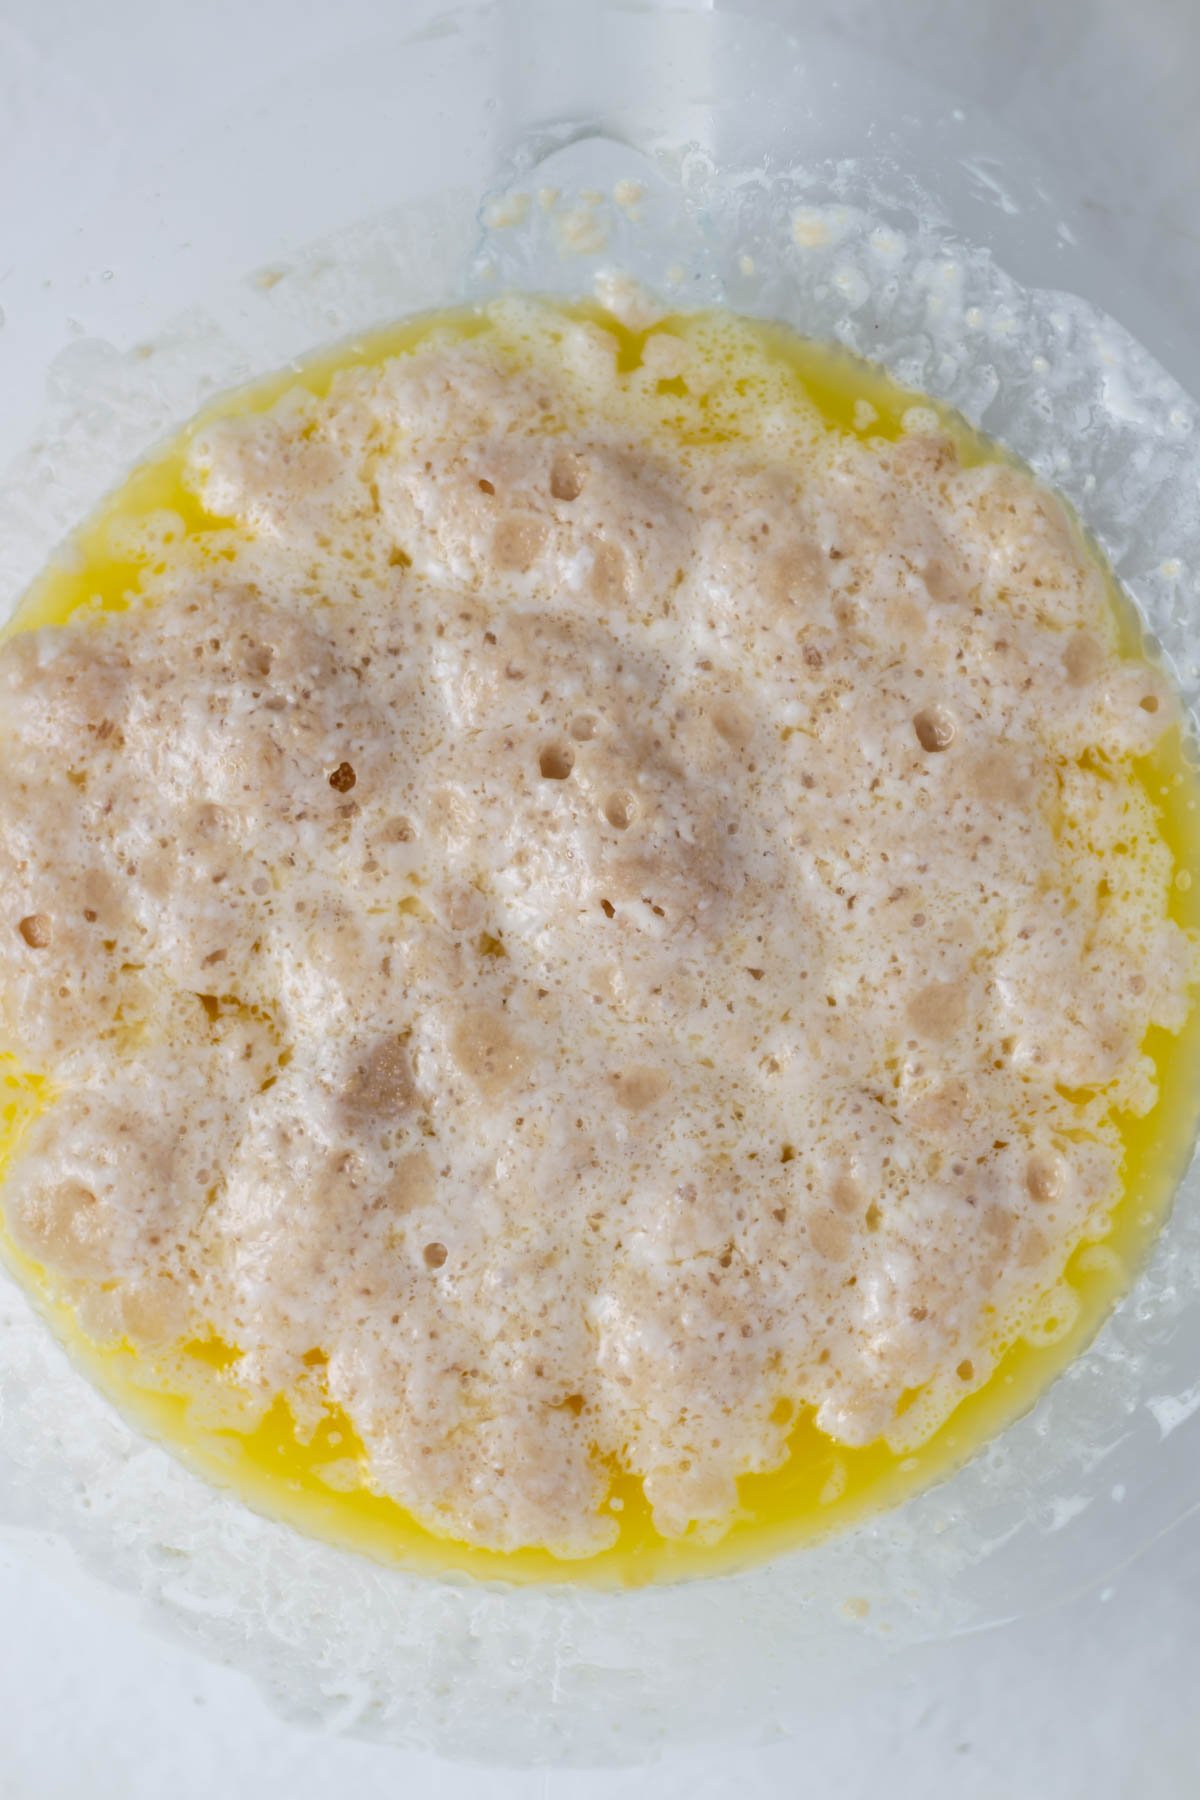
    In the bowl of a stand mixer add the warm kefir, sugar, yeast and melted and slightly cooled unsalted butter and give it a little stir. Let the mixture sit for 10 minutes.

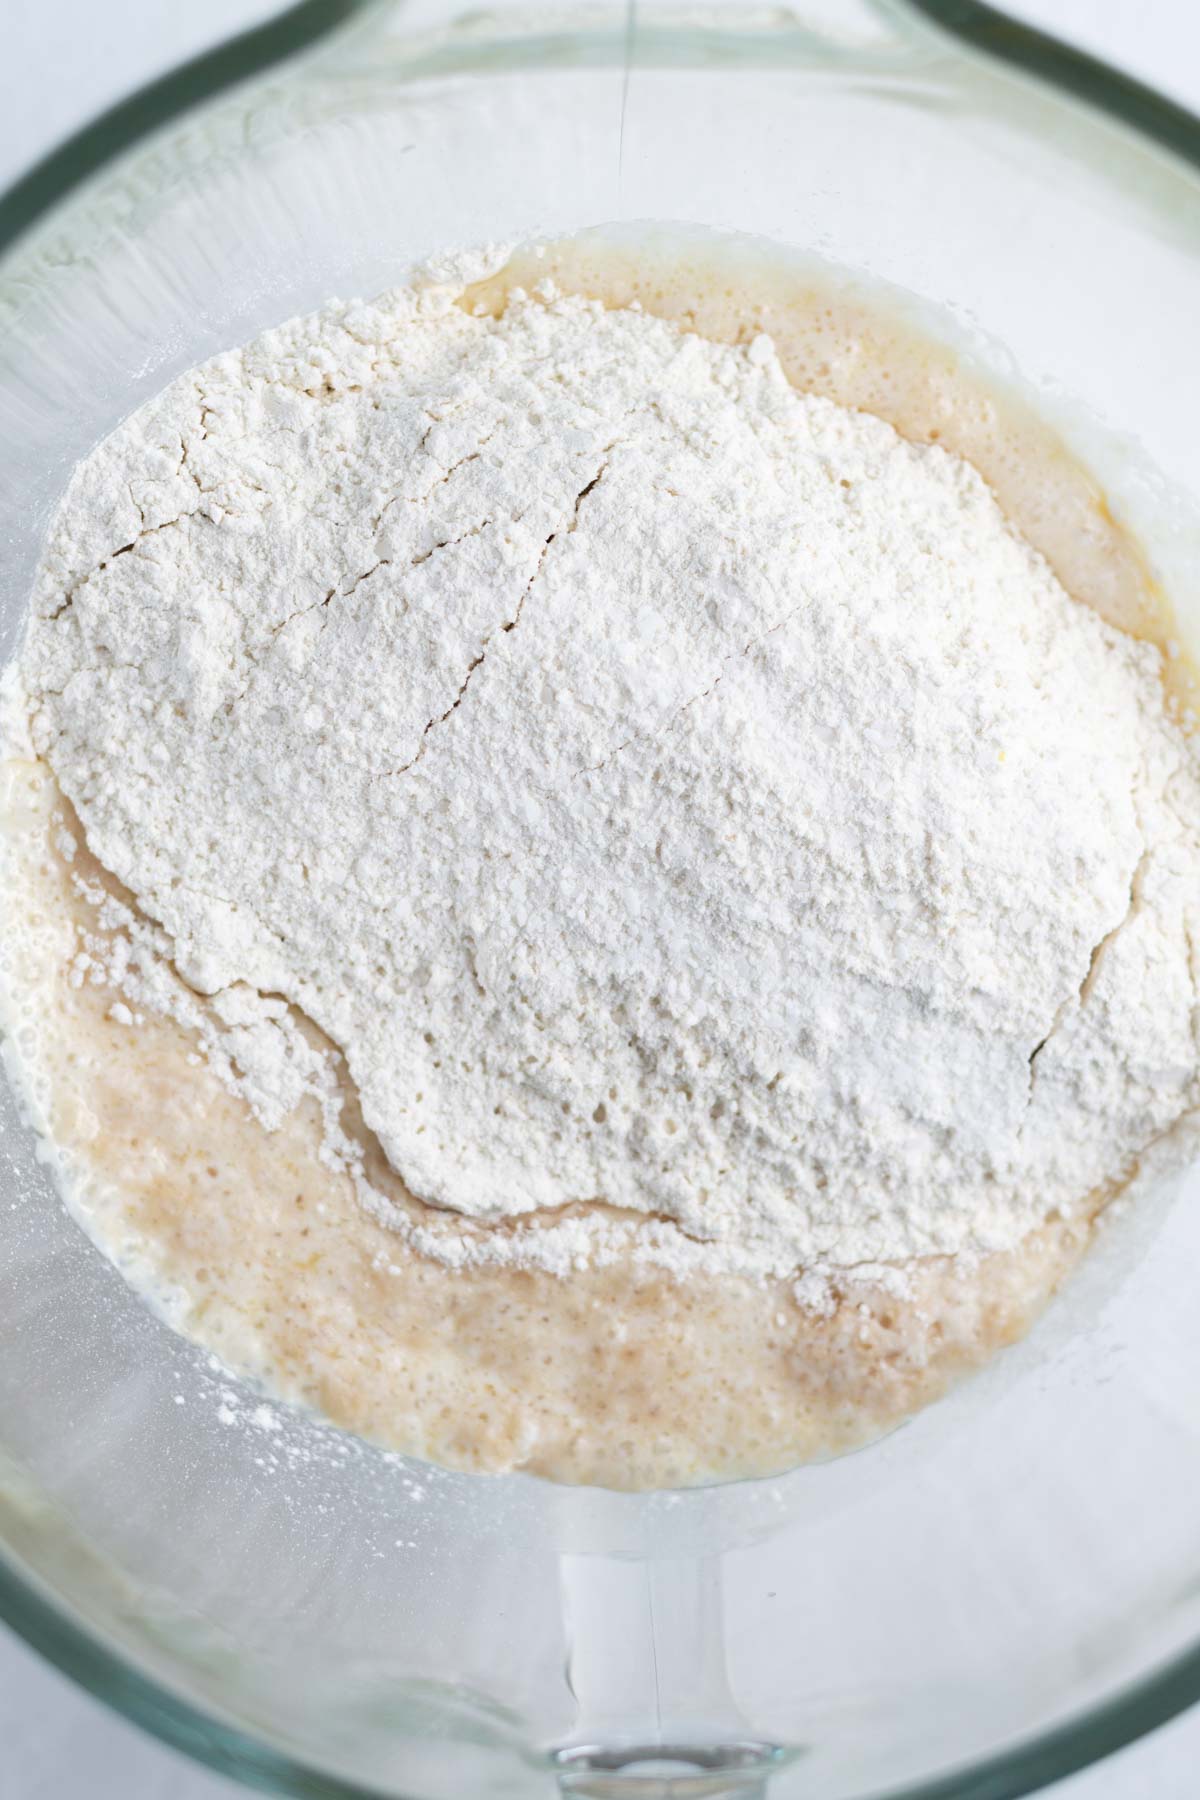
    Add the eggs, bread flour and kosher salt, and beat at medium speed with the dough hook until a soft dough forms.

    activated yeast with sugar, milk and melted butter in a mixing bowl
    The yeast should be foamy after the 10 minute rest.
    flour added on top of activated yeast, sugar and melted butter in a mixing bowl
    Add the bread flour on top of the activated yeast mixture.

    If the dough is sticking to the sides of the bowl after 4-5 minutes, add up to 3 tablespoons of additional flour.

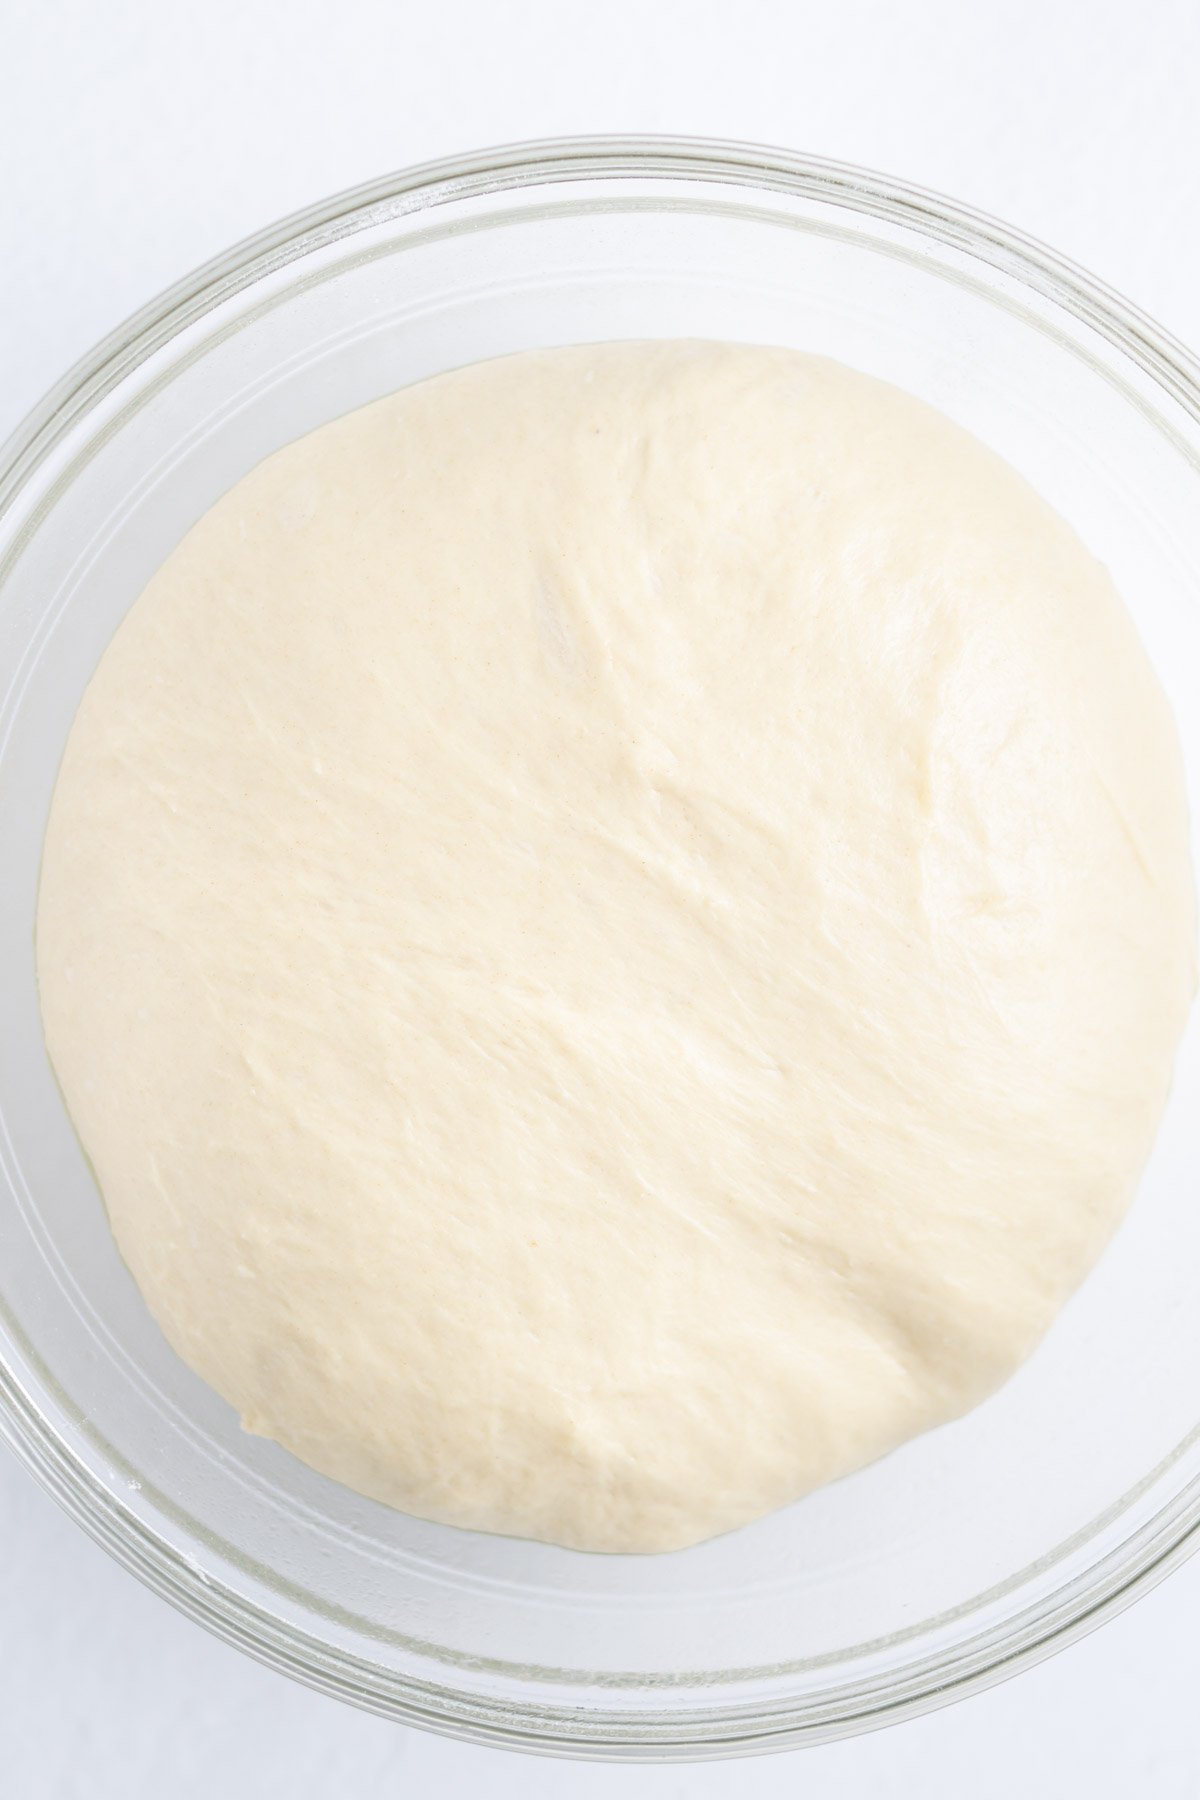
    Grease the bowl you mixed the dough in {no need to wash it} and place the dough in the bowl, cover and let rise about 1 hour or until double in size. You will notice I moved the dough into another bowl, but that is only because my mixing bowl doesn't fit in my toaster oven}.

    oreo cinnamon roll dough sticking to the edges of the mixing bowl.
    If the dough is sticking to the mixing bowl after 4-5 minutes of mixing, add 1-3 tablespoons more of flour.
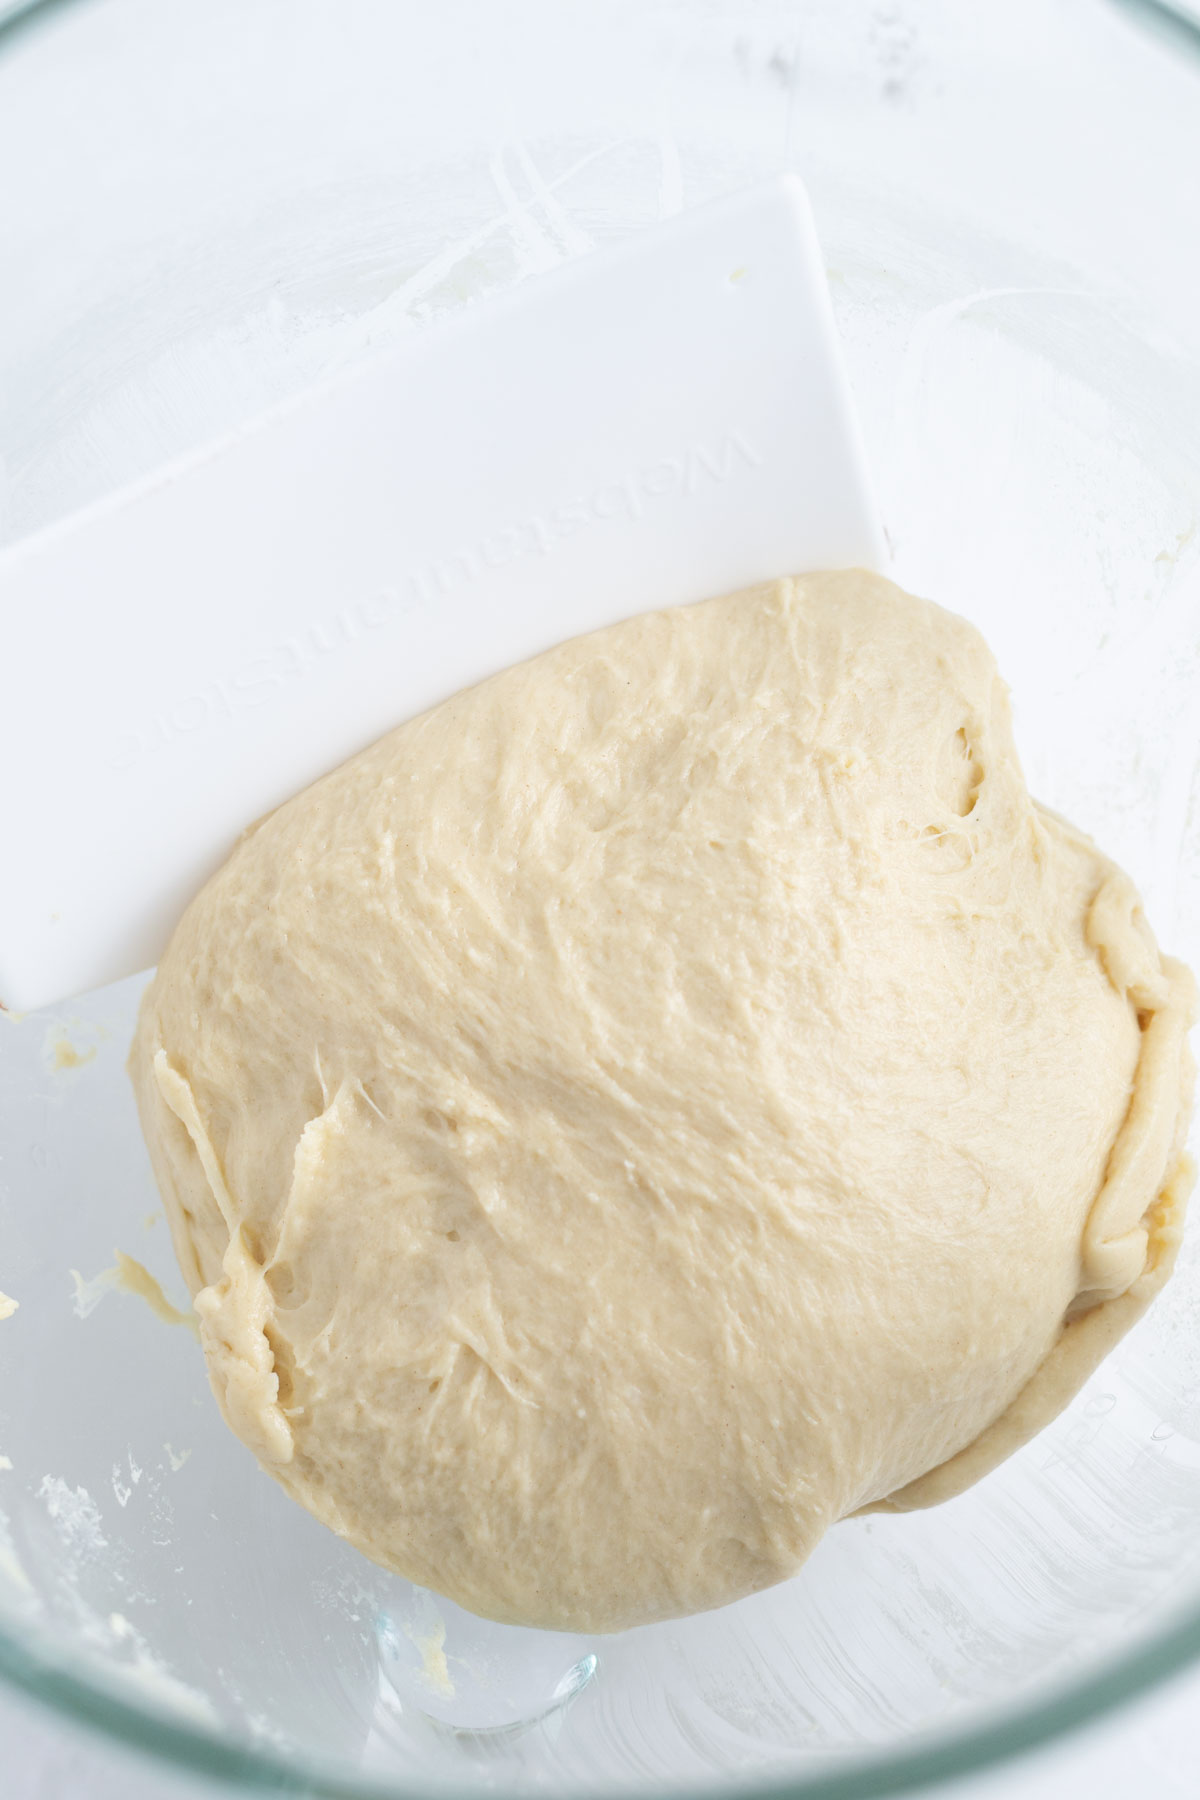
    The cinnamon roll dough after it has been mixed in the mixer.
    A flexible bench knife makes it easy to remove the kneaded dough from the mixing bowl.

    how to stuff and shape the oreo cinnamon rolls

    Now remove the dough from the bowl and roll it into a rectangle on a lightly floured surface. I like the narrow side to be about 12 inches and the long side about 16-18 inches.

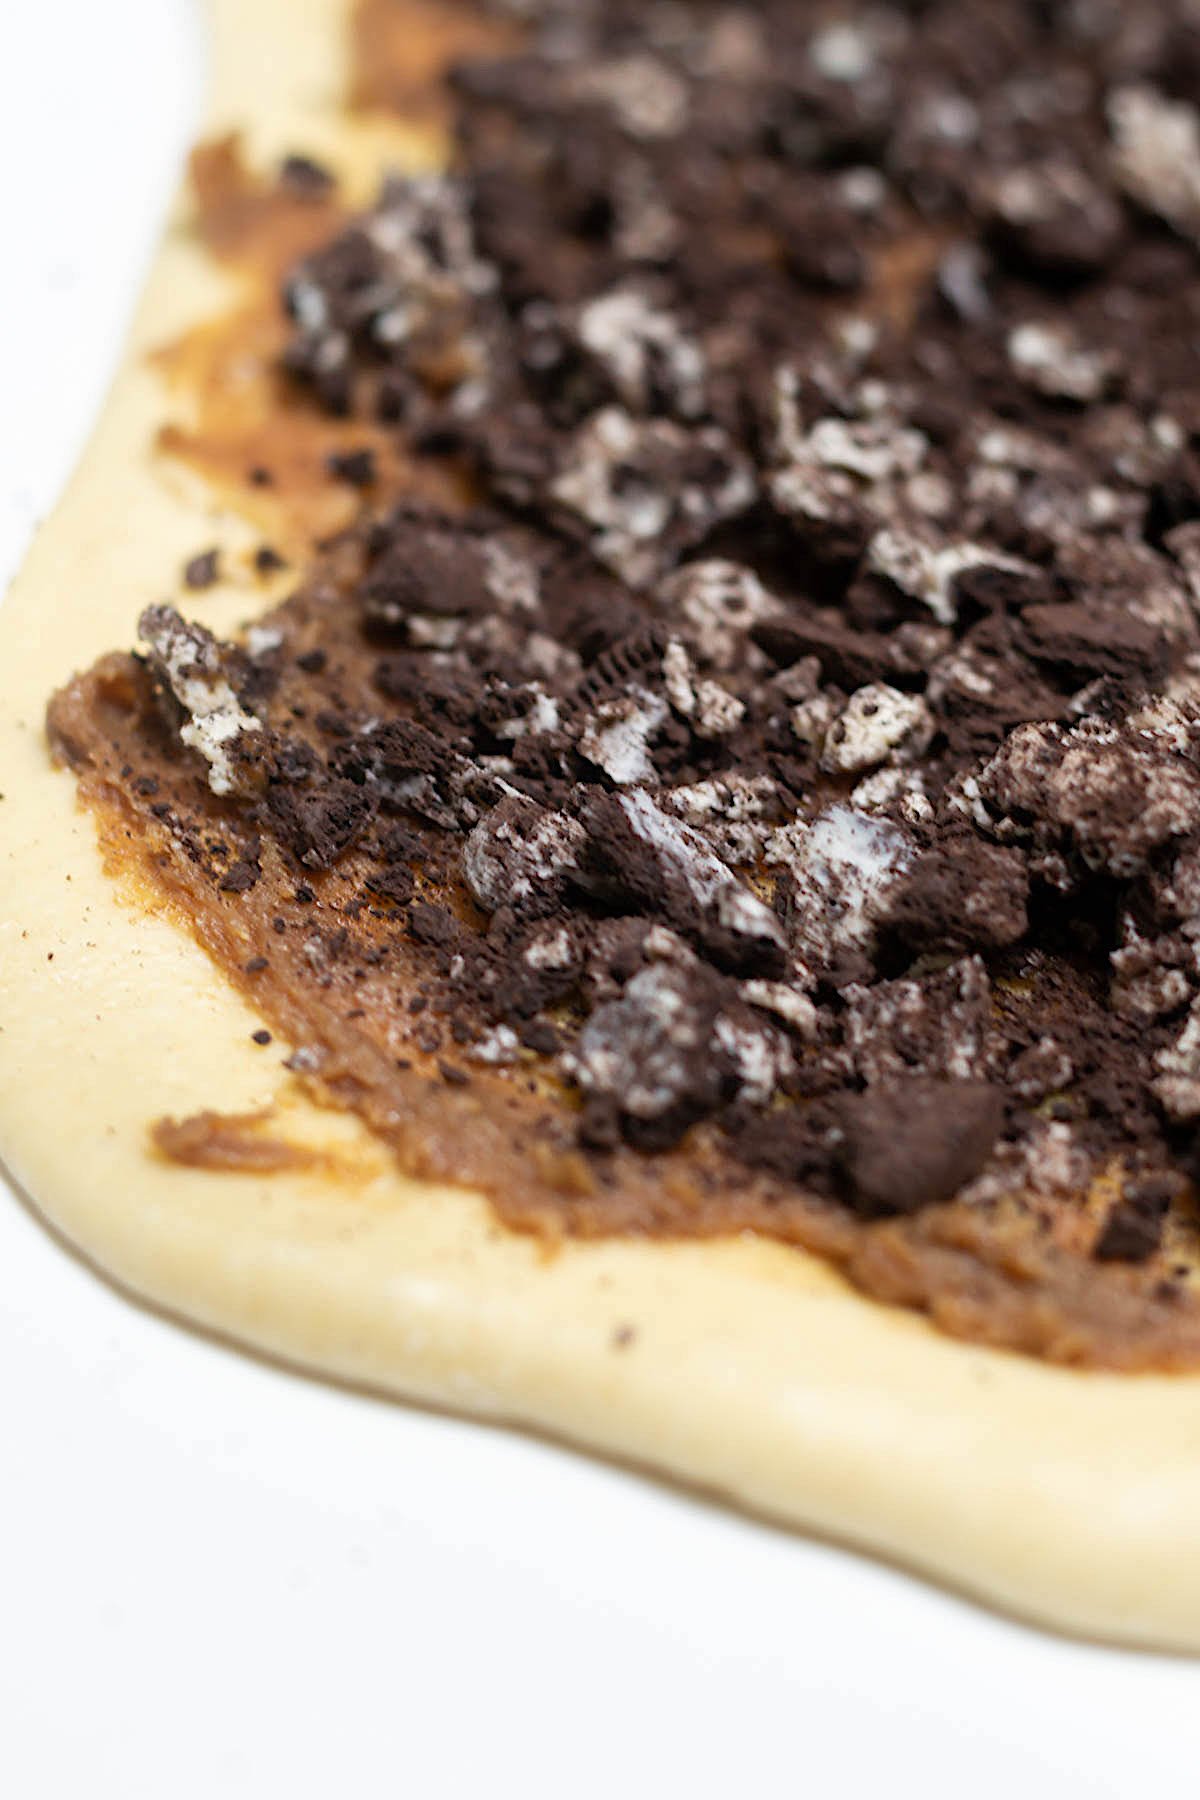
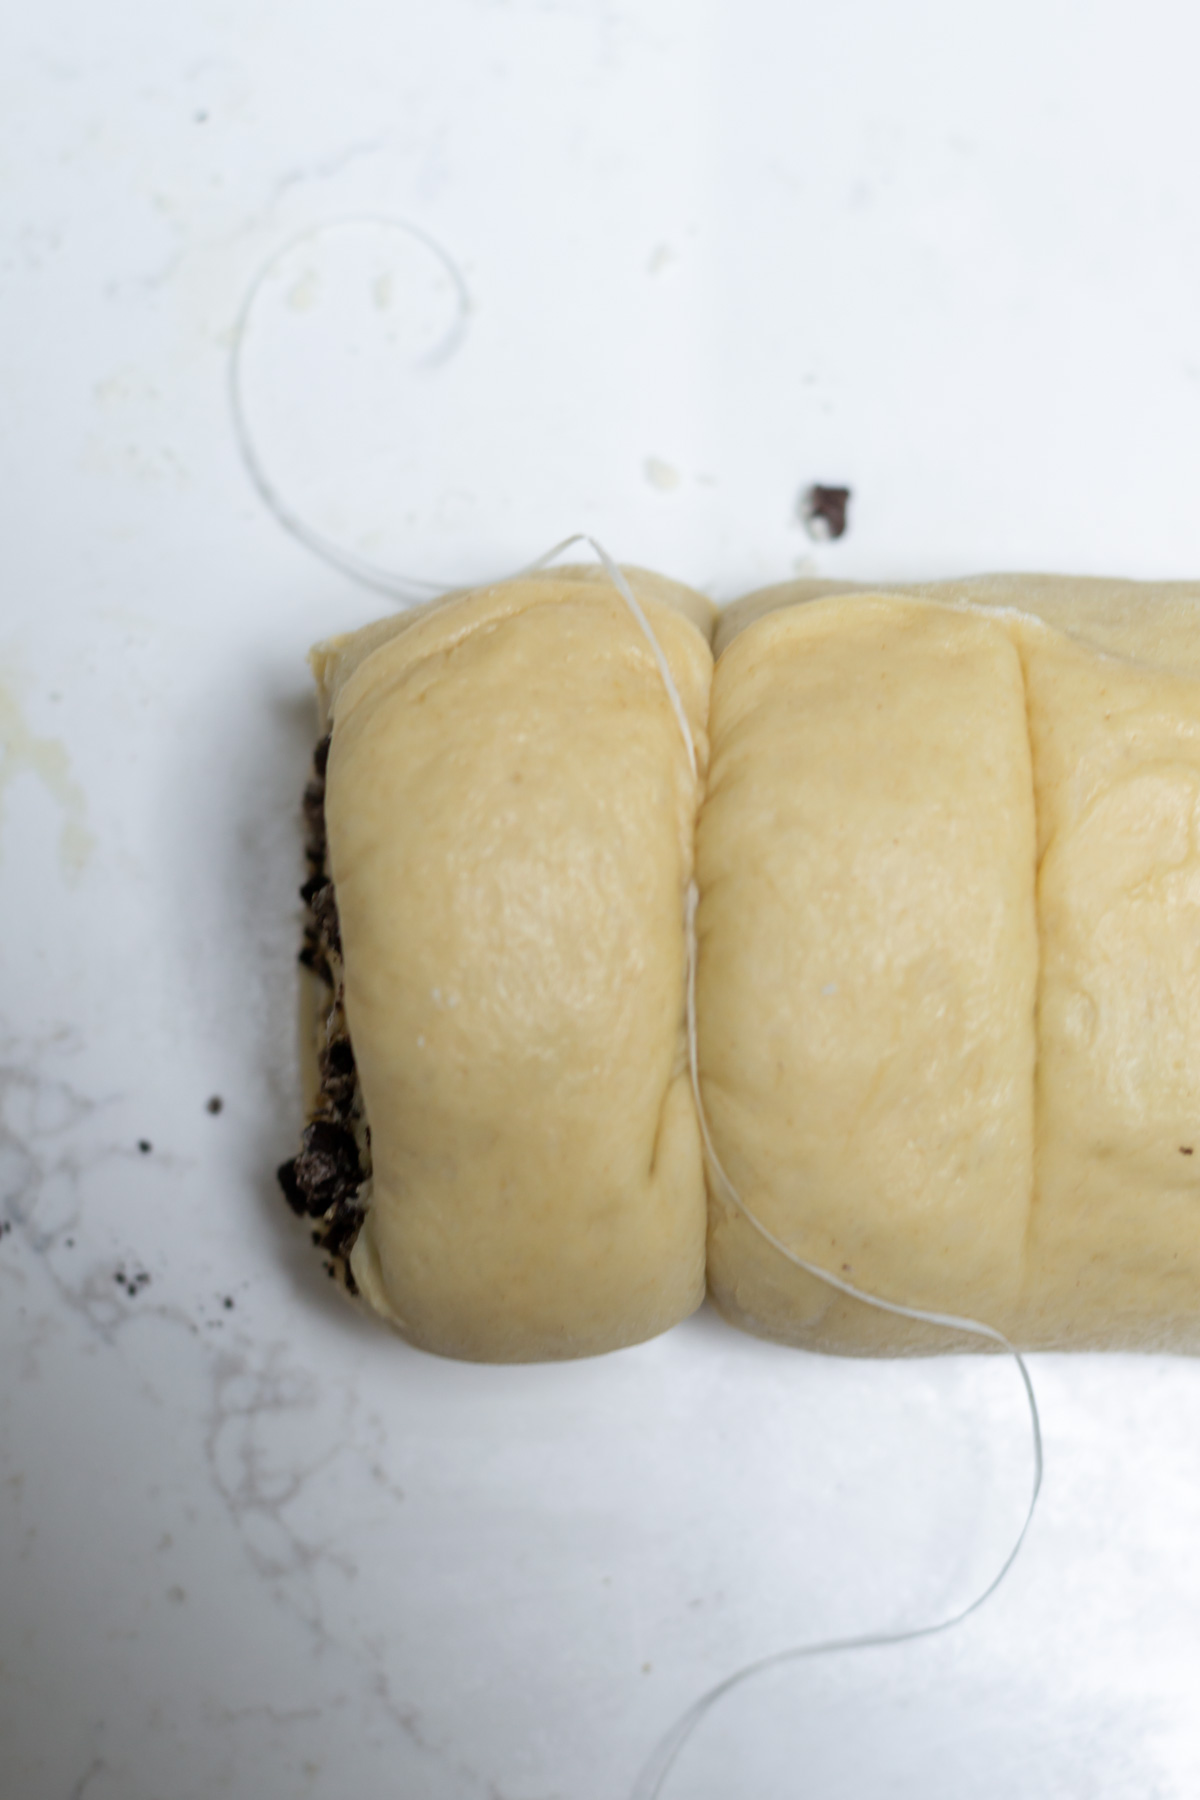
    Spread the cinnamon filling over the dough, covering almost to the very edge. Then sprinkle the crushed Oreo cookies over the top of the cinnamon. Tightly roll the dough starting from a long side until you create a log. Using dental floss, cut the log into 12 equal pieces and place them in a prepared 9x13 pan.

    oreo cinnamon roll dough after the first rise in a bowl
    The dough after it has risen the first time.
    oreo cookies crumbled over the top of the cinnamon roll filling
    Spread the crumbled the Oreos over the top of the cinnamon filling.
    using dental floss to cut oreo cinnamon rolls
    I lightly score the cinnamon rolls before cutting them with floss.

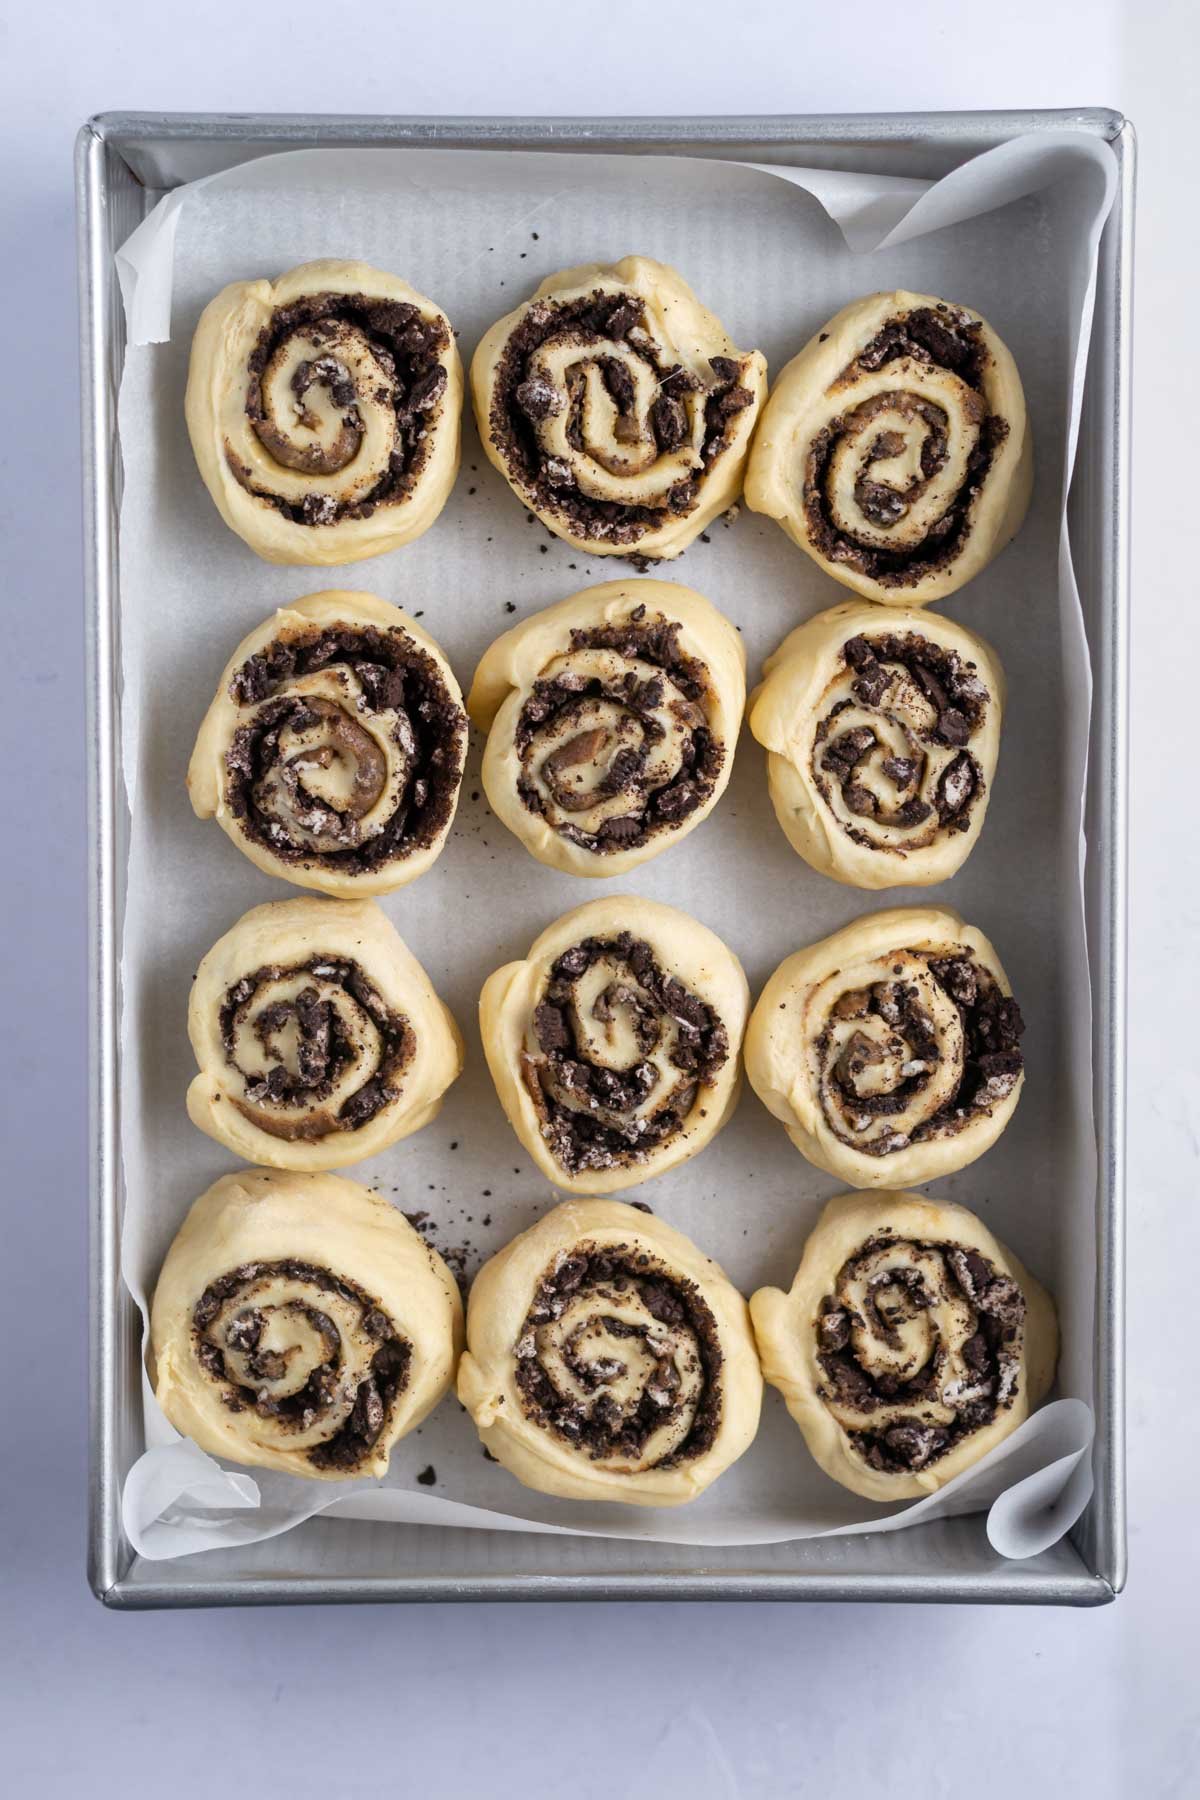
    Place the dough back in your warm spot and allow it to rise a second time, about 30 to 45 minutes until the rolls have doubled in size {if your kitchen is warm, it may not take this much time}.

    When the Oreo cinnamon rolls are close to the end of the second rise, preheat the oven to 350°F. Bake until the edges are lightly brown. If you want to check by temperature, the homemade rolls internal temperature should be 190°F.

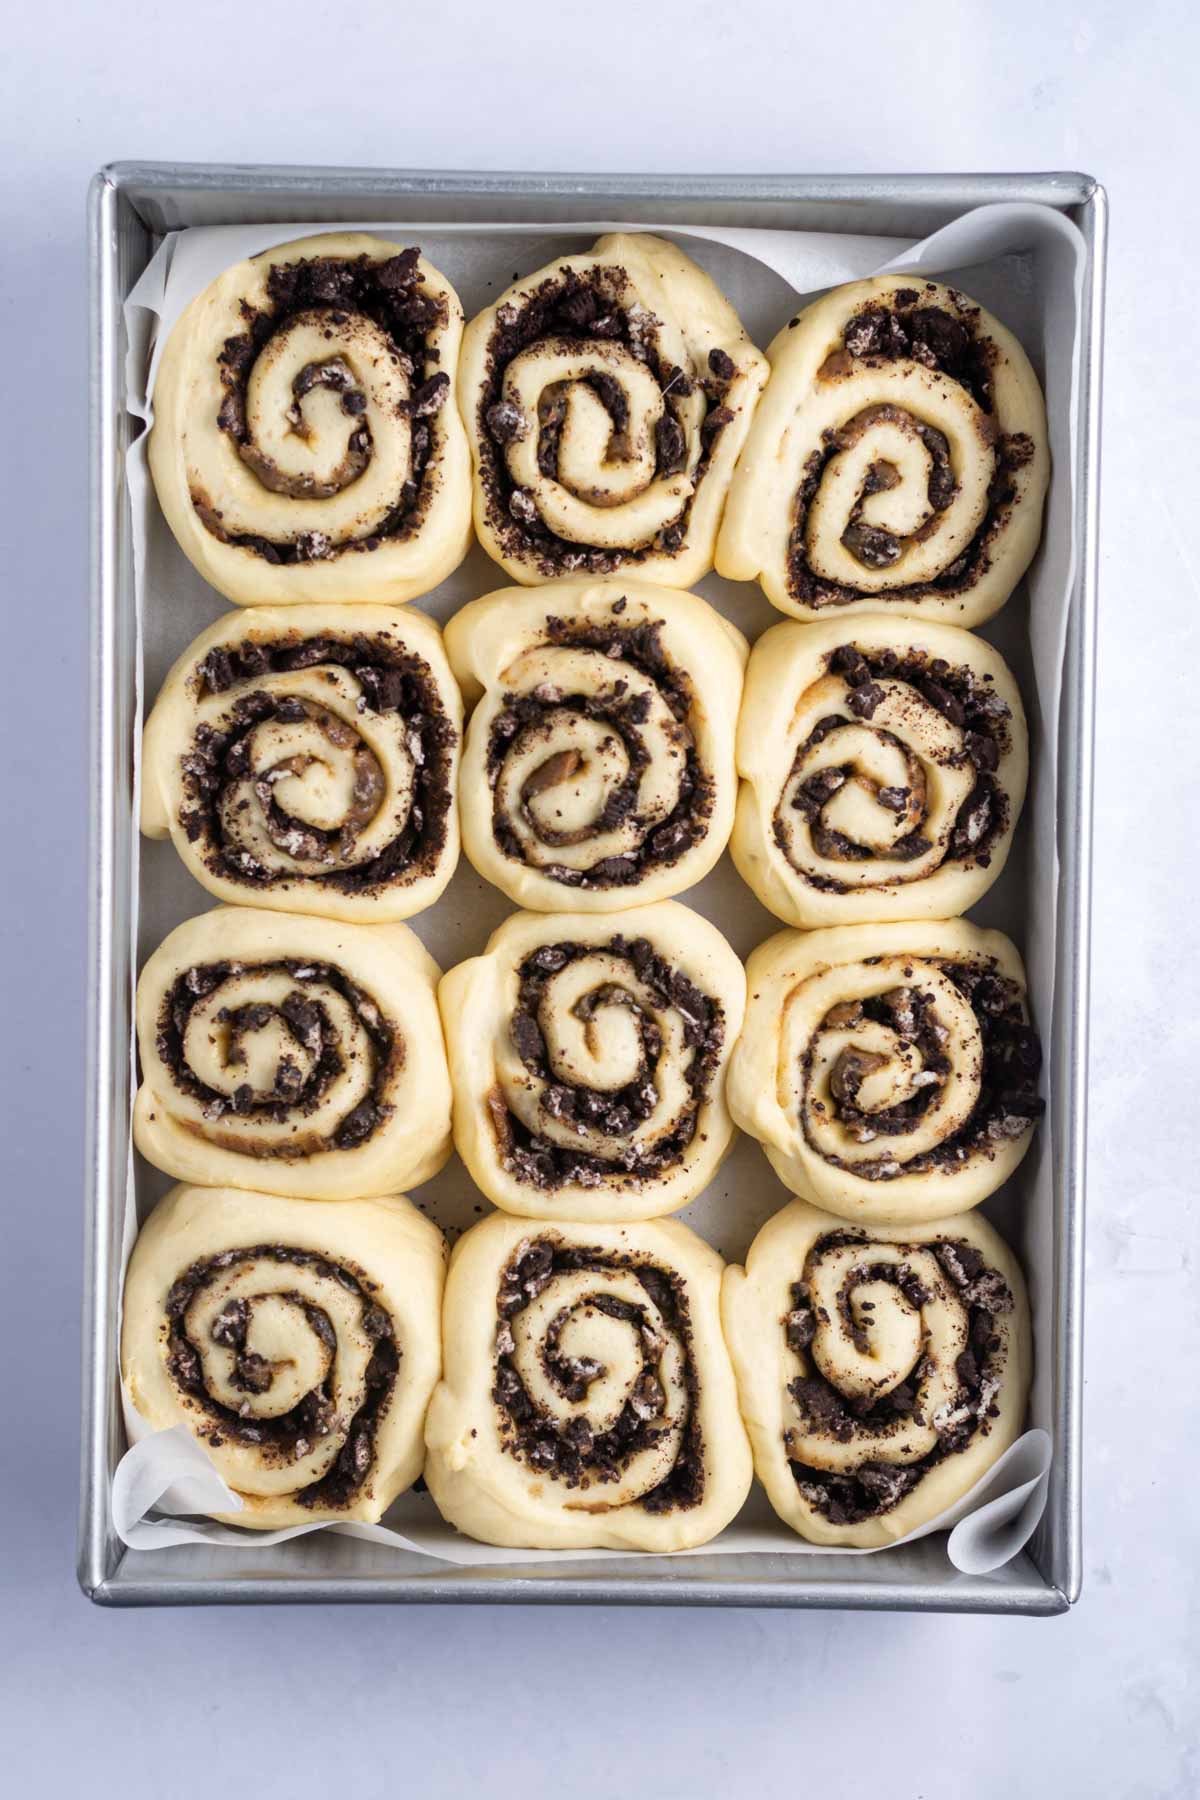
    oreo cinnamon rolls in a parchment lined baking pan
    oreo cinnamon rolls after the second rise in a baking pan
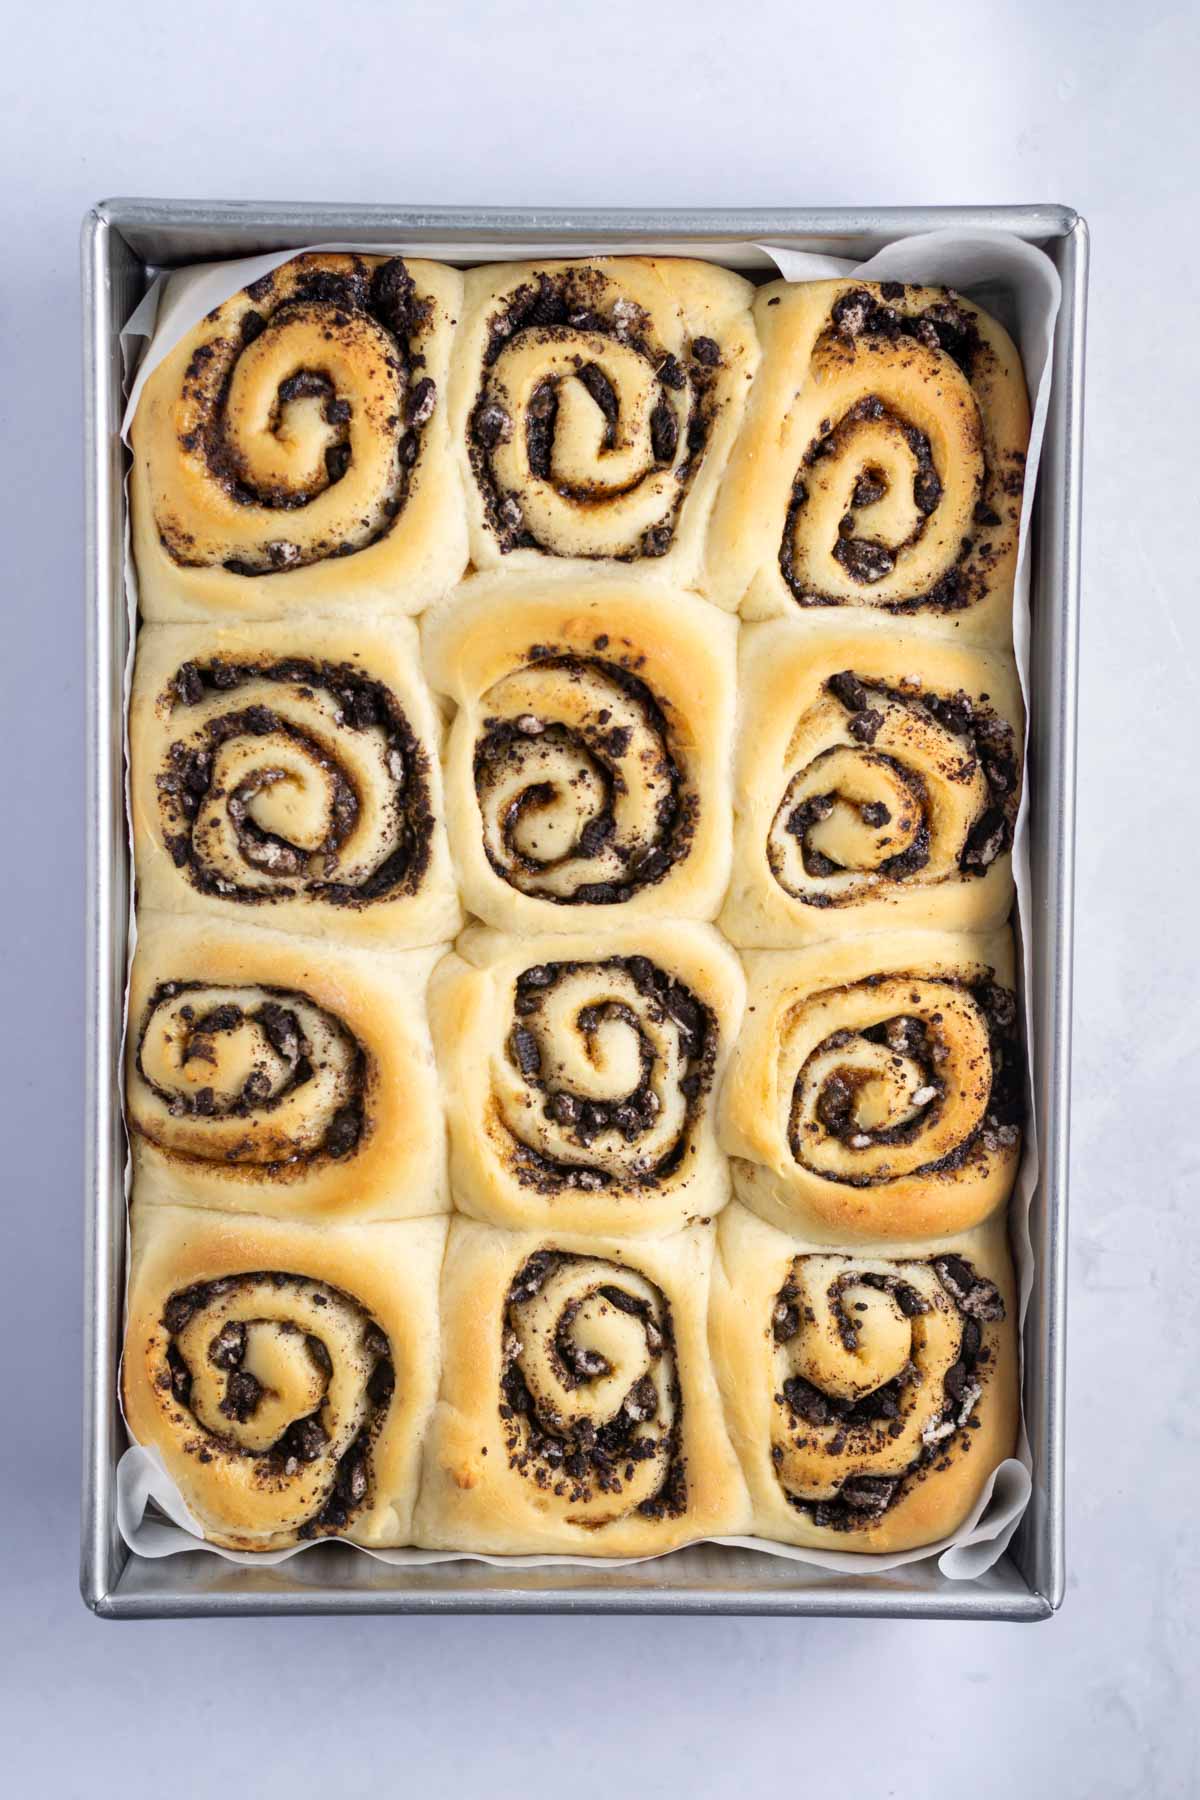
    baked oreo cinnamon rolls without icing glaze

    make ahead overnight option

    You can prepare the Oreo cinnamon rolls up until the second rise, then loosely cover with plastic wrap and refrigerate overnight. Pull the rolls out of the refrigerator when you wake up. Start the coffee and preheat the oven, then bake. 

    You can also bake the rolls and allow them to cool {don't glaze them yet}. Then cover them tightly and store at room temperature for up to one day. Gently rewarm them {tightly wrapped with foil and warmed at 300°F for 10-15 minutes}. Then add the glaze and serve.

    tips for the best soft and gooey rolls

    • Use a thermometer to check the temperature of your kefir {or milk}. If the liquid is too hot, it can kill the yeast. If it's too cold, it won't activate the yeast.
    • Don't add too much flour when kneading the dough! The dough is very sticky to start and you may be tempted to add extra flour. Be patient; if you add too much flour the rolls will be dense instead of soft and fluffy. I typically 2 - 3 tablespoons of additional flour.
    • Create a warm environment for the cinnamon rolls to rise if your kitchen is cold like mine. I usually create a warm environment in our Breville Smart Oven. A regular oven also works. Preheat the oven to the lowest temperature setting {ideally less than 200°F, you really don't want it warmer than about 90°F in there}. Leave the oven on for 2-3 minutes, then turn off the oven, but leave the door closed. When the dough is ready to rise, place it in the barely warm oven.
    • Use very soft room temperature butter for the filling. Your finger should be able to press all the way through the butter without any resistance. This allows you to easily spread the butter over the dough without risking tearing the dough.
    • I like a rough chop on the Oreo cookies {and crush mine with a rolling pin in a zip-top bag}, which can make them a little bit trickier to roll. If you'd like the Oreo in the middle part of the rolls to be finer; use a food processor to crush the sandwich cookies.
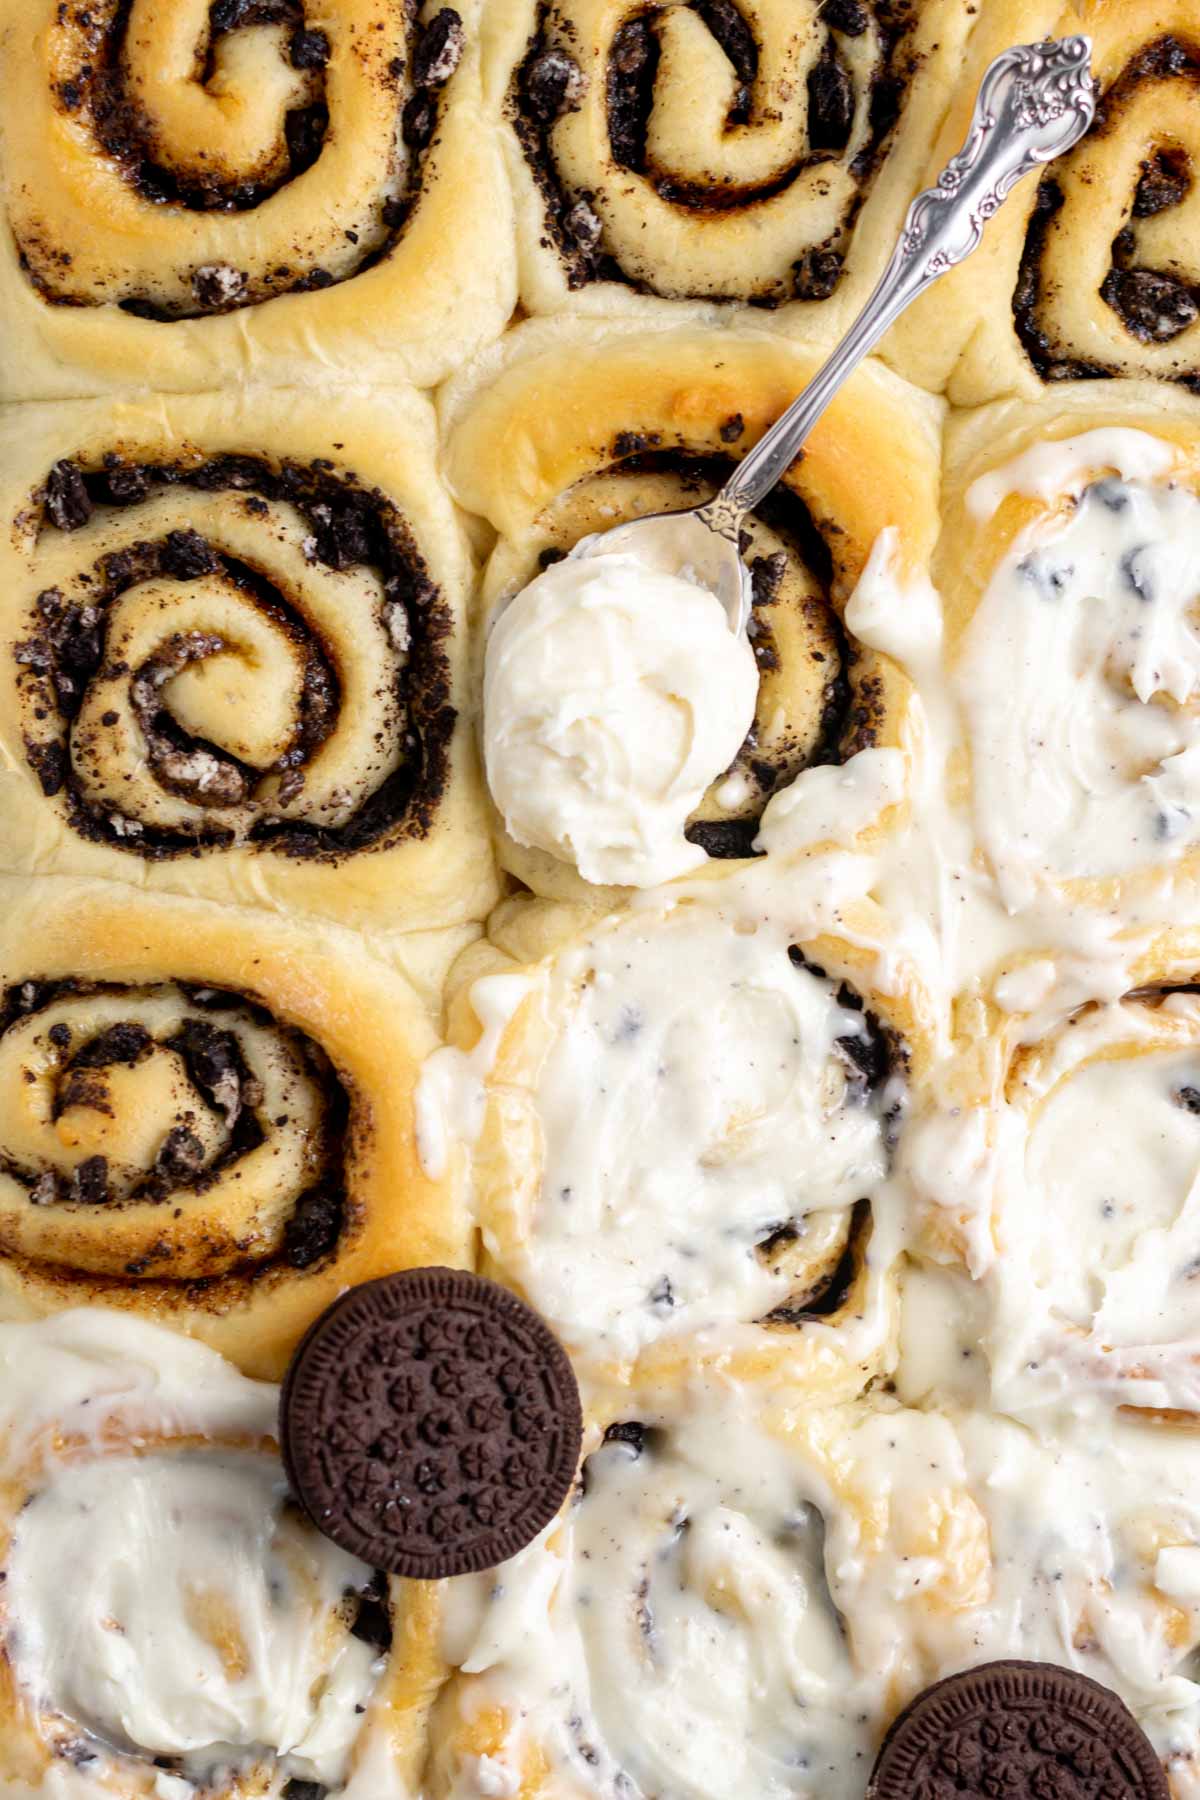
    spoon with vanilla icing on top of baked oreo cinnamon rolls

    frequently asked questions

    how to know when dough is done rising

    The dough should have doubled in size at the end of the first rise. You can gently press two fingers into the dough; if the indent stays in place the dough is ready. If the indents don't stay, let it rise a little longer.

    why did my cinnamon rolls turn out dry?

    The most common reason for dry cinnamon rolls is that too much flour is added. I know I sound like a broken record, but a kitchen scale is truly your best friend in baking. This is the scale I use in my kitchen.

    Another reason cinnamon rolls can turn out dry is that they are over baked. Using a thermometer is a great way to check if the Oreo cinnamon rolls are done baking. 190°F is what the internal temperature should be when they are finished.

    can oreo cinnamon rolls be make without a mixer?

    Yes! This simple yeast dough can come together easily with a bowl and a spoon. Then you knead it by hand. No fancy equipment needed. For more step-by-step directions, check out my sweet pull apart bread post.

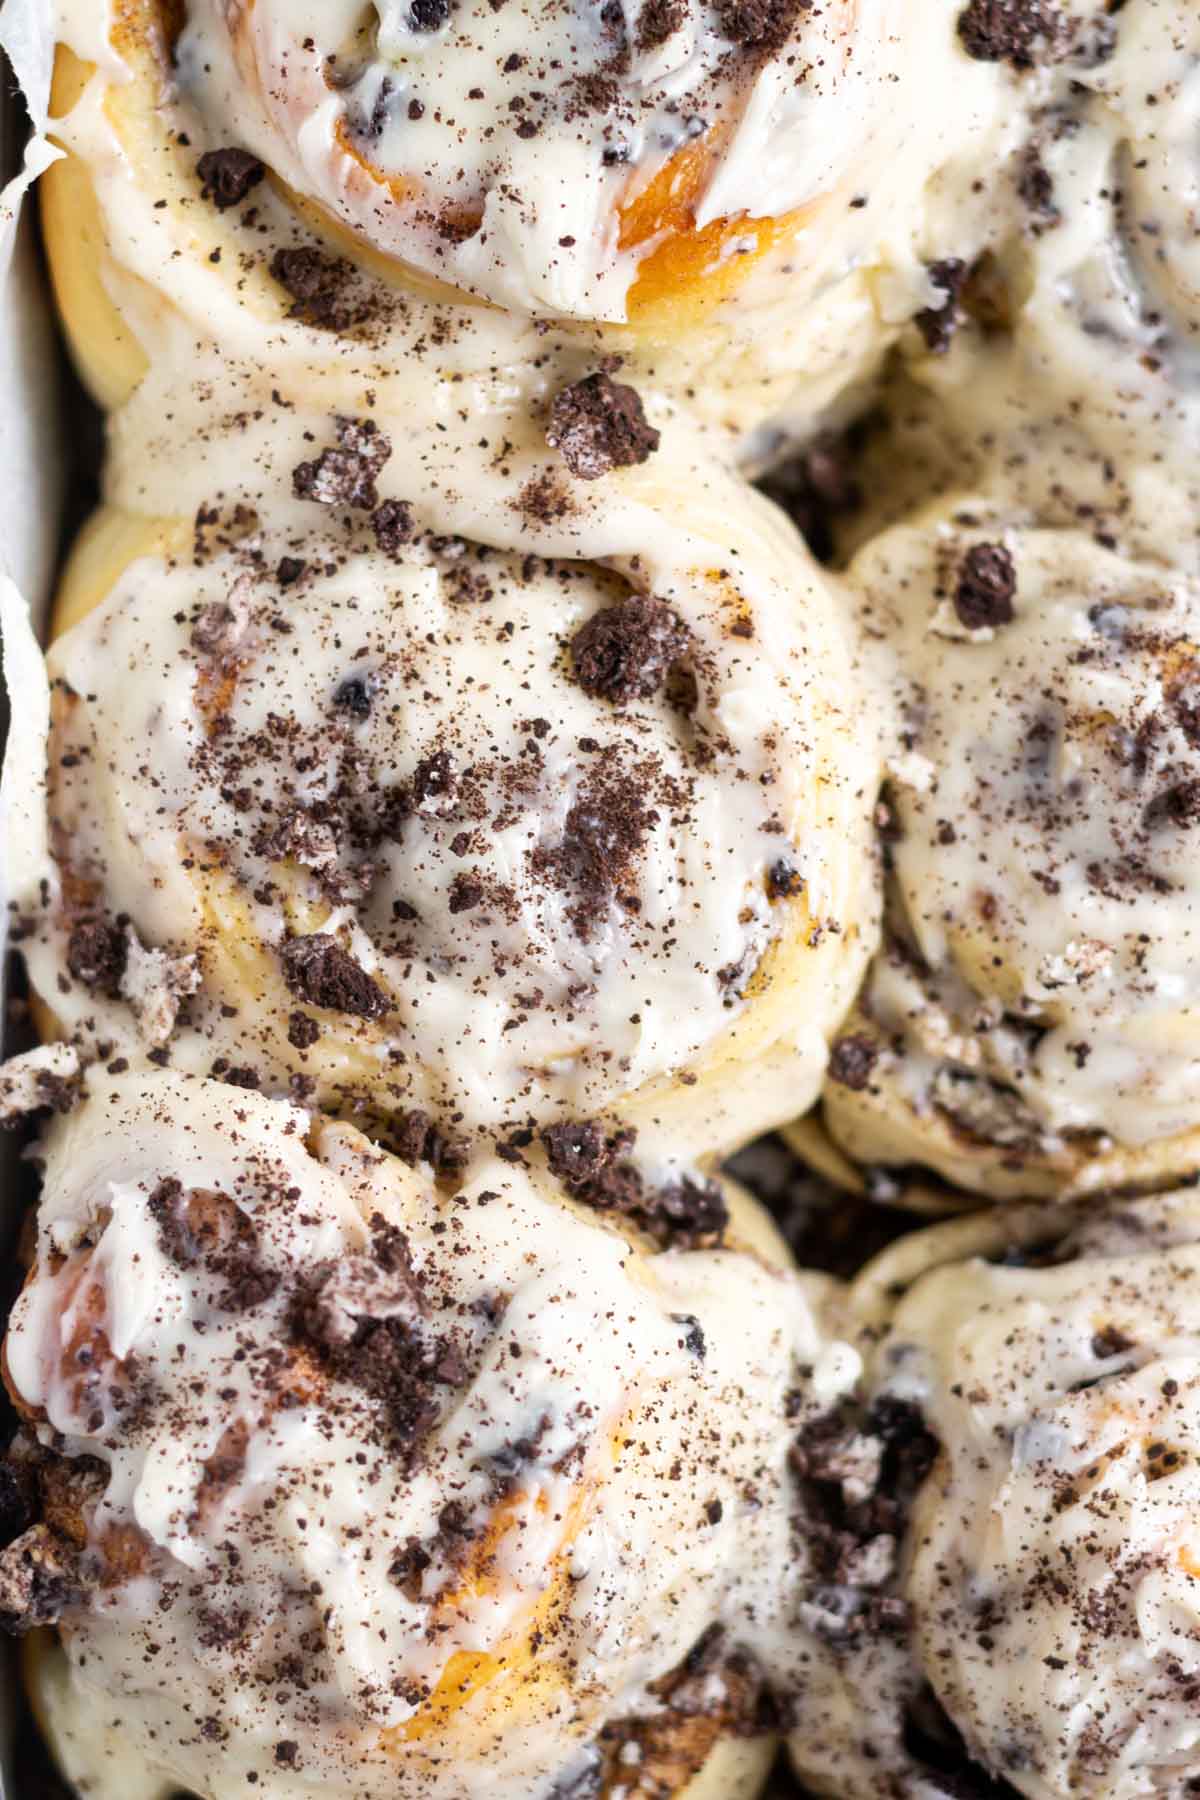
    oreo cinnamon rolls with icing and crumbled Oreos

    how to store

    Store in an airtight container or tightly wrapped at room temperature for 2-3 days or in the refrigerator for up to 5 days.

    The Oreo rolls can be frozen. Freeze in an airtight container or wrapped tightly and in a zip top bag for up to 2 months. Thaw overnight in the refrigerator and rewarm following the instructions below. If you know you will be freezing the rolls, I would wait to put the icing on until after you have rewarmed them.

    how to rewarm cinnamon rolls

    Gently rewarm the Oreo cinnamon rolls by tightly wrapping them with foil and warm them in a 300°F oven for 10-15 minutes. This works for both cinnamon rolls frozen with icing/glaze or without.

    oreo cinnamon rolls with a glass of milk

    Remember to snap a picture and tag me on Instagram if you make these Oreo Cinnamon Rolls. It warms my heart to see you bring these recipes to life! Thank you for being here and happy baking!

    more breakfast options

    • Funfetti Cinnamon Rolls
    • Chocolate Swirl Bread Rolls
    • Cherry Almond Scones
    • Healthy Breakfast Cookies
    • Cherry Pop Tarts

    If you make this recipe {or any recipe!} from two sugar bugs please come back and leave a review and a ⭐️⭐️⭐️⭐️⭐️ star rating.  I read every comment, and I LOVE hearing from you!

    Yield: 12 Cinnamon Rolls

    Oreo Cinnamon Rolls

    oreo cinnamon rolls with forks in a baking pan

    Gooey Oreo cinnamon rolls are classic cinnamon rolls filled with chocolate sandwich cookies. The easy recipe has that cookies and cream taste you love and is iced with a simple vanilla glaze.

    Prep Time 25 minutes
    Bake Time 20 minutes
    Rise Time 1 hour 45 minutes
    Total Time 2 hours 30 minutes

    Ingredients

    sweet bread rolls

    • ¾ cup warm kefir*, 100-110°F (180mL)
    • ¼ cup granulated sugar (50g)
    • 1 tablespoon active dry yeast (10g)
    • ¼ cup unsalted butter, melted and slightly cooled (56g)
    • 2 large eggs, room temperature
    • 3 cups bread flour** (390g)
    • 1 teaspoon kosher salt

    oreo cinnamon filling

    • 6 tablespoons unsalted butter, room temperature (85g)
    • 2 teaspoons ground cinnamon***
    • ⅓ cup packed brown sugar (67g)
    • 16 Oreo cookies, crushed (~220g)

    vanilla frosting

    • ¼ cup unsalted butter, room temperature (56g)
    • 1 teaspoon pure vanilla extract
    • 1 ½ cups confectioners’ sugar (180g)
    • 1-2 tablespoons half and half or milk
    • 1-2 crushed oreo cookies, for garnish

    Instructions

    1. (I like to turn on my Breville toaster oven to 120°F while I am mixing and kneading the dough. Turn it off when it reaches temperature and keep the door closed. This creates a warm environment for letting the dough rise)
    2. In the bowl of a stand mixer add the warm kefir (¾ cup/180mL), sugar (¼ cup/50g), yeast (1 tablespoon/10g) and melted and slightly cooled unsalted butter (¼ cup/56g) and give it a little stir. Let the mixture sit for 10 minutes.
    3. Add the eggs (2 large), bread flour (3 cups/390g) and kosher salt (1 teaspoon), and beat at medium speed (4 on KitchenAid mixer) with the dough hook until a soft dough forms, about 8 minutes. If the dough is sticking to the sides of the bowl after 4-5 minutes, add up to 3 tablespoons of additional flour. *If you do not have a stand-mixer with a hook attachment, knead the dough by hand in this step. You can see this post for the how to. When kneading by hand, add flour as necessary, but try to add as little as possible. (I typically use less than 2 tablespoons flour for kneading)
    4. Grease the bowl you mixed the dough in (no need to wash it) and place the dough in the bowl, cover and let rise about 1 hour (I place it in the slightly warm toaster oven), or until double in size.
    5. While the dough is rising, prepare the filling. In a bowl combine the room temperature unsalted butter (6 tablespoons/85g), cinnamon (2 teaspoons), brown sugar (⅓ cup/67g) and mix until thoroughly combined. Set aside. Crush the Oreo cookies (16 cookies) with either a food processor or by placing in a zip top bag and crushing with a rolling pin.
    6. Grease a 9x13 baking pan with butter or cooking spray and set aside or line the pan with parchment paper.
    7. Remove the dough from the bowl and roll it into a rectangle on a lightly floured surface. I like the narrow side to be about 12 inches and the long side about 16-18 inches.
    8. Spread the cinnamon filling over the dough, covering almost to the very edge. Then sprinkle the crushed Oreo cookies over the top of the cinnamon. Tightly roll the dough starting from a long side until you create a log. Using dental floss***** (or a sharp knife), cut the log into 12 equal pieces and place them in the prepared pan. Alternately, you can cut 12 long strips of dough and roll each length of dough individually or cut them traditionally and place them in a buttered muffin pan (they will bake faster in a muffin pan; check them at 12 minutes).
    9. Place the dough back in your warm spot and allow it to rise a second time, about 30 to 45 minutes until the rolls have doubled in size (if your kitchen is warm, it may not take this much time). When the Oreo cinnamon rolls are close to the end of the second rise, preheat the oven to 350°F.
    10. Bake for about 18-25 minutes, until the edges are lightly brown. If you want to check by temperature, the sweet rolls internal temperature should be 190°F.
    11. When the rolls are done, remove the pan from the oven and place the pan on a wire cooling rack. Allow to cool for a couple minutes while you prepare the frosting.
    12. In a small bowl, mix the butter (¼ cup/56g) and vanilla (1 teaspoon) until combined. Add the confectioners’ sugar (1 ½ cups/180g) and mix it in until you have a very thick and clumpy paste. Then add 1-2 tablespoons of half and half (or milk) and stir until a thick frosting forms.
    13. Spread the frosting over the warm rolls. The vanilla icing is thick and the warmth of the rolls helps to thin it as you spread it on (top with 1-2 more crushed Oreo's if desired) and enjoy!

    Notes

    Cover and store leftovers at room temperature for up to 3 days or in the refrigerator for up to 5 days. Reheat gently in the oven until warm by wrapping tightly in aluminum foil and placing in a 300°F oven for 10-15 minutes. The Oreo cinnamon rolls can also be frozen for up to 2 months. Freeze in an airtight container or wrap tightly and place in a zip top bag.

    * This recipe also works with buttermilk, 2% or whole milk

    ** I also tested this recipe with all-purpose flour. Either works, but I prefer the lighter/fluffier sweet roll with bread flour. If using all-purpose, 3 cups is 375g.

    **If you prefer a more Oreo filling; omit the cinnamon and replace it with cocoa powder. Unsweetened, Dutch or Black cocoa all work.

    *****Slide a long piece of dental floss under the dough. Wrap it around the top. Pull tightly in opposite directions to pull the floss through the roll. Using dental floss is the best way to slice your rolls and have them keep their shape.

    If you would like to make the rolls ahead of time: You can bake the rolls and allow them to cool (don't glaze them yet). Then cover them tightly and store at room temperature for up to one day. Gently rewarm them (tightly wrapped with foil and warmed at 300°F for 10-15 minutes). Then add the glaze and serve. Or,
    You can also prepare the rolls up until the second rise, then loosely cover with plastic wrap and refrigerate overnight. Pull the rolls out of the refrigerator when you start the coffee and preheat the oven, then bake.

    Nutrition Information:

    Yield:

    12

    Serving Size:

    1

    Amount Per Serving: Calories: 452Total Fat: 19gSaturated Fat: 10gTrans Fat: 0gUnsaturated Fat: 8gCholesterol: 70mgSodium: 232mgCarbohydrates: 63gFiber: 2gSugar: 32gProtein: 8g

    The nutrition information is an estimate only and may not be entirely accurate.

    Did you make this recipe?

    Please make my day and PIN to Pinterest and share a photo on Instagram ~ making sure to tag @twosugarbugs! THANK YOU!!

    © Tasia
    Cuisine: American / Category: Breads

    Strawberry Vanilla Cake

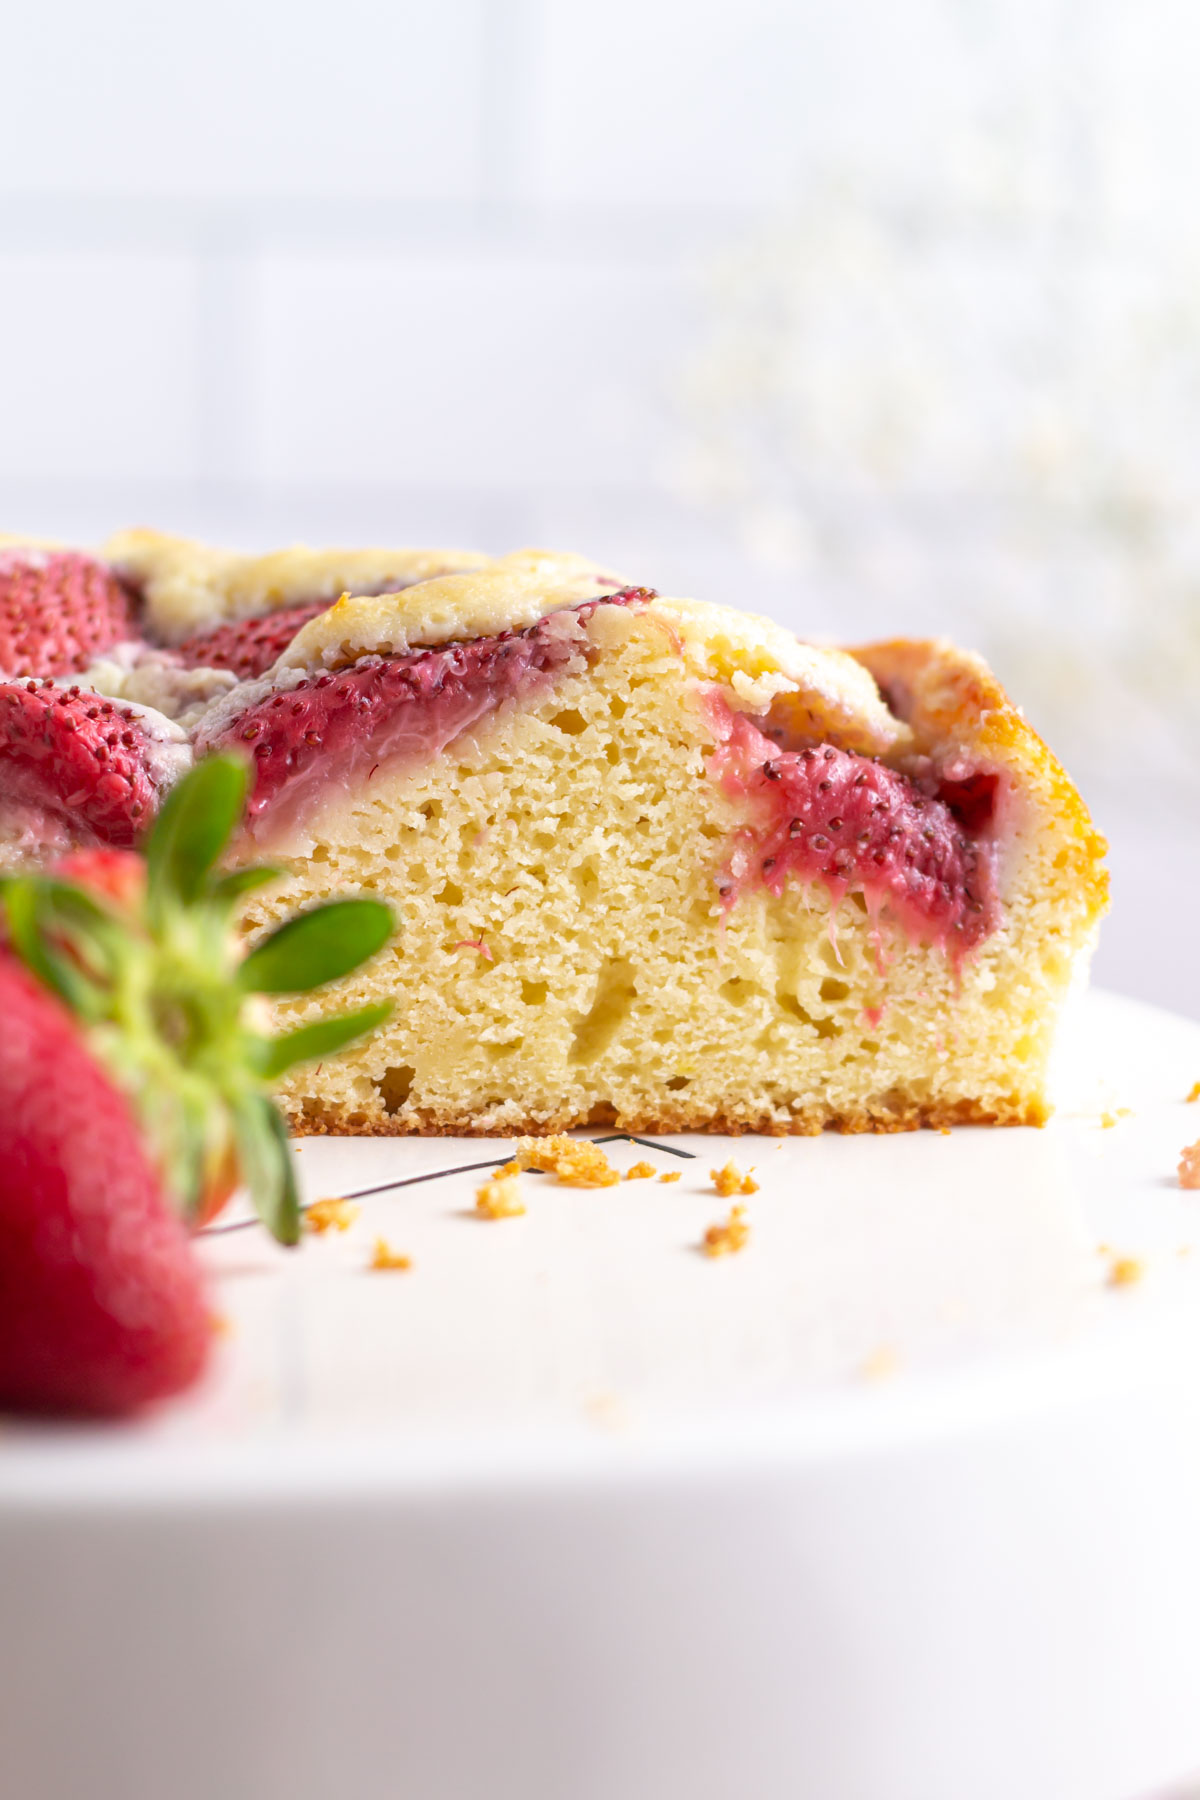
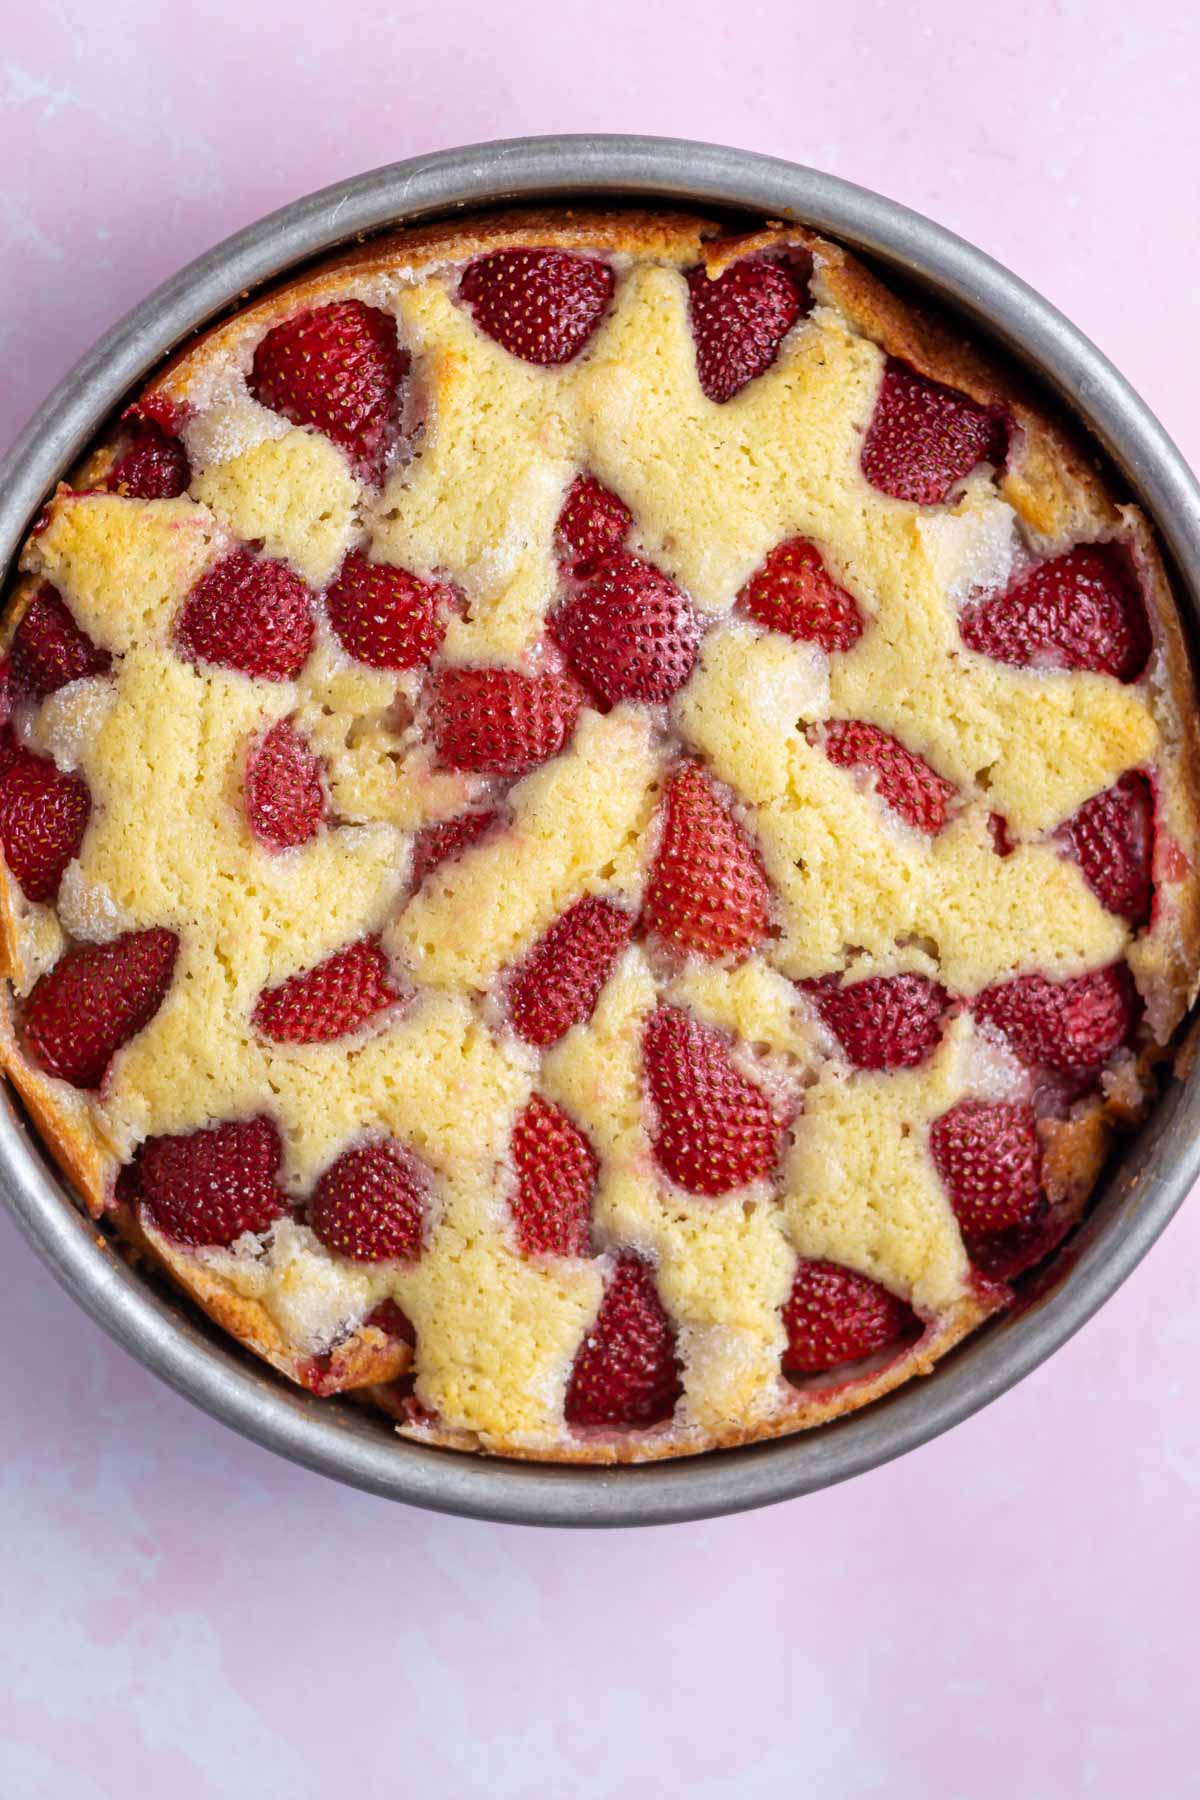
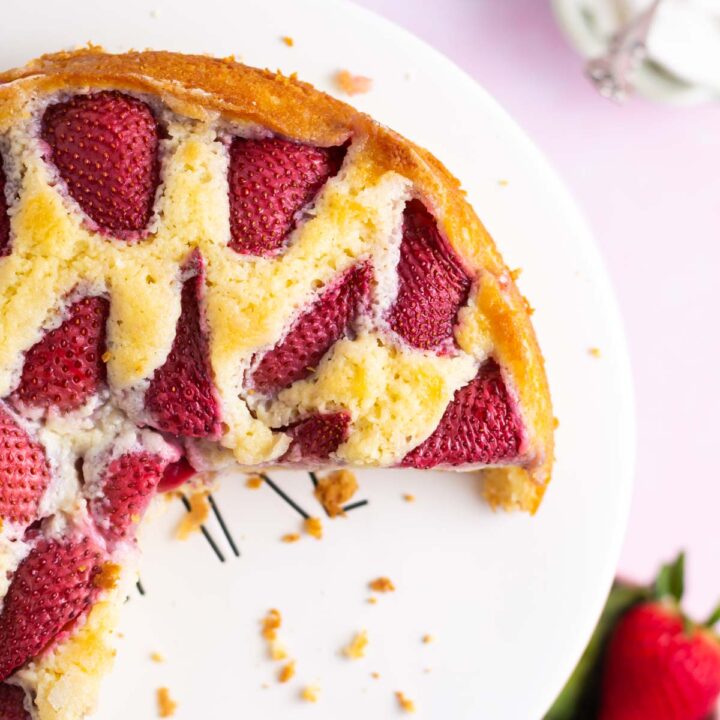
    top view of strawberry vanilla cake with a couple slices missing

    This easy strawberry vanilla cake recipe is a perfect way to celebrate strawberry season! The cake is filled with vanilla and has a fresh strawberry topping baked in. You'll love the one layer cake because it's moist and flavorful; perfect for birthdays or any celebration!

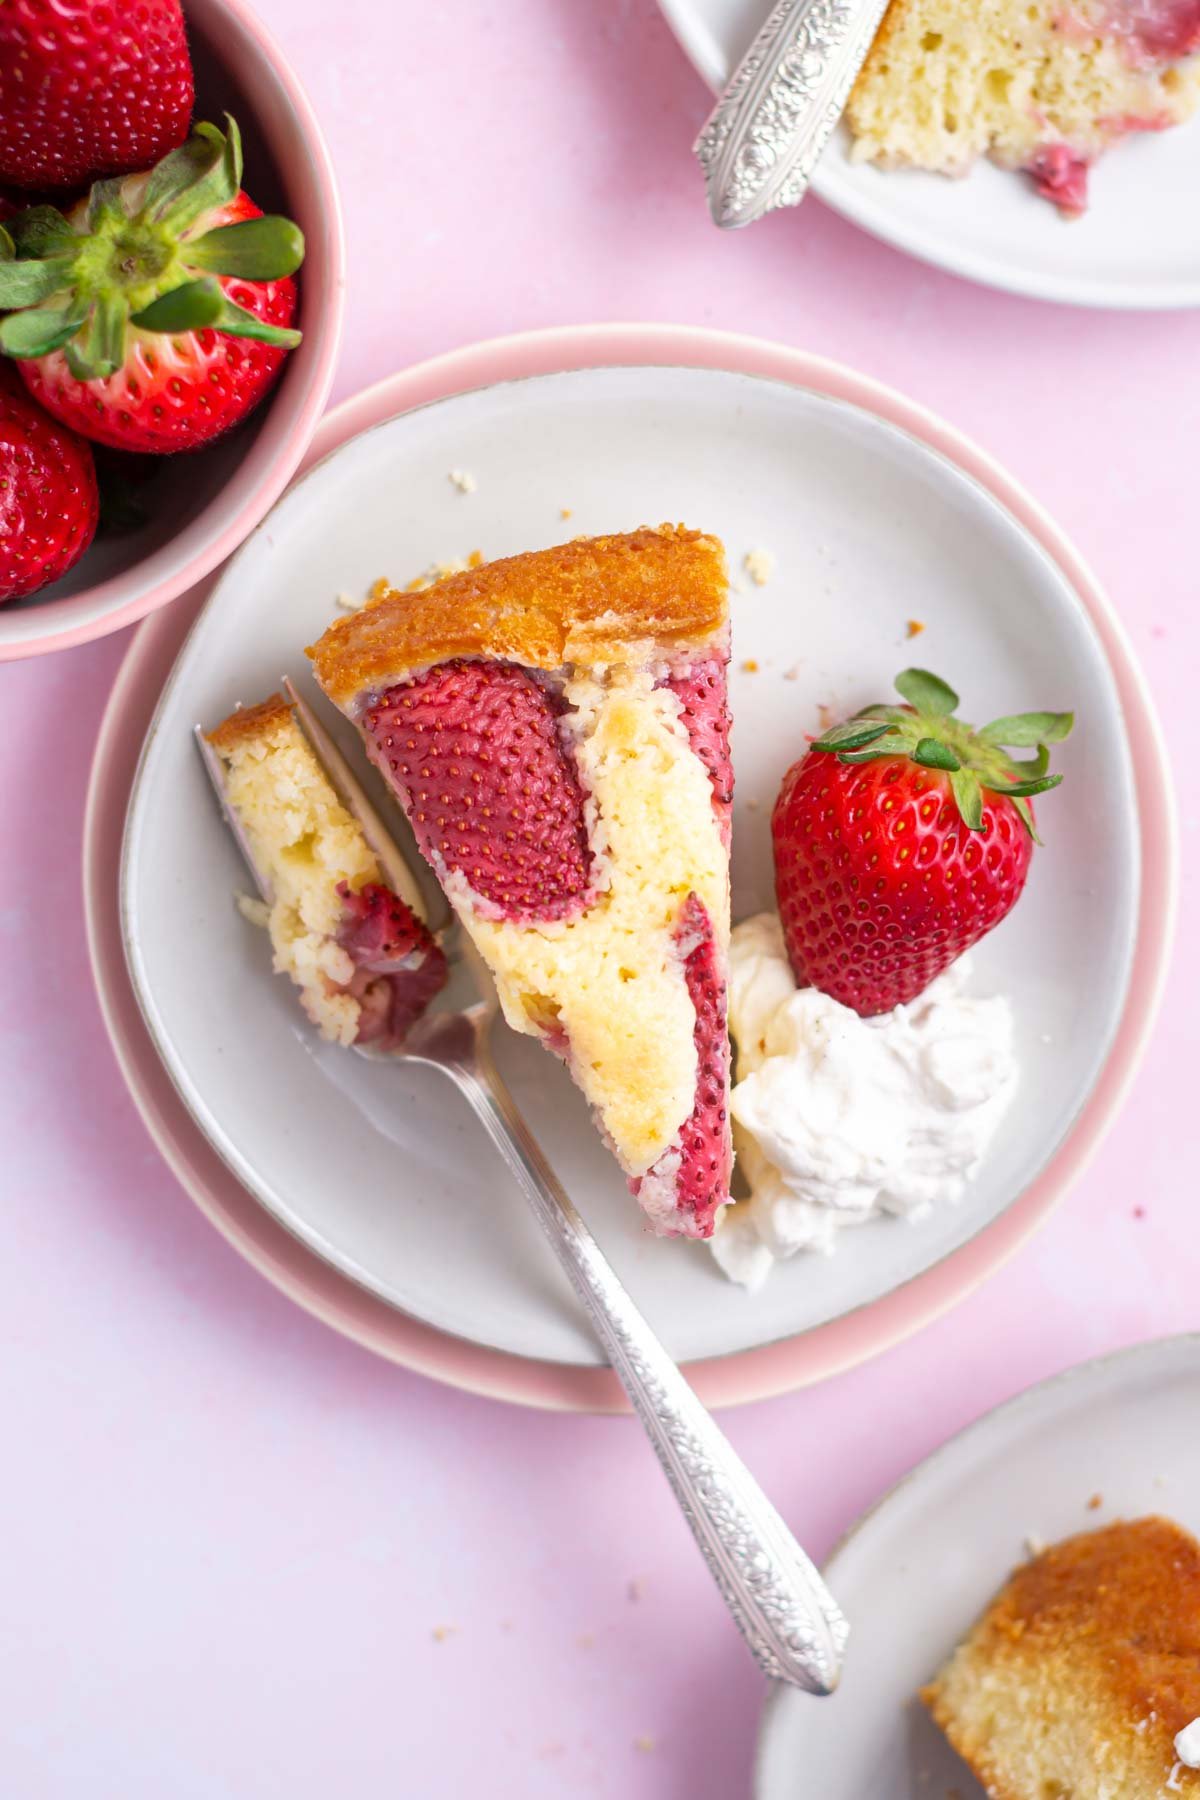
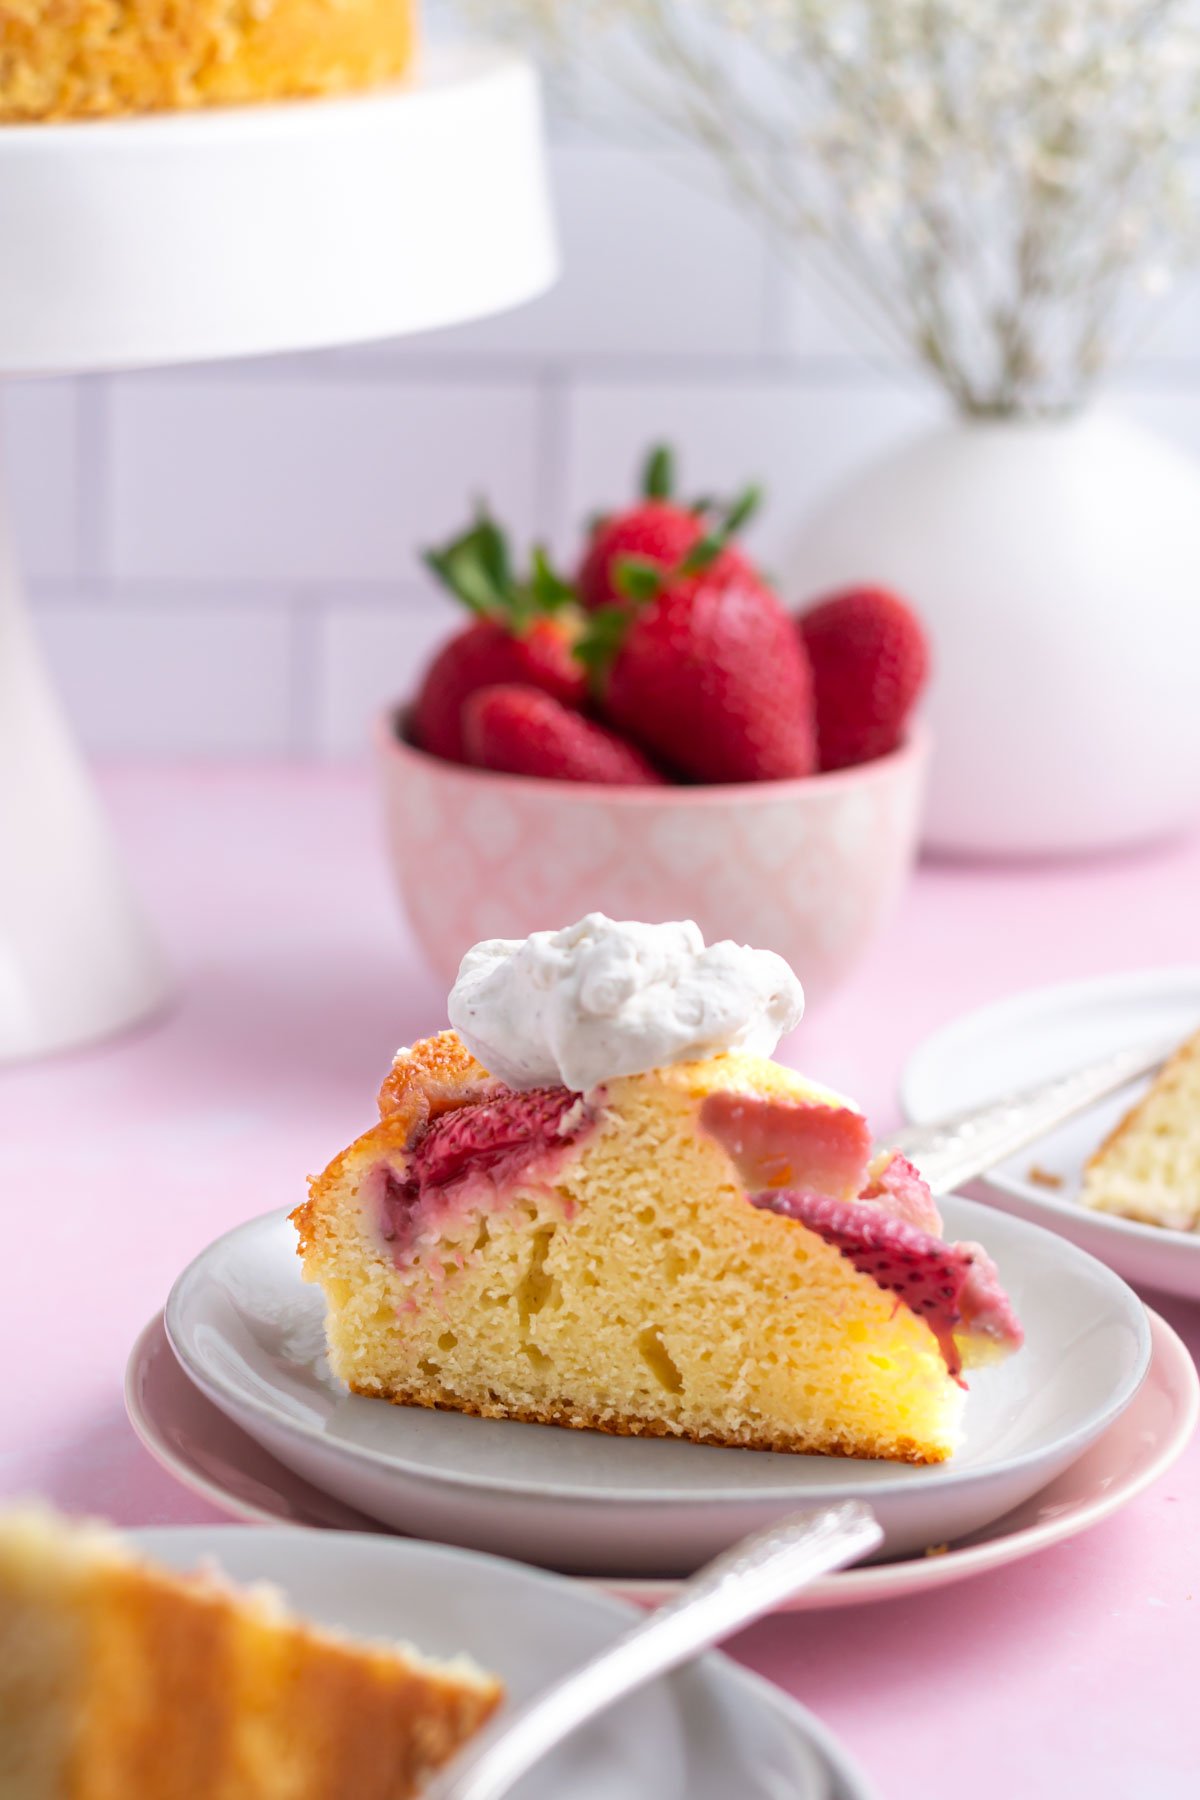
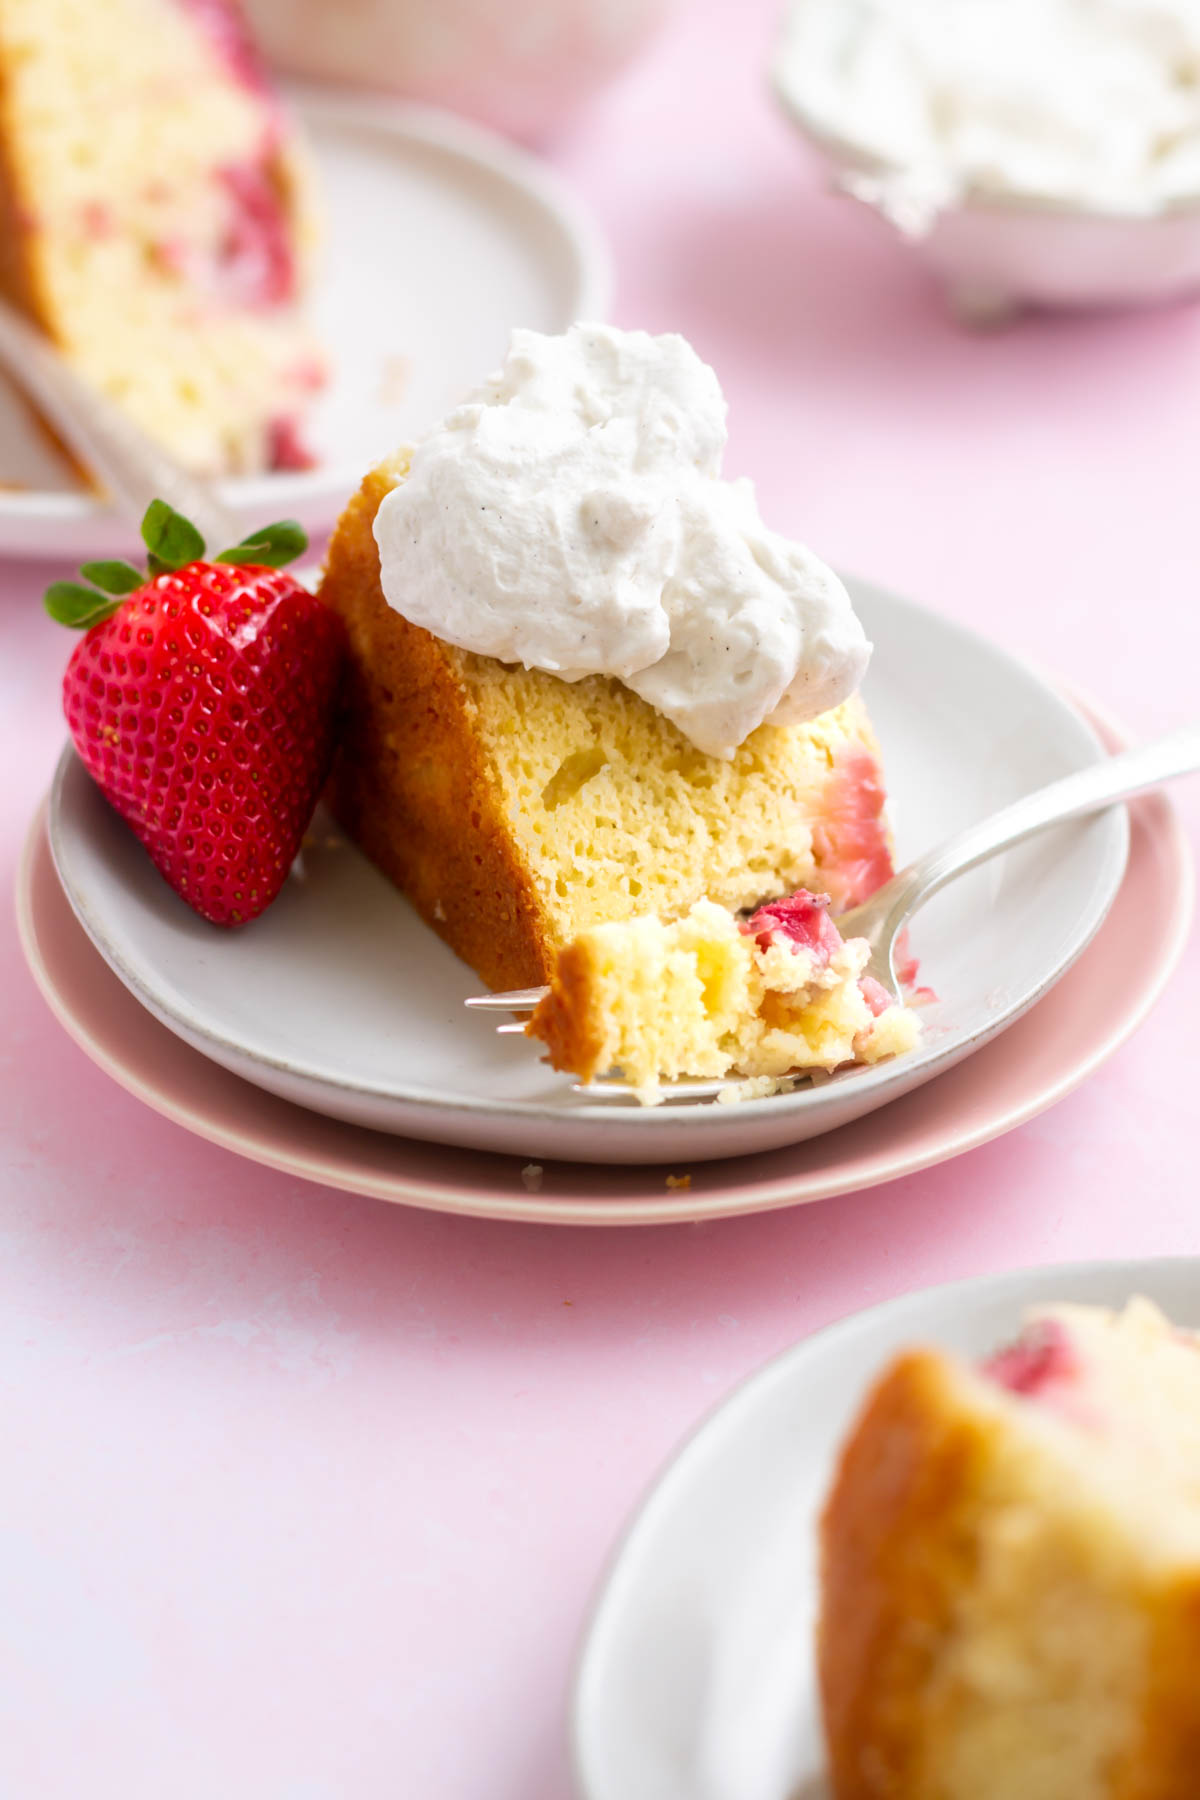
    slice of cake on a plate with vanilla whipped cream

    Disclosure | This post may contain affiliate links. As an Amazon Associate I earn from qualifying purchases.

    Who else is busy, but wants to create show stopping cakes? When I initially started brainstorming this cake recipe I was thinking a layer cake with strawberry jam filling and strawberry buttercream.

    But then I remembered this easy everyday pound cake I made growing up and decided to put a strawberry spin on it and this easy vanilla cake with strawberries was born.

    If you love strawberry desserts, be sure to try my strawberry filled cupcakes, strawberry crumb cake or no bake mascarpone cheesecake.

    why you will love this easy one layer cake

    • Mixes in one bowl.
    • One layer with no decorating needed.
    • A moist, soft sponge bakes with the strawberries on top; giving a sweet jammy topping without any extra work.
    • Serve with whipped cream for a variation on strawberry shortcake.
    • Perfect for birthdays, Easter and Sunday dinner dessert!
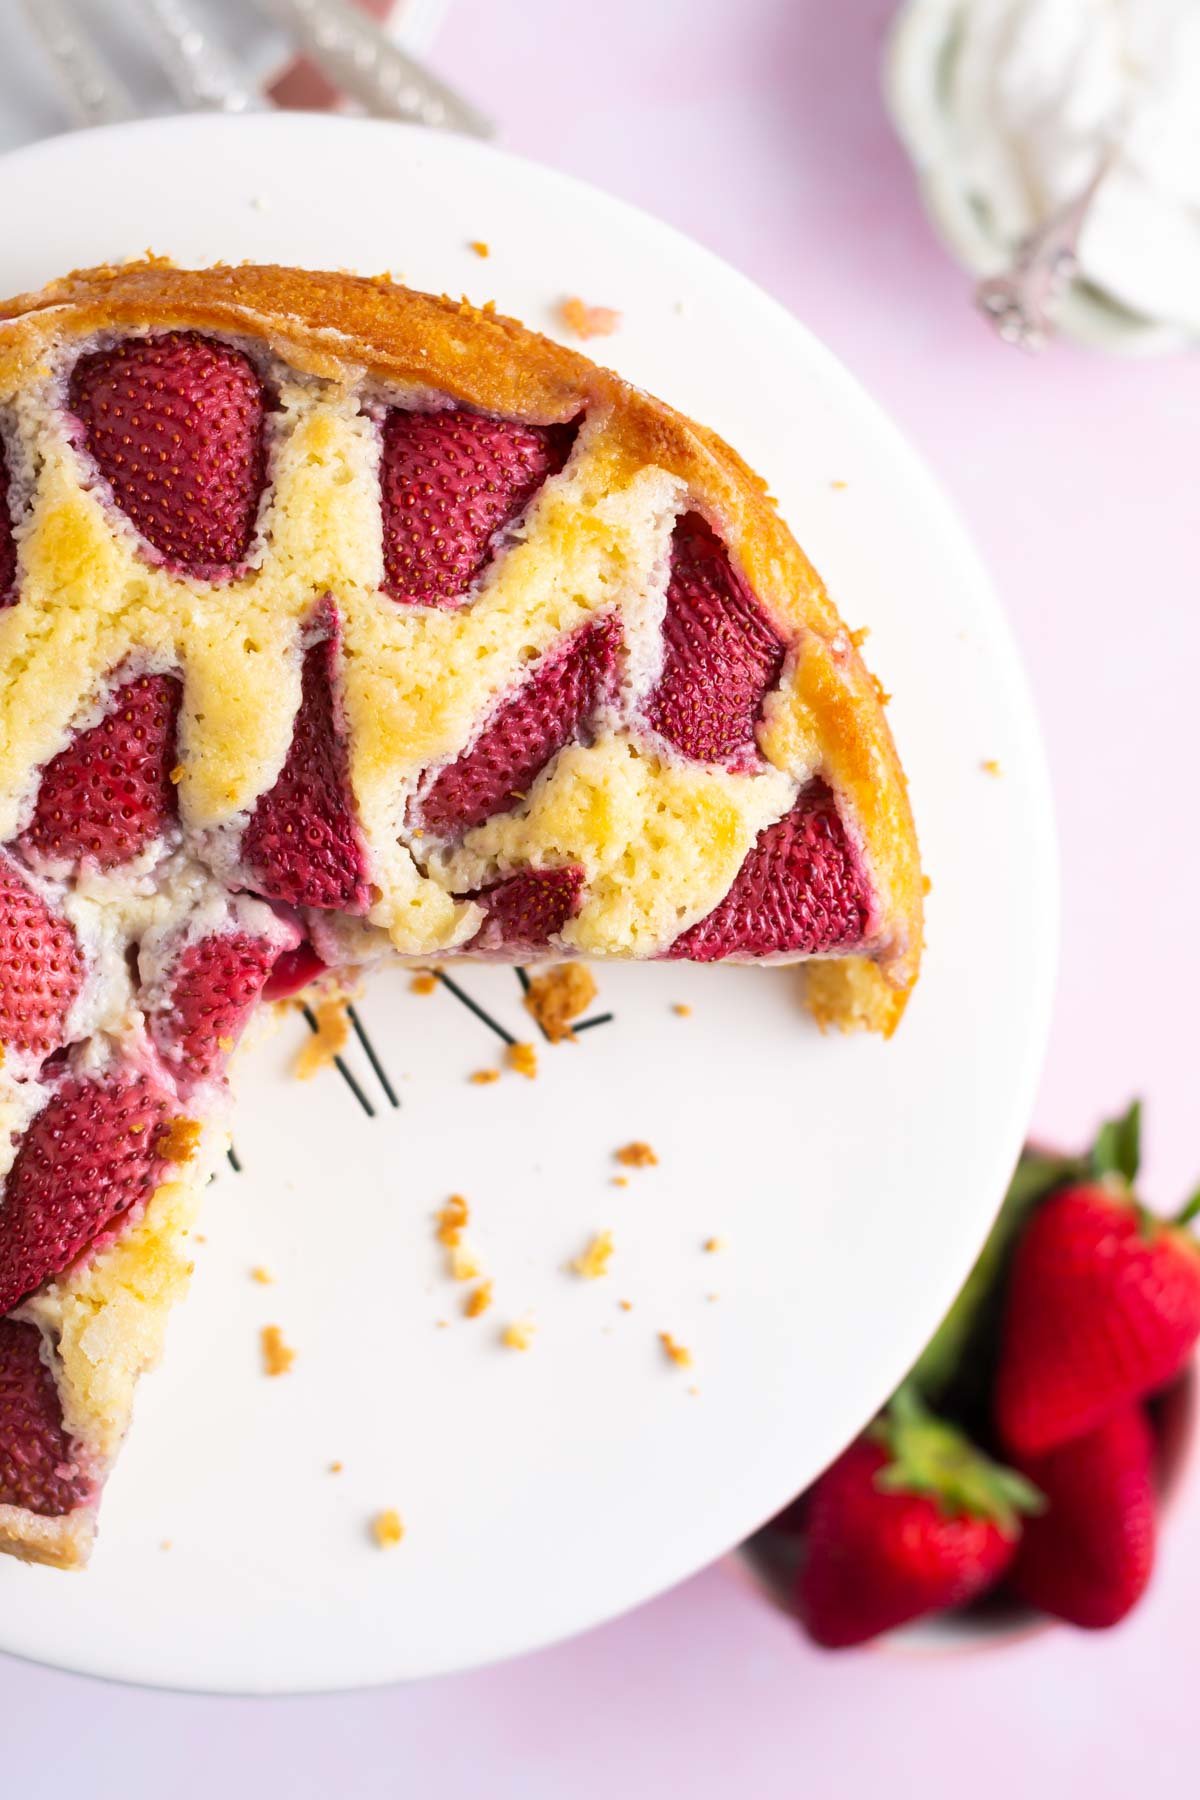
    slice of strawberry vanilla cake on a cake stand

    ingredients and substitutions

    Please scroll to the printable recipe card at the end of this post for the full list of ingredients and baking directions.

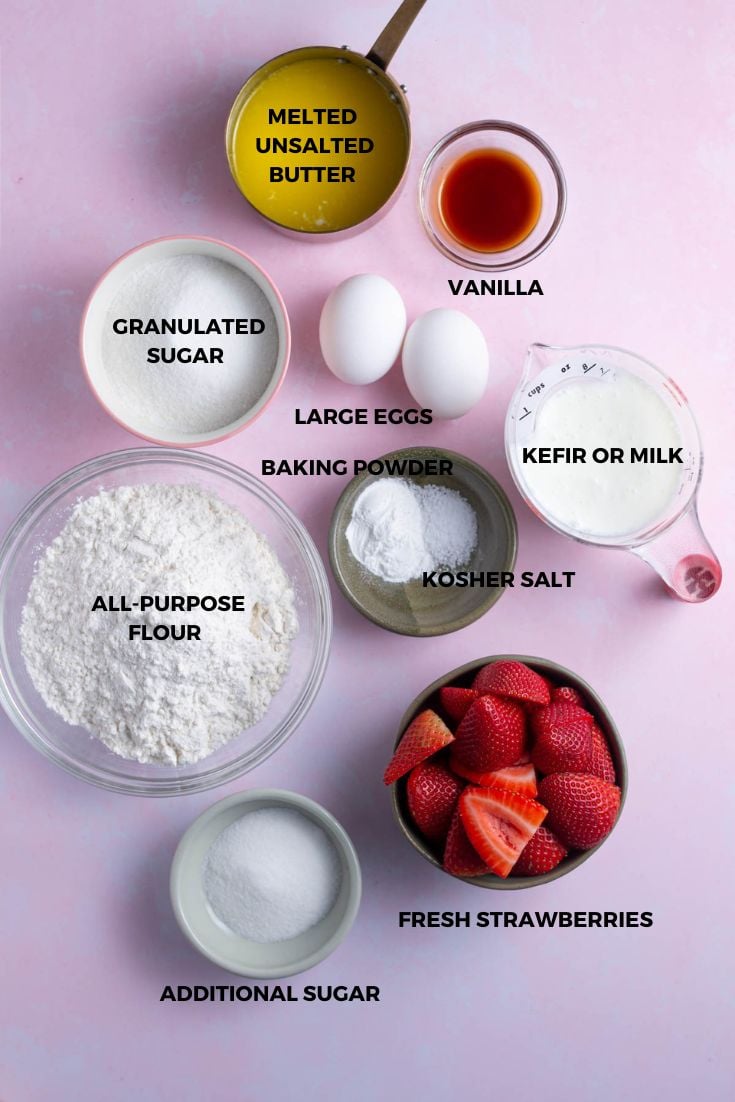
    strawberry vanilla cake ingredients
    • Unsalted butter ~ the butter is melted for this strawberry vanilla cake. If you only have salted butter, leave out the kosher salt.
    • Sugar ~ granulated sugar brings sweetness to the cake. Additional sugar is sprinkled over the top of the strawberries before baking the cake; adding a nice little caramelization to the top of the cake.
    • Vanilla ~ brings the vanilla flavor to this easy homemade cake. The recipe card is not a typo, we want a full tablespoon!
    • Kosher salt ~ balances the flavors. If you only have table salt, use half the amount.
    • Baking powder ~ brings some height to the cake. I use aluminum free baking powder.
    • Eggs ~ 2 large eggs are needed, they should be at room temperature.
    • All-purpose flour ~ be sure to measure your flour correctly. A kitchen scale is best or fluff the flour in it's container before spooning it into your measuring cup and using the back of a knife to level it off.
    • Kefir ~ I love the moisture and slight tang that kefir brings to cakes and muffins {like these healthy lemon blueberry muffins}. It also adds richness and protein to the recipe. You can substitute with buttermilk or milk {I tested it with 1%}. The milk should be room temperature so pull it out 1-2 hours before starting.
    • Strawberries ~ one pound of fresh strawberries are needed. Ideally, the ripest and sweetest strawberries will taste the best. After the strawberries are washed, remove the tops and slice in half. If the berries are really large, they can be cut in quarters.

    Pro tip ~ to quickly bring eggs to room temperature, place them in a bowl of warm tap water for 5-10 minutes.

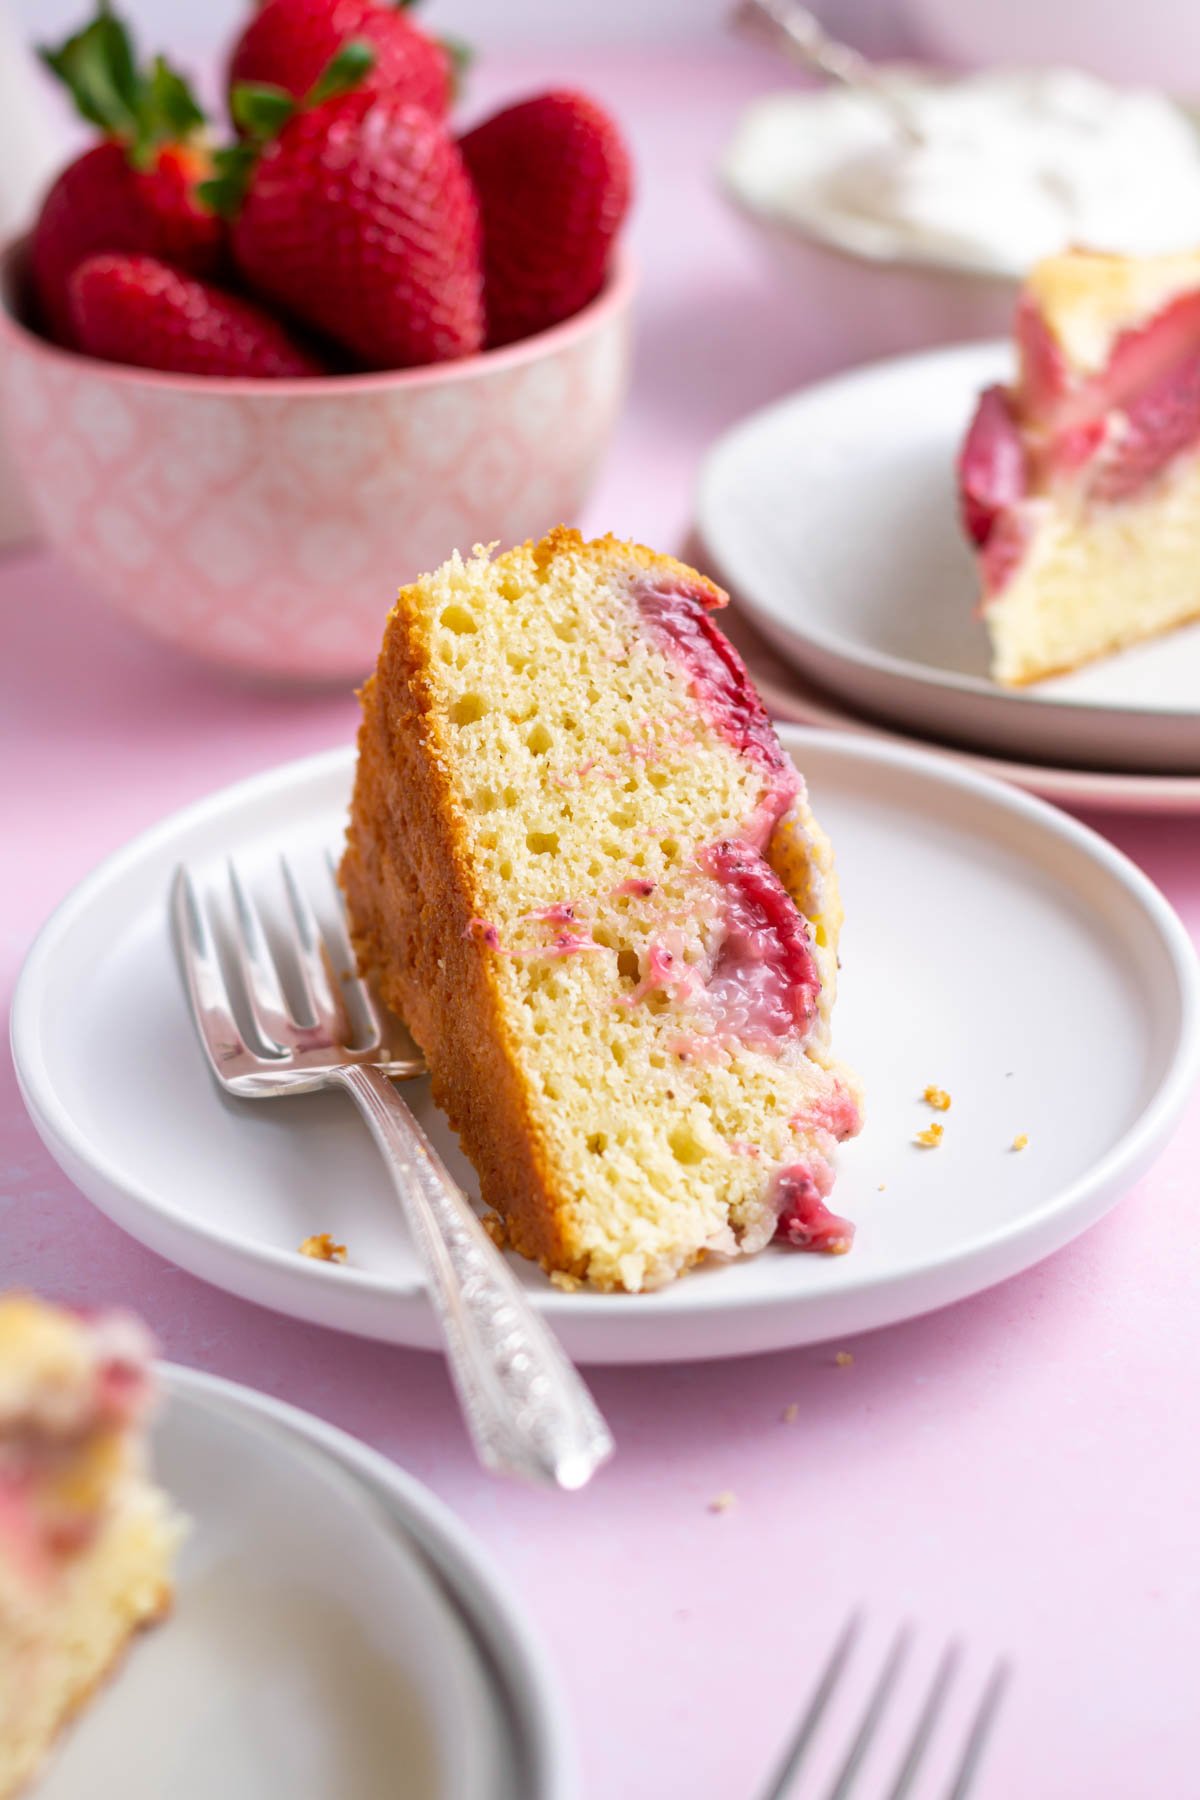
    slice of strawberry vanilla cake with whipped cream on a plate with bowl of strawberries in the background

    how to make the best one bowl cake

    Start by washing the strawberries, then pat dry, remove the tops and cut in half. Set aside.

    Next preheat the oven to 350°F and prepare a 9-inch cake pan {I use this Fat Daddio's Pan} by buttering the bottom and sides, placing a parchment round and then buttering the parchment. Set aside.

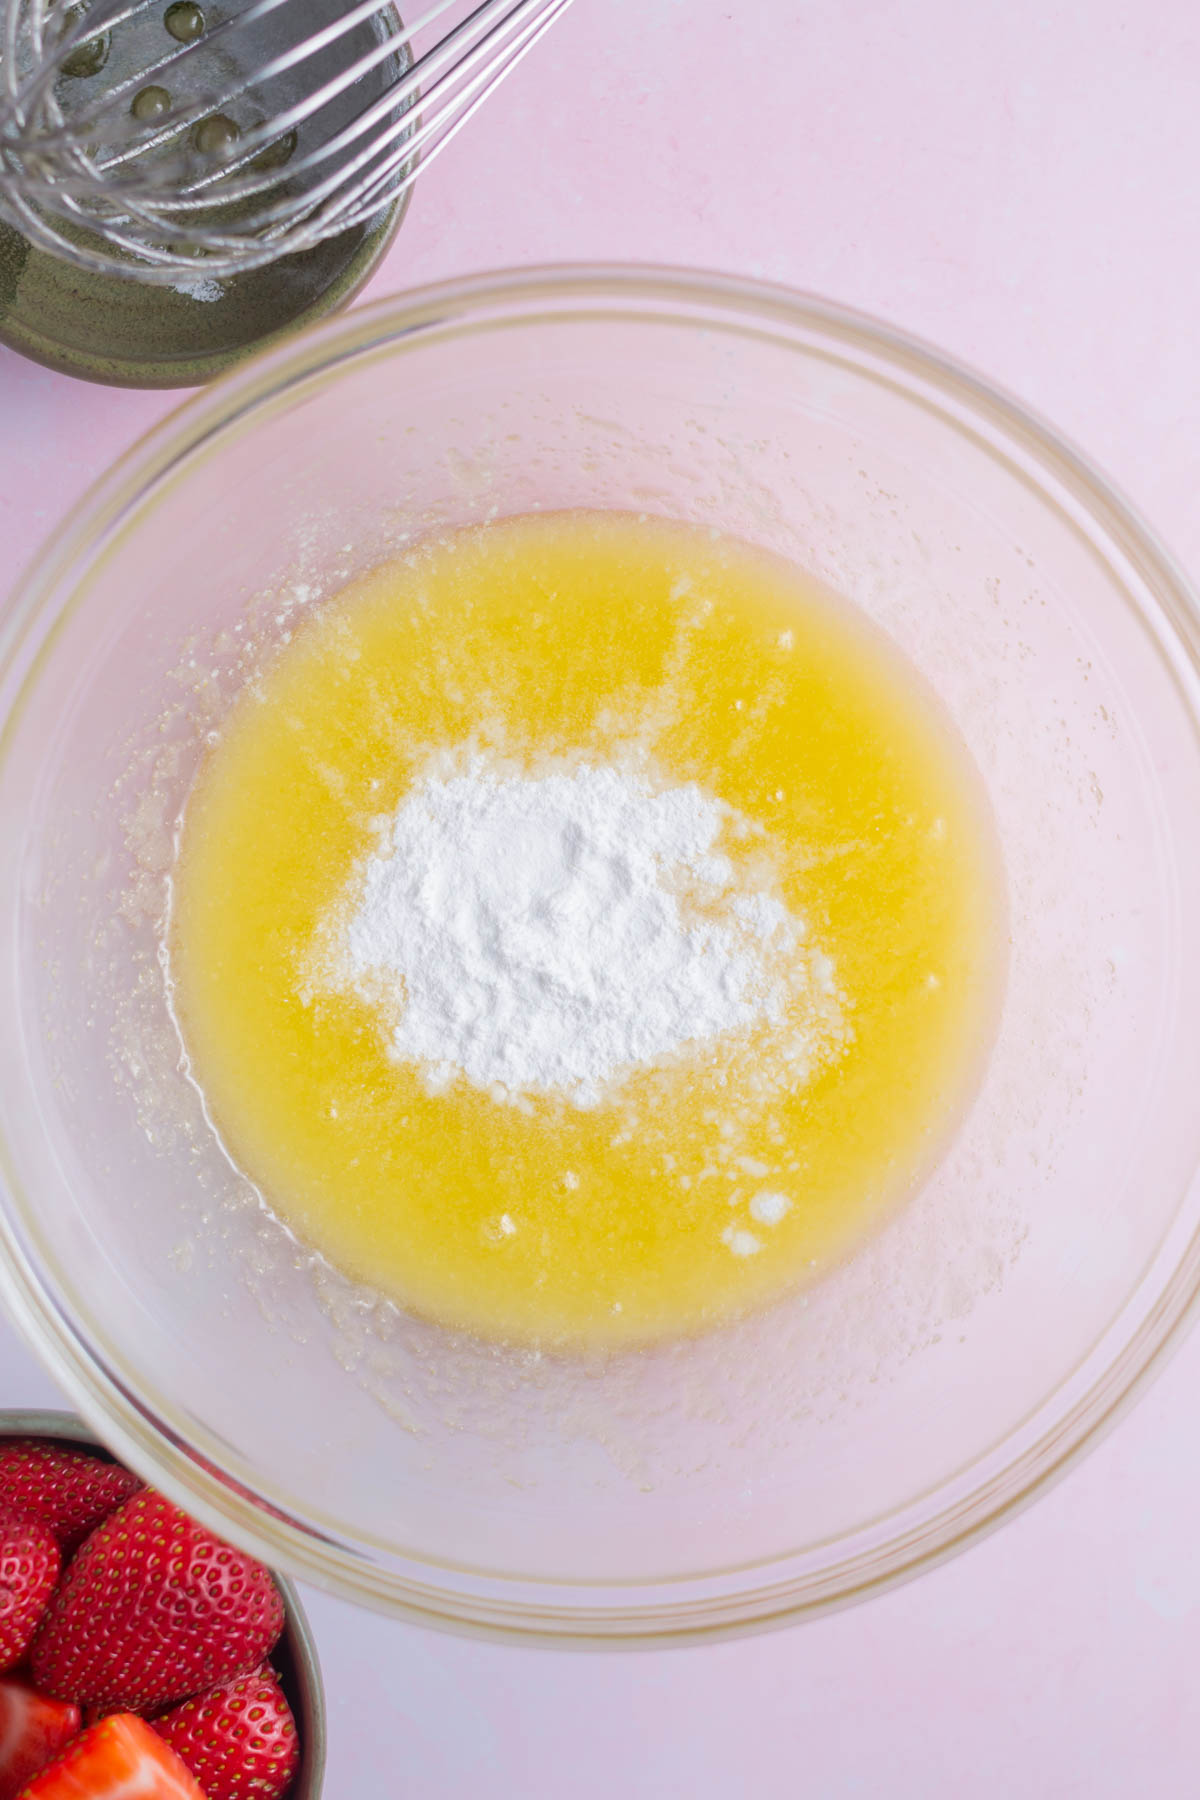
    In a medium to large bowl, whisk together the melted butter and sugar until fully combined. Then whisk in the vanilla, kosher salt and baking powder.

    Now whisk in the eggs. Then add half of the flour, once mostly combined add the kefir followed by the remaining flour. Mix until just fully combined.

    baking powder and salt on top of whisked sugar and melted butter in a bowl
    Add the baking soda and kosher salt after you've whisked the melted butter and sugar together.
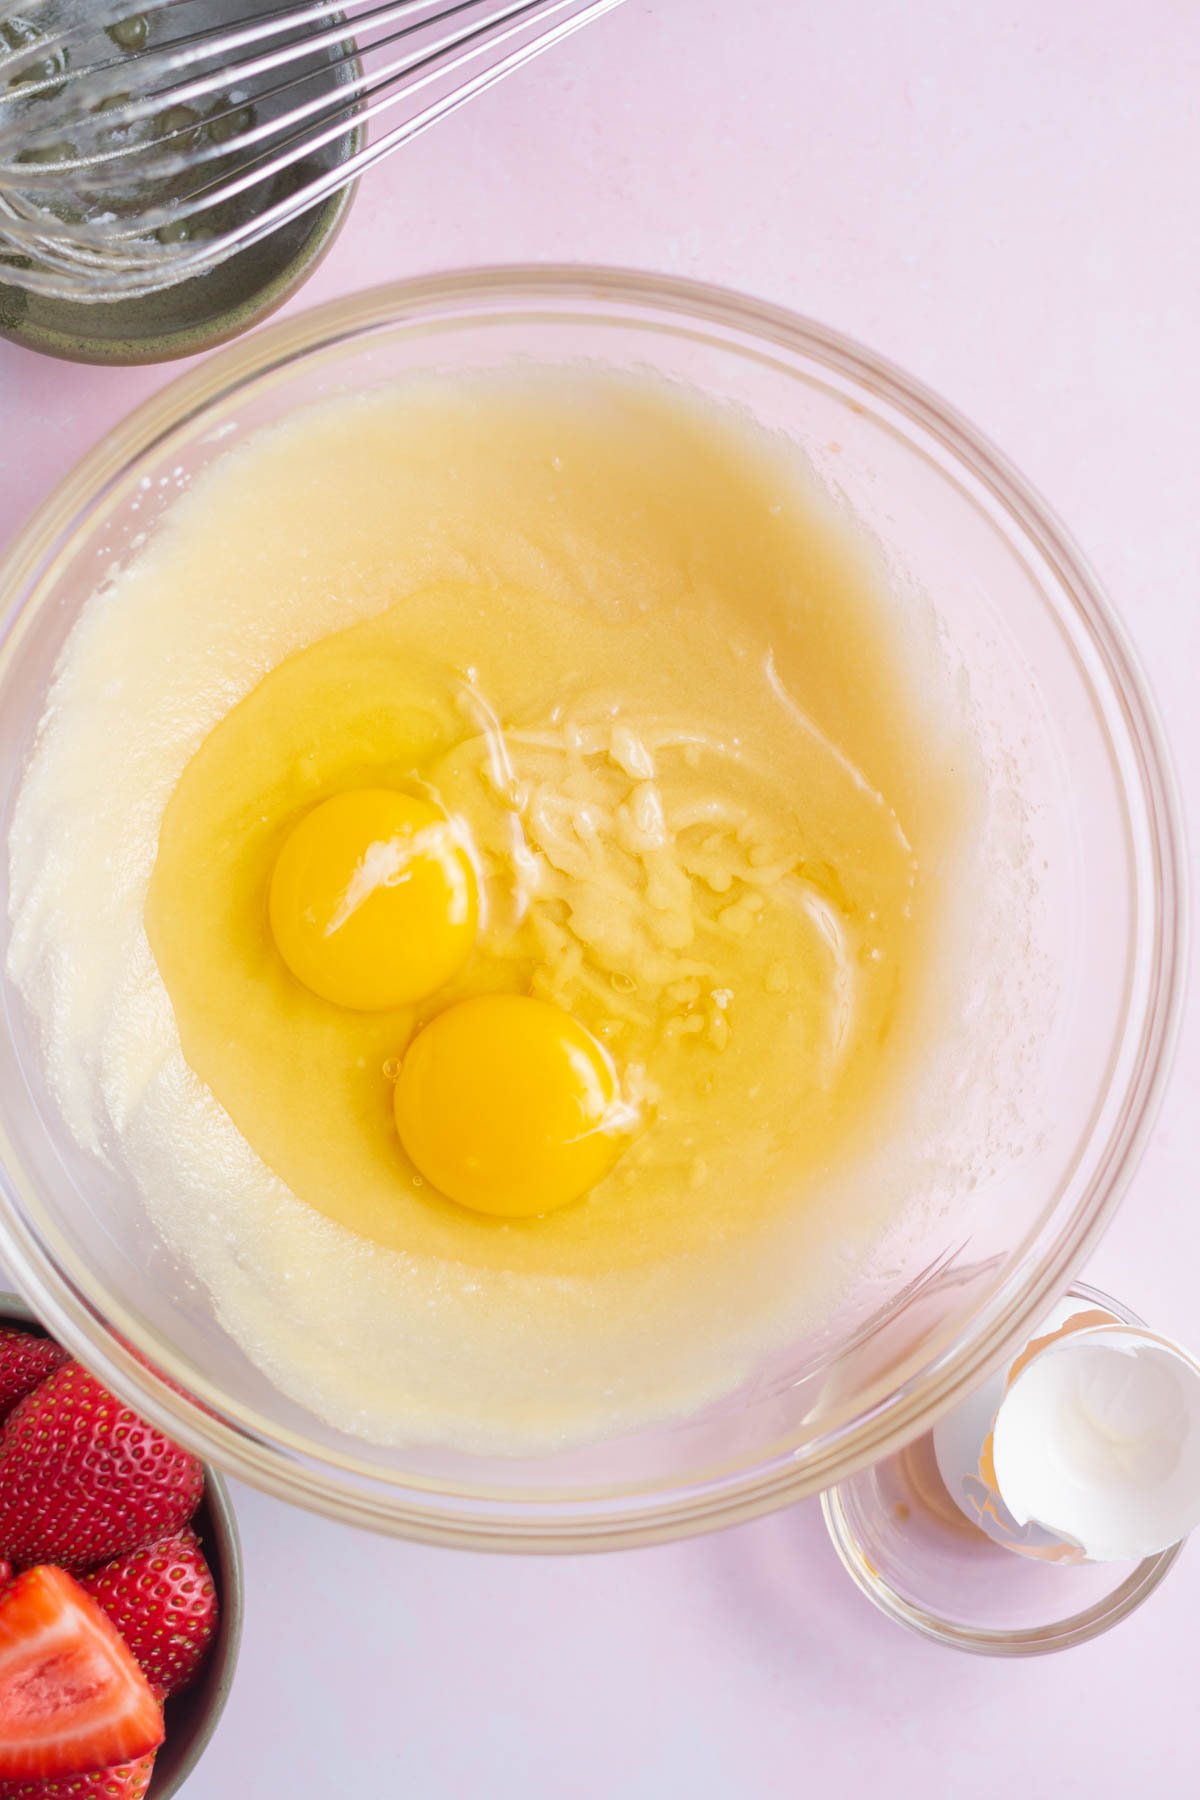
    eggs added to vanilla cake batter
    Then whisk in the eggs.
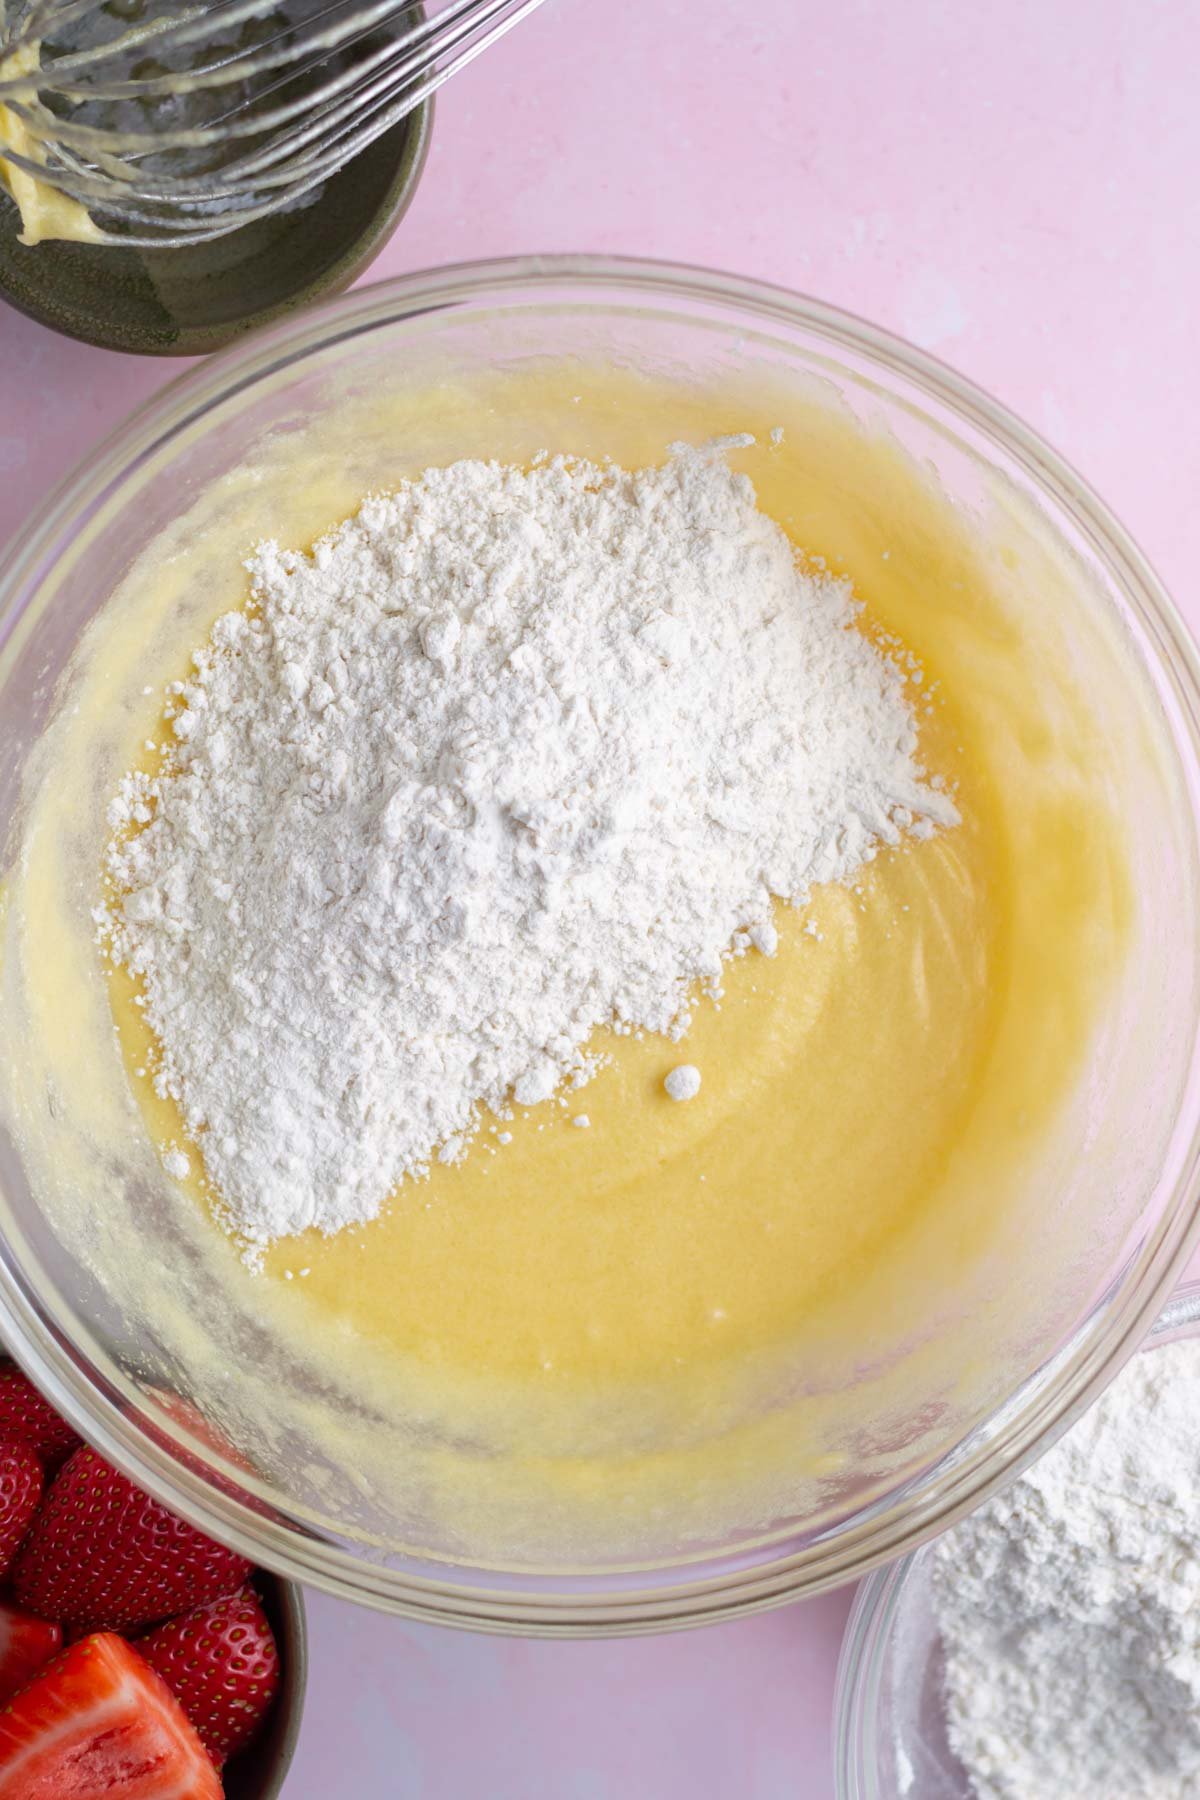
    Flour being added to vanilla cake batter
    Mix in the flour with a spatula until just combined, then add the kefir, followed by the remaining flour.

    Pour the batter into the prepared cake pan. Place the strawberries on top of the batter and sprinkle with sugar.

    Bake for 35-45 minutes until the edges are set and a toothpick comes out with just a few moist crumbs. Allow the cake to rest in the pan for 10 minutes, then run a knife between the cake and the edge of the pan and allow the cake to cool completely before slicing and serving.

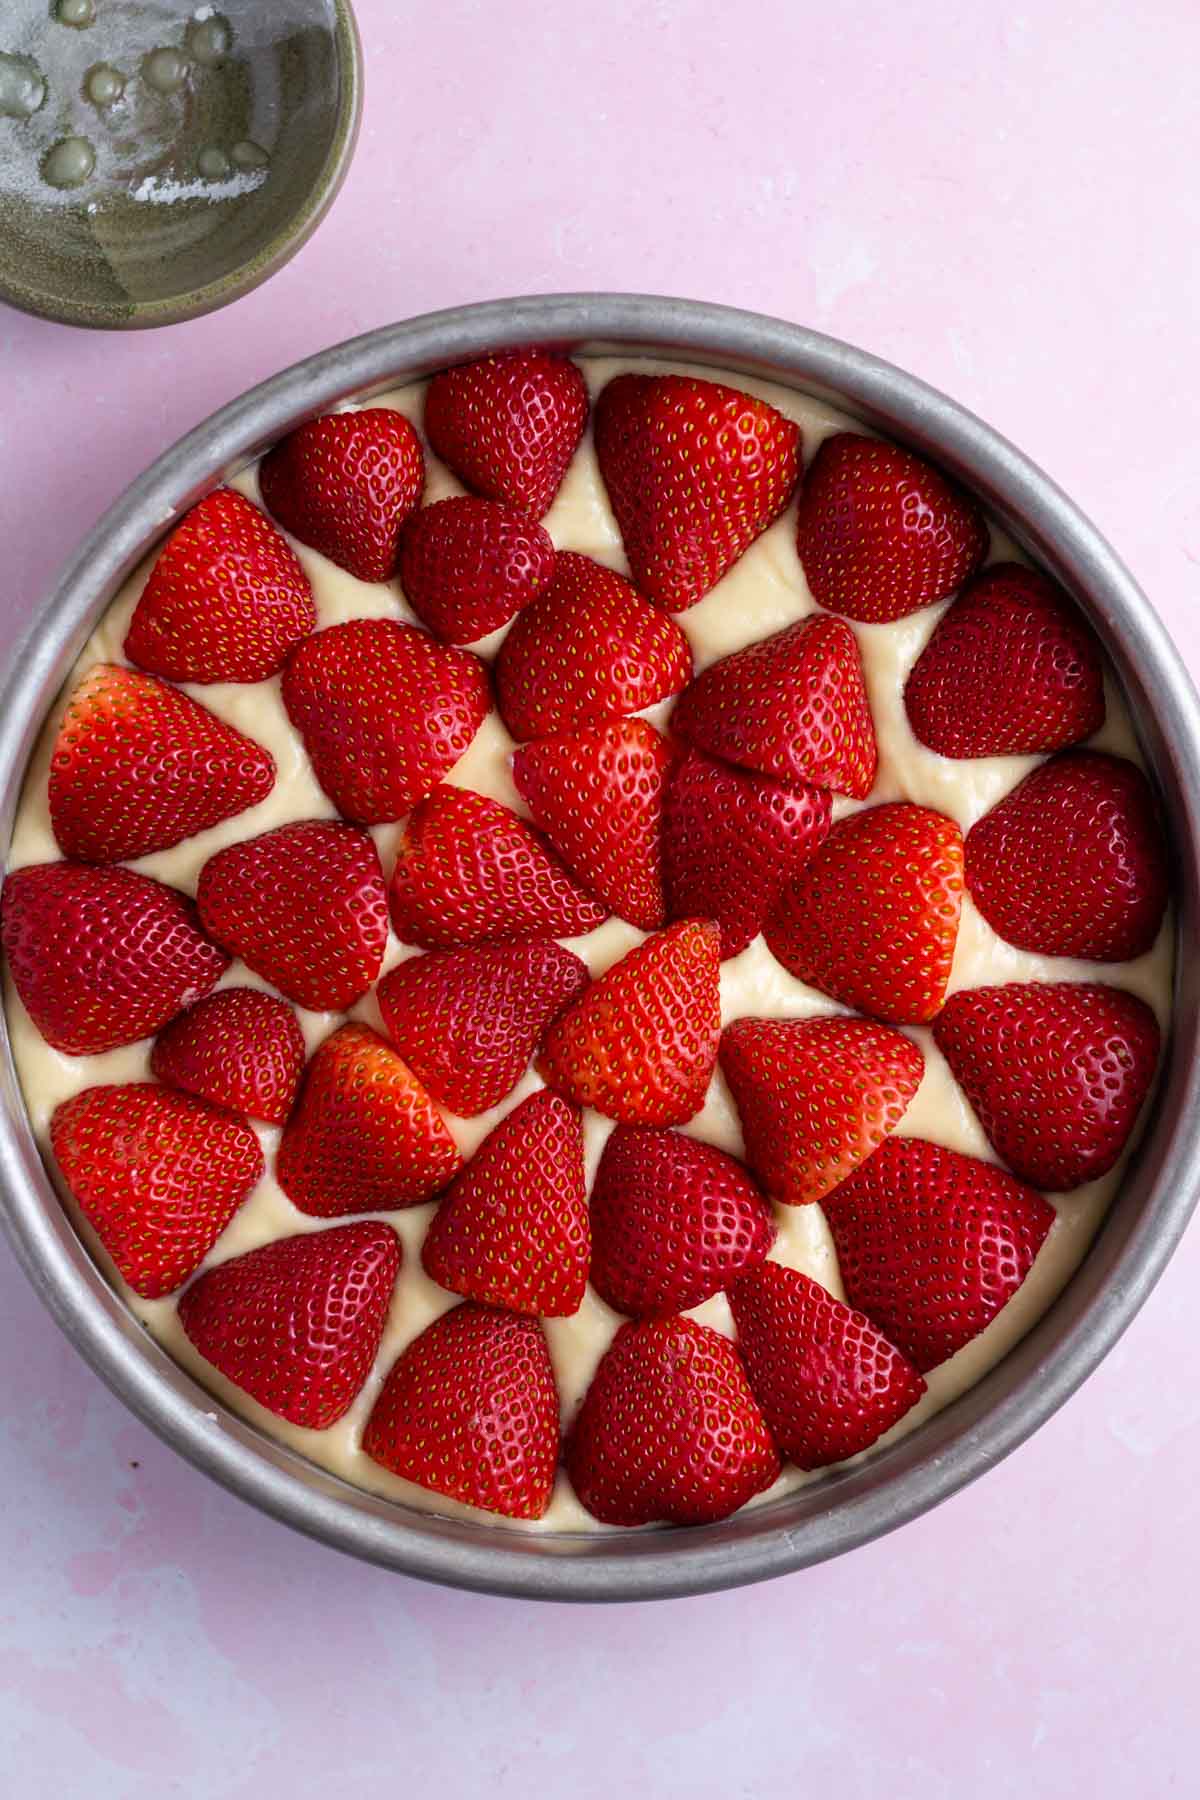
    fresh strawberries layered over vanilla cake batter in a baking pan
    Place all the strawberries over the top of the cake batter.
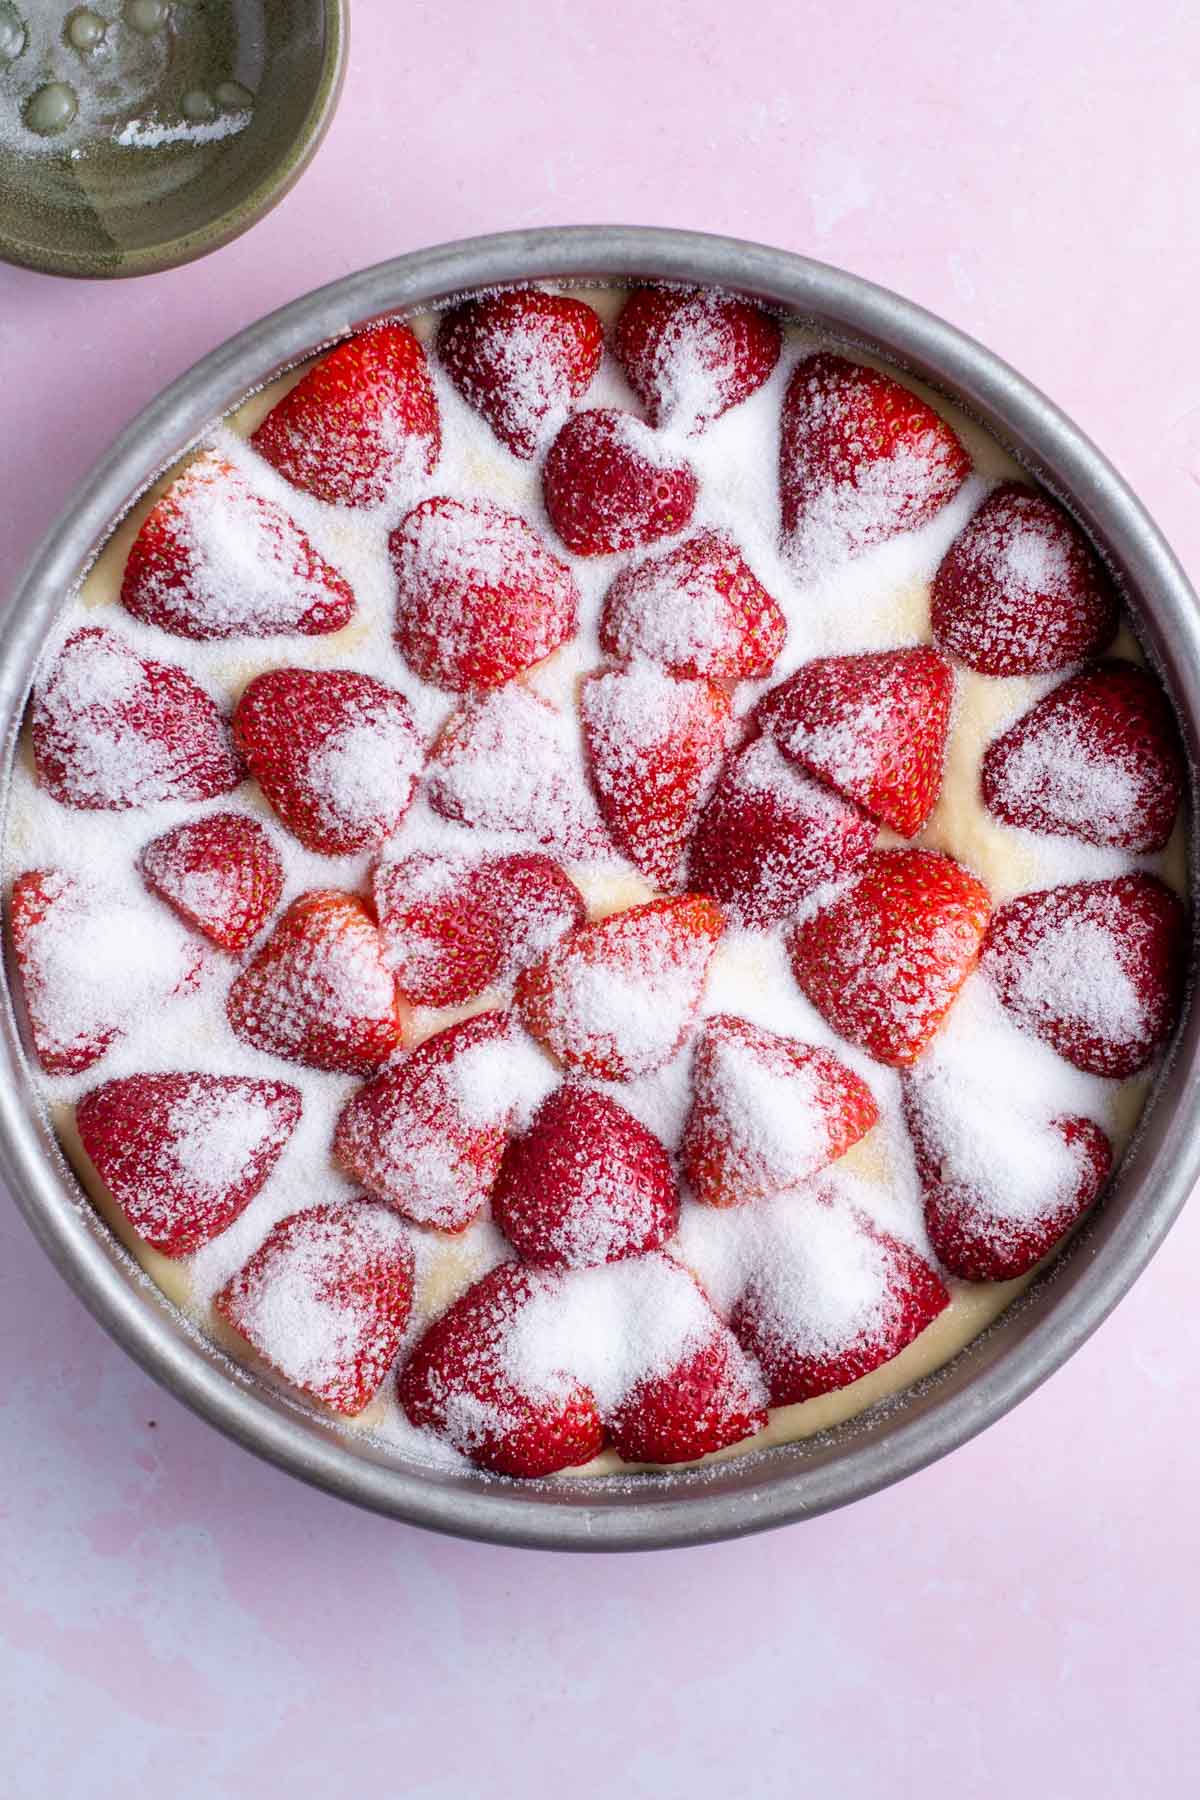
    granulated sugar sprinkled over the strawberry topping
    Granulated sugar dusted over the top of the fresh strawberries before the cake is baked.
    baked strawberry vanilla cake in a cake pan
    Some of the strawberries sink into the cake batter once baked.
    slice of cake with vanilla whipped cream on a plate with a fork and fresh strawberry

    how to decorate this strawberry vanilla cake

    The beauty of this vanilla and strawberry cake is that you don't have to do anything to decorate it! You could always create a design with the strawberries on top, but it comes out pretty any way the berries go on.

    I've served this cake as is {and with a dusting of confectioners' sugar}, but if you love the strawberry and cream combo; it's incredible with vanilla whipped cream {use the whipped cream from my cherry shortcake recipe}. Come to think of it, it would also be delicious with the whipped mascarpone frosting from this apple cake recipe!

    tips for making cake from scratch

    • Use room temperature ingredients.
    • Don't over mix the batter.
    • Measure the ingredients properly, especially the flour.
    • Take the time to prepare the baking pan so the cake doesn't stick {I always use a parchment round when baking cakes}.
    • Don't over bake! The cake is done when the edges are lightly browned and a toothpick comes out with just a few moist crumbs.
    cut cake on a cake stand

    frequently asked questions

    can this cake be baked in other sizes?

    Yes, an 8-inch cake round or 8x8 baking pan can be used. The baking time will increase a little bit if baked in an 8-inch round, see the recipe card for time recommendations.

    can I use frozen strawberries?

    No, this strawberry vanilla cake needs fresh strawberries. Frozen strawberries would add too much moisture and the cake would be soggy.

    can this recipe be baked as cupcakes?

    Although I have not tested it, I believe you could. The baking time would likely be 16-20 minutes. Please let me know if you try it! My strawberry filled cupcakes are also a great option.

    how to store

    Any vanilla and strawberry cake leftovers should be stored covered in the refrigerator for up to 5 days.

    I personally think cake tastes best at room temperature, but have been known to eat this one cold from the refrigerator too.;-)

    slice of cake on a plate with a fork

    Remember to snap a picture and tag me on Instagram if you make this Strawberry Vanilla Cake. It warms my heart to see you bring these recipes to life! Thank you for being here and happy baking!

    more berry desserts to enjoy

    • Berry Crumble Bars
    • Chocolate Raspberry Cheesecake
    • White Chocolate Ice Cream with Roasted Blueberries
    • Strawberry Crumb Cake
    • Raspberry Crumble Cookies

    If you make this recipe {or any recipe!} from two sugar bugs please come back and leave a review and a ⭐️⭐️⭐️⭐️⭐️ star rating.  I read every comment, and I LOVE hearing from you!

    Yield: 14 slices

    Strawberry Vanilla Cake

    top view of strawberry vanilla cake with a couple slices missing

    This easy strawberry vanilla cake recipe is a perfect way to celebrate strawberry season! The cake is filled with vanilla and has a fresh strawberry topping baked in. You'll love the one layer cake because it's moist and flavorful; perfect for birthdays or any celebration!

    Prep Time 15 minutes
    Bake Time 40 minutes
    Total Time 55 minutes

    Ingredients

    • 1 pound fresh strawberries, washed and halved
    • ½ cup unsalted butter, melted (113g)
    • ¾ cup granulated sugar (150g)
    • 1 tablespoon pure vanilla extract
    • ½ teaspoon kosher salt
    • 2 teaspoons baking powder
    • 2 large eggs, room temperature
    • 1 ¾ cup all-purpose flour (219g)
    • ¾ cup kefir* (180mL)
    • 3 tablespoons granulated sugar

    Instructions

    1. Start by washing the strawberries (one pound), then pat dry, remove the tops and cut in half (if some of the strawberries are really large, you can slice into quarters). Set aside.
    2. Next preheat the oven to 350°F and prepare a 9-inch cake pan by buttering the bottom and sides, placing a parchment round and then buttering the parchment again. Set aside.
    3. In a medium to large bowl, whisk together the melted butter (½ cup/113g) and sugar (¾ cup/150g) until fully combined. Then whisk in the vanilla (1 tablespoon), kosher salt (½ teaspoon) and baking powder (2 teaspoons).
    4. Whisk in the eggs (2 large). Then add half of the flour (1 ¾ cup/219g), once mostly combined add the kefir* (¾ cup/180mL) followed by the remaining flour. Mix until just fully combined.
    5. Pour the batter into the prepared cake pan. Place the strawberries on top of the batter and sprinkle with sugar (3 tablespoons).
    6. Bake for 35-45 minutes until the edges are set and a toothpick comes out with just a few moist crumbs. Allow the cake to rest in the pan for 10 minutes, then run a knife between the cake and the edge of the pan and allow the cake to cool completely (it can stay in the baking pan) before slicing and serving.
    7. If desired, top with vanilla whipped cream.

    Notes

    *The kefir can be substituted with buttermilk or milk (I tested with 1%).

    Store any leftovers covered in the refrigerator for up to five days.

    The cake can be baked in an 8-inch cake round. It will take 5-10 minutes longer to bake. A 8x8 pan can also be used and should take the same amount of time as the 9-inch round.

    Nutrition Information:

    Yield:

    14

    Serving Size:

    1

    Amount Per Serving: Calories: 196Total Fat: 8gSaturated Fat: 4gTrans Fat: 0gUnsaturated Fat: 3gCholesterol: 45mgSodium: 152mgCarbohydrates: 29gFiber: 1gSugar: 16gProtein: 3g

    The nutrition information is an estimate only and may not be entirely accurate.

    Did you make this recipe?

    Please make my day and PIN to Pinterest and share a photo on Instagram ~ making sure to tag @twosugarbugs! THANK YOU!!

    © Tasia
    Cuisine: American / Category: Cakes and Cupcakes

    Cherry Almond Cookies

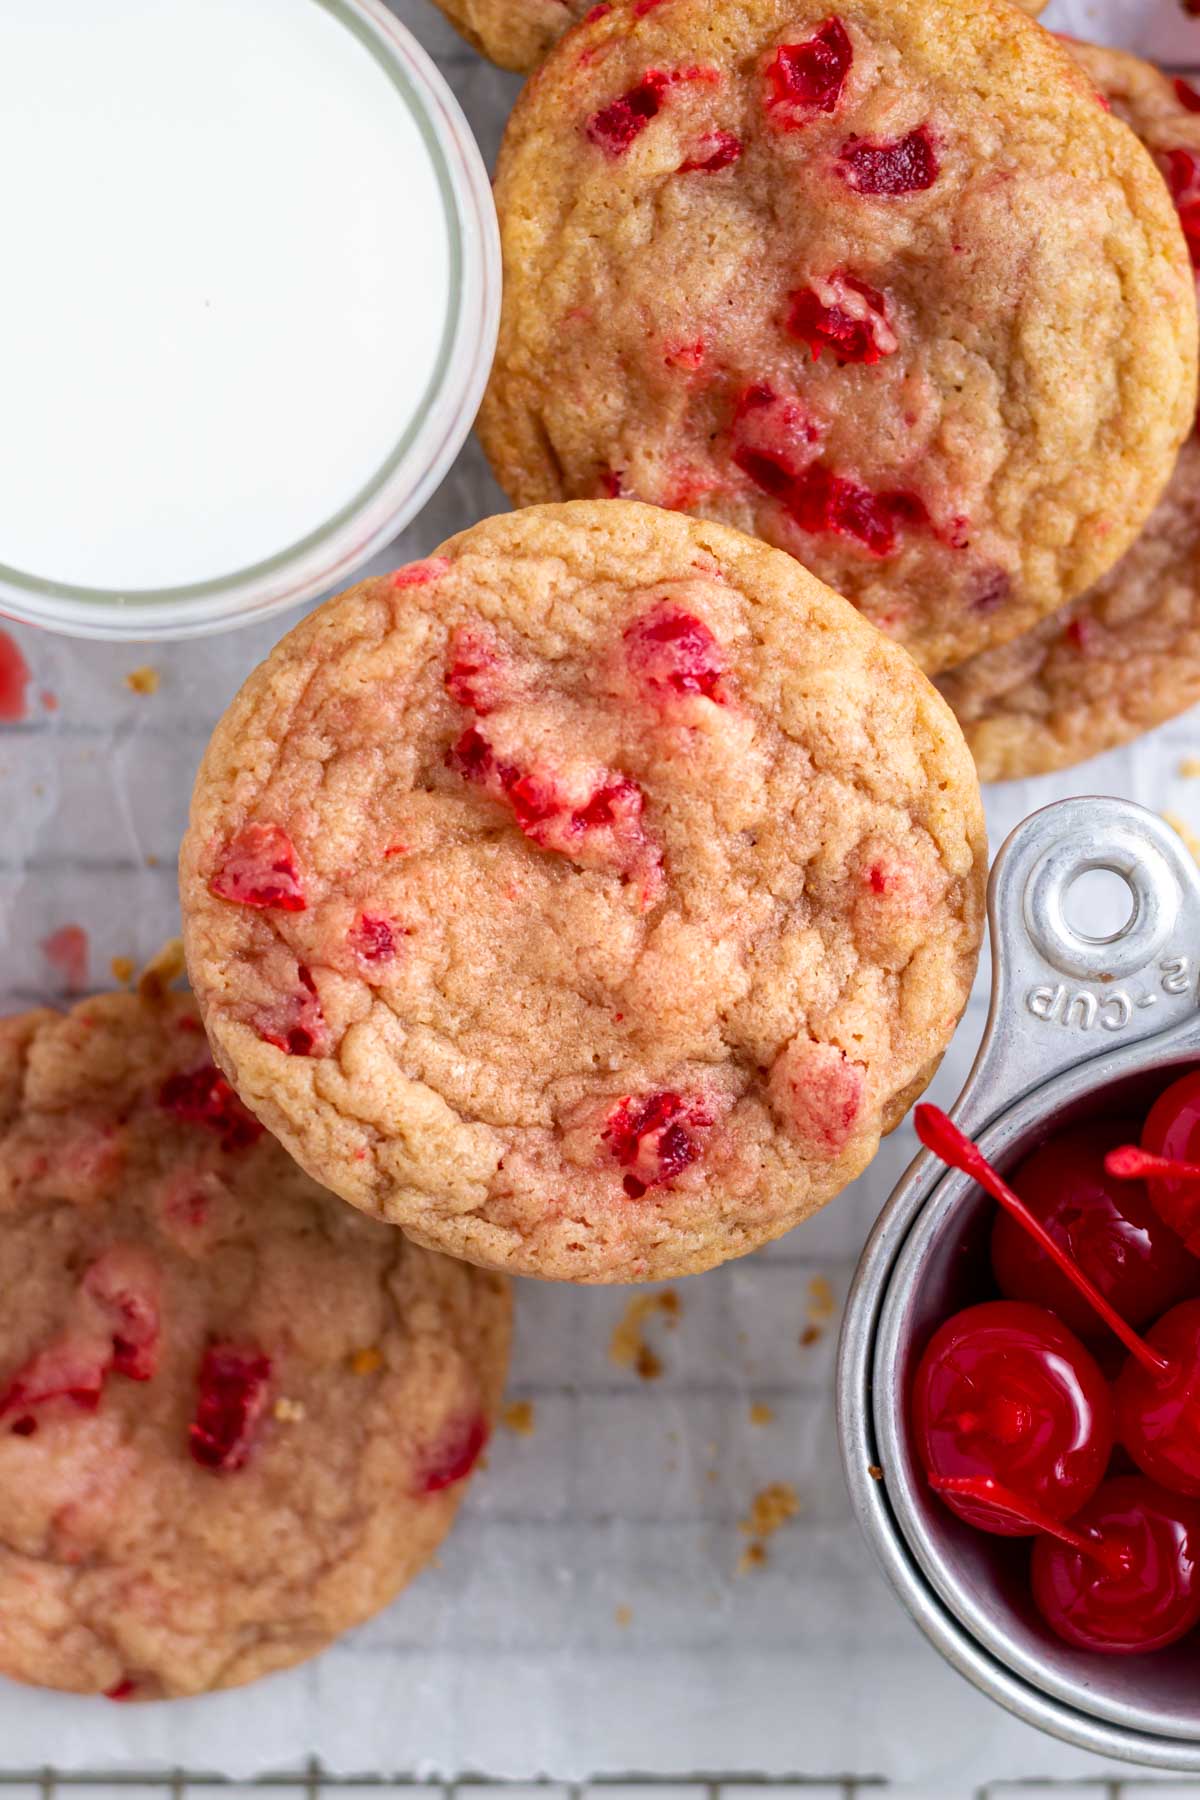
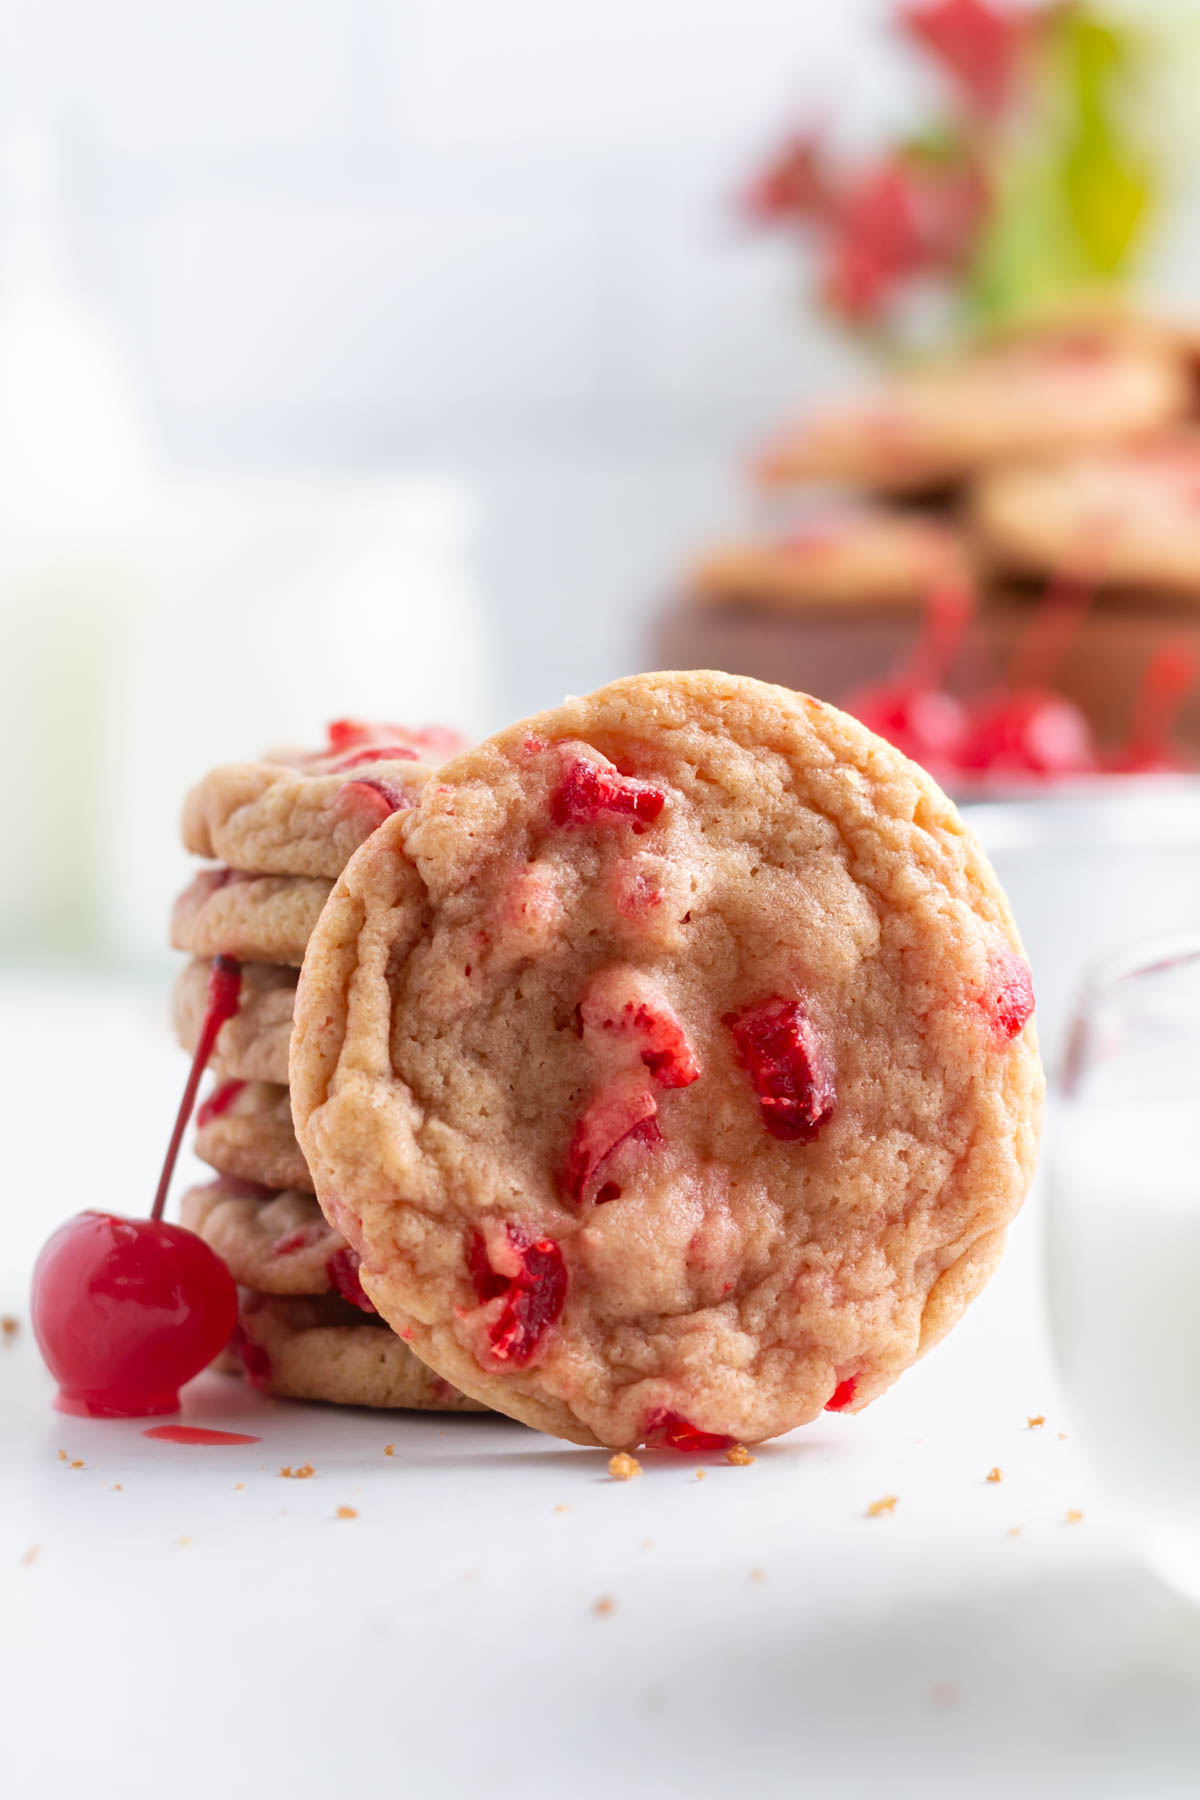
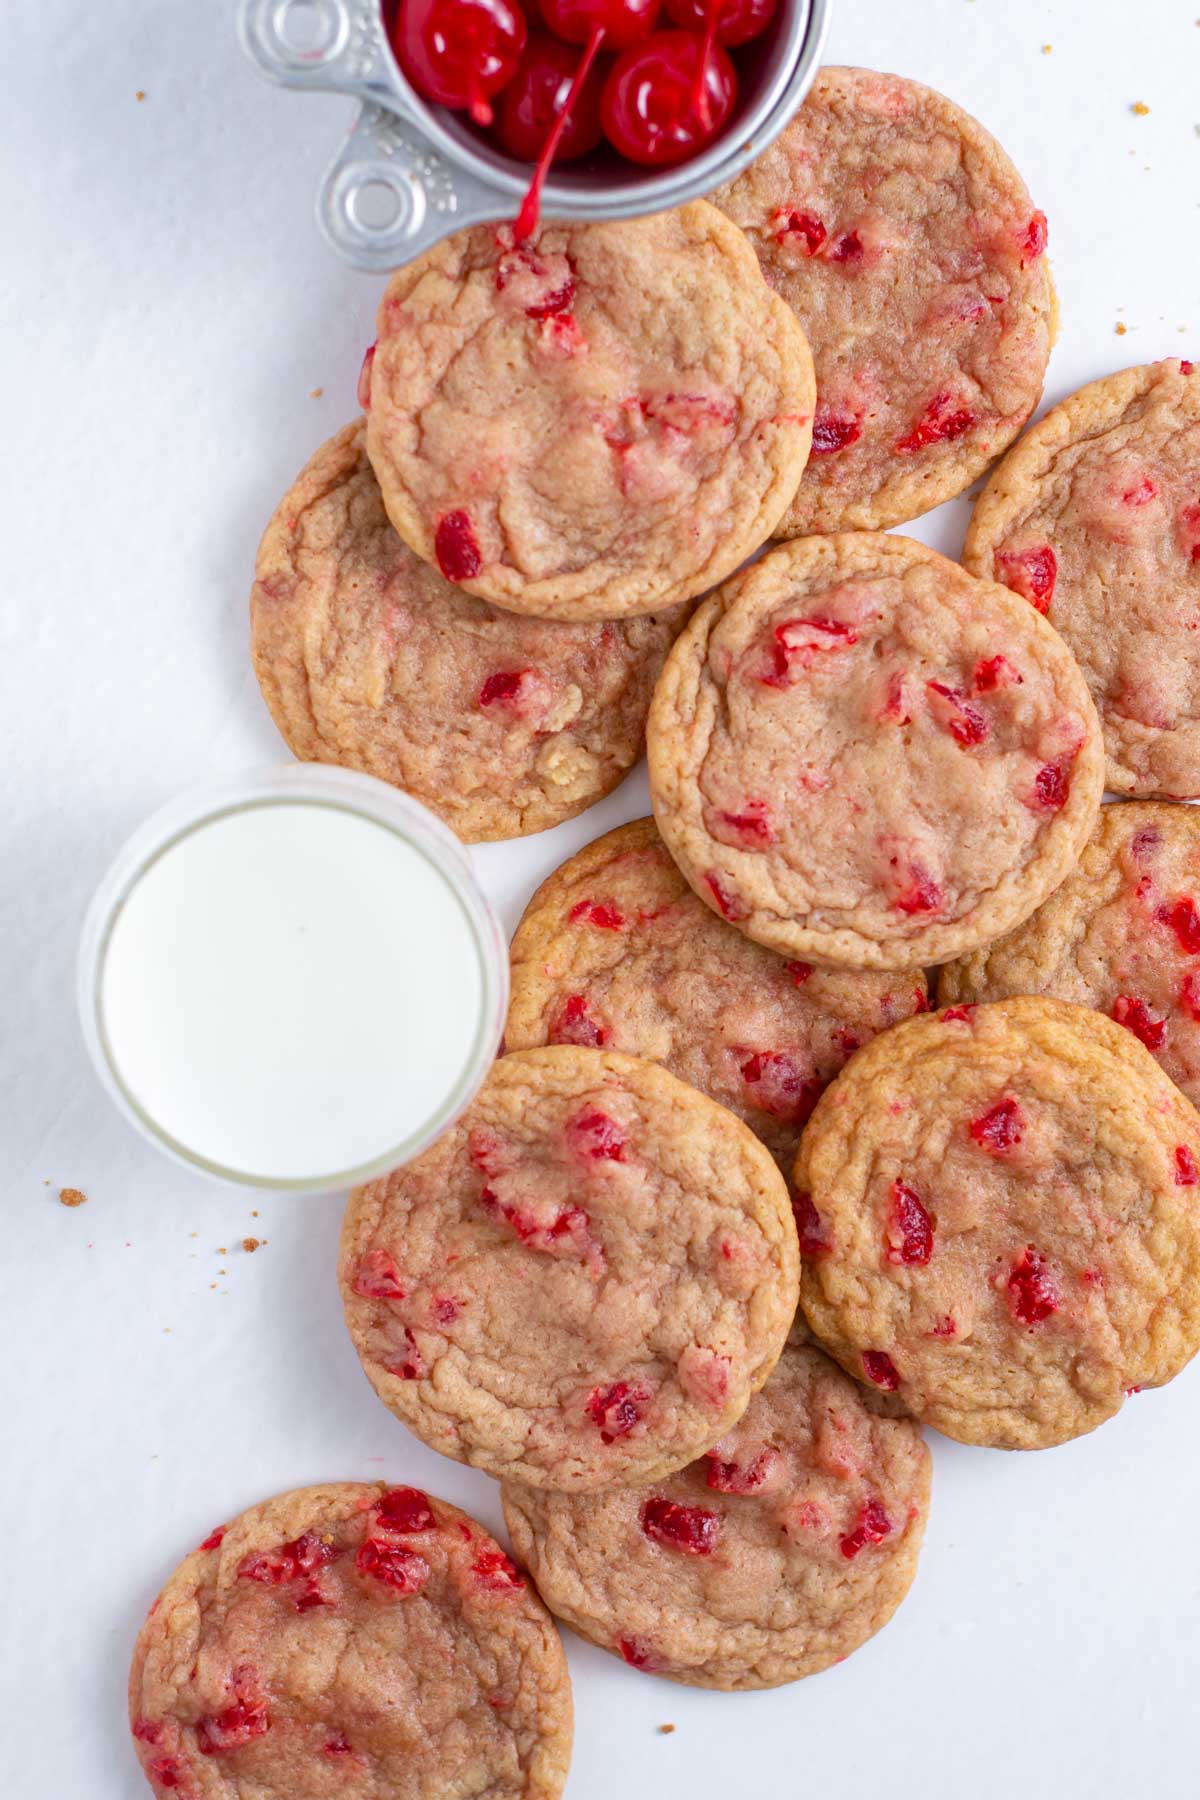
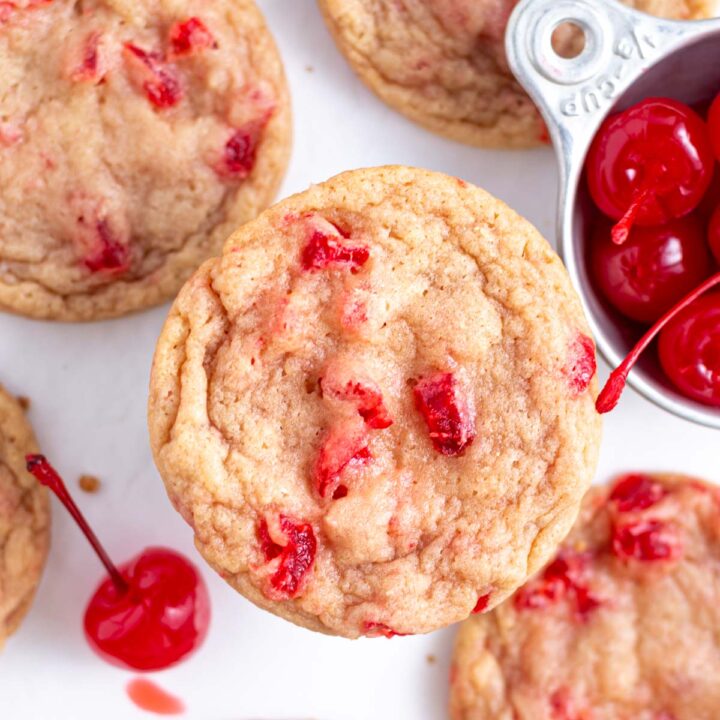
    cherry almond cookies with a cup of maraschino cherries

    No chill cherry almond cookies are made with maraschino cherries and almond extract. They are soft and chewy drop cookies perfect for Easter, Christmas, Valentine's Day or just because you love the classic cherry and almond combination!

    cherry almond cookies with milk and maraschino cherries

    Disclosure | This post may contain affiliate links. As an Amazon Associate I earn from qualifying purchases.

    Sunny spring weather always has me dreaming of summer. Okay, honestly I'm always dreaming of summer! The PNW has some of the most delicious cherries and enjoying those fresh cherries is one of my favorite parts of summer.

    Cherry and almond is such a classic flavor combo, at least as famous as cherry and chocolate, right??? So I wanted to find a way to enjoy this flavor with a sweet twist when it isn't cherry season; by adding maraschino cherries, like I do in my cherry chip cake.

    For other recipes with fresh or frozen cherries, try dark chocolate cherry shortbread, cherry almond scones or homemade cherry pop tarts.

    why you will love these drop cookies

    • No waiting from ingredients to warm up.
    • A one bowl recipe {you're busy and need fewer dishes to wash!}
    • No chill time required!
    • Melted butter = soft and chewy cookies that are full of cherry almond flavor.
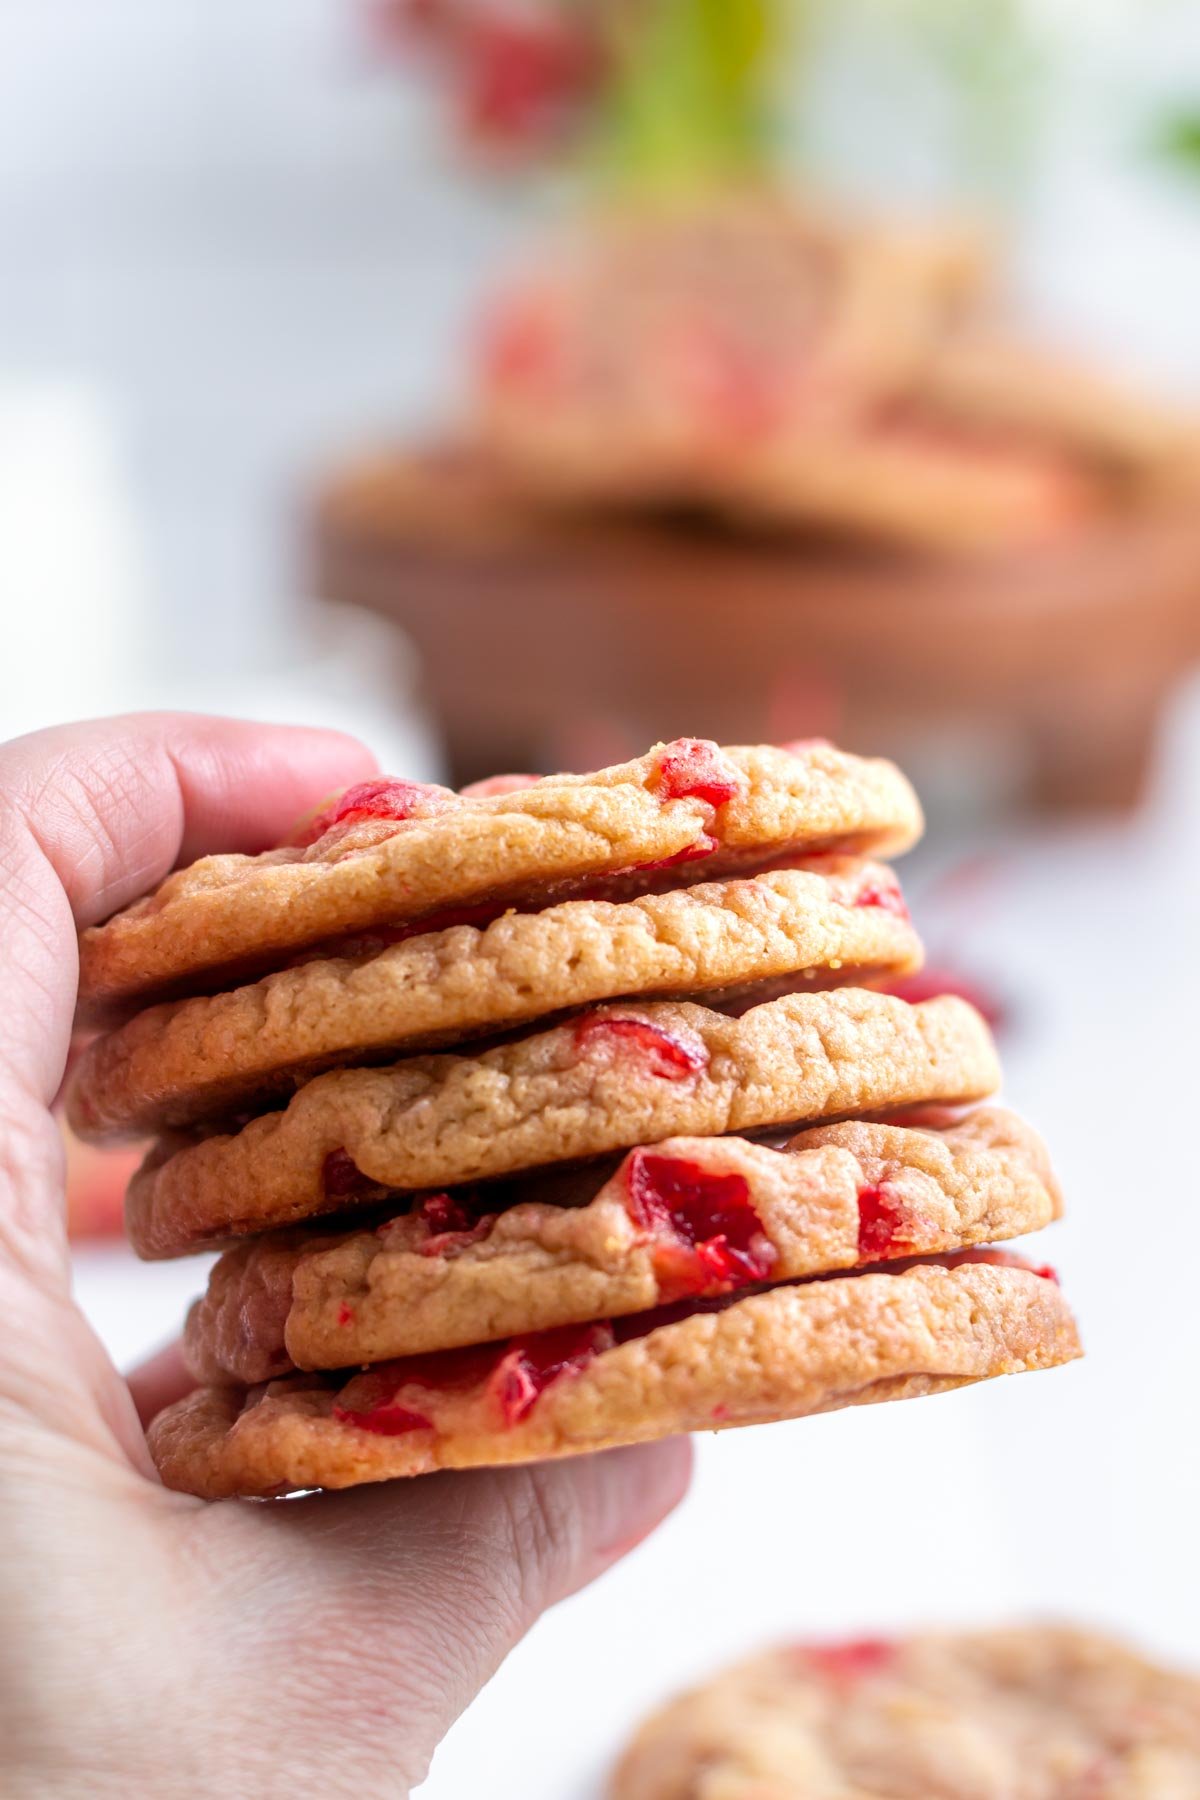
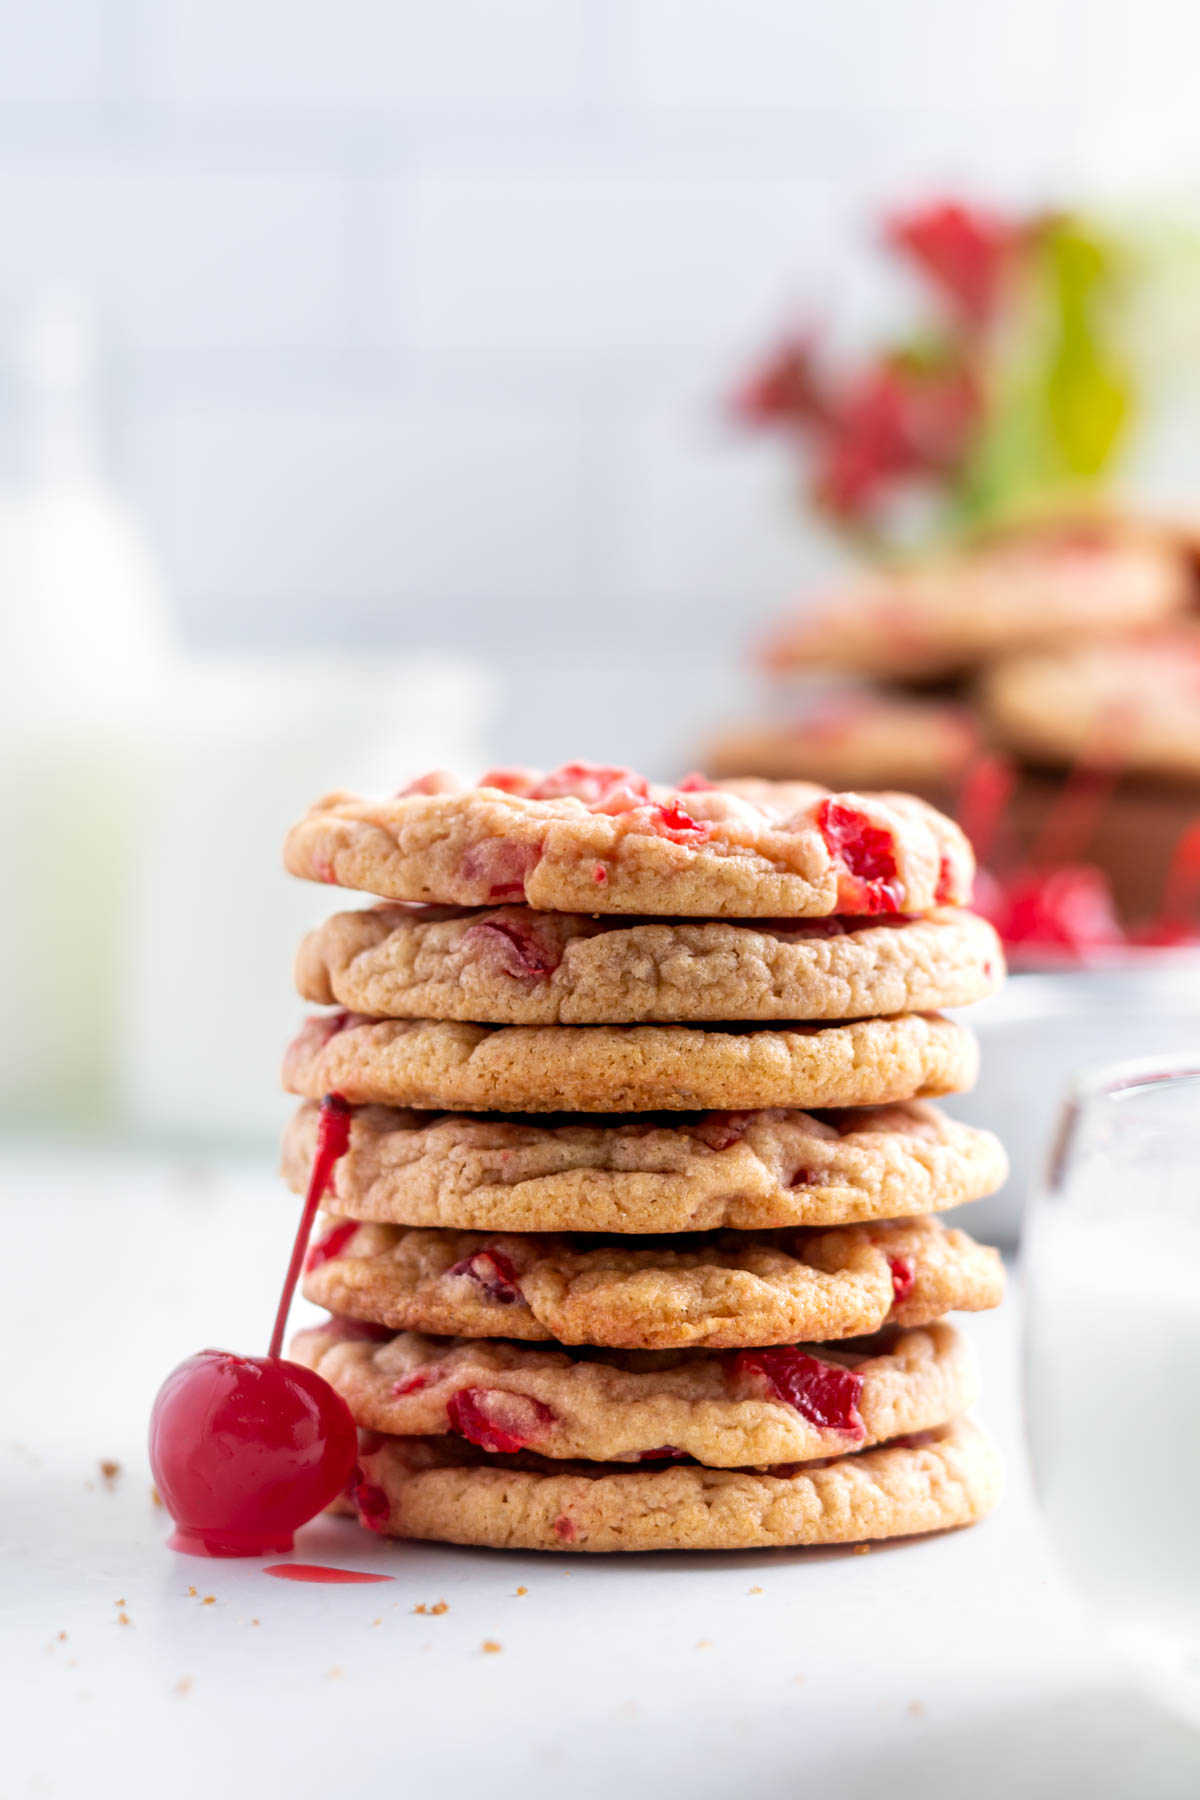
    hand holding a stack of cherry almond cookies

    ingredients and substitutions

    Please scroll to the printable recipe card at the end of this post for the full list of ingredients and baking directions.

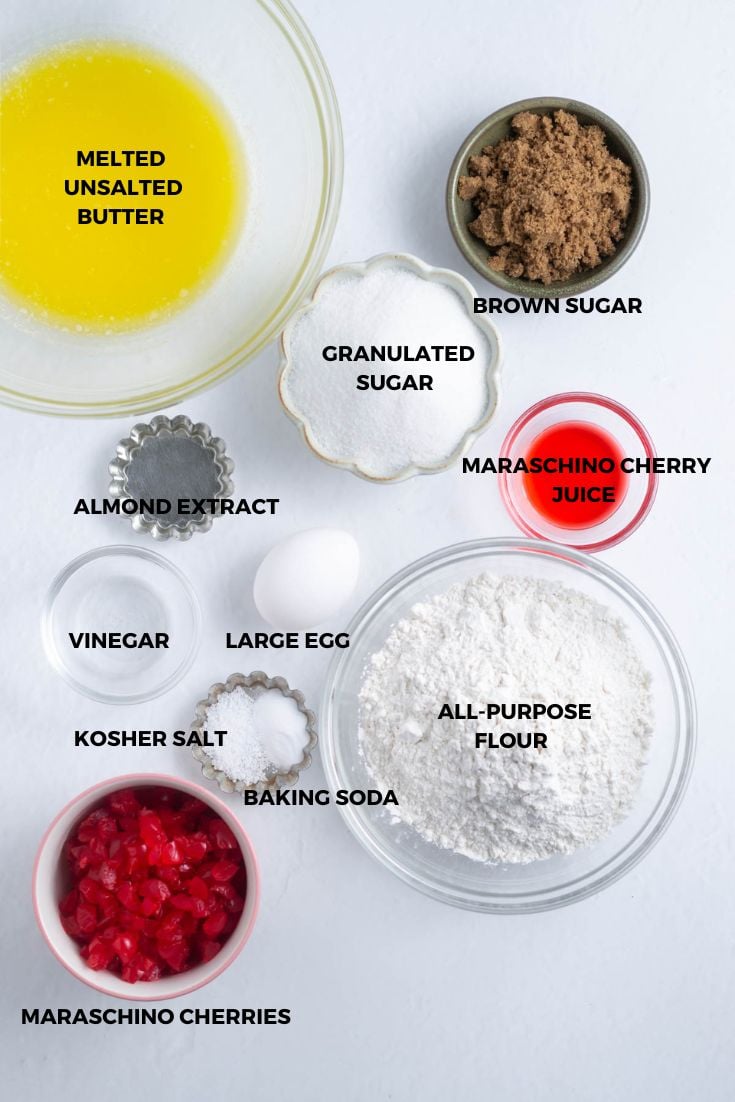
    cherry almond cookies ingredients
    • Butter ~ this cookie recipe calls for unsalted butter. If you only have salted butter, just leave out the kosher salt. The butter gets melted, so no planning ahead. 😉
    • Sugar ~ both granulated and brown sugars are used. I wanted these cherry almond cookies to have more of a sugar cookie flavor, so there is a higher amount of white sugar in this recipe.
    • Egg ~ just one large egg needed and it can come straight from the refrigerator. The egg brings structure and binds the ingredients together.
    • Almond extract ~ adds the lovely almond flavor. I always use Cooks almond extract, my local market carries it, but you can also buy it on Amazon.
    • Vinegar ~ reacts with the baking soda to add thickness and also adds to the soft texture of the cookies. White vinegar or apple cider vinegar can be used.
    • Baking soda ~ adds some lift and thickness to the cherry almond cookies.
    • Kosher salt ~ helps to balance the sweetness.
    • All-purpose flour ~ be sure to spoon and level the flour or use a kitchen scale for the most accurate measuring.
    • Maraschino cherries ~ sometimes called cocktail cherries. I buy my maraschino cherries at Target, but most major grocery stores will carry them. They can usually be found with the ice cream toppings or in the baking section. Although occasionally they will be with the canned fruit. You will also use some of the juice from the jar of cherries in the easy dough.
    cherry almond cookie with milk

    how to make cherry almond cookies

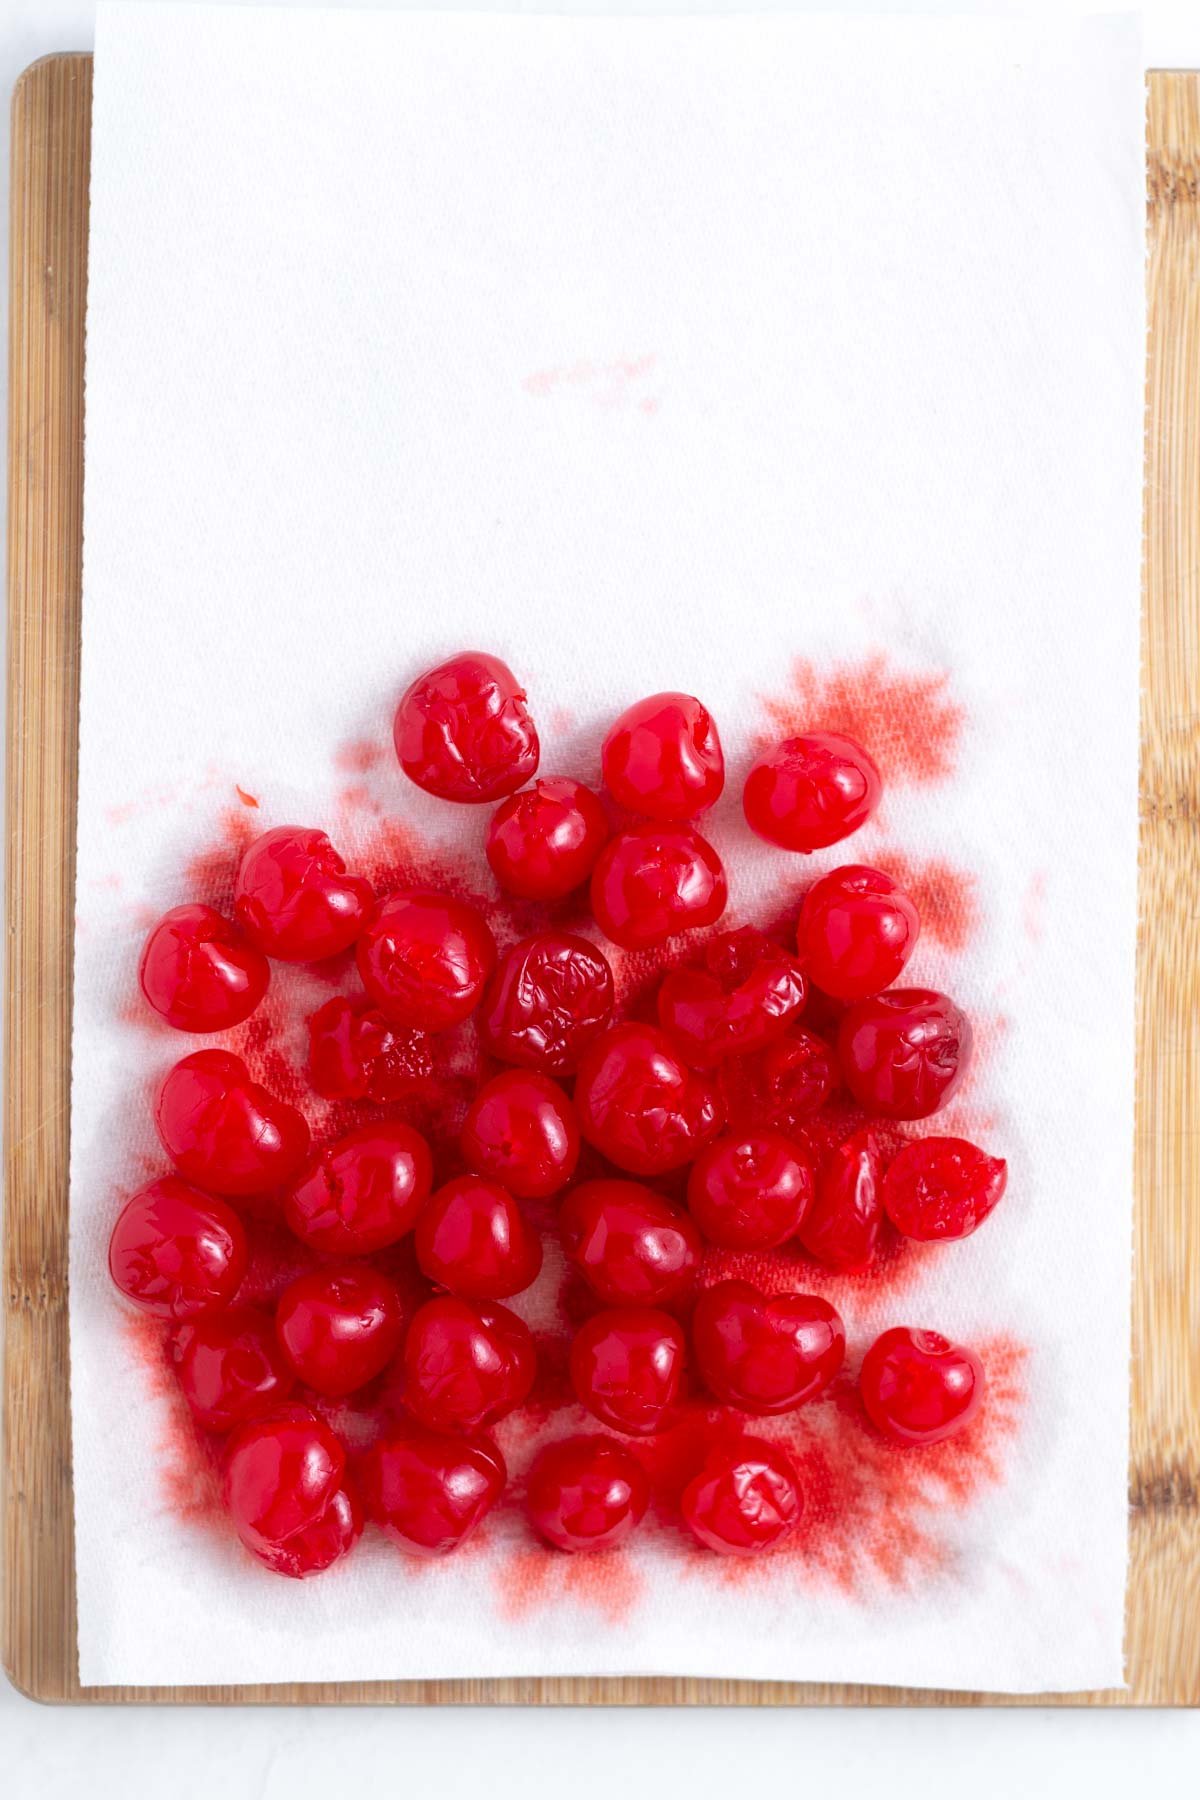
    Start by removing the maraschino cherries from their juice {remove the stems if they have them} and place on a layer or two of paper towels.

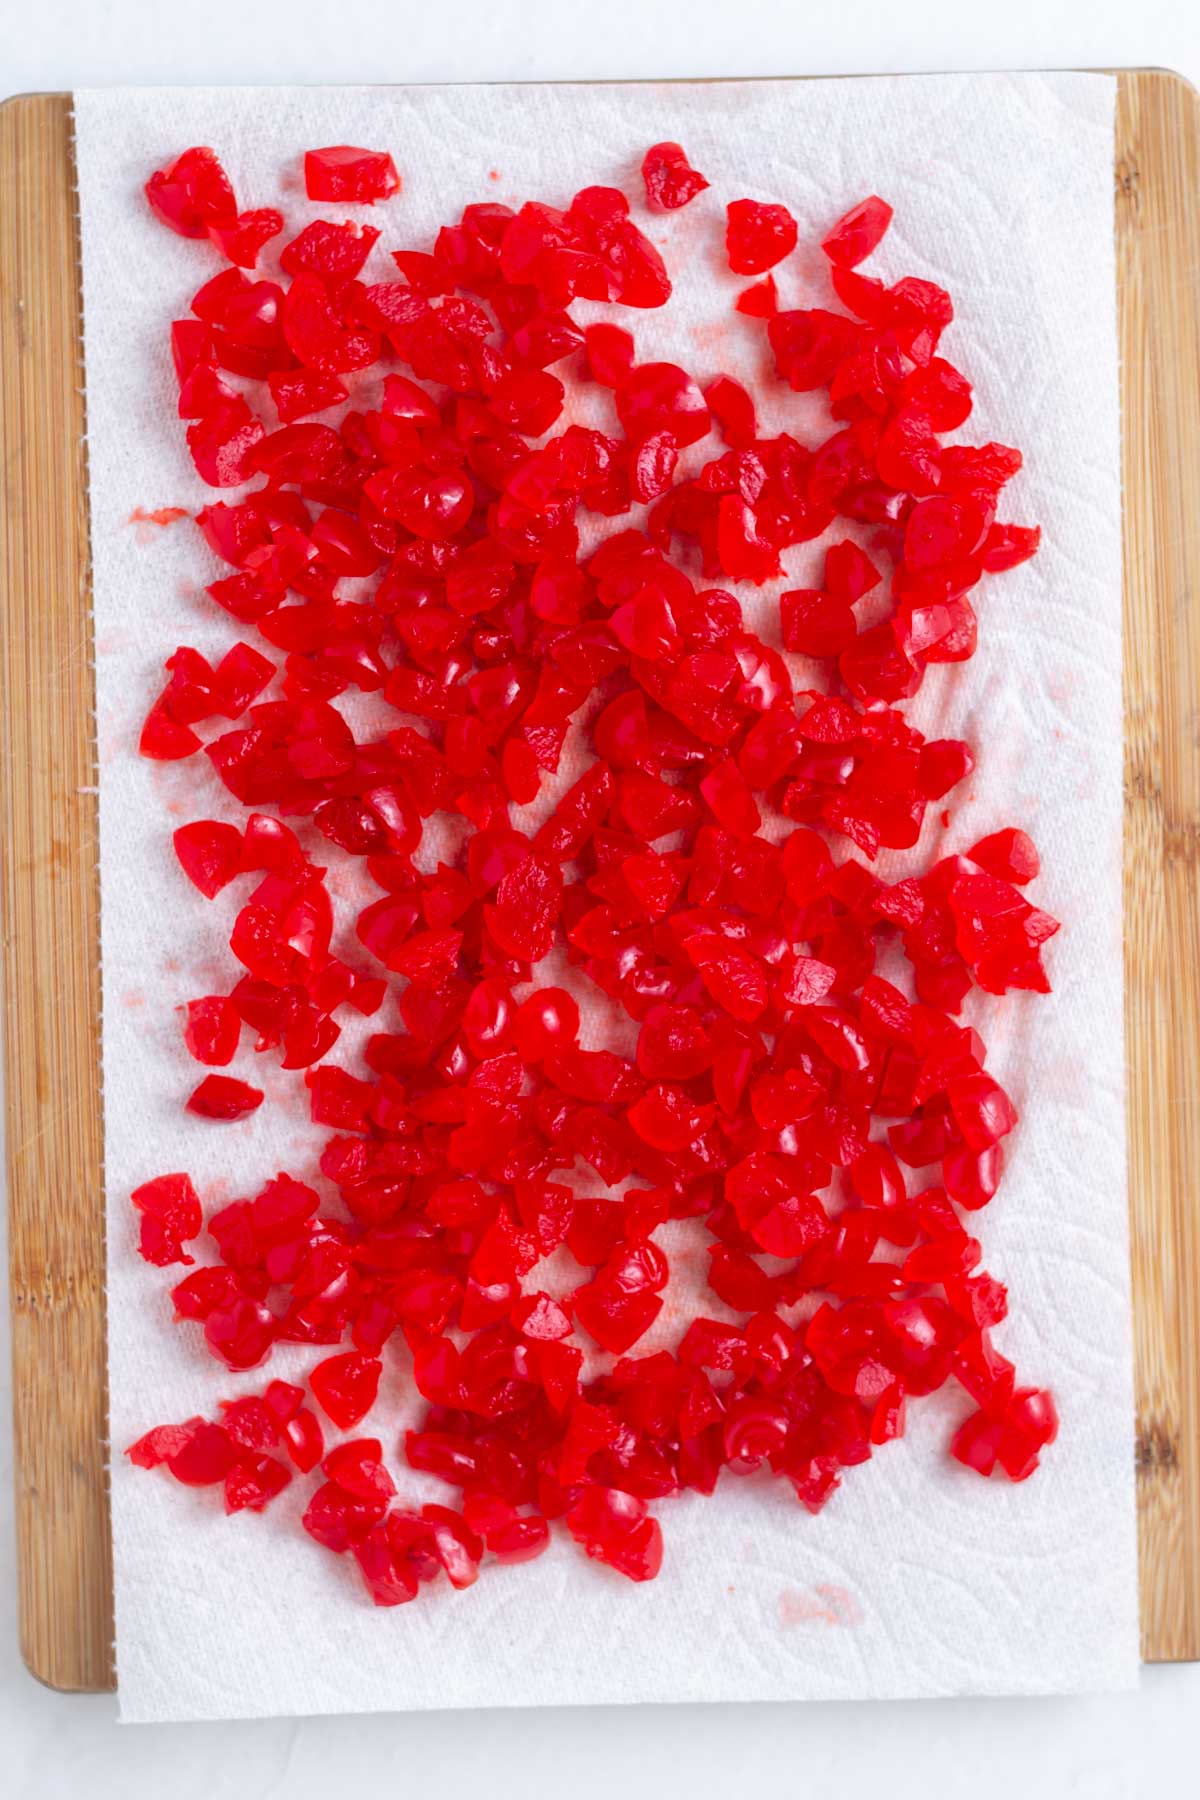
    Then slice each cherry in half and then each half into 6 pieces {giving you 12 small pieces per cherry}. Move the sliced cherries onto another paper towel. Once all the cherries are in small pieces, blot them dry with another paper towel and set aside while you make the cookie dough.

    Maraschino cherries on a paper towel lined cutting board
    Remove any stems from the maraschino cherries and pat dry on paper towels.
    Chopped maraschino cherries on a paper towel lined cutting board.
    Chop each maraschino cherry into 12 small pieces before patting most of the moisture out.

    Preheat oven to 350°F and prepare two sheet pans with parchment paper or silicone baking mats and set aside.

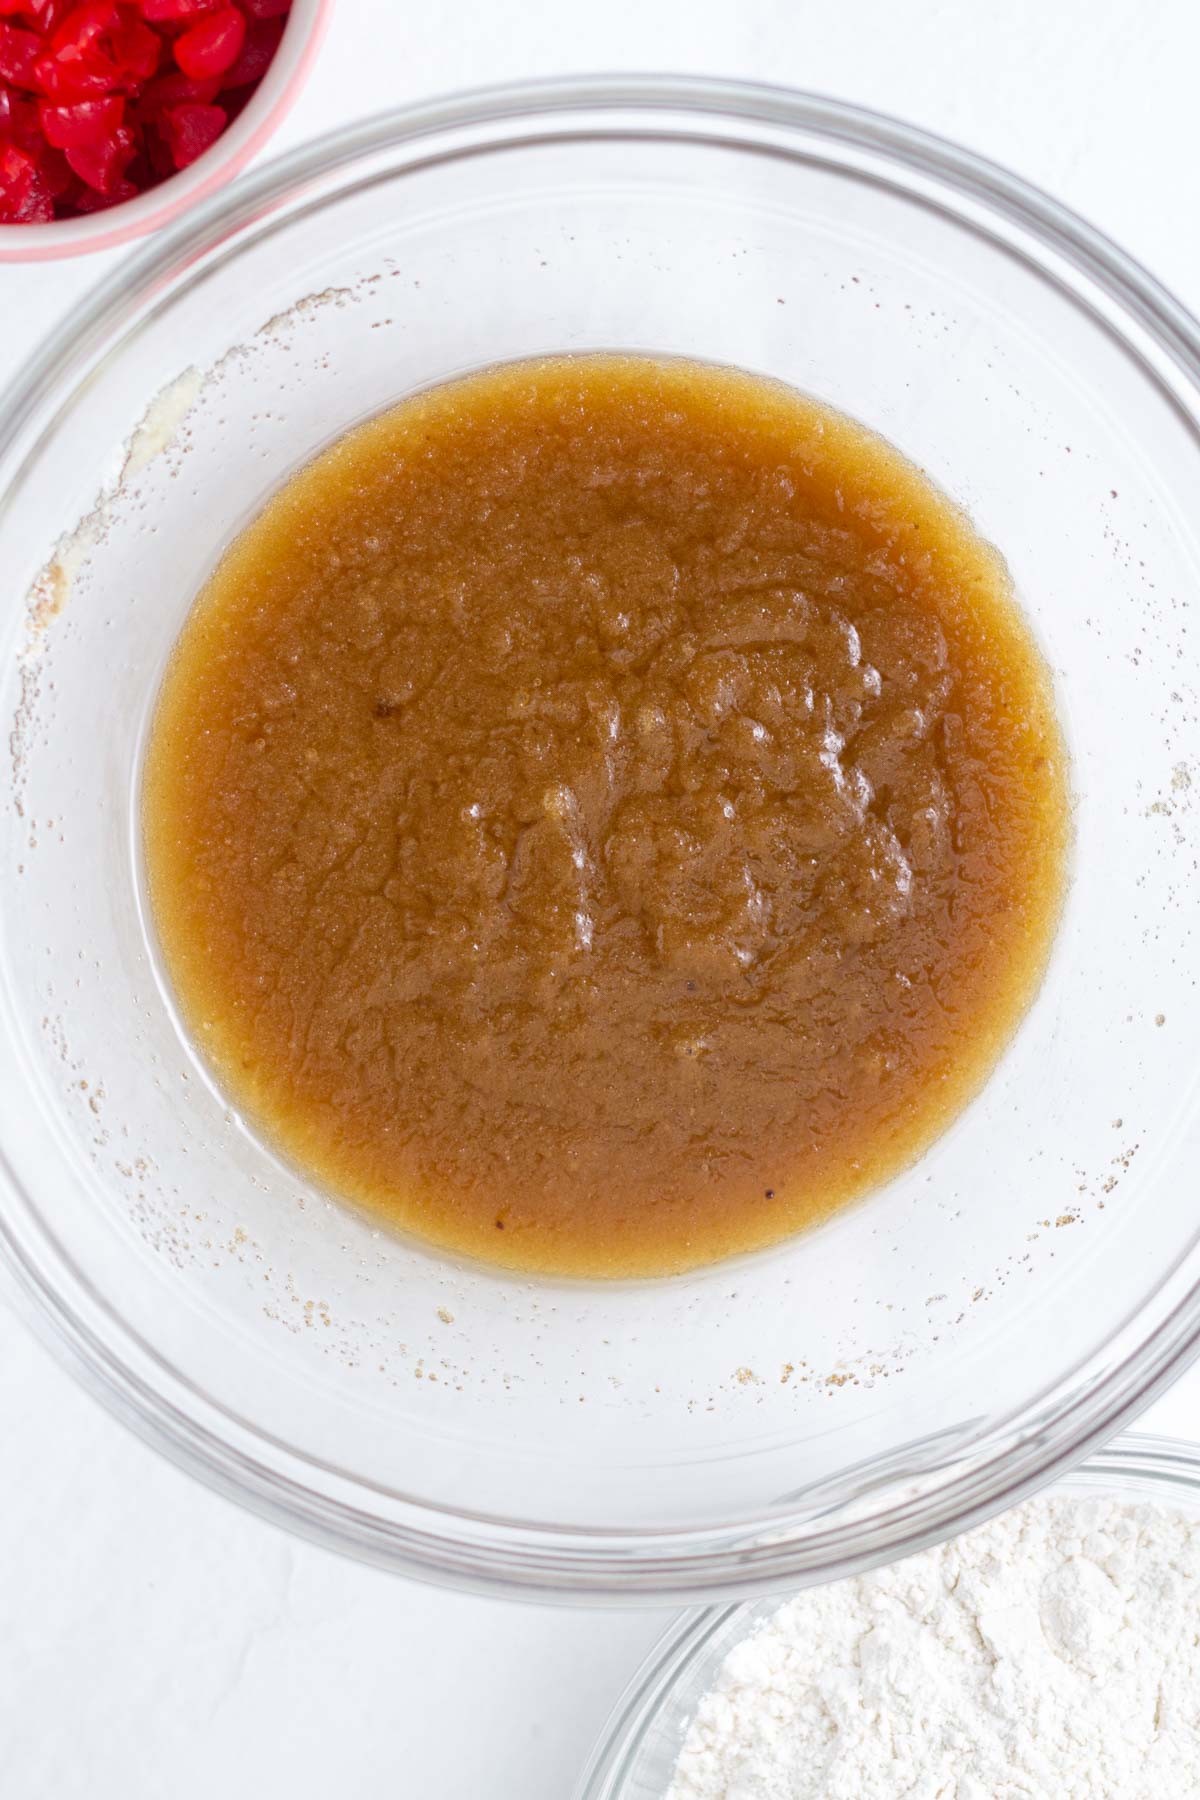
    In a medium to large bowl, melt the butter. Then add both sugars and whisk until fully incorporated {first photo below}.

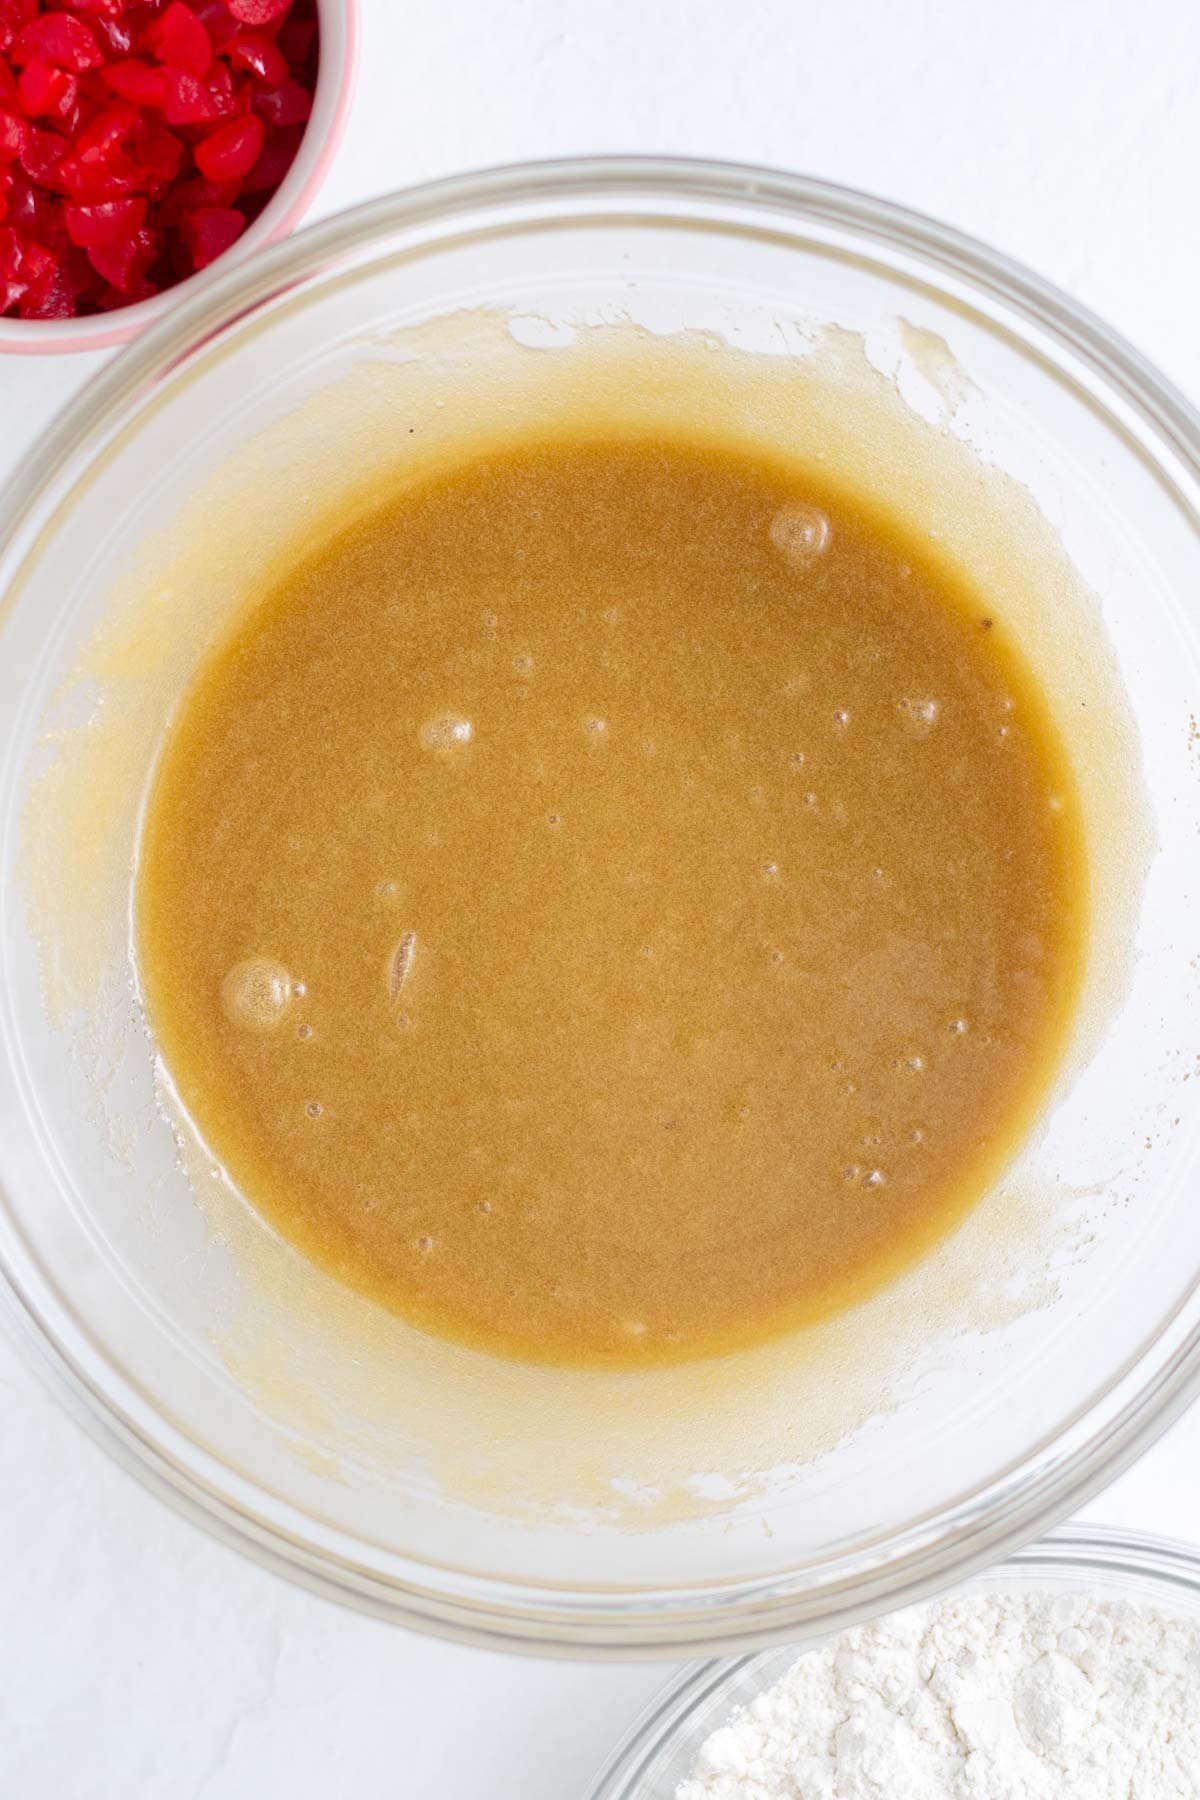
    Next add the egg, almond extract, cherry juice and vinegar and whisk until the mixture is combined {second photo below}.

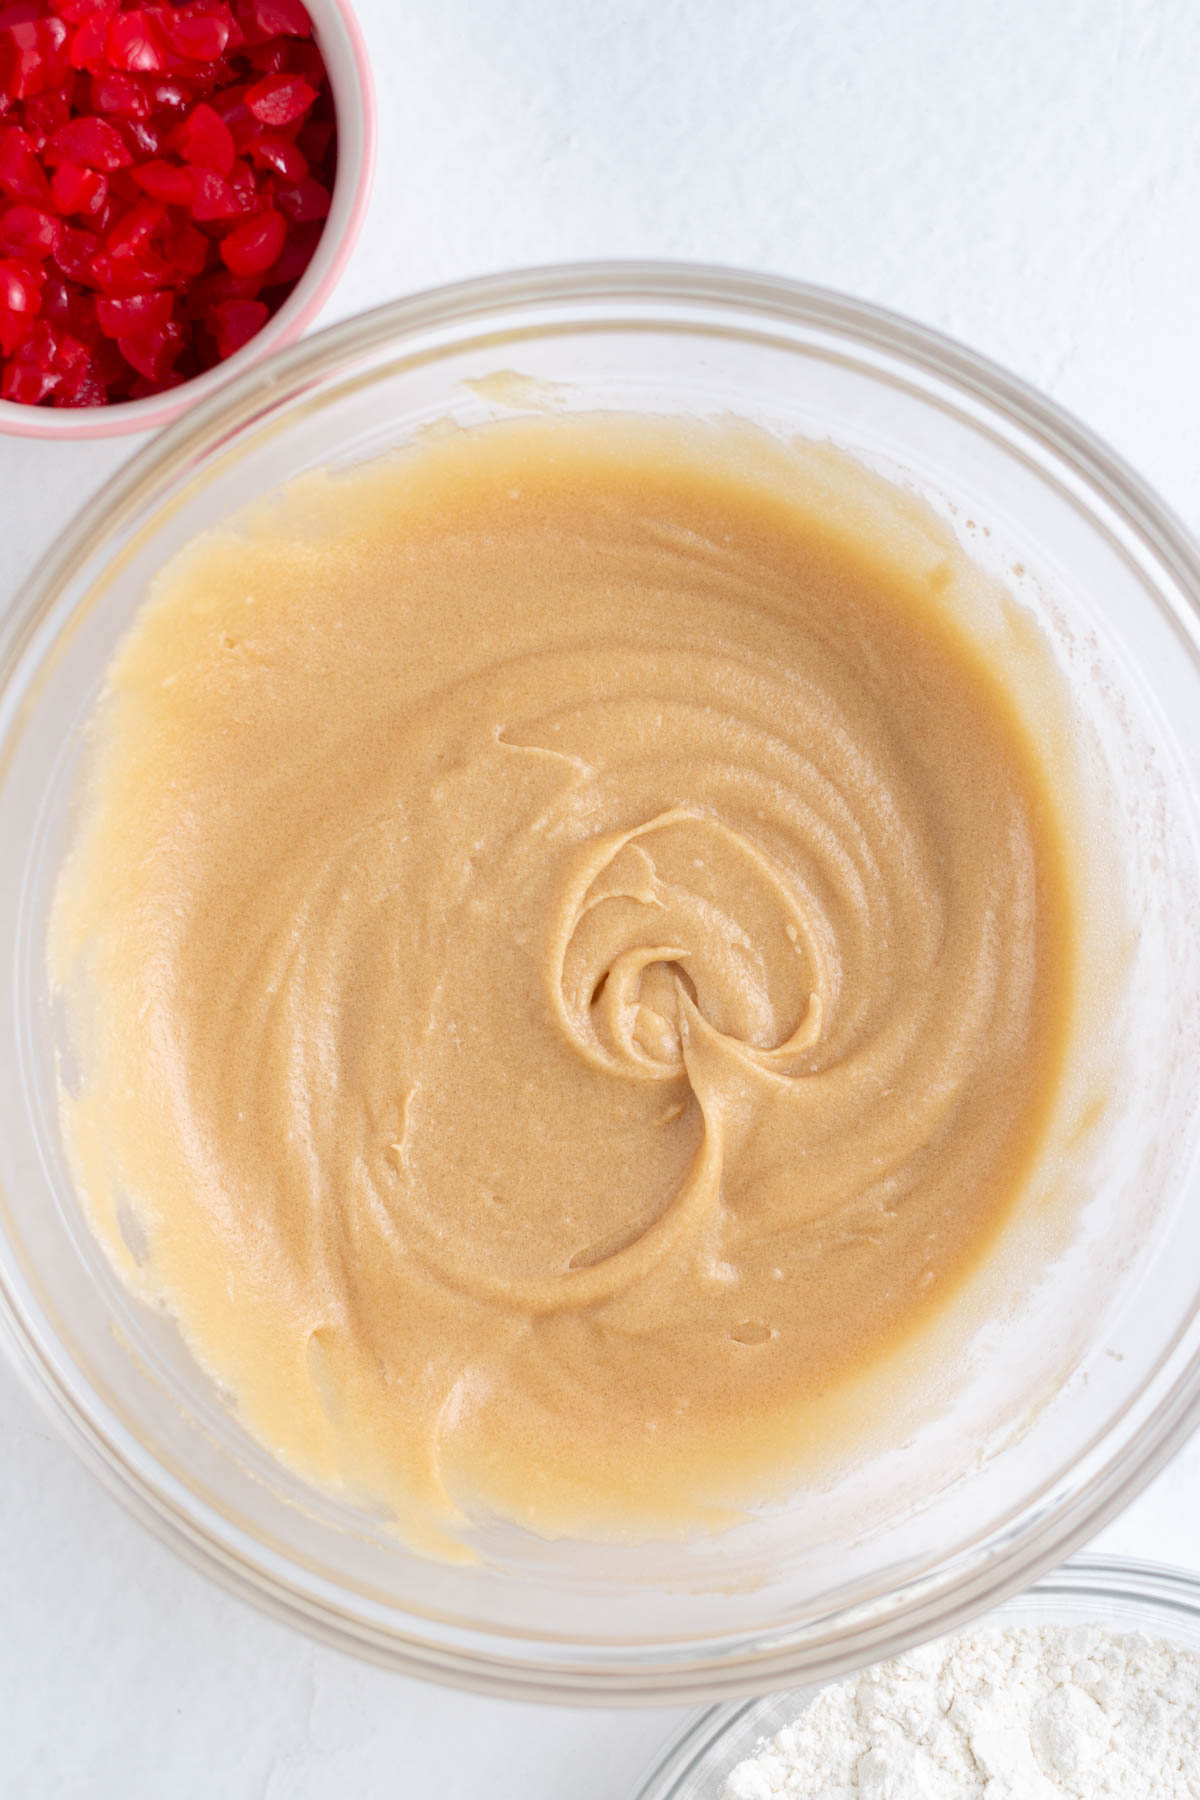
    Sprinkle the baking soda and kosher salt over the mixture and stir well {third photo below}.

    Melted butter mixed together with white and brown sugar
    The melted butter, granulated sugar and brown sugar mixed together.
    Wet cherry almond cookies ingredients mixed in a bowl.
    Cookie dough after the egg, almond extract, cherry juice and vinegar have been added.
    Wet cookie ingredients mixed in a bowl
    The cookie dough after the baking soda and kosher salt has been mixed in.

    Then add the flour and stir until just a little bit of flour remains showing.

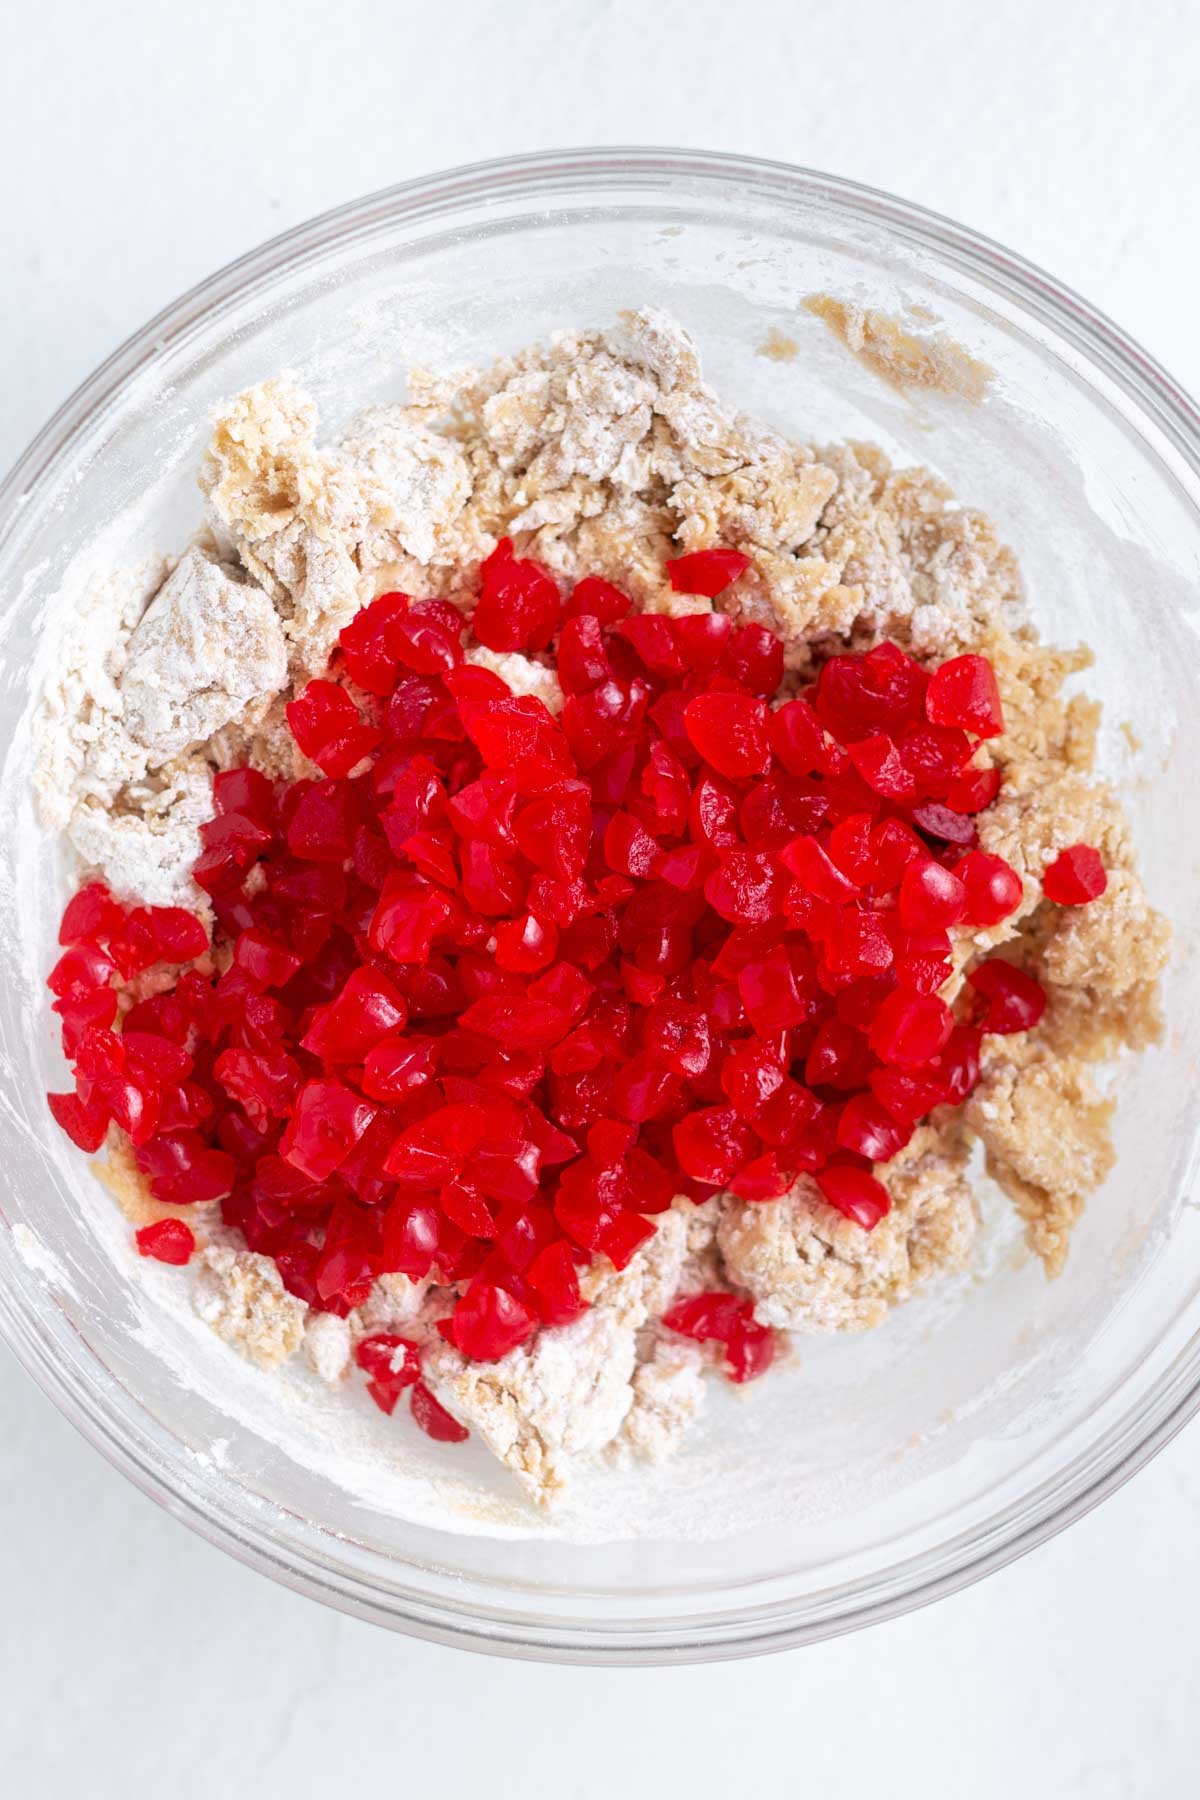
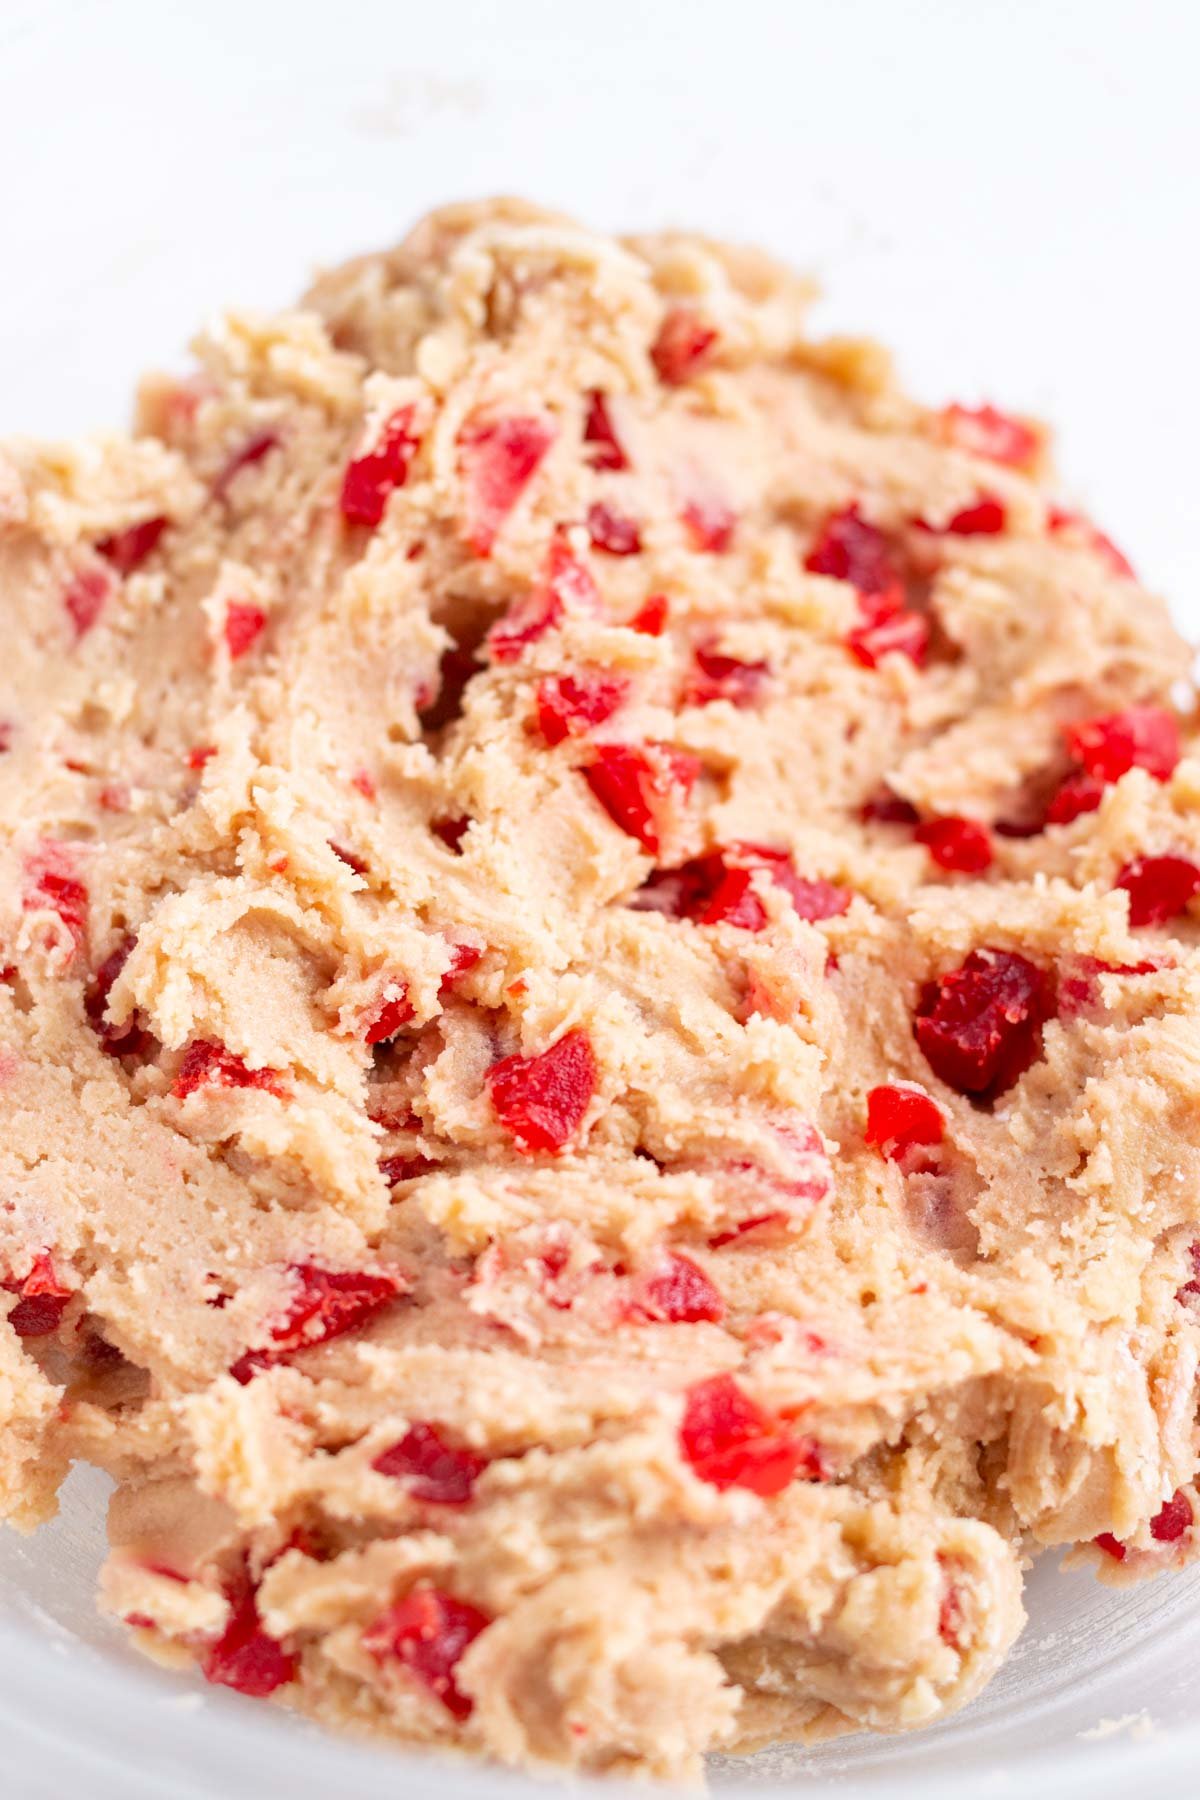
    Fold in the chopped and dried maraschino cherries.

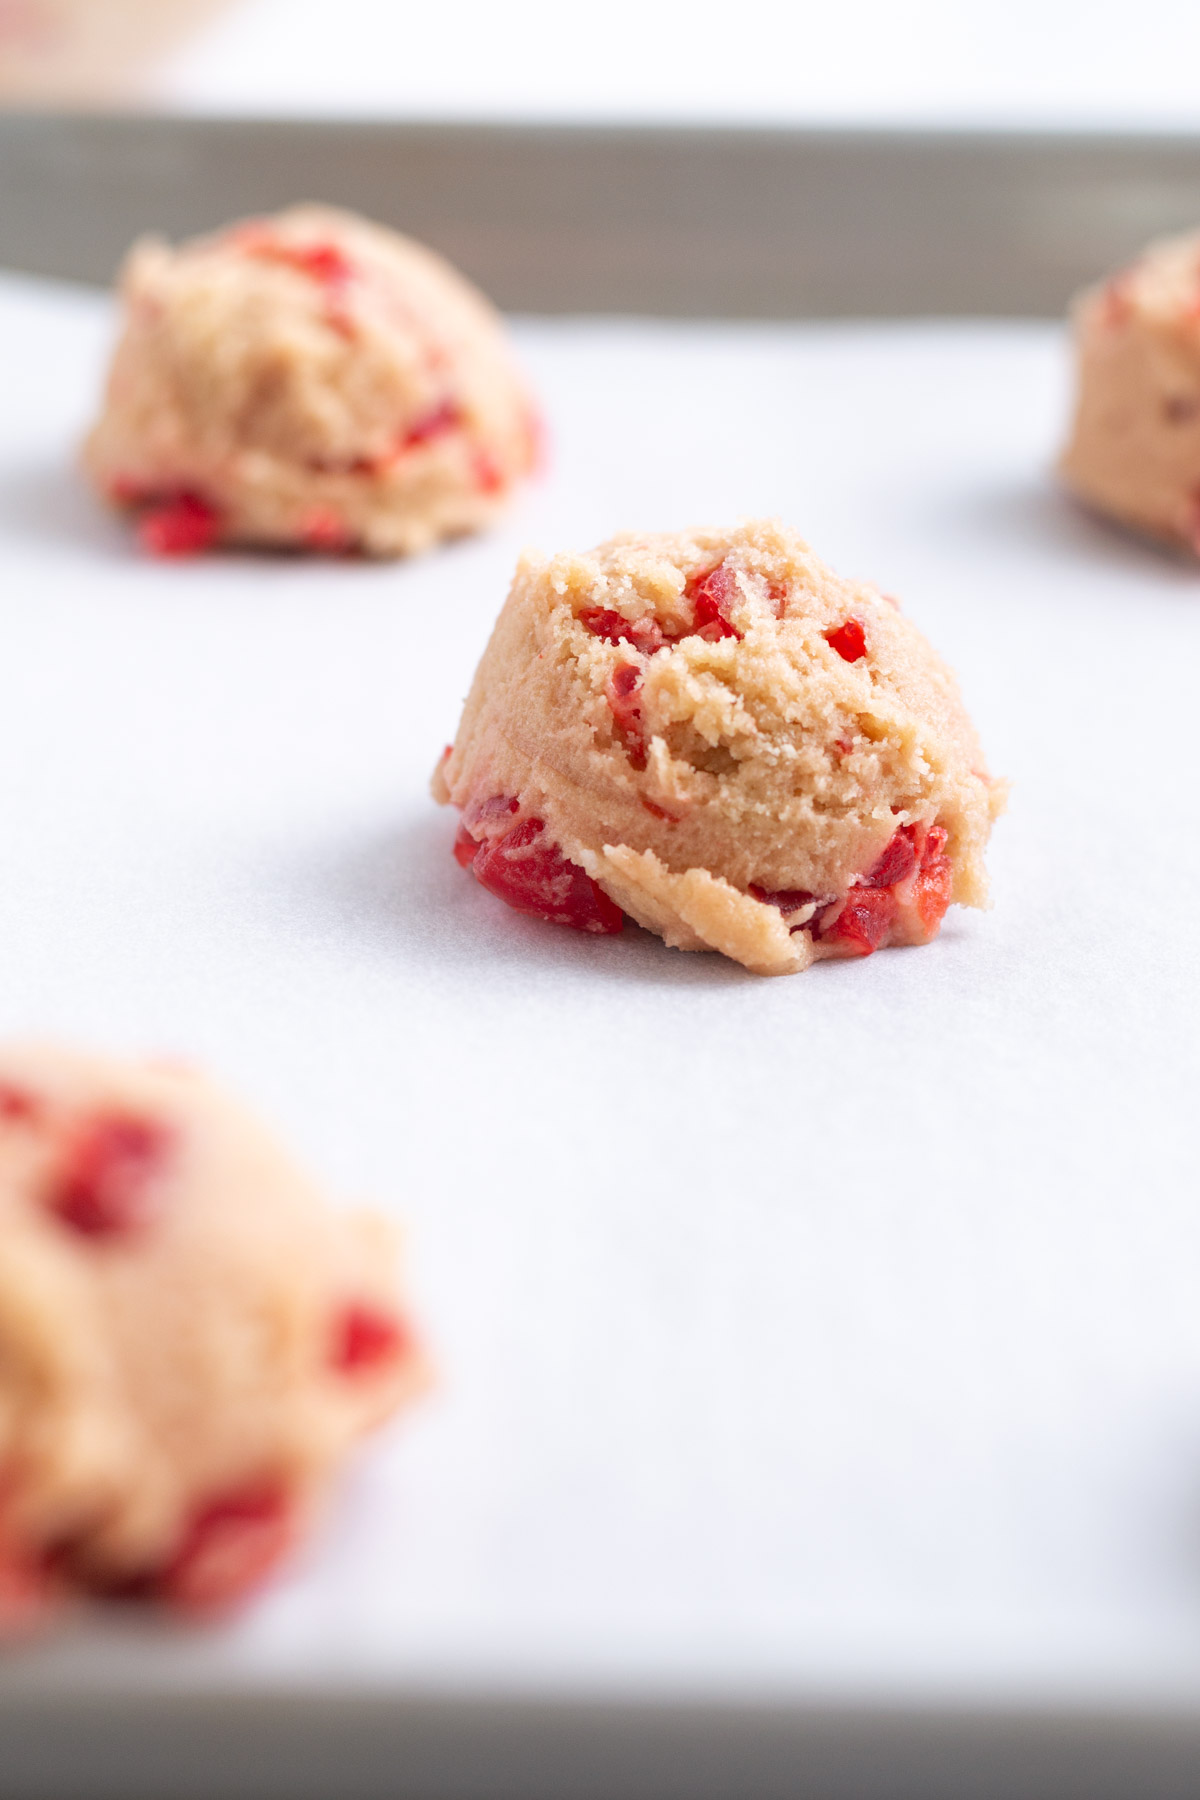
    Use about 2 tablespoons of dough per cookie {I like using a size 30 scoop} and place the dough onto the prepared baking sheets, spacing them about 2 inches apart.

    maraschino cherries being added to cookie dough
    Add the chopped and dried maraschino cherries to cookie dough with some flour still showing.
    cookie dough in a bowl
    The cookie dough once the maraschino cherries have been added.
    cookie dough on parchment lined baking pan
    I prefer to use a cookie scoop for uniform size cookies.

    Bake the cookies for 10-12 minutes, until the edges are set. Allow the cookies to rest on the pan 2 minutes, then remove to a wire rack to cool completely. If the cookies haven’t flattened as much as you’d like, bang the pan on the counter once or twice and use a large round cutter to “scoot” the cookies into a perfectly round shape, if desired.

    tips for soft and chewy cookies

    • Prepare the cherries first as you want most of the moisture removed from them. See above for tips on drying the cherries.
    • Work gently once you add in the maraschino cherries so you don't overwork the cookie dough.
    • Use a cookie scoop for uniform cookies. A size 30 scoop is my favorite!
    • Be careful not to over bake the cherry almond cookies. To achieve the soft texture, you want them slightly under baked in the center. They will continue to bake as they cool.
    • If the cookies haven’t flattened as much as you’d like, drop the pan on the stovetop or counter a few times when the pan is hot from the oven.
    • For that bakery style cookie look, "cookie scoot" when the cookies are hot out of the oven. Use a round cookie or biscuit cutter that is a little larger than your baked cookies and scoot it around the edges of the hot cookies while still hot on the baking pan. This smooshes in any unruly edges and creates perfectly round cookies. {I use this biscuit cutter set all the time!}
    pile of cookies with a glass of milk

    frequently asked questions

    can I use almond flour?

    Yes, but in combination with all-purpose flour. Use 1 ¼ cups + 2 tablespoons all-purpose flour {172g} and ½ cup almond flour {56g}. This is the same combo I use in my butterscotch pretzel cookies.

    can I use fresh cherries?

    This drop cookie recipe was developed for maraschino cherries, which taste very different from fresh cherries. I suspect you could prepare fresh cherries the same way and add them, but the flavor of the cookies won't be the same. Please let me know if you try it!

    would white chocolate work in this recipe?

    The maraschino cherries bring a lot of sweetness to this cookie! As much as I love white chocolate, I think it would make the cookies too sweet. But chocolate would be delicious; add ½ cup of chocolate chips with the maraschino cherries.

    how to store

    Store cherry almond cookies in an airtight container at room temperature for 4-5 days.

    The cookies also freeze well for up to three months; allow them to cool completely, then store in an airtight container.

    stack of cookies with milk

    Remember to snap a picture and tag me on Instagram if you make these Cherry Almond Cookies. It warms my heart to see you bring these recipes to life! Thank you for being here and happy baking!

    more no chill cookie recipes

    • Sprinkle Cookies
    • White Chocolate Raspberry Cookies
    • Lemon Blueberry Cookies
    • German Chocolate Cookies
    • Malted Chocolate Chip Cookies

    If you make this recipe {or any recipe!} from two sugar bugs please come back and leave a review and a ⭐️⭐️⭐️⭐️⭐️ star rating.  I read every comment, and I LOVE hearing from you!

    Yield: 18 cookies

    Cherry Almond Cookies {No Chill}

    cherry almond cookies with a cup of maraschino cherries

    Soft, chewy and chock full of cherries and almond. You will love this NO CHILL bakery style cookie recipe because the quick and easy dough comes together with maraschino cherries and melted butter.

    Prep Time 20 minutes
    Bake Time 12 minutes
    Total Time 32 minutes

    Ingredients

    • 1 - 12 ounce jar maraschino cherries*, diced small and patted dry (340g)
    • ½ cup unsalted butter, melted (113g)
    • ¾ cup granulated sugar (150g)
    • ¼ cup brown sugar (50g)
    • 1 large egg
    • 1 teaspoon pure almond extract
    • 2 teaspoons maraschino cherry juice
    • 1 teaspoon vinegar**
    • ½ teaspoon baking soda
    • ½ teaspoon kosher salt
    • 1 ¾ cups all-purpose flour (220g)

    Instructions

    1. Remove the maraschino cherries* from their juice (remove the stems if they have them) and place on a layer or two of paper towels. Then slice each cherry in half and then each half into 6 pieces (giving you 12 small pieces per cherry). Move the sliced cherries onto another paper towel. Once all the cherries are in small pieces, blot them dry with another paper towel and set aside.
    2. Preheat oven to 350°F and prepare two sheet pans with parchment paper or a silicone baking mat and set aside.
    3. In a medium to large bowl, melt the butter (½ cup/113g). Add both sugars (¾ cup/150g granulated and ¼ cup/50g brown) and whisk until fully incorporated.
    4. Add the egg (1 large), almond extract (1 teaspoon), cherry juice (2 teaspoons) and vinegar*(1 teaspoon). Whisk until the mixture is combined and smooth.
    5. Sprinkle the baking soda (½ teaspoon) and kosher salt (½ teaspoon) over the mixture and stir well. Then add the flour (1 ¾ cups/220g) and stir until just a little bit of flour remain. Fold in the chopped and dried maraschino cherries.
    6. Use about 2 tablespoons of dough per cookie (I like using a size 30 scoop) and place the dough onto the prepared baking sheets, spacing them about 2 inches apart. You should get about 18 cookies.
    7. Bake the cookies for 10-12 minutes, until the edges are set. Allow the cookies to rest on the pan 2 minutes, then remove to a wire rack to cool completely. If the cookies haven’t flattened as much as you’d like, bang the pan on the counter once or twice and use a large round cutter to “scoot” the cookies into a perfectly round shape, if desired.

    Notes

    Store cookies in an airtight container at room temperature for 4-5 days. The cookies also freeze well for up to three months; allow them to cool completely, then store in an airtight container.

    I have not tested freezing this cookie dough prior to baking. I suspect it would work fine! Once you have scooped the cookie dough into balls, chill them until firm. Then place in an airtight container or zip-top bag and place in the freezer. When ready to bake the cookies, place the dough balls on a baking sheet while the oven preheats then bake as directed.

    If you only have salted butter, eliminate the kosher salt. If you only have table salt, start with half the amount and adjust as needed.

    *You are using the cherries and 2 teaspoons of juice from a 12 ounce jar. If measuring the cherries alone, they are about 185g {give or take} before patting them dry.

    **I’ve tested the recipe with both white vinegar and apple cider vinegar, they work interchangeably.

    If you want to use some almond flour in the cookie dough ~ Use 1 ¼ cups + 2 tablespoons all-purpose flour (172g) and ½ cup almond flour (56g)

    Nutrition Information:

    Yield:

    18

    Serving Size:

    1

    Amount Per Serving: Calories: 175Total Fat: 6gSaturated Fat: 3gTrans Fat: 0gUnsaturated Fat: 2gCholesterol: 24mgSodium: 84mgCarbohydrates: 30gFiber: 1gSugar: 20gProtein: 2g

    The nutrition information is an estimate only and may not be entirely accurate.

    Did you make this recipe?

    Please make my day and PIN to Pinterest and share a photo on Instagram ~ making sure to tag @twosugarbugs! THANK YOU!!

    © Tasia
    Cuisine: American / Category: Cookies

    Chocolate Cut Out Cookies

    chocolate cut out cookies dipped in chocolate and decorated with buttercream

    EASY recipe for chocolate cut out cookies! Soft, thick and chewy chocolate sugar cookies are made with cocoa powder and perfect for decorating with buttercream or being dipped in chocolate.

    chocolate cut out sugar cookies with buttercream swirls

    Disclosure | This post may contain affiliate links. As an Amazon Associate I earn from qualifying purchases.

    Chocolate cut out cookies are my go to recipe for chocolate sugar cookies. They are the best soft, chewy and chocolatey cookies!

    This cookie recipe is a variation of my classic sugar cookies, but with cocoa powder and a little less flour. We make them for Christmas, Easter, Valentine's Day, Halloween and really any time we are craving chocolate cookies.

    If you are looking for chocolate sugar cookies with sprinkles, try this recipe. You can also try my espresso flavored coffee sugar cookies, lemon sugar cookies and white chocolate cut out cookies.

    This post was originally posted in April 2019 and has been updated with new photos and helpful information. The recipe has been modified to use one less egg.

    why you will love this chocolate sugar cookie recipe

    • An easy cookie dough that comes together in minutes!
    • The chocolate cookies are no spread, so they actually look like your cookie cutters.
    • Perfect to decorate for the holidays, but also delicious dipped in chocolate!
    stack of cookies with a glass of milk

    ingredients and substitutions

    Please scroll to the printable recipe card at the end of this post for the full list of ingredients and baking directions.

    ingredients for chocolate cut out cookies
    • All-purpose flour ~ if you don't have a scale for measuring {this is the scale I love and use daily in my kitchen}, make sure you use the scoop and level method so you don't end up with too much flour. If you need gluten free cookies, a 1 to 1 gluten free flour can be substituted.
    • Baking powder ~ this recipe calls for aluminum free baking powder. For chocolate sugar cookies that taste good, I highly recommend making sure your baking powder is aluminum free. I use Trader Joe's brand or Rumford.
    • Cocoa powder ~ unsweetened natural cocoa powder is what I use, but an equal amount of Dutch process cocoa can be used for a deeper chocolate flavor. Scharffen Berger is my go to brand, but I also use Hershey's from time to time.
    • Unsalted butter ~ you want the butter room temperature so pull it out 1-2 hours before making the dough. I prefer using unsalted butter so I can control the saltiness of the finished cookies.
    • Kosher salt ~ enhances the flavor of the chocolate sugar cookies. If you only have table salt, use half the amount.
    • Granulated sugar ~ brings the sweetness and classic sugar cookie taste without being overly sweet. It also provides structure.
    • Egg ~ one large egg is needed to bind the cookie dough together. {The original recipe used two eggs, but I've found one works fine too}. The egg should be room temperature, so pull it out when you pull out the butter.
    • Vanilla ~ pure vanilla extract brings balance and flavor.

    how to make the easy chocolate cookie dough

    Start by combining flour, unsweetened cocoa powder and aluminum free baking powder in a medium bowl with a whisk. Set aside.

    Using a hand mixer or stand mixer with the paddle attachment, beat the butter and kosher salt on medium speed until combined. Scrape up and down the sides of the bowl.

    Then add in the sugar and beat until smooth. Beat in the egg and vanilla and mix until well combined.

    dry ingredients in a bowl
    Whisk the dry ingredients together before adding them to the wet ingredients.
    creamed sugar and butter
    Creamed butter, kosher salt and sugar.
    wet ingredients creamed together for chocolate cut out cookies
    The wet ingredients creamed together before adding the dry.

    Then with the mixer on low, add the flour mixture a little at a time, occasionally stopping to scrape your bowl. The chocolate cut out cookie dough should form a ball around the paddle when the mixing is finished. The dough should be soft, but not sticky.

    Wrap the dough ball in plastic wrap and press into a 1 inch thick disk. Chill for a minimum of 30 minutes {and up to three days} before rolling. If the dough has chilled for more than a couple of hours, let it sit on the counter for 20 minutes or so until you can roll it out without it cracking.

    chocolate cut out cookie dough on mixer paddle
    The cookie dough will ball up on the mixer paddle once it's done mixing.
    cookie dough wrapped and flattened into a disk
    Wrap the cookie dough and press into about a 1 inch disk and chill at least 30 minutes.

    how do you know when sugar cookies are done?

    You do not want to over bake these chocolate sugar cookies. About 8 minutes is all they need in a 375°F oven. Yes, that quick. The cookies will appear slightly puffy when they are done.

    Let the cookies rest on the baking pan for 2 minutes before moving to a wire cooling rack to cool completely.

    chocolate cut out cookie dough on a baking sheet
    Roll the cookies about ¼ inch thick.
    what a baked cookie looks like coming out of the oven
    The cookies will be slightly puffy once baked.

    tips for the best chocolate cut out cookies

    • Start with room temperature butter and a room temperature egg. This usually takes 1-2 hours of sitting on the counter {depending on the temperature of your kitchen}. To test, your finger should make an indent without sinking or sliding down into the butter. The butter should not be warm to the touch or shiny or greasy.
    • Chill the dough. This cookie recipe requires a minimum of 30 minutes; I typically go somewhere between 30-60 minutes of chill time. The dough can chill for up to three days. If it is chilled longer than 1 - 2 hours, allow it to sit on the counter for 15-20 minutes to warm up before rolling out.
    • Roll the cookies ¼ inch thick. If you roll them too thin, they will not be as soft and chewy. When rolling the cookie dough, I like to treat it like pie crust and gently roll it, turning the dough after every pass of the rolling pin. This helps to prevent the dough from sticking to the counter.
    • Try not to overwork the dough. Overworked dough = tough cookies.
    • If the dough seems too warm after you've rolled and cut out the cookies, pop it in the freezer or refrigerator for 10 minutes to cool back down before baking them.
    • Make sure the cookie baking pan is cool before adding the cookies. I line mine with parchment paper or silicone baking mats.
    • Do not over bake the cookies! It takes about 8 minutes for the cookies to bake. They will appear slightly puffy on top when they are done baking. Allow them to cool on the pan for 2 minutes before moving to a wire cooking rack to cool completely.
    chocolate cut out cookies dipped in chocolate

    trouble shooting for chocolate sugar cookies

    Help, my dough is crumbly! The dough should be soft, but not sticky when it goes in for a chill. If the dough seems dry and crumbly when you press it into a ball, you likely added too much flour or overworked the dough. Add a little egg white {start with one tablespoon} and gently work it into the dough until it is soft, but not sticky.

    Help, my dough is super hard after chilling! If the chocolate cut out dough chills for more than an hour or two it will need time to warm up on the counter before rolling. Let it sit out for 10-20 minutes before rolling it out.

    Help, my dough is crumbly when I try to roll it! If the cookie dough is too cold, it will crumble when you go to roll it out. Let it warm slightly on the counter for 10-20 minutes and try again.

    Help, my cookies spread when they baked! Your dough likely got too warm when you rolled it out. You can always pop the cut out dough in the freezer or refrigerator for a 10 minute chill before baking them.  {I have never had to do this, but my kitchen doesn't get overly warm most of the year}.

    Help, my cookies aren't soft after they cooled! Most likely they were over baked. This sugar cookie recipe only needs about 8 minutes in the oven. The edges should be set and the cookies will be slightly puffy in the middle when they are done. {see photo earlier in the post if you need a visual}.

    buttercream decorated chocolate cut out cookies on a tray

    frequently asked questions

    what is the best thickness for cut out cookies?

    A ¼ inch thick is the ideal thickness for chocolate sugar cookie dough. If you roll them thinner they will be more crispy and not soft and chewy.

    should sugar cookies be soft or crispy?

    Ideally sugar cookies should be soft and tender, but this is also a very subjective question and the answer will vary from person to person! These chocolate cut out sugar cookies are designed to be soft and chewy.

    what is the difference between cut out cookies and drop cookies?

    Cut out cookies are made by rolling the dough and using cookie cutters to create shapes before baking. Drop cookies are made by dropping the dough into balls onto a baking sheet.

    what is the difference between natural cocoa powder and Dutch process?

    Dutch process cocoa and natural cocoa powder are different in that Dutch process has been washed with an alkaline solution, which lessens it's acidity. Meaning it won't react with baking soda in the same way as natural cocoa powder.

    In this chocolate cut out cookies recipe we are using baking powder, so natural cocoa powder or Dutch process can be used interchangeably.

    can I make a small batch?

    Yes, just halve the ingredients and use the full egg.

    how to store

    Chocolate cut out cookies will stay fresh covered in an airtight container at room temperature or in the refrigerator for up to 1 week.

    They also freeze well for up to 3 months. If freezing decorated sugar cookies, chill the cookies in a single layer first. Once cold, the cookies can be stacked and frozen in an airtight container. When you take the frozen cookies out of the freezer, be sure to unstack them before they thaw or the buttercream will stick the cookies together.

    chocolate sugar cookies with buttercream swirls

    Remember to snap a picture and tag me on Instagram if you make these Chocolate Cut Out Cookies. It warms my heart to see you bring these recipes to life! Thank you for being here and happy baking!

    more recipes with cocoa powder

    • Cookie Butter Brownies
    • Peppermint Hot Cocoa Cookies
    • Shortbread Brownies
    • Almond Joy Cupcakes

    If you make this recipe {or any recipe!} from two sugar bugs please come back and leave a review and a ⭐️⭐️⭐️⭐️⭐️ star rating.  I read every comment, and I LOVE hearing from you!

    Yield: approximately 24 cookies

    Chocolate Cut Out Cookies

    chocolate cut out cookies dipped in chocolate and decorated with buttercream

    EASY recipe for chocolate cut out cookies! Soft, thick and chewy chocolate sugar cookies are made with cocoa powder and perfect for decorating with buttercream or being dipped in chocolate.

    Prep Time 10 minutes
    Bake Time 8 minutes
    Chill Time 30 minutes
    Total Time 48 minutes

    Ingredients

    • 2 ½ cups all-purpose flour (313g)
    • ¾ cup unsweetened cocoa powder (60g)
    • 2 teaspoons aluminum free baking powder
    • 1 cup unsalted butter, room temperature (226g)
    • ½ teaspoon kosher salt
    • 1 cup granulated sugar (200g)
    • 1 large egg, room temperature
    • 2 teaspoons pure vanilla extract

    Instructions

    1. In a medium bowl, combine flour (2 ½ cups/313g), unsweetened cocoa powder (¾ cup/60g) and aluminum free baking powder (2 teaspoons) with a whisk. Set aside.
    2. Using a hand mixer or a stand mixer fitted with the paddle attachment, beat the butter (1 cup/226g) and kosher salt (½ teaspoon) on medium speed until combined, about 1 minute. Scrape up and down the sides of the bowl. Add in sugar (1 cup/200g) and beat until smooth, about 1-1 ½ minutes. Beat in egg (1 large) and vanilla (2 teaspoons) and mix until well combined, about 1 minute. Scrape up and down the sides of the bowl as needed.
    3. With the mixer on low, add the flour mixture a little at a time, occasionally stopping to scrape your bowl. The dough should form a ball around the paddle when the mixing is finished. The dough should be soft, but not sticky.
    4. Wrap the dough ball in plastic wrap and press into a 1 inch thick disk. Chill for a minimum of 30 minutes (and up to three days) before rolling. If the dough has chilled for more than a couple hours, let it sit on the counter for 20 minutes or so until you can roll it out without it cracking.
    5. Preheat the oven to 375°. Prepare baking sheets with silicone baking mats or parchment paper.
    6. On lightly floured surface, roll the dough to about a ¼ inch thickness, use additional flour as needed to prevent sticking. Cut into shapes with cookie cutters. Re-roll the remaining dough and continue cutting until all is used.
    7. Arrange cookies on baking sheets about 1 inch apart. If the dough has gotten warm while rolling and cutting, pop it in the freezer for about 10 minutes before baking to help prevent them from spreading.
    8. Bake one sheet at a time in the middle of the oven, about 7-8 minutes, until puffy. Allow the cookies to rest for 2 minutes on the pan and then transfer to a wire rack to cool completely.
    9. Decorate with buttercream or glaze, if desired.

    Notes

    The dough should be soft, but not sticky when it goes in for a chill. If the dough seems dry and crumbly when you press it into a ball, you likely added too much flour or overworked the dough. Add a little egg white (start with 1 tablespoon) and gently work it into the dough until it is soft, but not sticky. Then wrap and chill.

    Yield of cookies will depend on the size of your cookie cutter.

    If the dough chills for longer than 1-2 hours, allow it to warm up on the counter for 20 minutes or so before rolling it out. If it's breaking apart, it is too cold.

    If the dough gets very soft during the rolling and cutting process, place the cut out cookies in the refrigerator or freezer to firm up for 10 minutes before baking.

    I like to freeze the cookies once they have completely cooled, I think it adds to the softness of the cookies. I typically bake the cookies at least a day prior to decorating them (or bake in the evening and freeze overnight). You can also bake the cookies and freeze them for up to 2-3 months before decorating.

    If you prefer to dip the cookies in chocolate: melt 4 ounces/112g of chocolate and dip half the cookie. Place on a parchment lined plate or baking pan and allow the chocolate to harden.

    Cookies will stay fresh covered in an airtight container at room temperature or in the refrigerator for up to 1 week. They also freeze well for up to 3 months. If freezing decorated cookies, chill the cookies in a single layer. The cookies can then be stacked and frozen in an airtight container. When you take the frozen cookies out of the freezer, be sure to unstack them before they thaw or the buttercream will stick the cookies together.

    Nutrition Information:

    Yield:

    24

    Serving Size:

    1

    Amount Per Serving: Calories: 155Total Fat: 8gSaturated Fat: 5gTrans Fat: 0gUnsaturated Fat: 3gCholesterol: 28mgSodium: 71mgCarbohydrates: 19gFiber: 1gSugar: 8gProtein: 2g

    The nutrition information is an estimate only and may not be entirely accurate.

    Did you make this recipe?

    Please make my day and PIN to Pinterest and share a photo on Instagram ~ making sure to tag @twosugarbugs! THANK YOU!!

    © Tasia
    Cuisine: American / Category: Cookies

    Recipe shared with Meal Plan Monday - Holiday Treats and Miz Helen's Holiday Cookie Exchange

    Strawberry Filled Cupcakes

    Inside look at a strawberry filled cupcakes.

    Strawberry filled cupcakes are perfect for any celebration! The best fluffy and moist vanilla cupcakes are stuffed with a fresh strawberry filling. Top them with a strawberry frosting, lemon buttercream frosting or with cream cheese frosting ~ you choose your favorite!

    Strawberry filled cupcakes with fresh strawberries.

    Disclosure | This post may contain affiliate links. As an Amazon Associate I earn from qualifying purchases.

    Fresh strawberry filled cupcakes are a perfect treat! Whether it be for a birthday, Easter, a summer picnic or just because; they are sure to become a favorite.

    The vanilla cupcakes are moist and fluffy and super easy to make. I know you are busy bakers {like me}, so the strawberry filling couldn't be easier either.

    This homemade strawberry filling would be perfect for strawberry lemonade cupcakes {use this lemon cupcake recipe} or in peanut butter muffins for strawberry filled muffins.

    why you will love these easy stuffed cupcakes

    • The cupcake recipe is quick and easy. No mixer required!
    • Fresh strawberries shine in the homemade filling.
    • Customize them with your favorite buttercream. They are amazing with cream cheese frosting, lemon buttercream frosting, simple vanilla or a berry Swiss meringue buttercream.
    The inside of a strawberry filled cupcake.

    ingredients and substitutions

    Please scroll to the printable recipe card at the end of this post for the full list of ingredients and baking directions.

    ingredients for strawberry filled cupcakes
    • All-purpose flour ~ adds structure. If not using a kitchen scale, be sure to use the spoon and level method.
    • Baking powder and baking soda ~ add some height to the cupcakes.
    • Kosher salt ~ helps to balance the flavors.
    • Granulated sugar ~ brings the sweetness.
    • Eggs ~ 2 large eggs needed. Having the eggs at room temperature will provide the best results.
    • Sour cream ~ brings extra moisture by working to shorten the gluten strands in the flour, which results in a tender and soft cupcake. For the best cupcakes, use full fat sour cream and bring it to room temperature.
    • Vanilla ~ adds a nice burst of flavor to both the cupcake and strawberry filling.
    • Milk ~ brings moisture to the baked cupcakes; I use 1%, but 2% or whole milk also work. Having the milk at room temperature will give you the best cupcakes.
    • Unsalted butter ~ brings richness to the cupcakes. The butter gets melted and slightly cooled before adding to the cupcake ingredients.
    • Strawberries ~ fresh strawberries are needed for the filling. You need about 4 - 5 large strawberries. Once you remove the tops and dice them small, you'll have about a half cup of diced strawberries.

    To quickly bring the sour cream and milk to room temperature you can do quick {10-15 second} bursts in the microwave. Stir in between each burst and be careful NOT to heat them up, as this can change their structure.

    Pro tip ~ to quickly bring eggs to room temperature, place them in a bowl of warm tap water for 5-10 minutes.

    Strawberry filled cupcakes; one with the liner pulled off to show texture.

    how to make moist strawberry filled cupcakes

    Start by melting the butter and set aside to cool slightly. Then preheat the oven to 350°F and prepare a 12 count muffin pan with cupcake liners. Set aside.

    Now in a medium bowl, whisk together the all-purpose flour, baking powder, baking soda and kosher salt. Set aside.

    In a large bowl, whisk the granulated sugar, eggs, vanilla and sour cream until well combined.

    Then whisk in the milk and once combined whisk in the melted and cooled butter.

    Add the flour mixture to the wet ingredients and mix until just fully combined. The batter is on the thick side.

    eggs, sour cream, sugar and vanilla in a bowl
    Start by whisking the sugar, eggs, vanilla and sour cream.
    wet ingredients mixed in a bowl
    The wet ingredients after everything has been whisked together.
    vanilla cupcake batter in a bowl
    The finished cupcake batter is on the thick side.

    Divide the batter evenly between the 12 cupcake liners. They will be about ⅔ full.

    Bake for 16-20 minutes or until a toothpick inserted in the center comes out mostly clean. Allow to cool completely before filling with the fresh strawberry filling.

    vanilla cupcake batter in cupcake liners
    Fill the cupcake liners about ⅔ of the way full.
    the vanilla cupcakes in a muffin tin after they have baked.
    The moist vanilla cupcakes have a slight dome to them once they have baked.

    how to fill cupcakes

    Start by removing the tops and dice the strawberries into small pieces {remember these are going inside the cupcake and you want them to be nice size to bite into}. You will need 4 - 5 large fresh strawberries.

    Then in a small bowl mix the strawberries with granulated sugar {1 teaspoon - or more if your berries need a bit more sweetness} and vanilla and set aside.

    Fresh strawberries chopped small for the cupcake filling.
    Remember the fresh strawberries are going inside the cupcakes, so chop them small!
    chopped strawberries, sugar and vanilla in a bowl
    Add just a little vanilla and sugar to the chopped strawberries {you can adjust this based on the sweetness of your berries}.

    To fill the cupcakes, use a paring knife, apple corer or large star piping tip to remove some of the center of each cooled cupcake. Make sure you don't go through the bottom of the cupcake!

    Then fill each cavity with the fresh strawberry filling and top with the piece of cupcake you removed to seal. {You will need to trim a little of the cut piece so it will fit back in}. Then frost with desired buttercream frosting.

    Strawberry filling inside the cupcakes.
    Stuff each cupcake with the homemade strawberry filling.

    tips for the best cupcakes

    • Use room temperature ingredients. I've been making this vanilla cupcake recipe for years and have cheated and not brought my ingredients to room temperature. This will work, but for the BEST texture I highly recommend bringing the cold ingredients to room temperature.
    • Be careful to not over mix the batter once the flour mixture is added. This can lead to tough cupcakes and we are going for moist, tender and fluffy!
    • If you need to quickly cool the cupcakes ~ once the cupcakes have finished baking let them cool in the pan for 5 minutes. Then move them to a wire cooling rack and let them cool another 5 minutes before placing them in the freezer for 5-10 minutes.
    • Use good liners. These Paper Chef liners are the only ones I use in my kitchen.
    • Use a cookie or ice cream scoop to get even amounts of batter into each liner. This helps the cupcakes to bake uniformly.
    • For the best, moist and tender cupcakes, don't over bake them. Remove them from the oven when a toothpick or cake tester comes out with just a few moist crumbs.

    cupcake frosting ideas

    • Not too sweet vanilla American buttercream
    • Lemon buttercream frosting
    • Strawberry Swiss meringue buttercream {use freeze dried strawberries}
    • White chocolate {American} buttercream or Swiss meringue buttercream
    • Cream cheese frosting
    Strawberry filled cupcake on a plate with a fork.

    frequently asked questions

    can I use frozen strawberries?

    No, I do not recommend using frozen strawberries as they will add too much moisture to the cupcakes. Fresh strawberries are best in this cupcake recipe.

    can I use a different fruit or filling?

    Sure! But they will no longer be strawberry filled cupcakes ;-). Cherries would be delicious! I don't think you'd go wrong with raspberries or blackberries either. You can also fill the cupcakes with chocolate ganache, lemon curd, your favorite jam, Nutella, cookie butter.... The options are endless.

    how do you decorate cupcakes?

    For the look in these photos I used a Wilton 1M piping tip. The Wilton 2D {seen in my rum coconut cupcakes} and Wilton 8B {seen in my brown sugar cupcakes} are my other favorites for decorating cupcakes.

    If you don't have piping tips, just spoon the frosting on top of the cupcakes. You can use an offset spatula, the back of a spoon or a knife to smooth or swirl the buttercream.

    how to store

    Cupcakes can be stored at room temperature in an airtight container for up to 1 day. They can also be stored in an airtight container in the refrigerator for up to 3-4 days, but they will be more prone to drying out. Let them sit at room temperature for about 30 minutes before serving so they soften up.

    The strawberry filled cupcakes can be frozen in an airtight container for 2-3 months. Allow to defrost at room temperature before serving. I freeze mine with buttercream all the time!

    Cupcakes with buttercream and fresh strawberries.

    Remember to snap a picture and tag me on Instagram if you make these Strawberry Filled Cupcakes. It warms my heart to see you bring these recipes to life! Thank you for being here and happy baking!

    more strawberry desserts to enjoy

    • Strawberry Crumb Cake
    • Strawberry Lemonade Cookies
    • No Bake Mascarpone Cheesecake with Strawberries and Mint
    • Strawberry Coconut Chocolate Bars

    If you make this recipe {or any recipe!} from two sugar bugs please come back and leave a review and a ⭐️⭐️⭐️⭐️⭐️ star rating.  I read every comment, and I LOVE hearing from you!

    Yield: 12 cupcakes

    Strawberry Filled Cupcakes

    Inside look at a strawberry filled cupcakes.

    The best fluffy and moist vanilla cupcakes are stuffed with a fresh strawberry filling.

    Prep Time 15 minutes
    Bake Time 20 minutes
    Total Time 35 minutes

    Ingredients

    cupcakes

    • ½ cup unsalted butter, melted and slightly cooled (113g)
    • 1 ½ cups all-purpose flour (188g)
    • ½ teaspoon baking powder
    • ¼ teaspoon baking soda
    • ¼ teaspoon kosher salt
    • 1 cup granulated sugar (200g)
    • 2 large eggs, room temperature
    • 2 teaspoons pure vanilla extract
    • ¼ cup sour cream, room temperature (60g)
    • ½ cup milk, room temperature (120mL)

    fresh strawberry filling

    • 4-5 large strawberries, chopped small*
    • 1 teaspoon granulated sugar
    • ¼ teaspoon pure vanilla extract

    Instructions

    1. Melt the butter (½ cup/113g) and set aside to cool slightly.
    2. Preheat the oven to 350°F and prepare a 12 count muffin pan with cupcake liners. Set aside.
    3. In a medium bowl, whisk together the all-purpose flour (1 ½ cups/188g), baking powder (½ teaspoon), baking soda (¼ teaspoon) and kosher salt (¼ teaspoon). Set aside.
    4. In a large bowl, whisk the granulated sugar (1 cup/200g), eggs (2 large), vanilla (2 teaspoons) and sour cream (¼ cup/60g) until well combined. Then whisk in the milk (½ cup/120mL) and once combined whisk in the melted and cooled butter (½ cup/113g).
    5. Add the flour mixture to the wet ingredients and mix until just fully combined. The batter is on the thick side.
    6. Divide the batter evenly between the 12 cupcake liners. They will be about ⅔ full. Bake for 16-20 minutes or until a toothpick inserted in the center comes out mostly clean.
    7. Allow to cool completely before filling with the fresh strawberry filling.
    8. For the strawberry filling: remove the tops and chop the strawberries into small pieces (remember these are going inside the cupcake and you want them to be nice to bite into). Then in a small bowl mix the strawberries with granulated sugar (1 teaspoon - or more if your berries need a bit more sweetness) and vanilla (¼ teaspoon) and set aside.
    9. To fill the cupcakes: Use a paring knife, apple corer or large star piping tip to remove some of the center of each cooled cupcake. Make sure you don't go through the bottom of the cupcake! Then fill each cavity with the fresh strawberry filling and top with the piece of cupcake you removed to seal. (You will need to trim a little of the cut piece so it will fit back in). Then frost with desired buttercream frosting. I used a Wilton 1M for the cupcakes in these photos.

    Notes

    I highly recommend having your ingredients room temperature!! You can skip this step, but the batter won't come together as smoothly and it does slightly affect the finished texture of the cupcakes.

    *Once the strawberries are chopped into small pieces you should have about a ½ cup/80g

    Cupcakes can be stored at room temperature in an airtight container for up to 1 day. They can also be stored in an airtight container in the refrigerator for up to 3-4 days. Allow them to sit on the counter for about 30 minutes to soften to room temperature before serving.

    The cupcakes can be frozen in an airtight container for 2-3 months. Allow to defrost at room temperature before serving. I freeze mine with buttercream all the time!

    Nutrition Information:

    Yield:

    12

    Serving Size:

    1

    Amount Per Serving: Calories: 222Total Fat: 10gSaturated Fat: 6gTrans Fat: 0gUnsaturated Fat: 3gCholesterol: 55mgSodium: 93mgCarbohydrates: 30gFiber: 1gSugar: 18gProtein: 3g

    The nutrition information is an estimate only and may not be entirely accurate.

    Did you make this recipe?

    Please make my day and PIN to Pinterest and share a photo on Instagram ~ making sure to tag @twosugarbugs! THANK YOU!!

    © Tasia
    Cuisine: American / Category: Cakes and Cupcakes

    Chocolate Raspberry Cheesecake

    slice of chocolate raspberry cheesecake on a plate with a fork

    This unbelievably creamy chocolate raspberry cheesecake is baked in a chocolate cookie crust and swirled with a homemade raspberry sauce. The finishing touch is an easy chocolate ganache topping. You'll love how easily it comes together!

    slices of cheesecake with fresh raspberries

    Disclosure | This post may contain affiliate links. As an Amazon Associate I earn from qualifying purchases.

    This rich, creamy and ultra smooth chocolate raspberry cheesecake is the first baked cheesecake recipe to appear on two sugar bugs. And I think you'll agree that it was worth the wait!

    While there are four steps to this classic dessert, they are all quick and simple. So get ready to enjoy a slice of this dreamy homemade cheesecake with a raspberry swirl.

    True story; Mr. two sugar bugs loves this one even more than the ricotta bundt cake and brownie crinkle cookies.

    why you will love this easy cheesecake recipe

    • A rich and creamy classic New York cheesecake that isn't too sweet.
    • Two ingredient crust ~ chocolate sandwich cookies {like Oreos} and butter.
    • A simple homemade raspberry coulis swirl brings the raspberry flavor.
    • No traditional water bath needed!

    If you are looking for a more mousse like {without eggs} no bake cheesecake, be sure to check out my cookie butter cheesecake or no bake mascarpone cheesecake recipes.

    chocolate raspberry cheesecake on a cake stand

    ingredients and substitutions

    Please scroll to the printable recipe card at the end of this post for the full list of ingredients and baking directions.

    chocolate raspberry cheesecake ingredients
    • Raspberry coulis ~ the recipe has you make your own with frozen or fresh raspberries, sugar and water. If you would prefer to use a store-bought coulis, Fran's Chocolates makes one that works beautifully in this chocolate raspberry cheesecake.
    • Chocolate sandwich cookies ~ Oreos, Trader Joe's Jo Jos and Back to Nature's Classic Creme cookies all work.
    • Butter ~ I use unsalted butter. This gets melted for the chocolate crust.
    • Cream cheese ~ use full fat blocks of cream cheese; three 8-ounce blocks are needed. It's important for the cream cheese to be softened to room temperature. Depending on the temperature of your kitchen this will likely take at least 2 hours.
    • Sugar ~ granulated sugar is used to sweeten the cheesecake and also to sweeten the raspberry coulis.
    • Cornstarch ~ since we are adding a bit more liquid with the raspberry sauce, the cornstarch works to keep the cheesecake thick and silky.
    • Sour cream ~ use full fat sour cream and allow it to come to room temperature. If the liquid separates, just stir it back together before adding it to the batter.
    • Vanilla ~ adds flavor.
    • Eggs ~ three large eggs are needed and should be room temperature.
    • Chocolate ~ I found a 62% semi-sweet chocolate was the perfect balance. The chocolate should be chopped finely.
    • Heavy cream ~ for the ganache topping. You can use heavy whipping cream or heavy cream that has a minimum of 30% fat content.
    slice of chocolate raspberry cheesecake on a plate with a fork

    step by step instructions for making raspberry coulis

    Start by placing the frozen raspberries, granulated sugar and 2 tablespoons water in a small saucepan and stir together.

    Then cook over low heat, stirring every few minutes, until the berries are soft, about 12 minutes.

    raspberries, sugar and water in a saucepan
    Frozen raspberries, sugar and water cook together for the raspberry coulis.
    cooked raspberry sauce before pureeing
    The raspberry sauce after it has been cooked.

    Remove the pan from the heat and either use an immersion blender {I have a 25+ year old Braun that works great!} or regular blender to blend until smooth.

    Pour the sauce through a thin mesh sieve to remove the seeds from the coulis and discard the seeds. You should have about ⅔ cup of raspberry coulis. Allow to cool to room temperature before using. Can be made up to one week ahead, store in an airtight container in the refrigerator.

    raspberry puree being pushed through a sieve
    The pureed raspberry sauce being pushed through a fine mesh sieve.
    leftover raspberry seeds after raspberry sauce is pushed through a fine mesh sieve
    The raspberry seeds remaining after the raspberry puree has been pushed through a sieve.

    let's make the easy Oreo crust

    Start by crushing the chocolate sandwich cookies {with their filling} in a food processor or blender and pulse until fine crumbs. You can also place the cookies in a zip top bag and crush with a rolling pin; the crumbs won't be quite as fine, but it is another option.

    Add the melted butter and pulse another 8-10 times until the butter is fully combined with the crushed cookies.

    Press the mixture into the bottom and slightly up the sides of a 9 inch springform pan with a removable bottom. If you want to be able to remove the cheesecake from the bottom before serving, line the pan with a piece of parchment paper.

    I use the flat bottom of a measuring cup to firmly press the cookie crumbs into the bottom and slightly up the sides of the pan. Pre-bake the crust. Remove from the oven and allow to cool slightly while you prepare the filling.

    chocolate sandwich cookies crushed in a food processor
    Crush the chocolate sandwich cookie crumbs until fine.
    chocolate raspberry cheesecake Oreo crust
    The chocolate cookie crumbs pressed into the bottom and slightly up the sides of the springform pan.

    how to make chocolate raspberry cheesecake

    Start by beating the room temperature cream cheese and granulated sugar on medium until the mixture is smooth and creamy. This can be done using a handheld mixer or a stand mixer with the paddle attachment.

    Then add the cornstarch, sour cream and vanilla and beat until fully combined. Next with the mixer on low, add the eggs one at a time, beating until just blended. Once the final egg disappears into the batter, stop the mixer. Use a spatula to make sure the final egg is fully combined.

    cream cheese and sugar creamed together in a mixing bowl
    The cream cheese and sugar beaten until smooth.
    chocolate raspberry cheesecake filling in a mixing bowl
    The thick, smooth and velvety batter after mixing in the eggs.

    Pour half the cheesecake mixture into the pre-baked chocolate cookie crust. Drop spoonfuls of the raspberry coulis over the top of the batter {use a little less than half the coulis}.

    Spoon the other half of the cheesecake batter into the pan and use an offset spatula to carefully spread it in an even layer. Drop more spoonfuls of raspberry coulis over the top of the batter {save aside 2-3 tablespoons for serving, if desired}. Then take a knife and swirl the coulis into the cheesecake batter.

    raspberry coulis over cheesecake batter
    Raspberry coulis layered over the first half of the cheesecake batter.
    chocolate raspberry cheesecake before baking
    The raspberry coulis swirled into the cheesecake batter.

    Now prepare a large pot of boiling water and once it's boiling, pour about an inch of hot water in a 9x13 or large baking pan {do not use glass!} and place the pan of water on the bottom rack of the oven.

    Bake the cheesecake in the center of the oven for 50-60 minutes, or until the center is almost set. Turn the oven off and leave the door slightly open. Let the cheesecake cool in the oven for 30-60 minutes {with the pan of hot water still in the oven as well}.
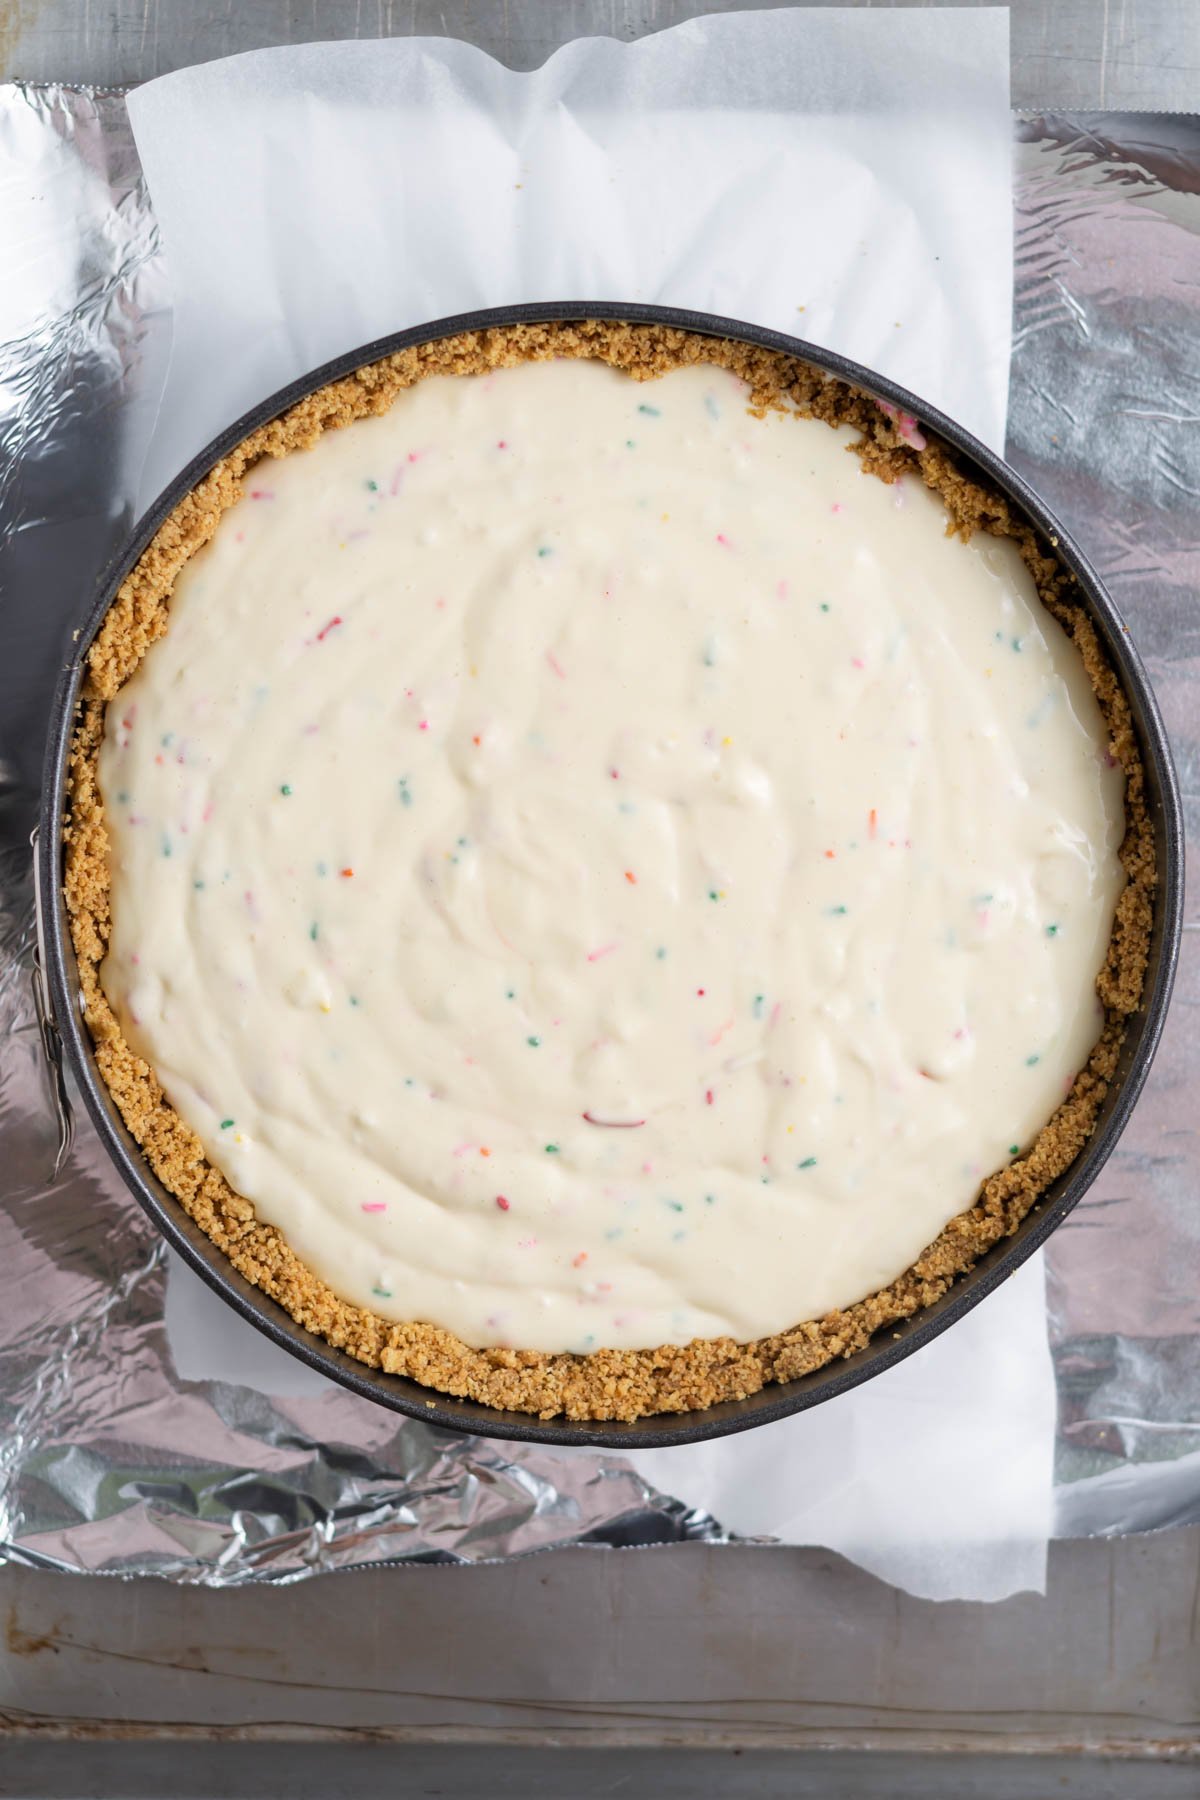
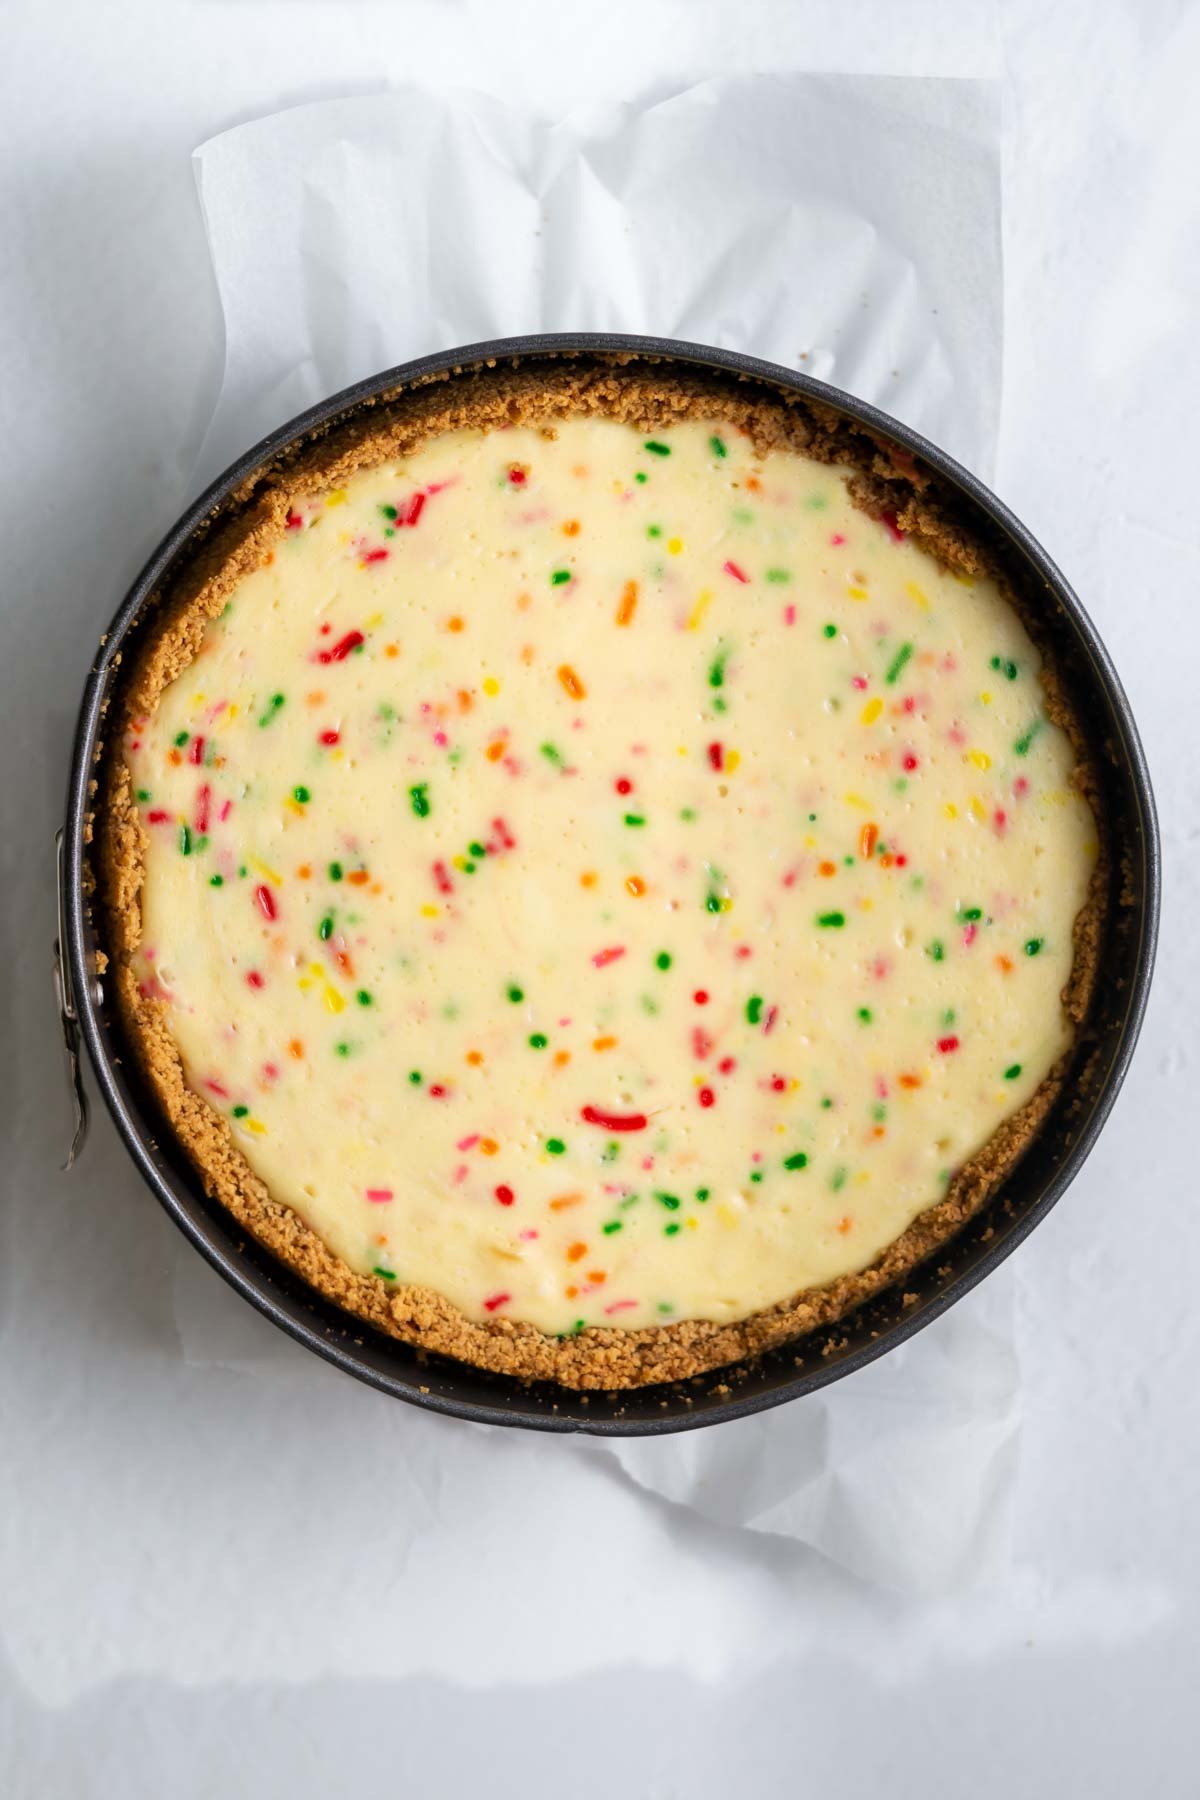
    Move the cheesecake to the counter to cool another 1-2 hours. Then prepare the ganache topping.

    baked chocolate raspberry cheesecake in springform pan
    The cheesecake after it has been baked.
    chocolate ganache on cheesecake before chilling
    Pour the chocolate ganache over the baked and cooled cheesecake. Then chill in the refrigerator.

    how to know when cheesecake is done baking

    This chocolate raspberry cheesecake should have a little jiggle in the middle when it is done baking. In my oven, this cheesecake was consistently baked at 55 minutes. The edges will be set and when you lightly tap the sides of the pan, the middle will have a little wiggle to it.

    For other baked cheesecake recipes, make sure you follow the specific instructions for that recipe.

    Remember to pin this recipe to Pinterest! Use the button on the recipe card or the share buttons on the side or bottom of this page.
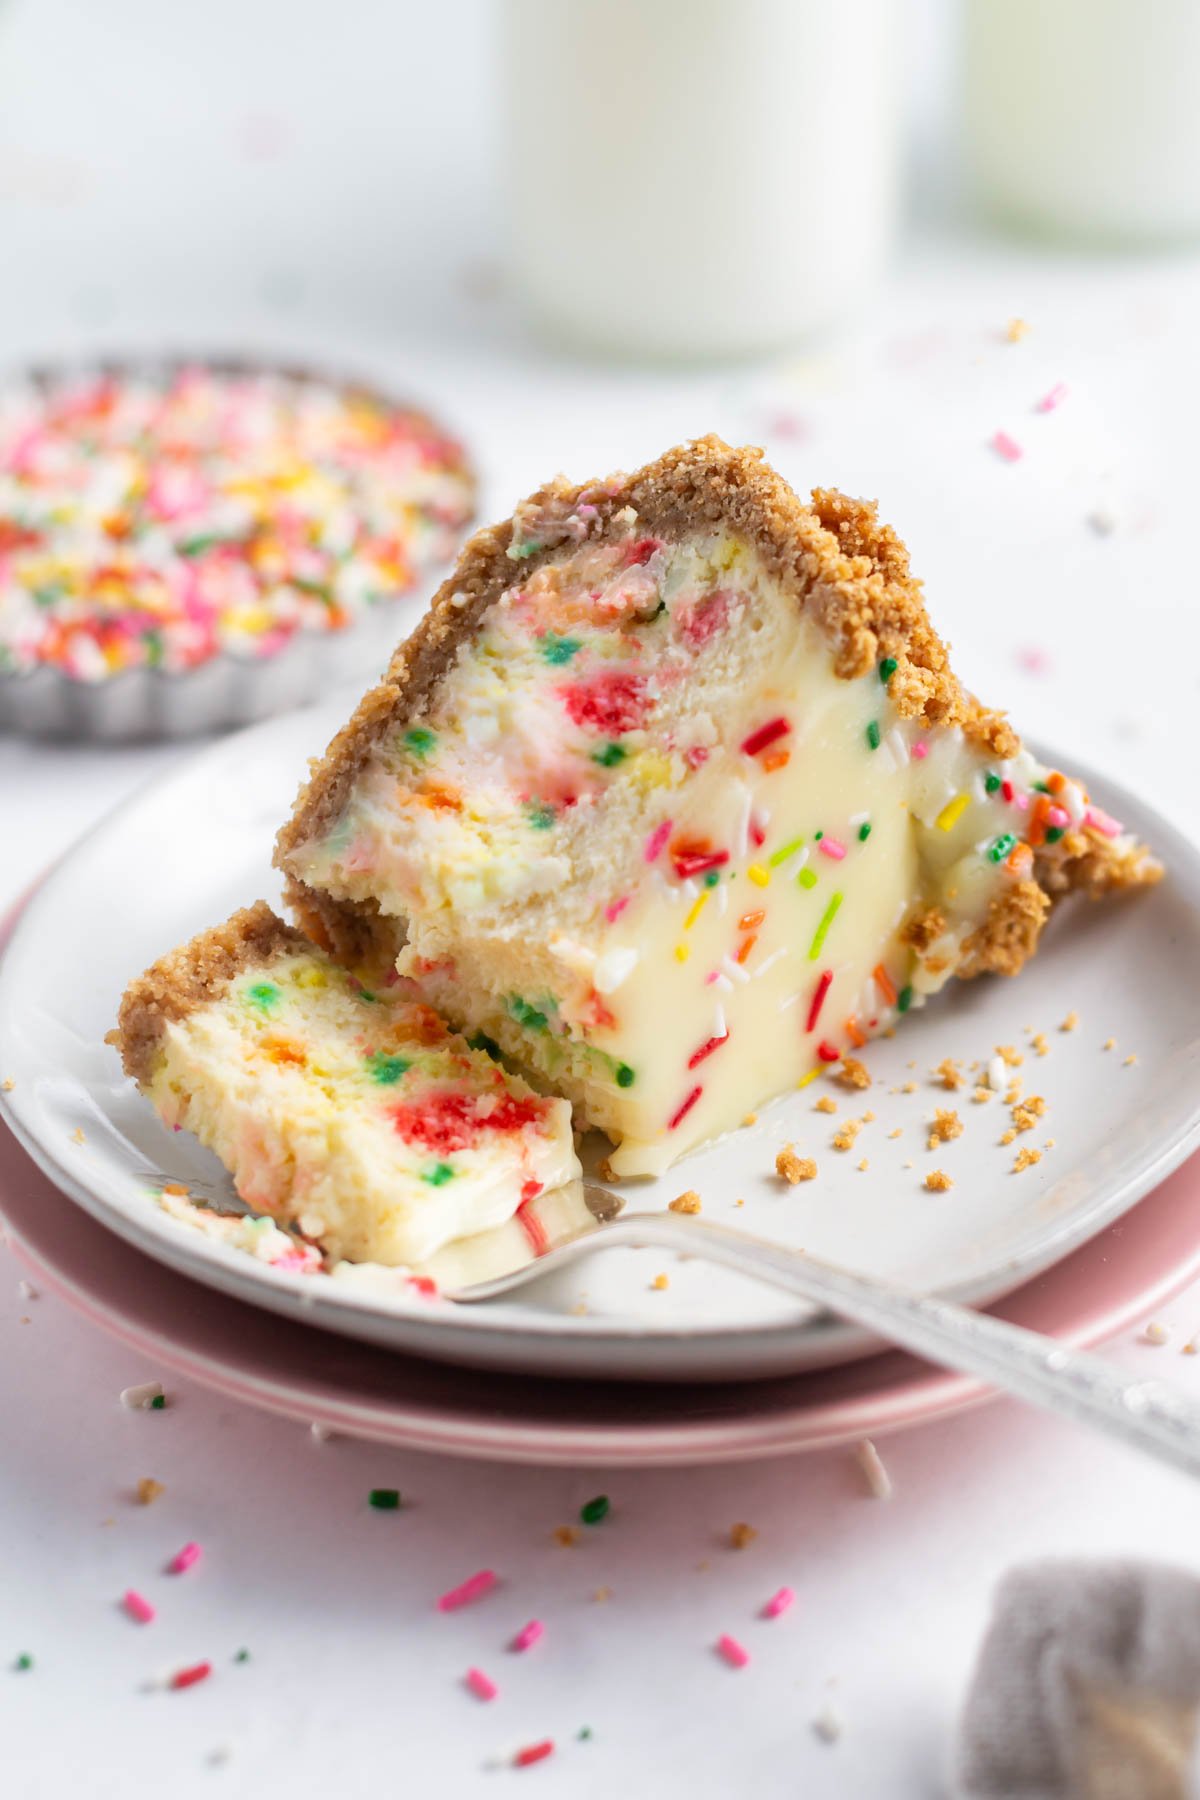
    tips for the best cheesecake

    • Use full fat cream cheese and sour cream. You want to buy the block cream cheese and not the whipped spread {they don't behave the same in baking}.
    • Bring the cream cheese, sour cream and eggs to room temperature before starting. My kitchen is on the cooler side, so I pull my ingredients out at least two hours before {and often 3-4 hours before}. The room temperature ingredients combine more evenly and create a smooth batter.
    • Try not to over mix the cheesecake batter, which can add too much air and cause the cheesecake to rise and then fall during baking.
    • Place the springform pan on top of a baking pan before placing in the oven {for both the baking of the cheesecake and the baking of the Oreo crust. This will catch any leaks of butter from the chocolate crust and keep your oven cleaner!
    • Allow the cheesecake to cool in the oven before removing to the counter to cool. {more detailed instructions are in the recipe card below}.
    • Once the raspberry cheesecake is topped with ganache, place it in the refrigerator to chill and set up. It needs to chill for a minimum of 6 hours and ideally 8 or more.
    • For clean slices when serving, wipe the knife clean between cuts.
    chocolate raspberry cheesecake with fresh raspberries on top

    frequently asked questions

    how to remove the cheesecake from the pan

    Once the chocolate raspberry cheesecake has chilled at least six hours {and ideally overnight}, the springform pan should pop right off the cheesecake once opened. If it doesn't, gently run a knife along the edge to release it.

    If you want to be able to remove the cheesecake from the springform pan bottom before serving, line the pan with a piece of parchment paper.

    can I use frozen raspberries?

    Absolutely! I prefer using frozen raspberries because they are frozen at the peak of their freshness and allow you to make this raspberry coulis any time of year.

    do I have to use a 9 inch springform pan?

    If you don't have a 9 inch springform pan, a 9 inch cake pan will also work. You will want to line the cake pan with parchment paper overhanging the sides so you can lift the finished cheesecake out of the pan.

    You can also use a 10 inch springform, but the cheesecake will be shorter and will require less baking time.

    can I skip the chocolate ganache topping?

    Yes. The chocolate crust and raspberry swirl cheesecake are delicious even without the ganache topping.

    how to store

    Cover and store any leftover chocolate raspberry cheesecake in the refrigerator for up to 5 days.

    The cheesecake can also be frozen for up to 2 months. You can either chill the cheesecake well; then wrap the whole thing tightly in a double layer in plastic wrap. Or cut the cheesecake into individual slices and chill; then wrap each slice tightly in a double layer of plastic wrap. Allow to defrost in the refrigerator before serving

    cheesecake with fresh raspberries on a stand

    Remember to snap a picture and tag me on Instagram if you make this Chocolate Raspberry Cheesecake. It warms my heart to see you bring these recipes to life! Thank you for being here and happy baking!

    more cheesecake recipes

    • Mini Peanut Butter Espresso Cheesecakes
    • Cookie Butter Cheesecake
    • No Bake Mascarpone Cheesecake with Strawberries and Mint

    If you make this recipe {or any recipe!} from two sugar bugs please come back and leave a review and a ⭐️⭐️⭐️⭐️⭐️ star rating.  I read every comment, and I LOVE hearing from you!

    Yield: 12 - 14 slices

    Chocolate Raspberry Cheescake

    slice of chocolate raspberry cheesecake on a plate with a fork

    This unbelievably creamy chocolate raspberry cheesecake is baked in a chocolate cookie crust and swirled with a homemade raspberry sauce. The finishing touch is an easy chocolate ganache topping!

    Prep Time 30 minutes
    Bake Time 1 hour
    Chill Time 8 hours
    Total Time 9 hours 30 minutes

    Ingredients

    raspberry coulis

    • 6 ounces frozen raspberries (170g)
    • ¼ cup granulated sugar (50g)
    • 2 tablespoons water

    chocolate cookie crust

    • 24 chocolate sandwich cookies (like Oreos) (268g)
    • 4 tablespoons unsalted butter (56g)

    raspberry cheesecake

    • three 8 ounce blocks of full fat cream cheese, room temperature (681g)
    • ¾ cup granulated sugar (150g)
    • 2 teaspoons cornstarch
    • ¾ cup full fat sour cream, room temperature (180g)
    • 1 tablespoon pure vanilla extract
    • 3 large eggs, room temperature
    • ⅔ cup raspberry coulis

    chocolate ganache

    • 4 ounces semi sweet chocolate, chopped finely (113g)
    • ½ cup heavy whipping cream (120mL/120g)

    Instructions

    1. Make the raspberry coulis: place the frozen raspberries (6 ounces/170g), granulated sugar (¼ cup/50g) and 2 tablespoons water in a small saucepan and stir together. Cook over low heat, stirring every few minutes, until the berries are soft, about 12 minutes. Remove the pan from the heat and either use an immersion blender or regular blender to blend until smooth (about 1 minute). Pour the sauce through a thin mesh sieve to remove the seeds from the coulis. Discard the seeds. You should have about ⅔ cup of raspberry coulis. Allow to cool to room temperature before using. Can be made up to one week ahead, store in an airtight container in the refrigerator.
    2. If necessary, adjust the oven racks to have room for a pan of water on the lowest rack and the cheesecake on the center rack. Then preheat the oven to 325°F.
    3. Make the chocolate crust: crush the cookies (with their filling (24 cookies/325g) in a food processor or blender and pulse until fine crumbs. Add the melted butter (4 tablespoons/56g) and pulse another 8-10 times until the butter is fully combined with the crushed cookies.
    4. Press the mixture into the bottom and slightly up the sides of a 9 inch springform pan with a removable bottom. If you want to be able to remove the tart from the bottom before serving, line the pan with a piece of parchment paper. I use the flat bottom of a measuring cup to firmly press the cookie crumbs into the bottom and slightly up the sides of the pan. Pre-bake the crust for 8 minutes*. Remove from the oven and allow to cool slightly while you prepare the filling.
    5. Make the raspberry cheesecake: Using a handheld mixer or stand mixer with the paddle attachment, beat the room temperature cream cheese (three 8 ounce blocks/681g) and granulated sugar (¾ cup/150g) on medium (speed 6 on a KitchenAid) until the mixture is smooth and creamy, about 2 minutes. Add the cornstarch (2 teaspoons), sour cream (¾ cup/180g) and vanilla (1 tablespoon) and beat another minute, until fully combined. On low (speed 2), add the eggs one at a time, beating until just blended. Once the final egg disappears into the batter, stop the mixer. Use a spatula to make sure the final egg is fully combined.
    6. Pour half the cheesecake mixture into the pre-baked chocolate cookie crust. Drop spoonfuls of the raspberry coulis over the top of the batter (use a little less than half the coulis). Spoon the other half of the cheesecake batter into the pan and use an offset spatula to carefully spread it in an even layer. Drop more spoonfuls of raspberry coulis over the top of the batter (save aside 2-3 tablespoons for serving, if desired). Then take a knife and swirl the coulis into the cheesecake batter.
    7. Prepare a large pot of boiling water and once it's boiling, pour about an inch of hot water in a 9x13 or large baking pan (do not use glass!) and place the pan of water on the bottom rack of the oven.
    8. Bake the cheesecake* in the center of the oven for 50-60 minutes, or until the center is almost set. The cheesecake is done when the center will jiggle slightly if you gently tap the pan. Turn the oven off and leave the door slightly open. Let the cheesecake cool in the oven for 30-60 minutes (with the pan of hot water still in the oven as well). Move the cheesecake to the counter to cool another 1-2 hours. Then prepare the ganache topping.
    9. Make the chocolate ganache: place the finely chopped semi-sweet chocolate (4 ounces/113g) in a glass or metal heat proof bowl. Then measure the heavy cream (½ cup/120mL) into a saucepan and warm the cream over medium heat, just until hot and it begins to simmer around the edges. Remove from the heat and pour the hot cream over the chopped chocolate.
    10. Allow the cream to sit on the chocolate for 1 minute and then stir the ganache until the chocolate is melted, smooth and shiny. Spread the ganache over the cooled cheesecake with an offset spatula.
    11. Move the cheesecake to the refrigerator for at least 6 hours and ideally overnight.
    12. If needed, use a knife to loosen the chilled cheesecake from the springform pan, then remove the rim. Slice and serve with extra raspberry coulis and fresh raspberries, if desired.

    Notes

    *Place the springform pan on top of a sheet pan to catch any leaks from the butter in the chocolate crust.

    Cover and store any leftover cheesecake in the refrigerator for up to 5 days. The cheesecake can also be frozen for up to 2 months. You can either chill the cheesecake well; then wrap the whole thing tightly in a double layer in plastic wrap. Or cut the cheesecake into individual slices and chill; then wrap each slice tightly in a double layer of plastic wrap. Allow to defrost in the refrigerator before serving.
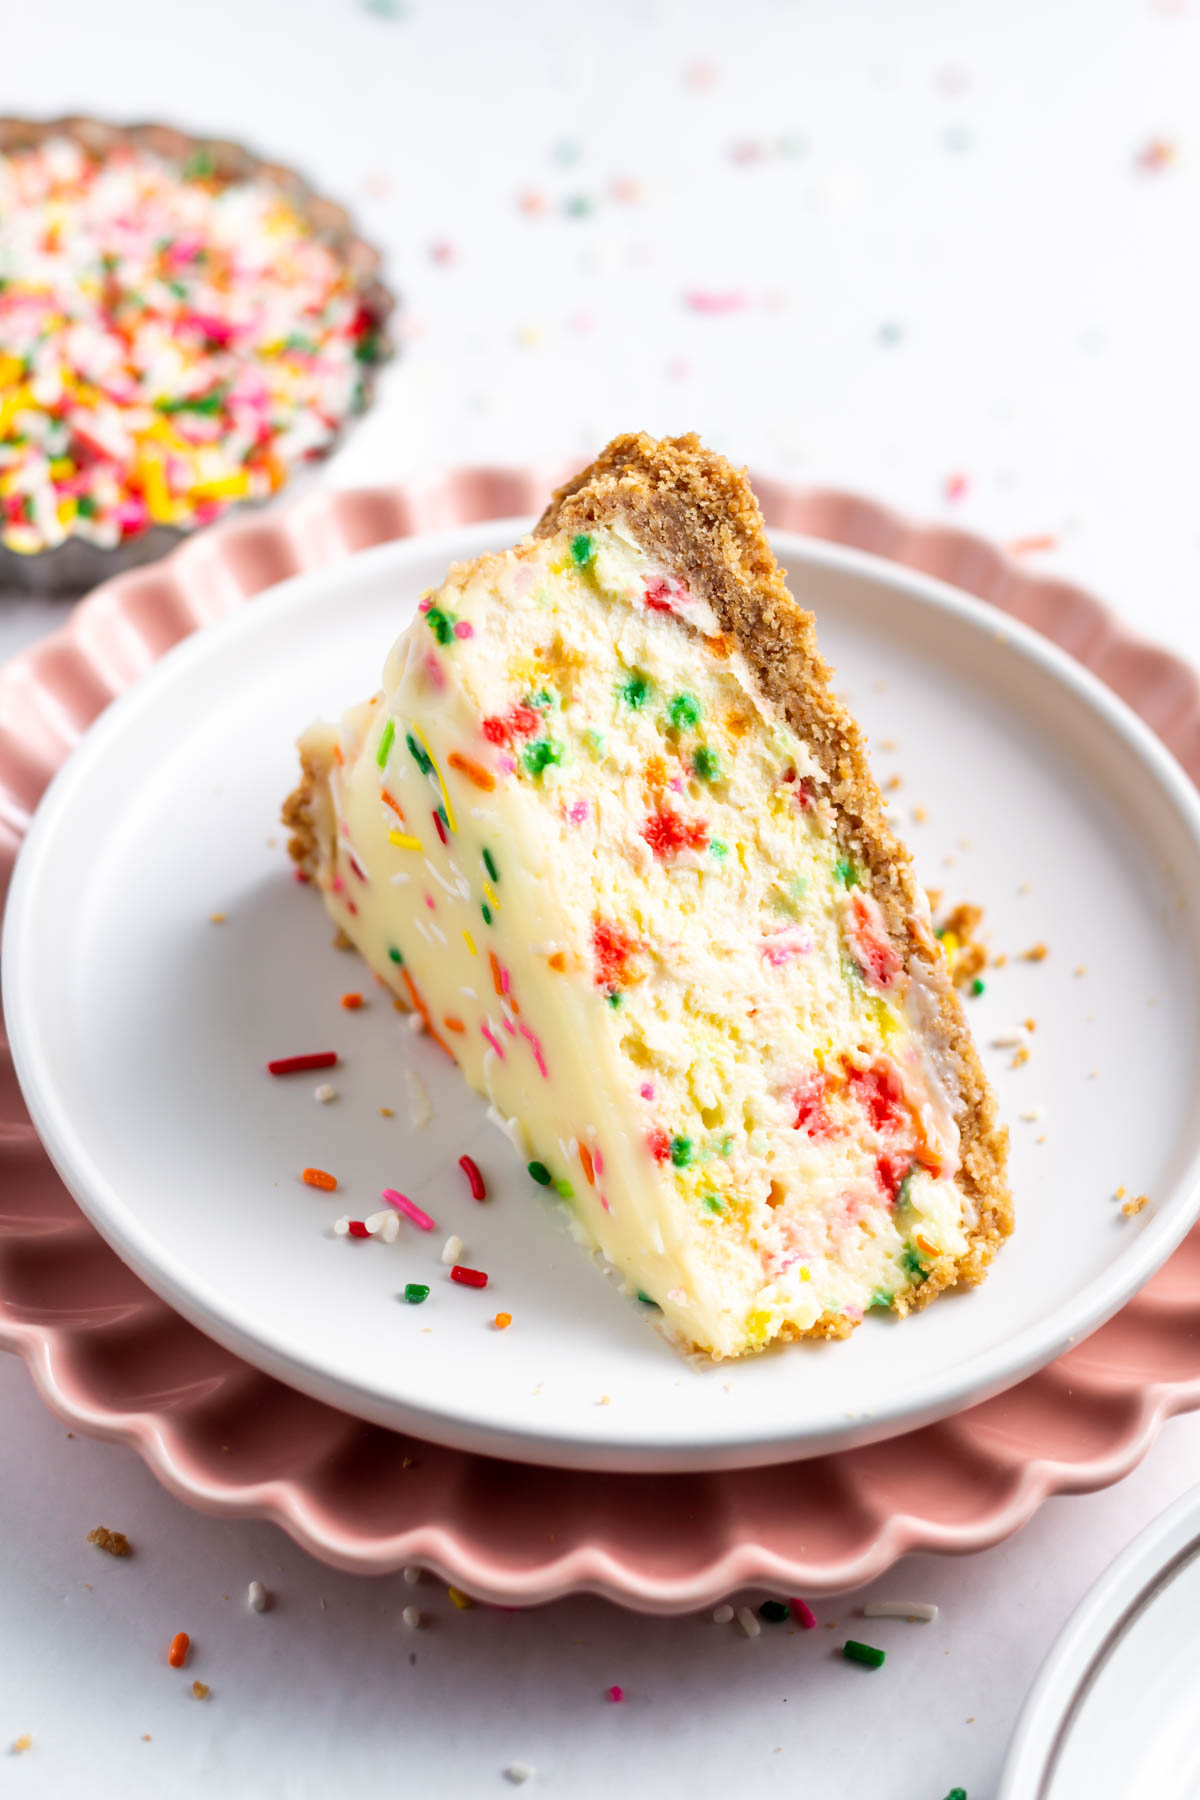
    Nutrition Information:

    Yield:

    14

    Serving Size:

    14

    Amount Per Serving: Calories: 461Total Fat: 33gSaturated Fat: 19gTrans Fat: 0gUnsaturated Fat: 11gCholesterol: 117mgSodium: 213mgCarbohydrates: 36gFiber: 2gSugar: 29gProtein: 7g

    The nutrition information is an estimate only and may not be entirely accurate.
    Did you make this recipe?

    Please make my day and PIN to Pinterest and share a photo on Instagram ~ making sure to tag @twosugarbugs! THANK YOU!!

    © Tasia
    Cuisine: American / Category: Cakes and Cupcakes

    Cardamom Cake

    sliced cardamom cake on cake stand

    This cardamom cake is a moist and flavorful snacking cake. Topped with a quick and easy brown butter frosting. It's perfect with a cup of afternoon tea!

    sliced cardamom cake on cake stand

    Disclosure | This post may contain affiliate links. As an Amazon Associate I earn from qualifying purchases.

    I'm excited to share this cardamom cake because I developed it due to a request from a two sugar bugs blog reader. She stated that winter baking can get boring and she was loving cardamom flavor and needed more recipes using it. So this cardamom snacking cake was born!

    As a busy baker myself, I'm always looking for simple recipes that make it look like I spent hours in the kitchen {when I really didn't}! This cake is an Indian inspired cake perfect for dessert or to go with afternoon tea or coffee.

    For more easy, yet impressive cakes try Italian almond cake, apple spice cake with mascarpone frosting or brown sugar cupcakes.

    why you will love this easy one layer cardamom cake

    • Quick to prepare ~ a simple one layer cake with the easiest frosting glaze! No stacking layers or fussy decorating.
    • Exotic flavor ~ the cake bakes up soft, fluffy and moist with a lovely spice from the cardamom.
    • The EASIEST brown butter frosting! Need I say more???
    cardamom cake on a cake stand

    ingredients needed

    Please scroll to the printable recipe card at the end of this post for the full list of ingredients and baking directions.

    ingredients for cardamom cake
    • Unsalted butter ~ brings fat and structure to the cardamom cake. You want this room temperature, so pull it out of the refrigerator 1-2 hours before baking.
    • Granulated sugar ~ brings the sweetness to the cake.
    • Pure vanilla extract ~ helps to balance the flavors.
    • Eggs ~ two large eggs are needed, for best results bring to room temperature. {I did test this cake without eggs. The flavor was excellent, but the final cake is much more dense}.
    • Sour cream ~ use full fat sour cream. For the best results bring to room temperature.
    • Kefir ~ I love the moisture and slight tang that it brings to this cake. It also adds richness and protein to the recipe. You can substitute with buttermilk. Pull this out with the butter and the eggs so it is room temperature.
    • All-purpose flour ~ be sure to measure your flour correctly. A kitchen scale is best or fluff the flour in it's container before spooning it into your measuring cup and using the back of a knife to level it off.
    • Baking powder ~ adds some height to the cake.
    • Kosher salt ~ balances the flavors.
    • Cardamom ~ ground cardamom can be found in the spice aisle.
    • Nutmeg ~ ground nutmeg adds balance to the cardamom.

    Remember to pin this recipe to Pinterest! Use the button on the recipe card or the share buttons on the side or bottom of this page.

    what does cardamom taste like?

    Cardamom is a spice with a complex and distinct flavor. It's a little citrusy and spicy {it comes from the ginger family} and it pairs really nicely with the brown butter frosting. In my opinion, it has an exotic taste and a little goes a long way.

    Cardamom also goes beautifully with orange, lemon, coffee and berries.

    slices of cardamom cake on plates

    how to make

    Start by preheating the oven to 350°F and butter an 8 inch cake pan, add a piece of parchment paper to the bottom and butter it as well. Set aside.

    In a medium bowl whisk the dry ingredients together; all-purpose flour, baking powder, kosher salt, cardamom and nutmeg. Set aside.

    Then in a stand mixer with the paddle attachment or with a hand held mixer, cream the unsalted butter and granulated sugar on medium. Scrape up and down the bowl then add the vanilla and sour cream and mix on low until combined.

    Scrape up and down the bowl then add the eggs and mix on medium until combined. The mixture may look a bit curdled at this point.

    creamed butter and sugar
    Creamed butter and sugar.
    creamed butter, sugar and eggs in a mixing bowl
    Creamed butter, sugar, sour cream and vanilla.
    cardamom cake batter looking curdled after eggs and sour cream added
    The batter can look curdled after the eggs are added.

    Now add half the flour mixture and mix on the lowest speed. Slowly drizzle in the kefir then add the final half of the flour mixture, mixing until just a couple streaks of flour remain. Use a spatula to finish bringing the cake batter together. The batter will be on the thick side. Pour the batter into the prepared cake pan.

    Tap the pan on the counter a few times to remove any extra air and bake in the preheated oven until a toothpick comes out with just a few moist crumbs. The edges will have lightly browned. Allow the cake to cool in the pan for 10-15 minutes, then remove to a wire cooling rack to cool completely.

    cardamom cake batter in baking pan
    Cake batter prior to baking.
    baked cardamom cake in pan
    The cake edges will be lightly browned when the cake is done baking.

    the easiest brown butter frosting!

    Place the unsalted butter in a light colored sauce pan and melt over low {or medium low} heat. Let it cook until small brown flakes form. You will want to stir or swirl the pan frequently to keep it from burning. The butter will foam and bubble up along the process, just keep stirring/swirling and move the foam aside from time to time to check the color. The butter will turn an amber/brown color and will smell nutty and toasted when it’s ready {about 7-10 minutes}.

    Remove the pan from the heat and add in the confectioners' sugar. Stir until the butter has accepted all the sugar and you have a thick frosting. Spread the frosting on top of the cooled cake.

    brown butter in saucepan
    What the butter will look like once browned.
    brown butter frosting in saucepan
    Mix the confectioners' sugar into the brown butter in the saucepan.

    tips for the best cardamom cake

    • Use a kitchen scale to ensure that you are using the accurate amounts of the ingredients. In my opinion, this is the number one reason why baked goods fail.
    • Use room temperature ingredients.
    • Be careful not to over mix the batter. Over mixing cake batter can make for a dense and chewy cake; we want soft and fluffy! Over mixing can also cause a cake to sink in the middle due to too much air trapped in the batter.
    • Don't put the frosting on a warm cake! You have to let this cardamom cake cool before adding the brown butter frosting. If you try and frost a hot cake, the frosting will just melt off.
    slices of cake on a cake stand

    ideas for other frosting flavors

    Put your own spin on this cake with a different frosting. For all the ideas below I would double the frosting recipes.

    • An orange cream cheese glaze would be fantastic.
    • For a spin on cardamom coffee, use a coffee glaze.
    • This cardamom cake is also lovely with lemon glaze.

    frequently asked questions

    can this cardamom cake be made without eggs?

    Yes! I did test this cake with no eggs in the batter. The flavor is still excellent, but the final cake is much more dense.

    can I bake this cake in a different pan?

    Yes, you can also bake this as a loaf cake in a loaf pan. The baking time will increase to around 1 hour.

    how long do you cool a cake before removing it from the pan?

    This can vary from recipe to recipe, so follow the instructions given for the specific cake you are baking.

    For a generic answer, I typically allow the cake about 15 minutes in the baking pan before moving it to a wire cooling rack to cool completely.

    can you freeze cakes?

    Yes! See below for how to freeze this cardamom cake. My lemon white chocolate cake also has some great tips for freezing cake.

    how to store

    Cardamom cake can be covered at room temperature for up to three days or stored in the refrigerator for up to one week.

    The cake can also be frozen for up to three months. I would double wrap in plastic and place in a zip top bag. Allow to defrost at room temperature prior to serving.

    As with most cakes, this cardamom cake tastes best at room temperature.

    slices of cardamom cake

    Remember to snap a picture and tag me on Instagram if you make this Cardamom Cake. It warms my heart to see you bring these recipes to life! Thank you for being here and happy baking!

    more snacking cake recipes

    • Homemade Vanilla Snack Cake
    • Strawberry Crumb Cake
    • Chocolate Malt Cake
    • Brown Sugar Snack Cake Bars

    If you make this recipe {or any recipe!} from two sugar bugs please come back and leave a review and a ⭐️⭐️⭐️⭐️⭐️ star rating.  I read every comment, and I LOVE hearing from you!

    Yield: 10 slices

    Cardamom Cake

    sliced cardamom cake on cake stand

    This cardamom cake is a moist and flavorful snacking cake. Topped with a quick and easy brown butter frosting. It's perfect with a cup of afternoon tea!

    Prep Time 20 minutes
    Bake Time 38 minutes
    Total Time 58 minutes

    Ingredients

    cake

    • 1 ¾ cup all-purpose flour (220g)
    • 1 teaspoon baking powder
    • ½ teaspoon kosher salt
    • 2 teaspoons cardamom
    • ¼ teaspoon ground nutmeg
    • ½ cup unsalted butter, room temperature (113g)
    • ¾ cup granulated sugar (150g)
    • 1 teaspoon pure vanilla extract
    • ¼ cup full fat sour cream, room temperature (60g)
    • 2 large eggs, room temperature
    • 1 cup kefir*, room temperature (240mL)

    brown butter frosting

    • 4 tablespoons unsalted butter, browned (56g)
    • ¾ cup confectioners' sugar (90g)

    Instructions

    1. Preheat oven to 350°F and butter an 8 inch cake pan, add a piece of parchment paper to the bottom and butter it as well. Set aside.
    2. In a medium bowl whisk the dry ingredients together; all-purpose flour (1 ¾ cups/220g), baking powder (1 teaspoon), kosher salt (½ teaspoon), cardamom (2 teaspoons) and nutmeg (¼ teaspoon). Set aside.
    3. In a stand mixer with the paddle attachment or with a hand held mixer, cream the unsalted butter (½ cup/113g) and granulated sugar (¾ cup/150g) on medium (speed 4 on a KitchenAid) for 2 minutes. Scrape up and down the bowl then add the vanilla (1 teaspoon) and sour cream (¼ cup/60g) and mix on low (speed 2) until combined, about 30 - 60 seconds.
    4. Scrape up and down the bowl then add the eggs (2 large) and mix on medium (speed 4) for 1 - 2 minutes. The mixture may look a bit curdled at this point.
    5. Add half the flour mixture and mix on the lowest speed. Slowly drizzle in the kefir (1 cup/240mL) then add the final half of the flour mixture, mixing until just a couple streaks of flour remain. Use a spatula to finish bringing the cake batter together. The batter will be on the thick side.
    6. Pour the batter into the prepared bake pan. Tap the pan on the counter a few times to remove any extra air and bake in the preheated oven for 32-38 minutes or until a toothpick comes out with just a few moist crumbs. The edges will have lightly browned. Allow the cake to cool in the pan for 10-15 minutes, then remove to a wire cooling rack to cool completely.
    7. Once the cake has cooled, prepare the brown butter frosting. Place the unsalted butter (4 tablespoons/56g) in a light colored sauce pan and melt over low (or medium low) heat and let it cook until small brown flakes form. You will want to stir or swirl the pan frequently to keep it from burning. The butter will foam and bubble up along the process, just keep stirring/swirling and move the foam aside from time to time to check the color. The butter will turn an amber/brown color and will smell nutty and toasted when it’s ready {about 7-10 minutes}.
    8. Remove the pan from the heat and add in the confectioners' sugar (¾ cup/90g). Stir until the butter has accepted all the sugar and you have a thick frosting. Spread the frosting on top of the cake.

    Notes

    *Buttermilk can be used instead of kefir.

    Cake can be covered at room temperature for up to three days or in the refrigerator for up to one week. You can also wrap the cake and freeze for up to three months. I would double wrap in plastic and place in a zip top bag. Allow to defrost at room temperature prior to serving.

    Nutrition Information:

    Yield:

    12

    Serving Size:

    1

    Amount Per Serving: Calories: 276Total Fat: 14gSaturated Fat: 8gTrans Fat: 0gUnsaturated Fat: 5gCholesterol: 65mgSodium: 148mgCarbohydrates: 35gFiber: 1gSugar: 20gProtein: 4g

    The nutrition information is an estimate only and may not be entirely accurate.
    Did you make this recipe?

    Please make my day and PIN to Pinterest and share a photo on Instagram ~ making sure to tag @twosugarbugs! THANK YOU!!

    © Tasia
    Cuisine: American / Category: Cakes and Cupcakes

    Healthy Lemon Blueberry Muffins

    healthy lemon blueberry muffin with a bite missing

    Quick and easy healthy lemon blueberry muffins! This muffin recipe is kid friendly and made with honey and applesauce. It can be made vegan or dairy free.

    lemon blueberry muffin with the liner pulled off

    Disclosure | This post may contain affiliate links. As an Amazon Associate I earn from qualifying purchases.

    With years of baking experience under my belt, I love a good healthy recipe for breakfast items. With no refined sugar, a nutritional boost from whole wheat flour and no oil, this made from scratch muffin recipe fits that bill.

    These lemon blueberry muffins also got rave reviews from little e so you know they are a winner!

    For more healthier muffin recipes be sure to try peanut butter muffins and whole wheat blueberry oat muffins.

    why you will love this healthier muffin recipe

    • Easy and quick ~ it takes about 10 minutes of prep time before these muffins go in the oven.
    • Moist ~ thanks to the kefir and applesauce.
    • Flavorful ~ made with lemon juice and lemon zest, which compliments the blueberries and adds tons of flavor.
    • Healthy recipe ~ made with white whole wheat flour, honey and applesauce.
    muffin with a bite missing on a plate

    ingredients and substitutions

    Please scroll to the printable recipe card at the end of this post for the full list of ingredients and baking directions.

    ingredients for healthy lemon blueberry muffins
    • Whole wheat flour ~ I used white whole wheat flour, but traditional whole wheat flour also works. Whole wheat offers more nutritional value and extra fiber to our healthy muffins.
    • Baking powder and baking soda ~ both ingredients help the muffins to rise.
    • Kosher salt ~ balances all the flavors.
    • Honey ~ brings sweetness to the muffins. You can substitute with light or dark brown sugar or maple syrup for a vegan muffin.
    • Applesauce ~ adds moisture. I use an unsweetened applesauce and I also tested with a cinnamon applesauce.
    • Lemon zest and juice ~ you need two small lemons and their zest and one of those lemons is needed for juice. Be sure to zest your lemon before juicing it!
    • Eggs ~ provide structure to the lemon blueberry muffins. If you need a vegan muffin; see the recipe card notes for how to substitute flax eggs. The eggs should preferably be at room temperature.
    • Kefir ~ I love the moisture and nutrition that kefir adds to baked goods! It also adds a nice tang {like in strawberry crumb cake}. The kefir can be substituted with buttermilk or a vegan buttermilk for a dairy free option; see the recipe card for how to substitute.
    • Blueberries ~ either frozen blueberries or fresh blueberries work. DO NOT thaw frozen blueberries. Wash and completely dry fresh blueberries before using.
    • Turbinado sugar ~ also known as raw sugar. This gets mixed with lemon zest to make a crunchy sweet lemon topping for each muffin. You can find raw sugar in most baking aisles. I typically buy mine at Trader Joe's, but many bulk sections also have it.

    Pro tip ~ to quickly bring eggs to room temperature, place them in a bowl of warm tap water for 5-10 minutes.

    muffins on a parchment lined cutting board

    how to make lemon blueberry muffins

    Start by preheating oven to 425°F and line a standard 12 well muffin pan with liners. Set aside.

    Then place the turbinado sugar in a bowl and add the zest of one small lemon. Use your {clean} fingers to work the zest into the sugar. Set aside.

    In a large bowl whisk together the white whole wheat flour, baking powder, baking soda and kosher salt. Move 1 tablespoon of the mixture to a small bowl and set both bowls aside.

    In a medium bowl whisk together the honey, applesauce, lemon zest and 1-2 teaspoons of fresh lemon juice. Then whisk in the eggs followed by the kefir.

    applesauce, honey and lemon zest in a bowl
    Honey, applesauce and lemon zest get whisked together.
    kefir added to wet ingredients for healthy lemon blueberry muffins
    Kefir and eggs are whisked in.

    Add the wet ingredients to the dry ingredients and mix with a spatula until combined. Now mix the blueberries {do not thaw frozen berries} with the reserved tablespoon of the flour mixture and gently mix them into the muffin batter.

    blueberries tossed with flour in a bowl
    Blueberries tossed with flour prior to mixing into muffin batter.
    blueberries added to healthy lemon blueberry batter
    frozen blueberries being added to muffin batter

    Divide the healthy lemon blueberry muffin batter evenly between the 12 prepared muffin liners, I use a #16 scoop, which is about a ¼ cup. Top each muffin with about 1 teaspoon of the turbinado sugar and lemon zest mixture.

    turbinado sugar and lemon zest on top of muffin batter

    tips for success with this muffin recipe

    • Use good liners for your muffin pan or use a quality non stick pan {I can't say enough good things about my USA muffin pan}!
    • Don't over mix the batter! With muffin recipes we aren't going for a super smooth batter, you should stir just until the dry ingredients are fully moistened. Over mixing can result in tough muffins.
    • Save aside 1 tablespoon of the dry ingredients to toss with blueberries before mixing them into the batter. This helps to evenly distribute the blueberries and keeps them from sinking to the bottom of the muffins.
    • Allow the healthy lemon blueberry muffins to cool completely before serving. This recipe tastes best after they have cooled. The muffins will also stick to the muffin liners when they are still warm.
    lemon blueberry muffins on a cutting board

    frequently asked questions

    are blueberry muffins healthy?

    Anytime someone asks if a recipe is healthy, I like to clarify that healthy is a very subjective term. With that being said, I do consider this lemon blueberry muffin recipe to be healthier.

    This muffin recipe uses white whole wheat flour, which gives a nutritional boost over all-purpose flour. The recipe also uses honey, so we are only adding a teaspoon of a lightly refined sugar with the turbinado sugar topping. They are also low fat due to the use of applesauce and kefir {more protein!} over oil or butter.

    how do you create a bakery style dome on muffins?

    Using a higher oven temperature to start gives the muffins an inital burst of heat, which helps them to get more of a domed top. See the recipe card for specific baking instructions.

    Some people also swear by leaving every other muffin well empty, which allows more heat to get around each muffin. I've tested this and noticed a slight difference in the height of the lemon blueberry muffins.

    can I use fresh or frozen blueberries?

    Yes! I typically use frozen blueberries in muffins, but fresh blueberries also work.

    Tips ~ DO NOT thaw frozen blueberries before adding them to this muffin batter. Fresh blueberries should be washed and completely dry before adding to the batter.

    can I use bottled lemon juice?

    I don't recommend bottled juice because the flavor is typically less bright and pronounced than when squeezed fresh. Plus, for these lemon blueberry muffins you are already zesting a fresh lemon, so squeezing it for the juice is easy to do!

    Remember to pin this recipe to Pinterest! Use the button on the recipe card or the share buttons on the side or bottom of this page.

    how to store

    You can store any leftover muffins at room temperature for 1 day or in the refrigerator for up to 5 days.

    The lemon blueberry muffins also freeze well in an airtight container or zip-top bag for up to three months. Allow them to defrost before serving. I like to warm mine slightly in my Breville countertop oven {3 minutes at 350°F}.

    pile of healthy lemon blueberry muffins

    Remember to snap a picture and tag me on Instagram if you make these Healthy Lemon Blueberry Muffins. It warms my heart to see you bring these recipes to life! Thank you for being here and happy baking!

    more healthy breakfast recipes

    • Peanut Butter Donuts
    • Birthday Cake Protein Bars
    • Healthy Breakfast Cookies
    • Whole Wheat Cranberry Zucchini Bread
    • Snickerdoodle Banana Bread

    If you make this recipe {or any recipe!} from two sugar bugs please come back and leave a review and a ⭐️⭐️⭐️⭐️⭐️ star rating.  I read every comment, and I LOVE hearing from you!

    Yield: 12 muffins

    Healthy Lemon Blueberry Muffins

    healthy lemon blueberry muffin with a bite missing

    Quick and easy healthy lemon blueberry muffins! The muffins are kid friendly and made with honey and applesauce. Vegan or dairy free options.

    Prep Time 10 minutes
    Bake Time 20 minutes
    Total Time 30 minutes

    Ingredients

    sugar topping

    • ¼ cup Turbinado raw cane sugar (55g)
    • 1 small lemon, zested

    lemon blueberry muffins

    • 1 ¾ cup white whole wheat flour (210g)
    • 1 teaspoon baking powder
    • ½ teaspoon baking soda
    • ½ teaspoon kosher salt
    • 6 tablespoons honey* (120g)
    • 2 large eggs**, room temperature
    • ½ cup unsweetened applesauce (113g)
    • 1 small lemon, zested then juiced
    • ⅔ cup kefir***(160mL)
    • 1 cup blueberries, frozen or fresh**** (140g)

    Instructions

    1. Preheat oven to 425°F and line a standard 12 well muffin pan with liners. Set aside.
    2. Place the Turbinado sugar (¼ cup/55g) in a bowl and add the zest of one small lemon. Use your (clean) fingers to work the zest into the sugar. Set aside.
    3. In a large bowl whisk together the white whole wheat flour (1 ¾ cups/210g), baking powder (1 teaspoon), baking soda (½ teaspoon) and kosher salt (½ teaspoon). Move 1 tablespoon of the mixture to a small bowl and set both bowls aside.
    4. In a medium bowl whisk together the honey (6 tablespoons/120g), applesauce (½ cup/113g), lemon zest (from one small lemon) and 1-2 teaspoons of fresh lemon juice. Then whisk in the eggs (2 large) followed by the kefir (⅔ cup/160mL).
    5. Add the wet ingredients to the dry ingredients and mix with a spatula until combined. Now mix the blueberries (1 cup/140g) {do not thaw frozen berries} with the reserved tablespoon of the flour mixture and gently mix them into the muffin batter.
    6. Divide the batter evenly between the 12 prepared muffin liners, I use a #16 scoop, which is about a ¼ cup. Top each muffin batter with about 1 teaspoon of the Turbinado sugar mixture.
    7. Bake for 5 minutes, then drop the oven temperature to 350°F (leave the muffins in the oven) and bake for another 12-15 minutes more or until a toothpick comes out with just a few moist crumbs.
    8. Allow the muffins to rest in the pan for about 1 minute and then move to a wire rack to cool completely. (the muffins will stick to the liners when they are still warm)

    Notes

    *the honey can be substituted with packed light or dark brown sugar or maple syrup for a vegan option.

    **Flax eggs can be substituted to make these muffins vegan. Mix 2 tablespoons flaxseed meal with 5 tablespoons water; then allow to rest 5 minutes.

    ***the kefir can be substituted with buttermilk or for a dairy free or vegan option; measure ⅔ cup/160mL of a dairy free milk, add 2 teaspoons of lemon juice, stir and let rest for 5 minutes before using.

    ****if using frozen blueberries DO NOT thaw them. For fresh blueberries, wash them and dry completely before using.

    Any leftover muffins can be stored at room temperature for up to 1 day or in the refrigerator for up to 5 days. They also freeze well for up to 3 months.

    Nutrition Information:

    Yield:

    12

    Serving Size:

    1

    Amount Per Serving: Calories: 139Total Fat: 1gSaturated Fat: 0gTrans Fat: 0gUnsaturated Fat: 1gCholesterol: 32mgSodium: 185mgCarbohydrates: 30gFiber: 2gSugar: 16gProtein: 4g

    The nutrition information is an estimate only and may not be entirely accurate.
    Did you make this recipe?

    Please make my day and PIN to Pinterest and share a photo on Instagram ~ making sure to tag @twosugarbugs! THANK YOU!!

    © Tasia
    Cuisine: American / Category: Muffins
    • « Previous Page
    • 1
    • …
    • 15
    • 16
    • 17
    • 18
    • 19
    • …
    • 39
    • Next Page »
    welcome graphic

    Hi, I'm Tasia, a self-taught baker and enthusiastic home cook with over 25 years experience in the kitchen! I'm here to inspire you to have fun while creating food from scratch. I make approachable and nostalgic recipes for busy bakers that you will want to make again and again. The recipes you find here will mostly be sweet and sometimes savory.

    More about me →

    https://thefeedfeed.com/

    Reader Favorite Recipes

    • stack of cookies with the sun hitting them
      Espresso Brown Butter Toffee Cookies
    • buttercream sugar cookie with sprinkles
      Buttercream Sugar Cookies
    • cookies and sprinkles on a cooling rack
      Sprinkle Cookies
    • slice of cookie butter cake on a plate with a fork
      Moist Cookie Butter Cake

    ©two sugar bugs.  All images and content are copyright protected.  Please do not use our images without prior permission.  If you would like to republish a two sugar bugs recipe, please rewrite the recipe in your own words and link back to the blog post and one to the home page.  See my privacy policy for full details.
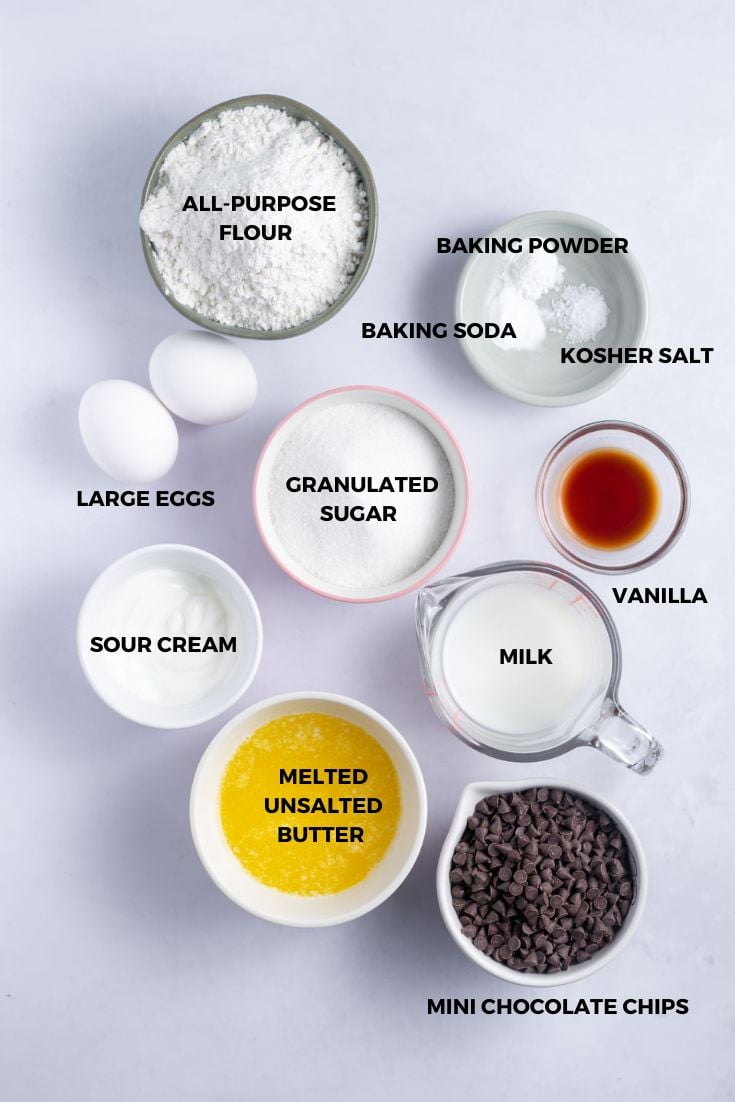
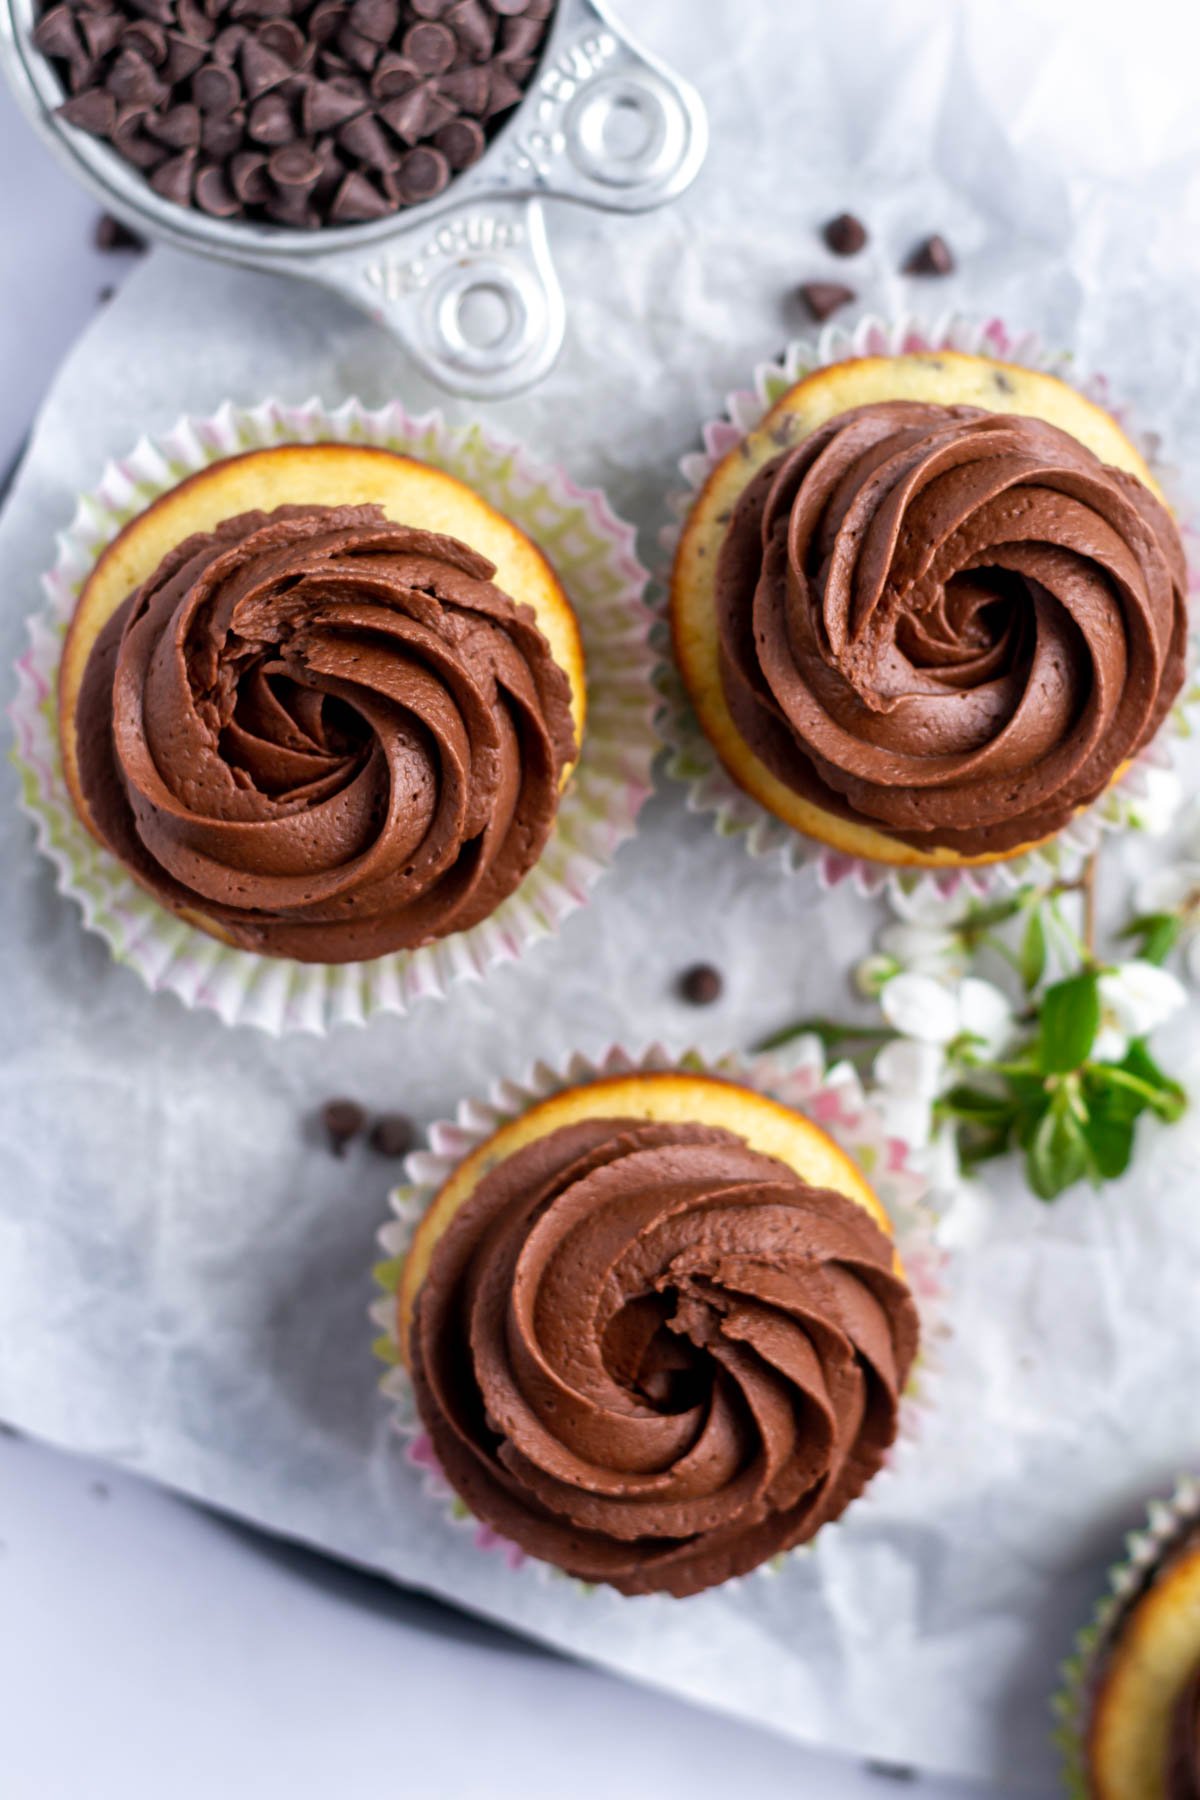
    Footer

    ↑ back to top

    About

    • Meet Tasia
    • Privacy Policy
    • Comment Policy
    • Terms & Conditions
    • Disclosure

    Shop

    • My favorite kitchen supplies via my Amazon Store

    Contact

    • Work with Me
    • Come Say hello
    • Sign Up! for emails and updates

    All images and content are copyright protected.  Please do not use our images without prior permission. 

    © 2026 two sugar bugs. All rights reserved.