two sugar bugs

  • About
  • Recipes
  • Coffee Talk
  • come say hello
    • Contact
    • Privacy Policy
menu icon
go to homepage
  • About
  • Recipes
  • Coffee Talk
  • Come say hello
  • Work With Me
    • Instagram
    • Pinterest
    • YouTube
  • subscribe
    search icon
    Homepage link
    • About
    • Recipes
    • Coffee Talk
    • Come say hello
    • Work With Me
    • Instagram
    • Pinterest
    • YouTube
  • ร—
    Home

    Old Fashioned Oatmeal Cream Pie Cookies

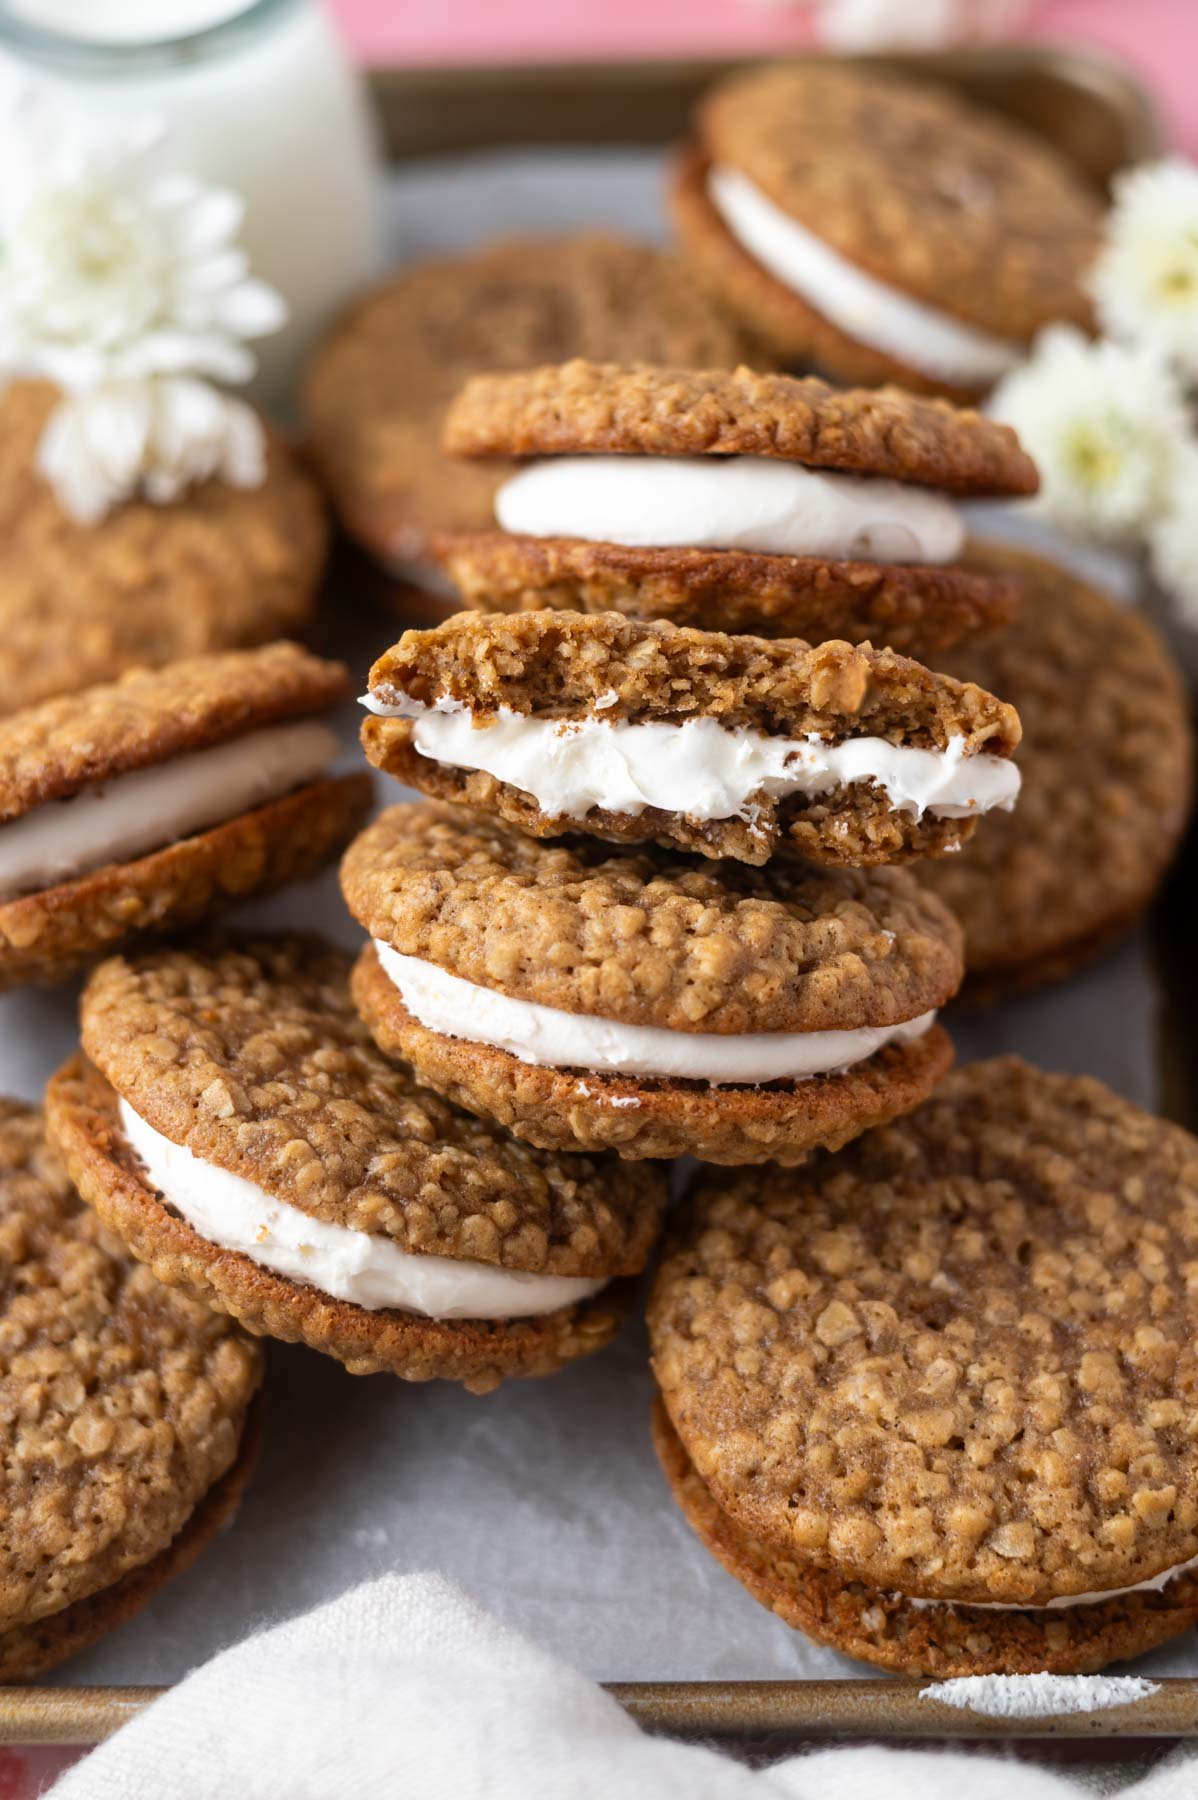
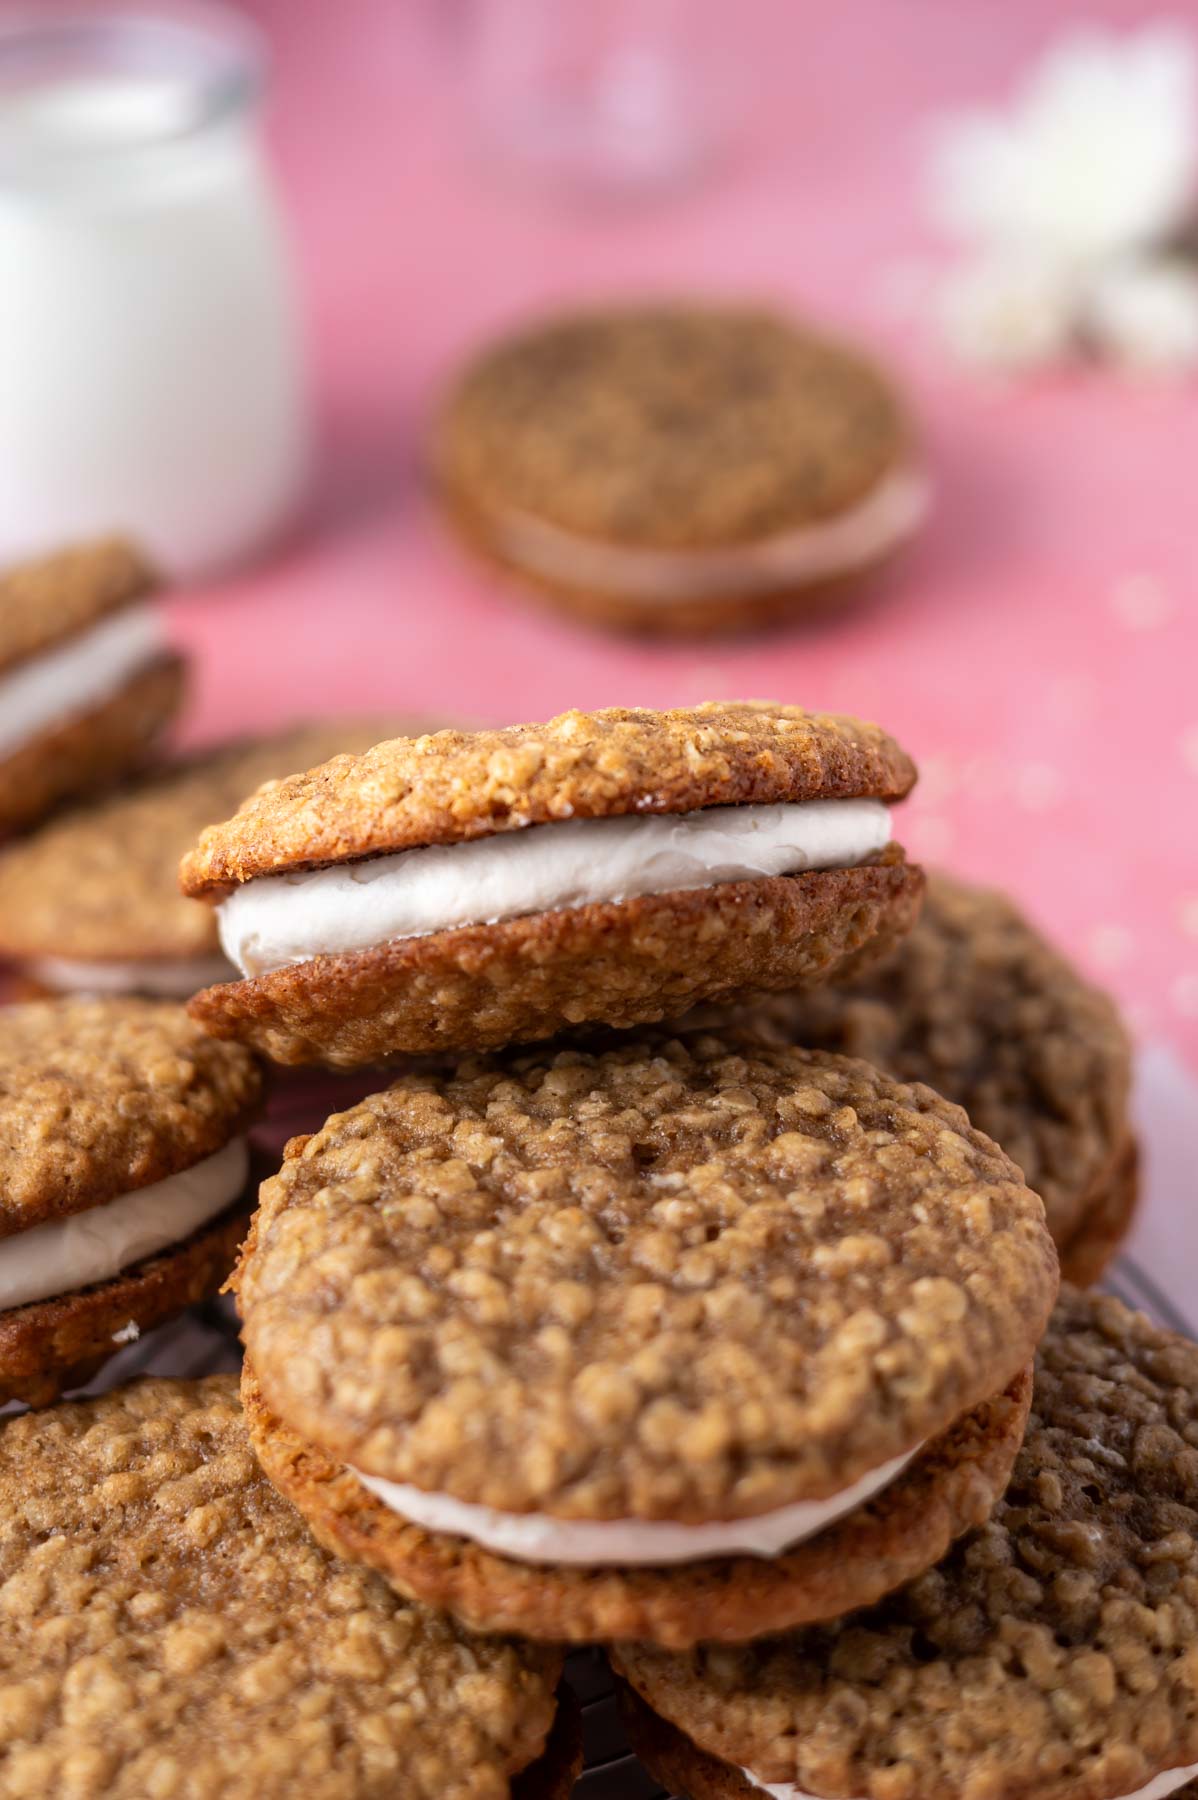
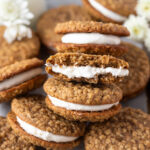
    pile of oatmeal cream pie cookies on a parchment lined baking sheet with milk and white flowers in the background

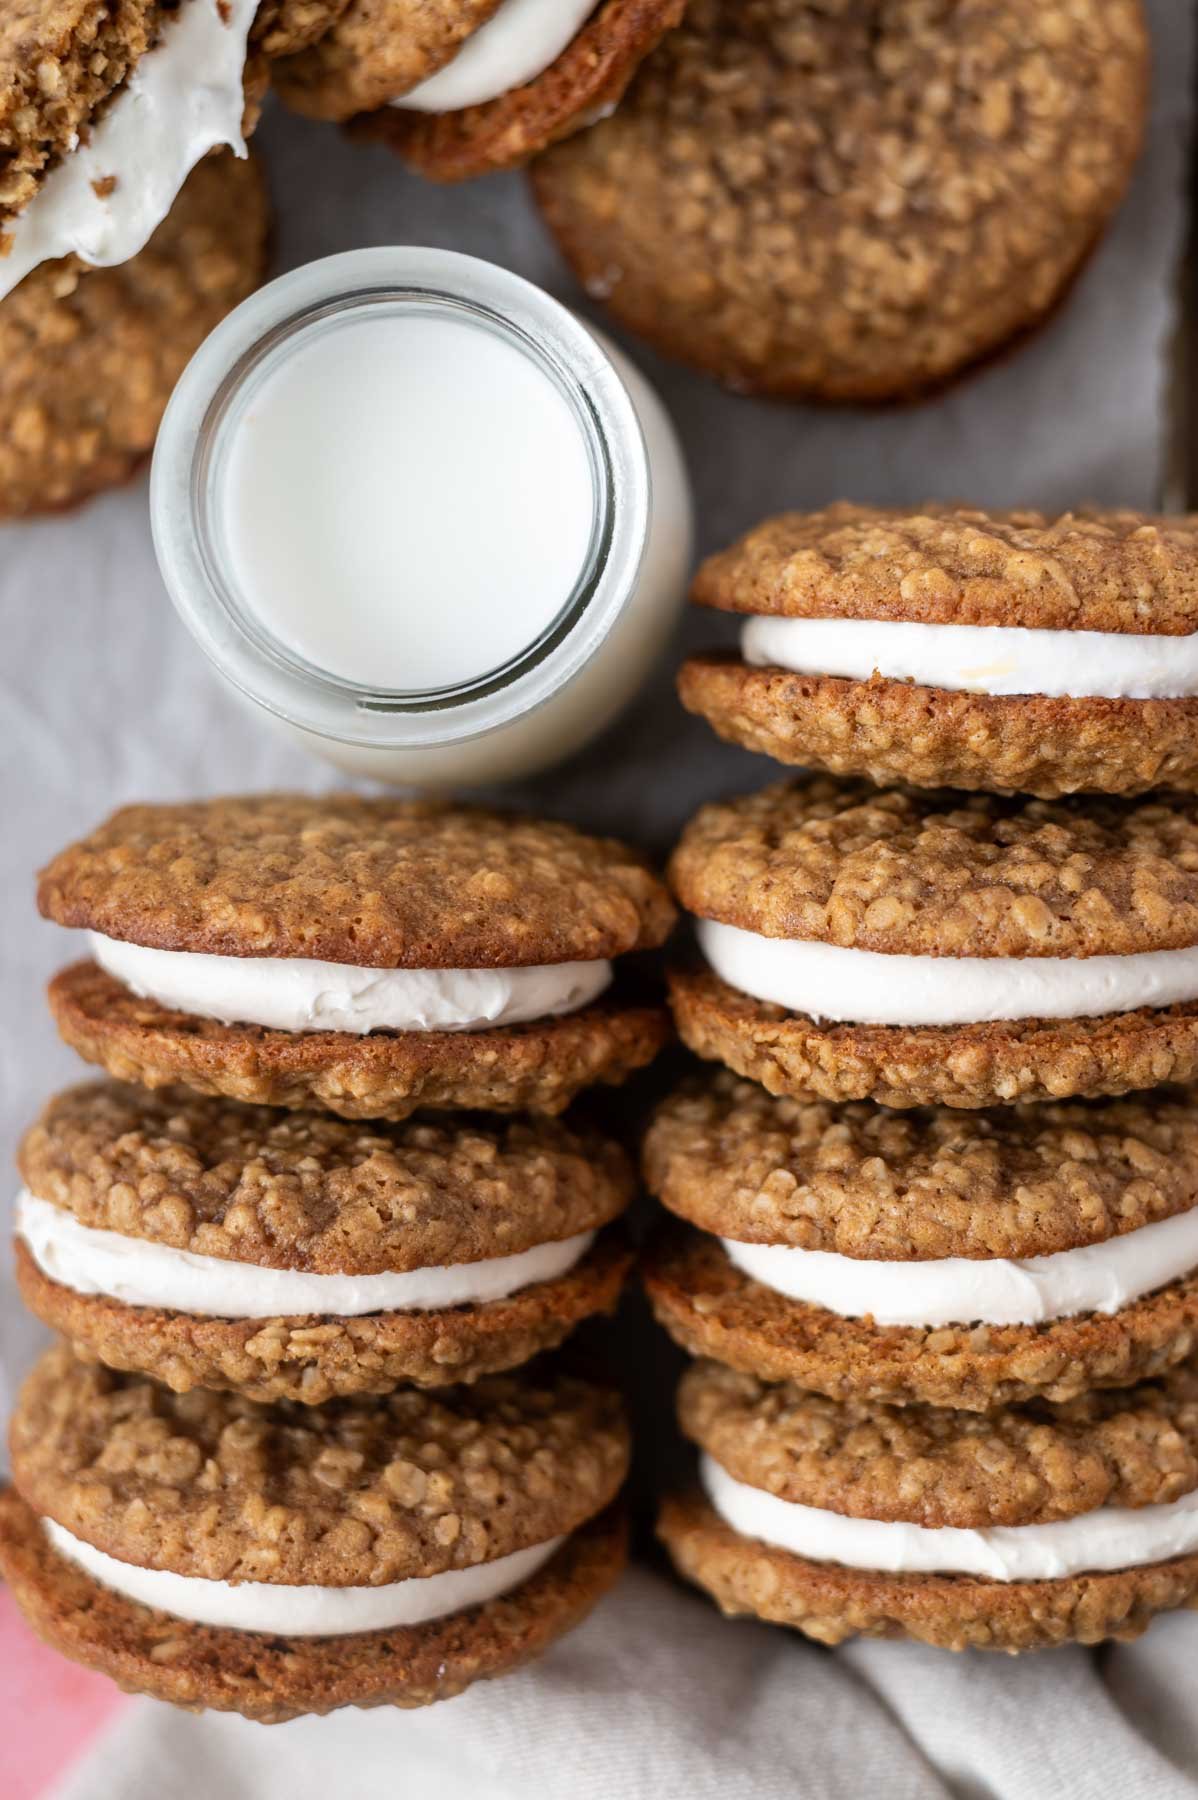
    These oatmeal cream pie cookies sandwich a marshmallow fluff buttercream filling between two soft oatmeal cookies. They are the grown up, homemade version of Little Debbie oatmeal creme pies.

    pile of oatmeal cream pie cookies on a parchment lined baking sheet with milk and white flowers in the background

    Disclosure | This post may contain affiliate links. As an Amazon Associate I earn from qualifying purchases.

    Get ready to be transported back in time. Oatmeal sandwich cookies are about as nostalgic as it gets! Whether you had them in your lunch box, at a friend's house or as a special after-school treat, oatmeal cream pies are sure to bring back some good memories!

    For this cream pies recipe, the soft oatmeal cookies are made without molasses and are stuffed with the best marshmallow fluff filling without cream cheese.

    They are simple to make and the cookies are made with cold butter. The cookie dough does not need to chill either. You'll be sinking your teeth into this old fashioned nostalgic treat in no time!

    Given the popularity of my brown butter oatmeal cookies and coconut oatmeal cookies, I know ya'll like oatmeal cookies. While the filling doesn't bake into the middle of the cookies like my sugar cookie sandwiches, I know you will still find this recipe easy to prepare.

    [feast_advanced_jump_to]
    oatmeal cream pie cookie on it's side in a pile showing the filling with milk in the background

    ๐Ÿช ingredient notes

    Please scroll to the printable recipe card at the end of this post for the full list of ingredients and baking directions.

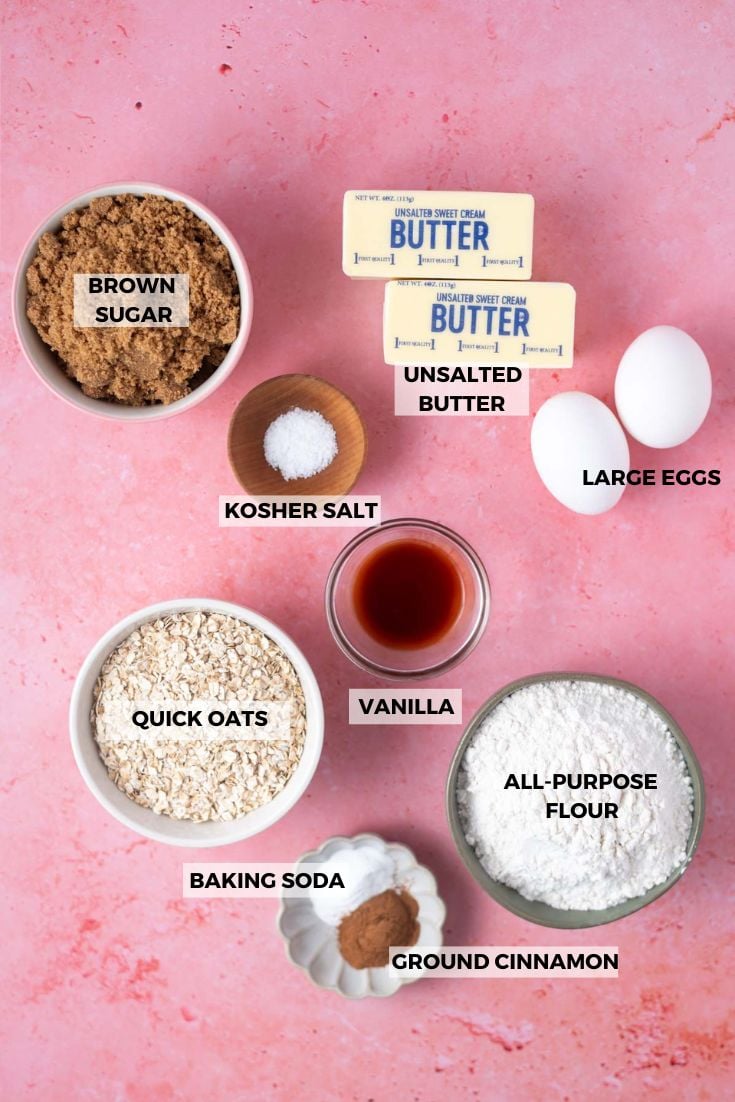
    ingredients for oatmeal cookies
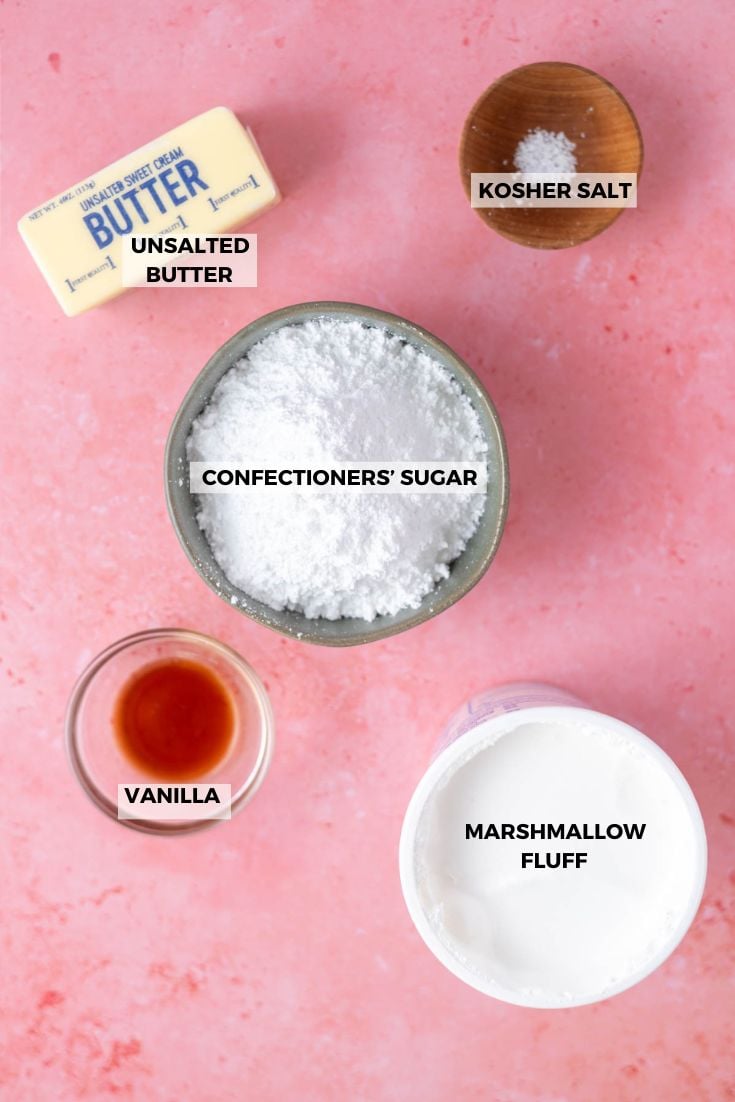
    marshmallow fluff buttercream filling ingredients

    Oats ~ in the testing of these cookies, people preferred the texture and softness that the cookies have with quick oats. If you only have rolled oats, give them a quick blitz in a food processor or high-powered blender to create smaller oat pieces.

    Brown sugar ~ dark brown sugar is preferred for the best sandwich cookies. It adds more moisture and chewiness to the oatmeal cookies. If you don't have it, feel free to use light brown sugar.

    Marshmallow fluff ~ this store bought ingredient is important for the cream filling to have a similar taste to Little Debbie's creme pies. If you don't have marshmallow fluff, a vanilla buttercream or meringue filling can be used.

    ๐Ÿ‘ฉ๐Ÿปโ€๐Ÿณ how to make

    Preheat oven to 350ยฐF and prepare baking sheet pans with parchment paper or silicone baking mats.

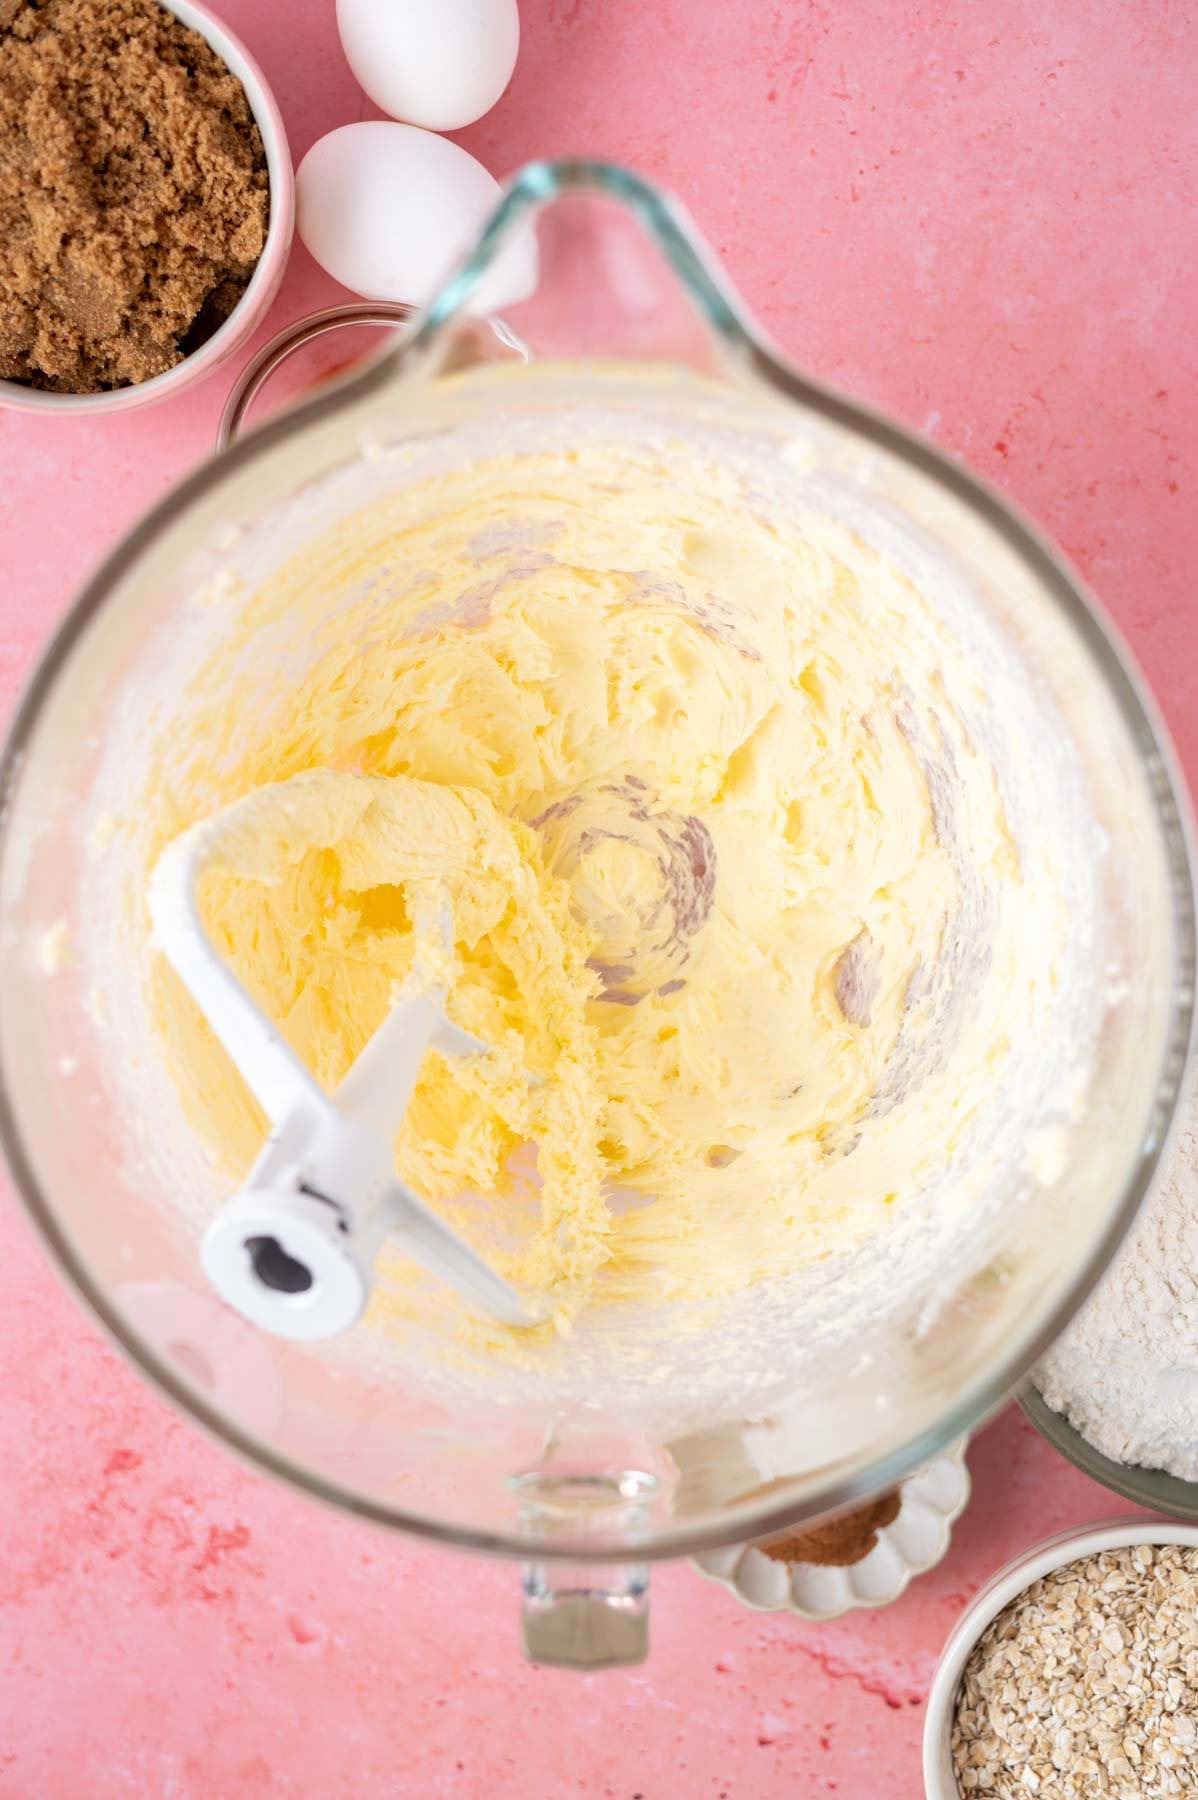
    cold butter and salt beaten together in a mixing bowl

    In a stand mixer with the paddle attachment beat the cold and cubed butter and kosher salt on medium-high until softened. Scrape up and down the bowl.

    brown sugar beaten into butter in a mixing bowl

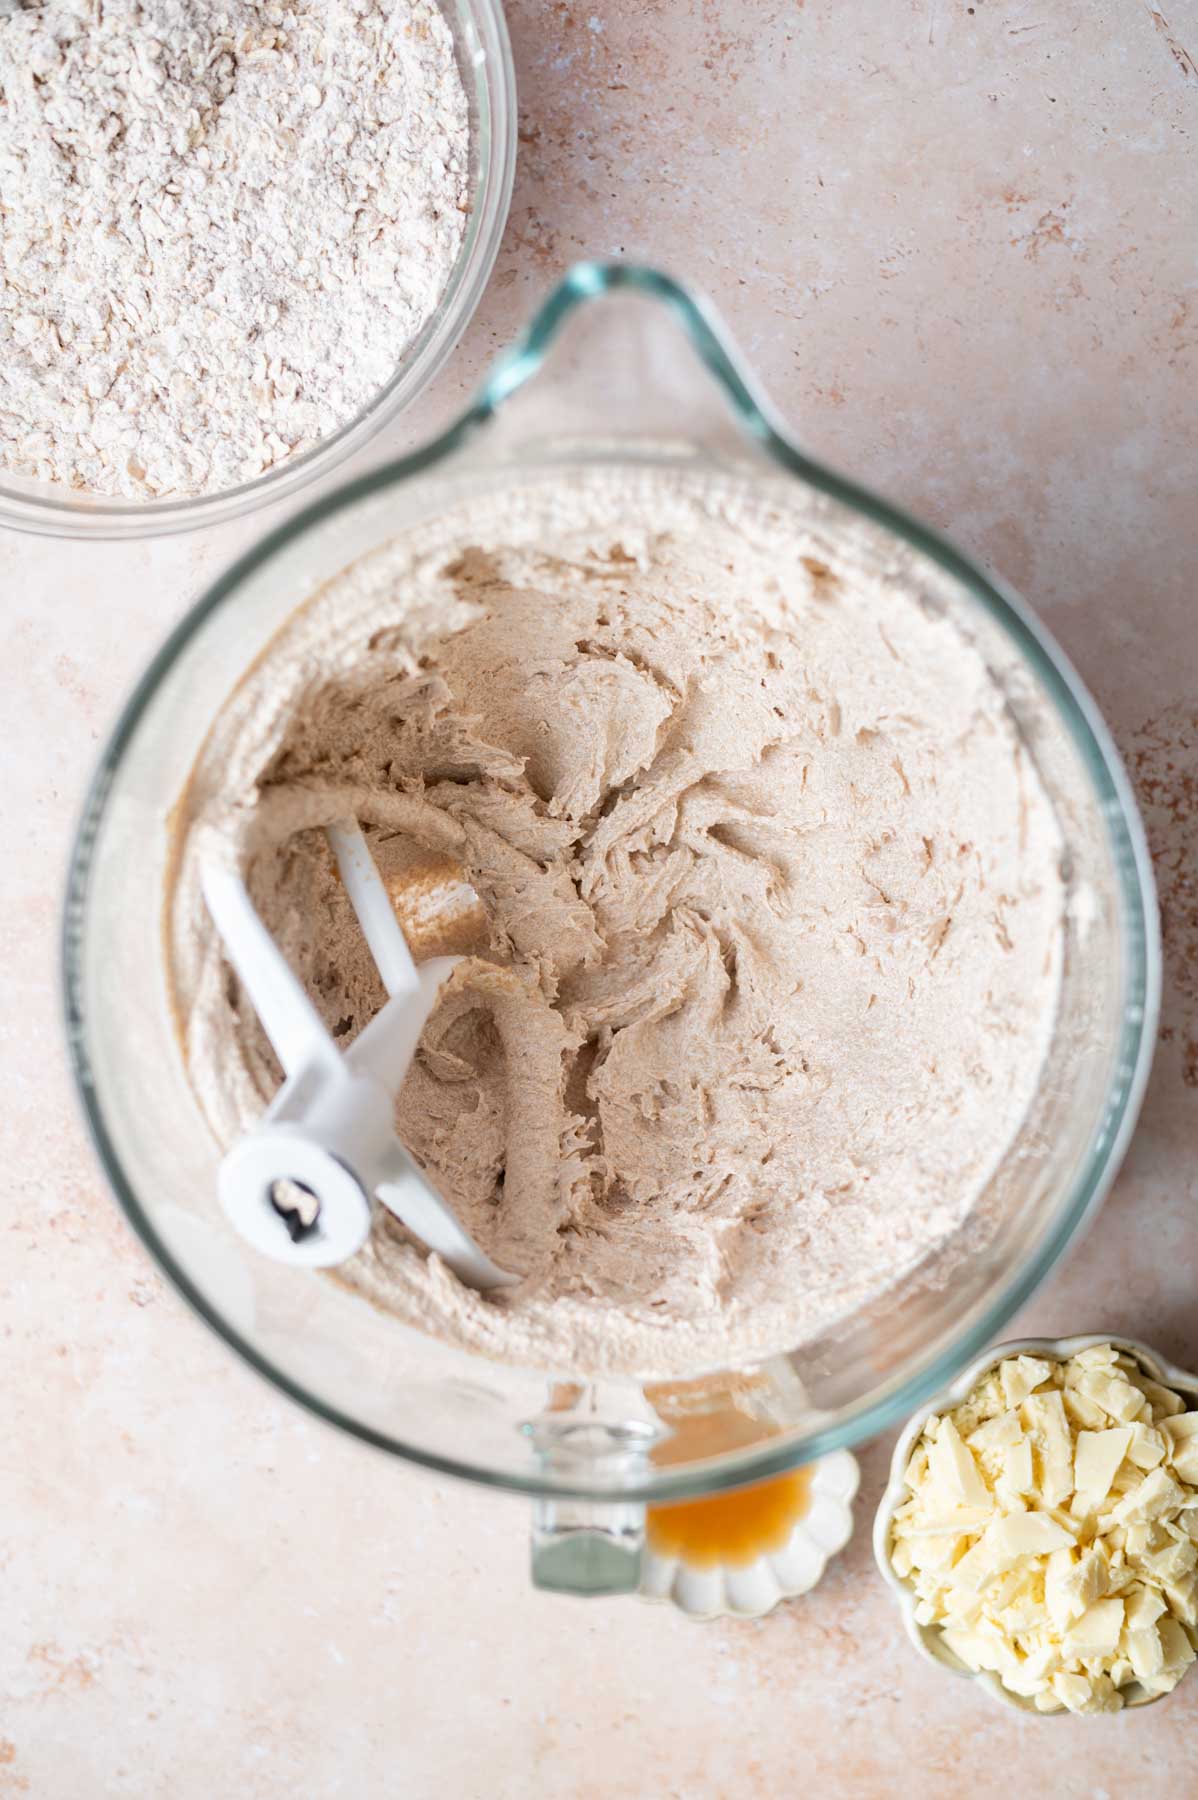
    Then add the dark brown sugar and mix on low until incorporated, then turn up to medium-high and beat until light and fluffy. Stop and scrape the bowl at least once during this time.

    cookie batter after eggs have been added

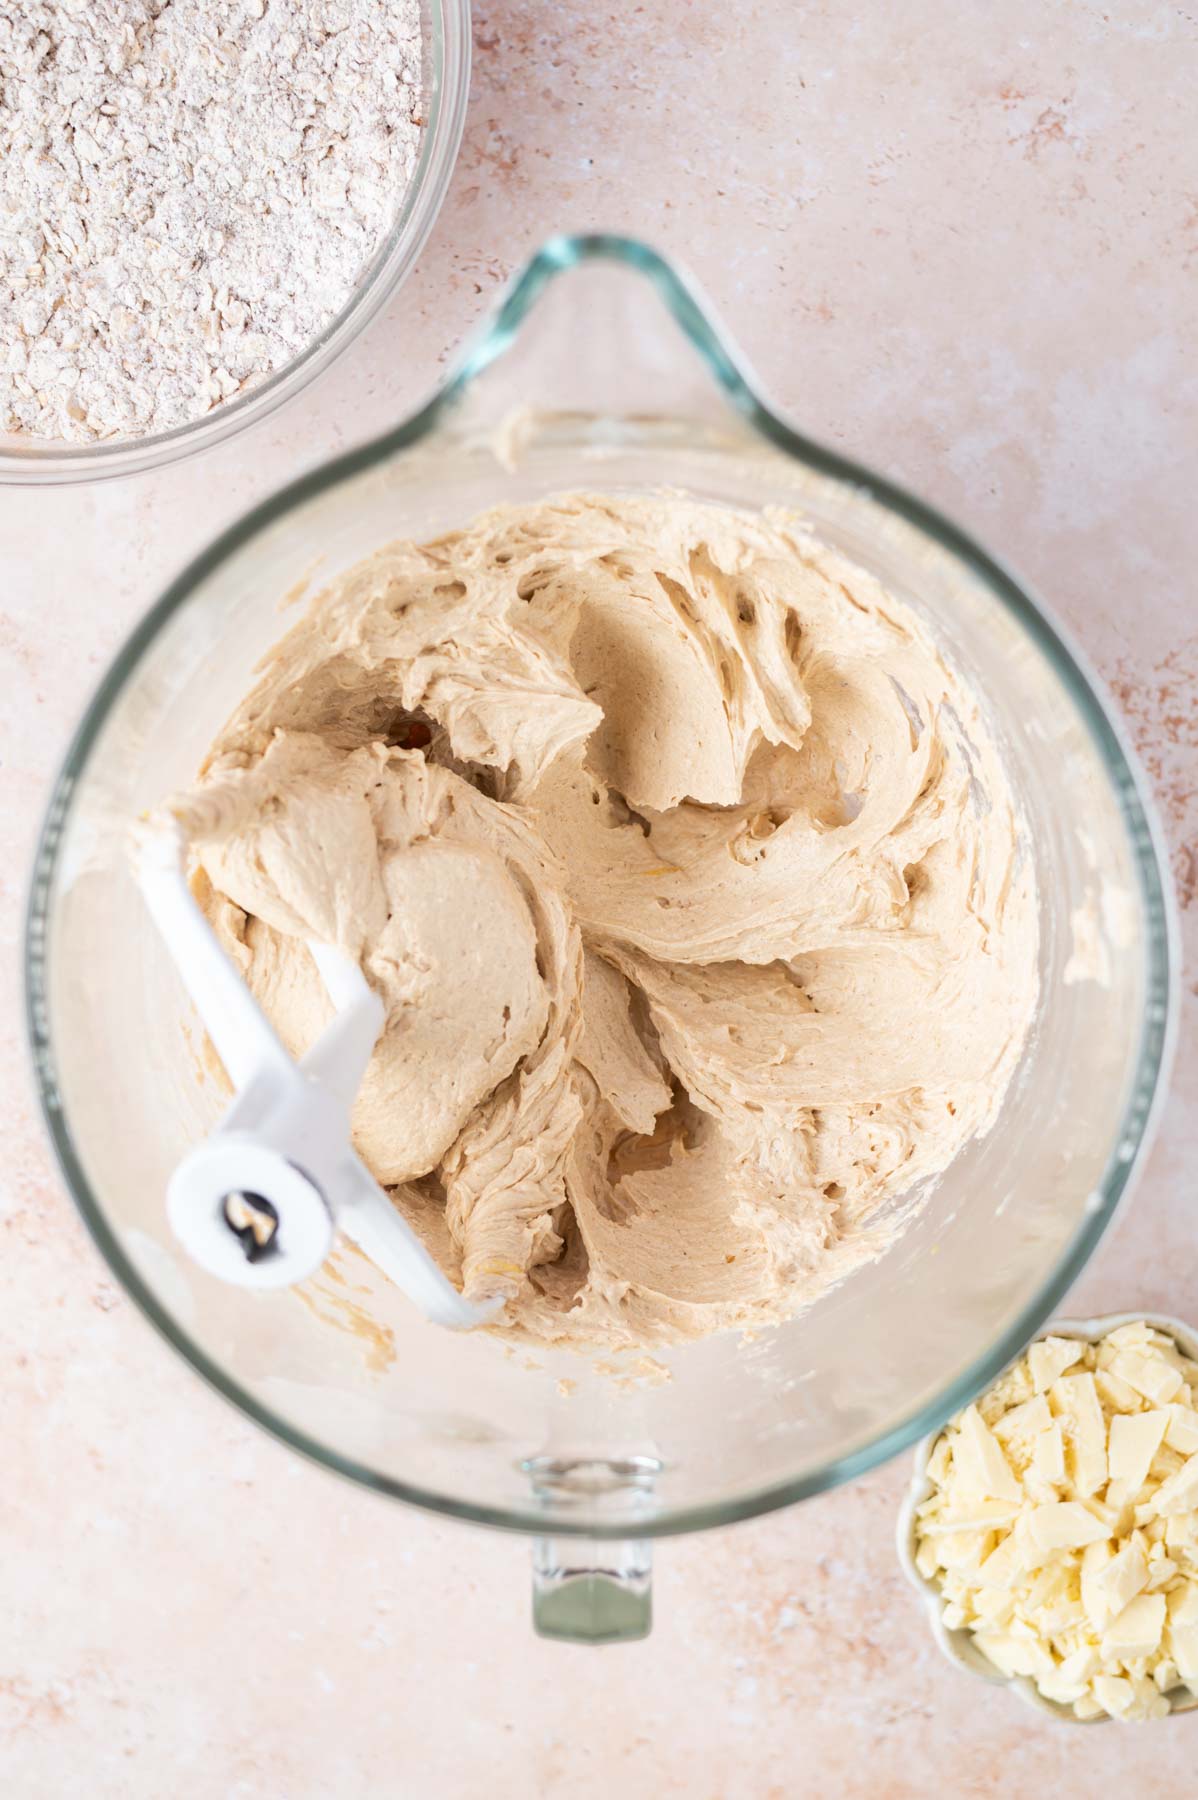
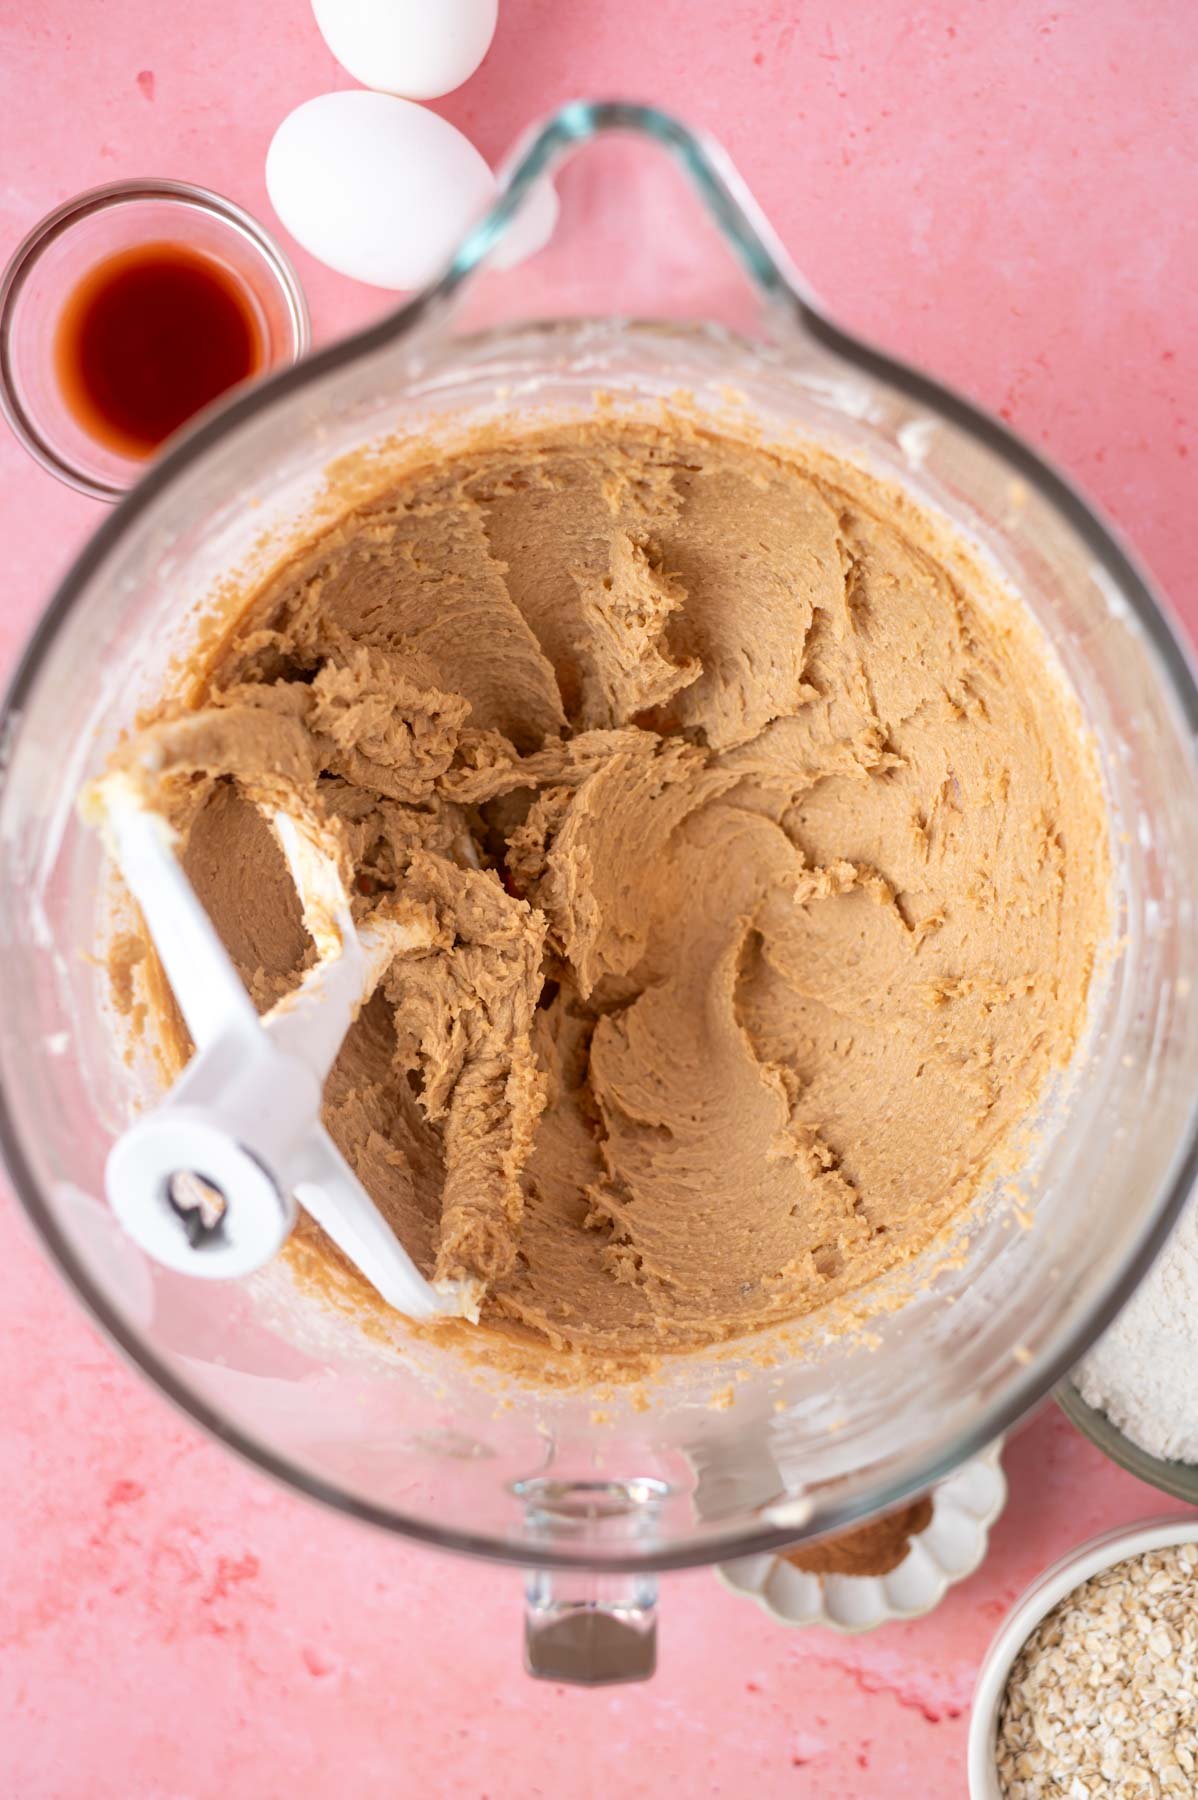
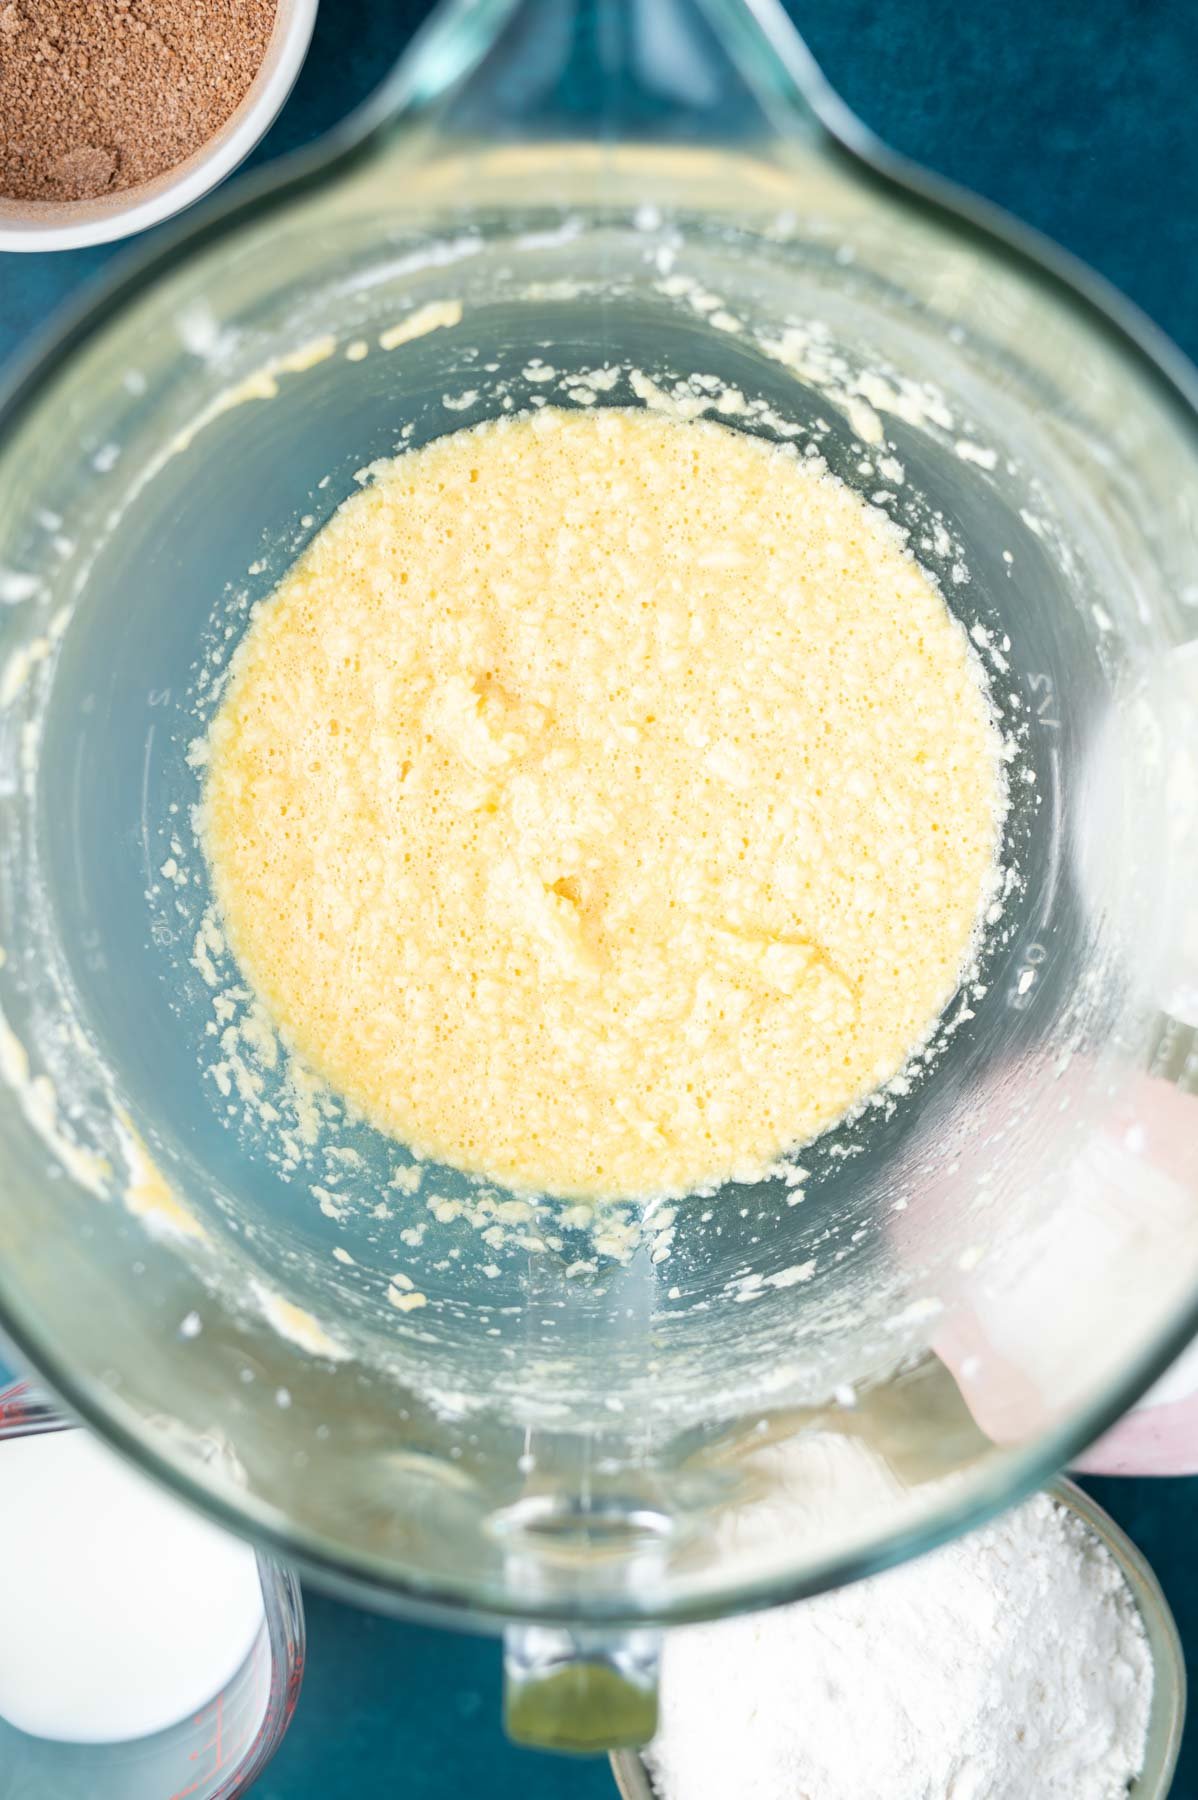
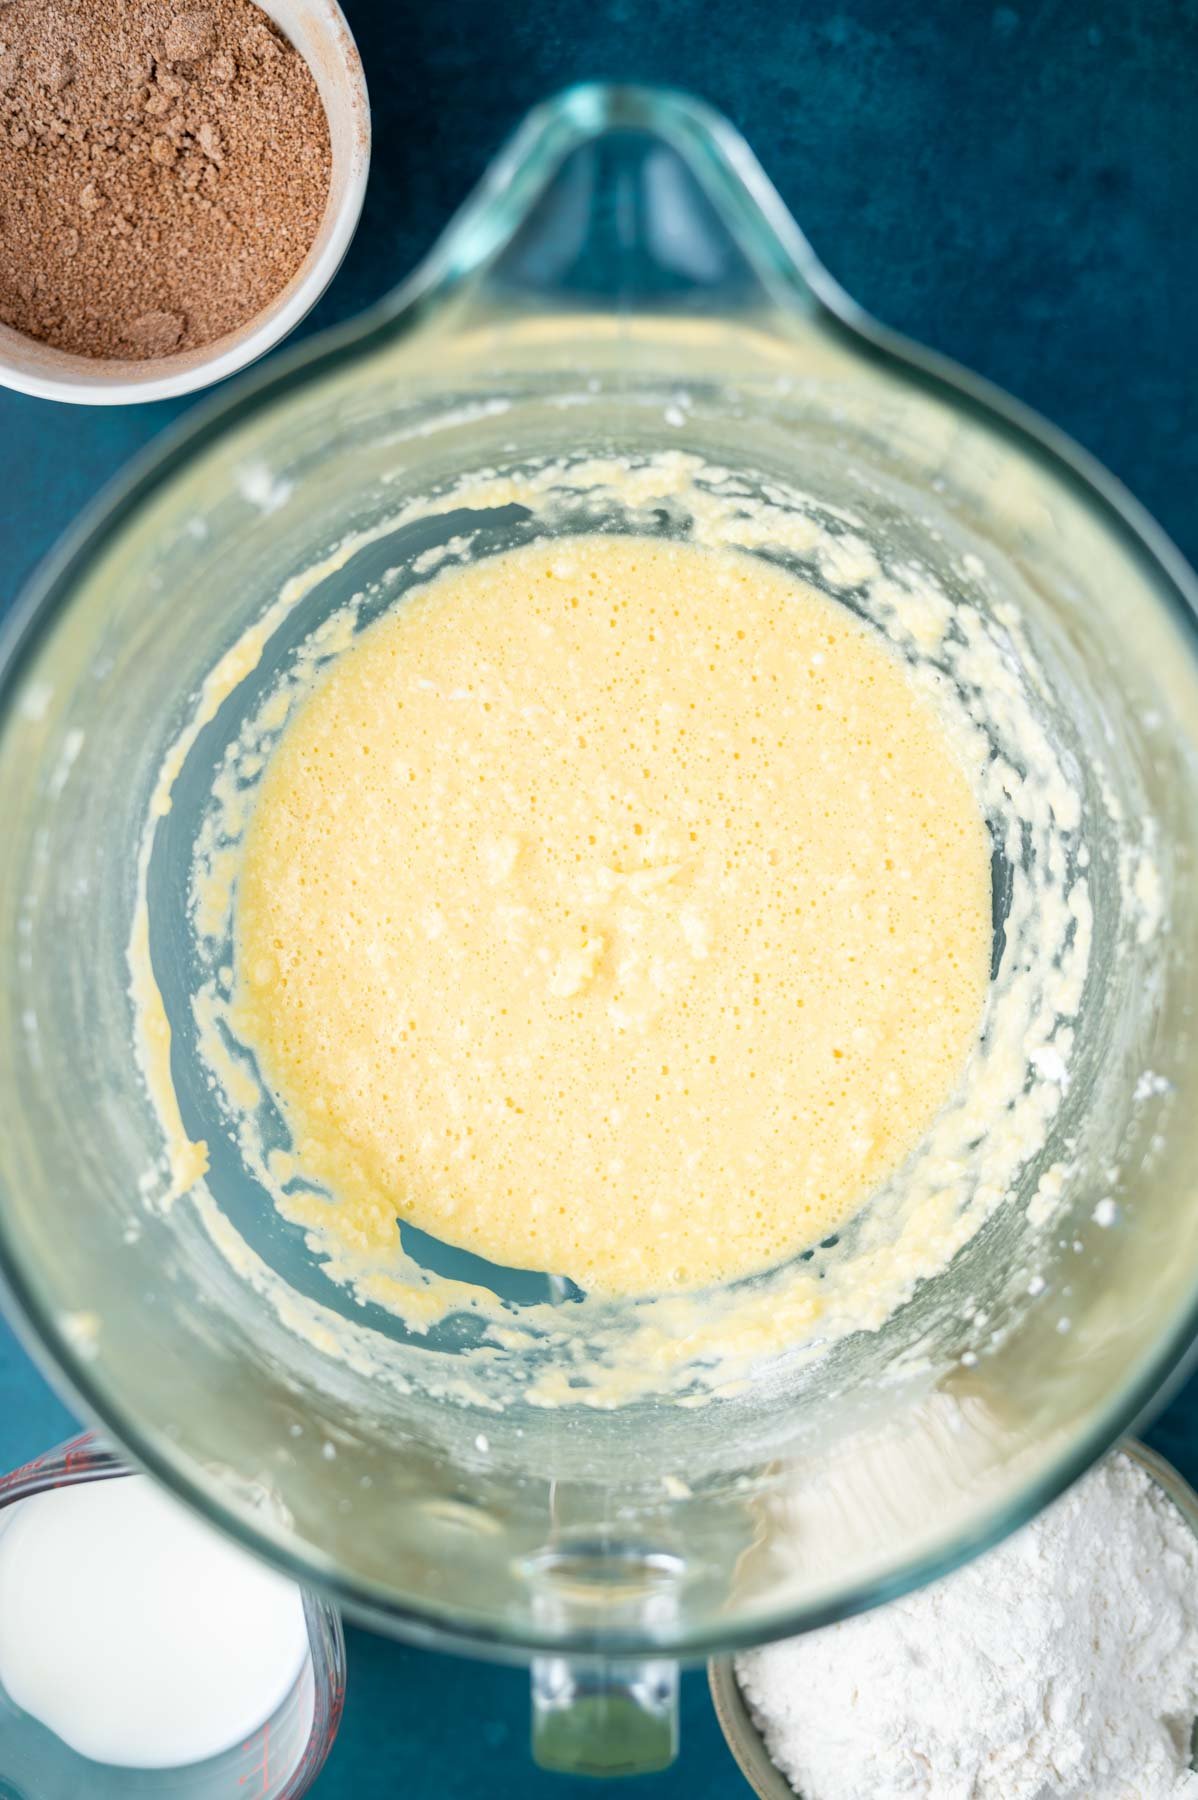
    Scrape down the bowl and add pure vanilla extract and the eggs, one at a time, mixing on medium until combined. Scrape up and down the bowl again.

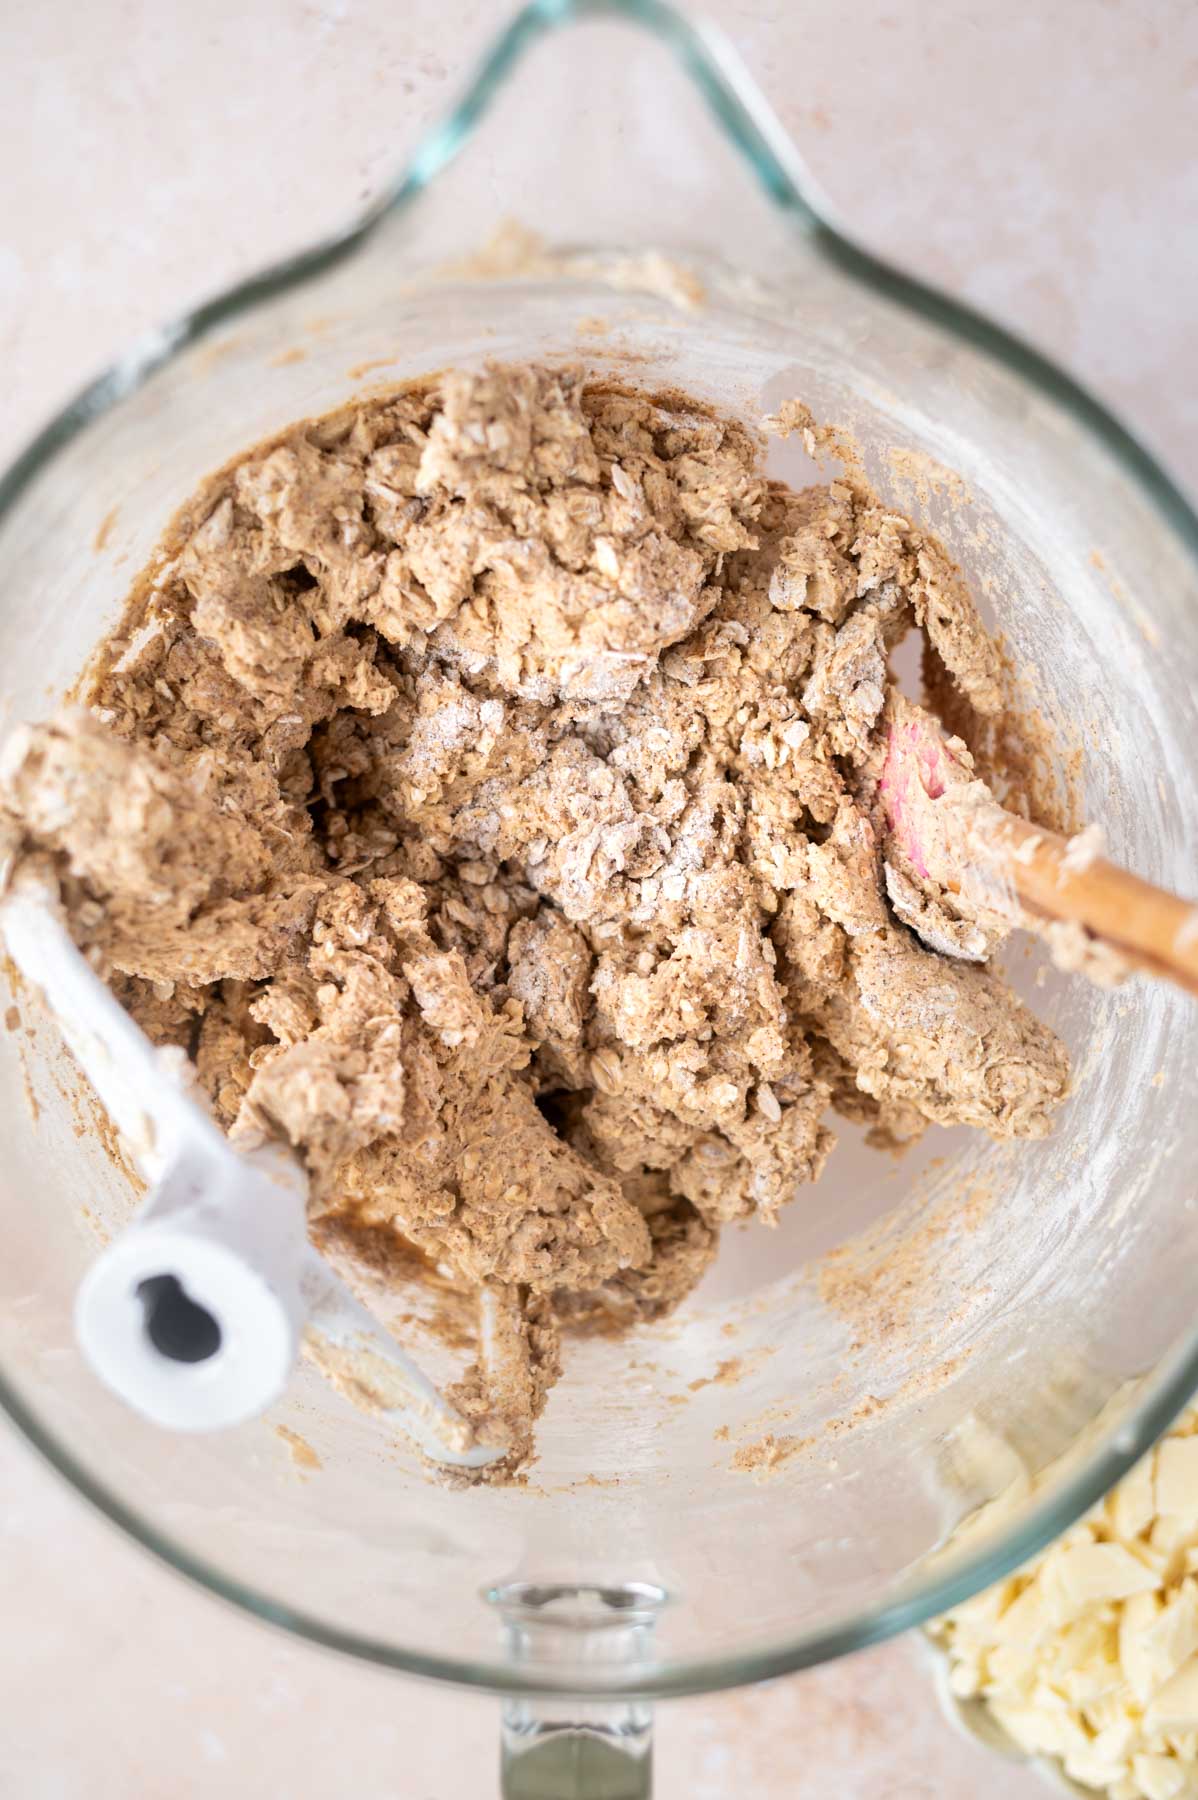
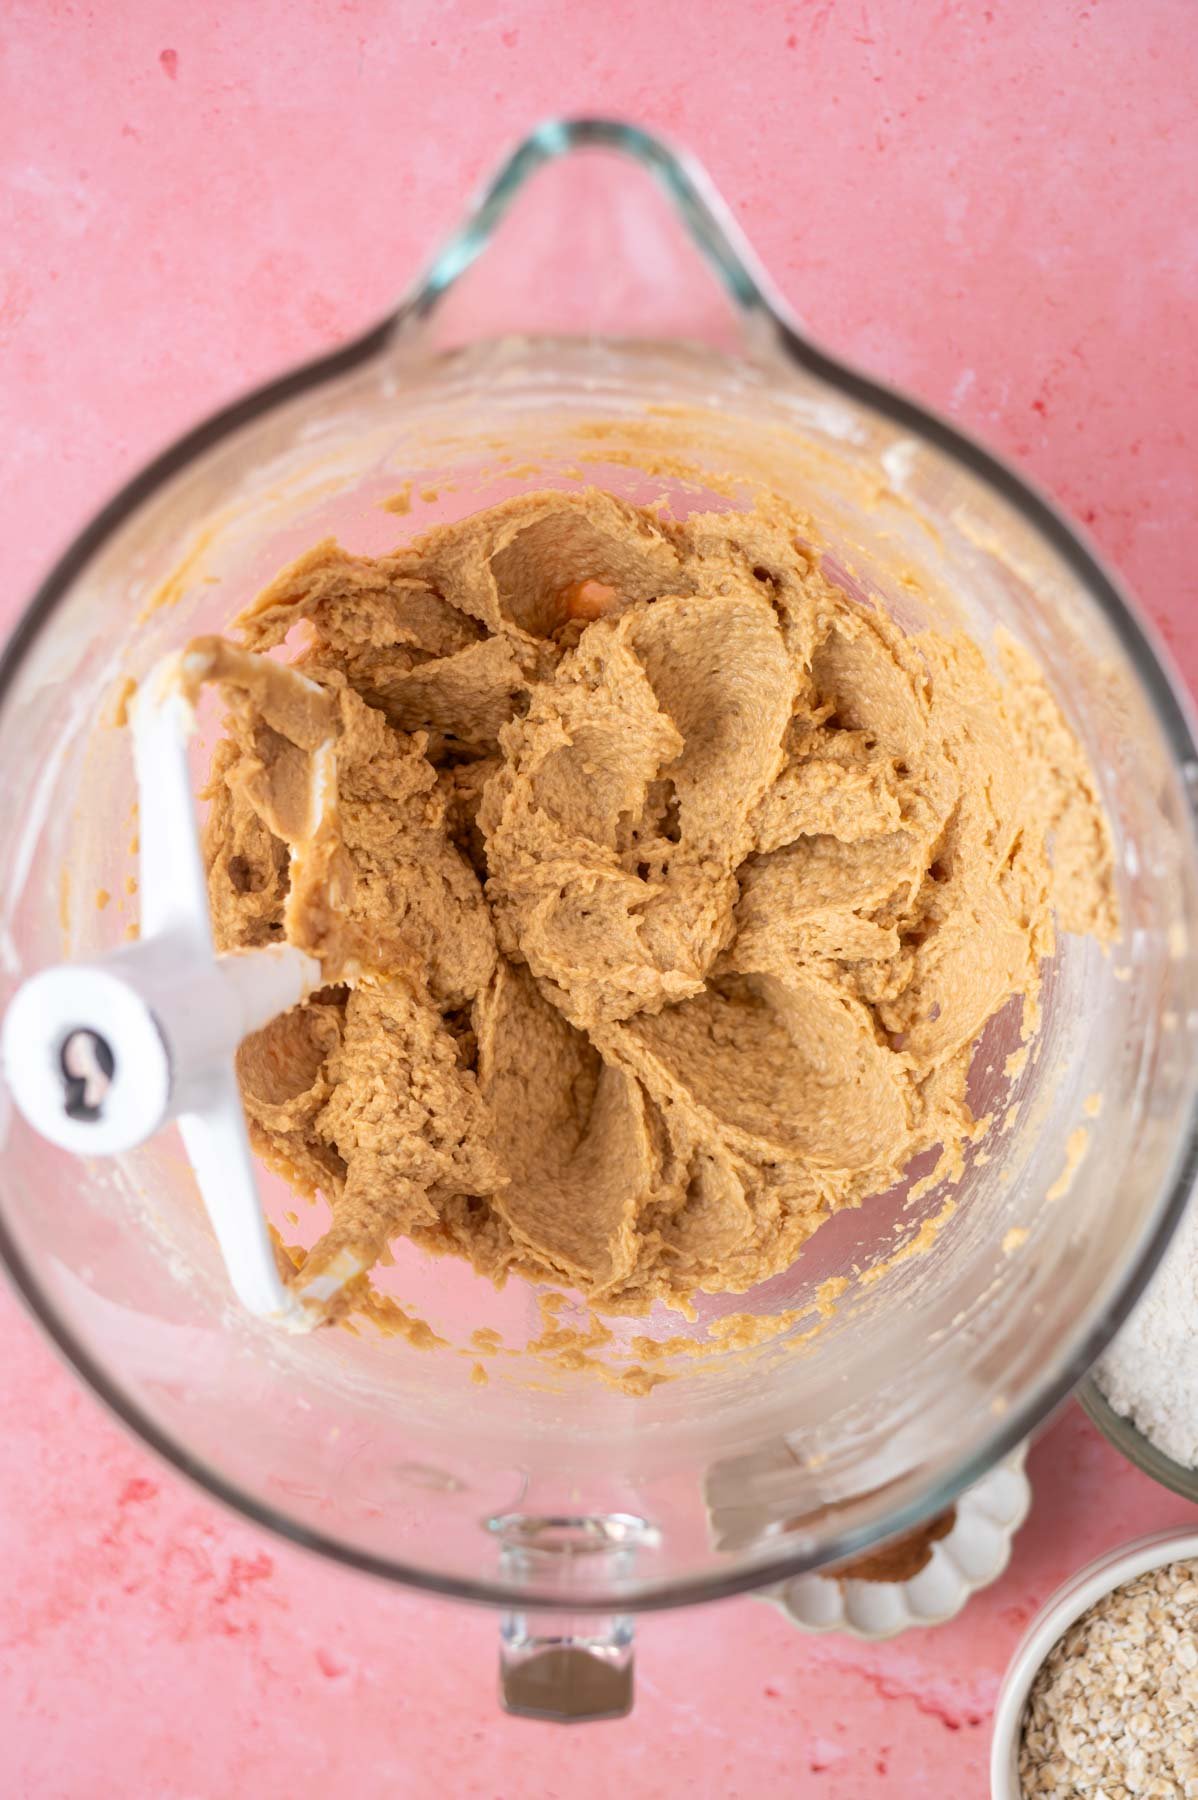
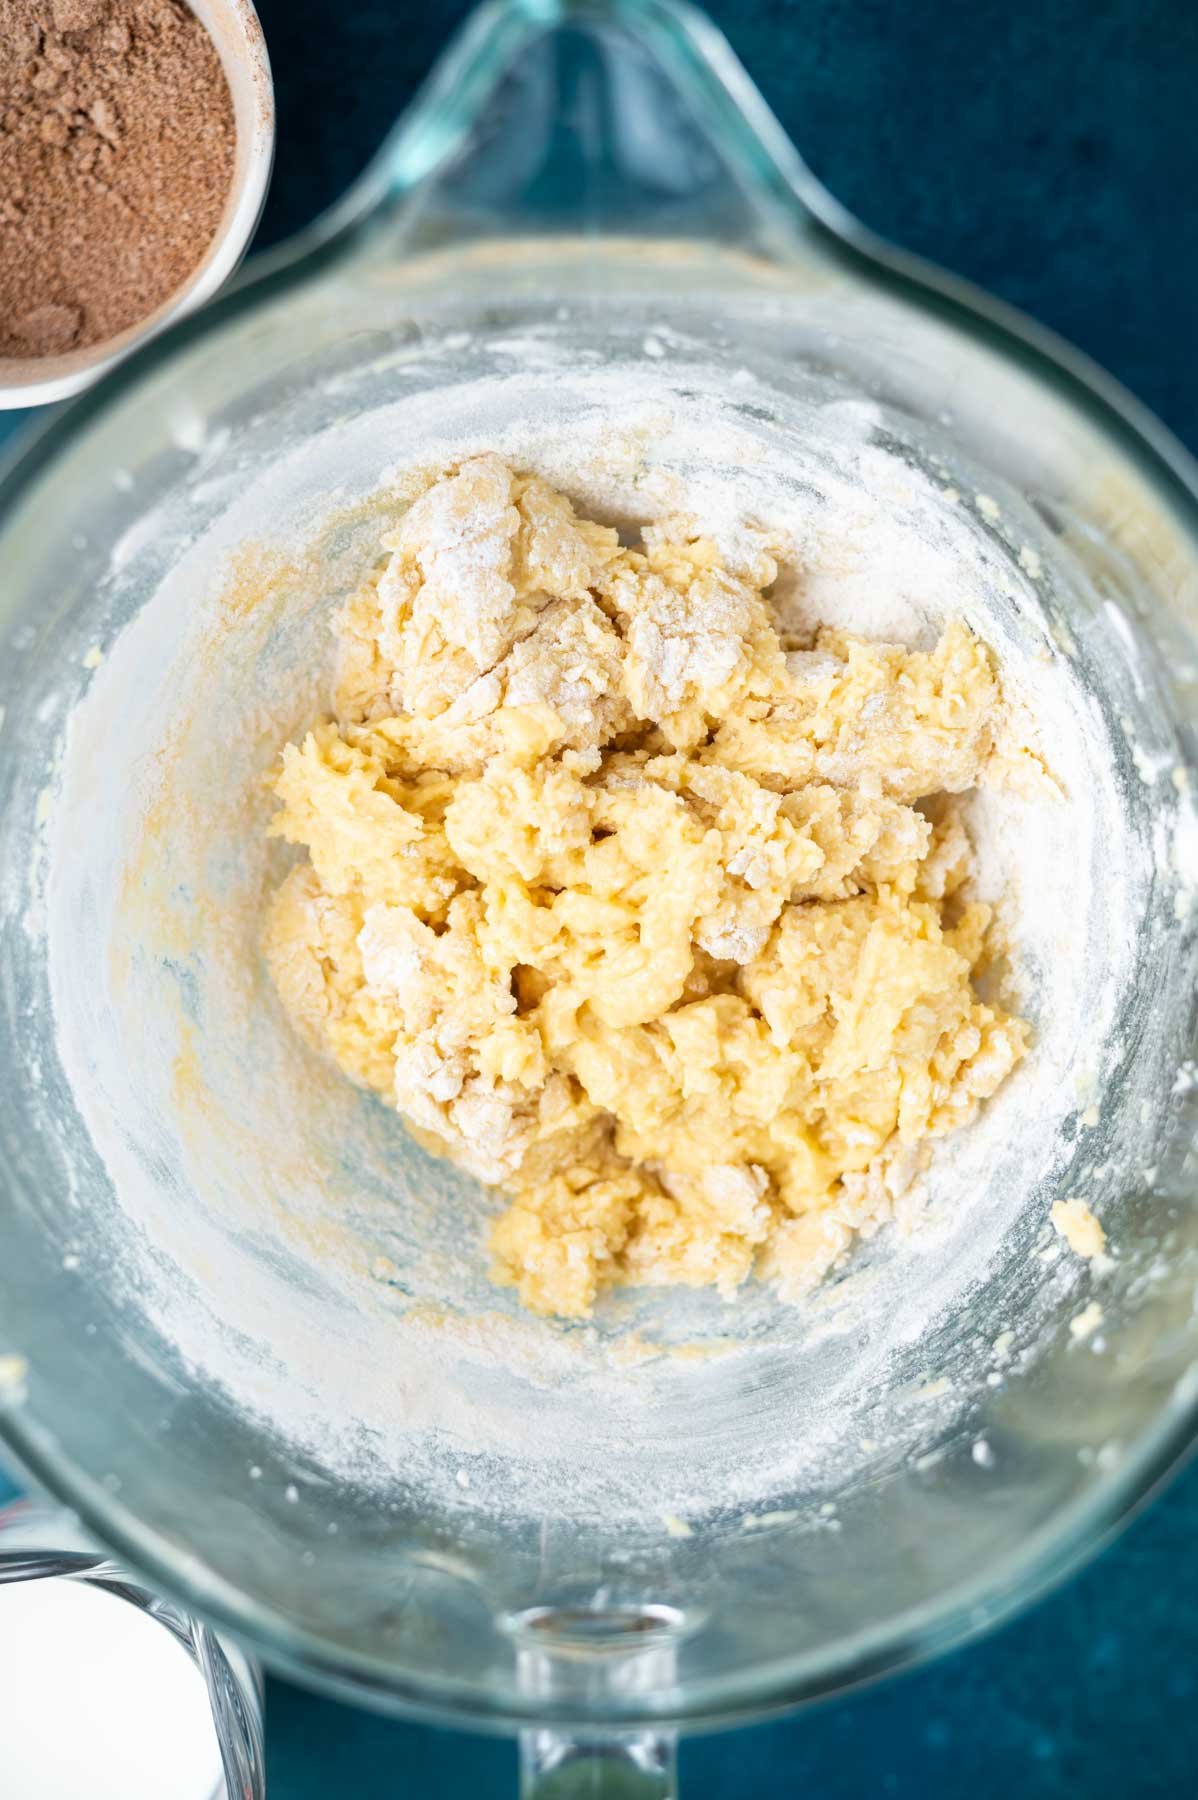
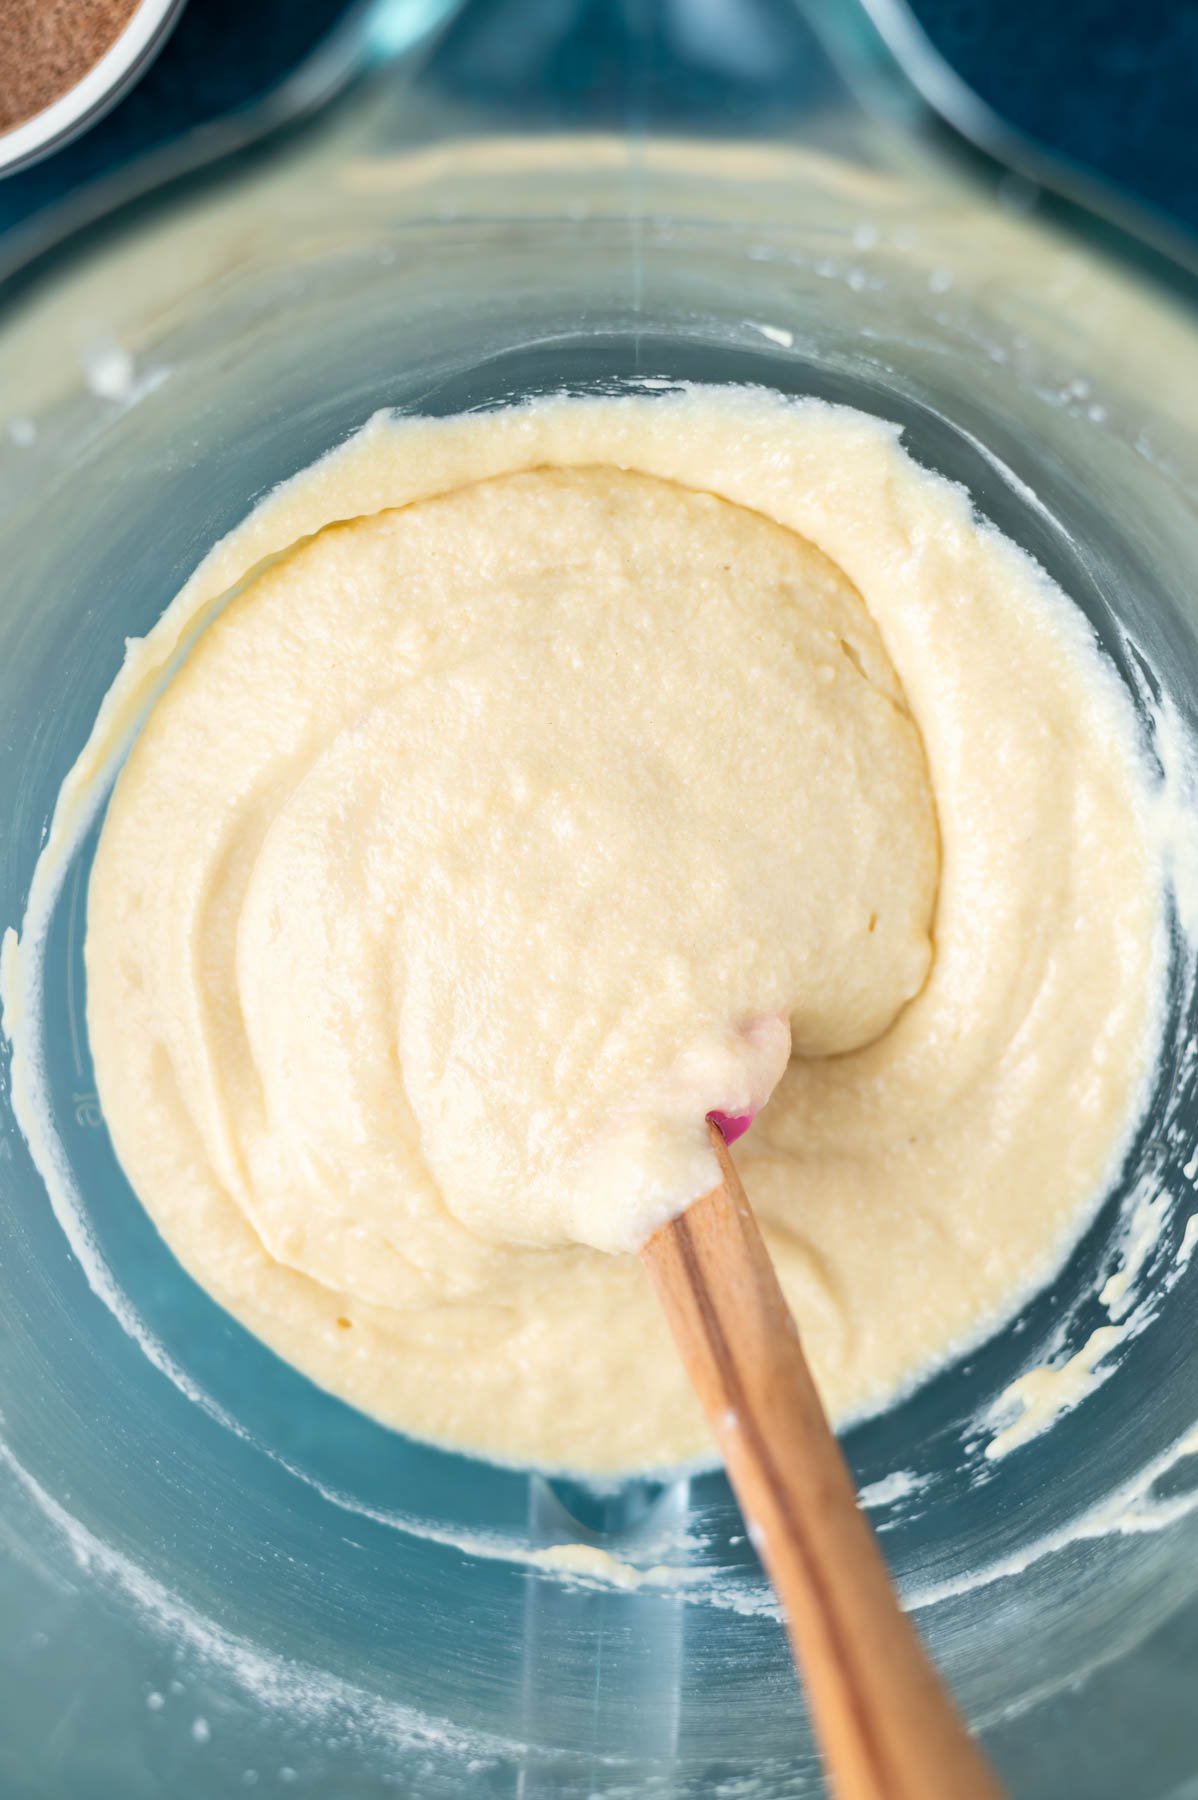
    With the mixer on low, add the baking soda and cinnamon and mix on low until fully combined. Then add half of the all-purpose flour and half of the quick oats and blend until a few large streaks of flour/oats remain.ย  Scrape up and down the bowl.ย Add in the remaining flour and oats and mix on low until just combined.

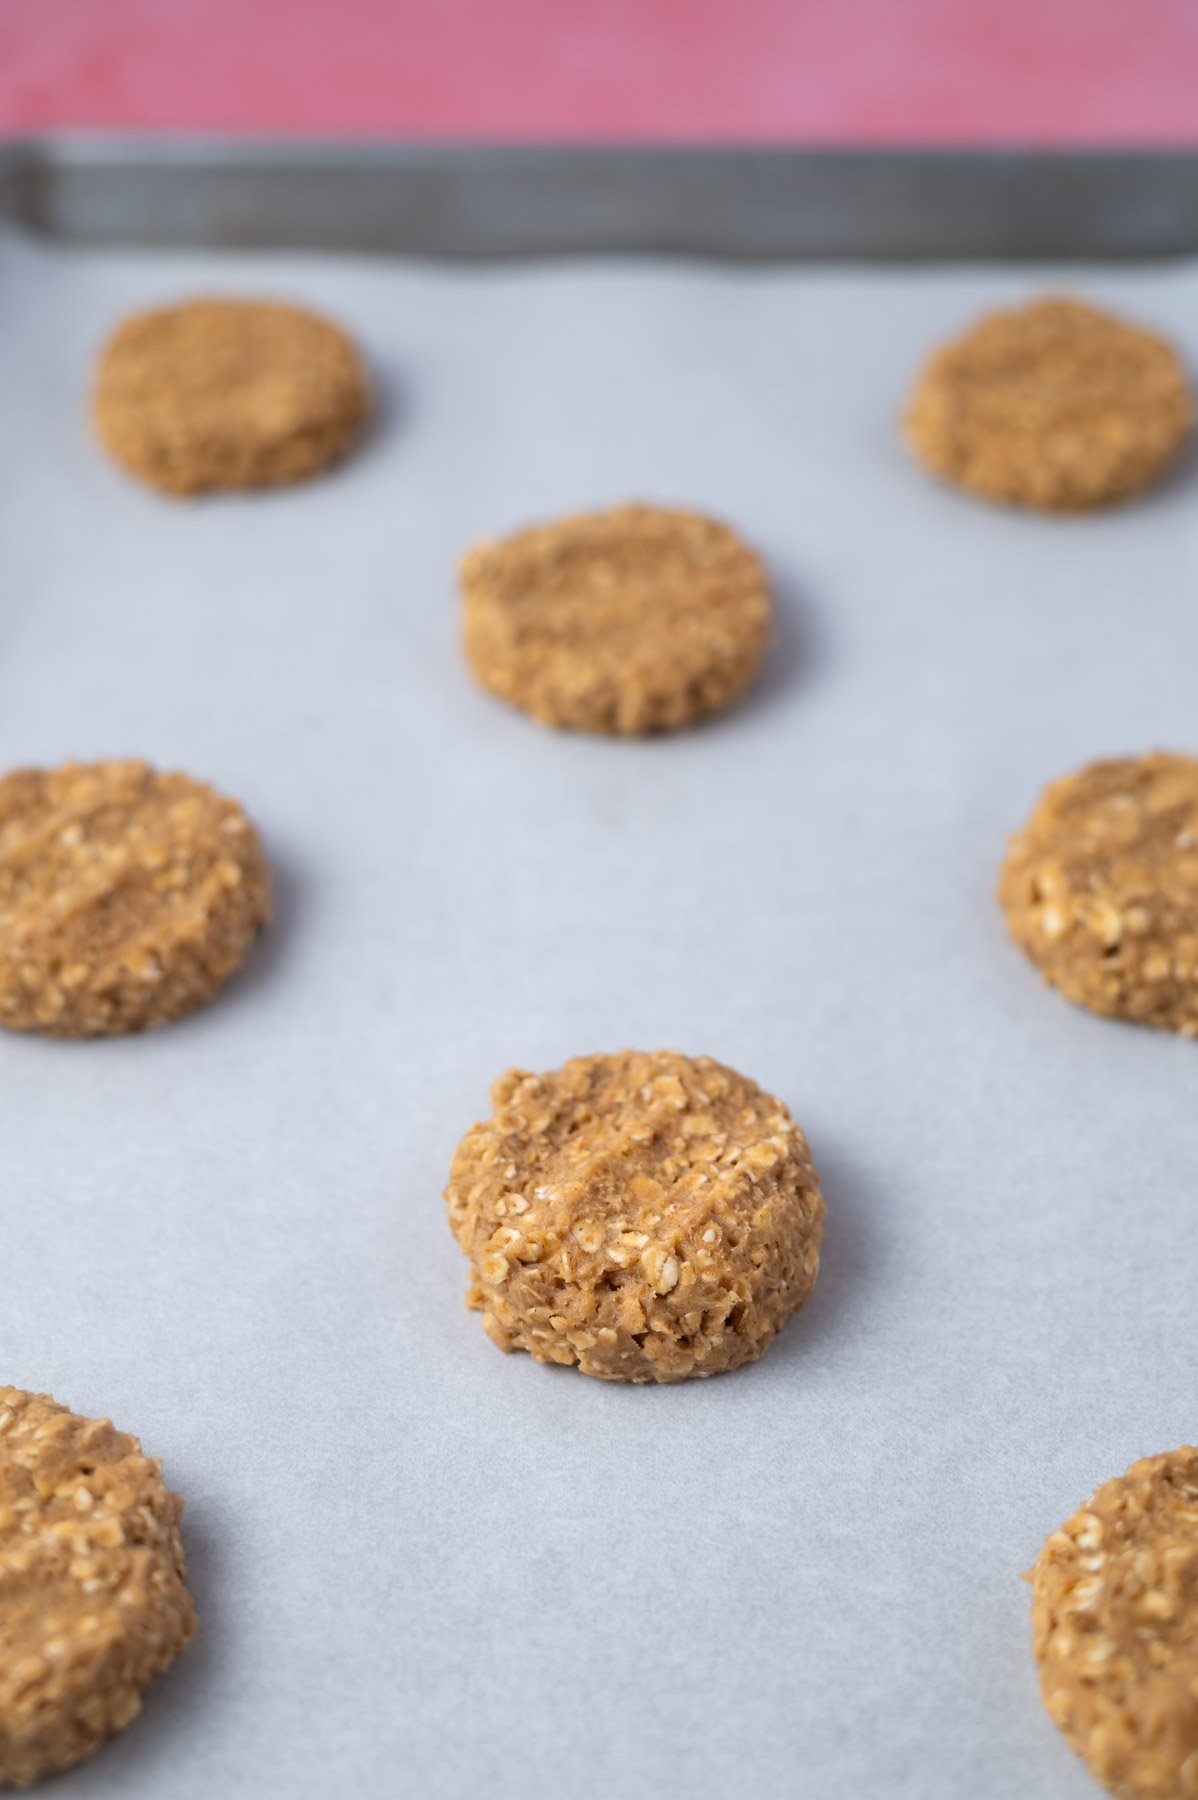
    oatmeal cookie dough on parchment lined baking sheet

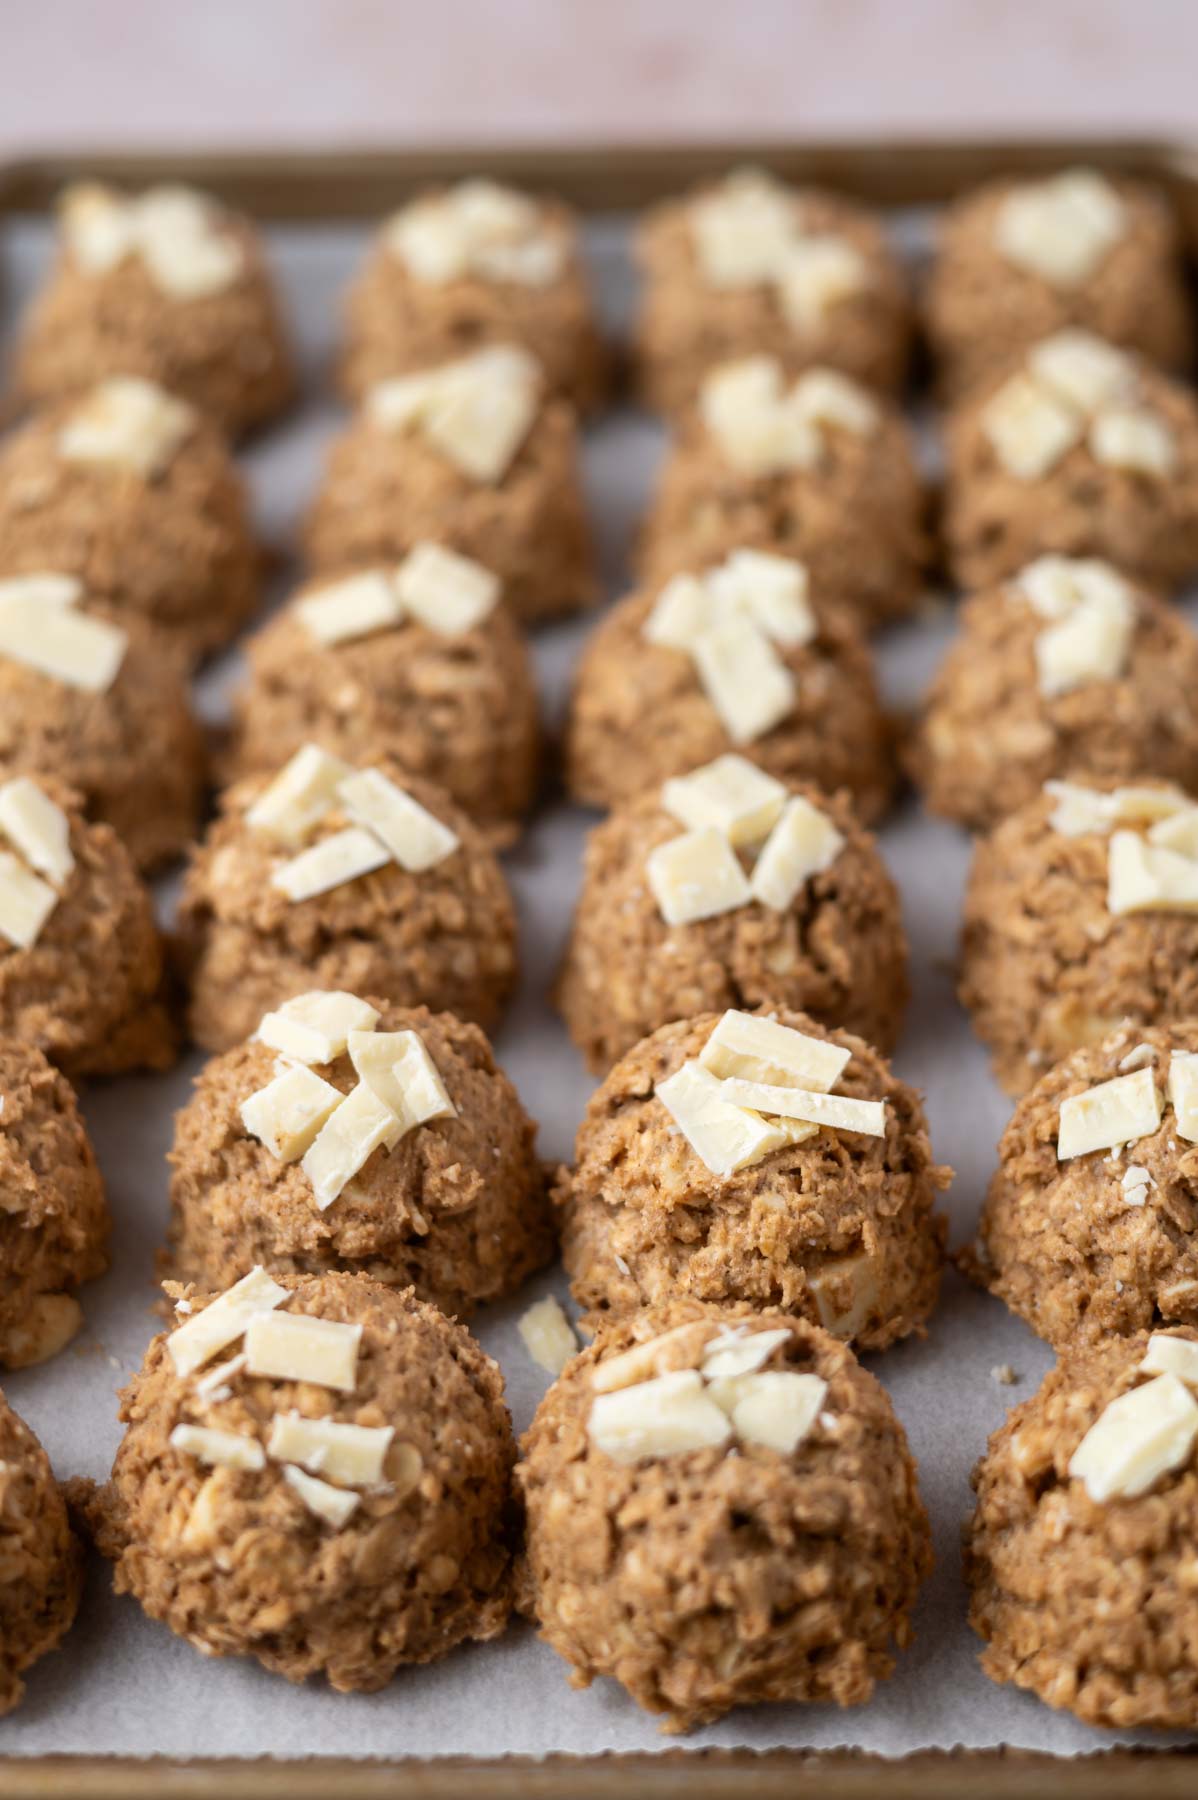
    Using a cookie scoop, place cookie dough on prepared baking sheet, spacing about 2 inches apart. {I use a size 30 scoop, a little more than 2 tablespoons}. Lightly press down on each cookie dough ball to flatten.

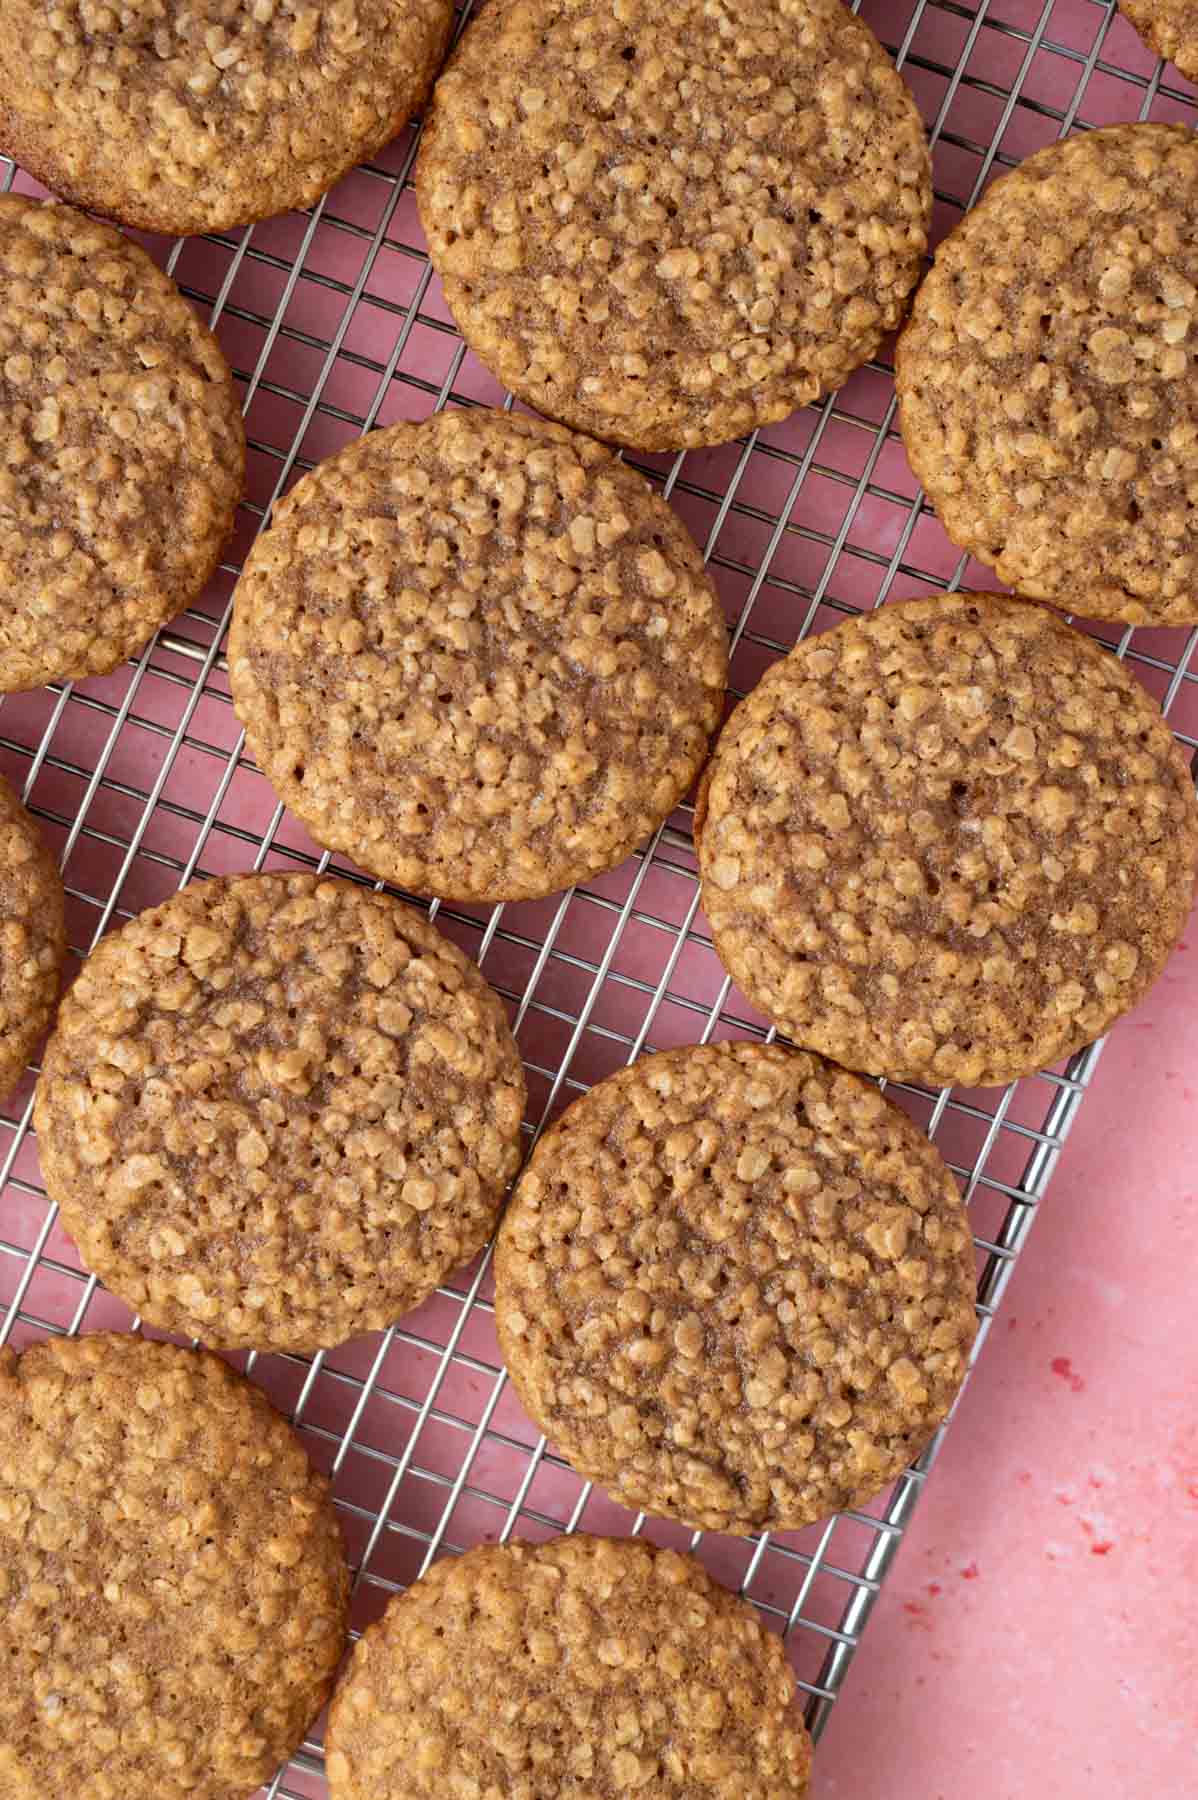
    baked cookies on a cooling rack

    Bake 9-12 minutes, until edges are lightly browned, but centers still look soft and unset. If desired, use a large circular biscuit cutter to "scoot" the cookies into perfect rounds when they are hot from the oven.

    Allow to cool on the pan for 5 minutes and then transfer to a cooling rack to cool completely.

    ๐Ÿฅฃ how to make the marshmallow cream filling

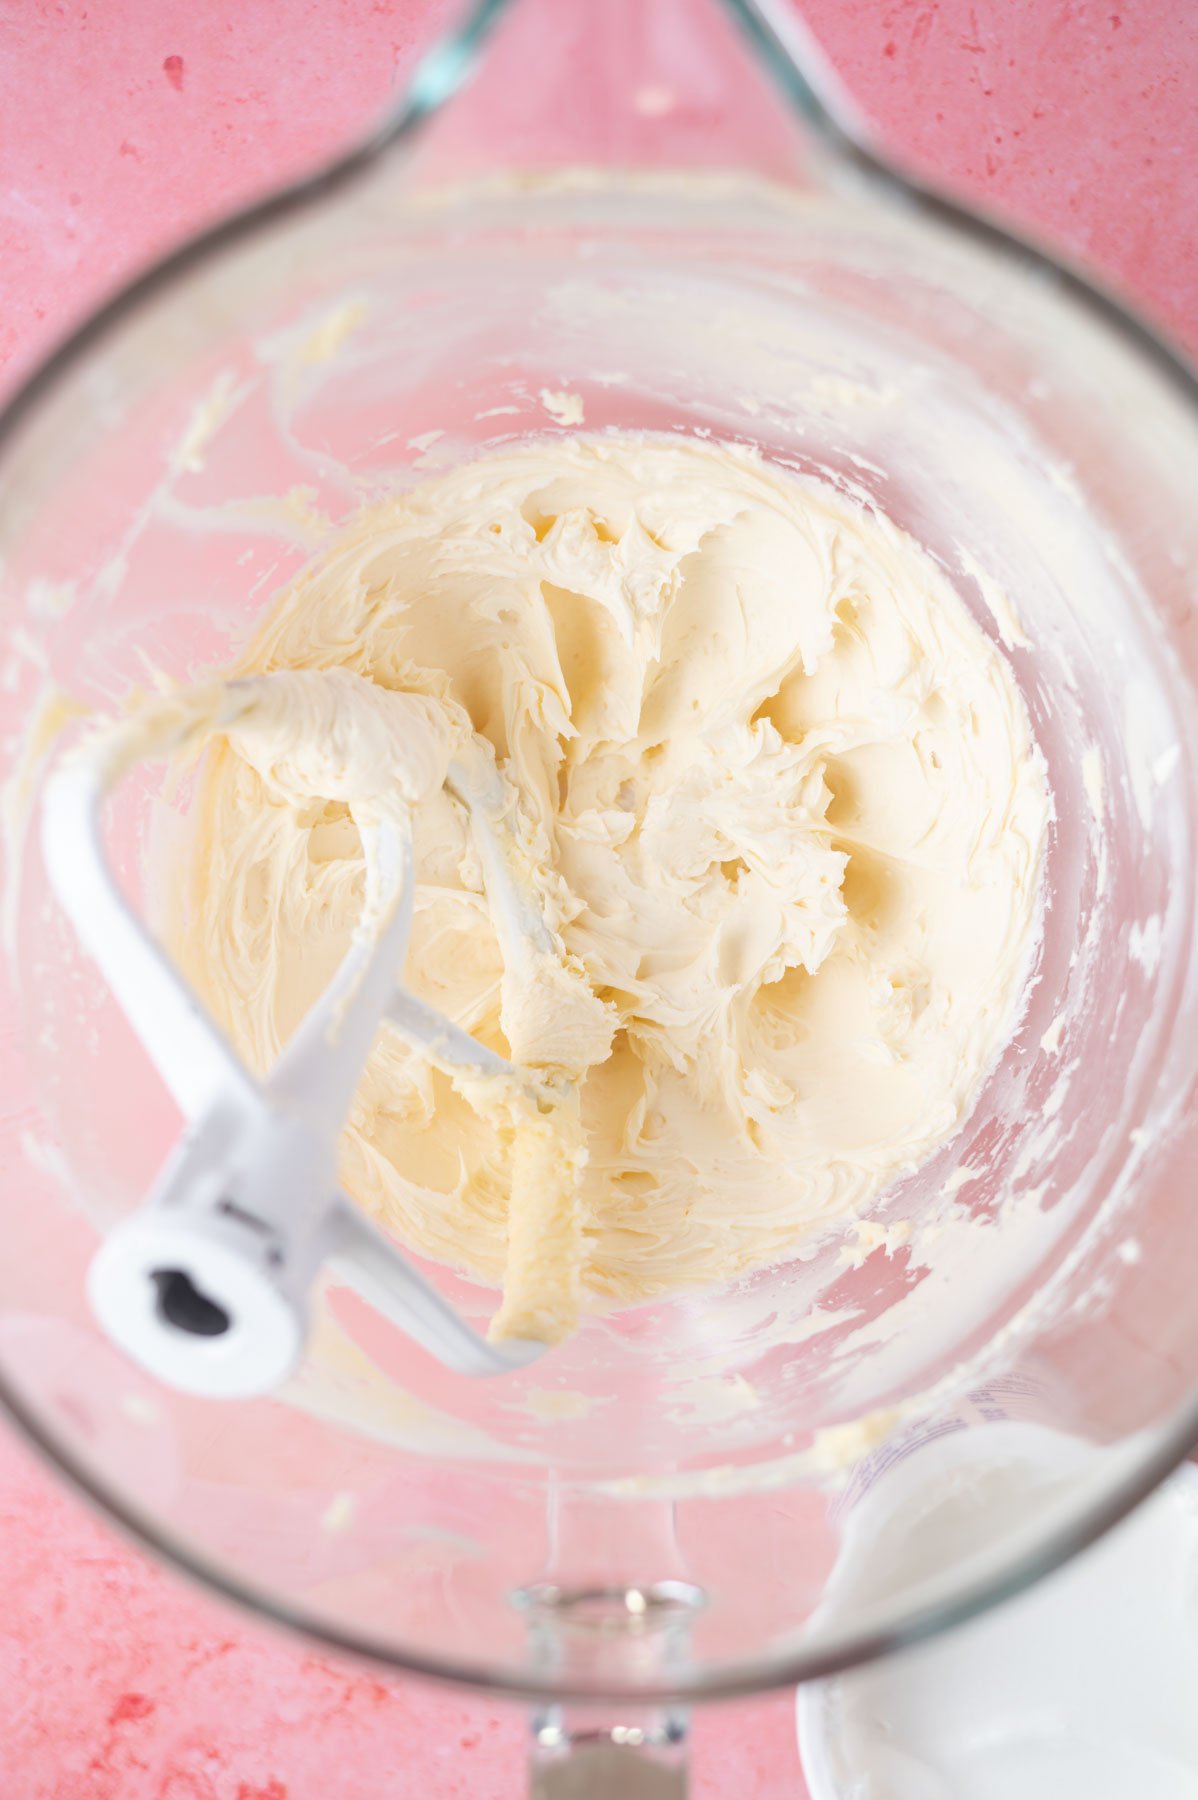
    Using a stand mixer with the paddle attachment or a hand mixer, combine the room temperature butter and a pinch of kosher salt.

    butter, vanilla and confectioners sugar beaten together in a mixing bowl

    Scrape up and down the bowl and add the confectioners' sugar and vanilla and beat on low until the sugar is combined, then increase the speed to high and beat until light and fluffy.

    marshmallow frosting in a mixing bowl

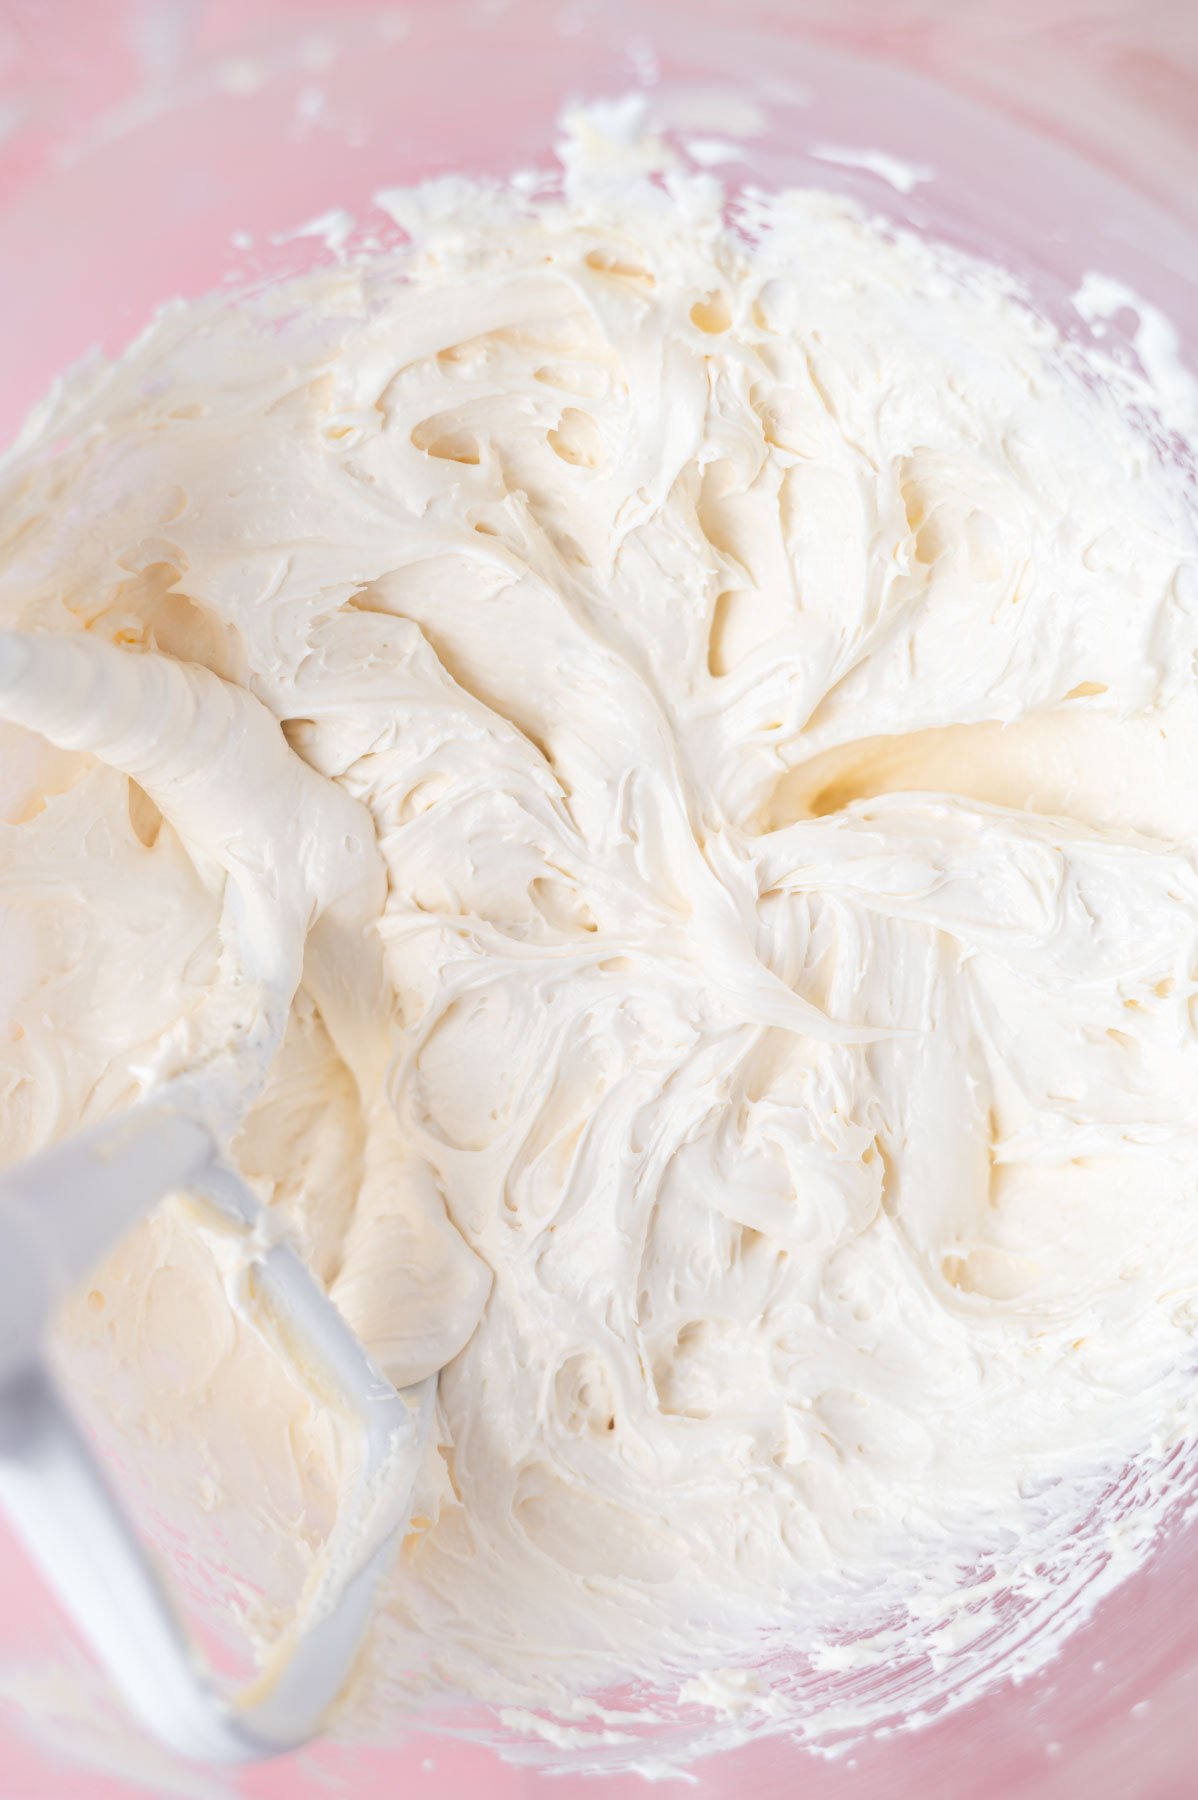
    Then scrape up and down the bowl again and add the marshmallow fluff and beat on medium another minute until combined and fluffy.

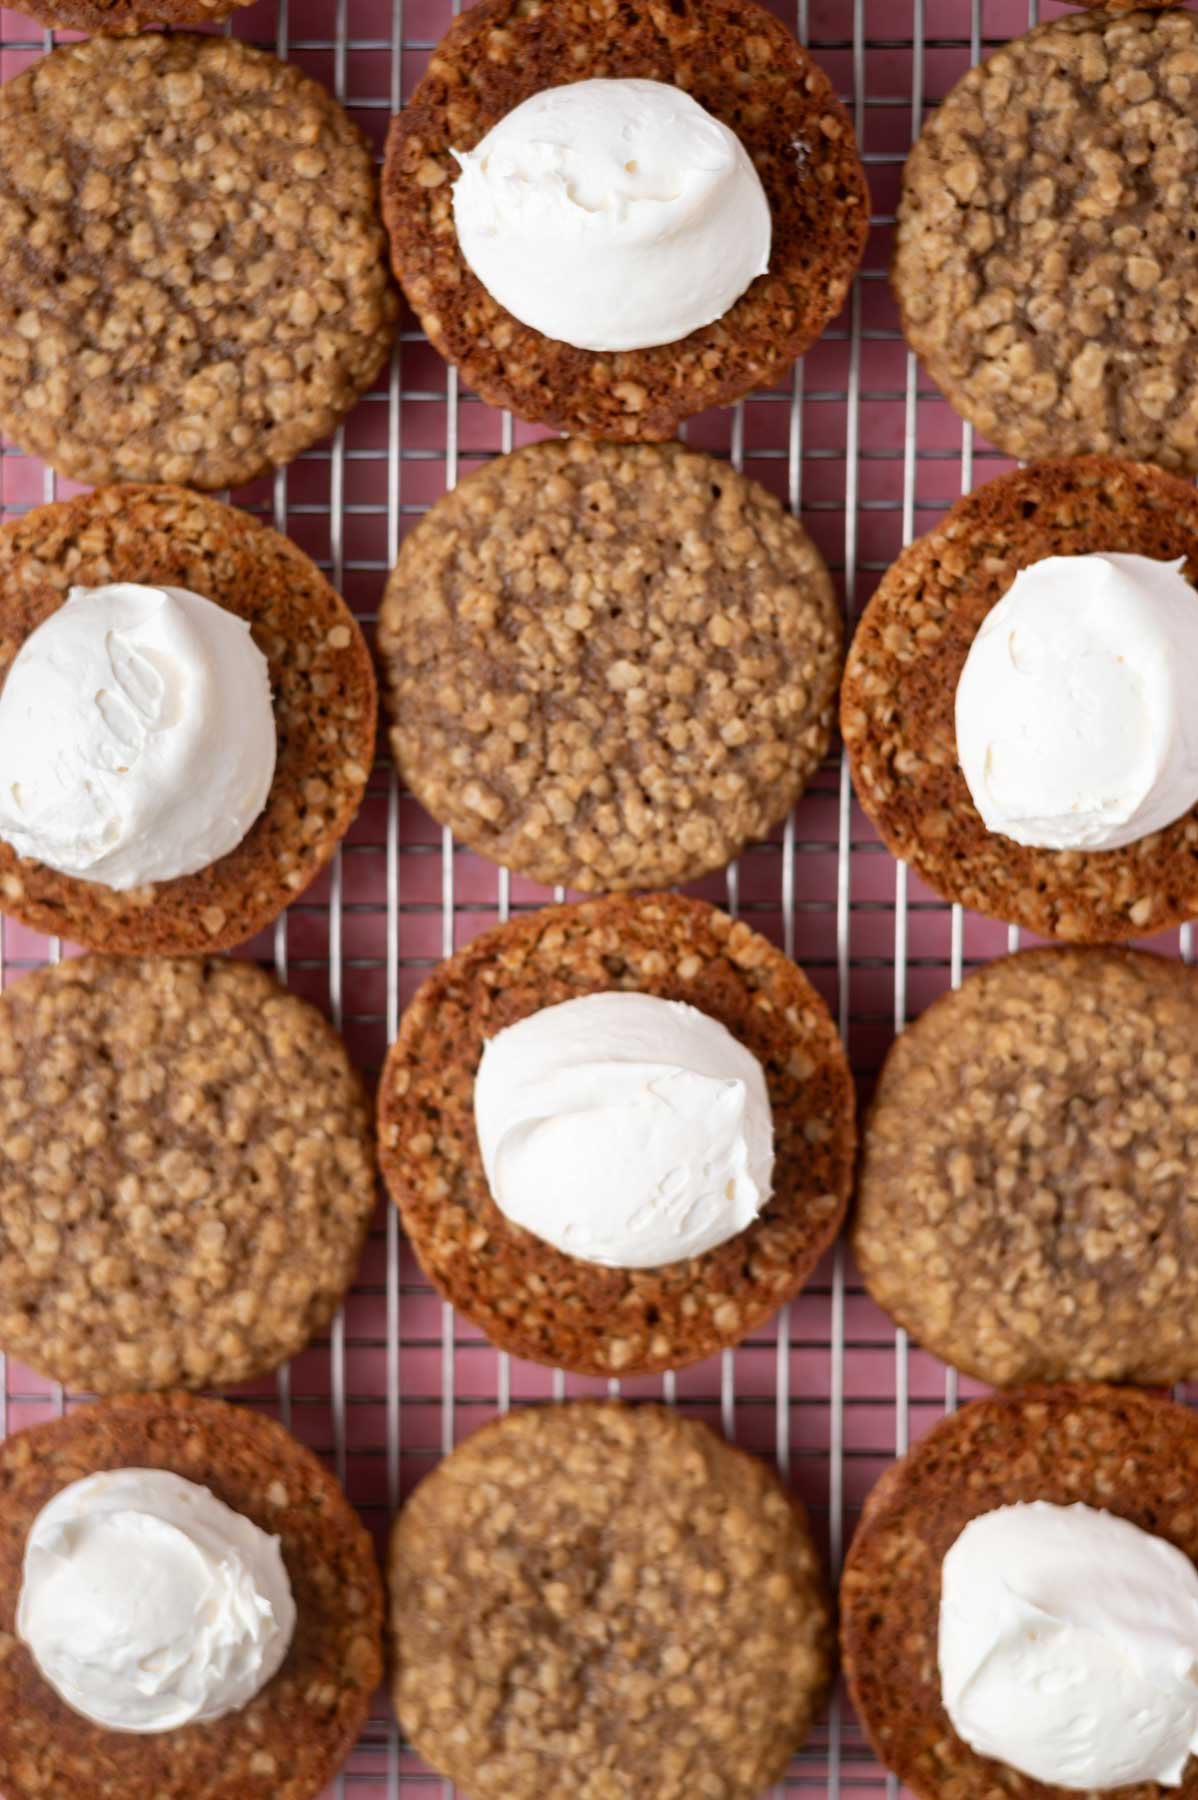
    oatmeal sandwich cookies with marshmallow fluff filling on half the cookies

    To assemble the sandwich cookies: take about 2 tablespoons of filling {I use a size 30 scoop} and place on the bottom of a cooled cookie. Then sandwich a second cookie on top with the bottom facing down.

    ๐Ÿ’ฌ questions about these oatmeal sandwich cookies

    can I make them into ice cream sandwiches?

    Yes! The oatmeal cookies are nice and soft and would make a great option for ice cream sandwiches. I recommend using a store bought ice cream. Homemade ice cream is often softer and doesn't hold up as well in ice cream sandwiches.

    can I make smaller sandwich cookies?

    Yes, this recipe makes large cookies. See the recipe card below for how to create a smaller oatmeal cream pie.

    ๐Ÿซ™ how to store

    Cookies stay fresh in an airtight container at room temperature for up to 2 days. They can also be stored in an airtight container in the refrigerator for up to 5 days.

    Oatmeal cream pies can also be frozen; store in an airtight container for up to 2 months.

    oatmeal cream pie cookies lined on a parchment baking pan with a glass of milk

    Remember to snap a picture and tag me @twosugarbugs onย Instagramย if you make these Oatmeal Cream Pie Cookies. It warms my heart to see you bring these recipes to life! Thank you for being here and happy baking!

    If you make this recipe {or any recipe!} from two sugar bugsย please come back and leave a review and a โญ๏ธโญ๏ธโญ๏ธโญ๏ธโญ๏ธ star rating.ย  I read every comment, and I LOVE hearing from you!

    ๐Ÿ“– recipe

    pile of oatmeal cream pie cookies on a parchment lined baking sheet with milk and white flowers in the background
    Print Recipe
    5 from 1 vote

    Old Fashioned Oatmeal Cream Pie Cookies

    These oatmeal cream pie cookies sandwich a marshmallow fluff buttercream filling between two soft oatmeal cookies. They are the grown up, homemade version of Little Debbie oatmeal creme pies.
    Prep Time15 minutes mins
    Cook Time12 minutes mins
    Total Time27 minutes mins
    Course: Cookies
    Cuisine: American
    Keyword: cream pie cookies, oatmeal cookies, oatmeal creme pies, oatmeal sandwich cookies
    Servings: 11 sandwich cookies*
    Calories: 528kcal
    Author: Tasia Harper

    Ingredients

    • 1 cup unsalted butter cold and cubed (226g)
    • ยฝ teaspoon kosher salt
    • 1 cup dark brown sugar firmly packed (200g)
    • 2 teaspoons pure vanilla extract
    • 2 large eggs
    • 1 teaspoon baking soda
    • 1 teaspoon ground cinnamon
    • 1 ยฝ cups all-purpose flour (188g)
    • 2 cups quick oats (212g)

    cream pie filling

    • ยฝ cup unsalted butter room temperature (113g)
    • 1 cup confectioners' sugar (120g)
    • 1 teaspoon vanilla
    • 7 ounces marshmallow fluff (198g)

    Instructions

    • Preheat oven to 350ยฐF and prepare baking sheet pans with parchment paper or silicone baking mats.
    • In a stand mixer with the paddle attachment beat the cold and cubed butter (1 cup/226g) and kosher salt (ยฝ teaspoon) on medium-high (speed 6 on KitchenAid) until softened, about 1-2 minutes. Scrape up and down the bowl.
    • Then add the dark brown sugar (1 cup/200g) and mix on low until incorporated, then turn up to medium-high and beat until light and fluffy, about 2-3 minutes. Stop and scrape the bowl at least once during this time.
    • Scrape down the bowl and add pure vanilla extract (2 teaspoons) and the eggs (2 large), one at a time, mixing on medium (speed 4) until combined, about 30-45 seconds per egg. Scrape up and down the bowl again.
    • With the mixer on low, add the baking soda (1 teaspoon) and cinnamon (1 teaspoon) and mix on low for about 15-30 seconds, until fully combined. Then add half of the all-purpose flour (total amount of flour 1 ยฝ cups/188g) and half of the quick oats (total amount 2 cups/212g) and blend until a few large streaks of flour/oats remain.ย  Scrape up and down the bowl.ย 
    • Add in the remaining flour and oats and mix on low until just combined.
    • Using a cookie scoop, place cookie dough on prepared baking sheet, spacing about 2 inches apart. (I use a size 30 scoop, a little more than 2 tablespoons. Each cookie dough ball weighs 39g). Lightly press down on each cookie dough ball to slightly flatten.
    • Bake 9-12 minutes, until edges are lightly browned, but centers still look soft and unset.
    • If desired, use a large circular biscuit cutter to "scoot" the cookies into perfect rounds when they are hot from the oven. Allow to cool on the pan for 5 minutes and then transfer to a cooling rack to cool completely.
    • For the marshmallow cream filling: using a stand mixer with the paddle attachment or a hand mixer, combine the room temperature butter (ยฝ cup/113g) and a pinch of kosher salt on medium-high for 2 minutes. Scrape up and down the bowl and add the confectioners' sugar (1 cup/120g) and vanilla (1 teaspoon) and beat on low until the sugar is combined, then increase the speed to high (speed 8 on KitchenAid) and beat until light and fluffy, about 2-3 minutes. Then scrape up and down the bowl again and add the marshmallow fluff (7 ounces/198g) and beat on medium another minute until combined and fluffy.
    • To assemble the sandwich cookies: take about 2 tablespoons of filling (I use a size 30 scoop) and place on the bottom of a cooled cookie. Then sandwich a second cookie on top with the bottom facing down.

    Notes

    If using salted butter, omit the kosher salt.
    If you only have table salt, start with half the amount.
    For smaller oatmeal sandwich cookies, use about 1 tablespoon/20g of dough per cookie. The smaller cookies will bake faster, I would check them at 7 minutes of bake time.
    Cookies stay fresh in an airtight container at room temperature for up to 2 days or in an airtight container in the refrigerator for up to 5 days. Oatmeal cream pies can also be frozen; store in an airtight container for up to 2 months.

    Nutrition

    Serving: 1 sandwich cookie | Calories: 528kcal | Carbohydrates: 69g | Protein: 5g | Fat: 27g | Saturated Fat: 16g | Polyunsaturated Fat: 2g | Monounsaturated Fat: 7g | Trans Fat: 1g | Cholesterol: 96mg | Sodium: 227mg | Potassium: 119mg | Fiber: 2g | Sugar: 42g | Vitamin A: 817IU | Vitamin C: 0.01mg | Calcium: 40mg | Iron: 2mg

    Fluffy Cookies and Cream Cake

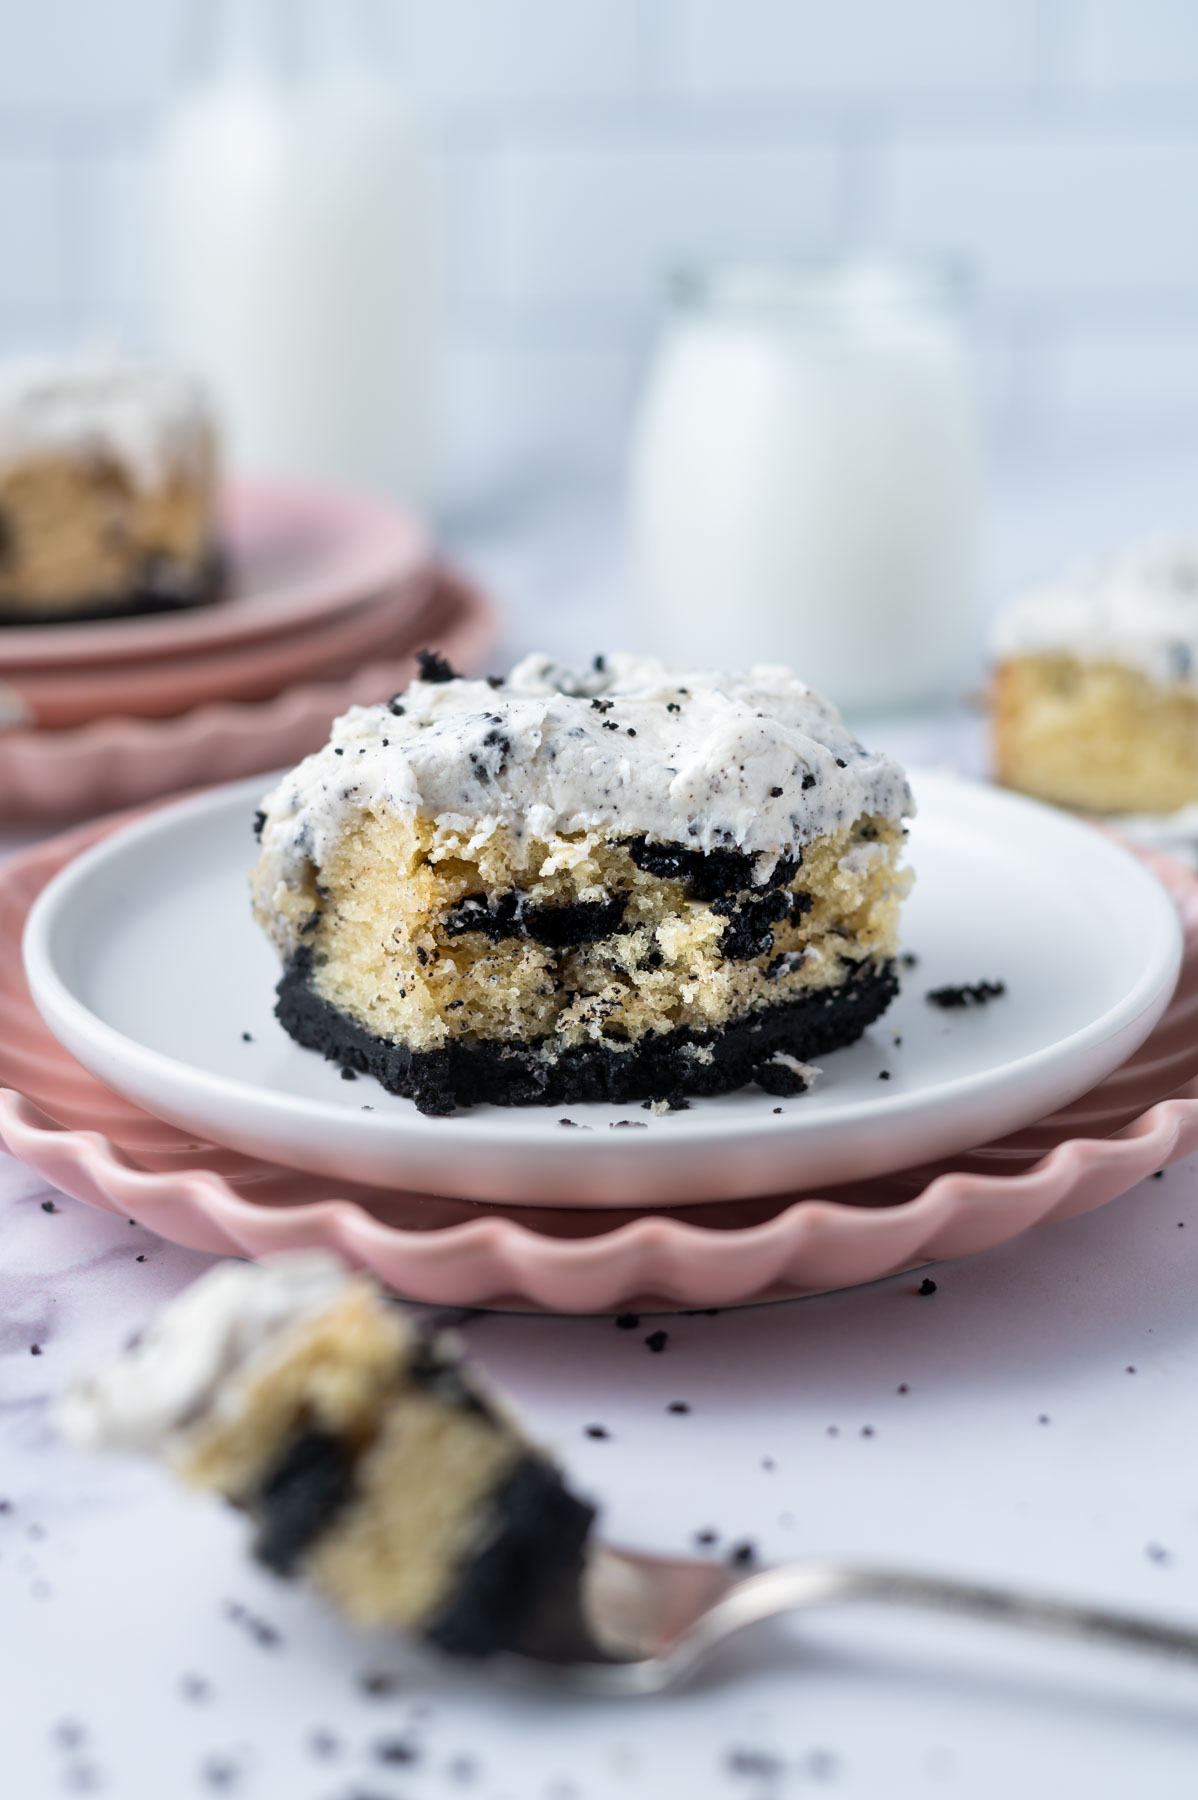
    slice of cookies and cream cake on a plate with a piece on a fork and milk in the background

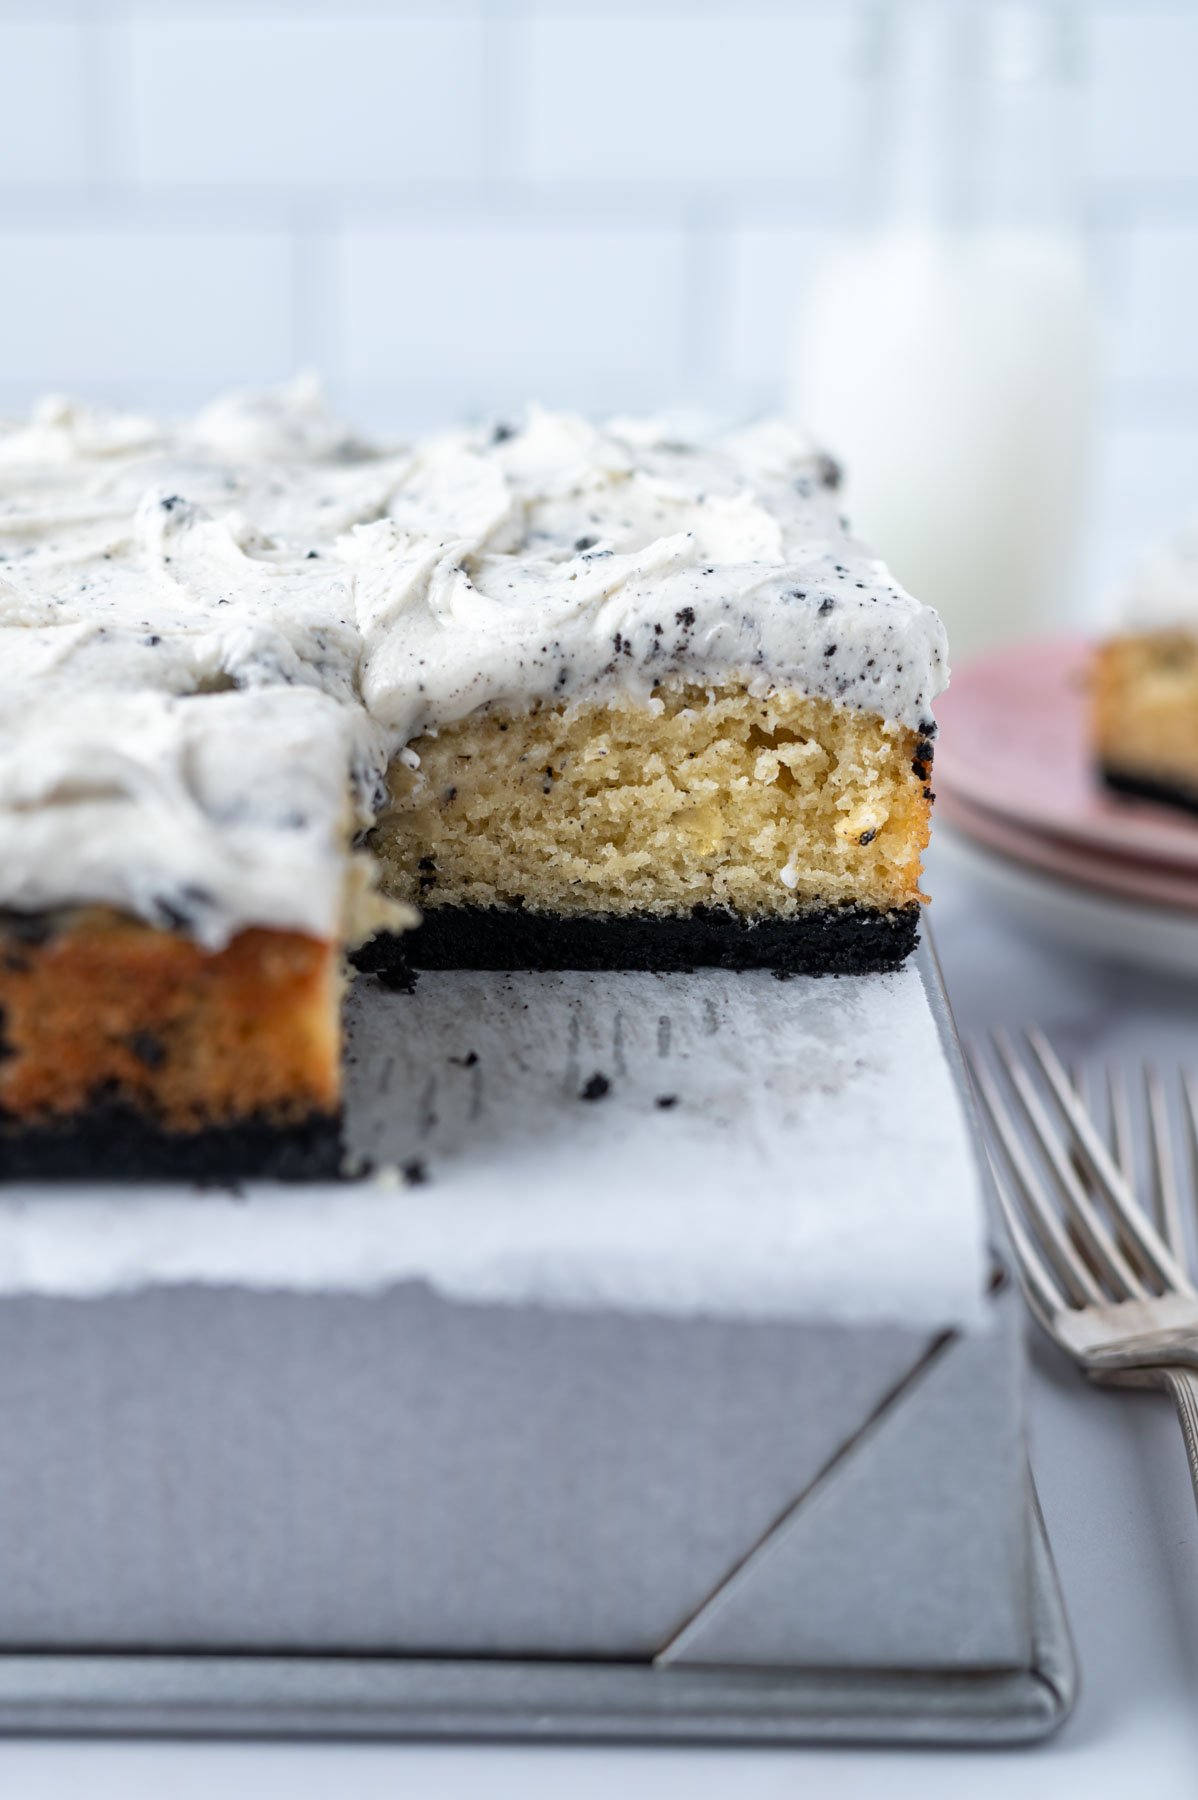
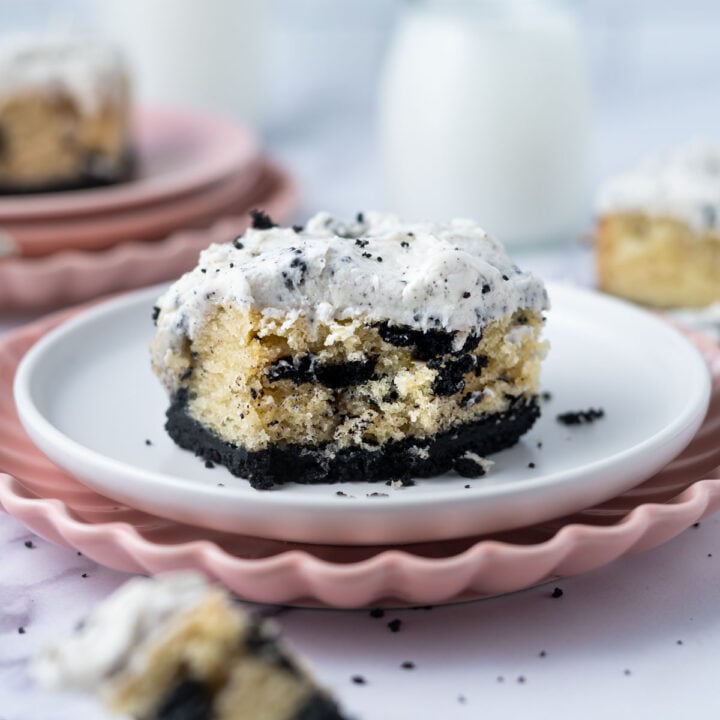
    Cookies and cream cake combines a moist white cake with the irresistible taste of chocolate sandwich cookies. With a chocolate cookie crust, fluffy vanilla cake and a frosting that tastes like the filling in Oreo cookies. You'll love how quickly this easy recipe comes together. Perfect as a birthday cake or for any celebration!

    slice of cookies and cream cake on a plate with a piece on a fork and milk in the background

    Disclosure | This post may contain affiliate links. As an Amazon Associate I earn from qualifying purchases.

    If I have learned anything over my 25+ years of baking, it's that people love the cookies and cream flavor! AKA Oreos, chocolate sandwich cookies or Joe-Joe's. From cookie bars to donuts, cookies and cinnamon rolls, it's a flavor my family can't get enough of.

    This simple snack cake recipe takes a fluffy and moist vanilla cake and stuffs it with chocolate sandwich cookie pieces. The frosting is like the one on top of my Oreo pound cake. It tastes like the filling in Oreo cookies!

    My recipe is different than many others. The ultimate cookies and cream cake sits on top of a cookie crust similar to the graham crust in my banoffee cake. This gives another layer of cookies and cream flavor. Easy to make {hello one layer cake!} and yet impressive enough that people will think you worked much harder than you did to make it!

    [feast_advanced_jump_to]
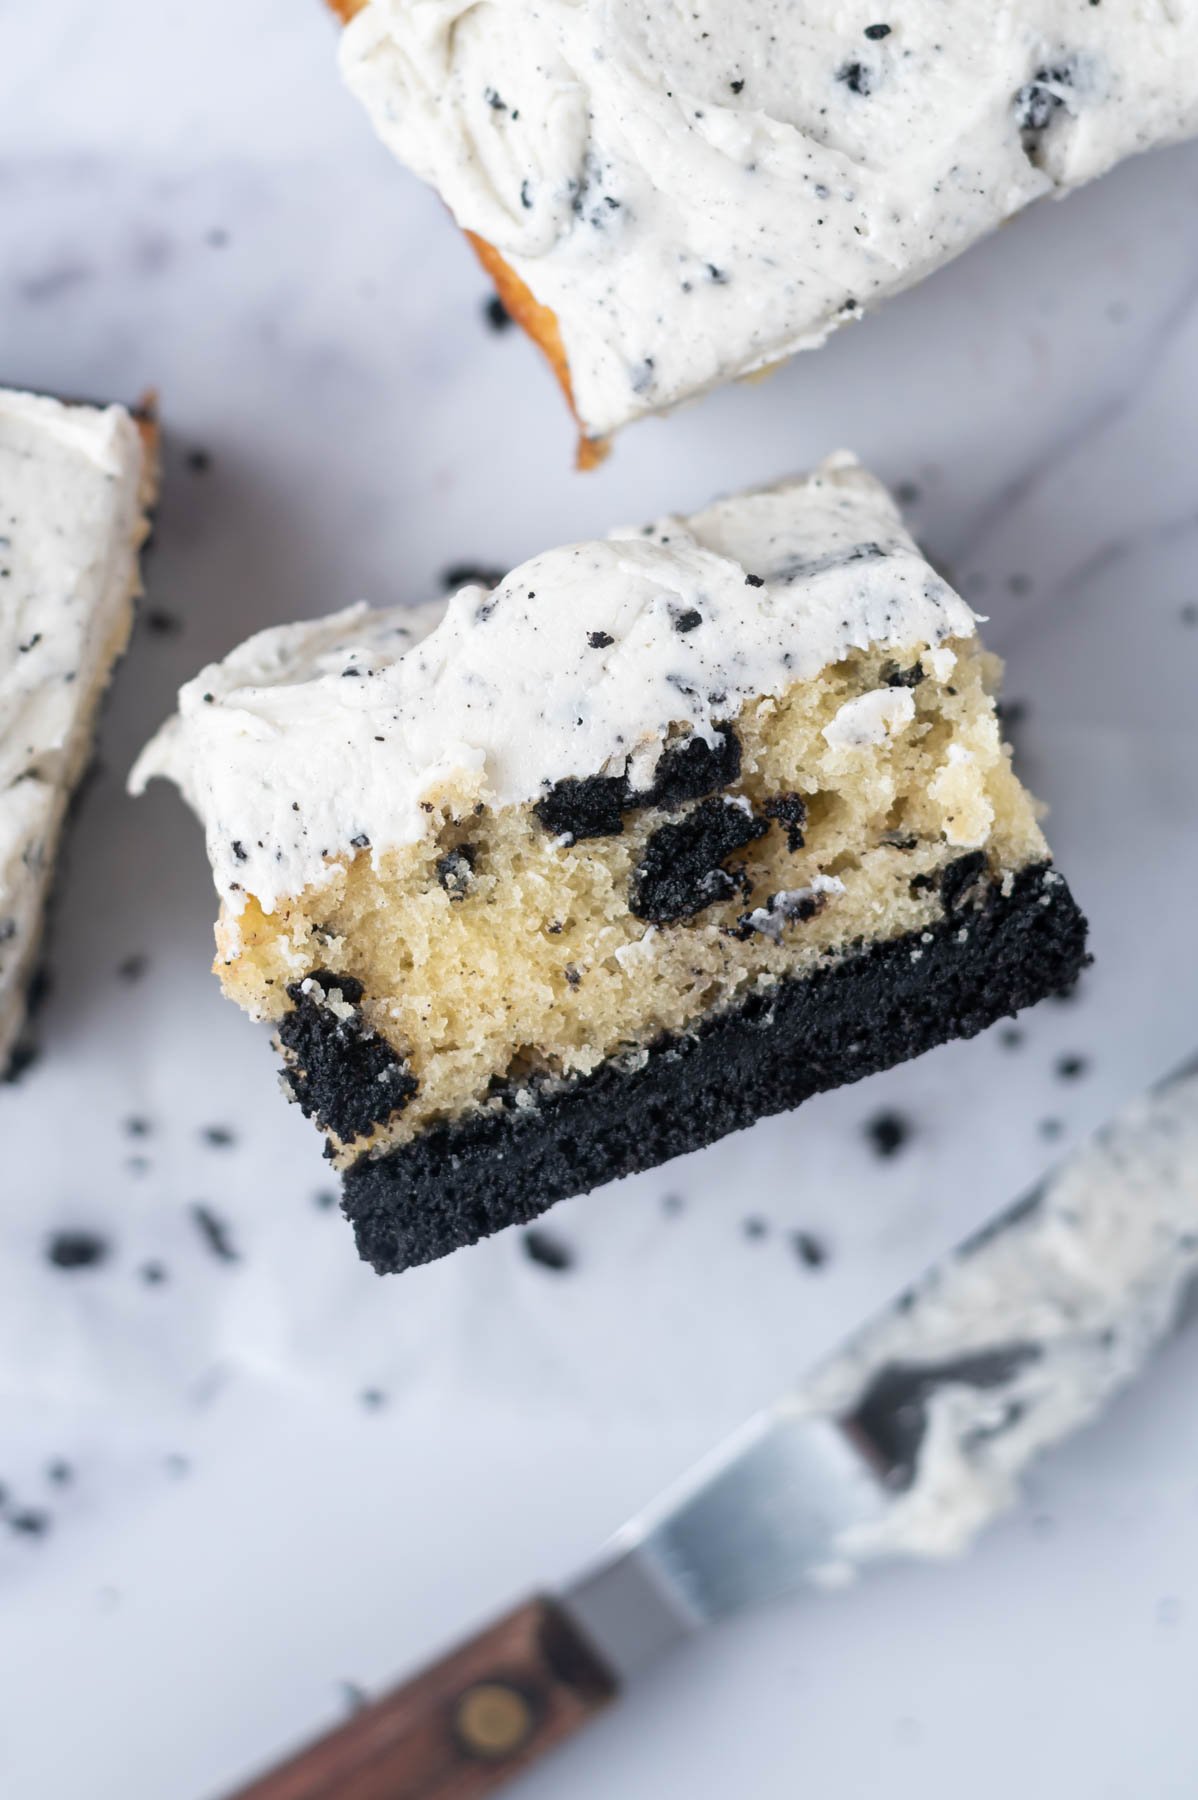
    slice of cookies and cream cake on it's side showing cookie layer, fluffy oreo stuffed vanilla cake and Oreo filling frosting

    ๐Ÿ›’ ingredient notes

    Please scroll to the printable recipe card at the end of this post for the full list of ingredients and baking directions.

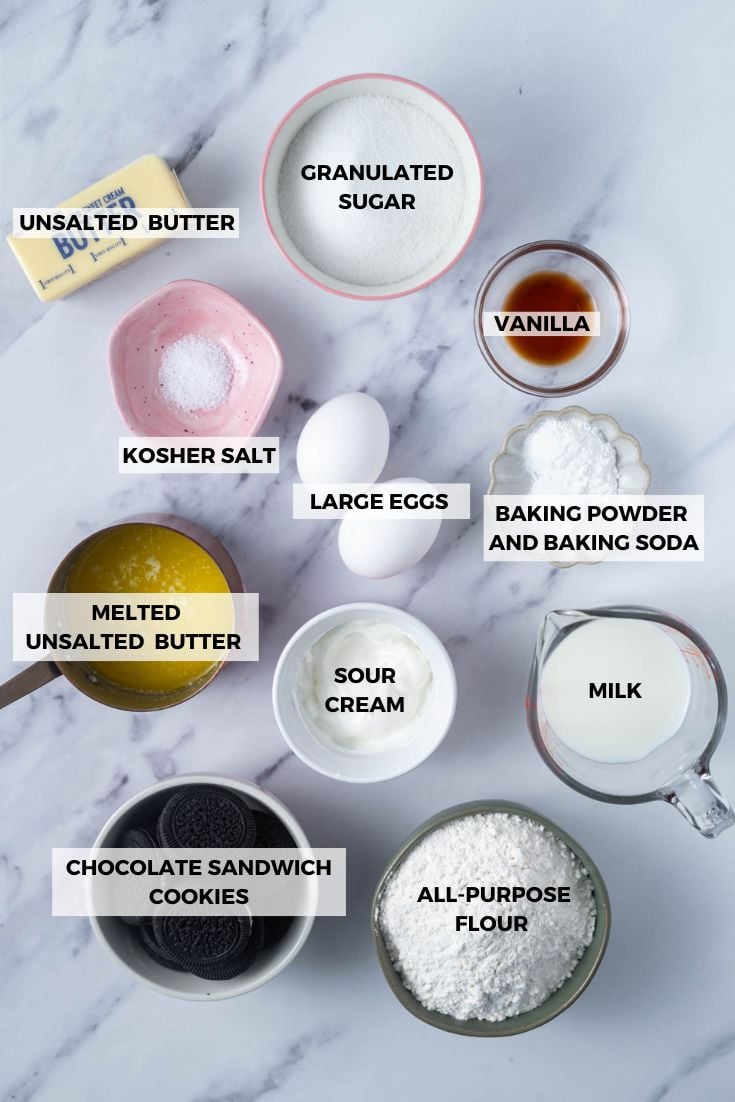
    ingredients for cookies and cream cake
    • Chocolate sandwich cookies ~ use your favorite brand, whether it's Oreos, Back to Nature, Trader Joe's Joe-Joe's or your favorite store brand. Each brand can have a slightly different weight and being off a few grams won't make a big difference in this recipe. As long as the cookies are standard size, use the number of cookies listed.
    • Sugars ~ granulated sugar is used in the vanilla cake and it's a little less than a traditional cake. When I tested with more sugar, the cake was too sweet with the addition of the cookies and frosting. Confectioners' sugar, aka powdered or icing sugar is used in the frosting. I don't sift mine, but if you want a super smooth frosting you can.
    • Milk, eggs and sour cream ~ you will get the best moist and tender cake texture if these ingredients are at room temperature. Depending on the temperature of your kitchen, pull them out 1 - 2 hours prior to baking the cake. Full fat sour cream will give the best results. I use 1% milk, but 2% or whole milk will also work.

    ๐Ÿฐ how to make this easy cake recipe

    Preheat oven to 350ยฐF and prepare an 8x8 baking pan with parchment paper. Set aside.

    For the chocolate cookie crust: Crush the chocolate sandwich cookies into fine crumbs in a food processor or in a zip-top bag with a rolling pin. Then add the melted butter and mix until well combined.

    creamed butter, salt and sugar in a mixing bowl

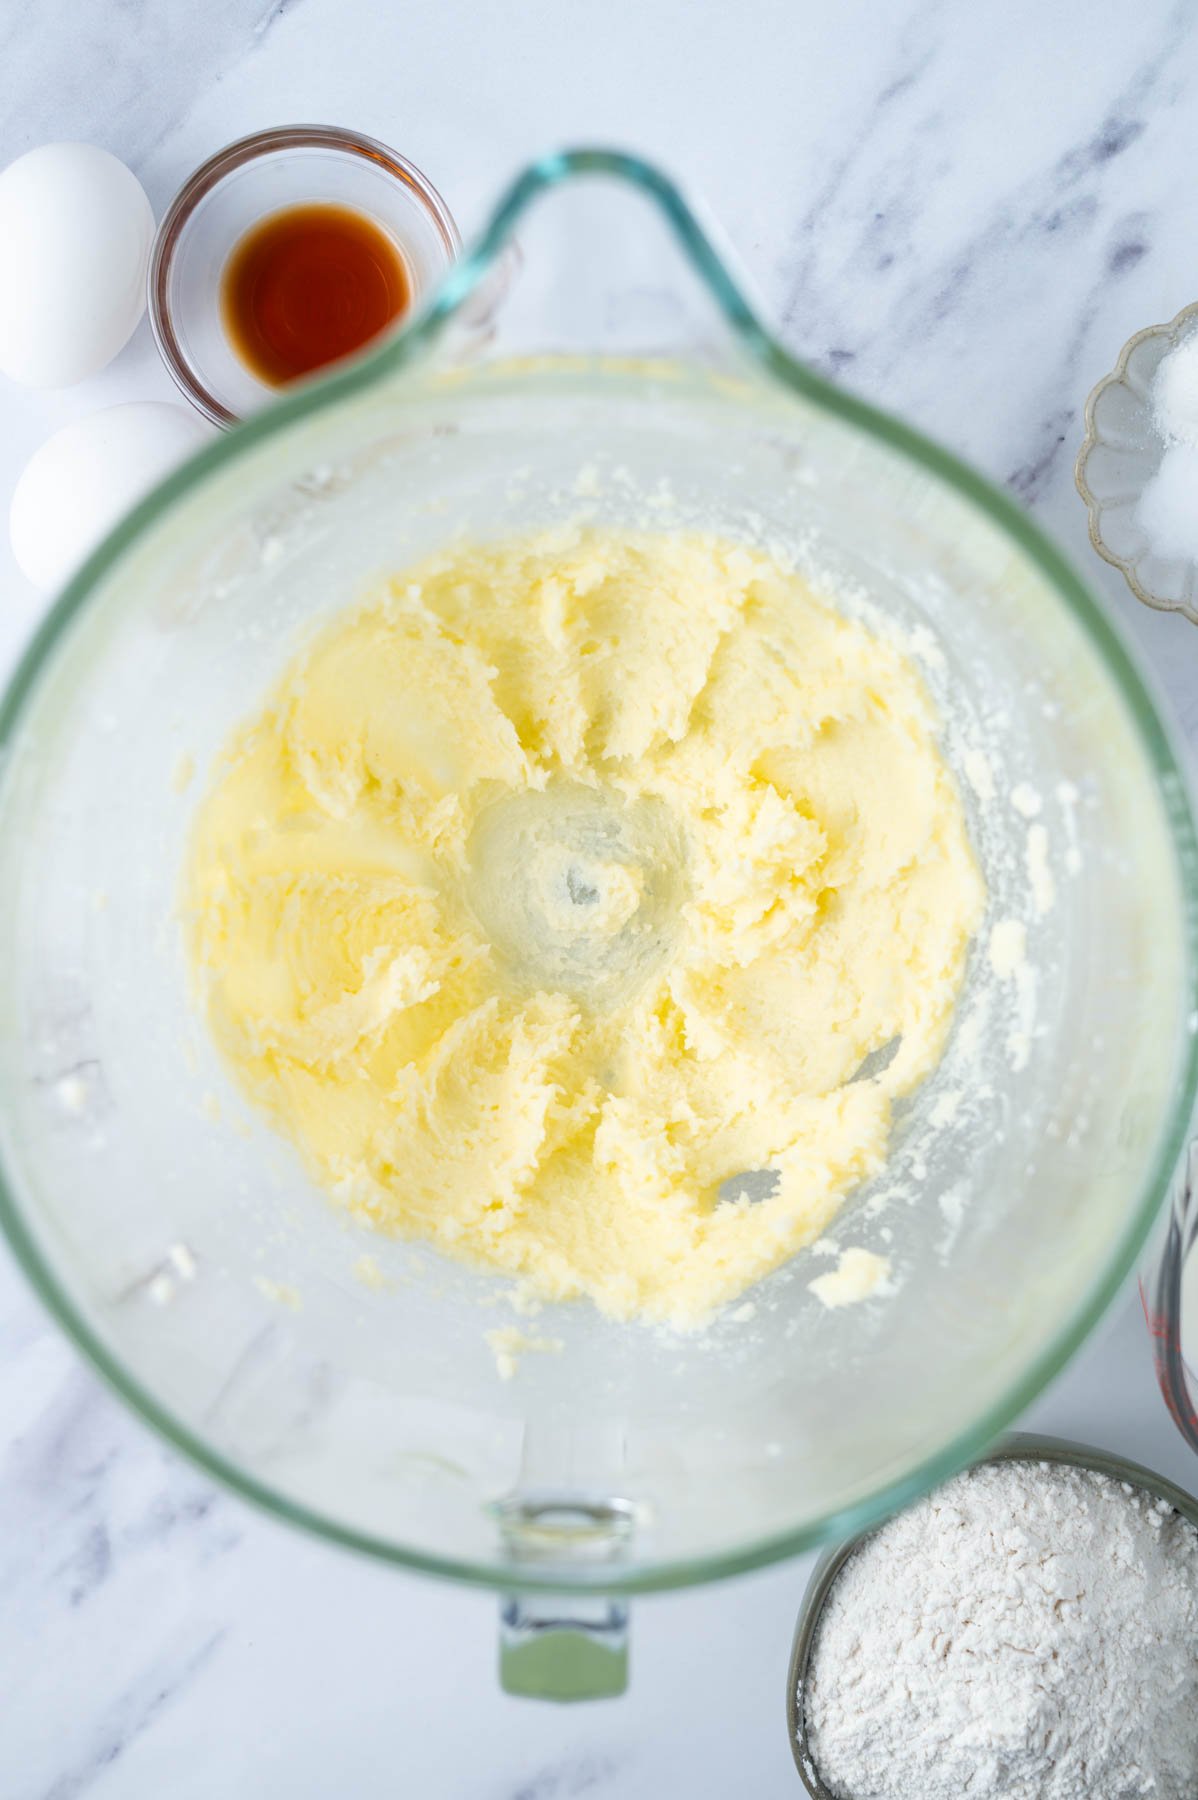
    In a stand mixer with the paddle attachment {or using a hand-held mixer}, cream together the unsalted butter, granulated sugar and kosher salt. Cream until light, about 3 minutes. Scrape the bowl at least once during the creaming process.

    cake batter after eggs have been added

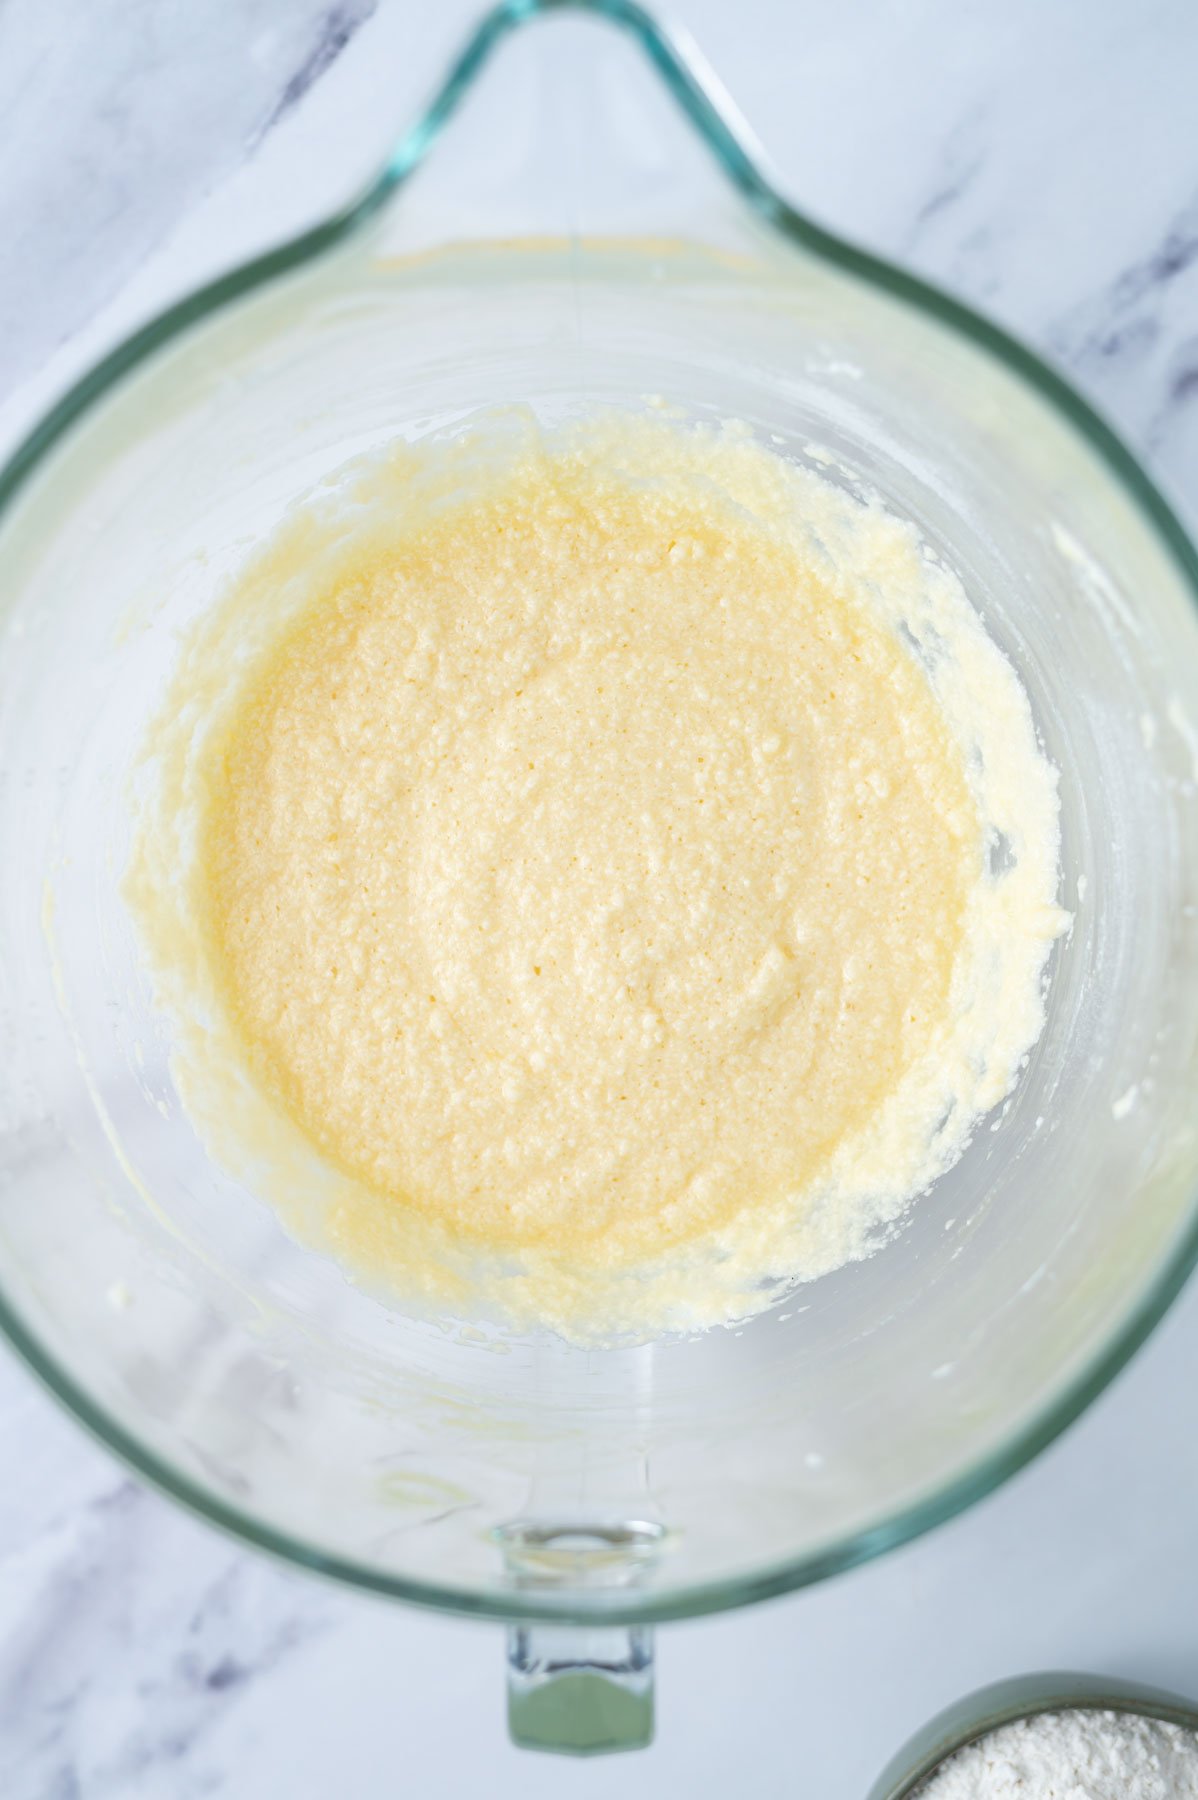
    Scrape up and down the bowl and add the eggs one at a time, scraping the bowl after the first egg and add the vanilla with the second egg, mixing until combined, about 1-2 minutes.

    cake batter looking slightly curdled after the addition of sour cream and eggs

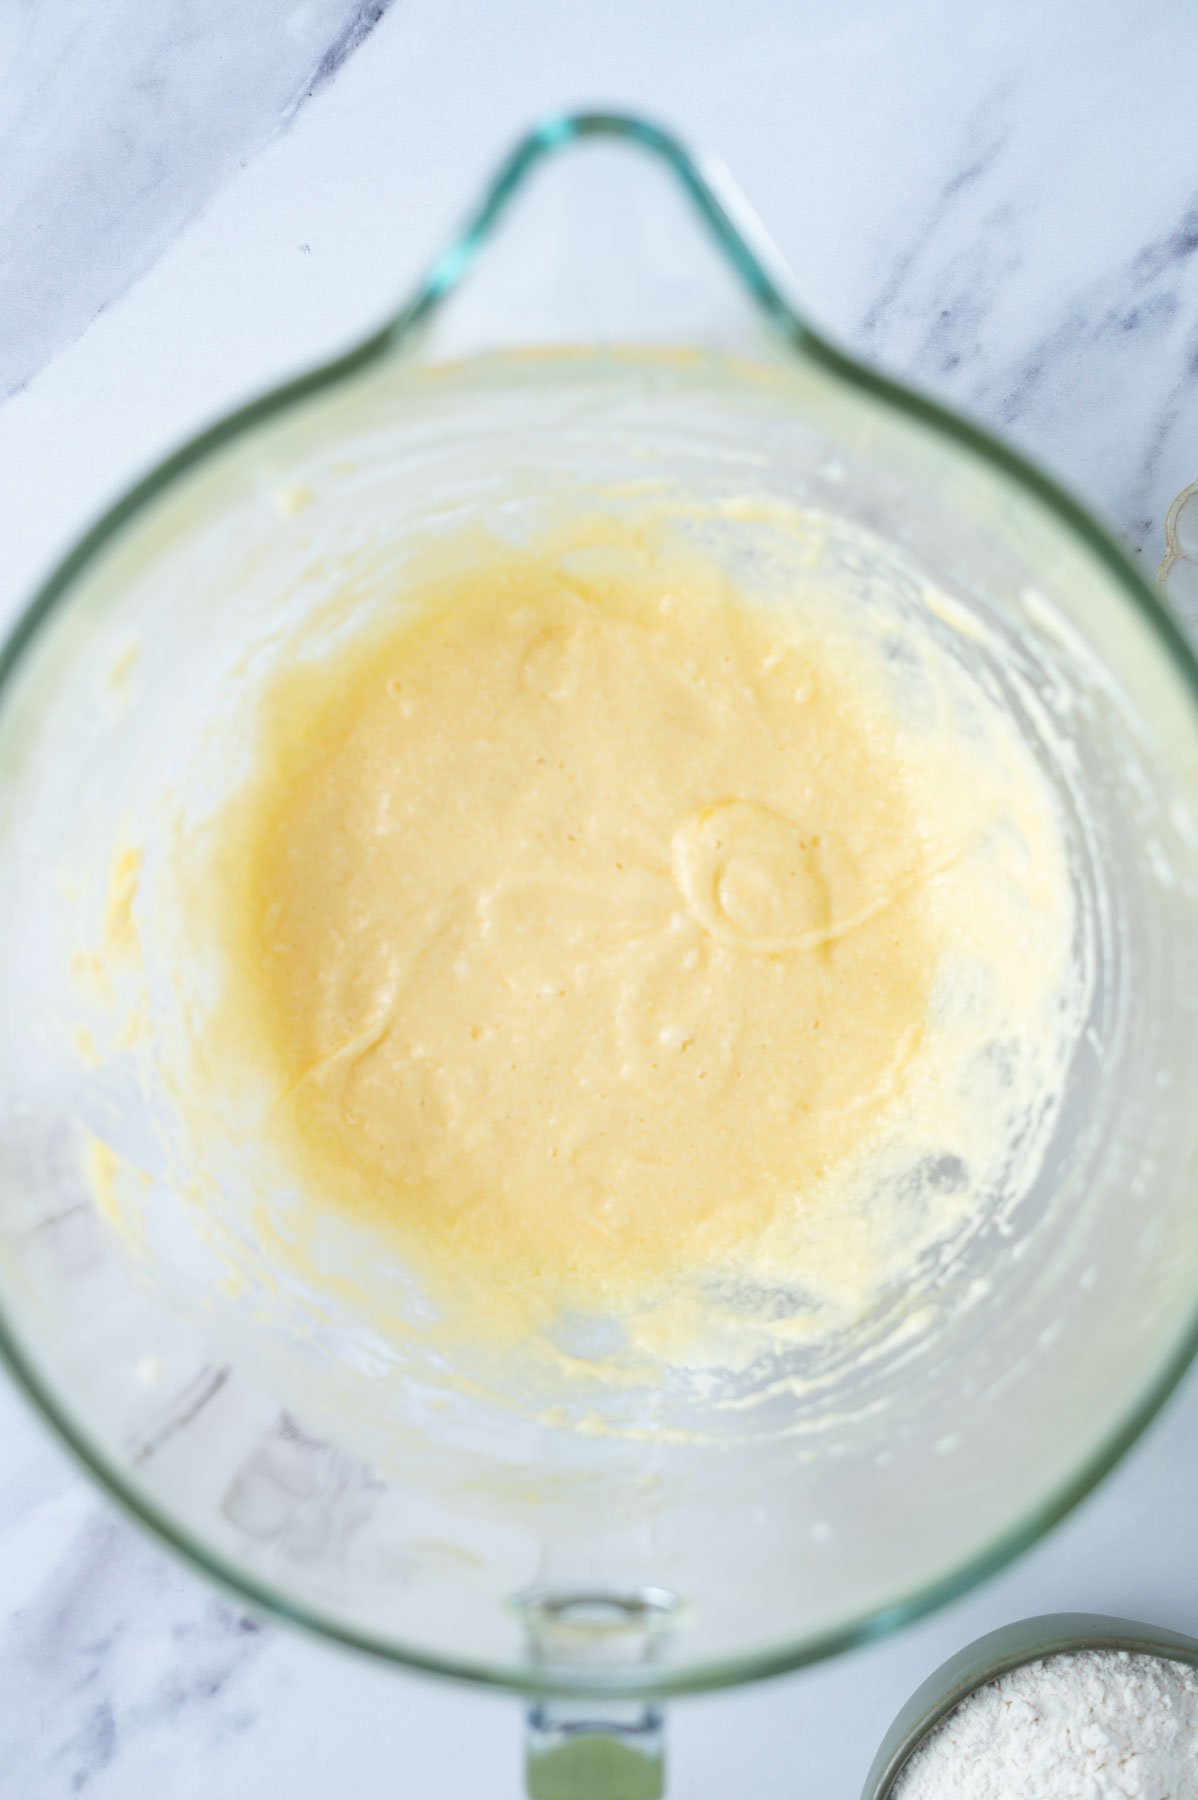
    Now scrape the bowl again and add the sour cream, baking powder and baking soda and mix on medium until combined about 30-60 seconds. The mixture can look a little curdled at this point, but don't let it worry you.

    cake batter in a mixing bowl showing some large streaks of flour before the milk is added

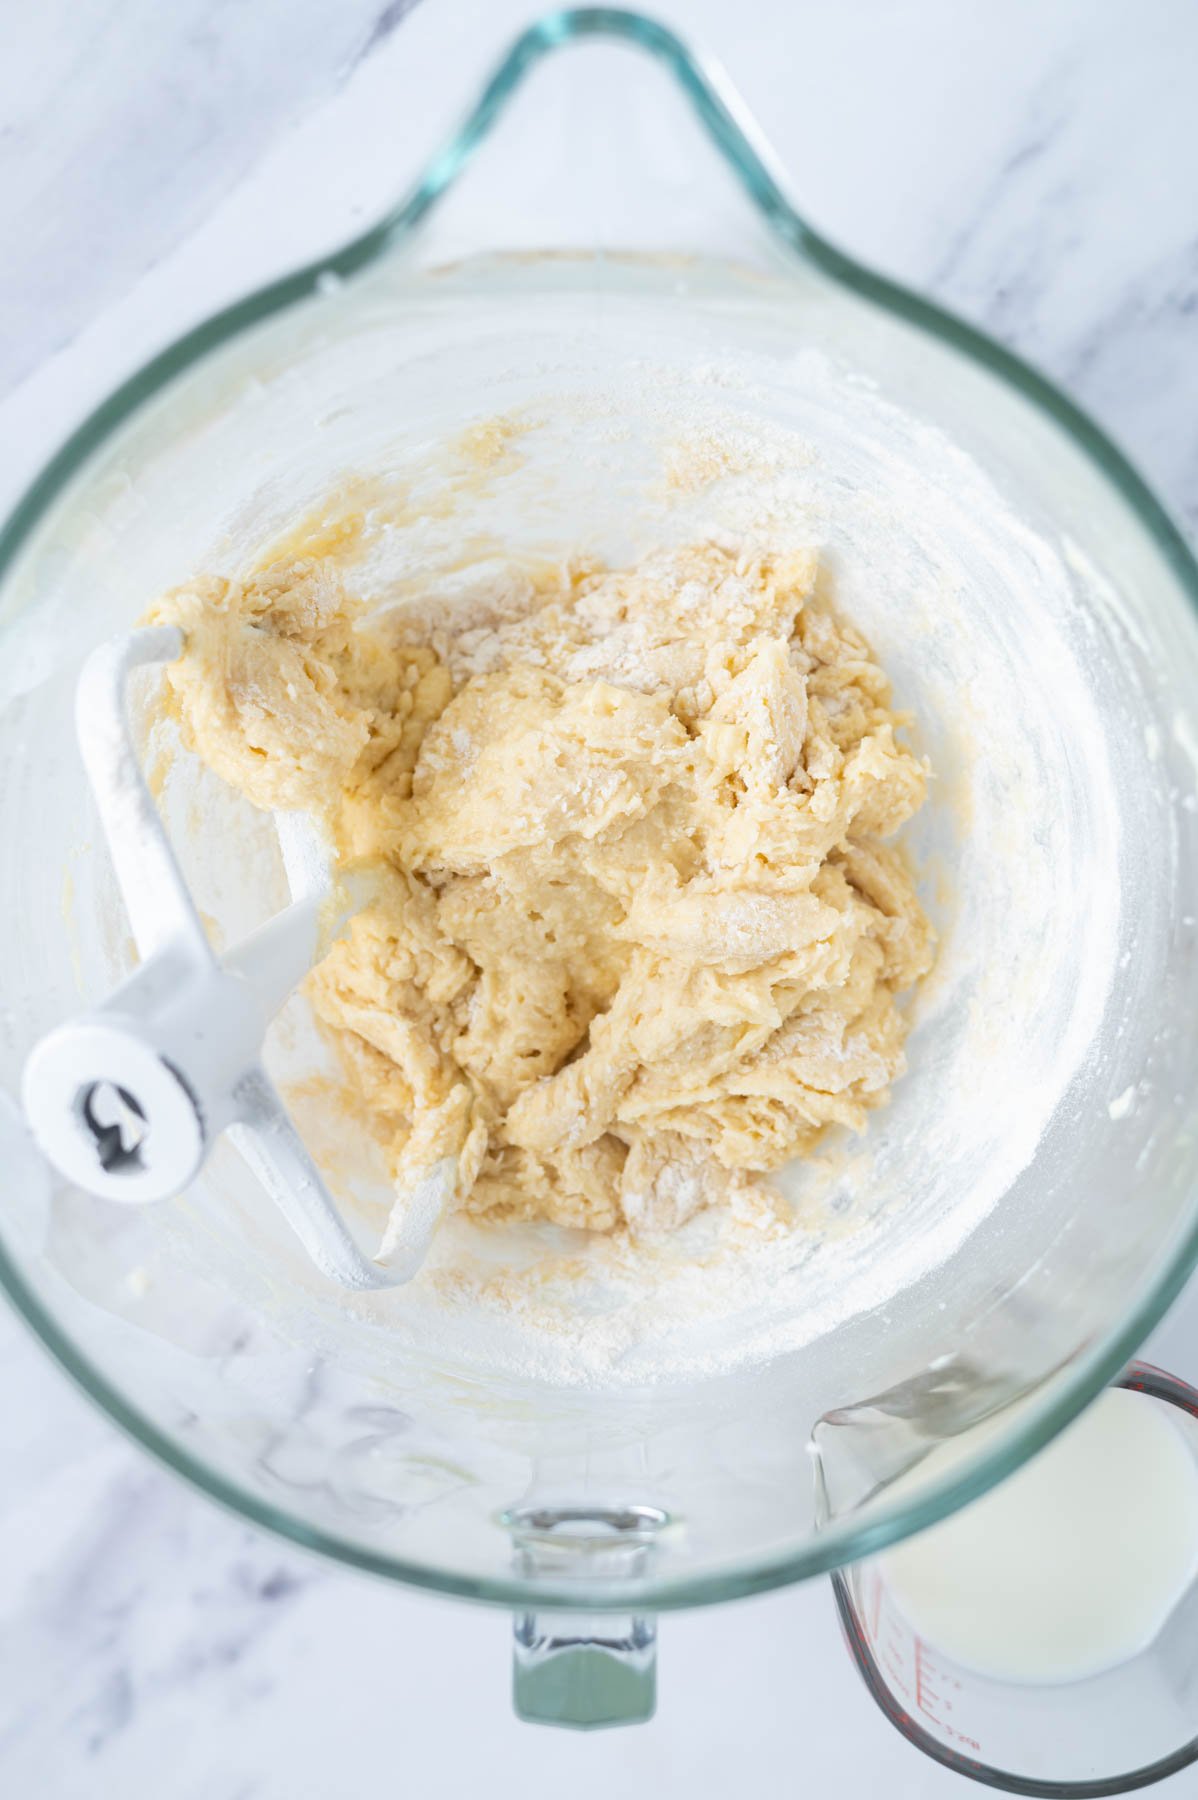
    With the mixer on low slowly add the flour and mix until some large streaks of flour remain. Scrape up and down the bowl.

    chocolate sandwich cookie pieces over cake batter in a mixing bowl with a spatula

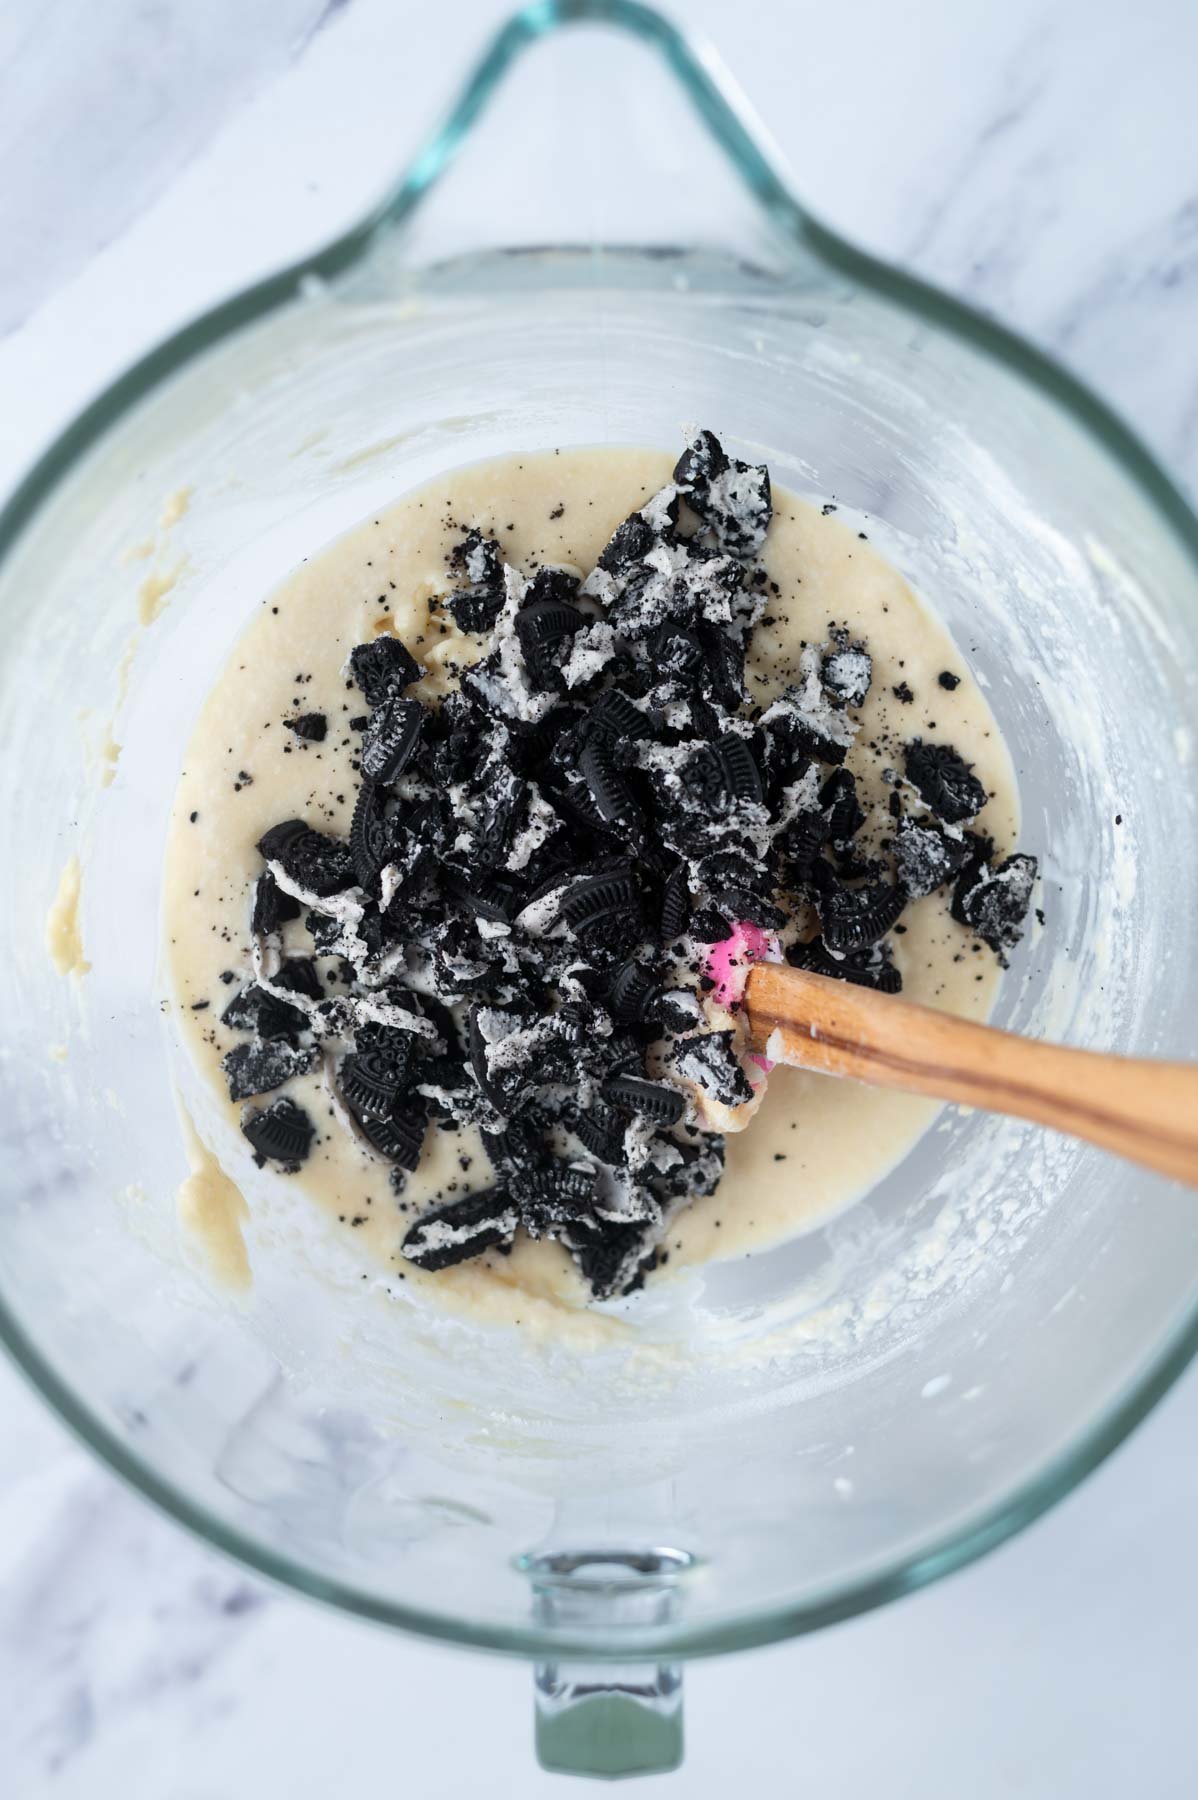
    Then with the mixer on low, slowly drizzle in the milk mixing until the batter just comes together. Use a spatula to do a final stir while you fold in the chopped/broken chocolate sandwich cookies.

    oreo cookie crust in a parchment lined baking tin

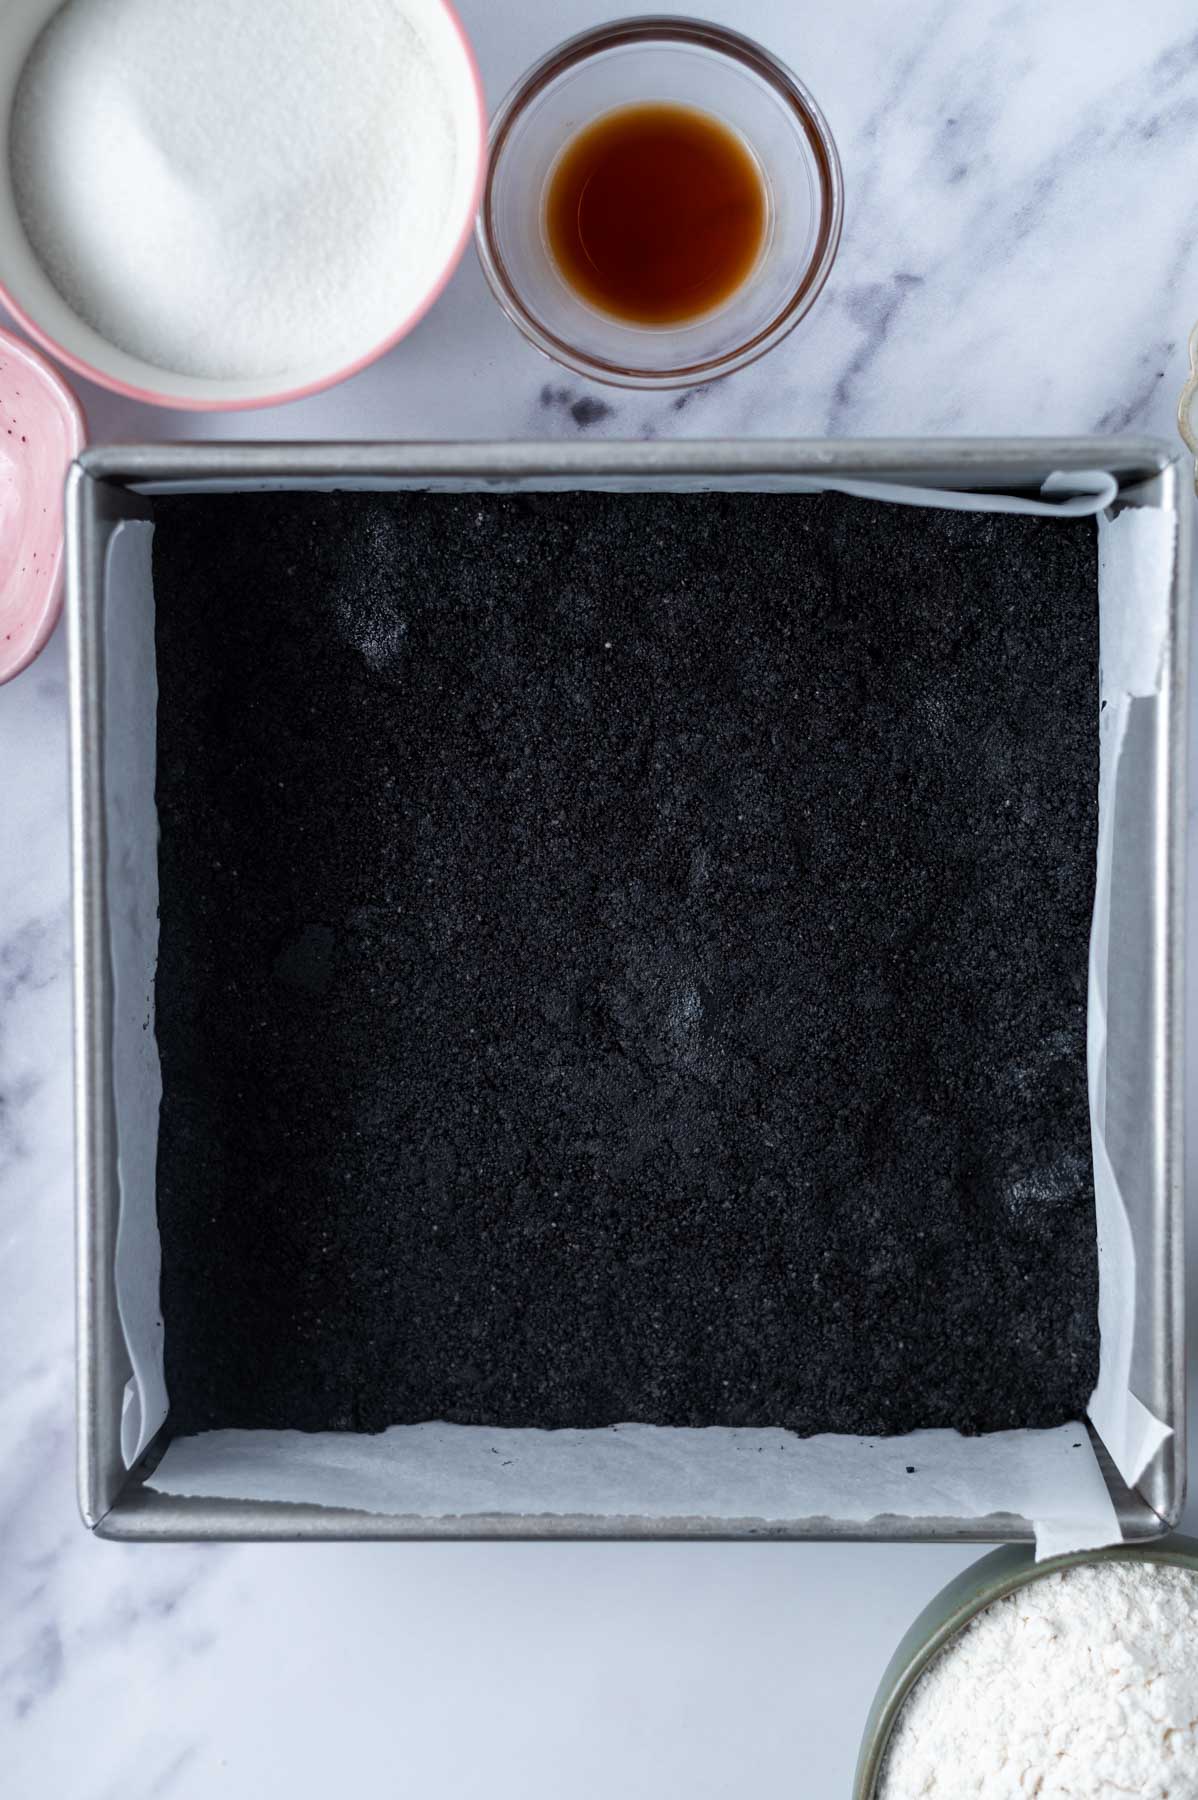
    Press the cookie crust firmly into the bottom of a parchment lined 8x8 baking pan.

    cookies and cream cake batter over cookie crust in a parchment lined baking pan

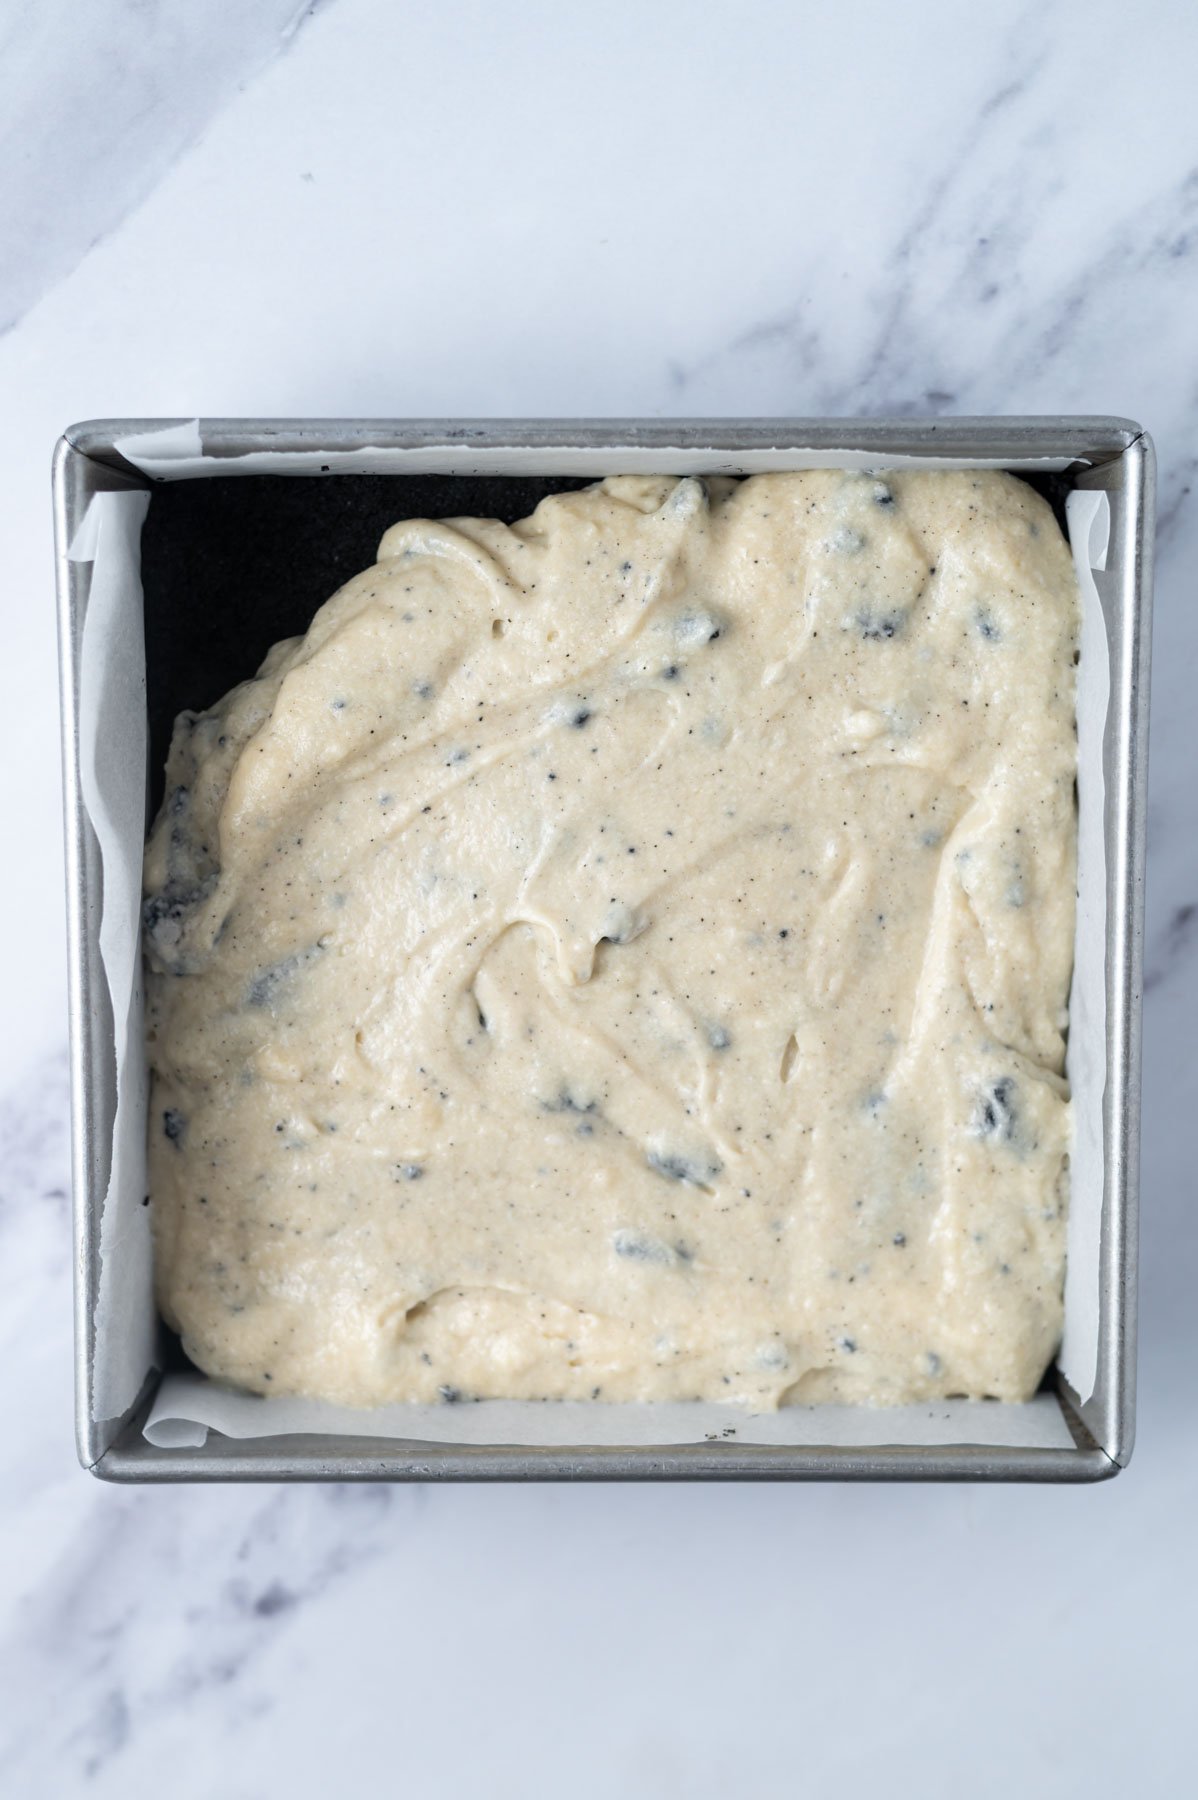
    Pour/spread the batter over the cookie crust and place the cake in the preheated oven.

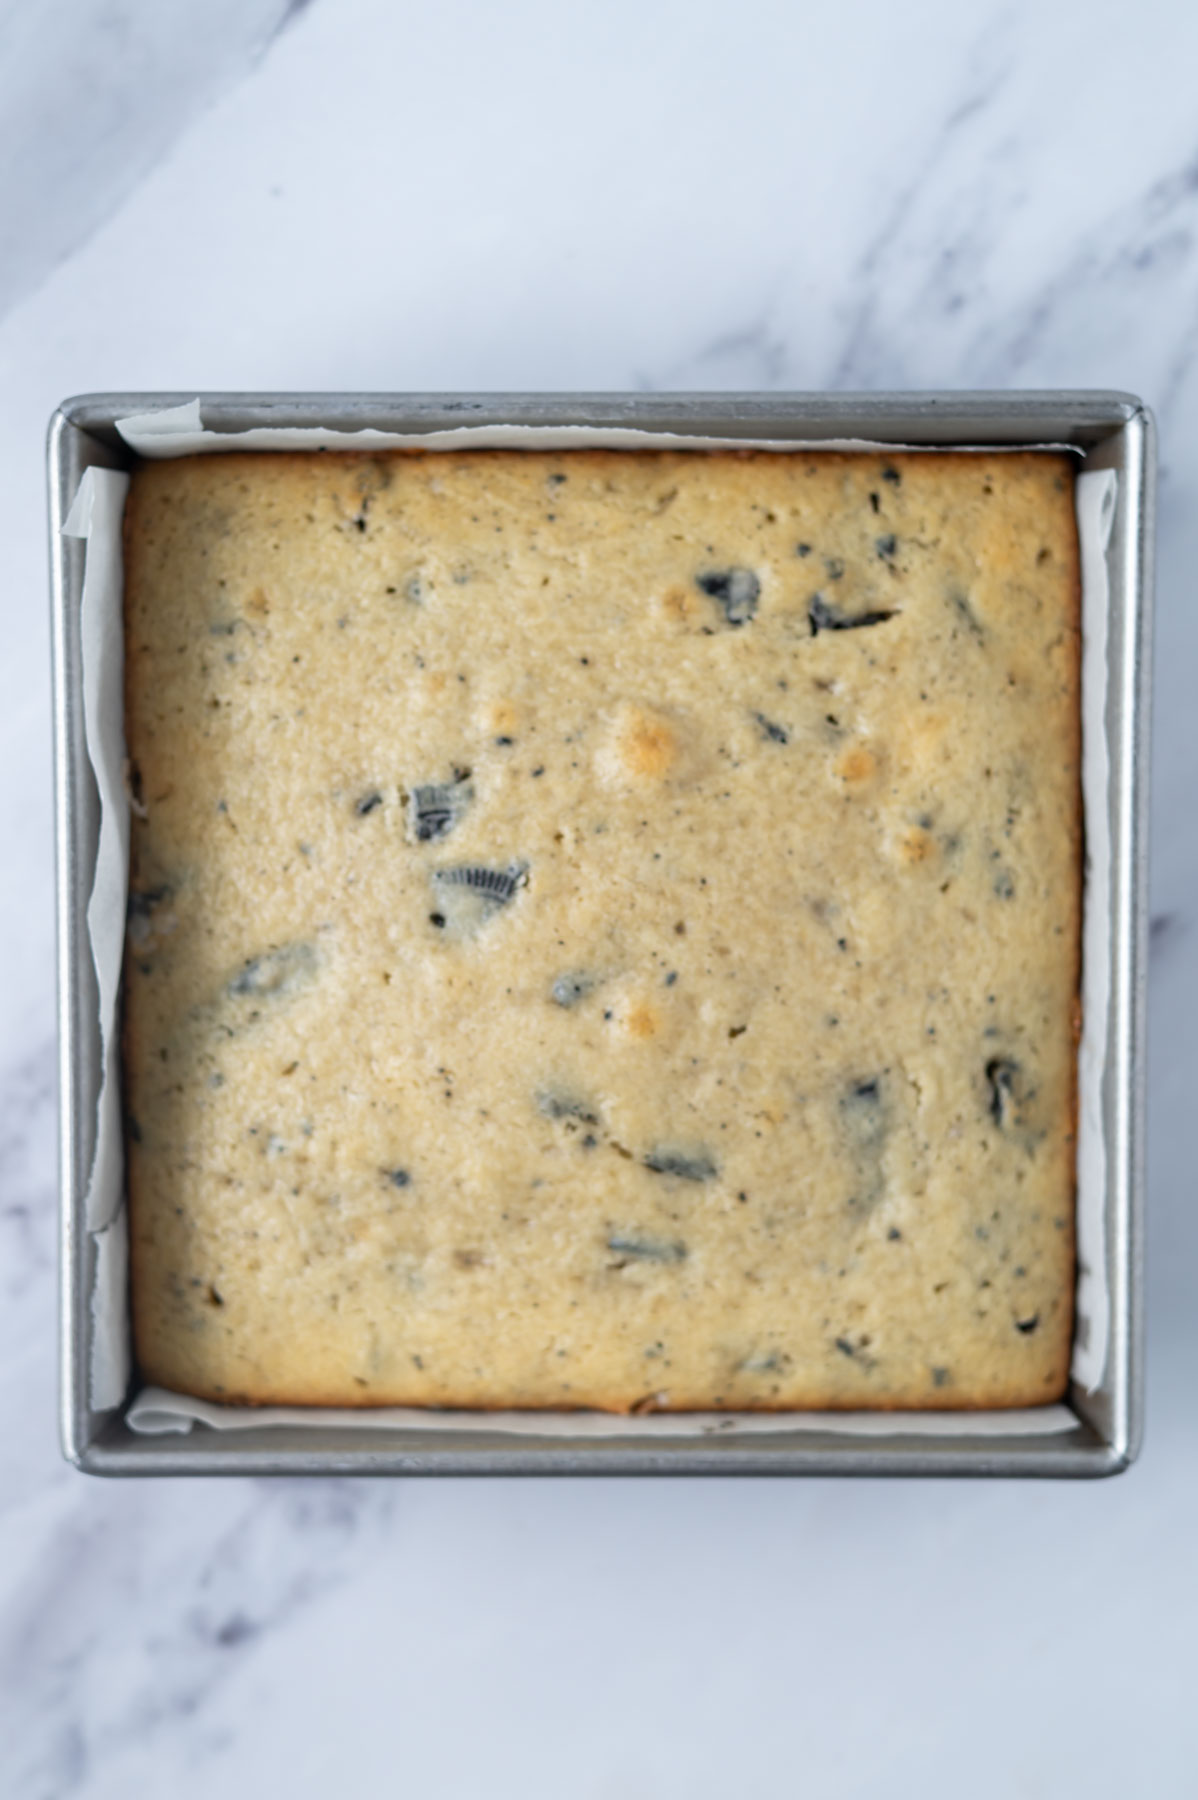
    baked cake in baking pan

    Bake for about 30-35 minutes or until a cake tester comes out with just a few moist crumbs.

    Allow the cake to cool in the pan on a wire cooling rack. Once the cake is cool, use the parchment to remove the cake from the pan.

    ๐Ÿ‘ฉ๐Ÿปโ€๐Ÿณ how to make an Oreo filling frosting

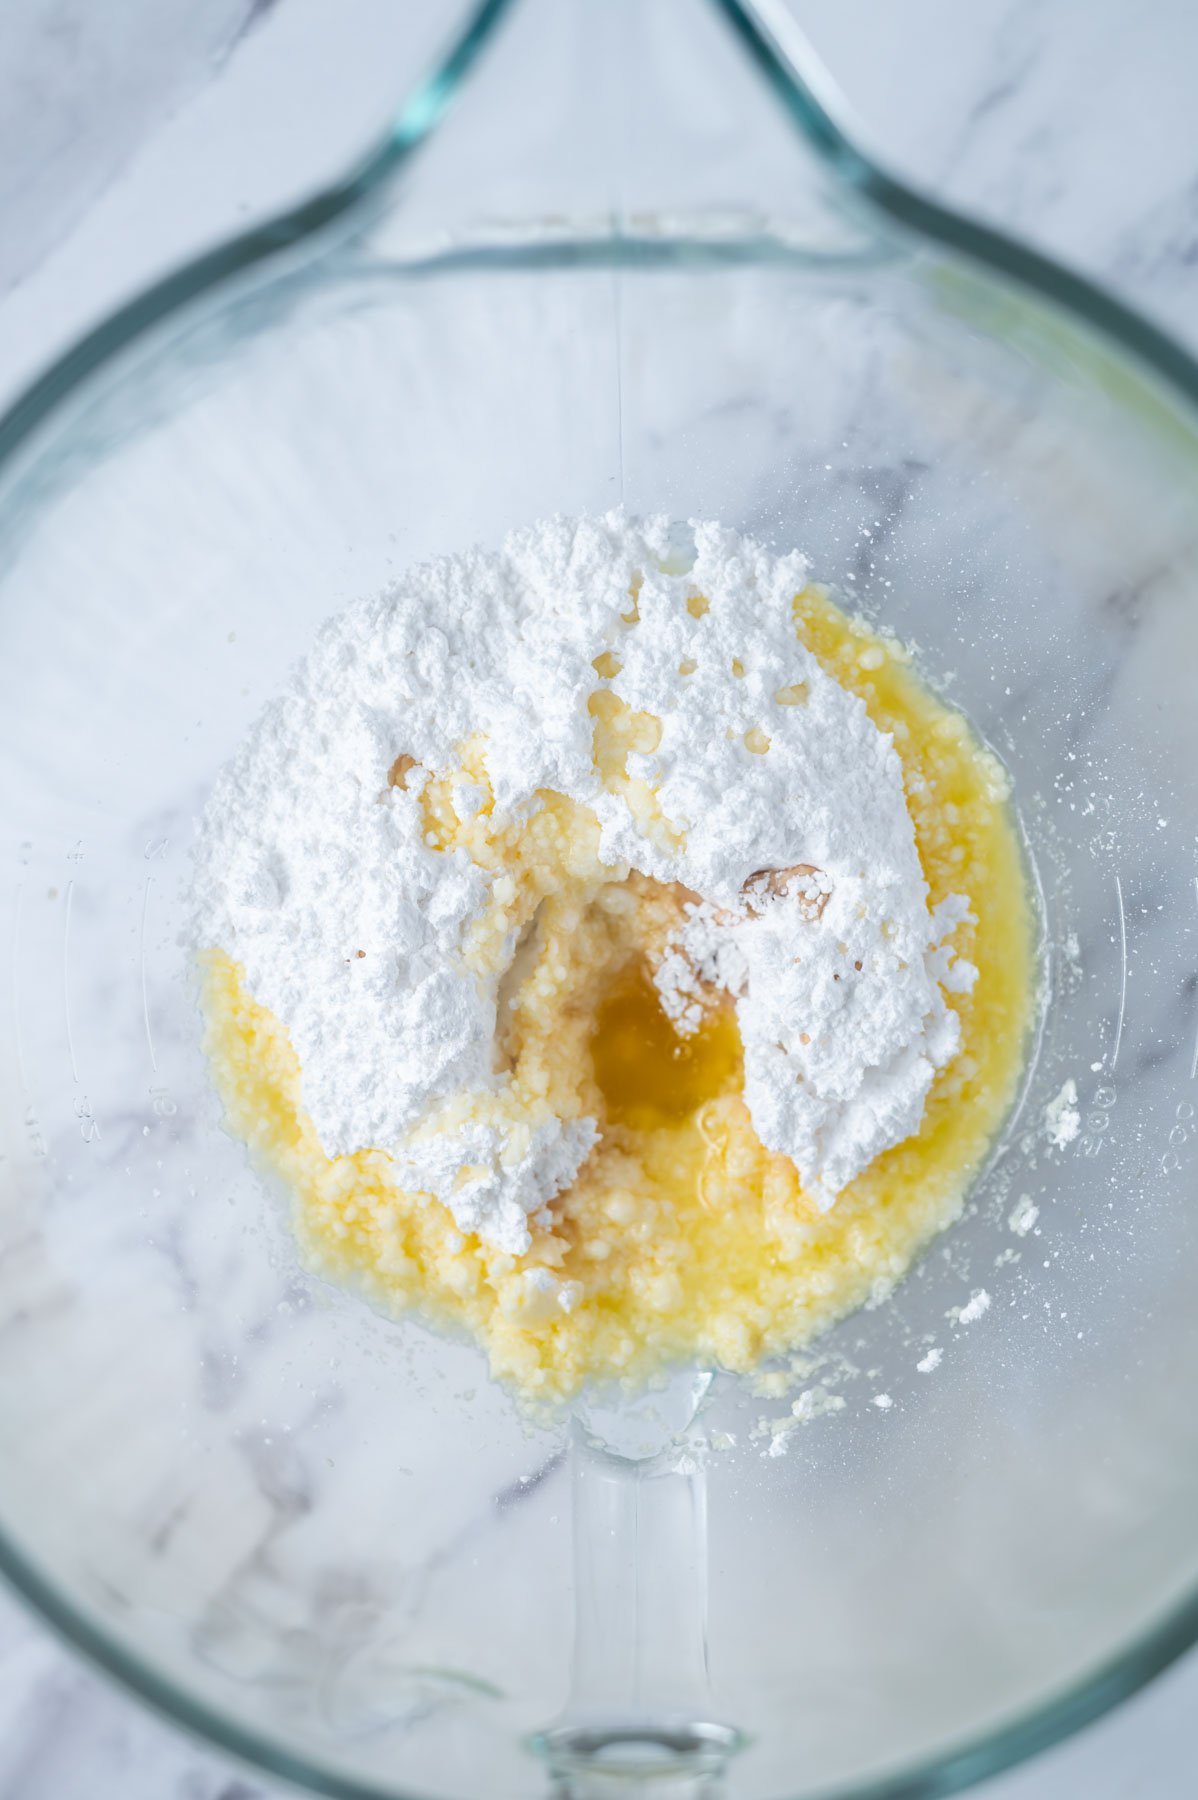
    melted butter, confectioners' sugar and vanilla in a mixing bowl

    Combine the confectioners' sugar with the melted butter, vanilla extract and whipping cream in a mixing bowl with a stand mixer or handheld mixer.

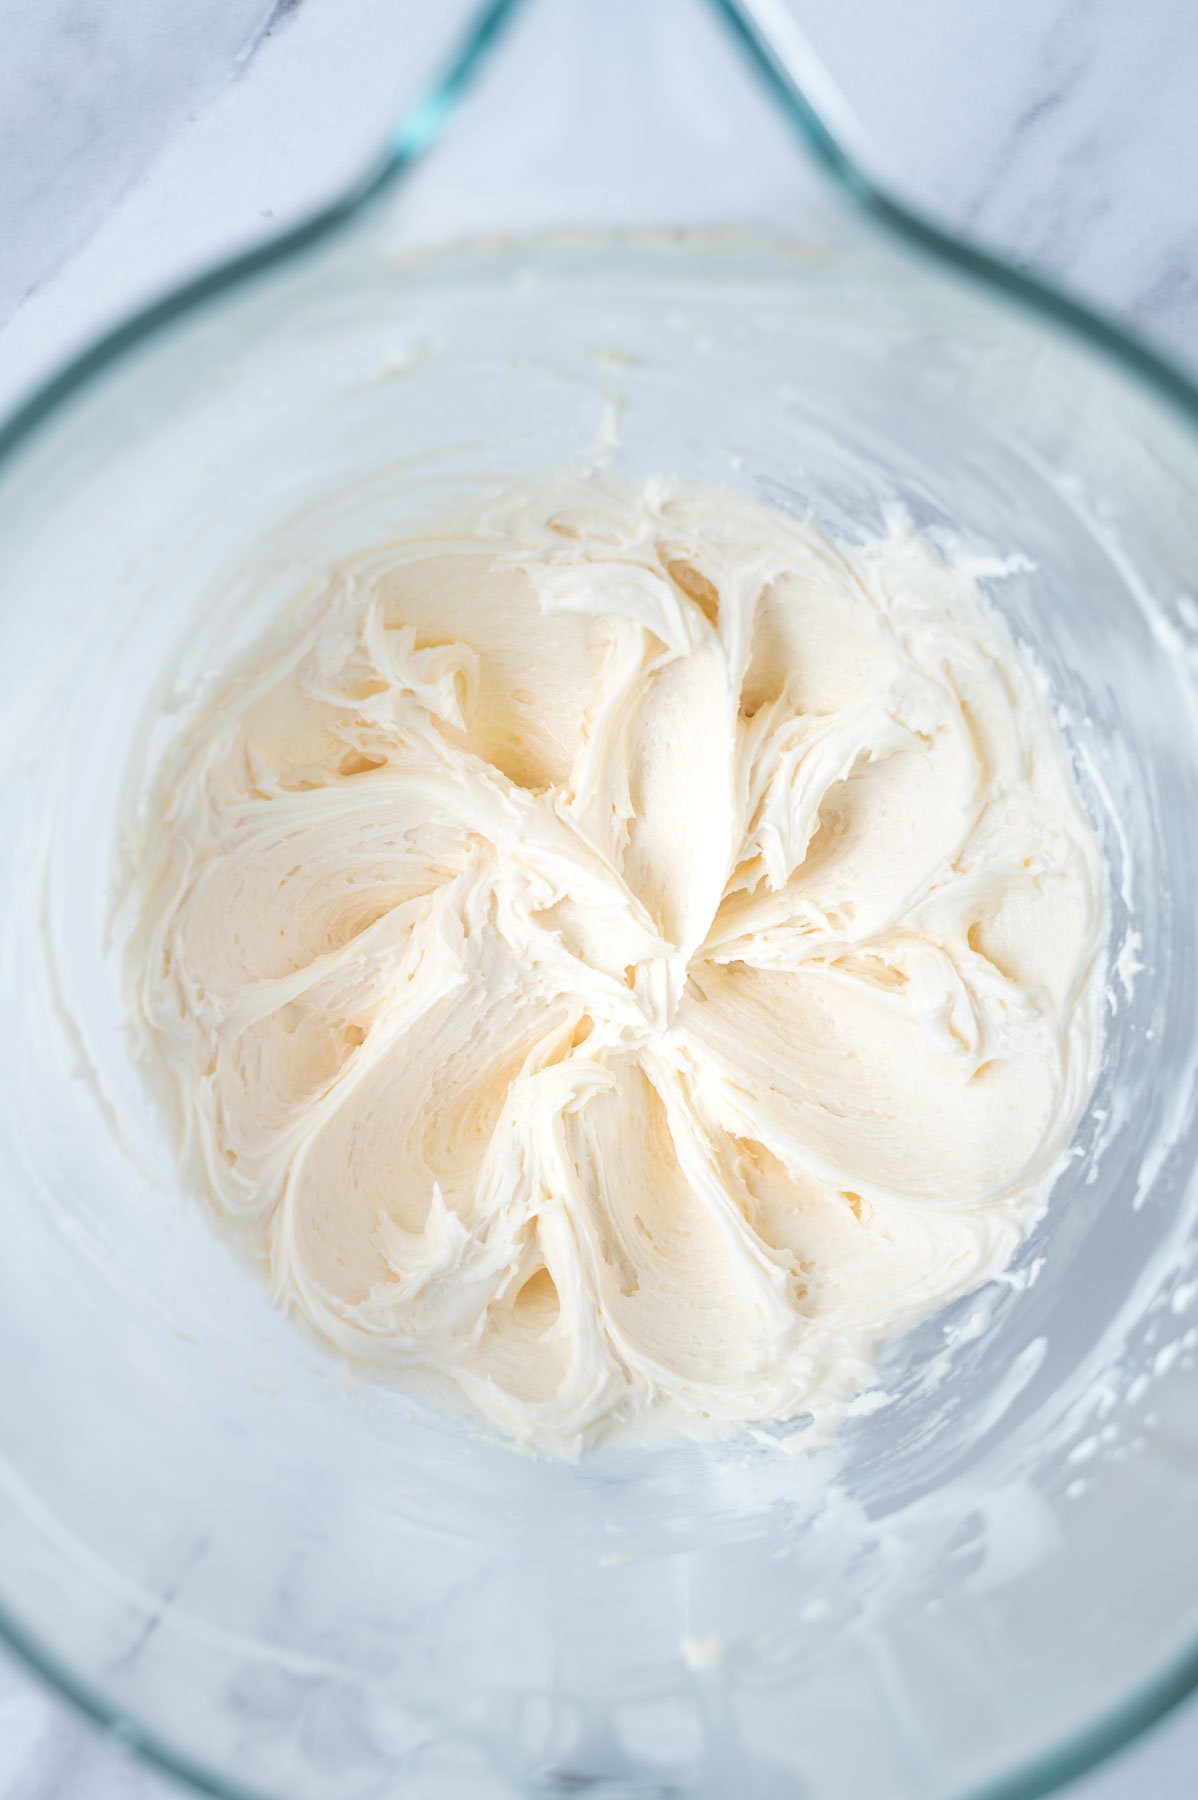
    creamy vanilla cream frosting in a mixing bowl

    Start on low and once combined, increase the speed to medium-high and beat until it reaches a thick fluffy frosting.

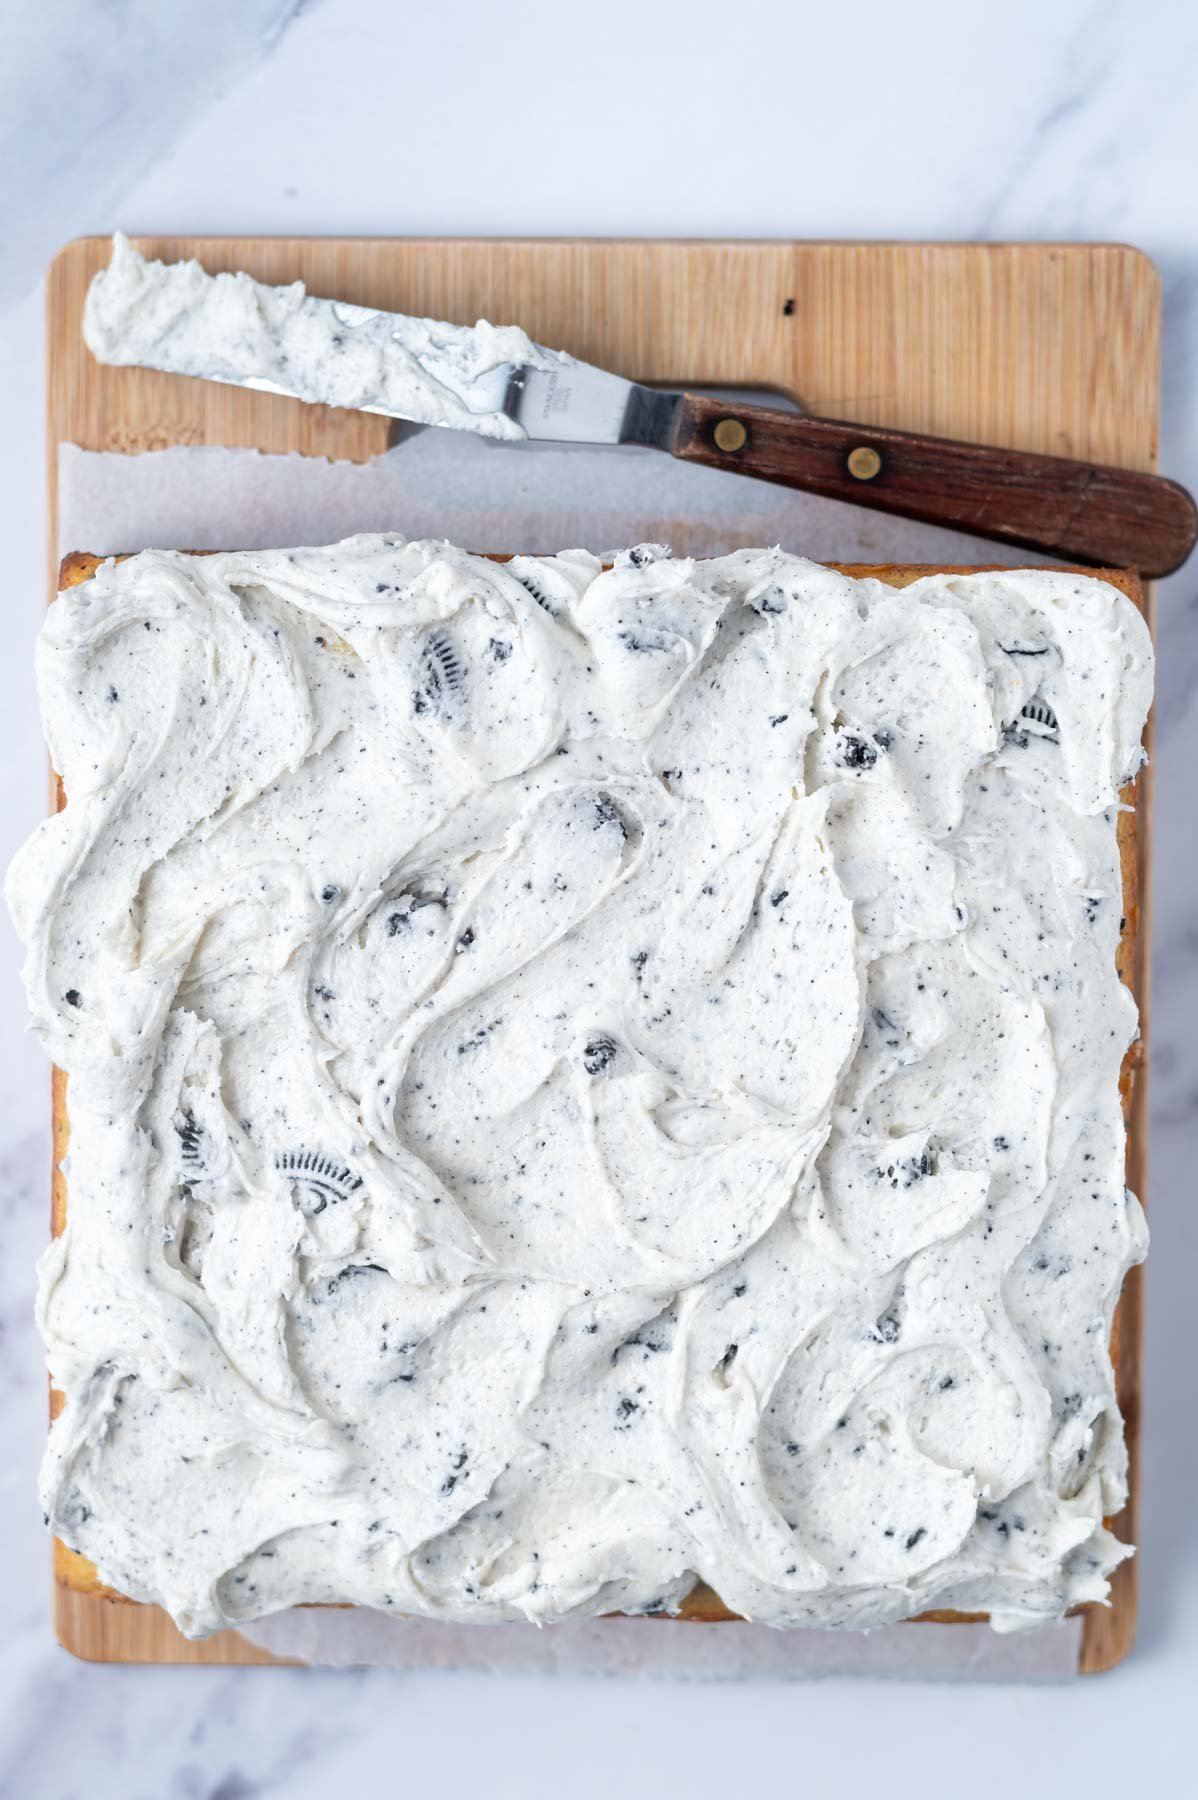
    Now fold in 3 - 4 crumbled chocolate sandwich cookies, if desired. Spread the frosting over the top of the cake and serve.

    oreo filling frosting over top of cake on a cutting board with an off-set spatula

    ๐Ÿ’ฌ questions about this homemade cake

    can I bake this cake in a different pan?

    Yes, a 9-inch round cake pan can be used with no changes to the recipe.

    The cake recipe can also be doubled and baked as a 9x13 sheet pan. The bake time should be similar.

    can I make this sheet cake a layer cake?

    Yes, double the recipe and split the batter between two 9-inch round cake pans. I would use the Oreo filling frosting in between the layers and then cover and decorate with a chocolate buttercream or vanilla buttercream.

    ๐Ÿซ™ how to store

    Cake can be stored in an airtight container at room temperature for 3-4 days.

    The cookies and cream cake can be frozen with the frosting for up to 2 months. You can either chill the cake well; then wrap the whole thing tightly in a double layer in plastic wrap. Or cut the cake into individual slices and chill; then wrap each slice tightly in a double layer of plastic wrap. Allow to defrost at room temperature before serving.

    This cookies and cream cake tastes best at room temperature.

    oreo cookie crusted cake on a baking pan showing the vanilla crumb

    Remember to snap a picture and tag me @twosugarbugs on Instagram if you make this Cookies and Cream Cake. It warms my heart to see you bring these recipes to life! Thank you for being here and happy baking!

    If you make this recipe {or any recipe!} from two sugar bugs please come back and leave a review and a โญ๏ธโญ๏ธโญ๏ธโญ๏ธโญ๏ธ star rating.  I read every comment, and I LOVE hearing from you!

    ๐Ÿ“– recipe

    Yield: 9 -12 servings

    Fluffy Cookies and Cream Cake

    slice of cookies and cream cake on a plate with a piece on a fork and milk in the background

    This easy-to-make cookies and cream cake features a moist white vanilla cake, chocolate cookie crust and frosting that tastes like Oreo filling!

    I highly recommend using weight {metric} measurements when available for more accuracy and the best results.

    Prep Time 15 minutes
    Bake Time 35 minutes
    Total Time 50 minutes

    Ingredients

    cookie crust

    • 20 chocolate sandwich cookies, crushed to fine crumbs (260g)
    • ยผ cup unsalted butter, melted (57g)

    cookies and cream cake

    • ยฝ cup unsalted butter, room temperature (113g)
    • ยพ cup granulated sugar (150g)
    • ยฝ teaspoon kosher salt
    • 2 large eggs, room temperature
    • 1 teaspoon pure vanilla extract (5mL)
    • ยผ cup full-fat sour cream, room temperature (60g)
    • 1 ยฝ teaspoons baking powder
    • ยผ teaspoon baking soda
    • 1 ยฝ cups all-purpose flour (188g)
    • ยฝ cup milk*, room temperature (120mL)
    • 5 whole chocolate sandwich cookies, chopped (65g)

    vanilla cream frosting

    • 2 cups confectioners' sugar (240g)
    • 4 tablespoons unsalted butter, melted (57g)
    • 1 teaspoon pure vanilla extract
    • 2 tablespoons whipping cream***(30mL)

    Instructions

      1. Preheat oven to 350ยฐF and prepare an 8x8** baking pan with parchment paper. Set aside.
      2. For the chocolate cookie crust: Crush the chocolate sandwich cookies (20 cookies/260g) into fine crumbs in a food processor or in a zip-top bag with a rolling pin. Then add the melted butter (ยผ cup/57g) and mix until well combined. Press firmly into the bottom of a parchment lined 8x8 baking pan and set aside.
      3. In a stand mixer with the paddle attachment (or using a hand-held mixer), cream together the unsalted butter (ยฝ cup/113g), granulated sugar (ยพ cup/150g) and kosher salt (ยฝ teaspoon). Start on low and once incorporated increase to medium-high (6 on a KitchenAid) and cream until light, about 3 minutes. Scrape the bowl at least once during the creaming process.
      4. Scrape up and down the bowl and add the eggs one at a time (2 large total), scraping the bowl after the first egg and add the vanilla (1 teaspoon) with the second egg, mixing on medium-high until combined, about 1-2 minutes.
      5. Scrape the bowl again and add the sour cream (ยผ cup/60g), baking powder (1 ยฝ teaspoons) and baking soda (ยผ teaspoon) and mix on medium (speed 4 on KitchenAid) until combined about 30-60 seconds. The mixture can look a little curdled at this point, but don't let it worry you.
      6. With the mixer on low (stir on KitchenAid) slowly add the flour (1 ยฝ cups/188g) and mix until some large streaks of flour remain. Scrape up and down the bowl.
      7. Then with the mixer on low, slowly drizzle in the milk (ยฝ cup/120mL) mixing until the batter just comes together. Use a spatula to do a final stir while you fold in the chopped/broken chocolate sandwich cookies (5 whole cookies/65g).
      8. Pour/spread the batter over the cookie crust and place the cake in the preheated oven.
      9. Bake for about 30-35 minutes or until a cake tester comes out with just a few moist crumbs. Allow the cake to cool in the pan on a wire cooling rack.
      10. Once the cake is cool, use the parchment to remove the cake from the pan.
      11. For the vanilla cream frosting:ย combine the confectioners' sugar (2 cups/240g) with the melted butter (4 tablespoons/57g), vanilla extract (1 teaspoon) and whipping cream (2 tablespoons) in a mixing bowl with a stand mixer or handheld mixer. Start on low and once combined, increase the speed to medium-high and beat until it reaches a thick fluffy frosting. Fold in 3 - 4 crumbled chocolate sandwich cookies, if desired.
      12. Spread the frosting over the top of the cake and serve.

    Notes

    *I use 1% milk, but 2% or whole milk can also be used.

    **The cake can also be baked in a 9-inch round. If using a 9-inch round, butter the pan, line with parchment paper and butter again.

    ***Whipping cream can be substituted with half and half or whole milk.

    You can double the recipe and bake the cake in a 9x13 pan for a full sheet cake. Or double the recipe and bake in two 9-inch rounds to create a layer cake.

    Cake can be stored in an airtight container at room temperature for 3-4 days. The cookies and cream cake can also be frozen; wrap tightly in plastic wrap and then place in an airtight container or zip-top bag in the freezer for up to 2 months. Allow to defrost and come to room temperature before serving. The cake tastes best at room temperature.

    Nutrition Information:

    Yield:

    12

    Serving Size:

    1

    Amount Per Serving: Calories: 478Total Fat: 24gSaturated Fat: 14gTrans Fat: 0gUnsaturated Fat: 8gCholesterol: 81mgSodium: 237mgCarbohydrates: 60gFiber: 1gSugar: 41gProtein: 6g

    The nutrition information is based on third-party calculations, is an estimate only and may not be entirely accurate. Actual nutritional values will vary based on brands used and portion sizes.

    Did you make this recipe?

    Please make my day and PIN to Pinterest and share a photo on Instagram ~ making sure to tag @twosugarbugs! THANK YOU!!

    © Tasia
    Cuisine: American / Category: Cakes and Cupcakes

    Peanut Butter Pretzel Pie

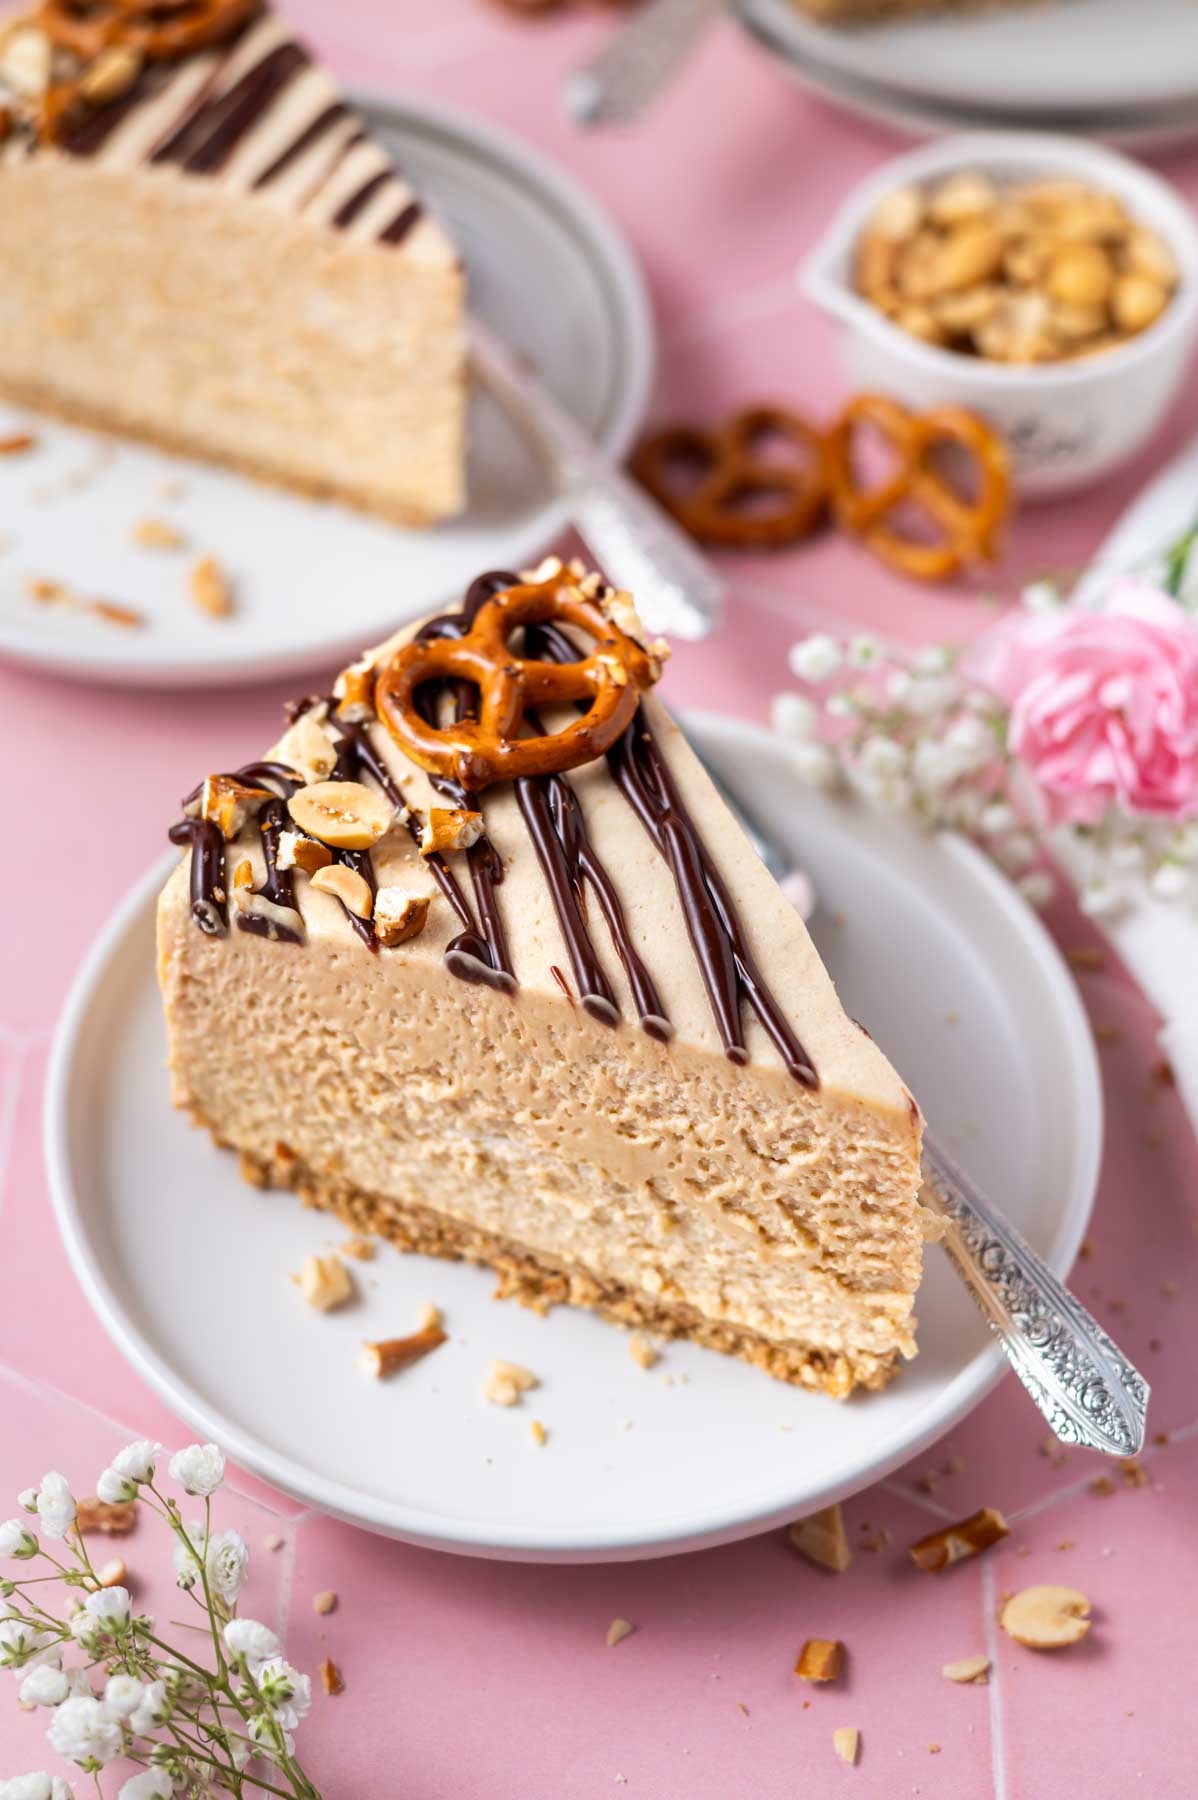
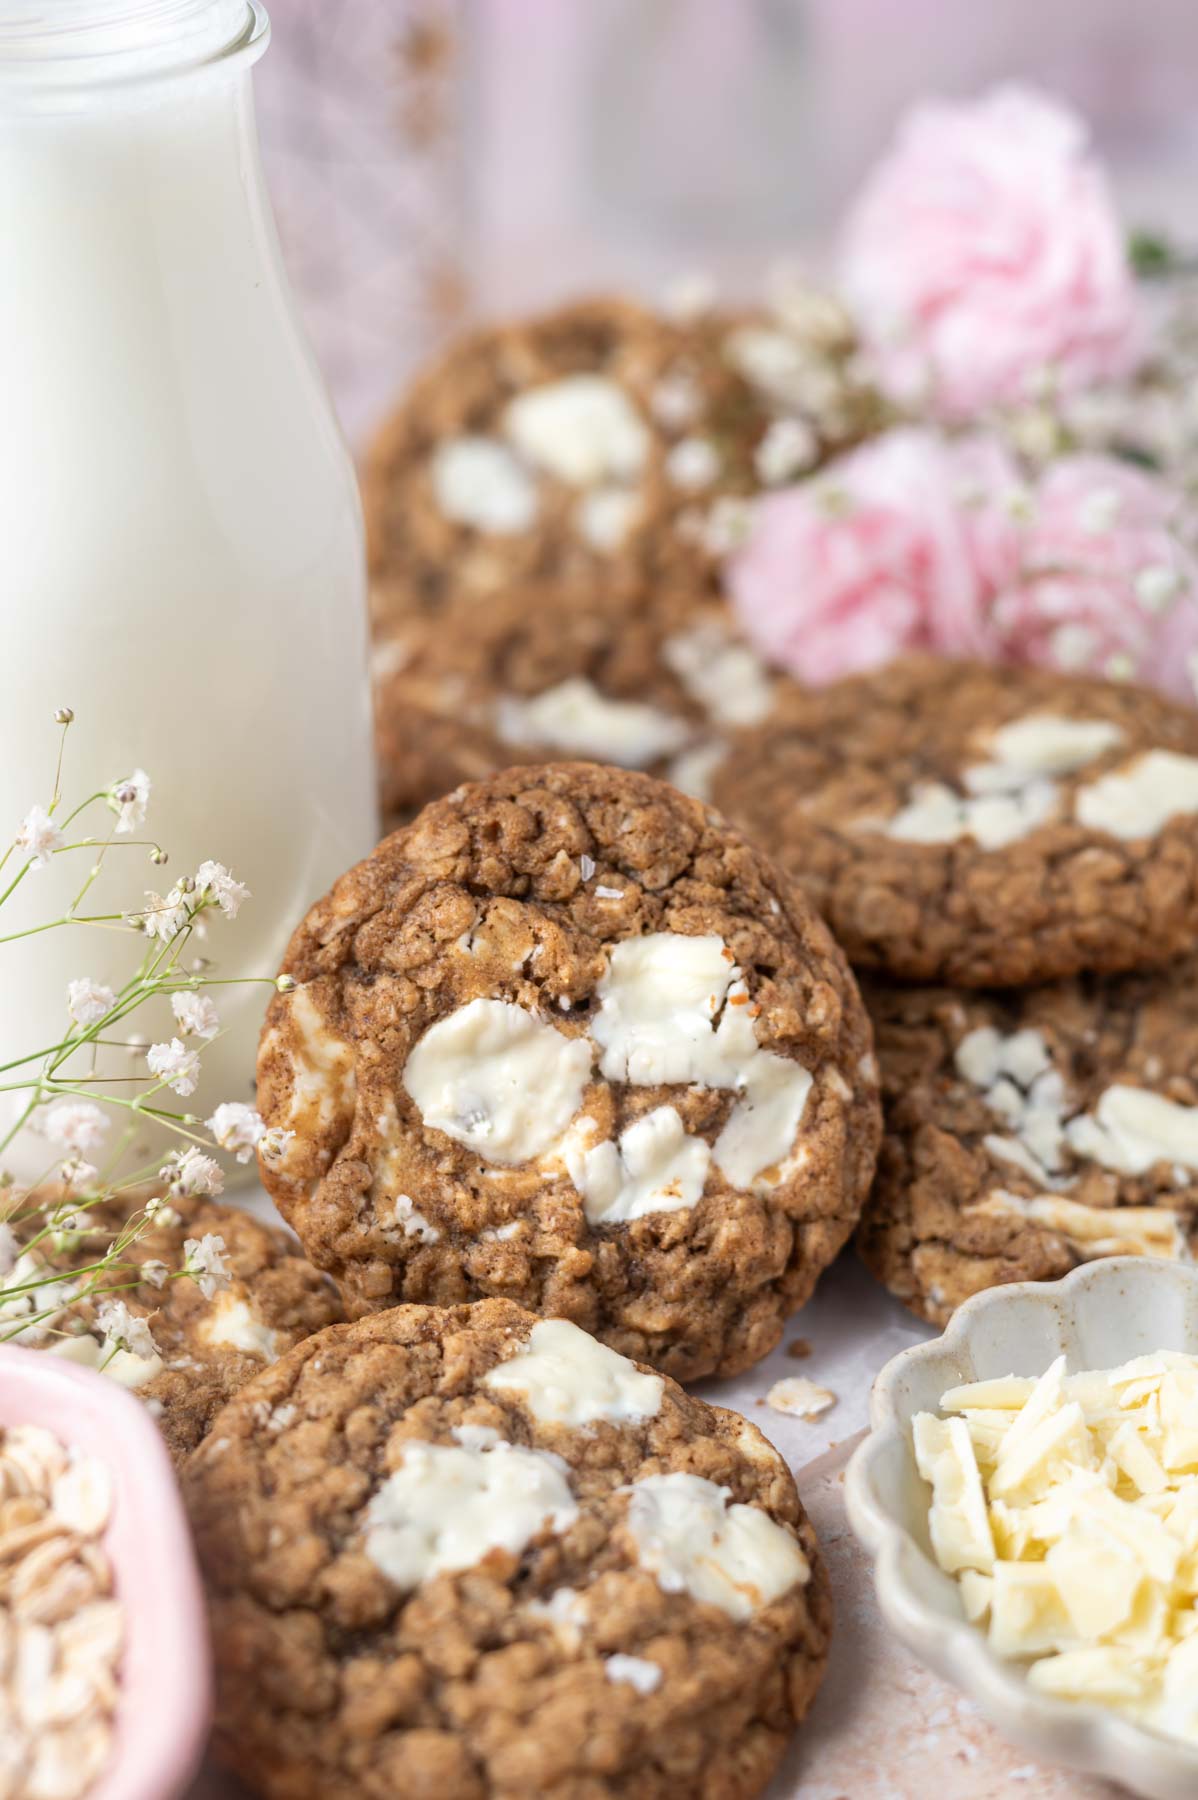
    slice of peanut butter pretzel pie on a plate with a fork and a bowl of peanuts and fresh flowers in the background

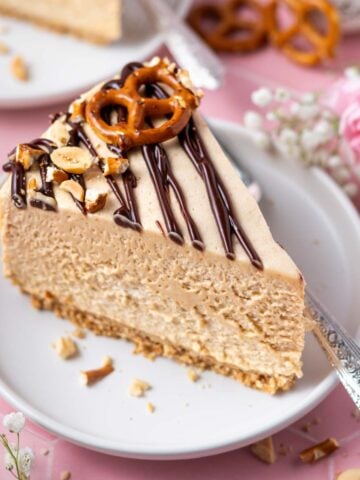
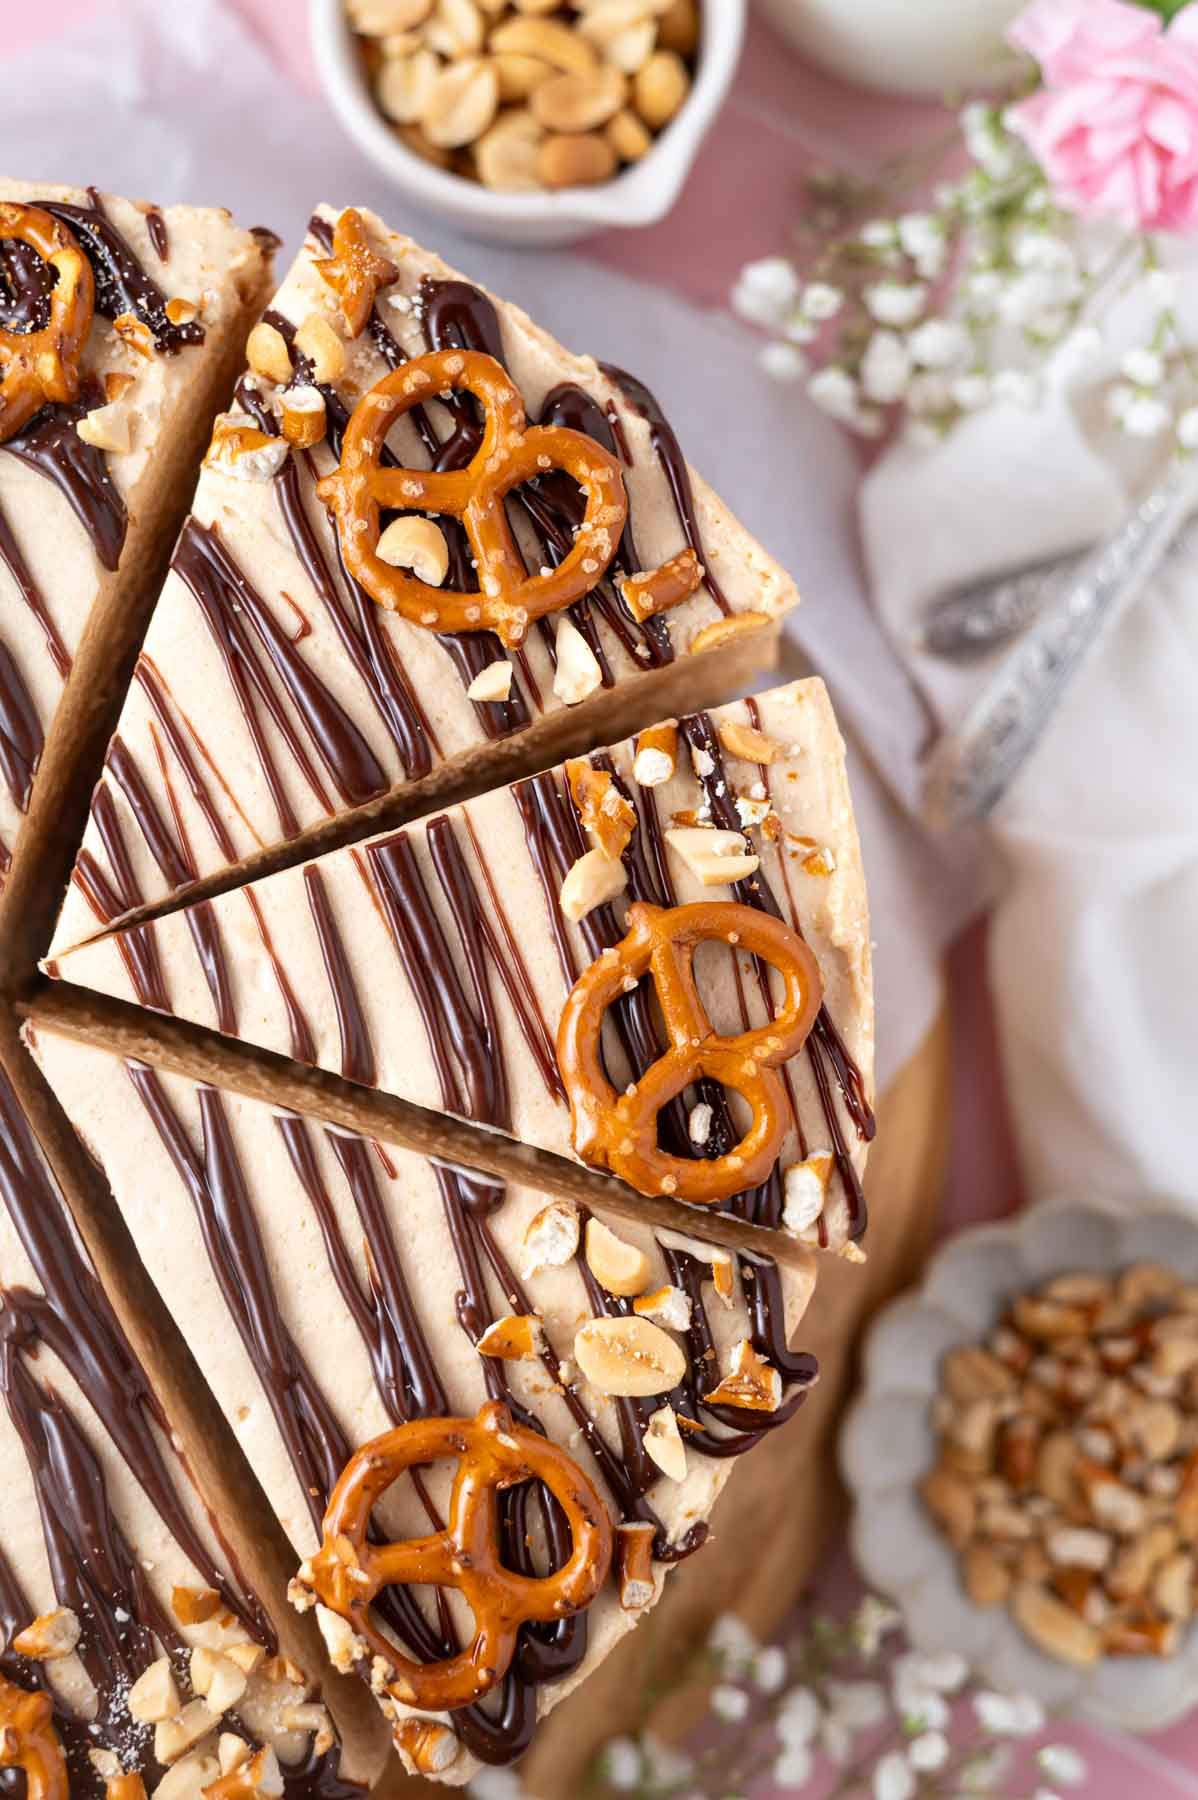
    This peanut butter pretzel pie has a light and fluffy filling. It is a simple pie to make ahead and is always a crowd pleaser! The pretzel graham cracker crust can be frozen instead of baked making it a no-bake dessert, if desired.

    This post was originally published in June of 2019 and has been updated with helpful information and new photos. The recipe remains the same.
    slice of peanut butter pretzel pie on a plate with a fork and a bowl of peanuts and fresh flowers in the background

    Disclosure | This post may contain affiliate links. As an Amazon Associate I earn from qualifying purchases.

    You may remember that I spent my early 20's working on cruise ships. During my sailing adventures, I spent multiple summers cruising to Alaska. The Land of the Midnight Sun will always hold a special place in my heart. This no-bake pie recipe comes from a restaurant we used to visit called Kay's Kitchen.

    I tinkered with the recipe over the years, making it my own. This peanut butter pie is simple to make and sits on top of a pretzel graham cracker crust, like my margarita pie. The pie is thick, with a creamy and silky texture that is complimented by the slightly salty crust. The sweet and salty combo that is also used in my peanut butter pretzel caramel brownies.

    My peanut butter pie is different than many others as it is made without Cool Whip and without pudding.

    [feast_advanced_jump_to]
    cut slices of peanut butter pretzel pie on a cake stand with flower and utensils in the background

    ๐Ÿ›’ ingredient notes and substitutions

    Please scroll to the printable recipe card at the end of this post for the full list of ingredients and baking directions.
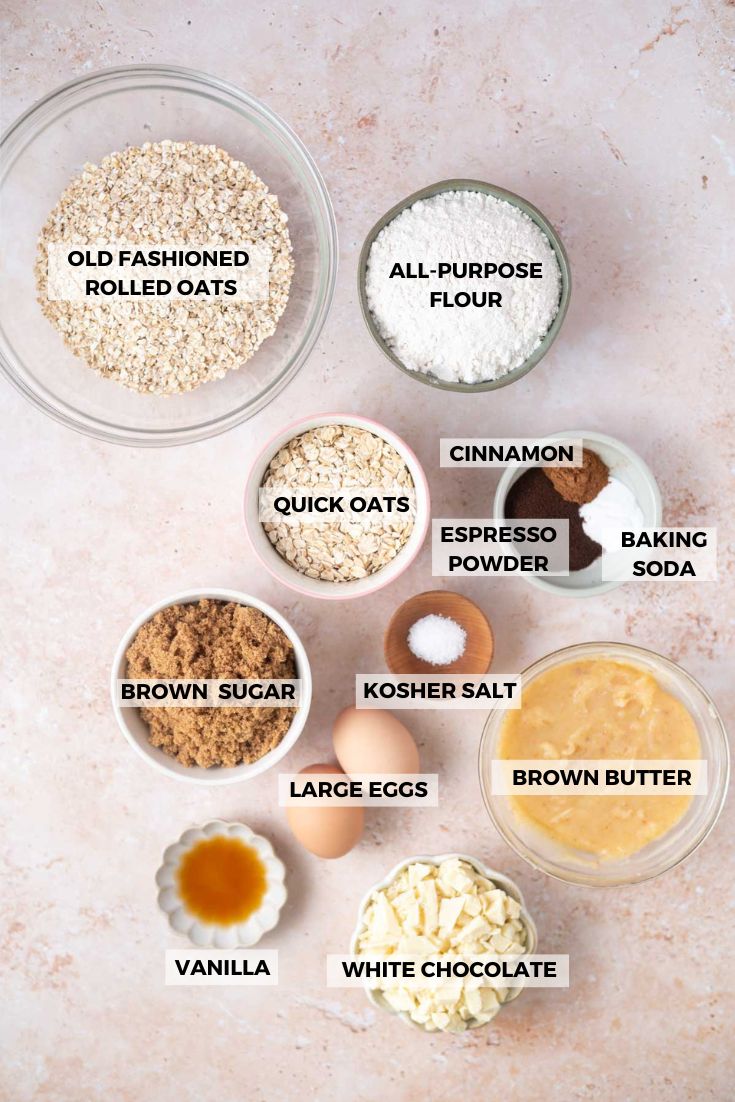
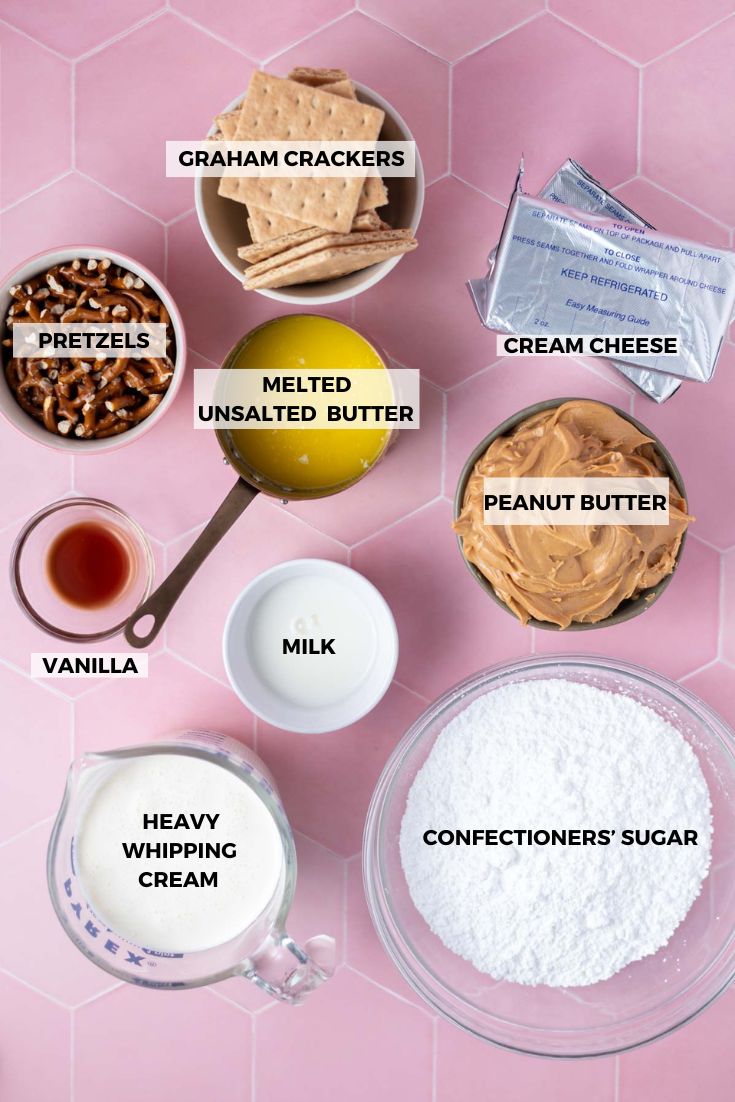
    peanut butter pretzel pie ingredients
    • Pretzels ~ I tested this recipe with an all pretzel crust as well as using graham crackers with pretzels. My taste testers loved the pretzel and graham combo! Kay's recipe used an all graham cracker crust, so feel free to use your favorite.
    • Graham crackers ~ crushed to crumbs. Since it can be a challenge to figure out how many graham crackers equal a cup of crumbs, use 8 full sheets of crackers.
    • Peanut butter ~ Kay's recipe uses crunchy peanut butter, my family prefers a smooth filling, so I use creamy peanut butter; either one works! You will want to use a shelf stable peanut butter like Skippy or Jif as as a natural peanut butter could separate and turn the pie into an oily mess.
    • Cream cheese ~ this needs to be room temperature. A full-fat cream cheese will give you the best structure and texture to the no bake filling and should be in brick form.
    • Confectioners' sugar ~ also known as powdered sugar is used to create a stabilized whipped cream to give the peanut butter pie the right texture. Kay's recipe used cool whip, feel free to substitute it; she used 1 ยฝ containers.
    • Milk ~ 1% milk is what I use, but 2% or whole can be substituted.
    • Heavy whipping cream ~ The heavy cream needs to be COLD when you whip it for the homemade whipped cream. I use my hand mixer, but a stand mixer or a cold bowl and a whisk {and some good arm strength!} will also work. I prefer heavy cream or heavy whipping cream with a minimum of 36% fat for the peanut butter filling. A whipping cream {typically 30% fat} can be substituted.
    • Milk chocolate ~ for the chocolate ganache drizzle. I get the best results when I use a chopped chocolate bar instead of chocolate chips.

    ๐Ÿ‘ฉ๐Ÿปโ€๐Ÿณ expert tips

    To quickly soften cream cheese: place the unopened packages of cream cheese into a warm bowl of water and completely submerge them. Allow it to sit for about 15 minutes and the cream cheese should be softened. If the package is opened, place it in a sealed zip-top bag before placing in water.

    Use full-fat brick cream cheese. Light cream cheese or cream cheese in a tub won't yield the same result.

    Use a shelf stable peanut butter for the best light and fluffy filling.

    ๐Ÿฅจ how to make the pretzel graham cracker crust

    Preheat oven to 350ยฐF/177ยฐC, only if baking the pretzel graham crust.

    crushed graham crackers and pretzels in the bowl of a food processor

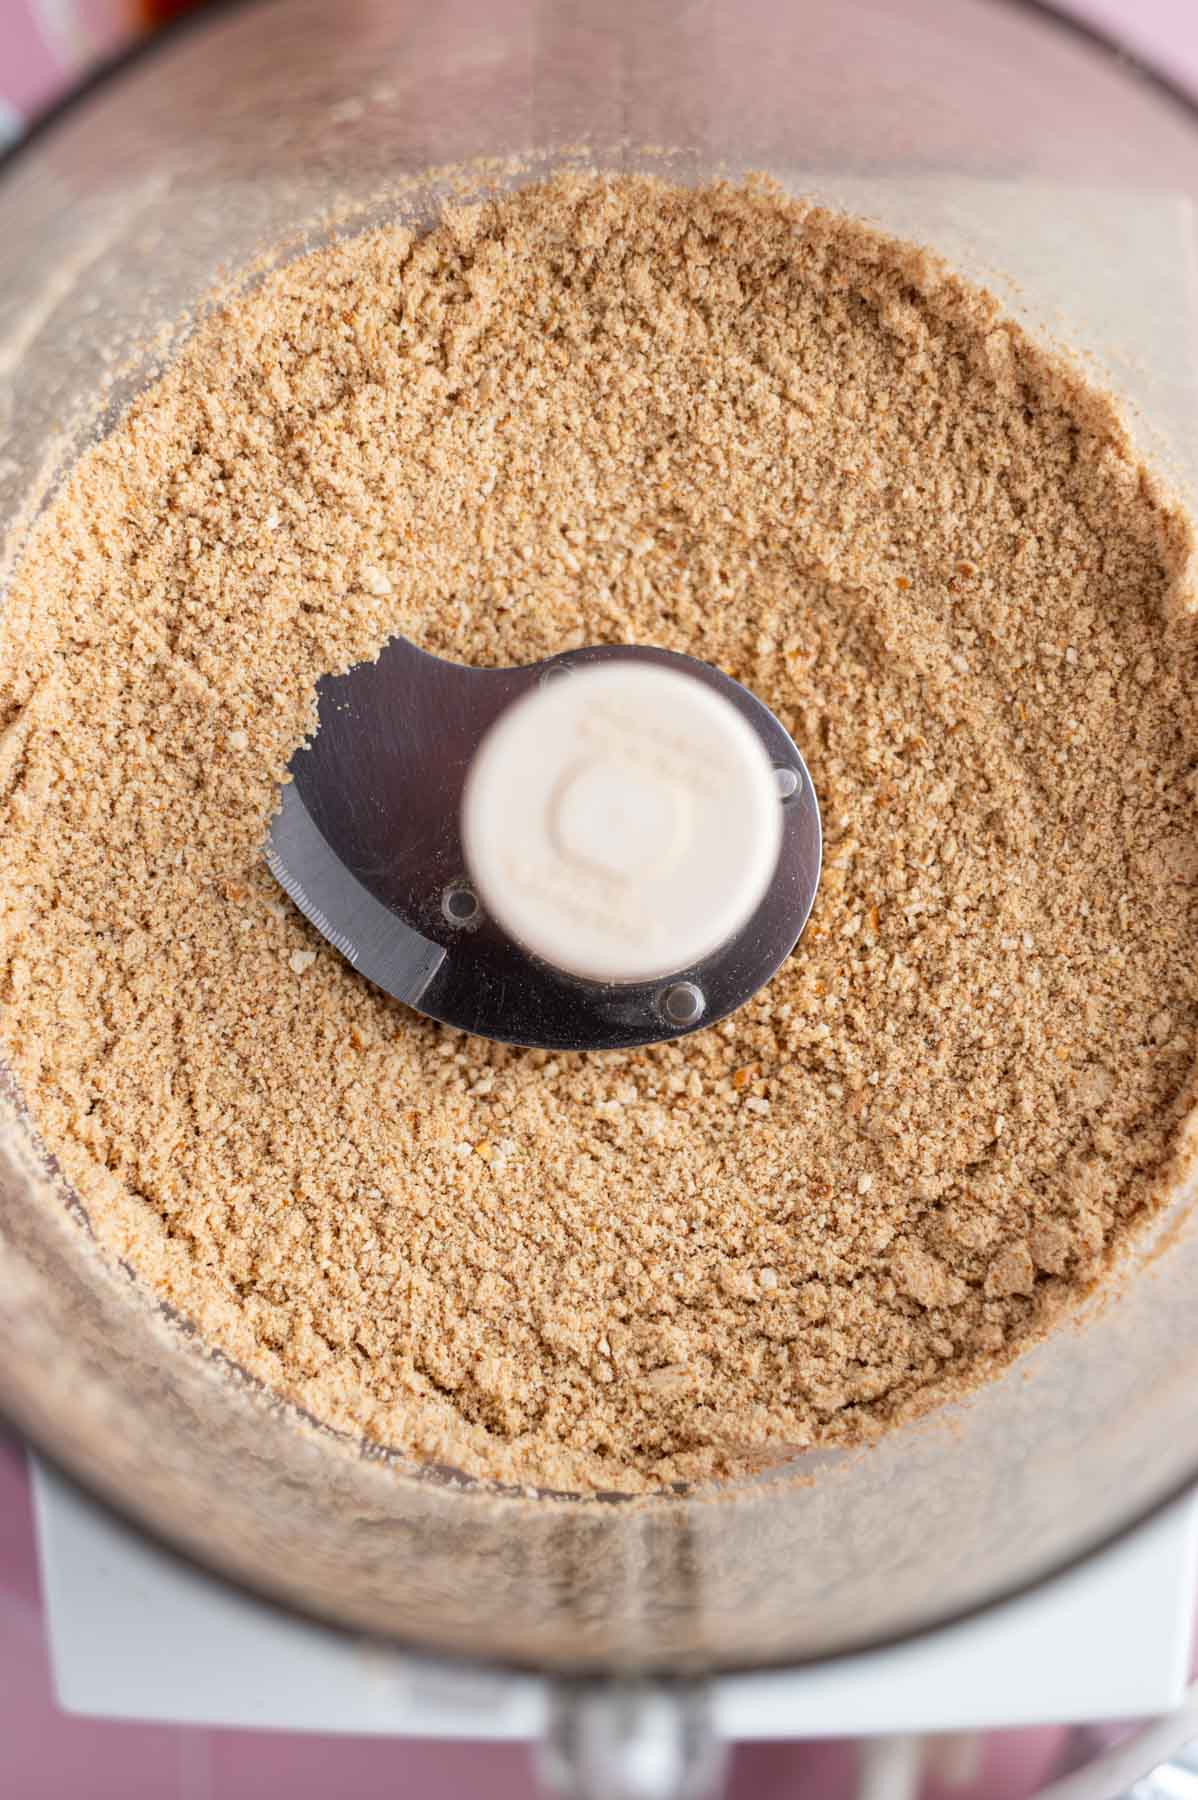
    In a food processor, crush pretzels and graham crackers until fine crumbs.

    pretzel graham crust in the bowl of a food processor

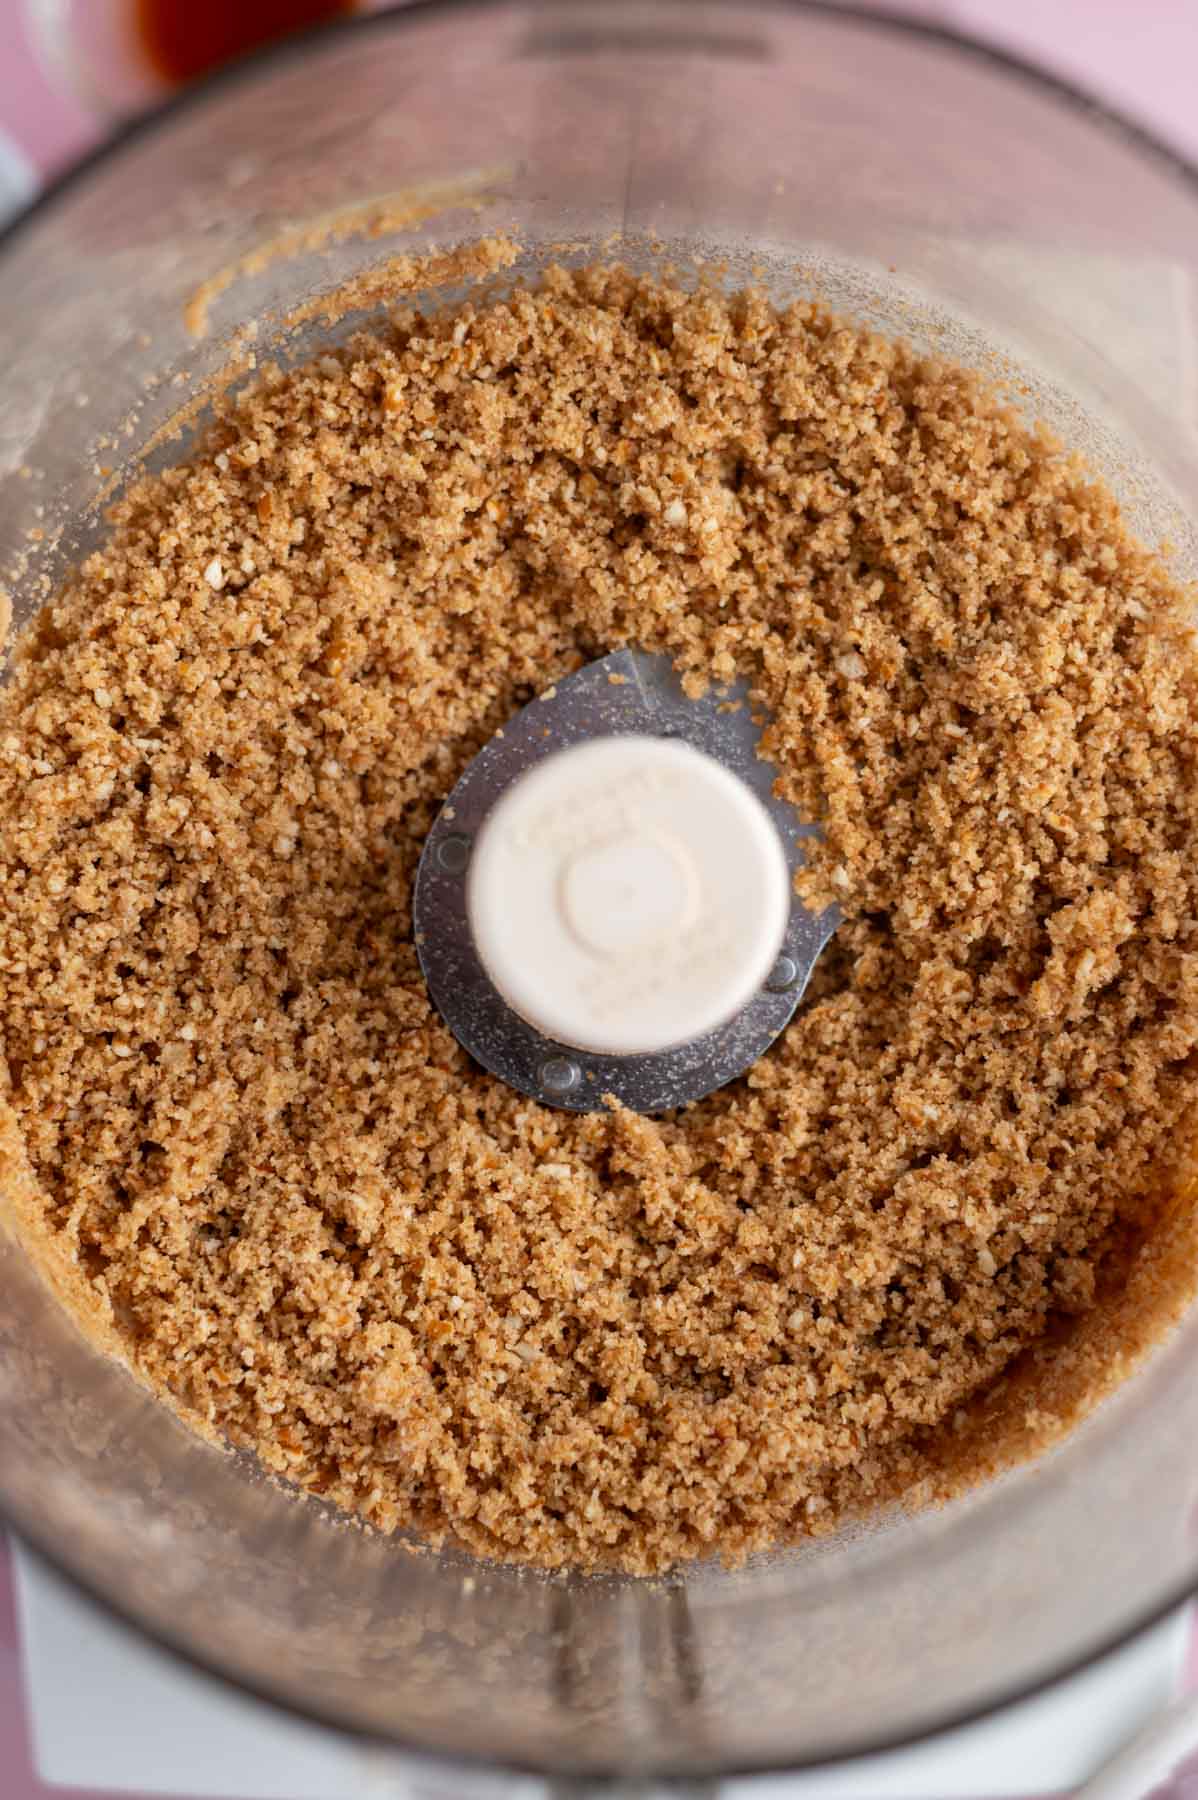
    Add the melted butter and pulse until the mixture looks like wet sand.

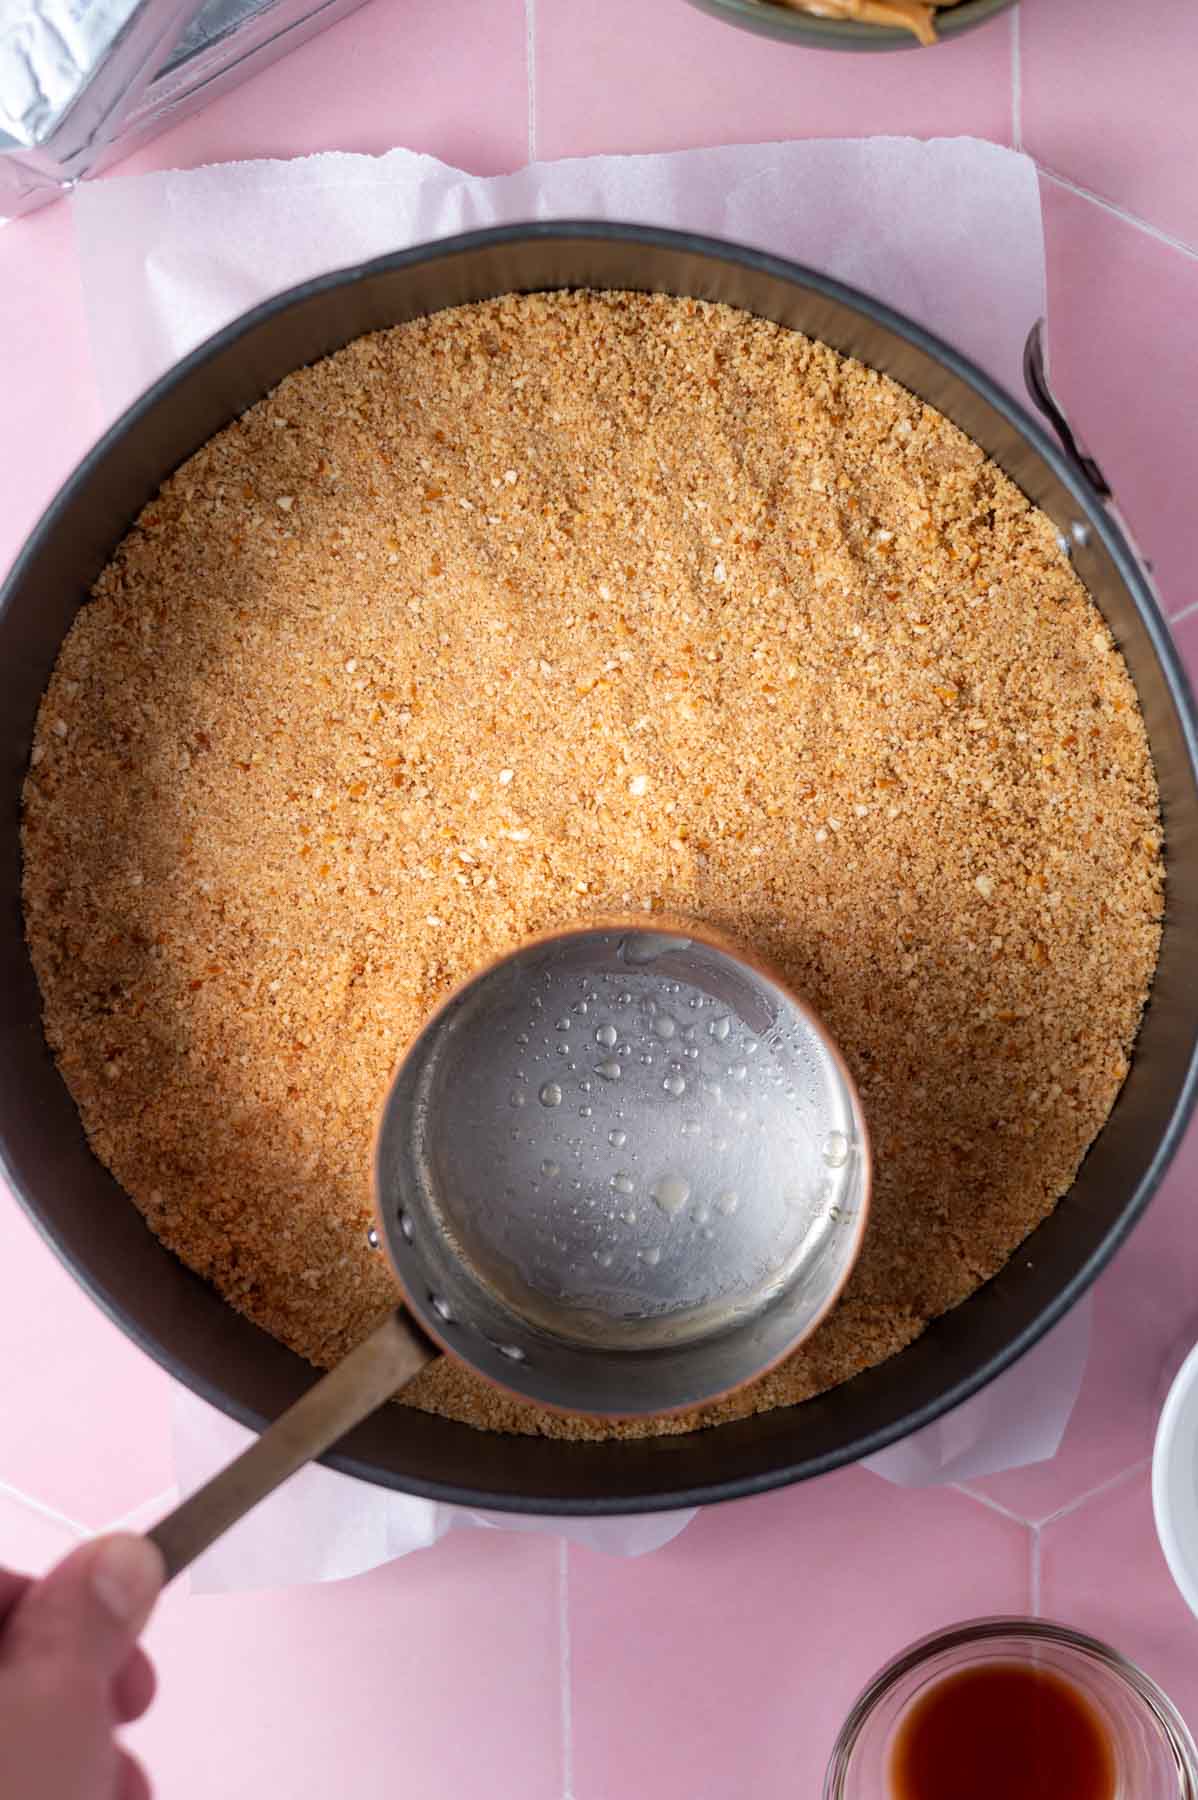
    tiny saucepan pressing crust into a springform pan

    Finally, press the mixture into the bottom of a 9-inch spring form pan.

    Alternately, you can place pretzels and graham crackers in a zip-top bag and crush with a rolling pin or mallet and then mix in melted butter.

    Line the bottom of the springform pan with parchment paper, if you want to remove the pie from the pan bottom. If baking, place the pan on top of a sheet pan and bake for 8-10 minutes. {The sheet pan keeps any leaking butter from dripping onto the bottom of your oven}. If not baking the crust, place it in the freezer to firm up while making the filling.

    ๐Ÿฅง how to make peanut butter pie without cool whip

    While the crust cools or chills, make the filling.

    Prepare whipped cream using a stand mixer with the whisk attachment or a hand held mixer. Then move the whipped cream to another bowl.

    cream cheese and peanut butter beaten together in a mixing bowl

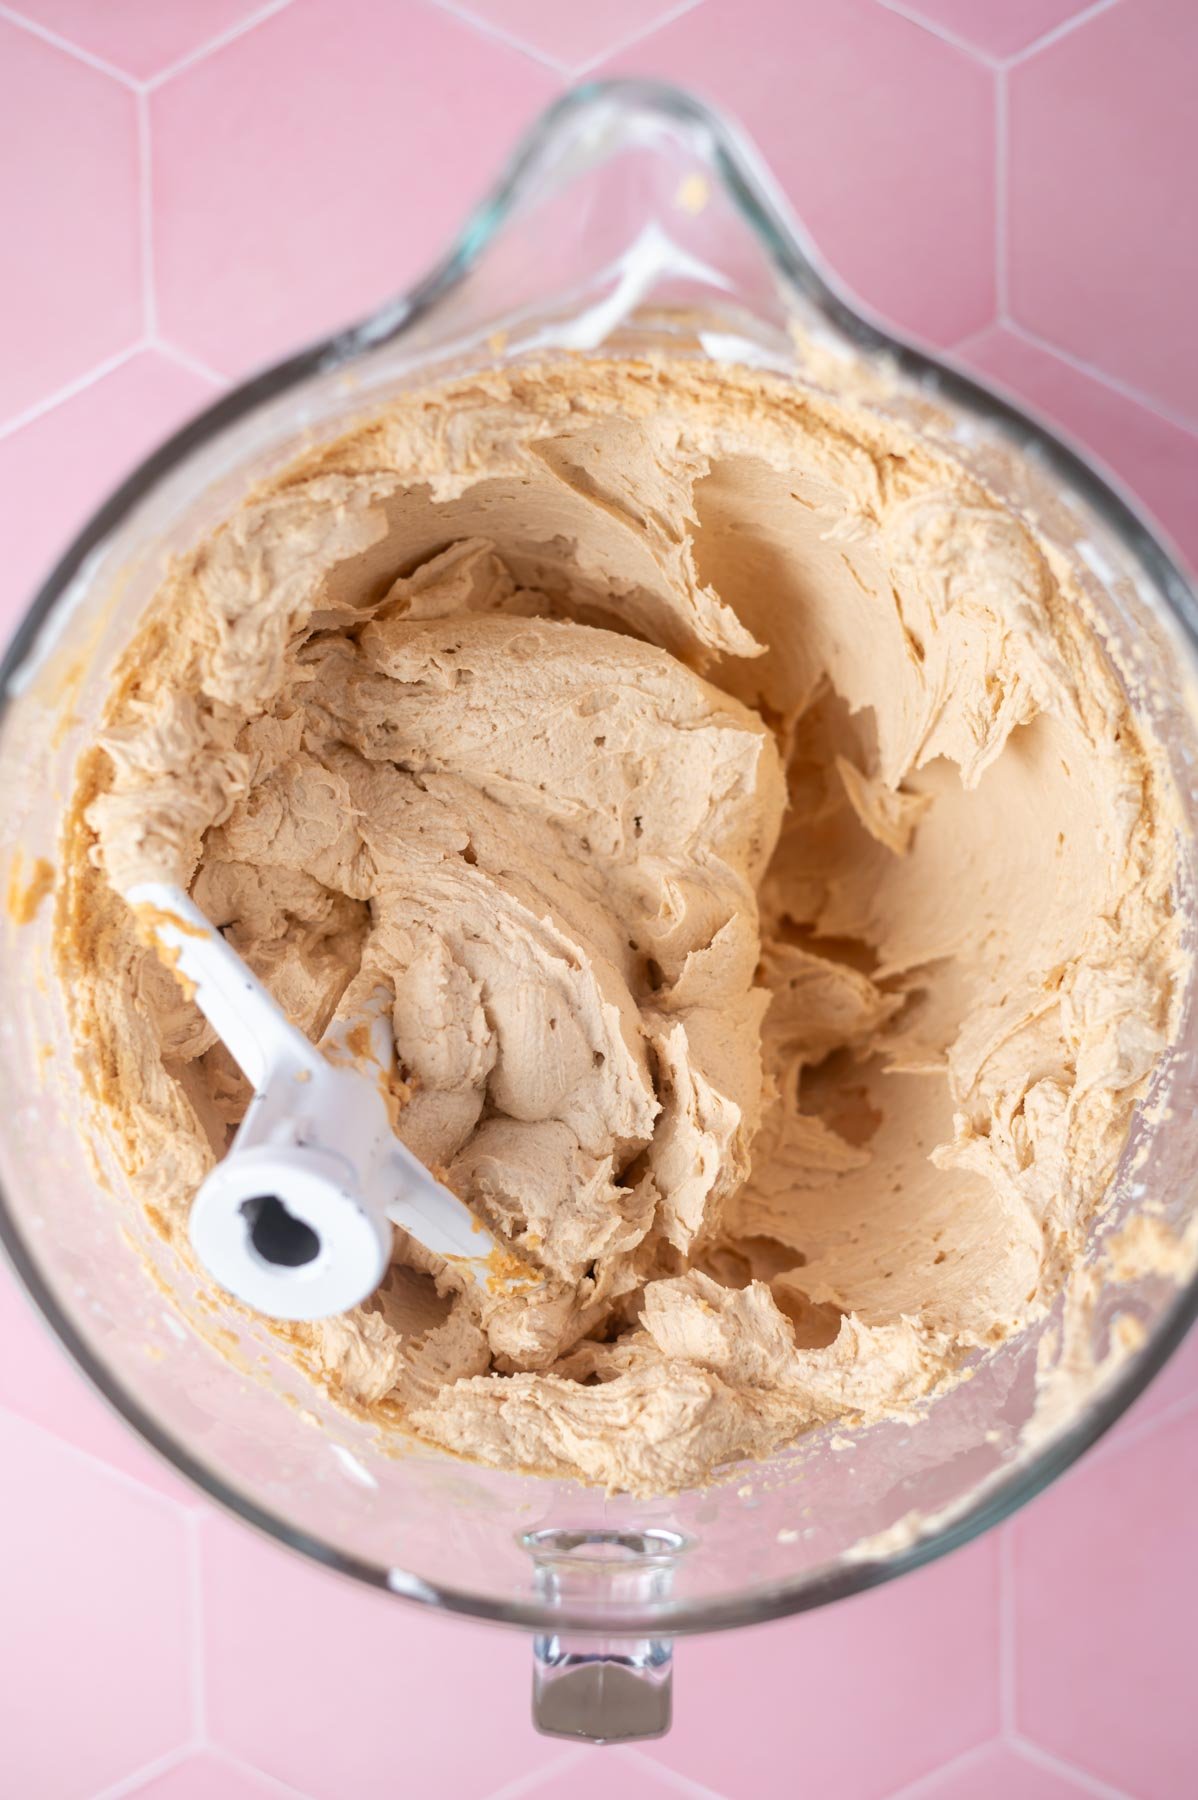
    Using a stand mixer with the paddle attachment or a hand held mixer {no need to wash the bowl you used for the whipped cream}, mix the peanut butter and cream cheese on medium-high until well blended and smooth and creamy. You will want to stop and scrape up and down the bowl one time during the mixing.

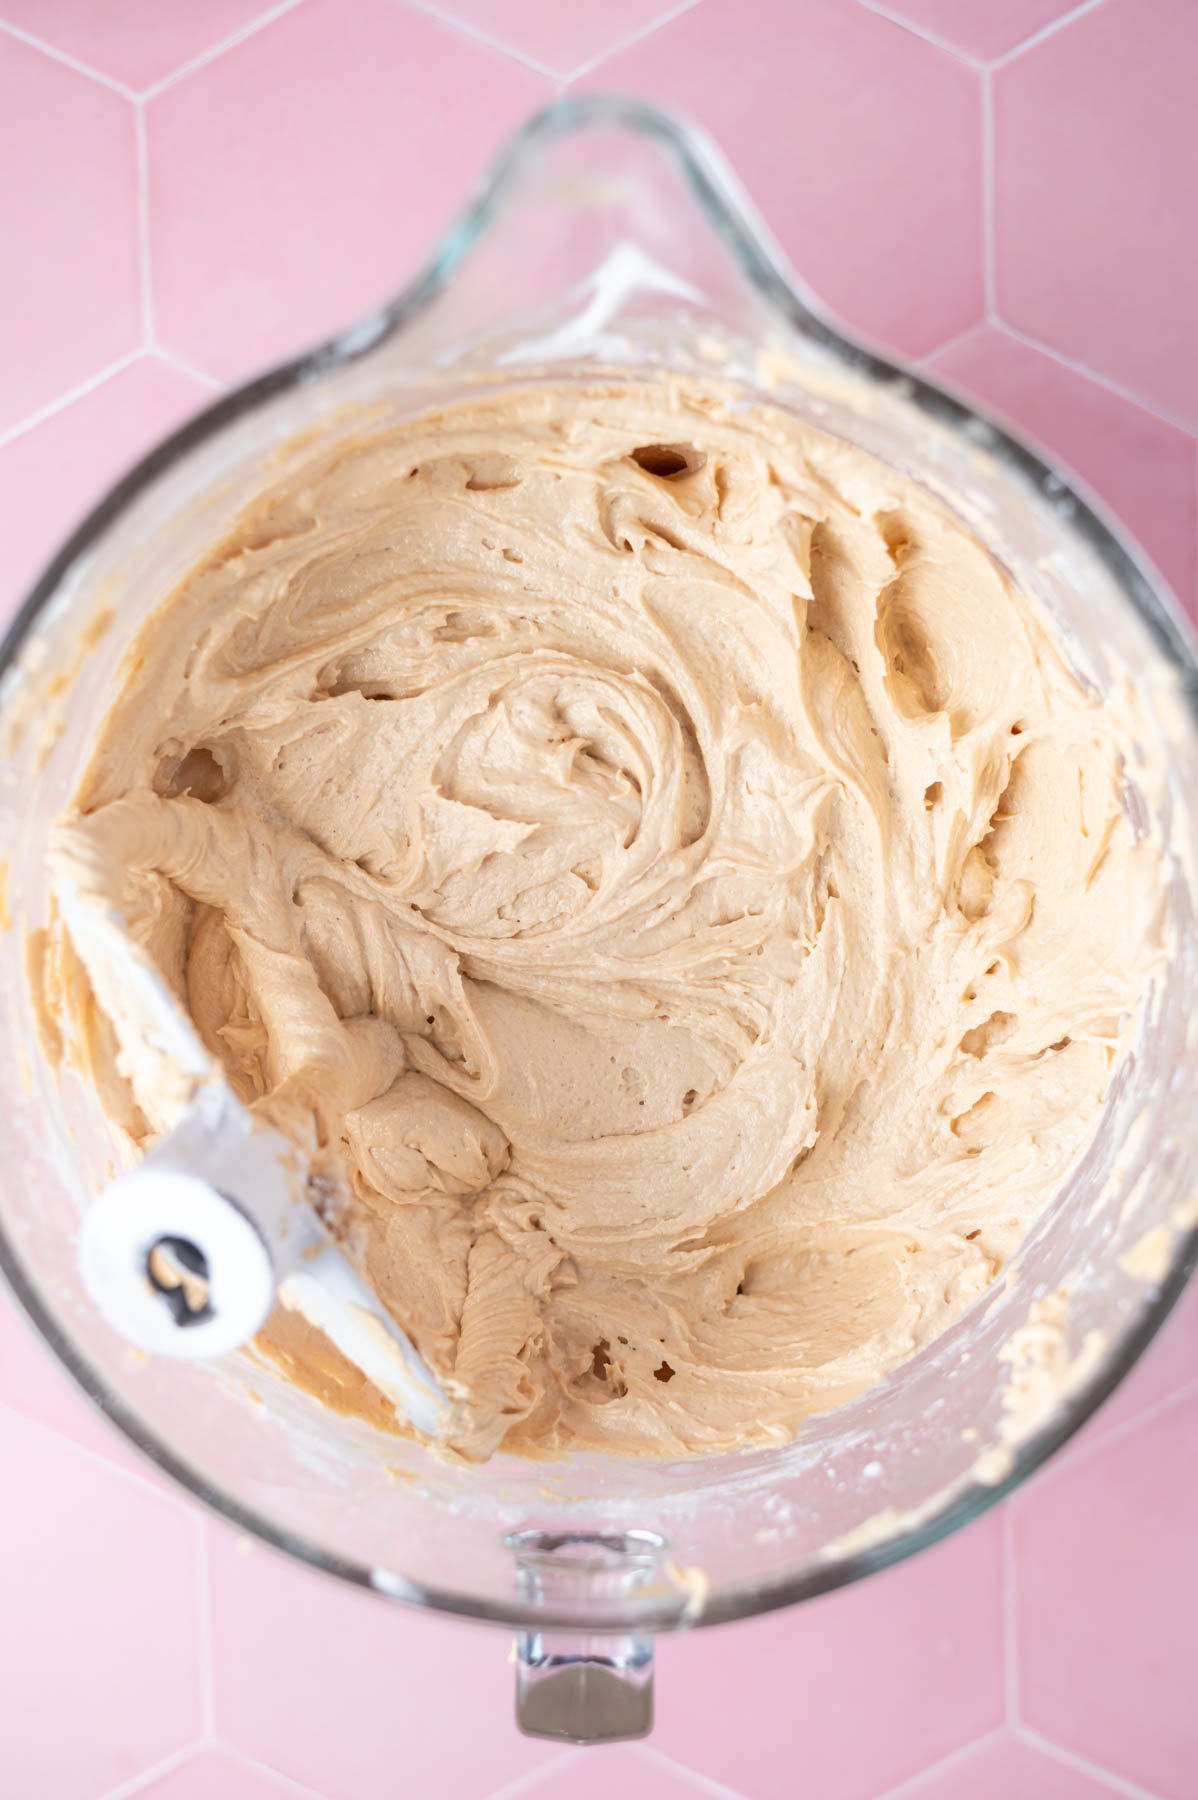
    peanut butter filling after milk and vanilla has been added in a mixing bowl

    Slowly add the confectioners' sugar on low. Then stop and scrape the bowl and slowly add the milk. Mix on medium until well combined.

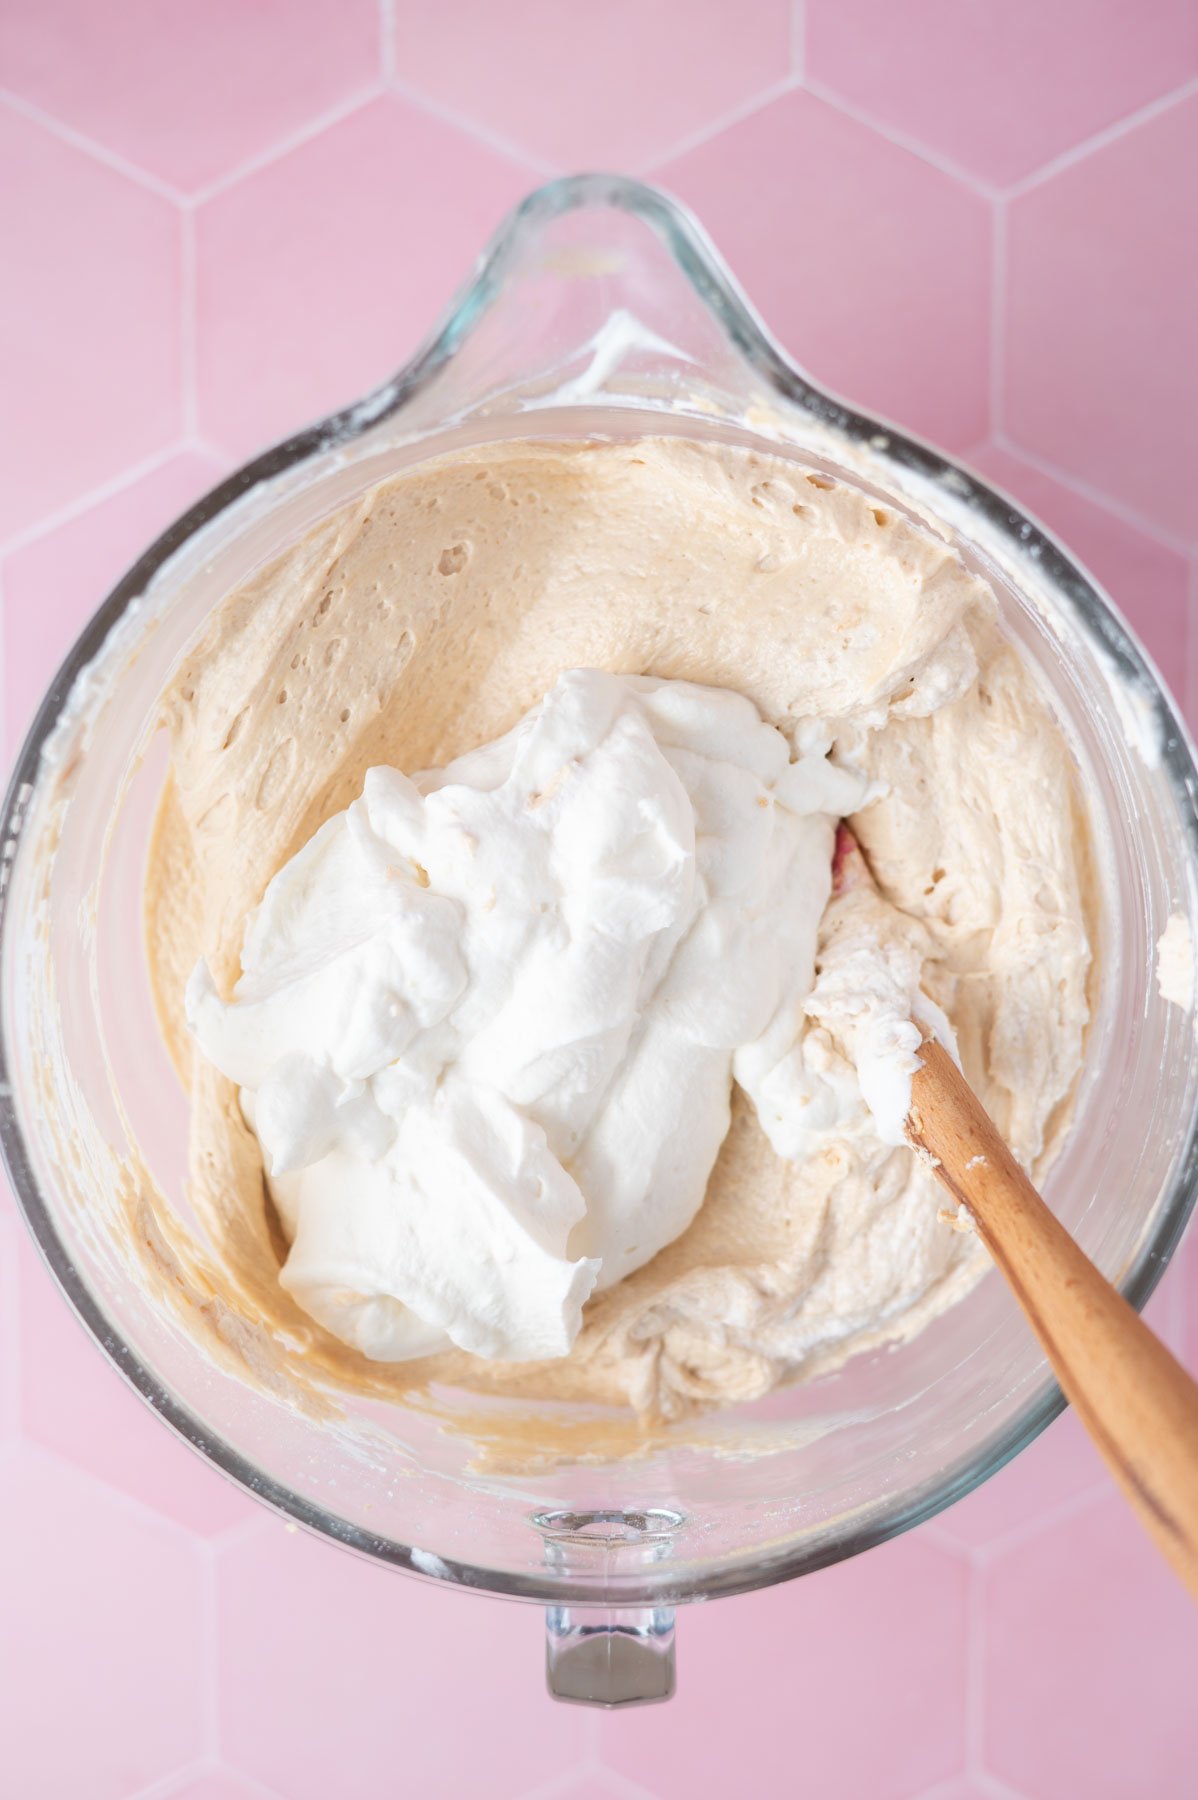
    homemade whipped cream being folded into peanut butter cream cheese mixture

    Add half the whipped cream into the peanut butter filling and fold it in with a rubber spatula by hand until combined. Then add the remaining whipped cream and gently fold it in.

    pie filling smoothed into springform pan

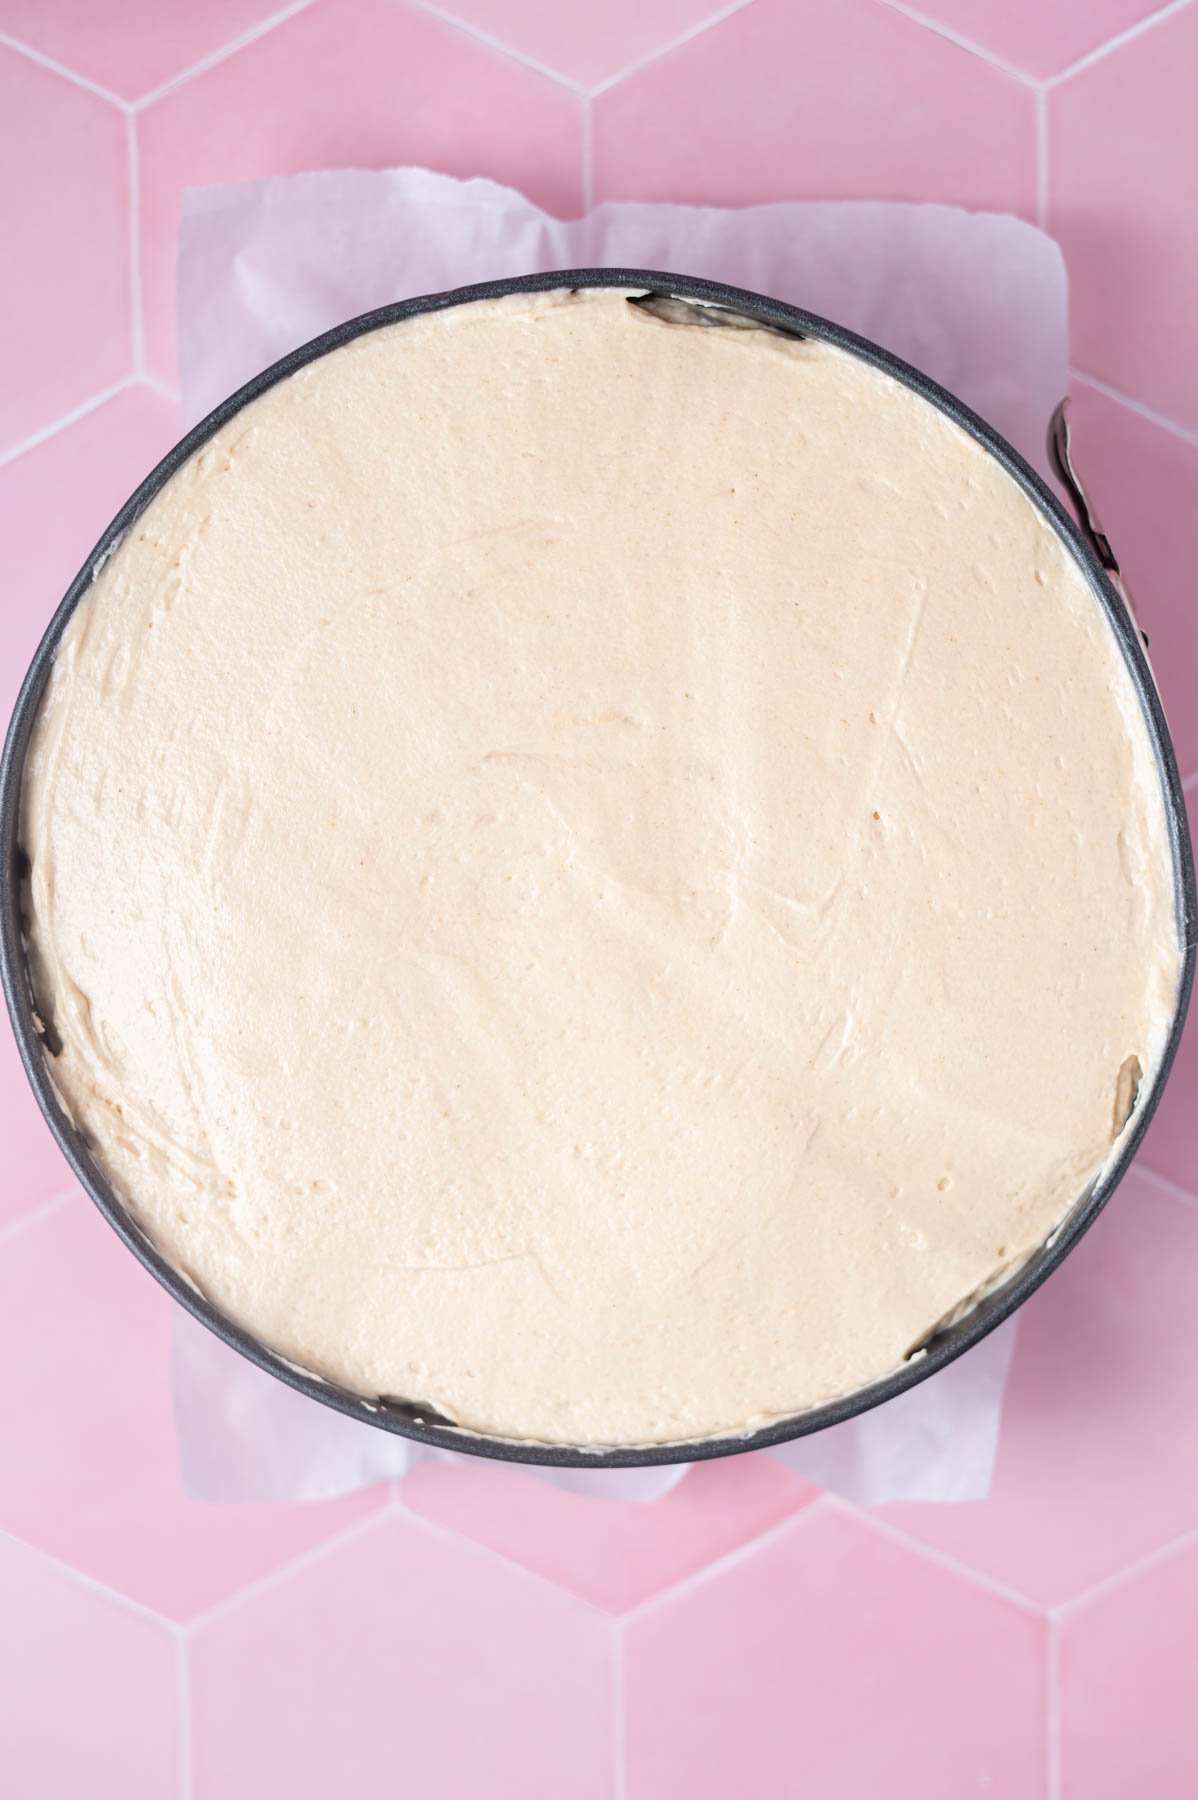
    Now pour/spoon the filling into the cooled or chilled pretzel graham crust, cover and freeze for a minimum of 4 hours and up to 24, then transfer to the refrigerator. You can remove the side of the springform pan after the pie is frozen.

    Once the peanut butter pretzel pie has chilled, garnish with a chocolate ganache drizzle and more peanuts and pretzels. Then slice and serve.

    ๐Ÿ’ก variations to make it your own

    • For an all pretzel crust, replace the graham crackers with pretzels.
    • With an Oreo crust, use the crust from this white chocolate cranberry tart.
    • For a peanut butter crust, use Nutter Butter cookies; you will need 9 - 10 cookies.
    • Make into peanut butter pie squares by using a 9x9 baking tin instead of making in a springform pan.
    • Use a caramel sauce instead of chocolate ganache for the topping.

    ๐Ÿซ™ how to store

    Store any leftover peanut butter pretzel pie in the refrigerator for up to 5 days or in the freezer for up to one month. To freeze, wrap the chilled pie in one layer of plastic wrap and then a layer of aluminum foil. Then place it in a zip-top bag or airtight container.

    Serve the no-bake pie frozen, chilled or at room temperature.

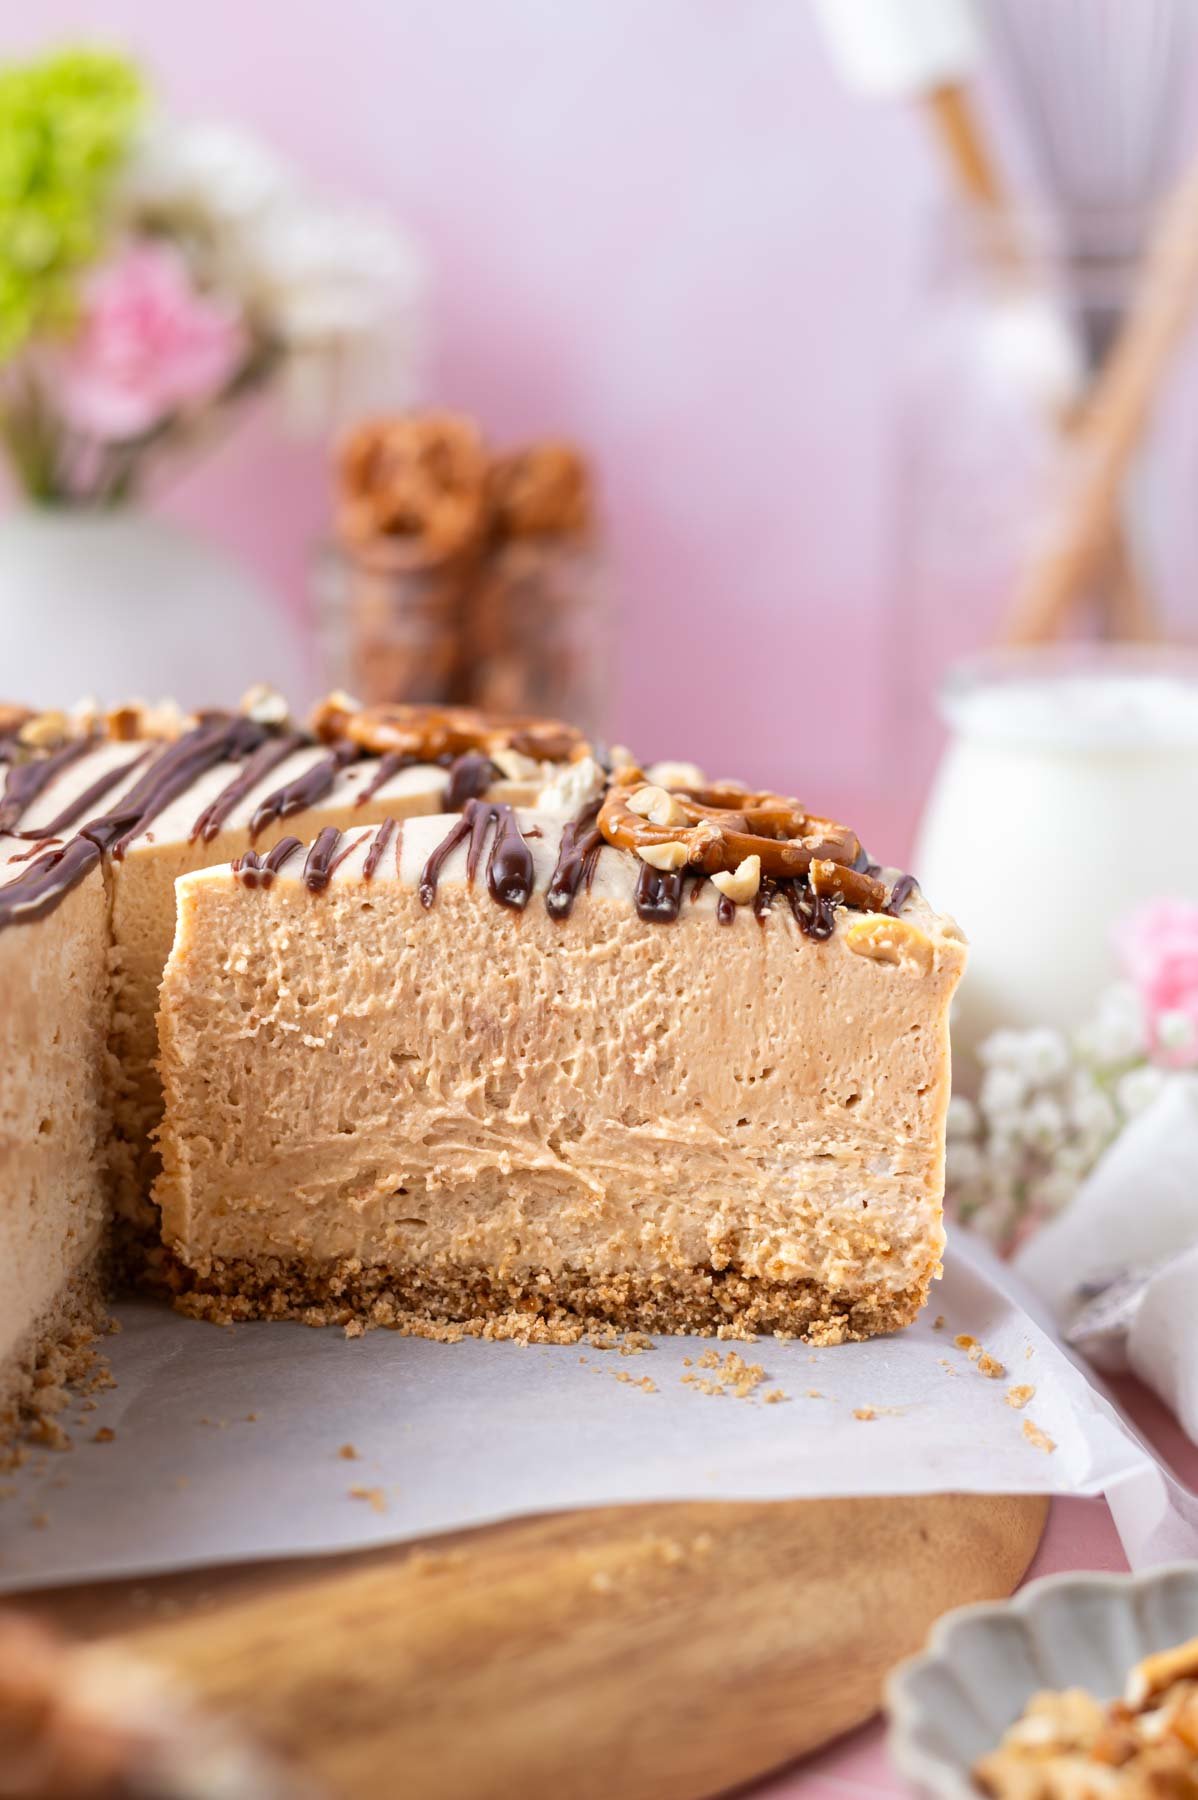
    inside look at fluffy and light filling of pie set on a parchment lined plate

    Remember to snap a picture and tag me on Instagram if you make this Easy Peanut Butter Pretzel Pie. It warms my heart to see you bring these recipes to life! Thank you for being here and happy baking!

    If you make this recipe {or any recipe!} from two sugar bugsย please come back and leave a review and a โญ๏ธโญ๏ธโญ๏ธโญ๏ธโญ๏ธ star rating.ย  I read every comment, and I LOVE hearing from you!

    ๐Ÿ“– recipe

    slice of peanut butter pretzel pie on a plate with a fork and a bowl of peanuts and fresh flowers in the background
    Print Recipe
    5 from 4 votes

    Easy Peanut Butter Pretzel Pie

    This peanut butter pretzel pie has a light and fluffy filling. It is a simple pie to make ahead and is always a crowd pleaser! The pretzel graham cracker crust can be frozen instead of baked making it a no-bake dessert, if desired.
    Prep Time15 minutes mins
    Cook Time10 minutes mins
    Chill Time4 hours hrs
    Total Time4 hours hrs 25 minutes mins
    Course: Pies and Tarts
    Cuisine: American
    Keyword: no bake pie, peanut butter pie, pretzel crust, pretzel graham crust
    Servings: 16 slices
    Calories: 582kcal
    Author: Tasia Harper

    Ingredients

    for the crust*:

    • 1 cup pretzels (60g)
    • 1 cup graham crackers about 8 full sheets/120g
    • 6 tablespoons unsalted butter melted (85g)

    for the filling:

    • 2 cups peanut butter creamy or crunchy/500g
    • 16 ounces cream cheese room temperature (452g)
    • 2 cups confectioners' sugar (240g)
    • 6 tablespoons milk (90mL)

    for the whipped cream:

    • 2 cups heavy whipping cream
    • ยพ cup confectioners' sugar (90g)
    • 1 teaspoon pure vanilla extract

    garnish

    • 2 ounces milk chocolate chopped small (56g)
    • 2 tablespoons heavy whipping cream
    • crushed peanuts and pretzels

    Instructions

    • Preheat oven to 350ยฐF/177ยฐC, only if baking the pretzel graham crust.
    • In a food processor, crush pretzels (1 cup/60g) and graham crackers (1 cup/about 8 full sheets/120g) until fine crumbs. Add the melted butter (6 tablespoons/85g) and pulse until the mixture looks like wet sand. Alternately, you can place pretzels and graham crackers in a zip-top bag and crush with a rolling pin or mallet and then mix in melted butter.
    • Press mixture into the bottom of a 9-inch spring form pan. Line the bottom of the pan with parchment paper if you want to remove the pie from the If baking, place the pan on top of a sheet pan and bake for 8-10 minutes. (The sheet pan keeps any leaking butter from dripping onto the bottom of your oven)
    • If not baking the crust, place it in the freezer to firm up while making the filling.
    • While the crust cools or chills, make the filling.
    • Prepare whipped cream using a stand mixer with the whisk attachment or a hand held mixer. Whip the cold heavy whipping cream (2 cups/480mL), confectioners' sugar (ยพ cup/90g) and vanilla (1 teaspoon) on medium-high (speed 6 on KitchenAid) until medium to stiff peaks form, approximately 2-4 minutes. Move the whipped cream to another bowl.
    • Using a stand mixer with the paddle attachment or a hand held mixer (no need to wash the bowl you used for the whipped cream), mix the peanut butter (2 cups/500g) and cream cheese (16 ounces/452g) on medium-high (speed 6 on KitchenAid) until well blended and smooth and creamy, about 2-3 minutes. You will want to stop and scrape up and down the bowl one time during the mixing. Slowly add the confectioners' sugar (2 cups/240g) on low. Then stop and scrape the bowl and slowly add the milk (6 tablespoons/90mL). Mix on medium (speed 4) until well combined, about 1 minute.
    • Add half the whipped cream into the peanut butter filling and fold it in with a rubber spatula by hand until combined. Then add the remaining whipped cream and gently fold it in.
    • Pour/spoon the filling into the cooled or chilled pretzel graham crust, cover and freeze for a minimum of 4 hours and up to 24, then transfer to the refrigerator. You can remove the side of the springform pan after the pie is frozen.
    • For the chocolate drizzle/garnish: add 2 ounces/56g of chopped milk chocolate and 2 tablespoons/1 ounce of heavy cream to a heat proof metal or glass bowl and place over the top of a pan of simmering water, being careful to not have the bottom of the bowl touch the hot water.ย  Then stir until all the chocolate is melted. Use a spoon to drizzle the chocolate over the top of a completely chilled pie or place the melted chocolate into a zip-top bag and snip off a tiny corner with scissors to drizzle the chocolate ganache. Sprinkle the outer edge of the peanut butter pie with crushed peanuts and pretzels.

    Notes

    *I like to bake the crust as I feel like it helps keep the crust more intact. You can skip the baking of the crust and it will still turn out just fine! The crust will be a little more crumbly.
    This is a really hefty peanut butter pie! If you'd prefer a smaller pie; keep the crust the same, but half the rest of the recipe.
    A natural peanut butter is not ideal for this recipe, a processed creamy peanut butter such as Jif or Skippy will work best.
    Use full-fat brick cream cheese for the best results.
    I use 1% milk in the peanut butter filling, but 2% or whole milk will also work.
    Heavy whipping cream or heavy cream that has a minimum of 30% fat content can be used.
    Serve frozen, chilled or at room temperature.
    Store any leftover peanut butter pretzel pie in the refrigerator for up to 5 days or in the freezer for up to one month. To freeze, wrap the chilled pie in one layer of plastic wrap and then a layer of aluminum foil. Then place it in a zip-top bag or airtight container.

    Nutrition

    Serving: 1 slice | Calories: 582kcal | Carbohydrates: 41g | Protein: 11g | Fat: 44g | Saturated Fat: 20g | Polyunsaturated Fat: 5g | Monounsaturated Fat: 15g | Trans Fat: 0.2g | Cholesterol: 76mg | Sodium: 339mg | Potassium: 291mg | Fiber: 2g | Sugar: 29g | Vitamin A: 986IU | Vitamin C: 0.3mg | Calcium: 79mg | Iron: 1mg

    Recipe shared with Full Plate Thursday, Weekend Potluck and Meal Plan Monday

    Brown Butter Chocolate Chipless Cookies

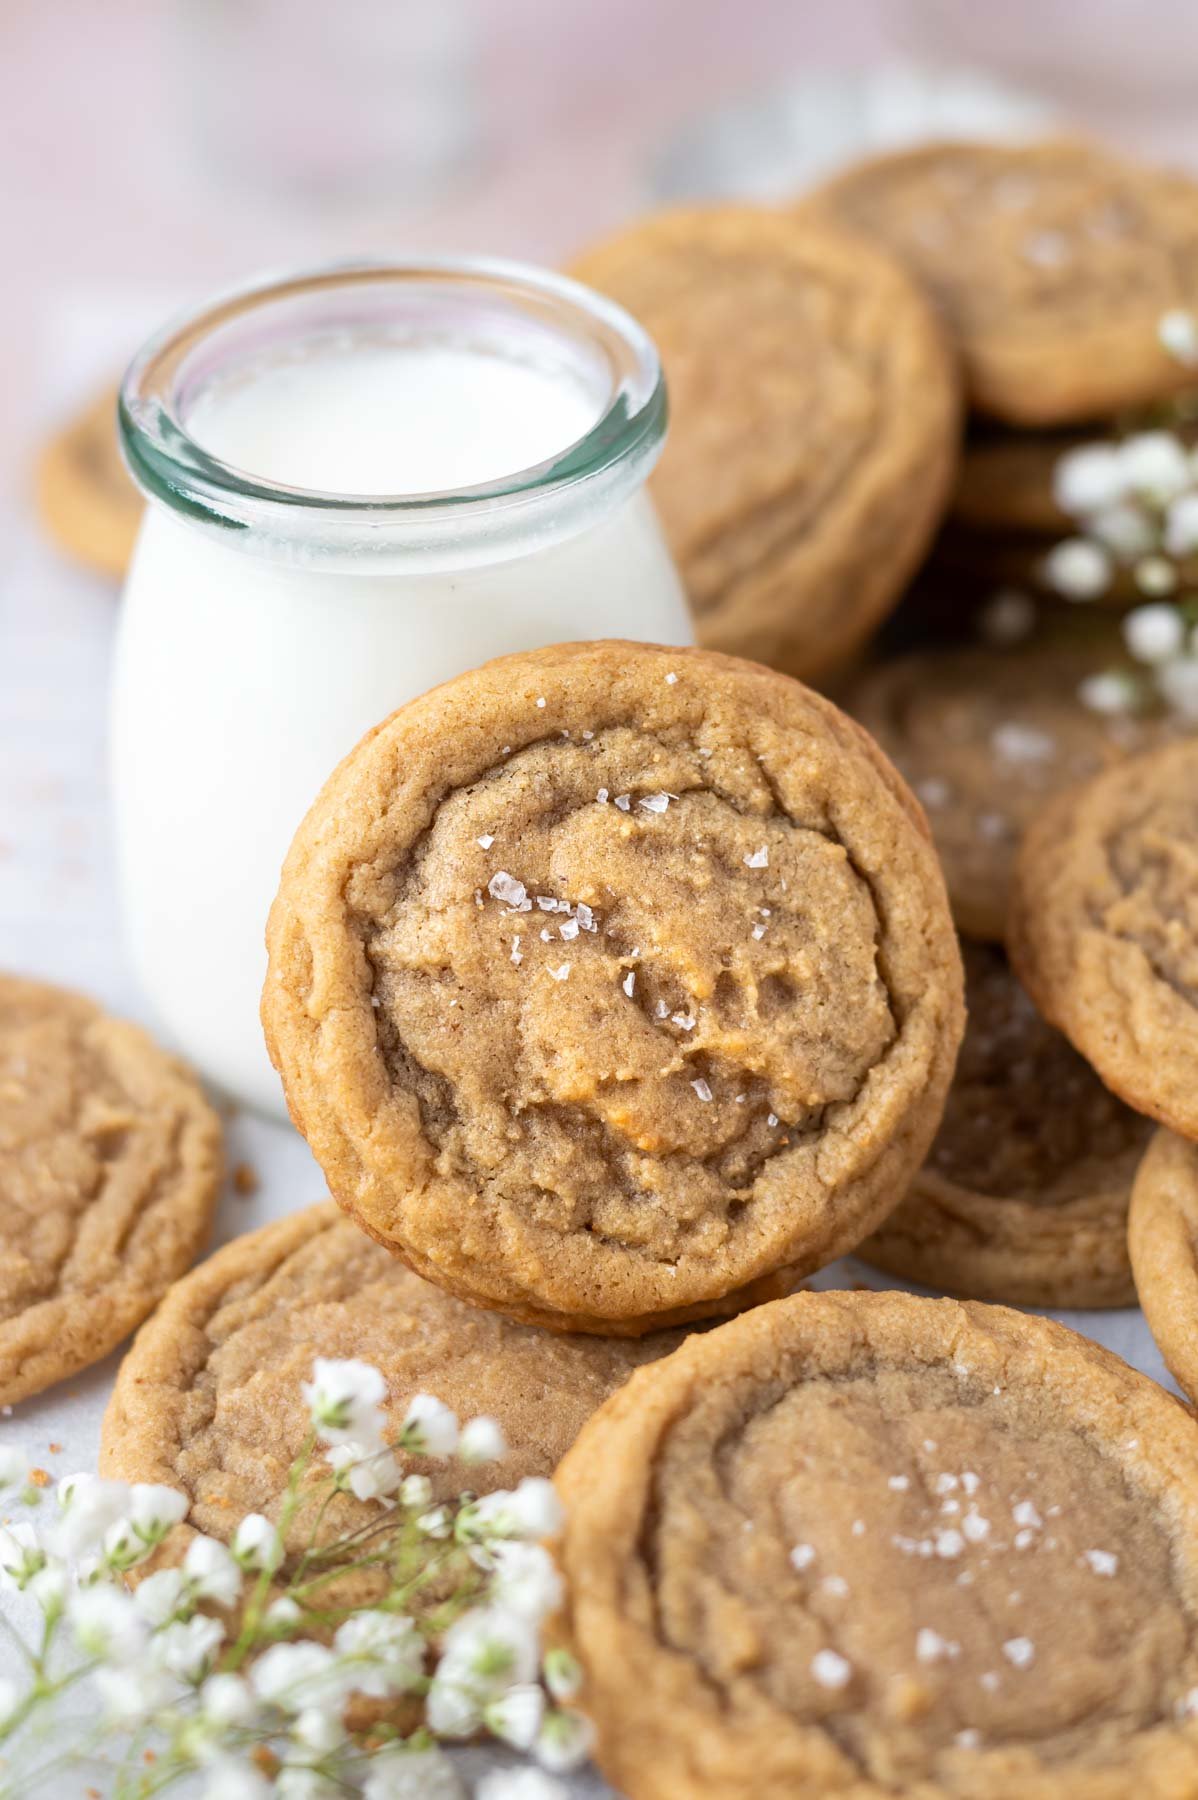
    chocolate chipless cookie leaning up against a glass of milk with more cookies piled around

    Brown butter chocolate chipless cookies are an easy drop cookie recipe.  They bake up thick, soft and chewy with slightly crisp edges.  The brown butter, dark brown sugar and vanilla give them the best flavor profile!

    chocolate chipless cookie leaning up against a glass of milk with more cookies piled around

    Disclosure | This post may contain affiliate links. As an Amazon Associate I earn from qualifying purchases.

    As a busy mom with decades of cookie baking behind me, I love a quick and easy cookie recipe! I know Iโ€™ve mentioned before that chocolate isnโ€™t always my favorite.  As a teenager I would make the Better Homes and Gardenโ€™s chocolate chip cookies without the chocolate chips {does anyone else remember baking from the red and white checkered cookbook?} But Iโ€™ve taken my melted butter cookie technique and improved the flavor and texture of these non chocolate cookies by using brown butter and extra vanilla.   

    These chocolate chipless cookies have a soft and chewy middle with a slightly crisp edge.  They are an easy recipe like my chocolate chip sugar cookies and have all tons of flavor like my brown butter oatmeal cookies or cookie butter cookies. 

    While you need about ten extra minutes for making browned butter, this cookie dough takes a quick 20 minute chill in the freezer while the oven preheats, so youโ€™ll be sinking your teeth into a perfect homemade cookie in under an hour.

    [feast_advanced_jump_to]

    ๐Ÿ’— what does a chocolate chipless cookie taste like?

    These chipless cookies have a wonderful flavor profile thanks to brown butter, dark brown sugar and a generous dose of vanilla.  They have slight caramel undertones and all the flavor you expect in a chocolate chip cookie, but without chocolate chips.

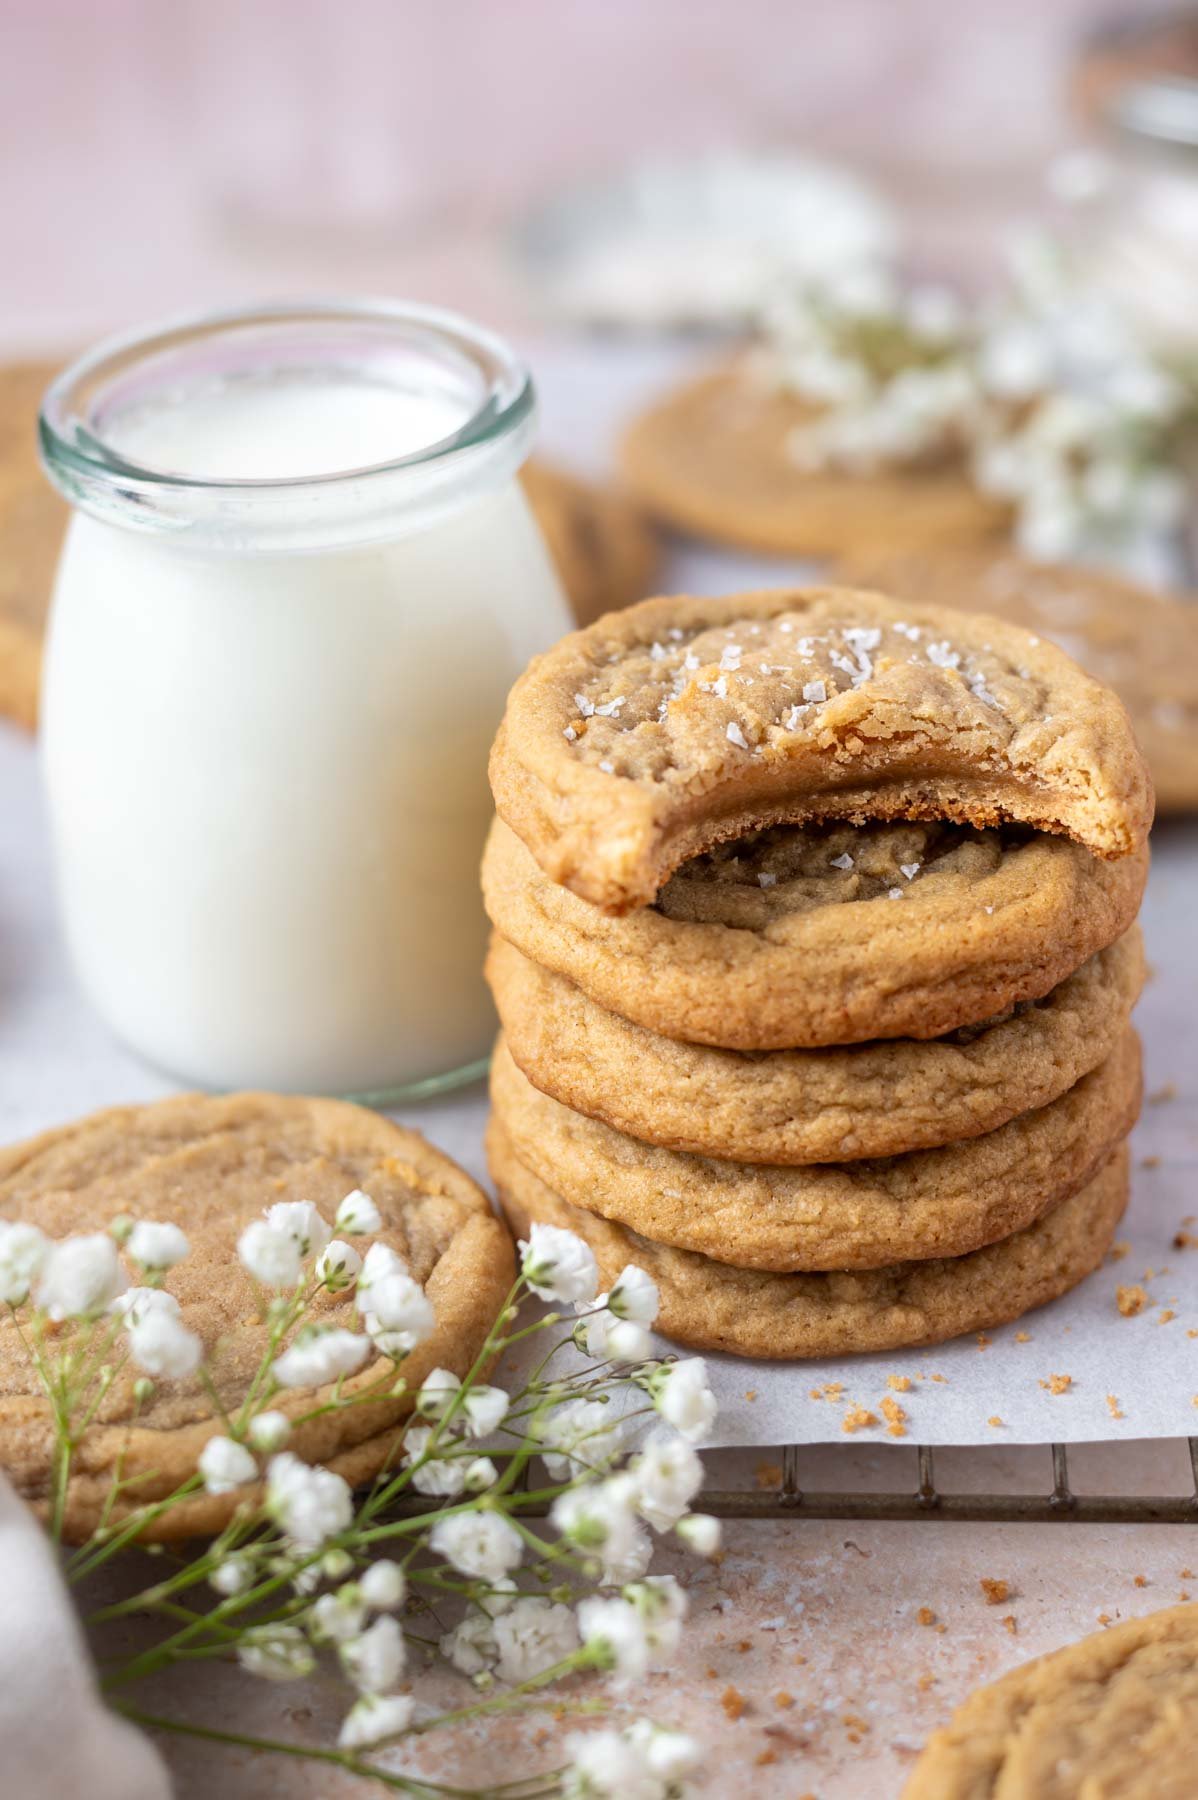
    stack of cookies with the top one missing a bite sitting on a parchment lined cooling rack with a glass of milk

    ๐Ÿ›’ ingredients and substitutions

    Please scroll to the printable recipe card at the end of this post for the full list of ingredients and baking directions.

    ingredients for chocolate chipless cookies

    Butter ~ unsalted butter is my choice as I like to be able to control the saltiness in my baking.  The butter starts cold and cubed and you will brown it on the stovetop. If you need a visual of how to brown butter, see this brown butter cookie bars recipe.

    Kosher salt ~ to balance the sweetness.  If you only have table salt, use half the amount.  If you only have salted butter, leave the salt out all together.

    Sugars ~ Both granulated and brown sugars are used to add sweetness and moisture.  I prefer dark brown sugar, but light brown also works.

    Eggs ~ two large eggs are needed to bind the cookie dough together. Room temperature eggs will give you the best results.

    Vanilla ~ pure vanilla extract is always my first choice; it adds a layer of flavor.

    Baking soda ~ just a little to lift the bakery size cookies up.

    Cornstarch ~ adds softness and helps to keep the cookies from spreading.

    All-purpose flour ~ adds structure to the espresso chocolate chip cookies.  If you don't use a kitchen scale {this is the scale I use and love}, use the spoon and level method to ensure you don't have too much flour. {Fluff the flour in the container, then spoon it into your measuring cup and level it off with the back of a knife}.

    Flaky sea salt ~ optional, but can be sprinkled over the hot baked cookies, if desired. I love this Murray River Pink Salt.

    ๐Ÿช how to make the best non chocolate cookies

    brown butter, granulated and brown sugars mixed together in a glass bowl

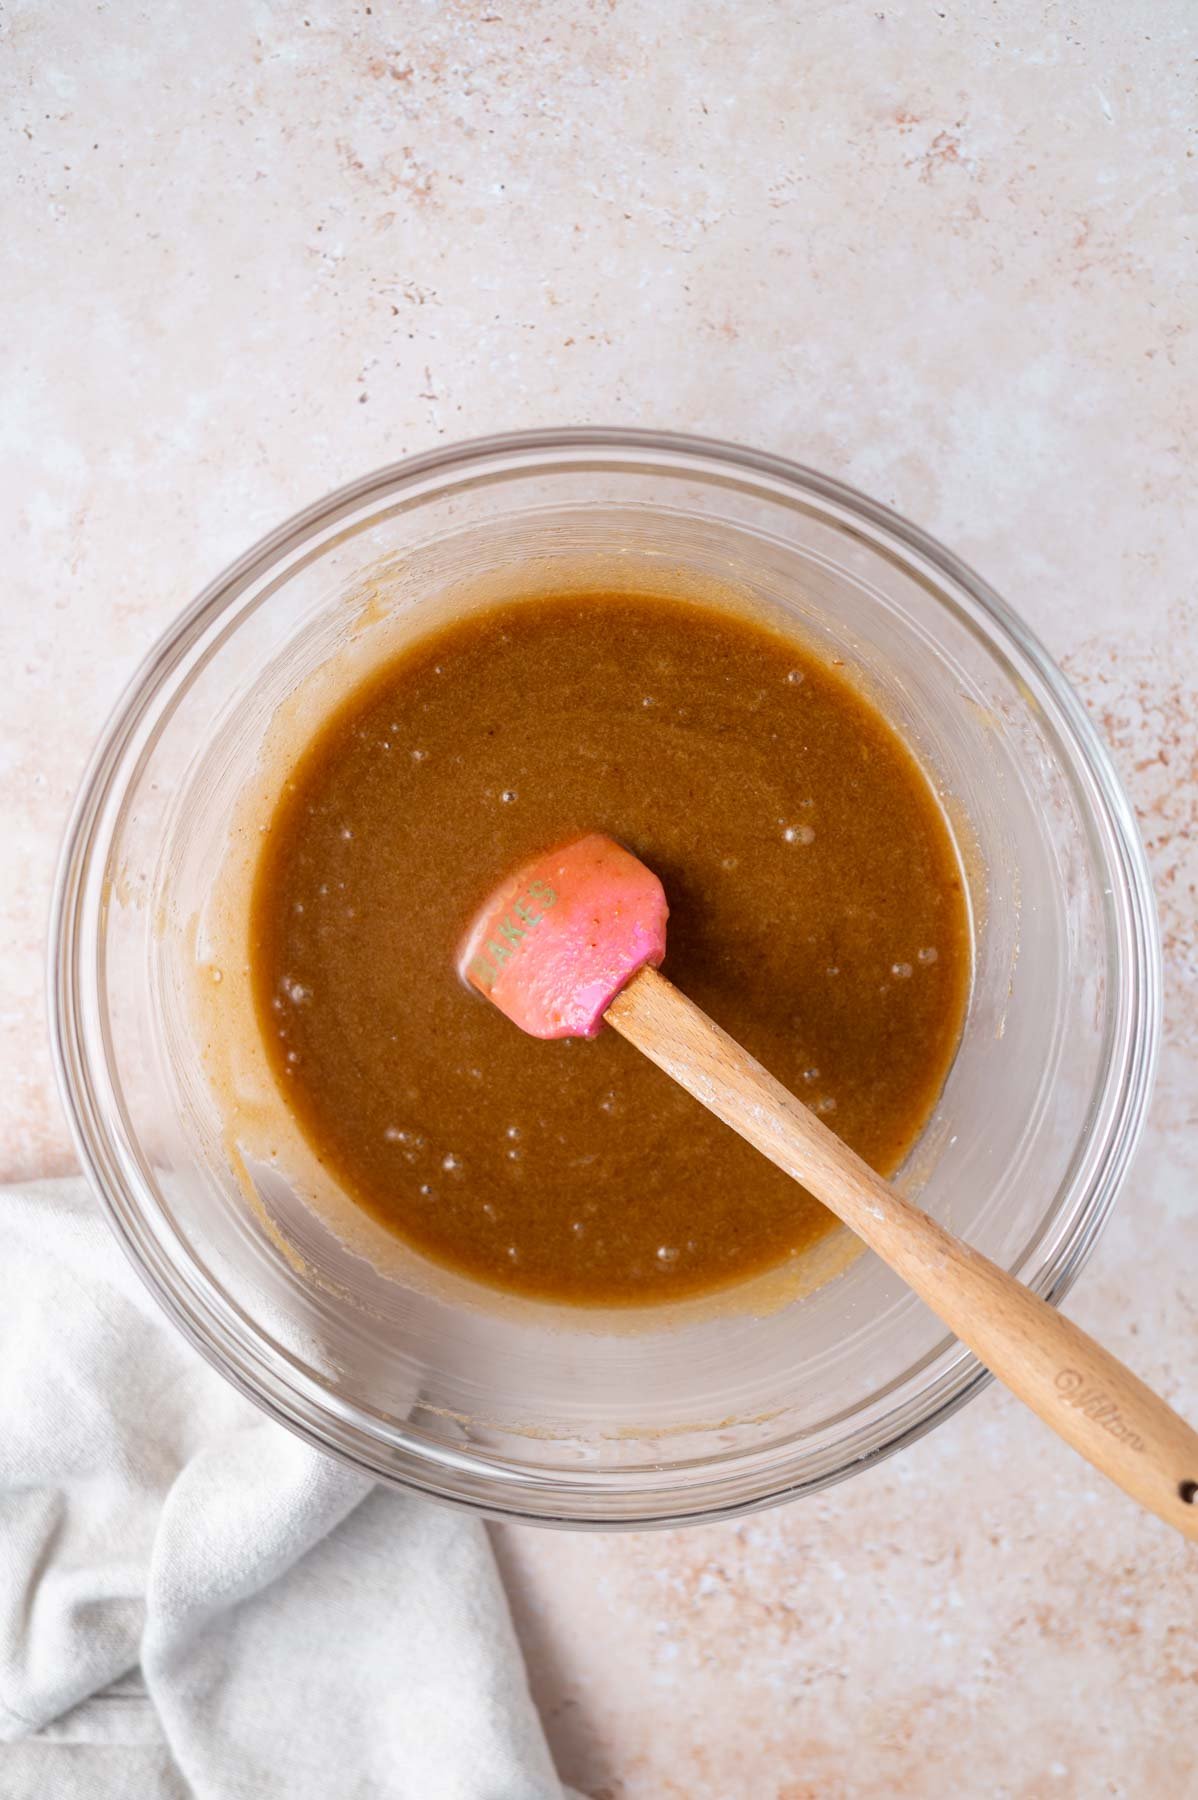
    In a medium to large bowl, add the brown butter, the dark brown sugar, granulated sugar and kosher salt and mix until fully incorporated.

    eggs and vanilla mixed into sugar and butter mixture in a bowl with a spatula

    Add the eggs and vanilla. Stir until the mixture is combined and smooth.

    baking soda and cornstarch mixed into cookie dough batter in a bowl with a spatula

    Sprinkle the baking soda and cornstarch over the mixture and stir well.

    chocolate chipless cookie dough in a glass bowl with a spatula

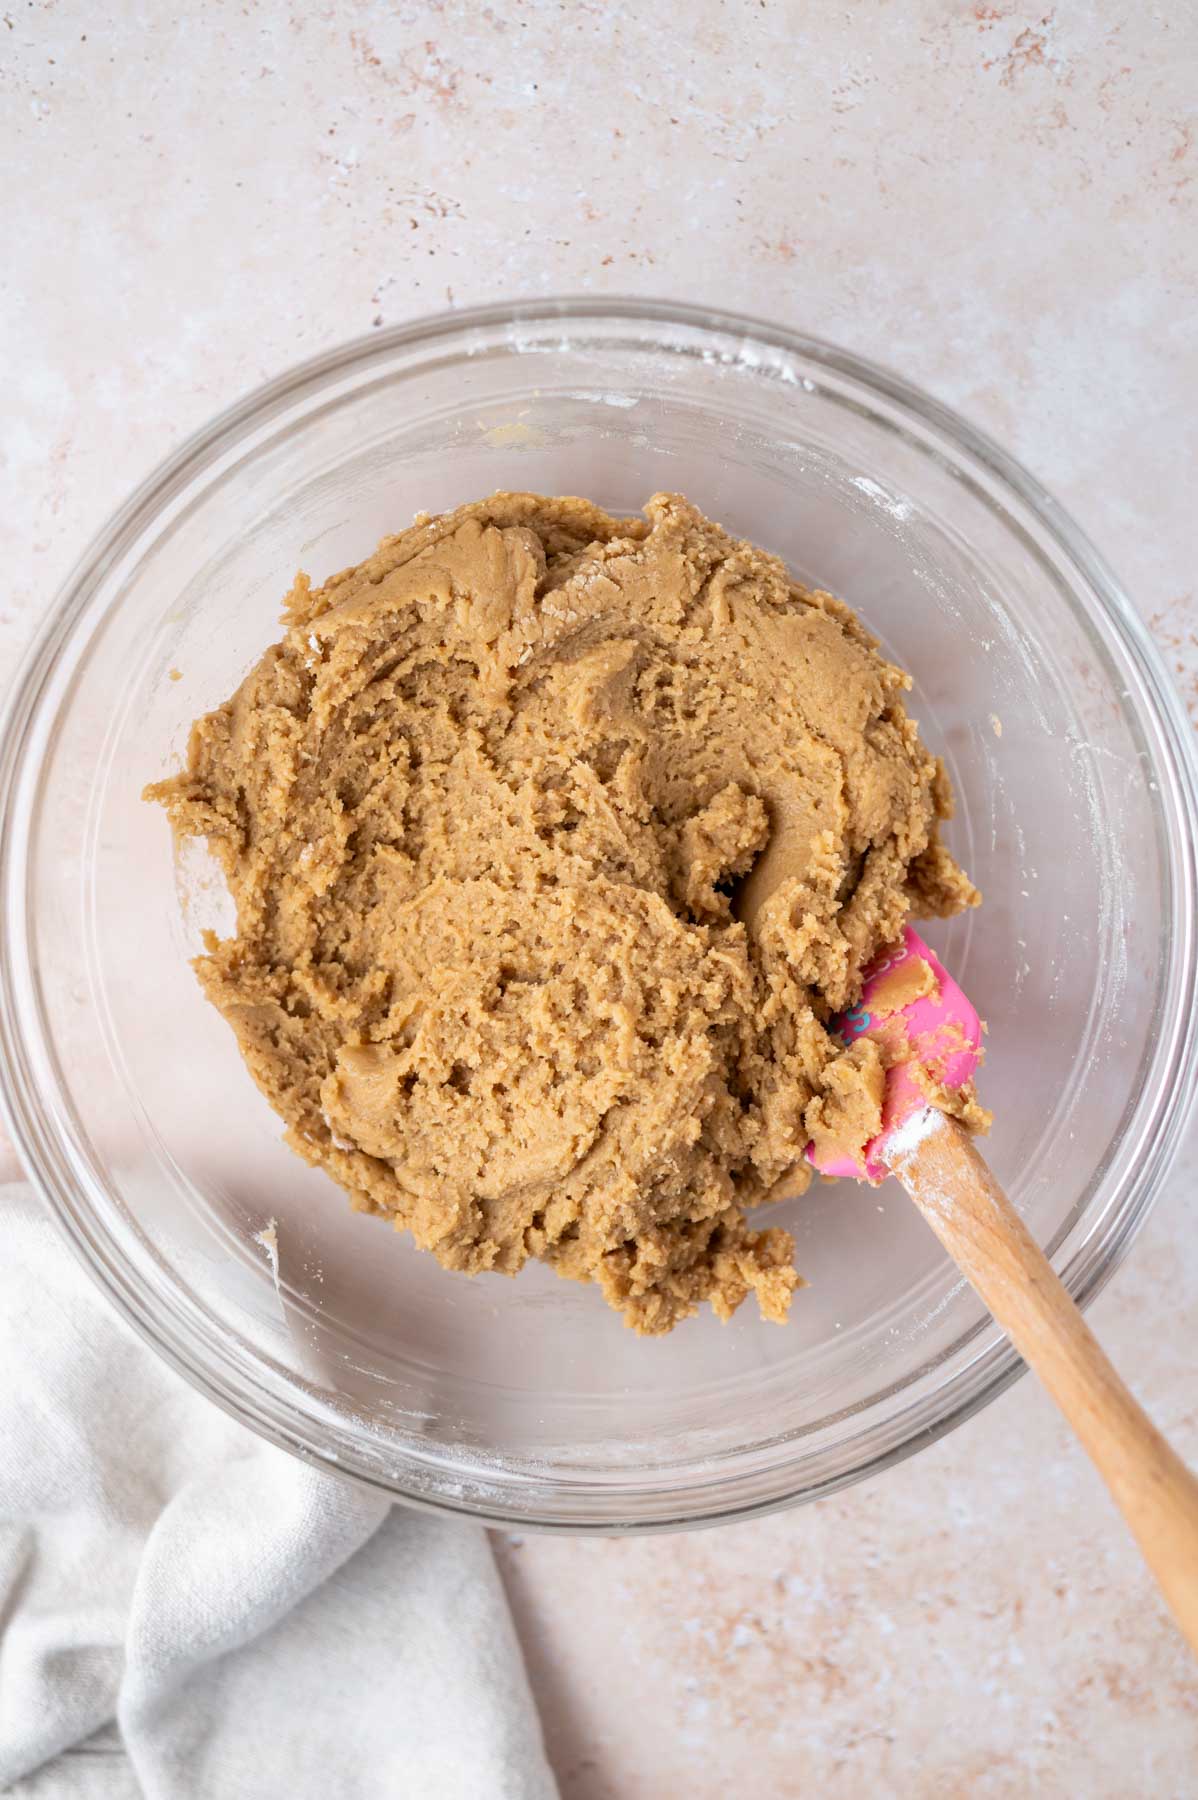
    Then add the flour and stir until the dough comes together.

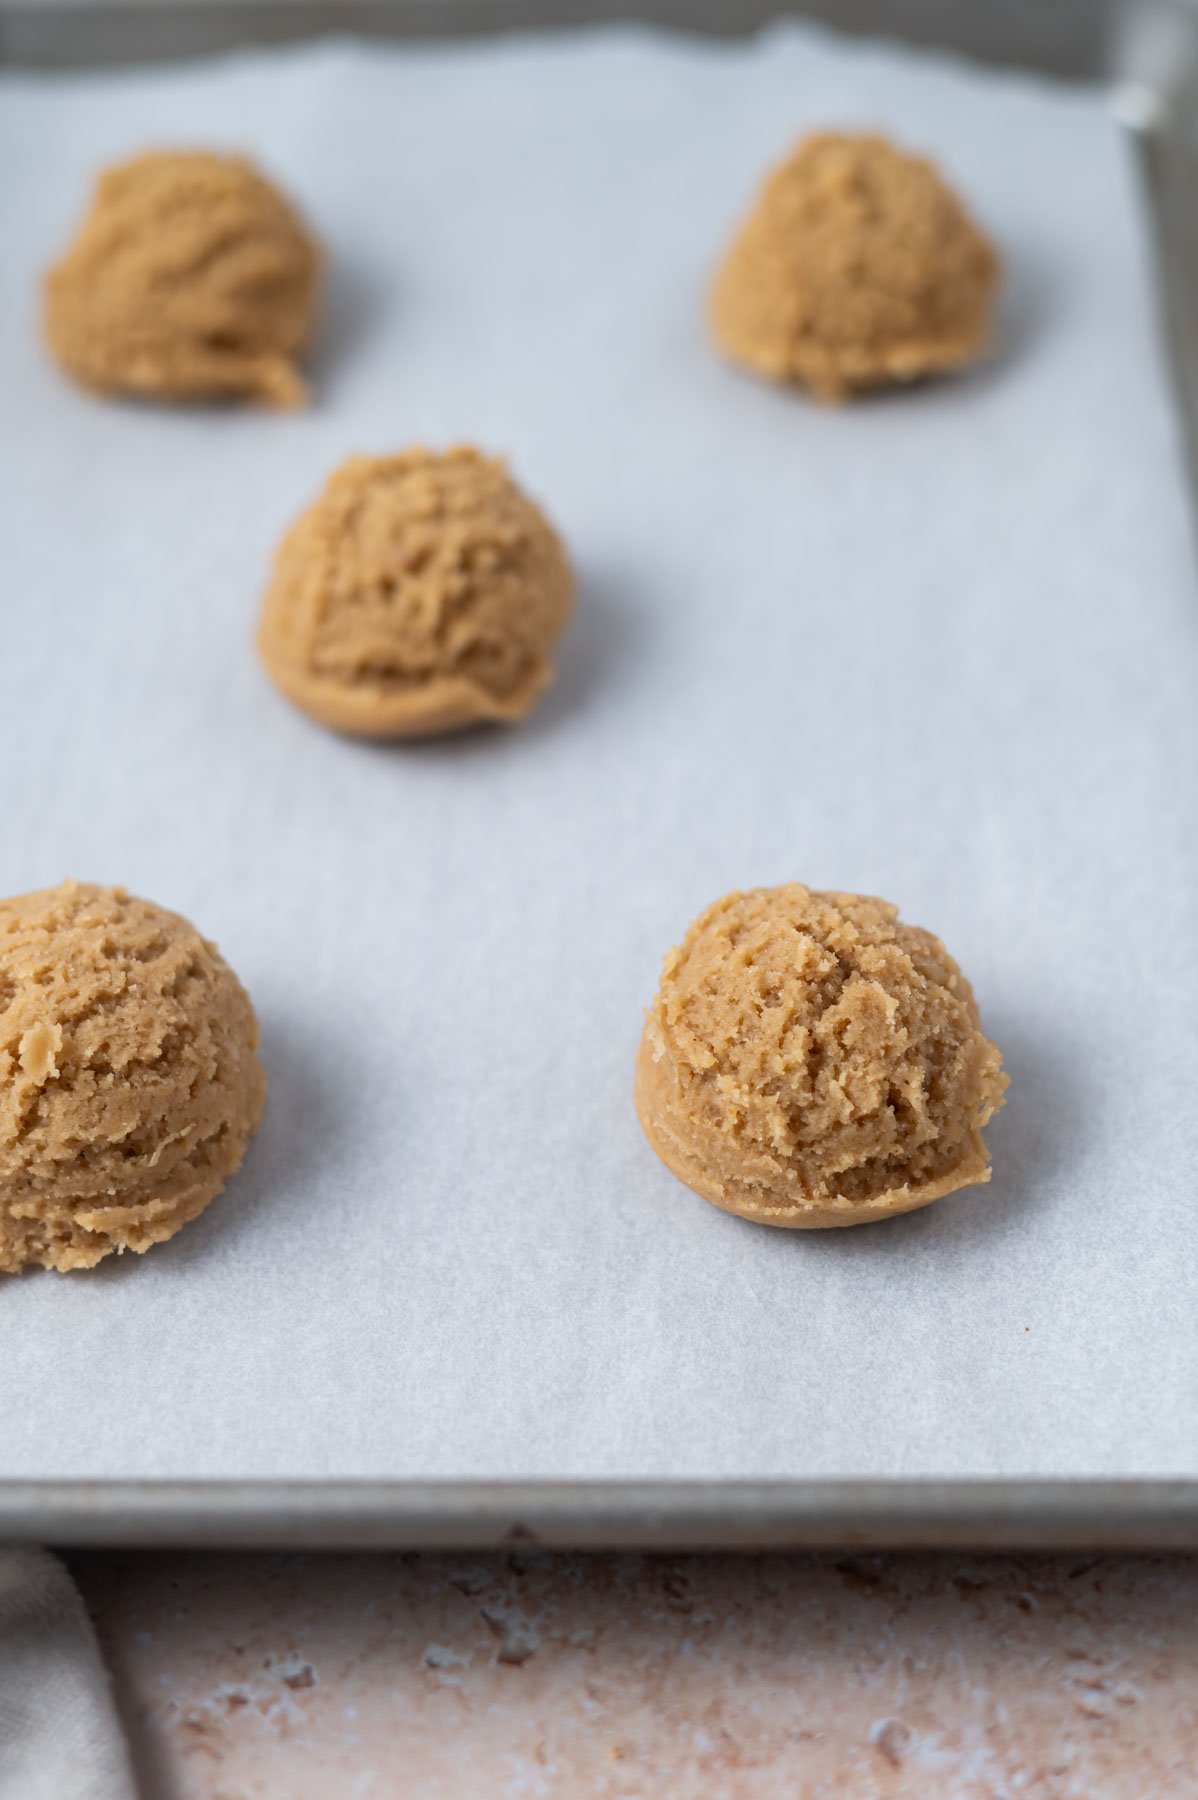
    cookie dough portions on a parchment lined baking sheet

    Use about 2 tablespoons of dough per cookie {I like using a size 30 scoop} and place the dough onto a plate or cookie sheet pan that will fit in your freezer, the dough is soft and may not fully hold it's shape. Freeze the cookie dough portions for 20 minutes.

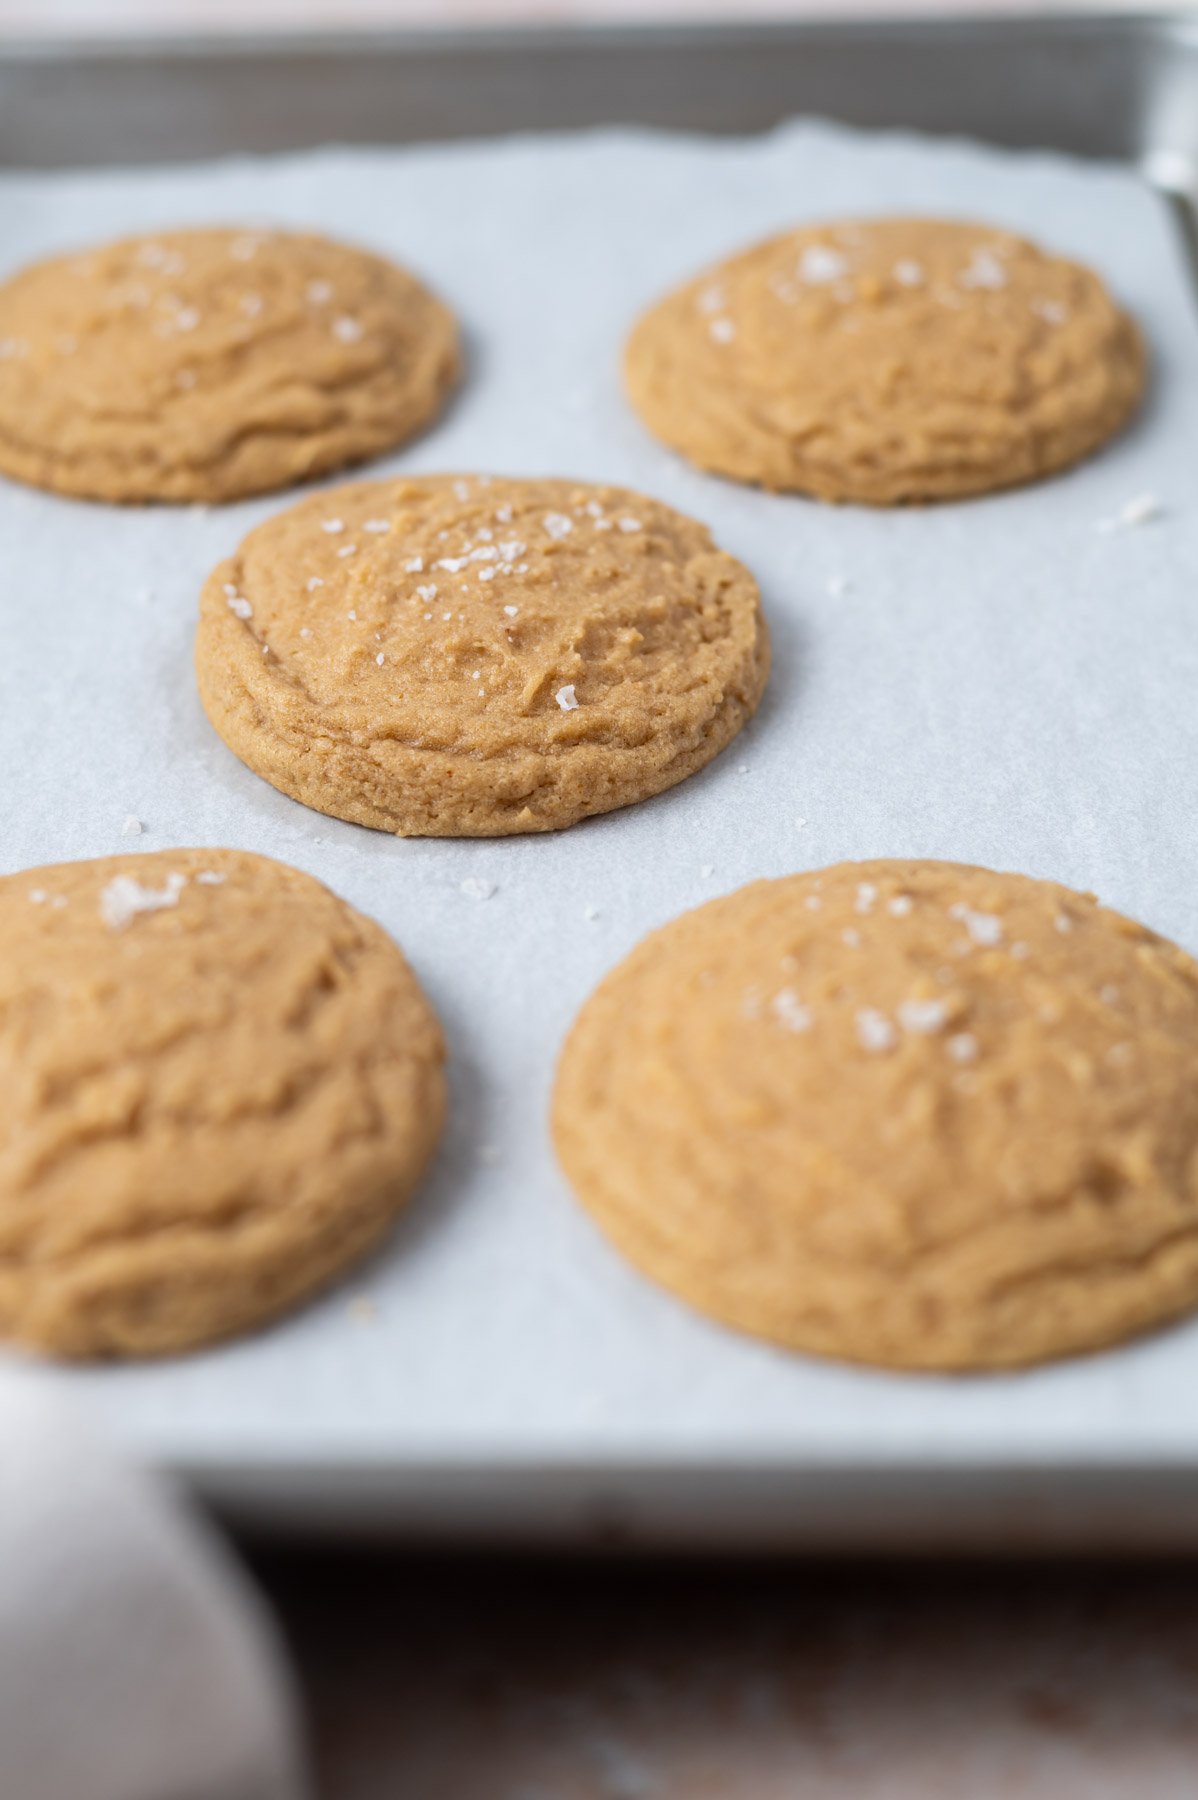
    baked cookies with flaky sea salt sprinkled on top

    While you freeze the dough, preheat oven to 350ยฐF and prepare two sheet pans with parchment paper or a silicone baking mat and set aside. Once the dough has chilled, place 8 cookies on each prepared baking sheet, spacing them about 2 inches apart.

    Bake one pan at a time for 10-12 minutes or until the edges are set. You want the cookies to look a little soft in the middle. If you want the edges of the cookies to crinkle like they do in these photos, drop the baking pan on the top of the stove or a cutting board once or twice when they are hot from the oven. Allow the cookies to rest on the pan 5 minutes, then remove to a wire rack to cool completely.

    ๐Ÿ’ฌ frequently asked questions

    what is the difference between chocolate chipless cookies and sugar cookies?

    Sugar cookies and chocolate chipless cookies are two very different cookies. The ratio of ingredients is different between a typical chocolate chip cookie and a sugar cookie, there is a higher amount of flour to sugar in a sugar cookie. Whereas chocolate chipless cookies have a combination of brown and white sugars and less flour.

    can I make these chocolate chipless cookies without browned butter?

    I did not test this recipe without browning the butter, but yes, I think it will work. You will need to reduce the amount of unsalted butter.  Ten tablespoons of butter or 140 grams is what you would need. Please let me know if you try this!

    can I make the cookie dough ahead and freeze it?

    Yes, the cookie dough can be formed into balls and frozen for up to one month; let the cookie dough sit out at room temperature while the oven preheats. The cookies may need an extra minute of baking time if baked frozen.

    ๐Ÿ‘ฉ๐Ÿปโ€๐Ÿณ expert tips for the best soft and chewy cookies

    Use the "cookie scoot" to get perfectly round cookies. {This is the set of biscuit cutters I use for cookie scooting}.

    Use a scale to measure your ingredients.  I know I say this all the time, but weighing your ingredients is the most accurate and will give the best results. I use this OXO scale in my kitchen and if your budget is tight, this Escali scale is also fantastic!

    Allow the cookies to cool for 5 minutes on the baking sheet before removing them; this helps them to be super chewy.  I love using my fish spatula to easily remove the cookies from the pan.

    Use real butter for the best tasting cookies.

    Do not grease your cookie pans, which can make your cookies spread more. Use parchment paper or silicone baking mats instead.

    Don't over bake the cookies! You want to remove the cookies from the oven when the edges are set and the middle is still a little soft. They will continue to bake and set up as they cool.

    Sprinkle the finished chipless cookies with a sprinkle of flaky sea salt for the ultimate salty and sweet cookie!

    ๐Ÿซ™ how to store

    Store chocolate chipless cookies in an airtight container at room temperature for 3 - 4 days.

    The cookies also freeze well for up to three months; allow them to cool completely, then store in an airtight container or zip-top bag. This is by far my favorite way to store cookies for freshness. The cookies will thaw at room temperature in about 30 minutes.
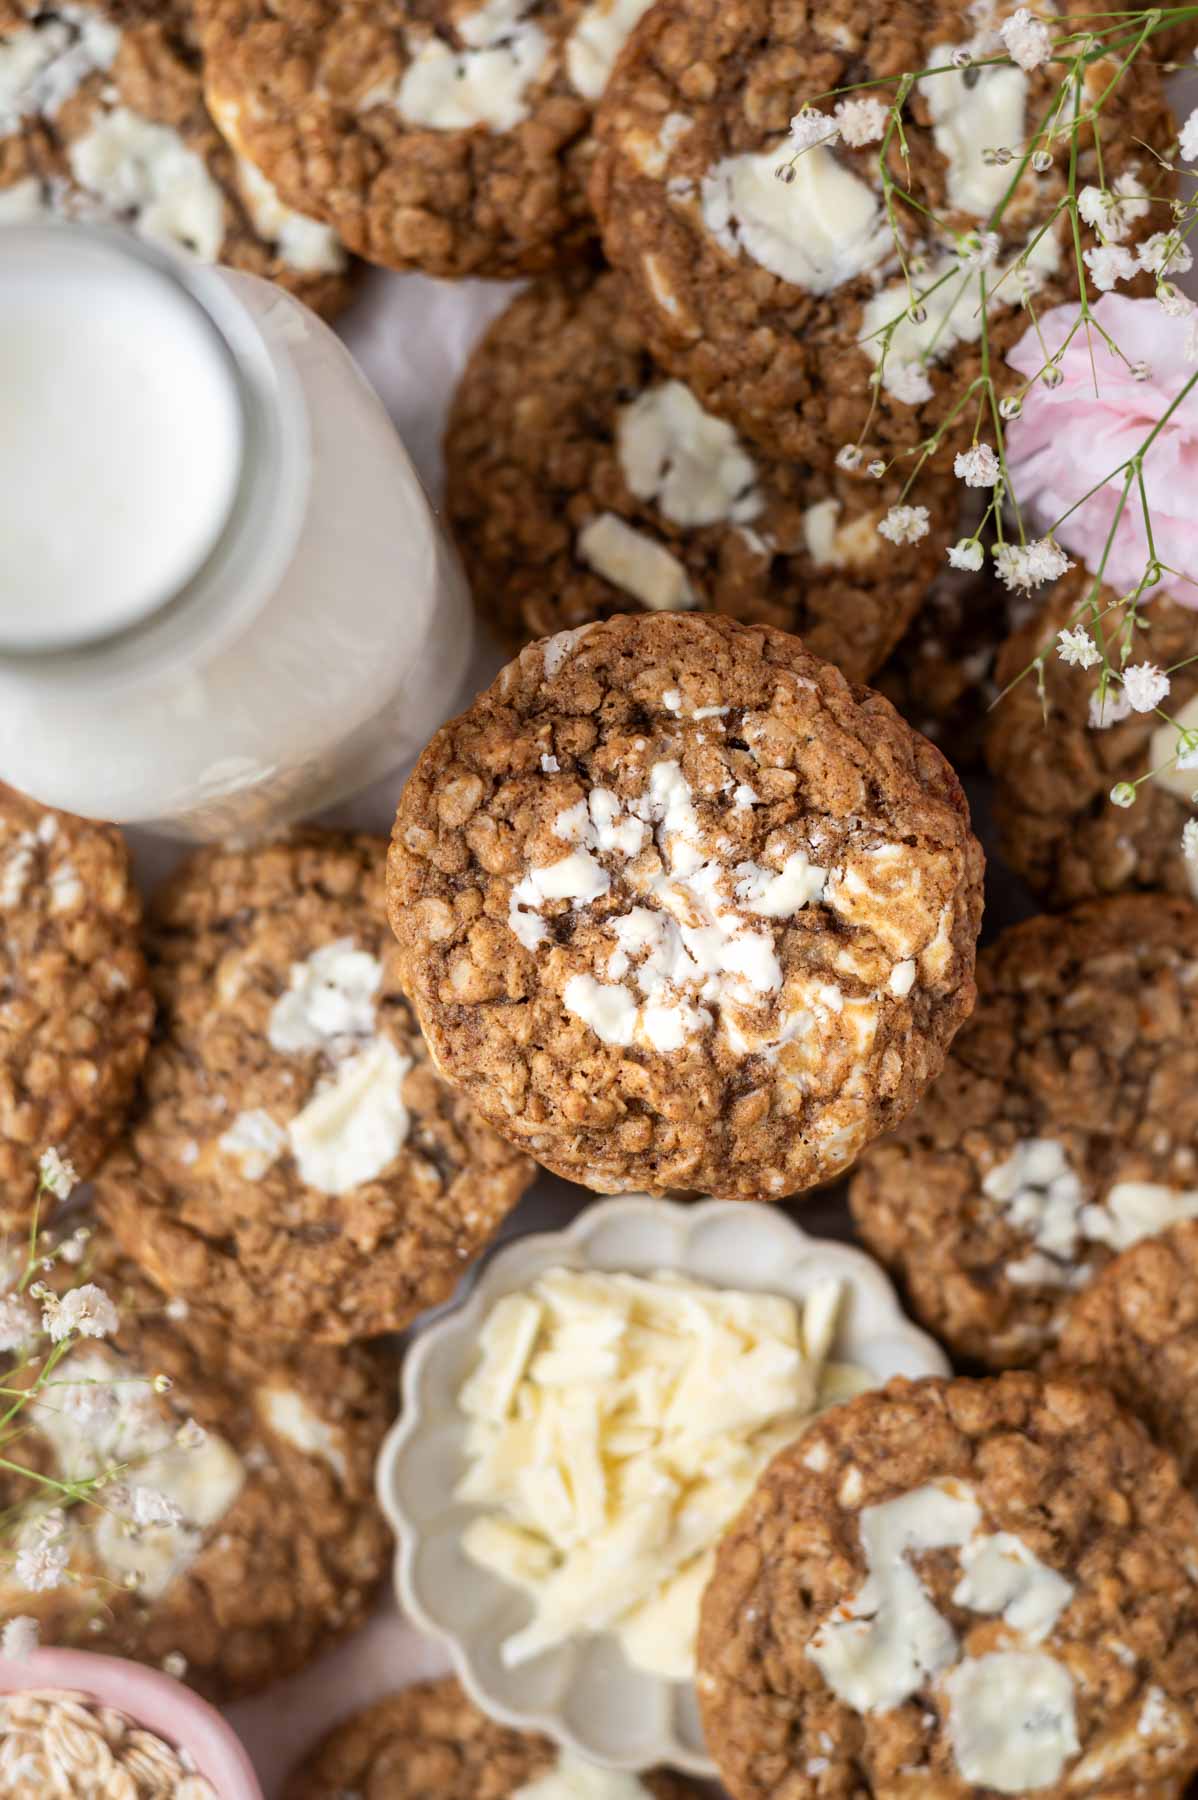
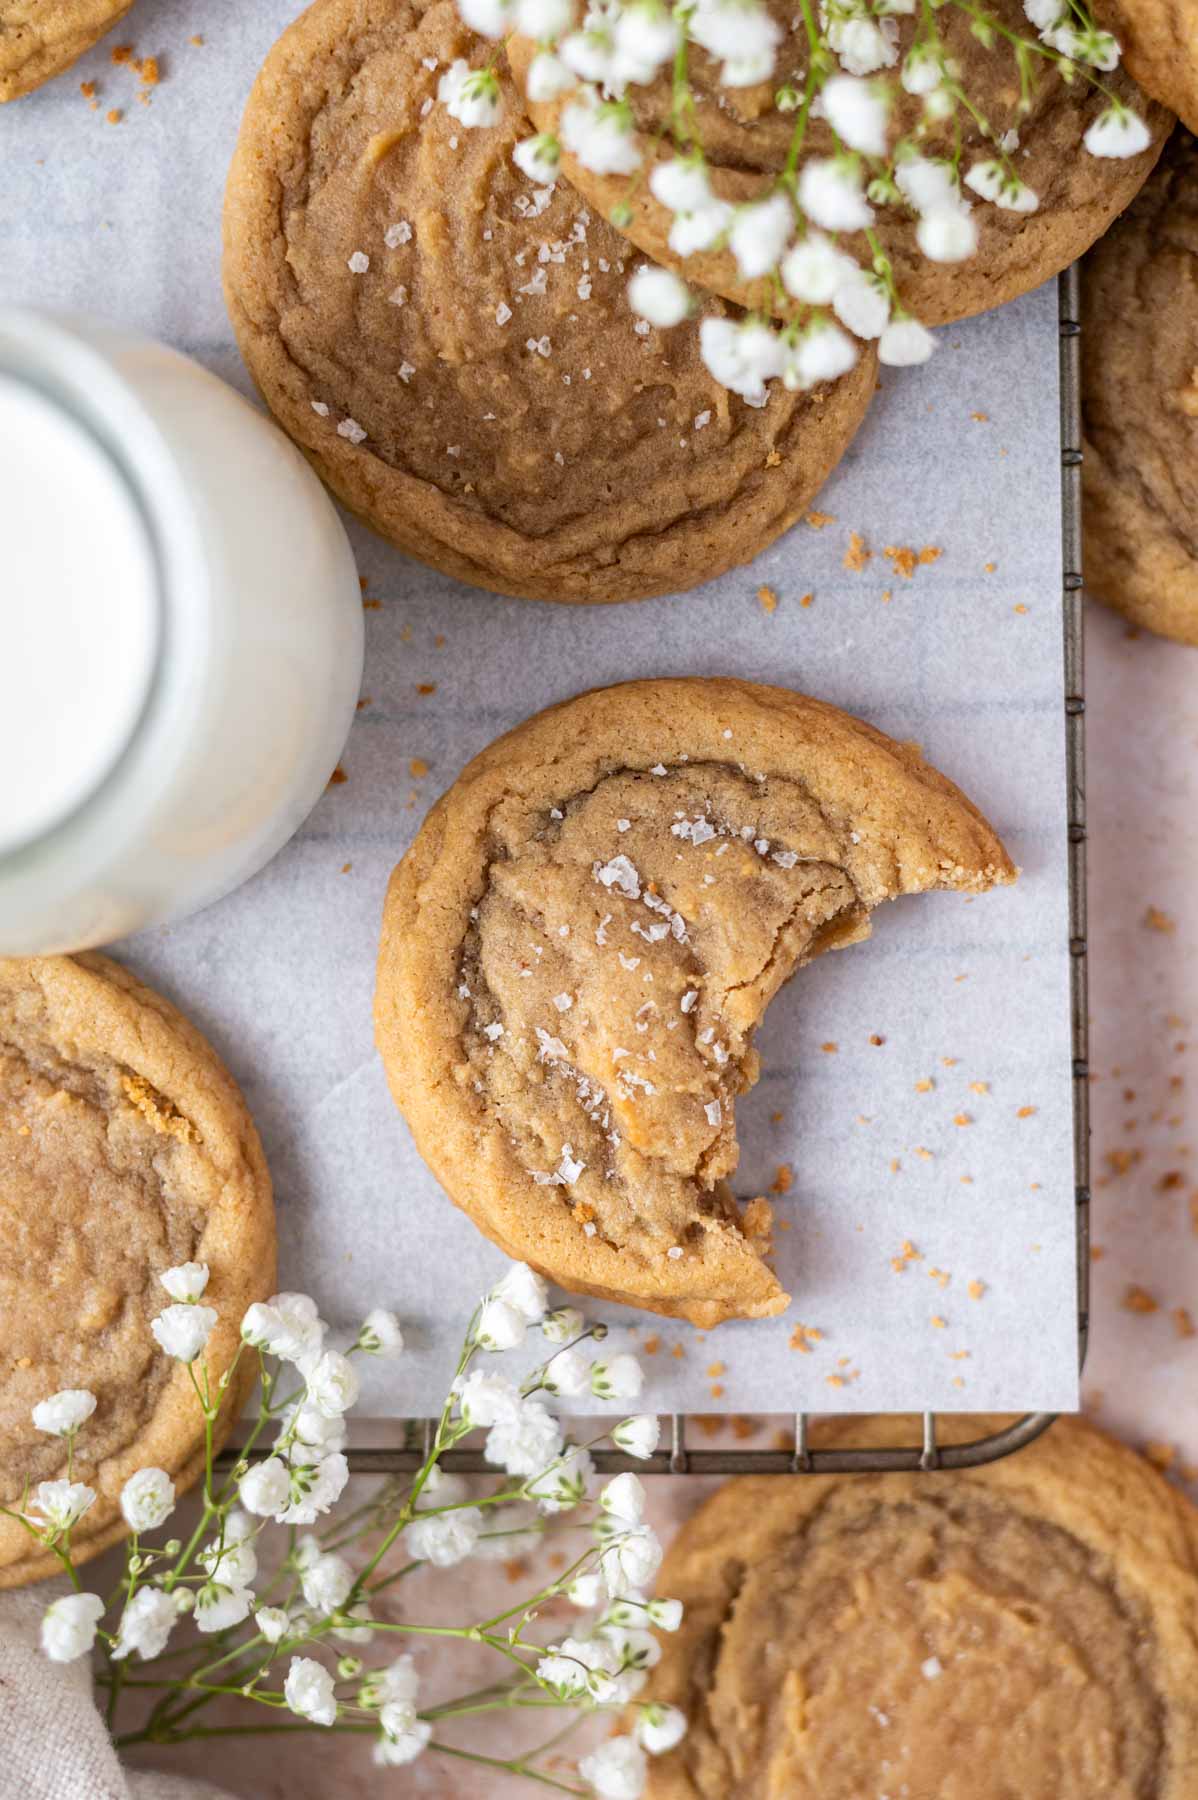
    overhead look at a bite missing from a cookie on a parchment lined cooling rack with a glass of milk and baby's breath flowers

    Remember to snap a picture and tag me on Instagram if you make these Brown Butter Chocolate Chipless Cookies. It warms my heart to see you bring these recipes to life! Thank you for being here and happy baking!

    If you make this recipe {or any recipe!} from two sugar bugsย please come back and leave a review and a โญ๏ธโญ๏ธโญ๏ธโญ๏ธโญ๏ธ star rating.ย  I read every comment, and I LOVE hearing from you!

    ๐Ÿ“– recipe

    chocolate chipless cookie leaning up against a glass of milk with more cookies piled around
    Print Recipe
    5 from 1 vote

    Brown Butter Chocolate Chipless Cookies

    Brown butter chocolate chipless cookies are an easy drop cookie recipe.ย  They bake up thick, soft and chewy with slightly crisp edges.ย  The brown butter, dark brown sugar and vanilla give them the best flavor profile!
    Prep Time15 minutes mins
    Cook Time10 minutes mins
    Chill Time20 minutes mins
    Total Time45 minutes mins
    Course: Cookies
    Cuisine: American
    Keyword: brown butter, chip free cookies, Cookies, drop cookies
    Servings: 20 cookies
    Calories: 188kcal
    Author: Tasia Harper

    Ingredients

    • ยพ cup unsalted butter* (170g), browned
    • 1 cup packed dark brown sugar** (200g)
    • ยฝ cup granulated sugar (100g)
    • ยฝ teaspoon kosher salt
    • 2 large eggs room temperature
    • 1 tablespoon pure vanilla extract
    • 1 teaspoon baking soda
    • 2 teaspoons cornstarch
    • 2 ยฝ cups all-purpose flour (312g)
    • Flaky sea salt if desired

    Instructions

    • To brown the butter: cut cubes of unsalted butter (ยพ cup/170g) and put in a light colored sauce pan and place over medium-low to medium heat and let it cook until small brown flakes form. You will want to stir or swirl the pan frequently after the butter has fully melted to keep it from burning. The butter will foam and bubble up along the process, just keep stirring/swirling and move the foam aside from time to time to check the color. The butter will turn an amber/brown color and will smell nutty and toasted when it's ready; it should take about 5-8 minutes.ย  Pour melted butter and all the browned bits into a bowl to cool for a minute or two.ย You will have about 140g of butter after browning due to the water loss.
    • In a medium to large bowl, add the brown butter, the dark brown sugar (1 cup/200g), granulated sugar (ยฝ cup/100g) and kosher salt (ยฝ teaspoon) and mix until fully incorporated. The mixture is quite thick at this point.
    • Add the eggs (2 large) and vanilla (1 tablespoon). Stir until the mixture is combined and smooth.
    • Sprinkle the baking soda (1 teaspoon) and cornstarch (2 teaspoons) over the mixture and stir well. Then add the flour (2 ยฝ cups/312g) and stir until the dough comes together.
    • Use about 2 tablespoons of dough per cookie (I like using a size 30 scoop/about 44g dough per cookie) and place the dough onto a plate or cookie sheet pan that will fit in your freezer, the dough is soft and may not fully hold it's shape. You should get about 20 cookies. Freeze the cookie dough portions for 20 minutes.
    • While you freeze the dough, preheat oven to 350ยฐF and prepare two sheet pans with parchment paper or a silicone baking mat and set aside.
    • Once the dough has chilled, place 8 cookies on each prepared baking sheet, spacing them about 2 inches apart.
    • Bake one pan at a time for 10-12 minutes or until the edges are set. You want the cookies to look a little soft in the middle. If you want the edges of the cookies to crinkle like they do in the photos in this post, drop the baking pan on the top of the stove or a cutting board once or twice when they are hot from the oven. If desired, sprinkle the tops with some flaky sea salt. Allow the cookies to rest on the pan 5 minutes, then remove to a wire rack to cool completely.

    Notes

    *you will lose a little volume in the butter when it browns; this has already been accounted for in this recipe so start with ยพ cup (170g) and you donโ€™t have to add any additional. The weight of the butter after it has been browned will be around 140g.
    **I use dark brown sugar, but light brown will also work.
    If you only have table salt, use half the amount.
    If you don't have cornstarch you can leave it out with no other adjustments.
    Cookie dough can be prepared and covered and refrigerated overnight, then baked the next day; the cookies may need an extra minute of baking time if chilled. Cookie dough can also be formed into balls and frozen for up to one month; let the cookie dough sit out at room temperature until the oven preheats. The cookies may need an extra minute of baking time if baked frozen.
    Store cookies in an airtight container at room temperature for 3-4 days. The chocolate chipless cookies also freeze well for up to three months. Store in an airtight container or zip-top bag in the freezer. Allow to come to room temperature before serving (about 30 minutes).

    Nutrition

    Serving: 1 cookie | Calories: 188kcal | Carbohydrates: 28g | Protein: 2g | Fat: 7g | Saturated Fat: 5g | Polyunsaturated Fat: 0.4g | Monounsaturated Fat: 2g | Trans Fat: 0.3g | Cholesterol: 35mg | Sodium: 124mg | Potassium: 41mg | Fiber: 0.4g | Sugar: 16g | Vitamin A: 236IU | Calcium: 16mg | Iron: 1mg

    Easy Churro Cake

    two slices of churro cake on a plate with a fork

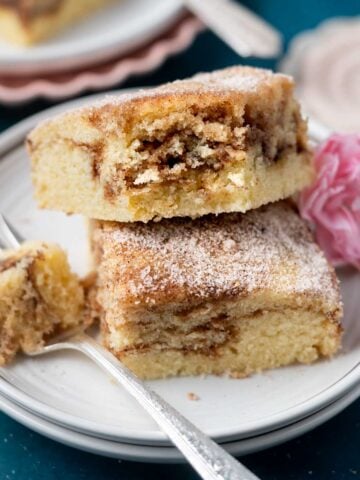
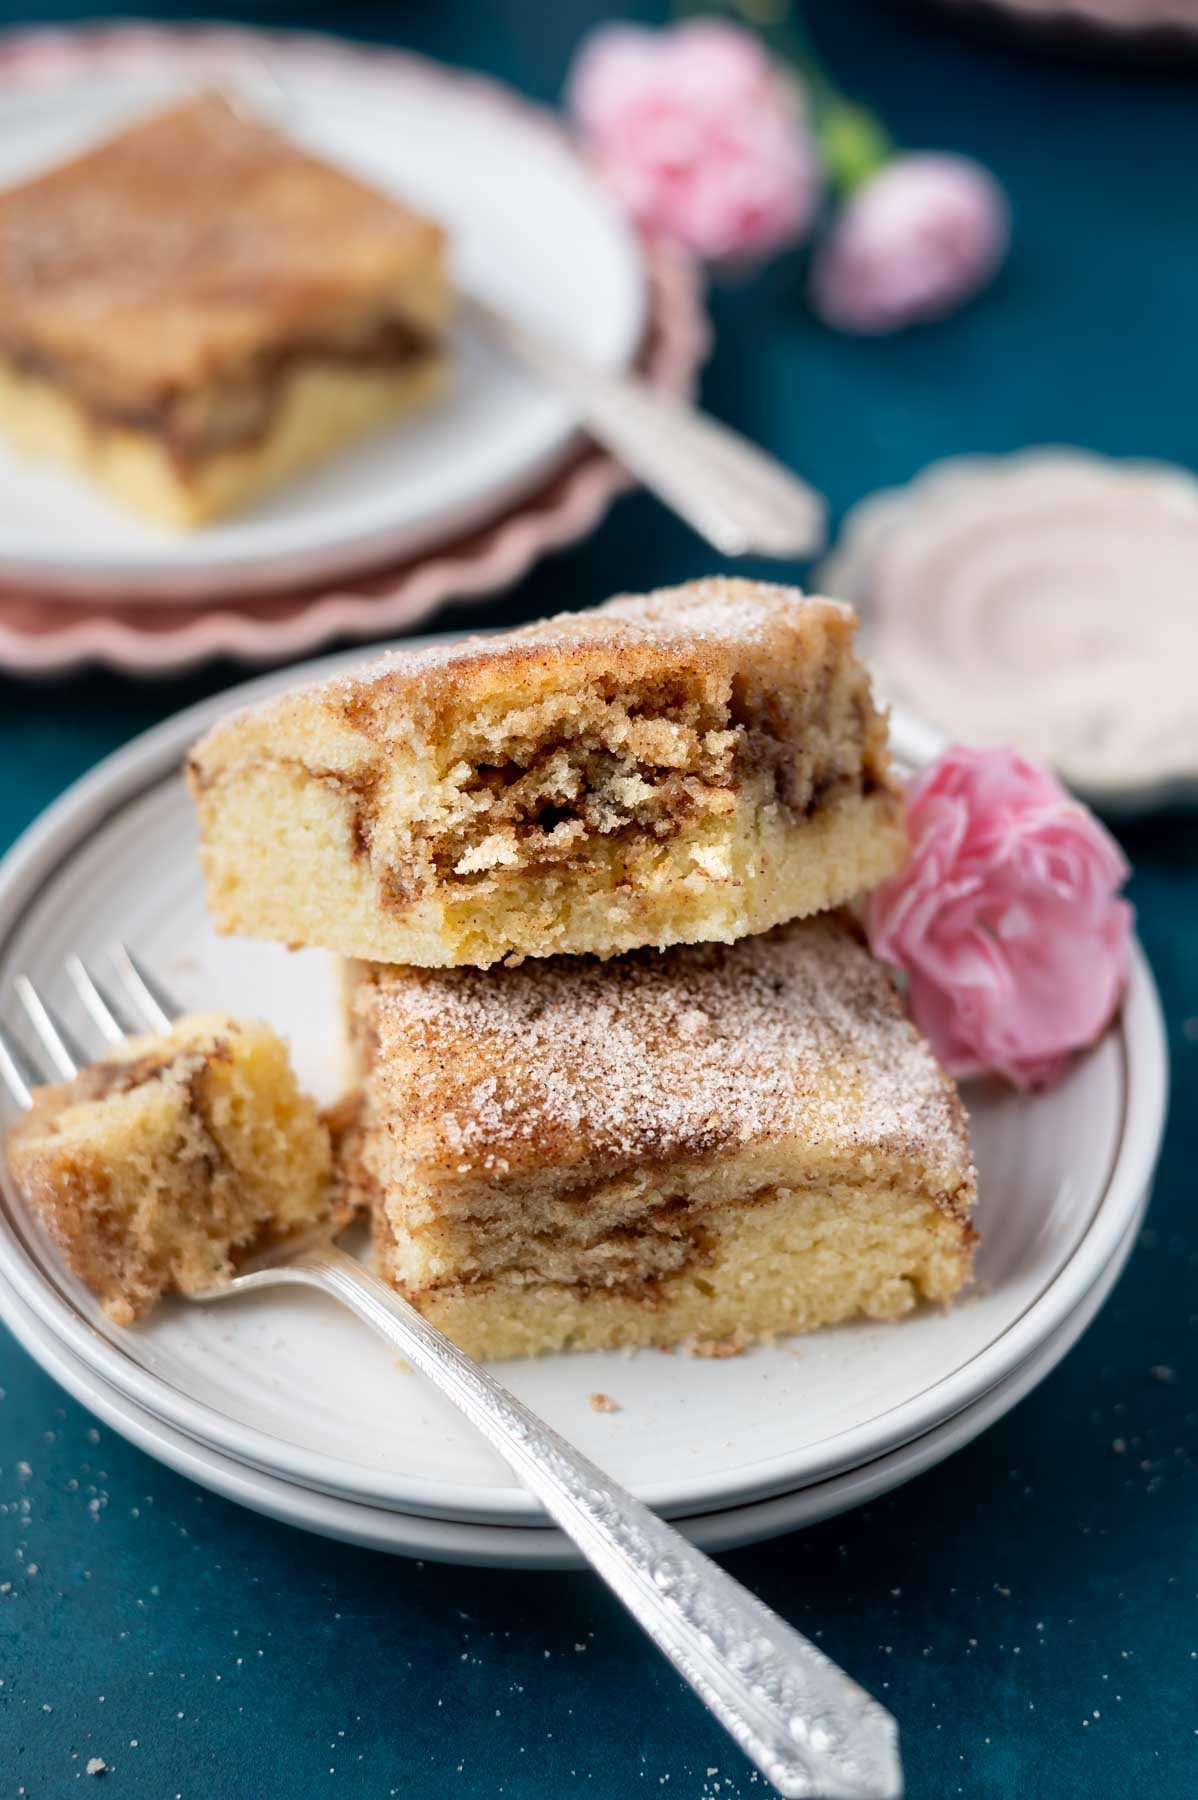
    This churro cake is a small one layer vanilla cake swirled with a cinnamon spice filling and coated in cinnamon and sugar.  The cake is made without a box mix and is soft, fluffy and quick and easy to make.

    two slices of churro cake on a plate with a fork

    Disclosure | This post may contain affiliate links. As an Amazon Associate I earn from qualifying purchases.

    Churros are full of nostalgia!  Whether you ate them at birthday parties, at the county fair or with chocolate dipping sauce at a Mexican restaurant, I think most of us have at least one or two fond memories of this dessert.  We arenโ€™t a big Disney family, but we always have to eat at least one churro while at Disneyland.

    Since cake recipes from scratch are always a winner in my book, Iโ€™ve got this nostalgic churro inspired cake for you.  As a busy mama and lifetime baker, I made sure this one is super easy to make, much like my graham cracker cake, chocolate snack cake and raspberry almond cake.

    I also share step-by-step photos and also a video on how to swirl in the cinnamon sugar filling.

    [feast_advanced_jump_to]

    ๐Ÿ’ญ what does churro cake taste like?

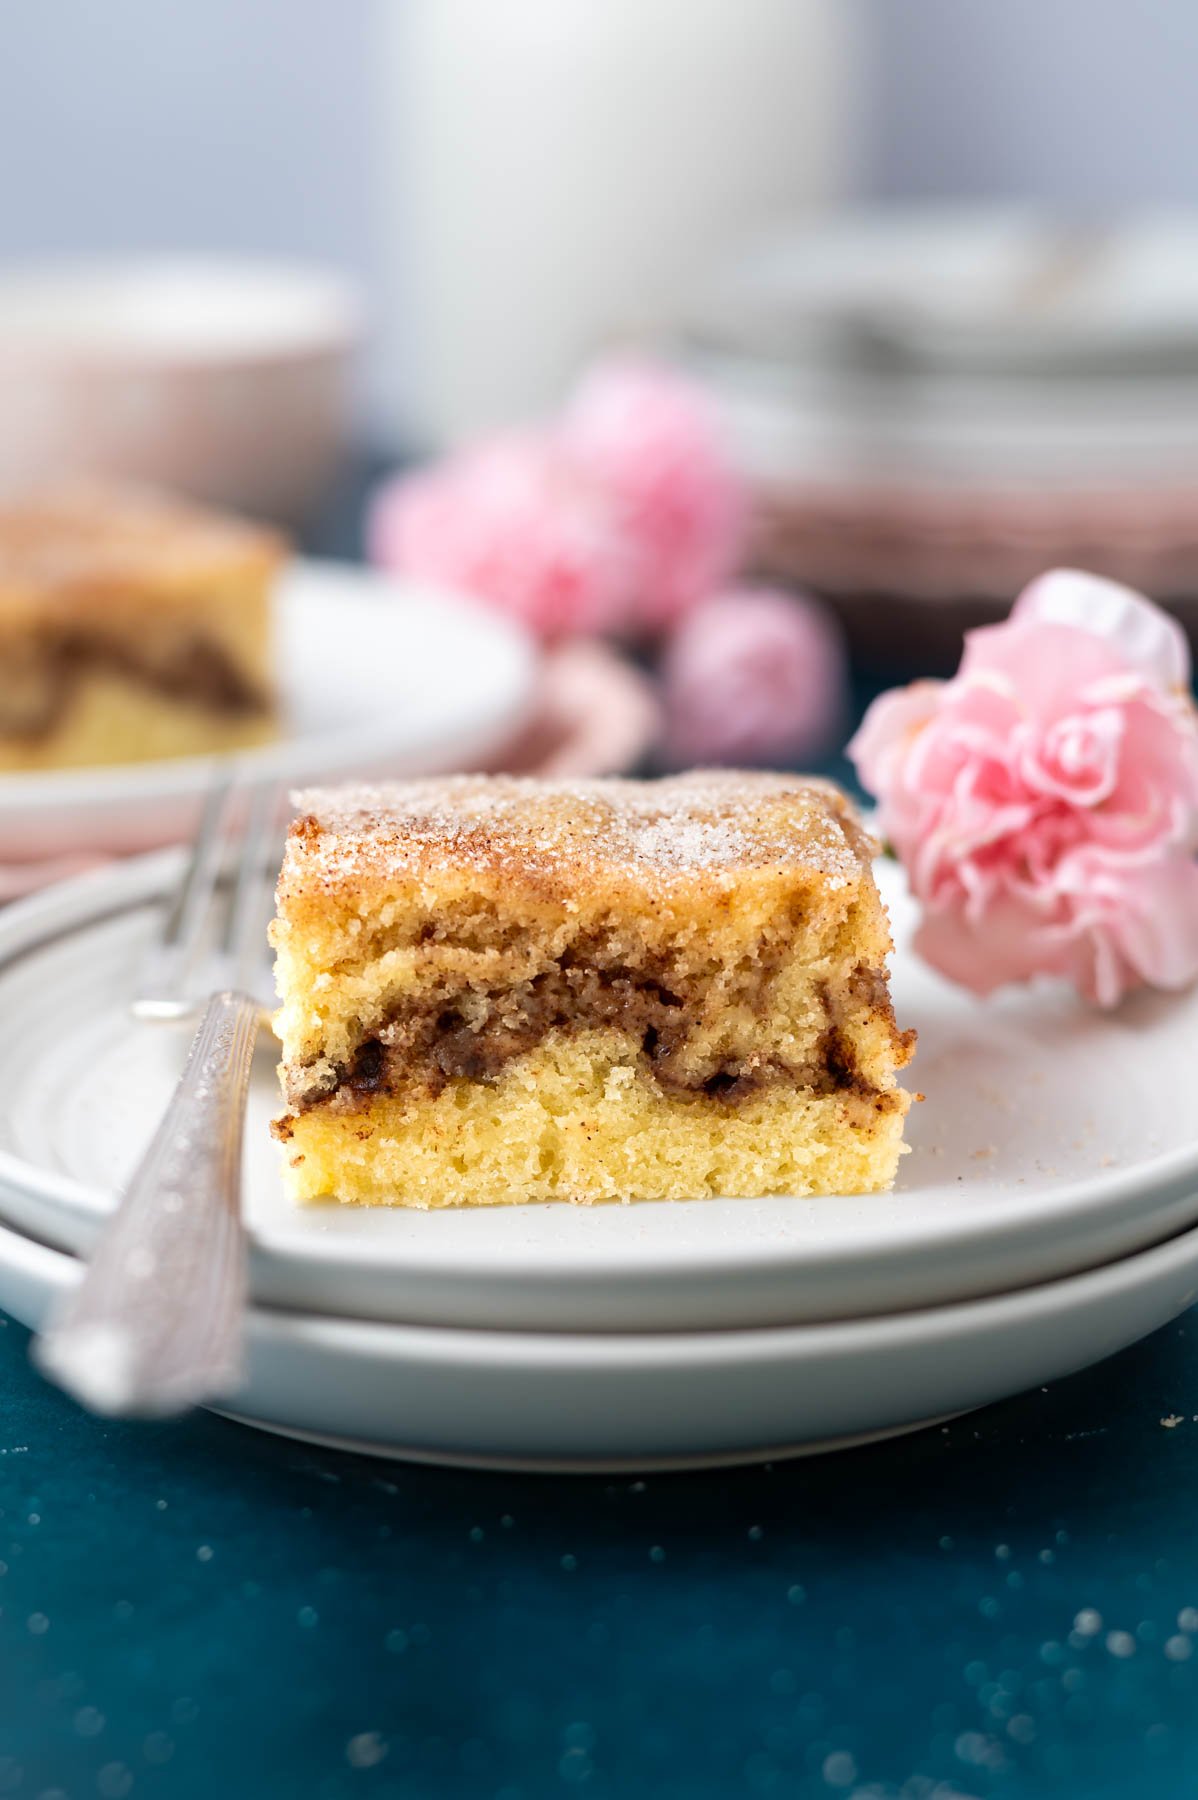
    This churro inspired cake is a moist vanilla cake with a cinnamon spice filling that gets swirled into the cake batter; yielding a soft and tender cake.  Instead of having to decorate with frosting, it has a slightly crunchy cinnamon sugar coating similar to a traditional churro.  It has all the sweet cinnamon sugar flavor without the deep fried texture.

    ๐Ÿ›’ ingredients and substitutions

    Please scroll to the printable recipe card at the end of this post for the full list of ingredients and baking directions.

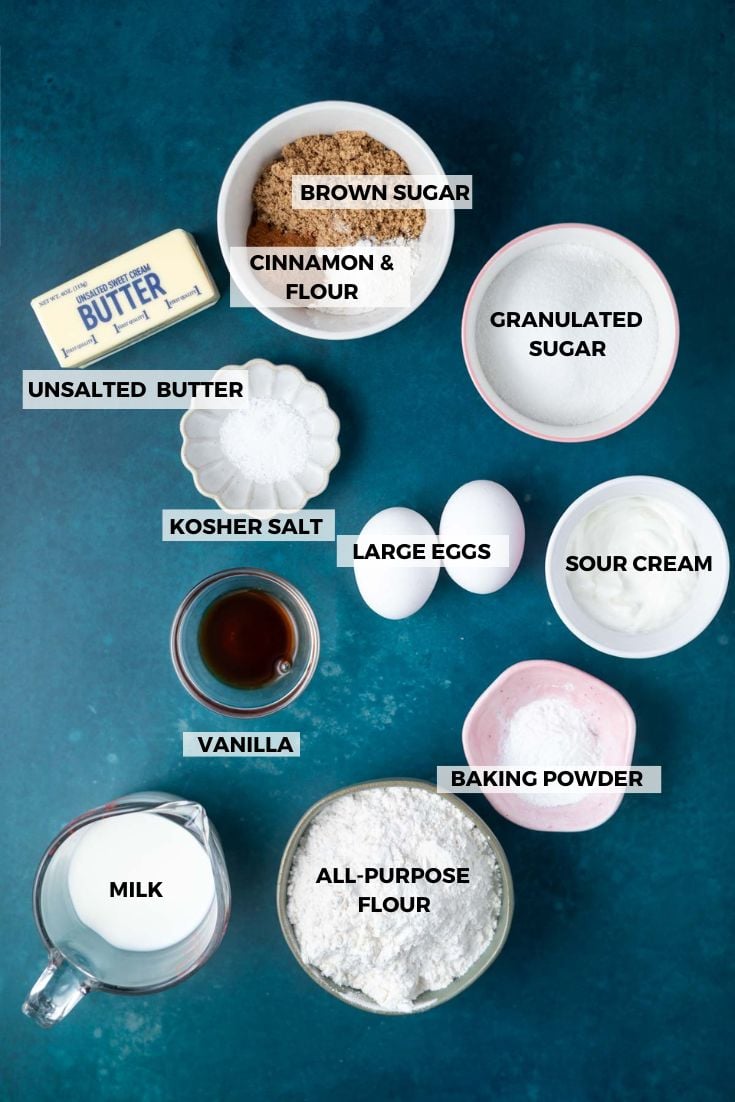
    ingredients for churro cake

    All-purpose flour ~ Too much flour can result in a dense churro cake. A kitchen scale is the most accurate way to measure. If using measuring cups; fluff the flour in the container first. Then spoon the flour into the measuring cup and level it off with the back of a knife.

    Baking powder ~ to help the cake rise and have a nice soft texture.

    Unsalted butter ~ if you only have salted butter, leave out the kosher salt. Needs to be at room temperature. A tablespoon of melted butter is used for helping the cinnamon sugar topping stick to the cake.

    Kosher salt ~ to balance the sweetness.  If you only have table salt, use half the amount.

    Sugars ~ granulated sugar is used for the cake, the filling and the cinnamon sugar coating. Brown sugar {you can use dark or light} is used in the filling.

    Eggs ~ two large eggs are needed at room temperature.

    Vanilla ~ I prefer pure vanilla extract for the best flavor.

    Milk ~ I use 1% milk, but 2% or whole milk can be substituted.  For the best results, have the milk at room temperature before baking.

    Sour cream ~ making cakes with sour cream brings extra moisture by working to shorten the gluten strands in the flour, which results in a tender and soft cake crumb. For the best cake, use full fat sour cream and bring it to room temperature.  Plain Greek yogurt can be used as a substitute.

    Ground cinnamon ~ you canโ€™t have a churro inspired cake without cinnamon!  Used in the filling and coating.

    ๐Ÿฅฃ how to make this one layer cake

    Preheat oven to 350ยฐF and prepare an 8x8 baking pan with parchment paper, then set aside.

    In a medium bowl, add the brown sugar, ground cinnamon and all-purpose flour and mix together. Set aside.

    butter and sugar creamed together in a mixing bowl

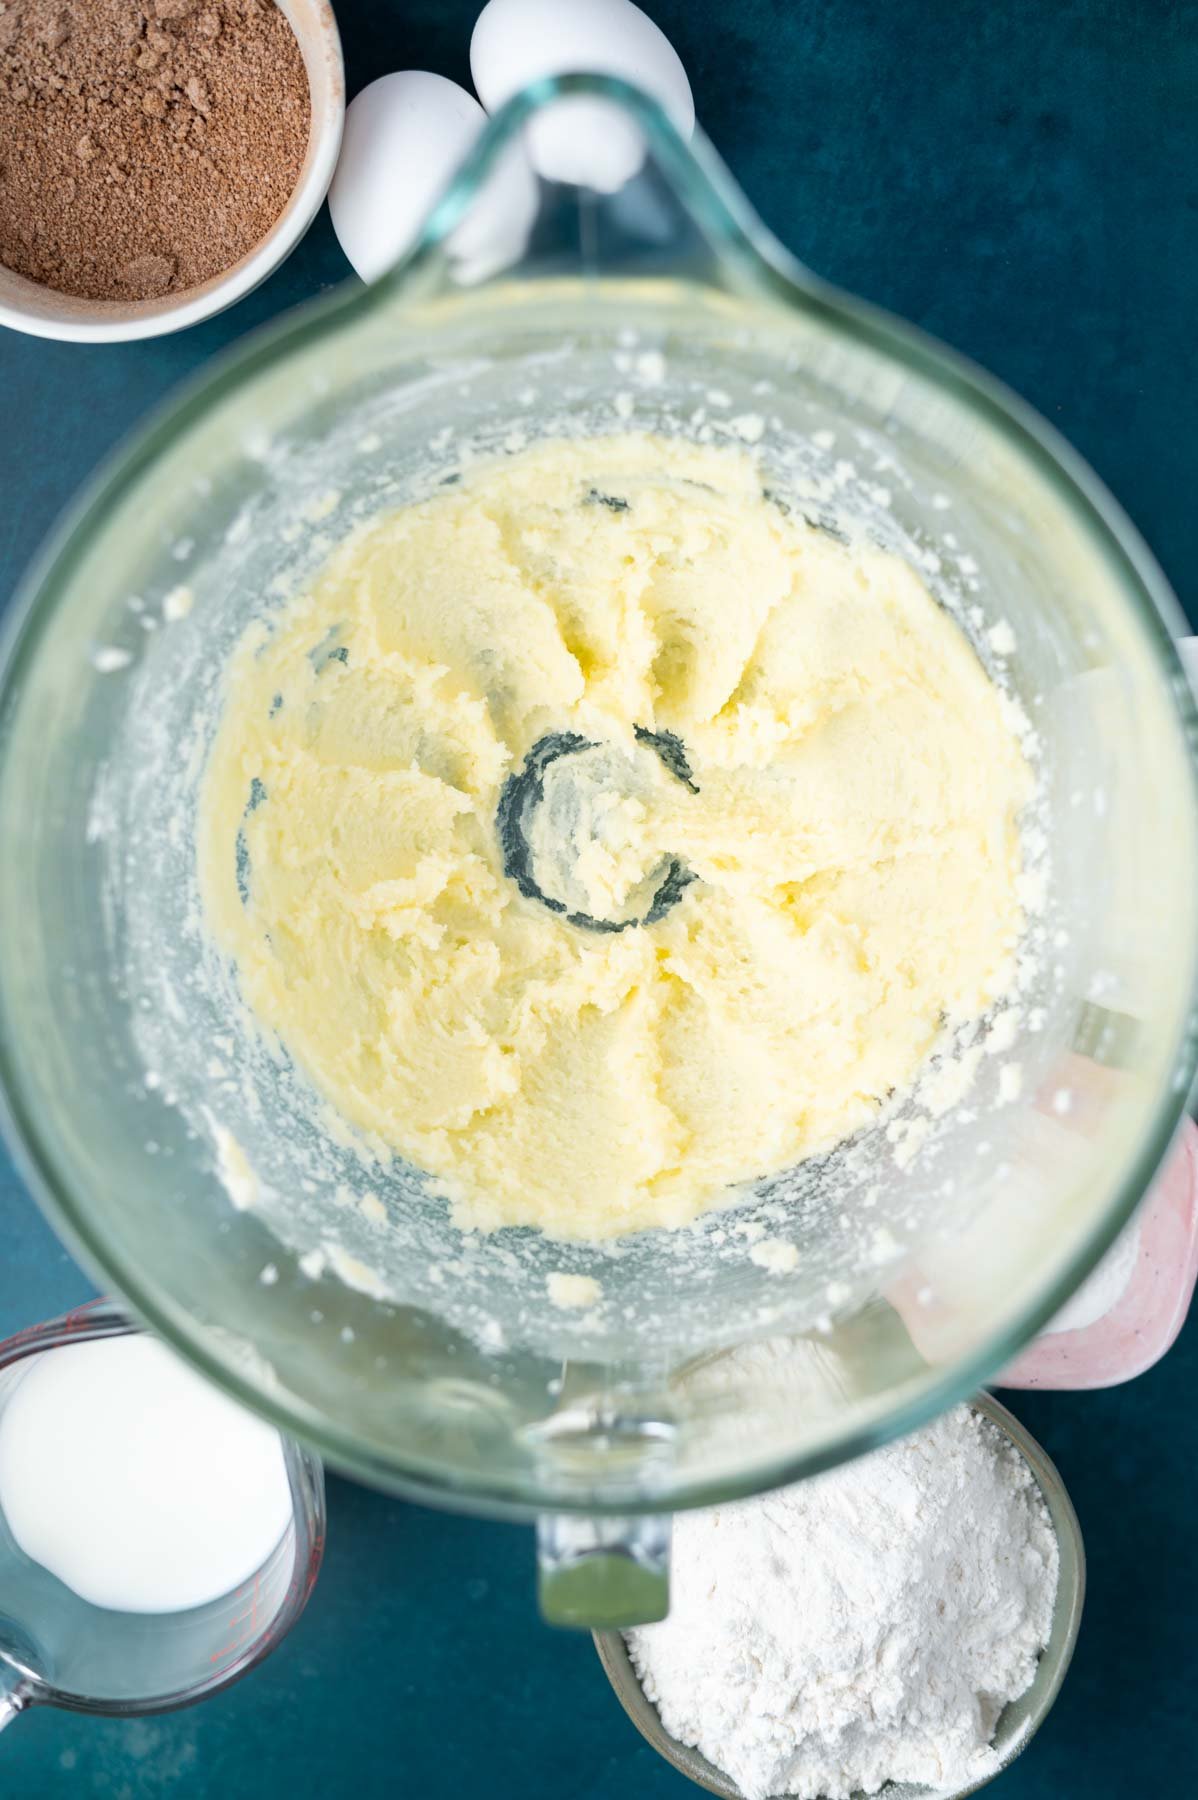
    In a stand mixer with the paddle attachment {or using a hand-held mixer}, cream together the unsalted butter, granulated sugar and kosher salt. Scrape the bowl at least once during the creaming process.

    butter, sugar and eggs mixed together in a mixing bowl looking a little curdled

    Scrape up and down the bowl and add the eggs and vanilla, mixing on medium-high until combined. The mixture can look a bit curdled here, but don't let it worry you.

    cake batter after eggs and sour cream have been mixed into the butter and sugar

    Scrape the bowl again and add the sour cream and baking powder and mix until combined.

    cake batter before the milk is added in a mixing bowl

    With the mixer on low slowly add the flour and mix until some large streaks of flour remain. Scrape up and down the bowl.

    cake batter in a bowl with a spatula

    Then with the mixer on low, slowly drizzle in the milk mixing until the batter just comes together. Use a spatula to do a final stir or two.

    cinnamon filling sprinkled over cake batter in a parchment lined baking pan

    Pour/spread half the batter into the prepared pan. Take the cinnamon swirl filling and spread it in an even layer over the cake batter.

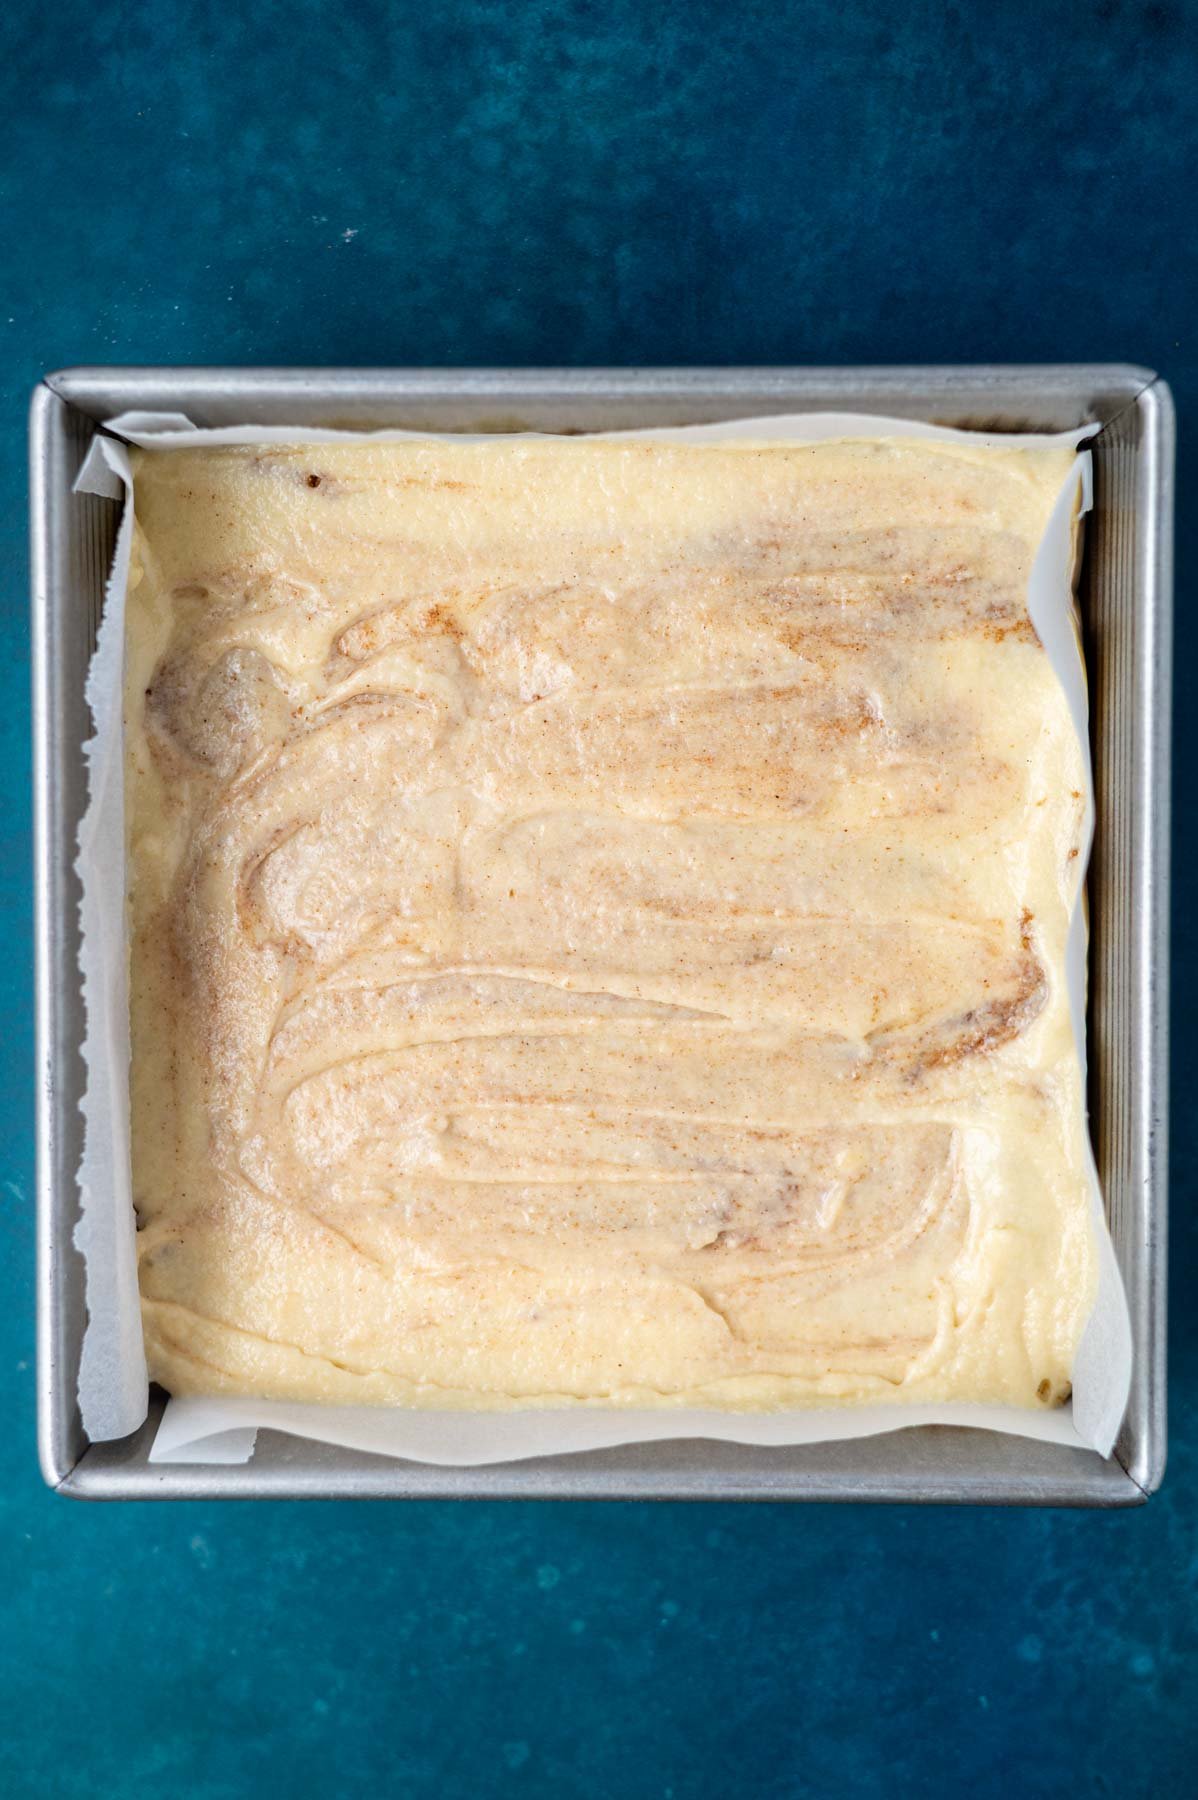
    cinnamon swirled cake batter in a parchment lined baking pan

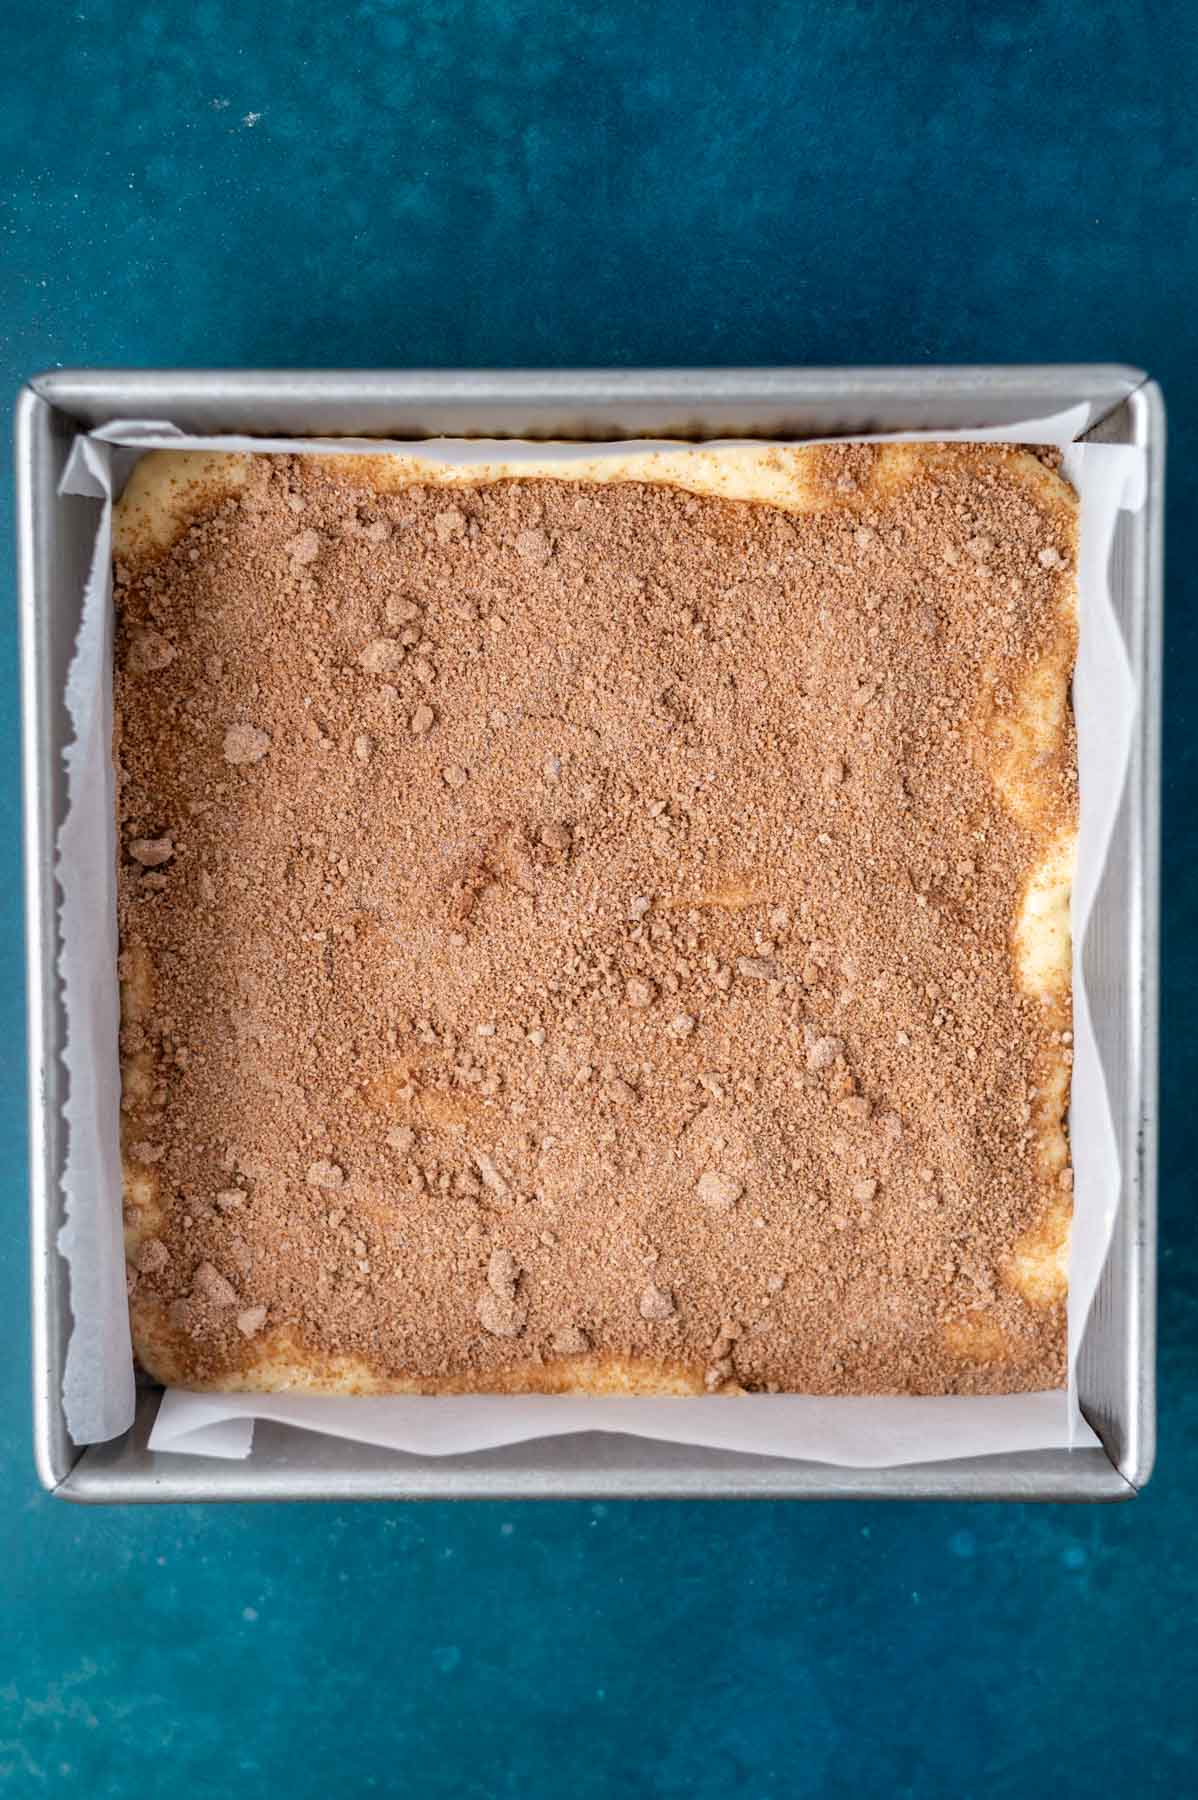
    Top with the remaining half of the batter and use an off-set spatula to spread the batter over the filling. The batter is thick, so work slowly.  Then use the off-set spatula or a knife to swirl the batter and filling together; then smooth the batter and drop the pan on the counter once or twice.

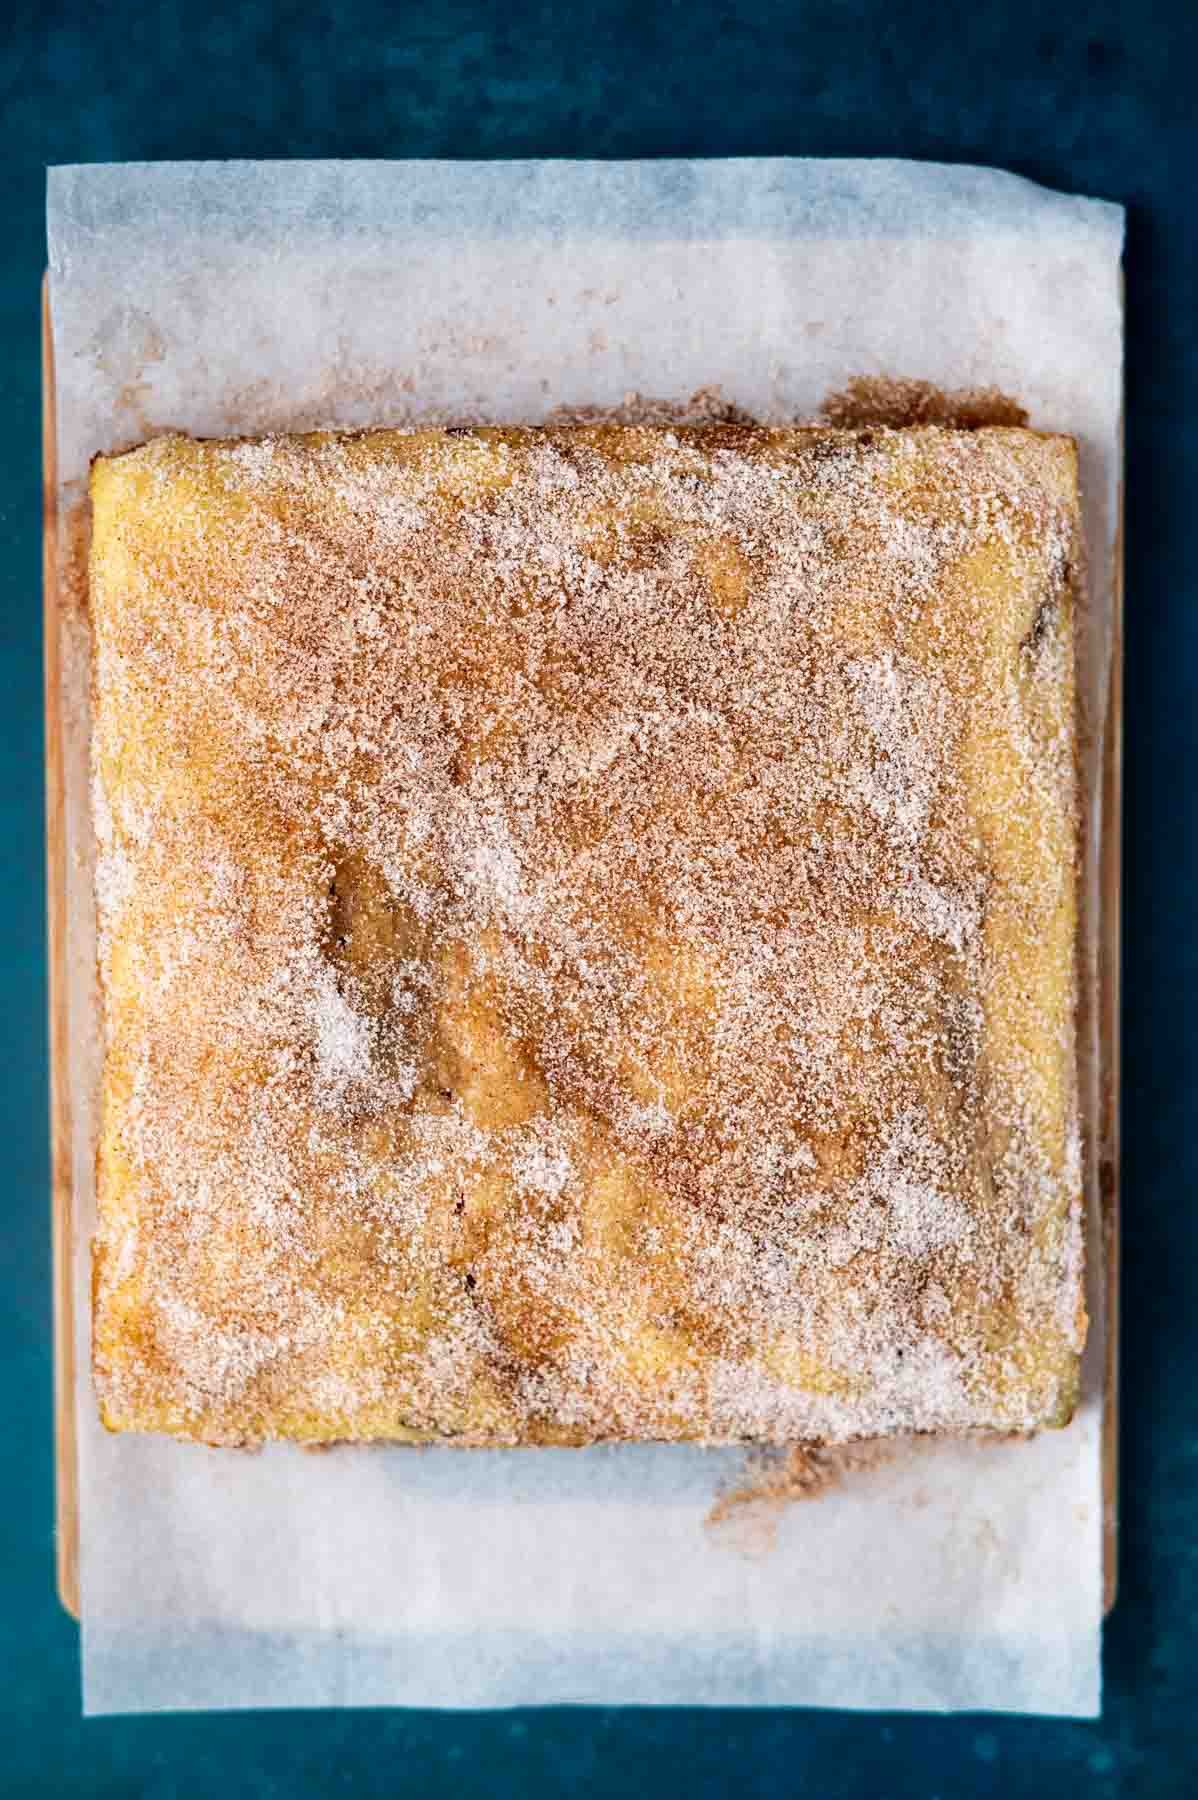
    cinnamon sugar coating on top of a churro cake sitting on a parchment lined cutting board

    Bake the churro cake in the preheated oven, then allow to cool in the pan on a wire cooling rack.

    Once the cake is cool, brush with melted butter and sprinkle with cinnamon and sugar.

    ๐ŸŽฅ step-by-step video

    ๐Ÿ’ฌ frequently asked questions

    how do I know when itโ€™s done baking?

    This churro cake will be done baking when a toothpick inserted in the center of the cake comes out with just a few moist crumbs, but no wet batter.  It should take about 25-30 minutes.

    can I make this in a different size pan?

    Yes, if you prefer a round cake pan, a 9-inch pan can be used.  If you only have an 8-inch round cake pan, the cake will be a little taller and will need a little more time to bake.  See the recipe card notes below for how to prepare the cake pan.

    I did not test it, but donโ€™t see why you couldnโ€™t double the recipe and bake this cake recipe as a 9x13 sheet cake.

    ๐Ÿ‘ฉ๐Ÿปโ€๐Ÿณ tips for the best homemade cake

    Use a scale to measure your ingredients for the best results. If you do not have a kitchen scale, see the notes in the ingredient section on how to measure the flour.

    For the perfect crumb, use full fat sour cream.  It gives the churro cake more flavor and moisture.

    Don't over mix the cake batter. Use low speed when combining the wet and dry ingredients and mix until everything is just combined. I usually stop when just a few streaks of dry ingredients remain and use a spatula to finish the mixing.

    The cake batter is thick so an off-set spatula works great to smooth it into the pan.

    Don't over bake the cake. Remember your oven is different from mine and baking times may vary a little. The easy churro cake is done when a toothpick inserted in the center comes out with just a few moist crumbs.

    Allow the cake to cool completely before adding the cinnamon sugar coating. 

    ๐Ÿซ™ how to store

    The churro cake can be stored in an airtight container at room temperature for 3-4 days.

    The cake can also be frozen; wrap tightly in plastic wrap and then place in an airtight container or zip-top bag in the freezer for up to 3 months. Allow to defrost and come to room temperature before serving.

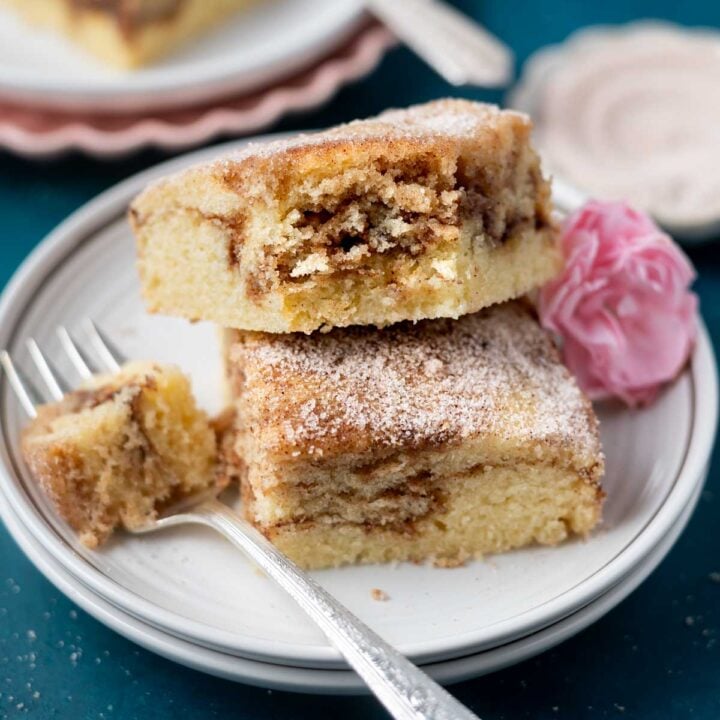
    slice of cake on a plate with a fork and a pink flower

    Remember to snap a picture and tag me @twosugarbugs on Instagram if you make this Easy Churro Cake. It warms my heart to see you bring these recipes to life! Thank you for being here and happy baking!

    If you make this recipe {or any recipe!} from two sugar bugsย please come back and leave a review and a โญ๏ธโญ๏ธโญ๏ธโญ๏ธโญ๏ธ star rating.ย  I read every comment, and I LOVE hearing from you!

    ๐Ÿ“– recipe

    Yield: 9 -12 servings

    Easy Churro Cake

    two slices of churro cake on a plate with a fork

    This churro cake is a small one layer vanilla cake swirled with a cinnamon spice filling and coated in cinnamon and sugar. It's soft, fluffy and quick and easy to make.

    I highly recommend using weight {metric} measurements when available for more accuracy and the best results.

    Prep Time 15 minutes
    Bake Time 30 minutes
    Total Time 45 minutes

    Ingredients

    Cinnamon swirl filling

    • ยผ cup packed brown sugar (50g)
    • 2 teaspoons ground cinnamon (about 3g)
    • 1 tablespoon all-purpose flour (8g)

    vanilla cake

    • ยฝ cup unsalted butter, room temperature (113g)
    • ยพ cup granulated sugar (150g)
    • ยฝ teaspoon kosher salt
    • 2 large eggs, room temperature
    • 2 teaspoons pure vanilla extract (10mL)
    • ยผ cup full-fat sour cream, room temperature (60g)
    • 2 teaspoons baking powder (9g)
    • 1 ยฝ cups all-purpose flour (188g)
    • ยฝ cup milk*, room temperature (120mL)

    cinnamon sugar coating

    • ยผ cup granulated sugar (50g)
    • ยฝ teaspoon ground cinnamon
    • 1 tablespoon unsalted butter, melted (14g)

    Instructions

      1. Preheat oven to 350ยฐF and prepare an 8x8** baking pan with parchment paper. Set aside.
      2. In a medium bowl, add the brown sugar (ยผ cup/50g), ground cinnamon (2 teaspoons/about 3g) and all-purpose flour (1 tablespoon/8g) and mix together. Set aside.
      3. In a stand mixer with the paddle attachment (or using a hand-held mixer), cream together the unsalted butter (ยฝ cup/113g), granulated sugar (ยพ cup/150g) and kosher salt (ยฝ teaspoon). Start on low and once incorporated increase to medium-high (6 on a KitchenAid) and cream until light, about 3 minutes. Scrape the bowl at least once during the creaming process.
      4. Scrape up and down the bowl and add the eggs (2 large) and vanilla (2 teaspoons), mixing on medium-high until combined, about 1-2 minutes. The mixture may look curdled at the point, but don't let it worry you.
      5. Scrape the bowl again and add the sour cream (ยผ cup/60g) and baking powder (2 teaspoons/9g) and mix on medium (speed 4 on KitchenAid) until combined about 30-60 seconds.
      6. With the mixer on low (stir on KitchenAid) slowly add the flour (1 ยฝ cups/188g) and mix until some large streaks of flour remain. Scrape up and down the bowl.
      7. Then with the mixer on low, slowly drizzle in the milk (ยฝ cup/120mL); stop when about half the milk is mixed in and scrape the bowl. Turn the mixer back on low and slowly drizzle in the remaining milk, mixing until the batter just comes together. Use a spatula to do a final stir or two.
      8. Pour/spread half the batter into the prepared pan. Take the cinnamon swirl filling and spread it in an even layer over the cake batter. Top with the remaining half of the batter and use an off-set spatula to spread the batter over the filling. The batter is thick, so work slowly.ย  Then use the off-set spatula or a knife to swirl the batter and filling together; then smooth the batter and drop the pan on the counter once or twice. (this helps to remove any air bubbles)
      9. Place the cake in the preheated oven and bake for 25-30 minutes or until a cake tester comes out with just a few moist crumbs. Allow the cake to cool in the pan set on a wire cooling rack.
      10. Once the cake is cool, use the parchment to remove the cake from the pan.
      11. In a small bowl, mix the granulated sugar (ยผ cup/50g) and cinnamon (ยฝ teaspoon). Brush the melted butter (1 tablespoon/14g) over the top and sides of the cake and sprinkle with the cinnamon and sugar mixture.
      12. Slice and serve.

    Notes

    *I use 1% milk, but 2% or whole milk can also be used.

    **The cake can also be baked in a 9-inch round. If using a 9-inch round, butter the pan, line with parchment paper and butter again.

    Cake can be stored in an airtight container at room temperature for 3-4 days. The churro cake can also be frozen; wrap tightly in plastic wrap and then place in an airtight container or zip-top bag in the freezer for up to 3 months. Allow to defrost and come to room temperature before serving.

    Recommended Products

    As an Amazon Associate and member of other affiliate programs, I earn from qualifying purchases.

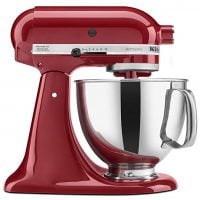
    • KitchenAid KSM150PSER Artisan Tilt-Head Stand Mixer with Pouring Shield, 5-Quart, Empire Red
      KitchenAid KSM150PSER Artisan Tilt-Head Stand Mixer with Pouring Shield, 5-Quart, Empire Red
    • PaperChef Parchment Paper for Baking: Multipurpose Nonstick Parchment Sheets, Oven Safe, No Grease or Butter Needed, Ideal for Cooking and Roasting, Biodegradable, Kosher-Certified (205 sq ft roll)
      PaperChef Parchment Paper for Baking: Multipurpose Nonstick Parchment Sheets, Oven Safe, No Grease or Butter Needed, Ideal for Cooking and Roasting, Biodegradable, Kosher-Certified (205 sq ft roll)
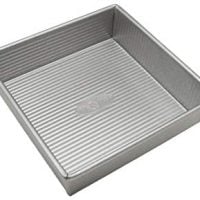
    • USA Pan Bakeware Square Cake Pan, 8 inch, Nonstick & Quick Release Coating, Made in the USA from Aluminized Steel
      USA Pan Bakeware Square Cake Pan, 8 inch, Nonstick & Quick Release Coating, Made in the USA from Aluminized Steel

    Nutrition Information:

    Yield:

    12

    Serving Size:

    1

    Amount Per Serving: Calories: 245Total Fat: 11gSaturated Fat: 6gTrans Fat: 0gUnsaturated Fat: 4gCholesterol: 58mgSodium: 155mgCarbohydrates: 34gFiber: 1gSugar: 21gProtein: 3g

    The nutrition information is based on third-party calculations, is an estimate only and may not be entirely accurate. Actual nutritional values will vary based on brands used and portion sizes.
    Did you make this recipe?

    Please make my day and PIN to Pinterest and share a photo on Instagram ~ making sure to tag @twosugarbugs! THANK YOU!!

    © Tasia
    Cuisine: American / Category: Cakes and Cupcakes

    Brown Butter Cupcakes with Salted Caramel Frosting

    brown butter cupcake on a plate with a spoon of caramel sauce in the foreground and milk and more cupcakes in the background

    Tender and flavorful brown butter cupcakes give a vanilla cupcake recipe an upgrade with brown butter.  Topped with the best salted caramel frosting!

    brown butter cupcake on a plate with a spoon of caramel sauce in the foreground and milk and more cupcakes in the background

    Disclosure | This post may contain affiliate links. As an Amazon Associate I earn from qualifying purchases.

    As a busy mama and self taught baker, I have been making cupcakes for decades. I have loads of tips and helpful information to help you make cupcakes that look as good as they taste, like these chocolate chip cupcakes or raspberry cupcakes. 

    The browned butter adds so much flavor and depth to this vanilla cupcake recipe and the salted caramel frosting pairs perfectly with the nutty flavor of brown butter. If you've never baked with brown butter before, you are in for a treat. 

    Reader Liz says: โญ๏ธโญ๏ธโญ๏ธโญ๏ธโญ๏ธ These are delicious! Easy to follow the recipe and my finished product looked just as good as the picture!

    This cupcake recipe has a few more steps than some of my recipes.  I know you are busy, so feel free to brown the butter and make the caramel sauce a few days before you want to bake.

    This post was originally published in February of 2019 and has been updated with helpful information and new photos. The recipe remains the same.

    [feast_advanced_jump_to]

    ๐Ÿ’— why you will love these cupcakes with brown butter 

    Easy to make ~ the cupcake batter is made from scratch and comes together quickly.

    Simple ingredients ~ made without cake flour, I bet you've got all the ingredients in your kitchen right now.

    Salted caramel frosting ~ the buttercream uses a homemade salted caramel sauce.

    Caramel drizzle ~ use extra caramel sauce to drizzle over the frosted cupcakes, which makes them look fancy while being easy to do.

    ๐Ÿ’ญ why use brown butter in baking?

    Brown butter adds a wonderful depth, richness and nutty flavor to baked items. It's also amazing in cookies and other foods; sweet and savory.ย  See this blondie cookie bar recipe if you need a visual of how to brown butter.

    caramel drizzled over the tops of cupcakes set on a parchment lined cutting board

    ๐Ÿ›’ ingredients and substitutions

    Please scroll to the printable recipe card at the end of this post for the full list of ingredients and baking directions.

    ingredients for brown butter cupcakes

    Brown butter ~ brings richness and a nutty flavor to the cupcakes. The unsalted butter gets browned and cooled to a solid state before adding to the cupcake ingredients. If you only have salted butter, leave out the kosher salt.  Unsalted butter is also used in the salted caramel frosting.

    All-purpose flour ~ adds structure. If not using a kitchen scale, be sure to use the spoon and level method. {Fluff the flour in the container, then spoon it into your measuring cup and level it off with the back of a knife}.

    Baking powder and soda ~ adds some height to the cupcakes.

    Kosher salt ~ helps to balance the flavors, if you only have table salt use half the amount.

    Sugars ~ granulated {white} sugar and brown sugar for sweetness and for a little moisture in the cupcakes. Granulated sugar is used for the caramel sauce as well and confectionersโ€™ sugar {or powdered sugar} is used in the frosting. 

    Eggs ~ 2 large eggs needed. Having the eggs at room temperature will provide the best results.

    Vanilla ~ adds a nice burst of flavor to the cupcakes and frosting. For the best brown butter cupcakes, use a pure vanilla extract or vanilla bean paste.

    Milk ~ brings moisture to the baked cupcakes. Having the milk at room temperature will give you the best cupcakes.  I use 1% milk, but 2% or whole milk will also work.

    Sour cream ~ making cupcakes with sour cream brings extra moisture by working to shorten the gluten strands in the flour, which results in a tender and soft cupcake. For the best cupcakes, use full fat sour cream and bring it to room temperature. Plain Greek yogurt can be substituted.

    Heavy cream or half and half {not shown} ~ optional for a fluffier salted caramel frosting.

    ๐Ÿฅฃ how to make 

    Once browned butter has cooled at room temperature and is solid {about 1-2 hours}, preheat your oven to 350ยฐF/177ยฐC.

    Prepare a 12 count muffin pan with liners, you may need another pan with two additional liners. Set aside.

    brown butter in a mixing bowl, showing brown bits of the butter

    Make sure you include all the dark brown bits with the brown butter. That is what brings the nutty flavor.

    brown butter and sugars creamed together in a mixing bowl

    In your stand mixer fitted with the paddle attachment or with a hand-held mixer, cream your solidified browned butter with the brown sugar, granulated sugar and kosher salt. Start on low until the butter and sugars are incorporated, then increase to medium until fluffy. You may need to scrape the bowl once or twice.

    batter in a mixing bowl after the eggs and vanilla have been added

    Now add the eggs and vanilla and mix on medium for approximately 1 - 2 minutes. Then scrape up and down the bowl.

    cupcake batter with sour cream and milk mostly mixed in

    With the mixer on low, add half the flour, baking powder and baking soda and mix until mostly incorporated. Add the milk and sour cream and mix on low until mostly incorporated.

    brown butter cupcake batter in a mixing bowl

    Scrape up and down your mixer bowl and then add the final half of the flour and mix on low until just combined.

    cupcake batter in muffin liners

    Divide the batter between the 12 liners, filling them about ยพ full. Youโ€™ll get at least 12 cupcakes and potentially up to 14.

    Bake for 16-20 minutes or until a toothpick inserted in the center comes out mostly clean.  Allow to cool completely before frosting. Please know these brown butter caramel cupcakes bake with fairly flat tops.

    how to make the best salted caramel frosting

    salted caramel frosting ingredients

    Gather the ingredients for the salted caramel frosting.

    butter beaten in a mixing bowl

    In a stand mixer with the paddle attachment or with a hand-held mixer, cream butter and vanilla on medium for approximately 2 minutes. You will likely need to scrape the bowl once during this time.

    butter and confectioners' sugar beaten together in a mixing bowl

    Scrape up and down the sides of the bowl and add the confectioners' sugar in 2 additions. Mix on low until incorporated, then increase the speed to medium-high and beat until well combined. Then add the final half of the confectioners's sugar, mixing on low and then up to medium-high until well combined. You will need to scrape the bowl a couple of times.

    salted caramel frosting in a mixing bowl

    Add the cool and room temperature salted caramel and mix on medium-high until light and fluffy. Add a pinch of salt if too sweet and 1 - 2 tablespoons of heavy cream or half and half if needed for a fluffier frosting.

    You can frost the completely cooled browned butter cupcakes in any way you like. To get the look in these pictures, I used a Wilton 1M tip and a disposable piping bag. The frosting yields just enough to give one rosette to each cupcake. Which is a very good thing in my case as I would just eat any remaining frosting with a spoon or spatula.๐Ÿ™ˆ It's just that good!!

    I used a little of the remaining salted caramel sauce to drizzle over the tops of the frosted brown butter cupcakes. This is completely optional, but in my opinion a little more caramel sauce is never a bad thing!๐Ÿ˜‰

    brown butter cupcake in a cupcake liner showing the soft and fluffy texture with a spoon of caramel sauce sitting nearby

    ๐Ÿ’ฌ frequently asked questions

    can I make the cupcakes in advance?

    Yes, the brown butter caramel cupcakes can be made a day ahead; store cooled cupcakes in an airtight container at room temperature. 

    If you need to bake even farther ahead, the freezer is your best friend when wanting to bake cupcakes ahead of time. Allow cupcakes to cool completely, then store in an airtight container in the freezer for up to 2 weeks. Let the cupcakes defrost, then decorate them.

    Or freeze the decorated cupcakes for up to three months.  I freeze them with frosting all the time!  Allow them to defrost at room temperature before serving, this takes about 30-45 minutes.

    what can I do with the leftover salted caramel sauce?

    Homemade salted caramel sauce is great on top of ice cream, drizzled over espresso brownies or as filling in brown sugar shortbread or peanut butter thumbprint cookies.

    why are my cupcakes dry?

    Dry cupcakes are often a result of too much flour or over baking. A kitchen scale will ensure that you have the correct amount of flour; this is the scale I use.  Remember your oven is different from mine and baking times may vary slightly.

    what if I don't want to make salted caramel frosting?

    Chocolate frosting ~ small batch chocolate Swiss meringue buttercream or the chocolate fudge buttercream from my chocolate snack cake would both be great options.

    Vanilla buttercream ~ my not-too-sweet American buttercream from vanilla snack cake would pair nicely with these browned butter cupcakes.

    ๐Ÿ‘ฉ๐Ÿปโ€๐Ÿณ tips for the best homemade cupcakes

    Use room temperature ingredients for the best cupcakes with browned butter.  Depending on the temperature of your kitchen you will want to pull out the milk, sour cream and eggs about 2 hours before baking. {My kitchen is on the cooler side, so I usually go 2-3 hours before baking}.

    Weigh the ingredients by using a food scale to ensure you have the correct amounts.

    Don't over mix the batter. When cake and cupcake batter is over mixed, it creates a more dense cake crumb. We are going for fluffy and moist!

    Use a cookie or ice cream scoop to get even amounts of batter into each liner. This helps the cupcakes to bake uniformly. Fill each cupcake liner about ยพ full of cupcake batter.

    Use good liners. These Paper Chef liners are my very favorite brand that I use in my kitchen. {not sponsored, just a fan!}

    For the best, moist and tender cupcakes, don't over bake them. Remove them from the oven when a toothpick or cake tester comes out with just a few moist crumbs.

    ๐Ÿซ™ how to store

    Store any leftover cupcakes in an airtight container at room temperature for up to 3 days.

    The browned butter cupcakes also freeze well for up to three months. I freeze them with frosting all the time.

    The cupcakes taste best at room temperature, so let them sit out for 30 -45 minutes prior to serving. {although I've eaten many cold from the refrigerator too! And my kids like them frozen!}

    cupcakes with a drizzle of caramel sauce over the frosting

    Remember to snap a picture and tag me @twosugarbugs on Instagram if you make these Brown Butter Cupcakes with Salted Caramel Frosting. It warms my heart to see you bring these recipes to life! Thank you for being here and happy baking!

    ๐Ÿง more easy cupcake recipes

    • Vanilla Cupcakes
    • Almond Joy Cupcakes
    • Cinnamon Cupcakes

    If you make this recipe {or any recipe!} from two sugar bugsย please come back and leave a review and a โญ๏ธโญ๏ธโญ๏ธโญ๏ธโญ๏ธ star rating.ย  I read every comment, and I LOVE hearing from you!

    Yield: 12 cupcakes

    Brown Butter Cupcakes with Salted Caramel Frosting

    brown butter cupcake on a plate with a spoon of caramel sauce in the foreground and milk and more cupcakes in the background

    Tender and flavorful brown butter cupcakes give a vanilla cupcake recipe an upgrade with brown butter. Topped with the best salted caramel frosting!

    I highly recommend using weight {metric} measurements when available for more accuracy and the best results.

    Prep Time 30 minutes
    Bake Time 20 minutes
    Additional Time 1 hour 30 minutes
    Total Time 2 hours 20 minutes

    Ingredients

    brown butter cupcakes

    • ยฝ cup browned butter* (unsalted butter) cooled at room temperature to solid state (113g)
    • ยผ teaspoon kosher salt
    • โ…“ cup packed brown sugar (67g)
    • โ…” cup granulated sugar (134g)
    • 2 large eggs, room temperature
    • 1 ยฝ teaspoons pure vanilla extract
    • 1 ยฝ cups all-purpose flour (188g)
    • ยฝ teaspoon baking powder
    • ยผ teaspoon baking soda
    • ยฝ cup milk**, room temperature (120mL)
    • ยผ cup sour cream, room temperature (60g)

    salted caramel sauce

    • 1 cup granulated sugar (200g)
    • 6 tablespoons unsalted butter, room temperature (85g)
    • ยฝ cup heavy cream, room temperature (120mL)
    • ยฝ teaspoon kosher salt

    salted caramel frosting

    • 5 tablespoons unsalted butter, room temperature (70g)
    • ยฝ teaspoon pure vanilla extract
    • 1 ยฝ cups confectioners' sugar (180g)
    • ยฝ cup salted caramel sauce (135g)
    • 1 -2 tablespoons heavy cream or half and half, if needed (15-30mL)
    • Pinch of salt if needed

    Instructions

    1. To brown the butter: cut cubes of unsalted butter (ยฝ cup/113g) and put in a light colored sauce pan and place over medium-low to medium heat and let it cook until small brown flakes form. You will want to stir or swirl the pan frequently after the butter has fully melted to keep it from burning. The butter will foam and bubble up along the process, just keep stirring/swirling and move the foam aside from time to time to check the color. The butter will turn an amber/brown color and will smell nutty and toasted when it's ready; it should take about 5-8 minutes.ย  Pour melted butter and all the browned bits into a bowl to cool and solidify. You will have about 95g of butter after browning due to the water loss.
    2. Now is the time to make your salted caramel sauce: Add one cup of granulated sugar (200g) to a medium saucepan and heat over medium, stirring constantly. Use a wooden spoon or a high heat resistant rubber spatula.
    3. The sugar will start to melt. Then it will clump together before melting into a thick amber colored liquid.
    4. When the sugar is fully melted, add the room temperature butter (6 tablespoons/85g). The butter will cause the sugar to bubble rapidly, so use caution in this step.
    5. Whisk the butter into the caramel until it is completely incorporated. I prefer using a whisk to keep the butter and sugar from separating, but your wooden spoon or spatula can work as well. When the butter and sugar are fully incorporated, slowly add the room temperature heavy cream (ยฝ cup/120mL) while continuing to whisk (or stir). Again, the mixture will bubble rapidly, so use caution.
    6. Let the mixture boil for 30-60 seconds.
    7. Remove from the heat and stir in ยฝ teaspoon of kosher salt. Carefully pour caramel into a heatproof container and allow to cool to room temperature before using. (you can always place it in the refrigerator for 15 minutes or so if needed, but you want it at room temperature before adding it to the frosting).
    8. You will have left over caramel sauce, store covered in the refrigerator for up to two - three weeks.

      To make the cupcakes: Once browned butter has cooled at room temperature and is solid (about 1-2 hours), preheat your oven to 350ยฐF/177ยฐC. Prepare a 12 count muffin pan with liners, you may need another pan with two additional liners. Set aside.

      In your stand mixer fitted with the paddle attachment or with a hand-held mixer, cream your solidified browned butter with the brown sugar (โ…“ cup/67g), granulated sugar (โ…” cup/134g) and kosher salt (ยผ teaspoon). Start on low until the butter and sugars are incorporated, then increase to medium (speed 6 on KitchenAid) for 2-3 minutes or until fluffy. You may need to scrape the bowl once or twice.

      Now add the eggs (2 large) and vanilla (1 ยฝ teaspoons) and mix on medium for approximately 1 - 2 minutes. Then scrape up and down the bowl.

      With the mixer on low, add half the flour (total flour amount is 1 ยฝ cups/188g), baking powder (ยฝ teaspoon) and baking soda (ยผ teaspoon) and mix until mostly incorporated. Add the milk (ยฝ cup/120mL) and sour cream (ยผ cup/60g) and mix on low until mostly incorporated. Scrape up and down your mixer bowl and then add the final half of the flour and mix on low until just combined.

      Divide the batter between the 12 liners, filling them about ยพ full. Youโ€™ll get at least 12 cupcakes and potentially up to 14. Bake for 16-20 minutes or until a toothpick inserted in the center comes out mostly clean.ย  Allow to cool completely before frosting.

      For the salted caramel frosting: in a stand mixer with the paddle attachment or with a hand-held mixer, cream butter (5 tablespoons/70g) and vanilla (ยฝ teaspoon) on medium for approximately 2 minutes. You will likely need to scrape the bowl once during this time.

      Scrape up and down the sides of the bowl and add the confectioners' sugar in 2 additions (total amount is 1 ยฝ cups/180g). Mix on low until incorporated, then increase the speed to medium-high (speed 8 on KitchenAid) and beat until well combined, about 2-3 minutes. Then add the final half of the confectioners's sugar, mixing on low and then up to medium-high until well combined. You will need to scrape the bowl a couple of times.

      Add the cool and room temperature salted caramel (ยฝ cup/135g) and mix on medium-high until light and fluffy, approximately 3-4 minutes. Add a pinch of salt if too sweet and 1 - 2 tablespoons of heavy cream or half and half (15-30mL) if needed for a fluffier frosting.

      Then decorate the cupcakes by piping or spooning the frosting on top and drizzle with a little more caramel sauce, if desired.

    Notes

    *a half cup of butter is what you need to brown, this will be a little under a half cup after browning, which has been accounted for in the recipe.

    **I use 1% milk for the brown butter cupcakes, but 2% or whole milk also works.

    You will have left over caramel sauce, store covered in the refrigerator for up to two - three weeks. Recipe was slightly adapted from Sally's Baking Addiction.

    I used a Wilton 1M for decorating the cupcakes in the photos.

    Store any leftover cupcakes in an airtight container at room temperature for up to 3 days. The cupcakes also freeze well for up to three months. I freeze them with frosting all the time. Allow them to defrost at room temperature before serving.

    Nutrition Information:

    Yield:

    14

    Serving Size:

    1

    Amount Per Serving: Calories: 410Total Fat: 21gSaturated Fat: 13gTrans Fat: 0gUnsaturated Fat: 7gCholesterol: 83mgSodium: 201mgCarbohydrates: 53gFiber: 0gSugar: 42gProtein: 3g

    The nutrition information is based on third-party calculations, is an estimate only and may not be entirely accurate. Actual nutritional values will vary based on brands used and portion sizes.
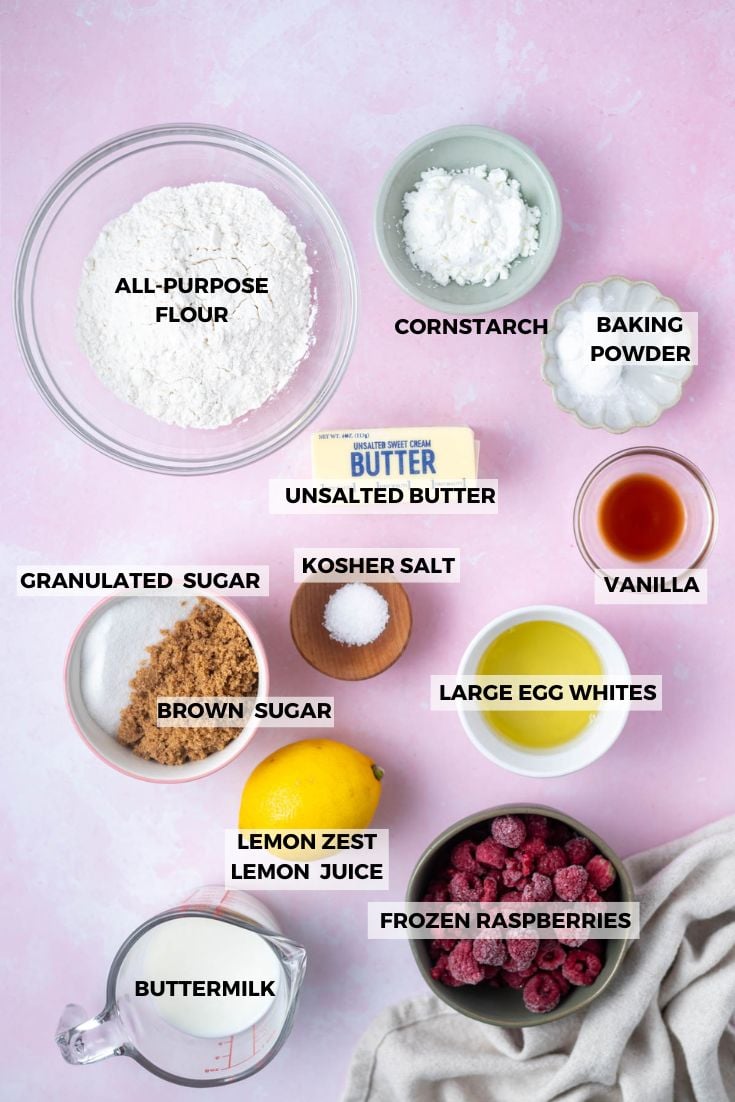
    Did you make this recipe?

    Please make my day and PIN to Pinterest and share a photo on Instagram ~ making sure to tag @twosugarbugs! THANK YOU!!

    © Tasia
    Cuisine: American / Category: Cakes and Cupcakes

    Recipe shared with Meal Plan Monday, Full Plate Thursday and Weekend Potluck

    Moist Carrot Cake Bundt Cake

    slice of carrot cake on a plate with a bite on a fork

    This carrot bundt cake is super moist, perfectly spiced and so flavorful.ย  Simple to make using a bundt pan and decorated with a quick cream cheese frosting.ย  This carrot cake bundt cake will be the star of the show for holidays!

    slice of carrot cake on a plate with a bite on a fork

    Disclosure | This post may contain affiliate links. As an Amazon Associate I earn from qualifying purchases.

    Carrot cake is one of Big Eโ€™s favorite cake flavors, one she often chooses at Nothing Bundt Cakes.  But who wants a mini bundt cake when you can have a full size one?! We make this cake for birthdays, Sunday Dinner and it's also a perfect dessert for Easter.

    As a busy home baker, this easy to prepare carrot bundt recipe will be your new favorite. It is so quick to make and because itโ€™s a bundt cake, no decorations needed.  The exterior gets a slight crunch from the brown sugar, which is a great compliment to the creamy cream cheese icing.

    Much like my carrot cake sandwich cookies, the cream cheese frosting is a perfect match for this homemade cake.  Donโ€™t be surprised when people tell you itโ€™s the best carrot cake they have eaten.

    [feast_advanced_jump_to]

    ๐Ÿ’— why you will want to make this carrot cake

    • Spiced with cinnamon, ginger and nutmeg for a classic flavor.
    • Quick recipe ~ about 15 minutes of active time are needed to get this simple carrot cake in the oven.
    • No mixer required ~ neither the cake or the cream cheese icing use a mixer.
    • Fantastic texture ~ the crumb of this carrot bundt cake is SO soft and tender thanks to using oil as our main fat ingredient!
    • Made without nuts and no pineapple so the carrots can shine.
    overhead look at a cream cheese glazed bundt cake cut in slices

    ๐Ÿ’ญ how do you remove a bundt cake from the bundt pan?

    Generously butter a 10-12 cup bundt pan, making sure to get the butter on every nook and cranny of the interior surface.  Then dust over the butter with flour.  Tap the flour around in the bundt, again making sure every surface of the butter is lightly coated in flour.  You can also use a baking release spray here, if your pan advises it.  I have a Nordic Ware pan and it recommends butter or shortening with flour or a baking spray containing flour, but not regular cooking spray. For a visual of a prepared pan, see my milky way cake post.

    Remove the bundt cake from the oven when done baking and allow it to sit for 10-15 minutes {set a timer!}, then place a metal cooling rack over the top of the bundt pan and turn the pan over onto the cooling rack and release the cake. If you prepared the pan well, it should slide right out.

    ๐Ÿ›’ ingredients and substitutions

    Please scroll to the printable recipe card at the end of this post for the full list of ingredients and baking directions.

    ingredients for carrot bundt cake
    • All-purpose flour ~ Too much flour can result in a cake with a dry texture. A kitchen scale is the most accurate way to measure. If using measuring cups; fluff the flour in the container first. Then spoon the flour into the measuring cup and level it off with the back of a knife.
    • Sugars ~ both granulated {white} sugar and brown sugar are used to add sweetness and structure to the carrot cake.
    • Spices ~ ground cinnamon, ginger and nutmeg add some depth to the flavor of this carrot bundt cake. 
    • Oil ~ itโ€™s hard to beat the moisture we get from oil in a cake!  Vegetable or canola oil can be used.
    • Eggs ~ you'll need four large eggs for moisture and structure.  To make sure the batter comes together properly, have your eggs at room temperature.
    • Vanilla ~ balances and brings depth to the flavors of this bundt cake.
    • Carrots ~ use fresh carrots and grate them yourself.  I use the small holes of my box grater to get nice small carrot shreds.  The carrots will seem wet and that is what adds extra moisture to the cake.  Please do not use pre-shredded carrot as they tend to be dry and wonโ€™t yield the best, moist carrot cake.
    • Baking soda ~ to help the cake rise and have the best soft texture.
    • Kosher salt ~ balances the flavors. If you only have table salt, use half the amount.
    • Confectionersโ€™ sugar, butter and cream cheese {not shown} for the cream cheese frosting glaze.

    Pro tip ~ to quickly bring eggs to room temperature, place them in a bowl of warm tap water for 5-10 minutes.

    ๐Ÿฅฃ how to make this simple carrot bundt cake

    Preheat the oven to 350ยฐF/177ยฐC.

    Generously butter a 10-12 cup bundt pan, making sure to get the butter on every nook and cranny of the interior surface.  Then dust over the butter with flour.  See above in the post or in the recipe card below for more descriptive instructions on using a bundt pan.

    sugars, eggs, oil and vanilla whisked in a bowl with a bowl of flour and grated carrots nearby

    In a large bowl add the all-purpose flour, baking soda, kosher salt, cinnamon, ginger and nutmeg and whisk to combine. In another large bowl add the vegetable oil, granulated sugar, brown sugar, vanilla and eggs and whisk until no clumps of brown sugar remain.

    grated carrots mixed into wet ingredients in a mixing bowl with a spatula

    Then fold in the grated carrots with a spatula.

    carrot cake batter in a bowl with a spatula

    Add the wet ingredients to the dry ingredients and fold together with a spatula until just combined.

    cake batter in a bundt pan

    Pour the batter into the prepared bundt pan and bake for 40-55 minutes or until a toothpick inserted into the cake comes out clean. This is a dense and heavy cake and takes a bit to bake.

    Remember your oven is different than mine and the bake time could vary a little. If the cake looks like it is browning too much, lightly tent it with aluminum foil.

    Remove the cake from the oven and allow to sit for 10-15 minutes {set a timer!}, then place a metal cooling rack over the top of the bundt pan and turn the pan over onto the cooling rack and release the cake. 

    Allow the bundt cake to cool completely before adding the cream cheese frosting.

    how to make the cream cheese frosting glaze

    cream cheese, butter and vanilla in a small saucepan

    Add the cream cheese, butter and vanilla in a small to medium saucepan. {if you have a microwave, you can do this in a microwave safe bowl}.

    butter, cream cheese and vanilla mixed together in a small saucepan

    Use a spoon to mix the icing ingredients together. Once well combined, stir in the confectioners' sugar. The mixture will be thick and takes a little stirring to bring it all together.

    simple cream cheese frosting glaze in a small saucepan

    Then lightly warm the mixture on the stovetop over low heat {or in the microwave} until it reaches a consistency where you can drizzle it.

    {I'm too lazy busy, so I don't sift the confectioners' sugar, which will leave a few lumps in the icing. I find they tend to even out once I warm the mixture, but if you want a completely smooth icing you can sift the confectioners' sugar}.

    Drizzle the frosting over the top of the cooled cake and allow to set. Big E loves how this icing sets soft and isn't as sweet as many cream cheese frostings.

    slice of cake on a plate with a napkin in the foreground and flowers in the background

    ๐Ÿ’ฌ frequently asked questions

    can I make this cake ahead?

    Yes!ย  This carrot bundt cake is super moist and will hold up well. The cake can be made the day before serving.ย  Allow the cake to cool completely, then wrap tightly and store at room temperature.ย Make the cream cheese frosting and frost the cake a few hours before serving. Once frosted, you will want to store the cake in the refrigerator.

    what if I donโ€™t like cream cheese frosting?

    The white chocolate glaze from this raspberry and white chocolate loaf cake would be delicious! {I would double the recipe for the bundt cake}. Or the vanilla glaze from this Oreo pound cake. A simple dusting of confectionersโ€™ sugar just before serving is also a great option {the carrot cake is very moist, so the sugar will melt into it}.

    can I add any mix-ins?

    Yes, up to one cup of toasted pecans or walnuts can be added.ย  For coconut or raisins, add a ยฝ cup.ย Fold any of these additions in at the end of mixing.

    can this be baked in a different pan?

    Yes, for cupcakes {you will get about 24}, fill cupcake liners about โ…” full and bake about 16-20 minutes.ย For a 9x13 sheet cake, bake about 30-35 minutes. For a layer cake, split the batter between two 9-inch rounds and bake 25-35 minutes.

    Remember to pin this recipe to Pinterest! Use the button on the recipe card or the share buttons on the side or bottom of this page.

    ๐Ÿ‘ฉ๐Ÿปโ€๐Ÿณ tips for the best from scratch carrot cake

    Use a kitchen scale to ensure you have the correct amount of flour. Adding too much flour can result in a dry carrot cake. If you don't have a scale, fluff the flour in it's container then spoon it into your measuring cup and use the back of a knife to level it.

    Grate your own fresh carrots.  Pre-shredded store bought carrots are dry and will not add the right amount of moisture to this cake.

    Prepare your bundt pan properly!  See the โ€œhow to remove a bundt cake from a bundt panโ€ above for details.

    Be careful not to over bake this cake! Remember your oven is different than mine and baking times may vary slightly.

    ๐Ÿซ™ how to store

    Store any cake leftovers wrapped tightly in the refrigerator for up to 5 days. 

    The carrot cake bundt cake can also be frozen for up to 2 months. Wrap the completely cool cake tightly and then place in an airtight container or zip-top bag.   Allow the cake to defrost overnight in the refrigerator and then bring to room temperature before serving.

    slice of carrot cake on a plate with a fork holding a bite and red flowers in the background

    Remember to snap a picture and tag me @twosugarbugs on Instagram if you make this Moist Carrot Bundt Cake. It warms my heart to see you bring these recipes to life! Thank you for being here and happy baking!

    ๐Ÿฐ more easy cake recipes

    • Chocolate Snack Cake
    • Sugar Cookie Cake
    • Vanilla Snack Cake

    If you make this recipe {or any recipe!} from two sugar bugsย please come back and leave a review and a โญ๏ธโญ๏ธโญ๏ธโญ๏ธโญ๏ธ star rating.ย  I read every comment, and I LOVE hearing from you!

    ๐Ÿ“– recipe

    slice of carrot cake on a plate with a bite on a fork
    Print Recipe

    Moist Carrot Cake Bundt Cake

    This carrot bundt cake is super moist, perfectly spiced an so flavorful. Simple to make using a bundt pan and decorated with a quick cream cheese frosting.
    Prep Time20 minutes mins
    Cook Time45 minutes mins
    Cooling Time1 hour hr
    Total Time2 hours hrs 5 minutes mins
    Course: Cakes and Cupcakes
    Cuisine: American
    Keyword: bundt cake, carrot cake, cream cheese frosting
    Servings: 16 slices
    Calories: 399kcal
    Author: Tasia Harper

    Ingredients

    carrot cake

    • 2 cups all-purpose flour (250g)
    • 2 teaspoons baking soda
    • ยฝ teaspoon kosher salt
    • 1 ยฝ teaspoons ground cinnamon
    • 1 teaspoon ground ginger
    • ยผ teaspoon ground nutmeg
    • 1 cup +2 tablespoons vegetable oil (265mL)
    • ยฝ cup granulated sugar (100g)
    • 1 ยฝ cups packed brown sugar (300g)
    • 2 teaspoons pure vanilla extract
    • 4 large eggs room temperature
    • 2 cups peeled and grated carrots about 4 large (260g)

    Cream Cheese frosting

    • 4 ounces cream cheese room temperature (114g)
    • ยผ cup unsalted butter room temperature (57g)
    • 1 teaspoon pure vanilla extract
    • 1 ยฝ cups confectioners' sugar (180g)

    Instructions

    • Preheat the oven to 350ยฐF/177ยฐC.
    • Generously butter a 10-12 cup bundt pan, making sure to get the butter on every nook and cranny of the interior surface.ย  Then dust over the butter with flour.ย  Tap the flour around in the bundt, again making sure every surface of the butter is lightly coated in flour.ย  You can also use a baking release spray here, if your pan advises it.ย ย I have a Nordic Ware pan and it recommends butter or shortening with flour or a baking spray containing flour, but not regular cooking spray.ย 
    • In a large bowl add the all-purpose flour (2 cups/250g), baking soda (2 teaspoons), kosher salt (ยฝ teaspoon), cinnamon (1 ยฝ teaspoons), ginger (1 teaspoon) and nutmeg (ยผ teaspoon) and whisk to combine.
    • In another large bowl add the vegetable oil (1 cup + 2 tablespoons/265mL), granulated sugar (ยฝ cup/100g), brown sugar (1 ยฝ packed cups/300g), vanilla (2 teaspoons) and eggs (4 large) and whisk until no clumps of brown sugar remain. Then fold in the grated carrots (2 cups/260g) with a spatula.
    • Add the wet ingredients to the dry ingredients and fold together with a spatula until just combined.
    • Pour the batter into the prepared bundt pan and bake for 40-55 minutes or until a toothpick inserted into the cake comes out clean. This is a dense and heavy cake and takes a bit to bake. Remember your oven is different than mine and the bake time could vary a little. If the cake looks like it is browning too much, lightly tent it with aluminum foil.
    • Remove the cake from the oven and allow to sit for 10-15 minutes (set a timer!), then place a metal cooling rack over the top of the bundt pan and turn the pan over onto the cooling rack and release the cake.ย  Allow the cake to cool completely before adding the cream cheese frosting.
    • For the cream cheese frosting:ย combine the cream cheese (4 ounces/114g), butter (ยผ cup/57g) and vanilla (1 teaspoon) in a medium saucepan with a spoon. (if you have a microwave, you can do this in a microwave safe bowl). Once well combined, stir in the confectioners' sugar (1 ยฝ cups/180g). The mixture will be thick and takes a little stirring to bring it all together. Then lightly warm the mixture on the stovetop over low heat (or in the microwave) until it reaches a consistency where you can drizzle it.
    • Drizzle the frosting over the top of the cooled cake and allow to set.

    Notes

    The cake can be made the day before serving. Allow the cake to cool completely, then wrap tightly and store at room temperature. Make the cream cheese frosting and frost the cake a few hours before serving. Once frosted, you will want to store the cake in the refrigerator.
    Do not use cream cheese spread for the frosting. Use brick cream cheese that is sold in 8 ounce blocks.
    You want the moisture from freshly grated carrots, so please don't use pre-shredded carrots from the grocery store.
    Cover leftovers tightly and store in the refrigerator for up to 5 days. The carrot cake bundt cake can also be frozen for up to 2 months. Wrap the completely cool cake tightly and then place in an airtight container or zip-top bag. ย  Allow the cake to defrost overnight in the refrigerator and then bring to room temperature before serving.

    Nutrition

    Serving: 1 slice | Calories: 399kcal | Carbohydrates: 52g | Protein: 4g | Fat: 20g | Saturated Fat: 6g | Polyunsaturated Fat: 8g | Monounsaturated Fat: 5g | Trans Fat: 0.2g | Cholesterol: 56mg | Sodium: 265mg | Potassium: 125mg | Fiber: 1g | Sugar: 38g | Vitamin A: 2917IU | Vitamin C: 1mg | Calcium: 41mg | Iron: 1mg

    Soft Lemon Coconut Cookies

    overhead look at lemon coconut cookies

    Lemon coconut cookies are simple drop cookies.  They are pillowy, soft and thick and filled with lemon zest and sweet coconut.  You will love this quick and easy recipe as no chill time is needed.

    overhead look at lemon coconut cookies

    Disclosure | This post may contain affiliate links. As an Amazon Associate I earn from qualifying purchases.

    From lemon white chocolate cake, to crispy coconut cookies, lemon snack cake and coconut patties, we might have a thing with coconut and lemon in the two sugar bugs house! Not to mention I have a coconut cake every year for my birthday.

    With decades of cookie baking in my back pocket, I have learned a thing or two about baking cookies!ย  As a busy baker myself, I am always looking for ways to make the best ever cookies that I can make quickly. So I have another no chill cookie recipe for you. They also share the soft and chewy texture of my blueberry white chocolate cookies and coconut sugar cookies and are super easy to put together.

    [feast_advanced_jump_to]

    ๐Ÿ‹ why you will love this drop cookie recipe

    • A quick and easy cookie dough.
    • Sweet coconut pairs perfectly with tart lemon, giving a bit of a tropical vibe.
    • The cookies have a thick, pillowy soft and chewy texture.
    • No chill time is needed so no waiting for the cookie dough to firm up in the refrigerator.
    stack of thick cookies with purple flowers in the background

    ๐Ÿ’ญ how do I know when my cookies are done?

    For these lemon coconut cookies, the edges will be set and the center will look barely dry. Cookies continue to bake once they are removed from the oven so for a soft and chewy cookie, you want to remove it before it looks done.

    Please remember that a "perfect" cookie texture is different for everyone! If you like a slightly raw cookie middle, bake a minute or two less. If you prefer a crunchy cookie, bake a minute or two more. Your oven is different than mine, so that can make the bake time vary as well. With a new cookie recipe, I always start checking my cookies 1-2 minutes before the recommended bake time.

    ๐Ÿ›’ ingredients and substitutions

    Please scroll to the printable recipe card at the end of this post for the full list of ingredients and baking directions.

    ingredients for lemon coconut cookies
    • Butter ~ If you only have salted butter, leave out the kosher salt. The butter should be room temperature, which is colder than you think! 65ยฐF is the temperature you should be aiming for. I use my Thermapen to quickly check the butter temperature.
    • Granulated sugar ~ these lemon and coconut cookies are more similar to a drop sugar cookie, so they only use white sugar.
    • Kosher salt ~ to balance the flavors and sweetness. If you only have table salt, use half the amount.
    • Eggs ~ 2 large eggs are needed, room temperature is best, so pull them out of the refrigerator when you pull out the butter.
    • Vanilla ~ pure vanilla extract is my preference, it adds flavor.
    • Baking soda ~ just a little to help the cookies rise.
    • All-purpose flour ~ for structure. If you don't use a kitchen scale {this is the scale I use and love}, use the spoon and level method to ensure you don't have too much flour. {Fluff the flour in the container, then spoon it into your measuring cup and level it off with the back of a knife}.
    • Lemon Zest ~ two large size lemons should give you what you need. The zest is what brings the burst of lemon flavor to the cookie dough.
    • Lemon juice ~ zest the lemons first, then juice them.
    • Flaked sweetened coconut ~ sweetened coconut flakes can be found in the baking aisle.

    Pro tip ~ to quickly bring eggs to room temperature, place them in a bowl of warm tap water for 5-10 minutes.

    ๐Ÿฅฃ how to make these easy drop cookies

    Preheat oven to 350ยฐF and prepare two sheet pans with parchment paper or silicone baking mats and set aside.

    granulated sugar with lemon zest mixed in in a small bowl

    Zest the lemons and work the 2 tablespoons of lemon zest into the granulated sugar with your clean fingers.

    butter and salt creamed together in a mixing bowl

    In the bowl of a stand mixer with the paddle attachment or with a hand held mixer, beat the unsalted butter, lemon zest granulated sugar and kosher salt until combined and lighter in color. Scrape up and down the bowl.

    cookie dough in a mixing bowl after the eggs, sugar and lemon juice have been added

    Add the eggs, vanilla and lemon juice and beat on medium until combined. The acidity of the lemon juice will cause the mixture to look curdled. Stop and scrape the bowl about 30 seconds into mixing and it should come together better.

    cookie dough with a bit of flour still showing in mixing bowl

    Now add the baking soda and beat on medium until incorporated. Then add the all-purpose flour and mix on low until some streaks of flour remain.

    cookie dough after coconut has been mixed in with a spatula

    Add the sweetened coconut flakes and stir in with a spatula.

    scoops of lemon coconut cookie dough on a parchment lined baking sheet

    Use a cookie scoop or about 2 tablespoons of dough per cookie (41-42g per cookie) and place on the prepared baking pans. I put 9 cookies on each pan. If you would like a flatter finished cookie, use the heel of your hand or a flat bottom cup to flatten the dough to about ยผ inch.

    cookies on a cooling rack

    Bake for 9-12 minutes or until the edges are set and the center of the cookies look slightly dry. I personally love the slightly more rustic look without flattening these cookies {the cookies on the left have been flattened, while the row on the right has not}.

    Allow the cookies to cool on the baking pan for 3-5 minutes, then move to a wire rack to cool completely.

    Remember to pin this recipe to Pinterest! Use the button on the recipe card or the share buttons on the side or bottom of this page.

    ๐Ÿ’ฌ frequently asked questions

    do I need to grease the cookie sheet?

    No, please donโ€™t!  Greasing the cookie sheet can cause cookies to spread and have less rise than desired.  I recommend parchment sheets or silicone baking mats for your cookie pans.

    why are my cookies dry?

    Too much flour, over mixing and over baking are the three biggest culprits in a dry cookie. I am a big believer in using a kitchen scale to weigh my ingredients, which means you have the correct amount of flour.

    To avoid over mixing the cookie dough, mix in the flour until a few streaks remain. Then mix in the coconut with a spatula until the dough comes together.

    As for over baking, this is probably the number one mistake I see people make when baking cookies. The cookies should have set edges, but still look a little soft in the center when you remove them from the oven.

    do I need to chill my cookie dough?

    No, not for this lemon coconut cookie recipe. I know you don't want to wait for cookie dough to chill, so this recipe was created so it can go straight in the oven.

    Some recipes do require chilling, so be sure to follow the instructions for the cookie recipe you are making.

    pile cookies with lemon slices and coconut

    ๐Ÿ‘ฉ๐Ÿปโ€๐Ÿณ tips for the best homemade cookies

    • Be sure your butter is at the correct temperature, which is room temperature for this recipe. That means you should be able to make an indent with your finger, but the butter shouldn't be shiny and your finger shouldn't sink into the butter. Depending on the temperature of your kitchen it will take 1-2 hours.
    • Zest the lemons first and then squeeze them for the fresh juice.  This is my favorite zesting tool and lemon or lime squeezer.
    • I'm a broken record on flour, but using a kitchen scale is going to get you the correct amount. Too much flour can lead to a dry cookie.  I use this OXO scale, but if you are looking for a more economical option this Escali digital scale is also a great one.
    • Use a cookie scoop for uniformly sized cookies. A size 30 scoop is my favorite.
    • Lighter colored pans help cookies to bake more gently, which equals a softer cookie.
    • I'm a big fan of parchment paper for baking. It helps the lemon coconut cookies bake more evenly, helps to keep the cookies from spreading and sticking and makes for easy clean up. King Arthur makes some great precut parchment sheets.
    • Don't over bake the cookies. In my opinion, this is the number one mistake home baker's make. To keep the cookies soft and chewy we want the centers slightly underdone. They will continue cooking as they cool and the centers will firm up.

    ๐Ÿซ™ how to store

    Lemon coconut cookies will stay fresh in an airtight container at room temperature for 3-4 days.

    They also freeze well for up to 3 months. Allow to defrost at room temperature for 15-20 minutes.

    unclose look at cookies with a bowl of lemons in the background

    Remember to snap a picture and tag me @twosugarbugs on Instagram if you make these Soft Lemon Coconut Cookies. It warms my heart to see you bring these recipes to life! Thank you for being here and happy baking!

    ๐Ÿ‹ ๐Ÿฅฅ more lemon or coconut recipes

    • Lemon Raspberry Bars
    • Mom's Lemon Bars
    • Almond Cookie Bars {with Coconut}
    • Lemon Bar Cookies

    If you make this recipe {or any recipe!} from two sugar bugsย please come back and leave a review and a โญ๏ธโญ๏ธโญ๏ธโญ๏ธโญ๏ธ star rating.ย  I read every comment, and I LOVE hearing from you!

    ๐Ÿ“– recipe

    Yield: 24 cookies

    Soft Lemon Coconut Cookies

    overhead look at lemon coconut cookies

    Lemon coconut cookies are simple drop cookies.ย  They are pillowy soft and thick and filled with lemon zest and sweet coconut.ย  You will love this quick and easy recipe as no chill time is needed.

    I highly recommend using weight {metric} measurements when available for more accuracy and the best results.

    Prep Time 15 minutes
    Bake Time 12 minutes
    Total Time 27 minutes

    Ingredients

    • 1 ยผ cups granulated sugar (250g)
    • 2 tablespoons lemon zest, about 2 large lemons
    • 1 cup unsalted butter, room temperature (226g)
    • ยฝ teaspoon kosher salt
    • 2 large eggs, room temperature
    • 1 teaspoon pure vanilla extract
    • 2 tablespoons fresh lemon juice (30mL)
    • ยฝ teaspoon baking soda
    • 3 cups all-purpose flour (375g)
    • 1 cup sweetened coconut flakes (120g)

    Instructions

    1. Preheat oven to 350ยฐF and prepare two sheet pans with parchment paper or silicone baking mats and set aside.
    2. Zest the lemons and work the 2 tablespoons of lemon zest into the granulated sugar (1 ยผ cups/250g) with your clean fingers.
    3. In the bowl of a stand mixer with the paddle attachment or with a hand held mixer, beat the unsalted butter (1 cup/226g), lemon zest (2 tablespoons) granulated sugar (1 ยผ cups/250g) and kosher salt (ยฝ teaspoon) on low - medium-low until combined, then medium (speed 4 on a KitchenAid) for 2 minutes until lighter and combined. Scrape up and down the bowl.
    4. Add the eggs (2 large), vanilla (1 teaspoon) and lemon juice (2 tablespoons) and beat on medium until combined, about 1 minute. The mixture will get very curdled due to the acidity of the lemon juice, stop and scrape the bowl about 30 seconds into mixing and it should come together better.
    5. Now add the baking soda (ยฝ teaspoon) and beat on medium until incorporated, about 30 seconds.
    6. Then add the all-purpose flour (3 cups/375g) and mix on low (stir on a KitchenAid) until some streaks of flour remain. Add the sweetened coconut flakes (1 cup/120g) and stir in with a spatula.
    7. Use a cookie scoop or about 2 tablespoons of dough per cookie (41-42g per cookie) and place on the prepared baking pans. I put 9 cookies on each pan. If you would like a flatter finished cookie, use the heel of your hand or a flat bottom cup to flatten the dough to about ยผ inch. I personally love the slightly more rustic look without flattening these cookies.
    8. Bake for 9-12 minutes or until the edges are set and the center of the cookies look slightly dry. (I bake one pan at a time). Allow the cookies to cool on the baking pan for 3-5 minutes, then move to a wire rack to cool completely.

    Notes

    If you only have salted butter, leave out the kosher salt.

    If you only have table salt, use half the amount.

    Lemon coconut cookies will stay fresh in an airtight container at room temperature for 3-4 days. They also freeze well for up to 3 months. Allow to defrost at room temperature for 15-20 minutes.

    Nutrition Information:

    Yield:

    24

    Serving Size:

    1

    Amount Per Serving: Calories: 190Total Fat: 9gSaturated Fat: 6gTrans Fat: 0gUnsaturated Fat: 3gCholesterol: 36mgSodium: 70mgCarbohydrates: 25gFiber: 1gSugar: 12gProtein: 2g

    The nutrition information is based on third-party calculations, is an estimate only and may not be entirely accurate. Actual nutritional values will vary based on brands used and portion sizes.
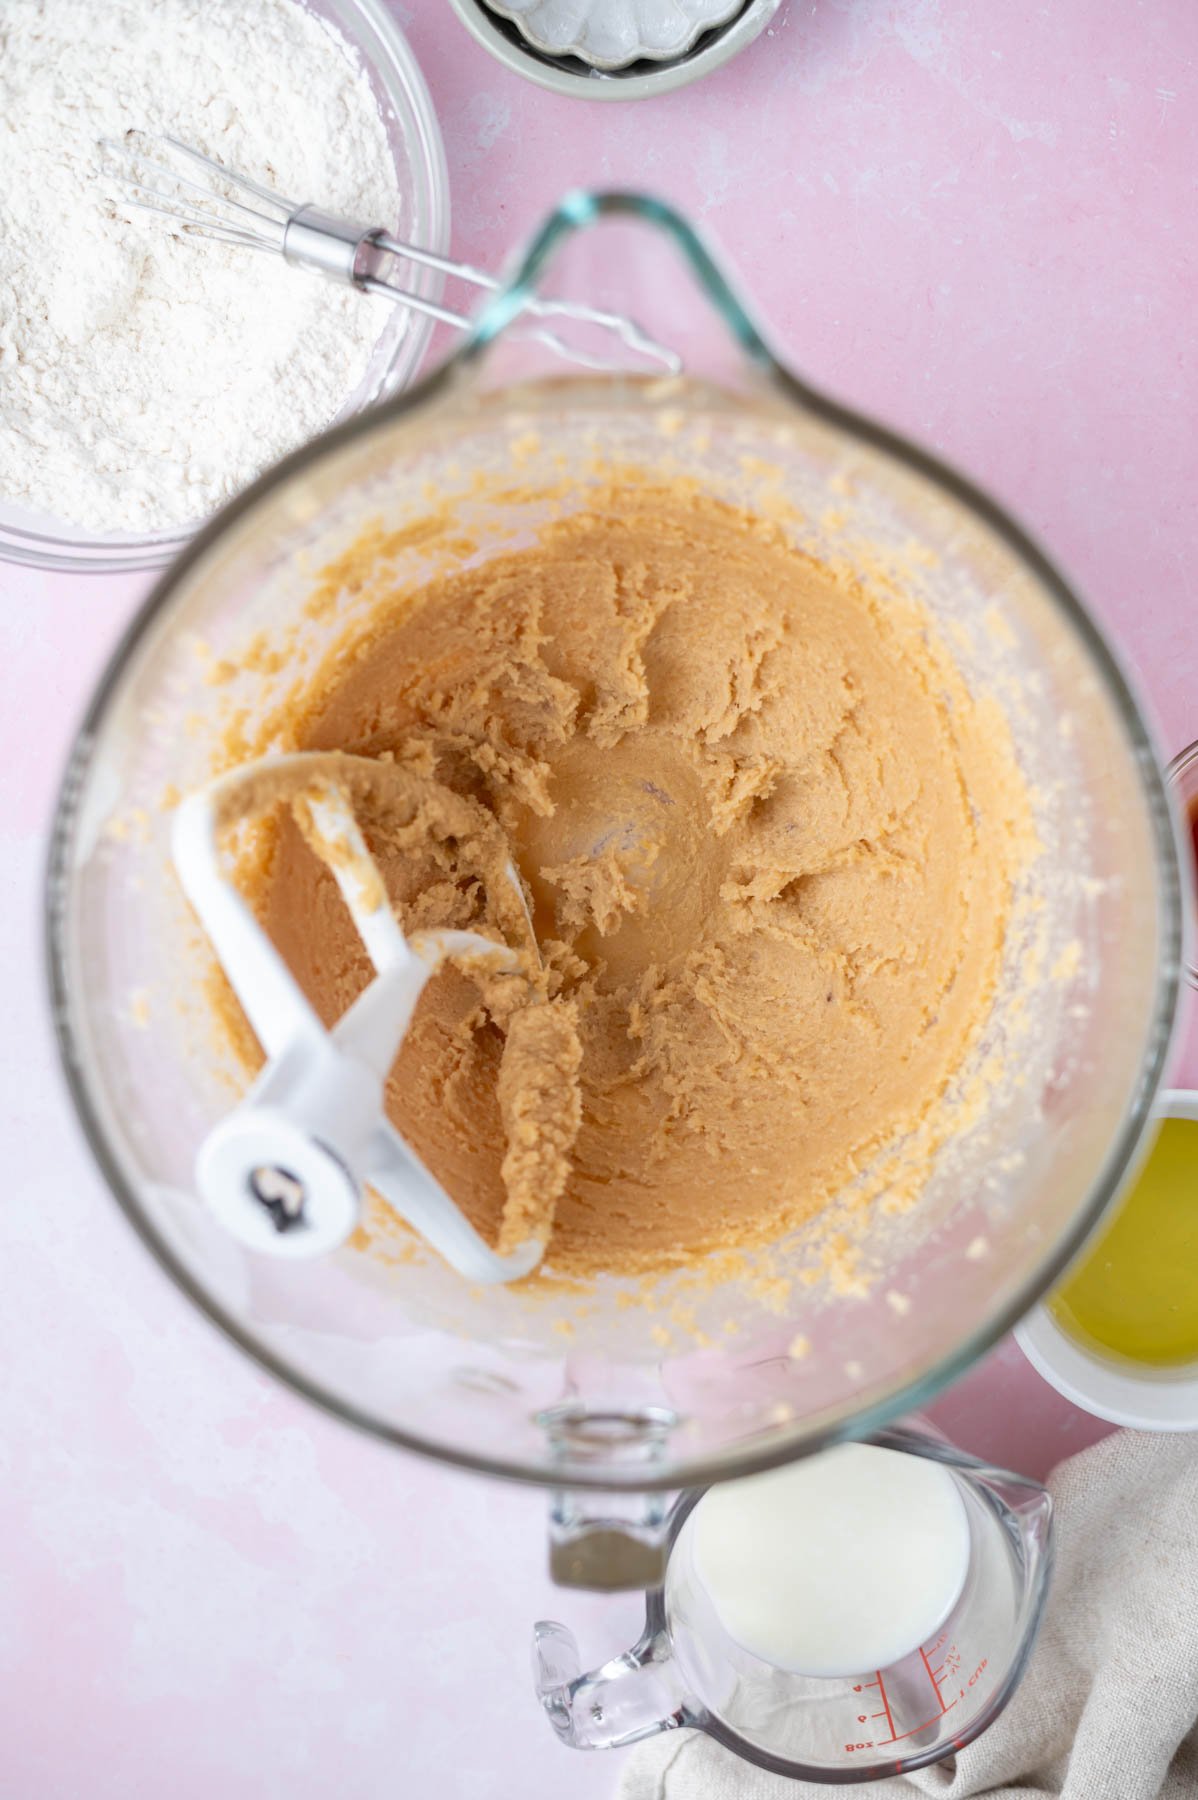
    Did you make this recipe?

    Please make my day and PIN to Pinterest and share a photo on Instagram ~ making sure to tag @twosugarbugs! THANK YOU!!

    © Tasia
    Cuisine: American / Category: Cookies

    Homemade Coconut Patties

    stack of chocolate candies with the top cut to show the coconut middle

    Homemade coconut patties have a sweet coconut filling that is covered in chocolate.  They are simple to make and taste like a mini Bounty Bar or a Mounds mini.

    This post was originally published in February of 2019 and has been updated with helpful information and new photos. The recipe remains the same.

    stack of chocolate candies with the top candy cut in half showing the coconut filling

    Disclosure | This post may contain affiliate links. As an Amazon Associate I earn from qualifying purchases.

    Making candy at home doesnโ€™t have to be hard! With decades of experience creating desserts, Iโ€™m going to walk you through making coconut patties from scratch {think peppermint patties, but without the peppermint}.

    Chocolate and coconut are a match made in heaven.ย  Coconut is sweet and luscious and just begs to be married with chocolate, like we do in these almond joy cupcakes, strawberry coconut chocolate bars, coconut brownies and chocolate coconut cream pie.ย  These homemade coconut patties have a creamy coconut filling that is dipped in rich, melted chocolate.

    The biggest trick to this recipe is to keep your coconut mixture cold. This means you will have a couple periods of wait time while the mixture chills in the freezer. I like to mix up the filling the evening before and let it chill overnight, but I have tested it with less chill time and have found 2 hours to be the minimum.

    [feast_advanced_jump_to]
    chocolate dipped coconut patties on a marble counter with a bowl of coconut

    ๐Ÿ’— why you should make these coconut patties

    Perfect for any occasion ~ birthdays, Valentineโ€™s Day, Easter, or an after dinner or party treat.

    Simple to make ~ mix the filling, chill, melt the chocolate, dip, chill and enjoy!

    No bake dessert ~ for when your oven is working overtime or itโ€™s too hot to bake.

    Full of coconut flavor ~ a Mounds or Bounty Bar copycat, they are bursting with coconut flavor and are a great alternative to peppermint patties.

    ๐Ÿฅฅ ingredients and substitutions 

    Please scroll to the printable recipe card at the end of this post for the full list of ingredients and baking directions.

    ingredients for coconut patties
    • Butter ~ I use unsalted butter, but salted butter could work here too.  The butter should be room temperature.
    • Confectionersโ€™ sugar ~ also known as powdered sugar, gives structure and sweetness to the homemade candy.
    • Coconut milk powder ~ used to give more coconut flavor. I used coconut milk powder, which I purchased from Amazon. I didn't want to add extra moisture with extra extract and the coconut milk powder adds excellent flavor and lets the mixture have a nice consistency. I use coconut milk powder when making coconut Swiss meringue buttercream, but know not everyone keeps this ingredient on hand, so I tested the recipe without it as well. While I prefer the version with the coconut milk powder, both versions taste delicious and I have instructions in the recipe card notes to make it without the coconut milk powder.
    • Flaked coconut ~ sweetened coconut flakes can be found in the baking aisle.
    • Coconut extract ~ adds another layer of coconut flavor.
    • Evaporated milk ~ NOT to be confused with sweetened condensed milk!  I used a 4 ounce can of Carnation evaporated milk, which is the smallest amount I could find.
    • Chocolate ~ Mr. two sugar bugs prefers them dipped in dark chocolate, while I like them best in milk chocolate. They will be fantastic with either, so use what you prefer the best.  I use Scharffen Berger or Trader Joeโ€™s Pound Plus chocolate bars.
    • Coconut oil ~ helps to thin out the melted chocolate, while also adding a little shine after the chocolate sets.

    ๐Ÿฅฃ how to make the chocolate dipped patties

    confectioners' sugar, butter and coconut mixed in a mixing bowl

    In a stand mixer fitted with the paddle attachment, or with a hand mixer, beat butter on medium until softened. Scrape down the bowl and add the confectioners' sugar, coconut milk powder and flaked coconut. Mix on low to combine. The mixture will look like coarse meal.

    coconut filling in a mixing bowl

    With the mixer on low, add in the coconut extract and then the evaporated milk. Switch the mixer to medium-low and beat until well combined. You will need to stop and scrape up and down the bowl at some point to make sure everything is well combined.

    coconut mixture on a confectioners' sugar coated piece of parchment paper

    Lay out a sheet of parchment or wax paper on your work surface and generously dust with confectioners' sugar. Dump your coconut mixture onto the sugared paper and lightly press it down with your spatula. Add a generous dusting of confectioners' sugar to the top of the dough and place another layer of paper over the top.

    parchment paper over candy filling on a cutting board with a rolling pin

    Then roll out the coconut mixture to the thickness of your liking. I rolled about ยผ inch thick. Place the rolled out coconut mixture onto a baking sheet and freeze for a minimum of 2 hours. {I typically mix dough in the evening and freeze overnight. The colder the coconut mixture, the easier it is to work with}.

    round and heart shaped coconut filling on a parchment lined baking pan

    Remove the dough from the freezer and cut into rounds with a circle cookie cutter, I used a 1.5 inch biscuit cutter {I also used a heart shape cookie cutter}. Return the coconut rounds to the parchment/wax paper lined baking sheet and return to the freezer for a minimum of 30 minutes.

    ๐Ÿซ how to cover the coconut candy in chocolate

    chopped chocolate and oil in a bowl atop a pot of water on the stove

    Melt the chocolate and coconut oil together using a double boiler. Stir until the chocolate and coconut oil are smooth and combined.

    hand holding a fork with a candy dipped in chocolate

    Working quickly, using a fork or candy making tools, dip each round in the melted chocolate. Gently tap the fork on the edge of the bowl to allow any excess chocolate to drip back into the bowl. Then place on a parchment/wax lined baking sheet. Repeat until all rounds have been covered.

    chocolate drizzled over chocolate dipped coconut patties

    If desired, use the remaining chocolate to drizzle over the tops of the chocolate dipped patties. {I use a zip-top sandwich bag and just cut off a teeny-tiny part of the corner of the bag}.

    Place the coconut patties back into the freezer to allow the chocolate to firm up, about 20 minutes.

    ๐Ÿงฐ tools recommended

    Fork or candy making tools.  I have both, but tend to just grab a fork when making them.  I have this set of candy dipping tools.

    Parchment or wax paper.  I use pre-cut parchment sheets, but wax paper also works great.  Use for rolling out the coconut filling rounds and for finishing the coconut patties after they have been dipped in chocolate.

    Round cookie/biscuit cutter. I use a 1.5 inch cutter from this Ateco set.

     ๐Ÿ‘ฉ๐Ÿปโ€๐Ÿณ tips for making homemade candy

    Keep the coconut cold! Keeping the coconut filling as cold as possible will make the cutting of the patties and dipping them in chocolate easier. I like to mix up the filling the evening before and let it chill overnight, but I have tested it with less chill time and have found 2 hours to be the minimum.

    Use extra confectionersโ€™ sugar {aka powdered sugar} to aid in the rolling of the candy filling.  If you find the mixture sticking to your cookie cutter, you can coat it in sugar as well.

    Prepare for the candy dipping. I like having a parchment lined baking sheet ready to go when I dipping my mini coconut patties into the chocolate.  

    Toppings nearby.  If you would like to add sprinkles, chopped nuts or cocoa powder to the tops of the finished candies, do it immediately after covering in chocolate so they will stick.  If using extra melted chocolate to drizzle over the tops of the patties, you can do that after the chocolate has firmed up.

    Remember to pin this recipe to Pinterest! Use the button on the recipe card or the share buttons on the side or bottom of this page.

    ๐Ÿ’ฌ frequently asked questions

    What should I use for dipping the coconut patties in chocolate?

    A fork works great, but if you have candy making tools, that works too!

    What can I use to cut out the coconut patty rounds?

    A 1.5 inch round cookie/biscuit cutter is recommended, but any simple small cookie cutter works as well {Iโ€™ve successfully made heart shapes}.  If you donโ€™t have a round cookie cutter, a small glass, like a champagne flute would work.

    ๐Ÿซ™ how to store

    Coconut patties should be stored in an airtight container in either the refrigerator or freezer.  You can place a layer of parchment or wax paper between the layers, if desired.  I did not have trouble with them sticking together, but this will ensure that they donโ€™t!

    They will last in the refrigerator up to one week and up to three months {or longer} in the freezer.  We eat them cold.

    chocolate candies, some in heart shapes with red and white sprinkles

    Remember to snap a picture and tag me @twosugarbugs on Instagram if you make these Homemade Coconut Patties. It warms my heart to see you bring these recipes to life! Thank you for being here and happy baking!

    ๐Ÿฅฅ more coconut dessert recipes to enjoy

    • Crispy Coconut Cookies
    • Almond Cookie Bars
    • Coconut Cream Pie
    • Almond Joy Pie

    If you make this recipe {or any recipe!} from two sugar bugsย please come back and leave a review and a โญ๏ธโญ๏ธโญ๏ธโญ๏ธโญ๏ธ star rating.ย  I read every comment, and I LOVE hearing from you!

    Yield: 24 candies*

    Homemade Coconut Patties

    stack of chocolate candies with the top cut to show the coconut middle

    Homemade coconut patties have a sweet coconut filling that is covered in chocolate. They are a simple to make candy and taste like a mini Bounty Bar.

    I highly recommend using weight {metric} measurements when available for more accuracy and the best results.

    Prep Time 20 minutes
    Chill Time 3 hours
    Total Time 3 hours 20 minutes

    Ingredients

    • 3 tablespoons unsalted butter, room temperature (43g)
    • 2 ยผ cups confectioners' sugar, packed (270g)
    • ยผ cup coconut milk powder** (24g)
    • 1 cup flaked coconut (120g)
    • 1 teaspoon coconut extract
    • 3 tablespoons evaporated milk (45mL)
    • 8 ounces chocolate chopped (dark, semi-sweet or milk)
    • 1 ยฝ tablespoons coconut oil (23g)

    Instructions

    1. In a stand mixer fitted with the paddle attachment, or with a hand mixer, beat butter (3 tablespoons/43g) on medium (speed 6 on a KitchenAid) until softened, about 1 minute. Scrape down the bowl and add the confectioners' sugar (2 ยผ cups/270g), coconut milk powder (ยผ cup/24g) and flaked coconut (1 cup/120g). Mix on low to combine, about 1 minute.
    2. The mixture will look like coarse meal.With the mixer on low, add in the coconut extract (1 teaspoon) and then the evaporated milk (3 tablespoons/45mL). Switch the mixer to medium-low (speed 4 on KitchenAid) and beat until well combined, about 1 minute. You will need to stop and scrape up and down the bowl at some point to make sure everything is well combined.
    3. Lay out a sheet of parchment or wax paper on your work surface and generously dust with confectioners' sugar. Dump your coconut mixture onto the sugared paper and lightly press it down with your spatula. Add a generous dusting of confectioners' sugar to the top of the dough. Then roll out the coconut mixture to the thickness of your liking. I rolled about ยผ inch thick.
    4. Place the rolled out coconut mixture onto a baking sheet and freeze for a minimum of 2 hours. (I typically mix dough in the evening and freeze overnight. The colder the coconut mixture, the easier it is to work with).
    5. Remove the dough from the freezer and cut into rounds with a circle cookie or biscuit cutter. (I also used a heart shape cookie cutter, I imagine any shape that isnโ€™t too intricate should work). Return the coconut rounds to the parchment/wax paper lined baking sheet and return to the freezer for a minimum of 30 minutes
    6. Melt the chocolate (8 ounces/227g) and coconut oil (1 ยฝ tablespoons/23g) together using a double boiler. Stir until the chocolate and coconut oil are smooth and combined.
    7. Working quickly, using candy making tools or a fork, dip each round in the melted chocolate. Gently tap the fork on the edge of the bowl to allow any excess chocolate to drip back into the bowl. Then place on a parchment/wax lined baking sheet. Repeat until all rounds have been covered.
    8. Place the coconut patties back into the freezer to allow the chocolate to firm up, about 20 minutes.

    Notes

    *Amount of candies will depend on how thick you roll them and the size of your cutter. 24 is a good average.

    **if you wish to omit the coconut milk powder, you can increase the confectioners' sugar to 2 ยฝ cups/300g and increase the coconut extract to 1 ยผ teaspoons. The rest of the recipe remains the same.

    Chocolate coconut patties are best kept stored in the freezer in an airtight container for up to 2 months.

    Recipe inspired and adapted fromย Beyond the Butter

    Nutrition Information:

    Yield:

    24

    Serving Size:

    1

    Amount Per Serving: Calories: 135Total Fat: 7gSaturated Fat: 5gTrans Fat: 0gUnsaturated Fat: 1gCholesterol: 7mgSodium: 21mgCarbohydrates: 18gFiber: 1gSugar: 16gProtein: 1g

    The nutrition information is based on third-party calculations, is an estimate only and may not be entirely accurate. Actual nutritional values will vary based on brands used and portion sizes.
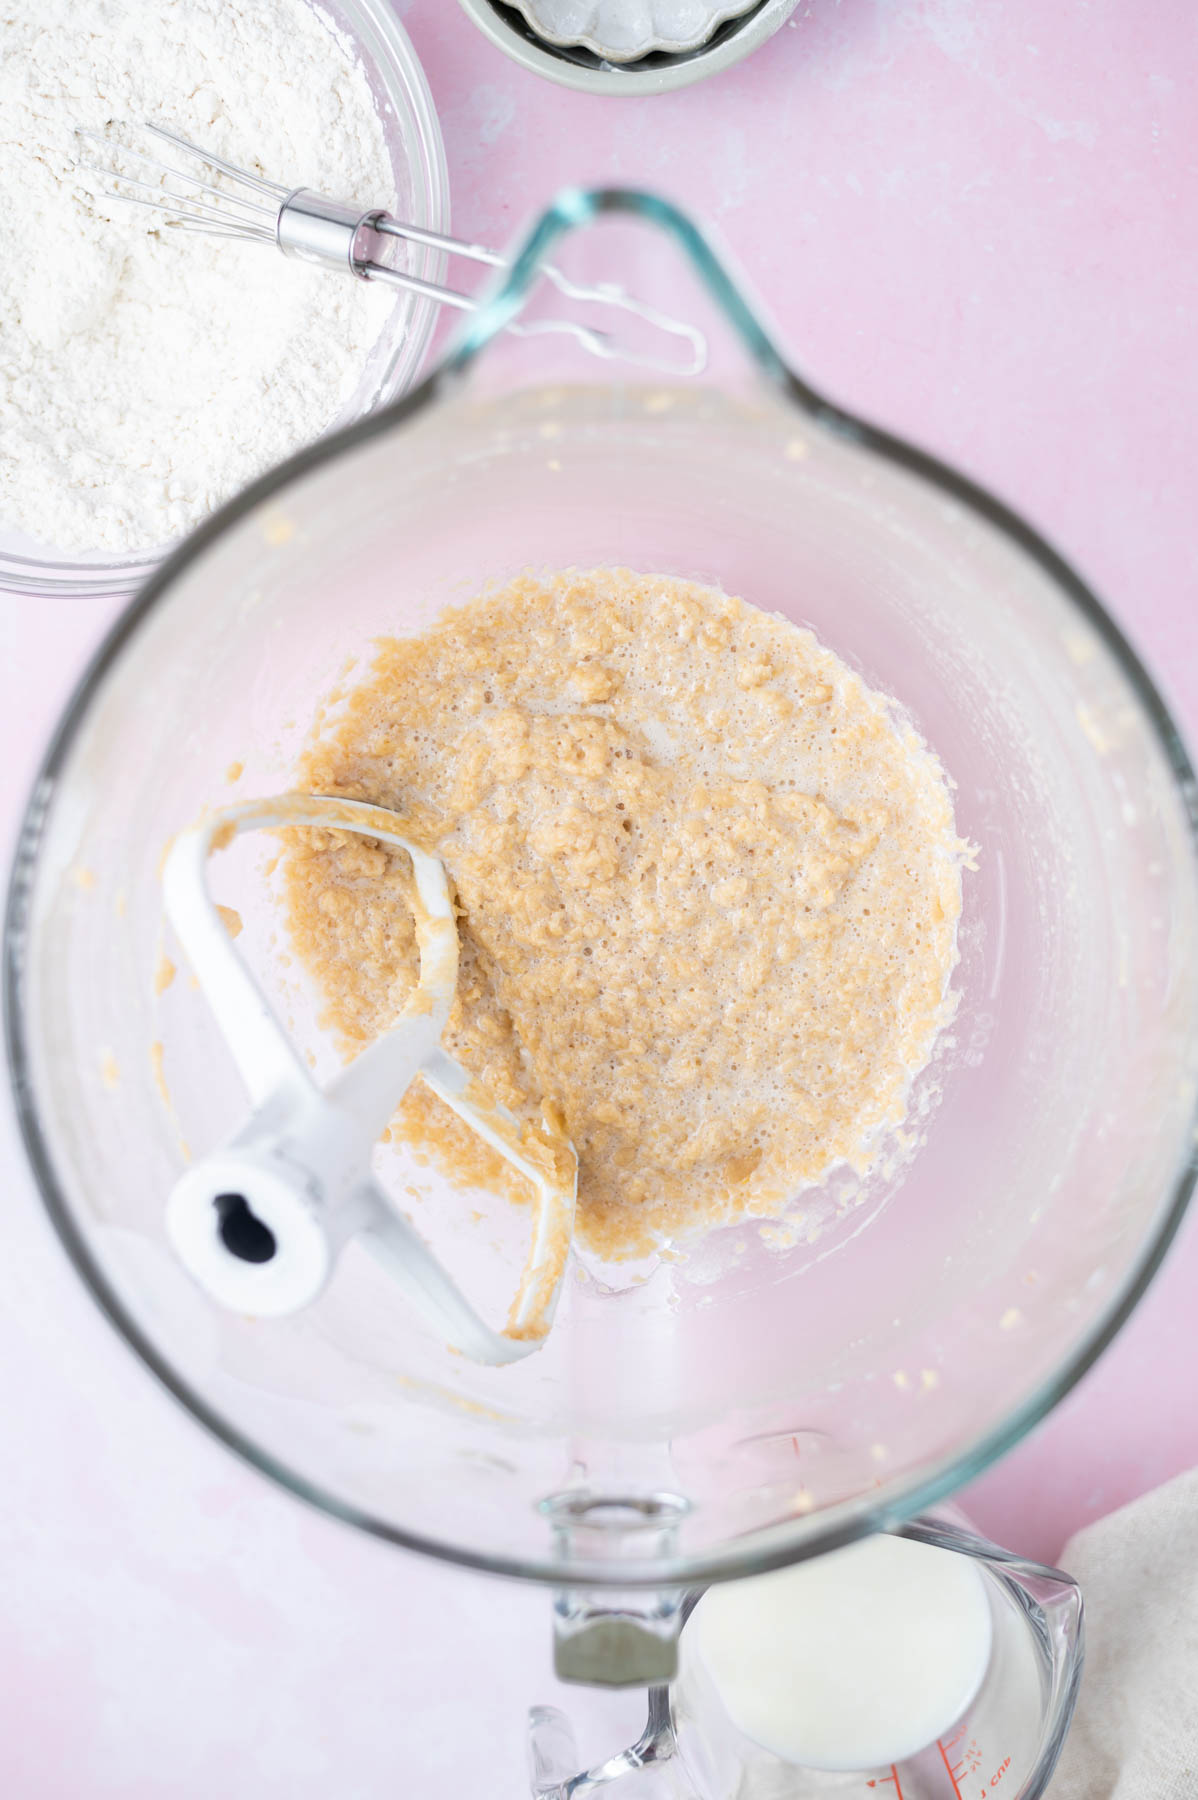
    Did you make this recipe?

    Please make my day and PIN to Pinterest and share a photo on Instagram ~ making sure to tag @twosugarbugs! THANK YOU!!

    © Tasia
    Cuisine: American / Category: Candies

    Easy St. Patrick's Day Sugar Cookies

    stack of st patrick's day sugar cookies with colored cereal marshmallows

    These easy St. Patrickโ€™s Day cookies are a soft, no chill sugar cookie recipe.  The cookie dough is rolled in green sugar and decorated with colored cereal marshmallows and have that nostalgic shamrock shake flavor.

    green sugar cookies on a cooling rack with a glass of milk in the background

    Disclosure | This post may contain affiliate links. As an Amazon Associate I earn from qualifying purchases.
    Sugar cookies are my very favorite cookie! As a lifetime baker and busy mama, I have decades of sugar cookie making behind me. I make dozens of cut out cookies for holidays like Christmas, Easter and Halloween, but sometimes I crave all the classic sugar cookie flavor in a quick and simple recipe.

    I'm sharing my favorite no chill, made with melted butter, no icing decorated sugar cookies that are perfect for St. Patrickโ€™s Day, much like my vanilla mint cookie bars.
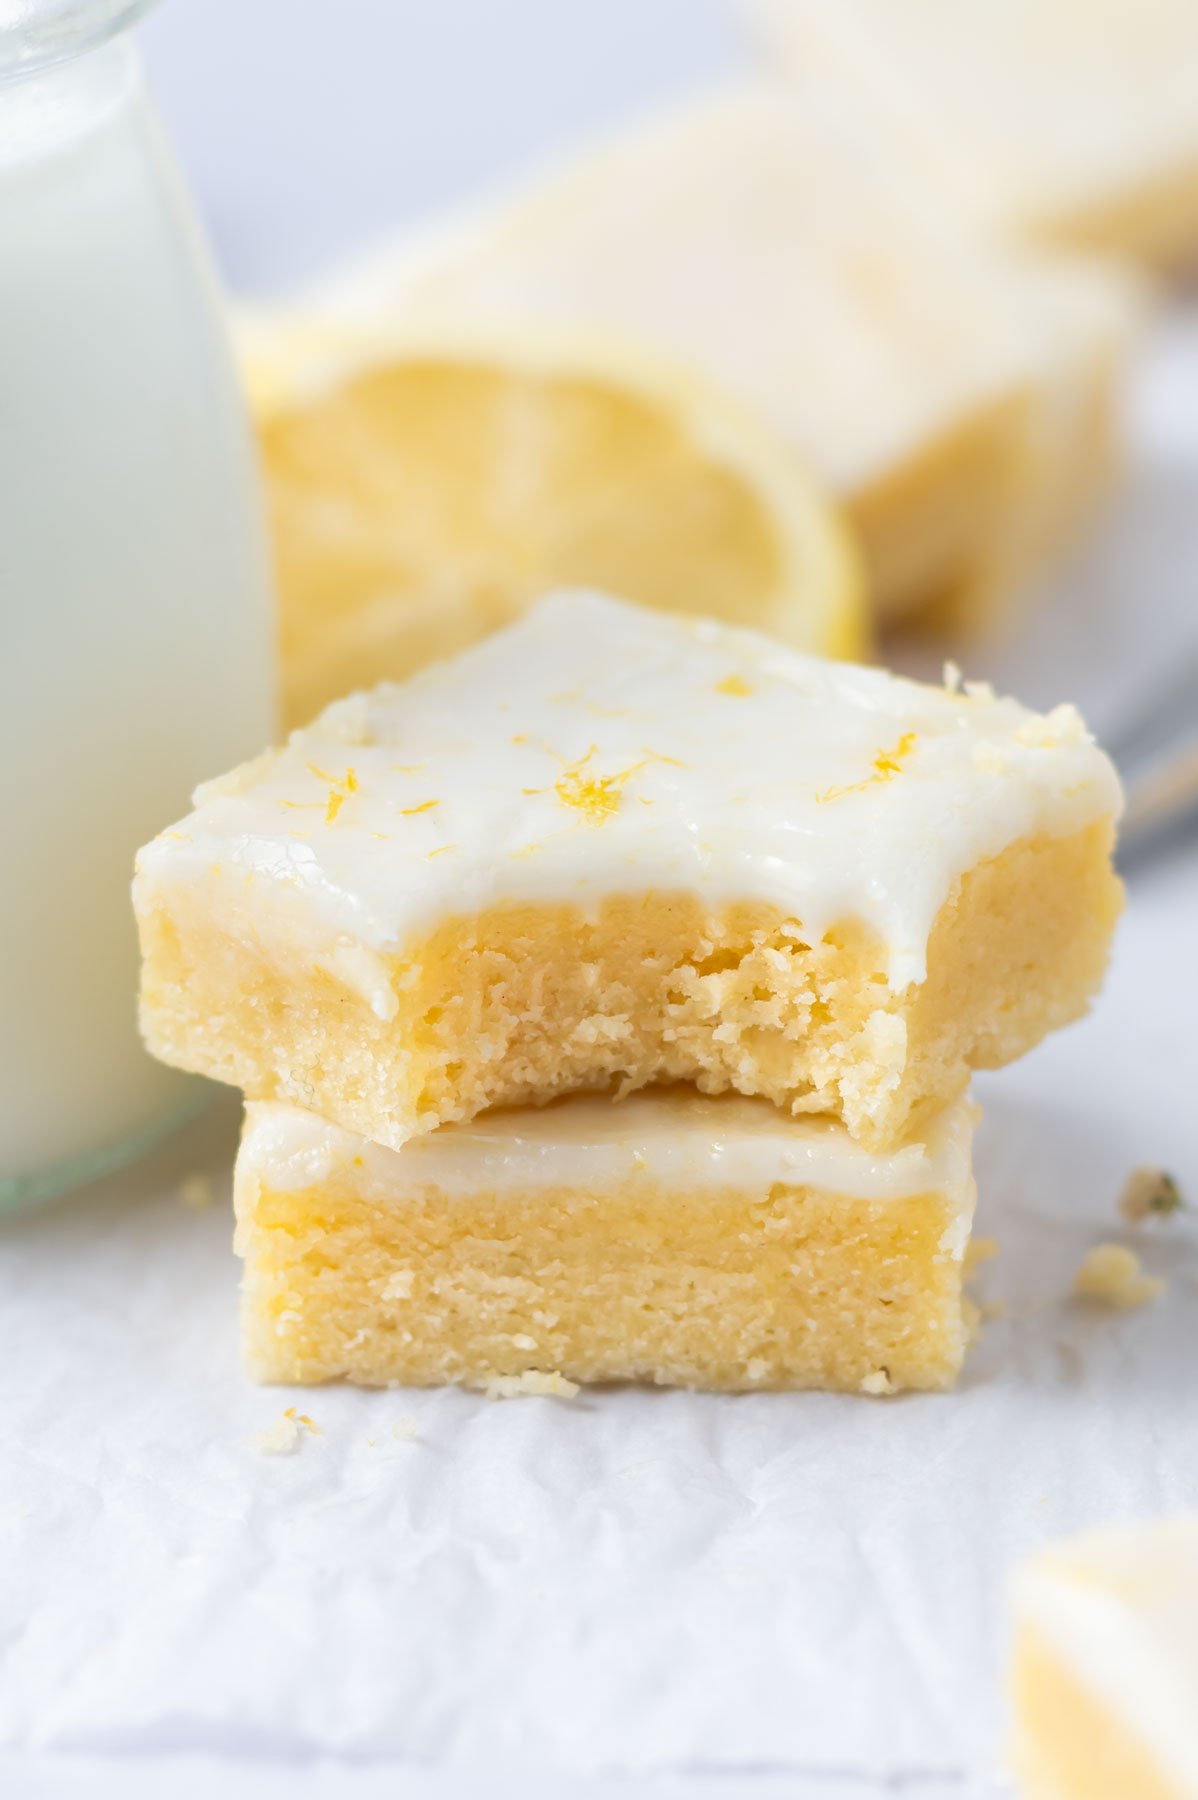
    two sugar bugs has dozens of sugar cookie recipes with all my secrets for making them. From sprinkle cookies to lemon sugar cookies to strawberry sugar cookies, I've got you covered on flavors!
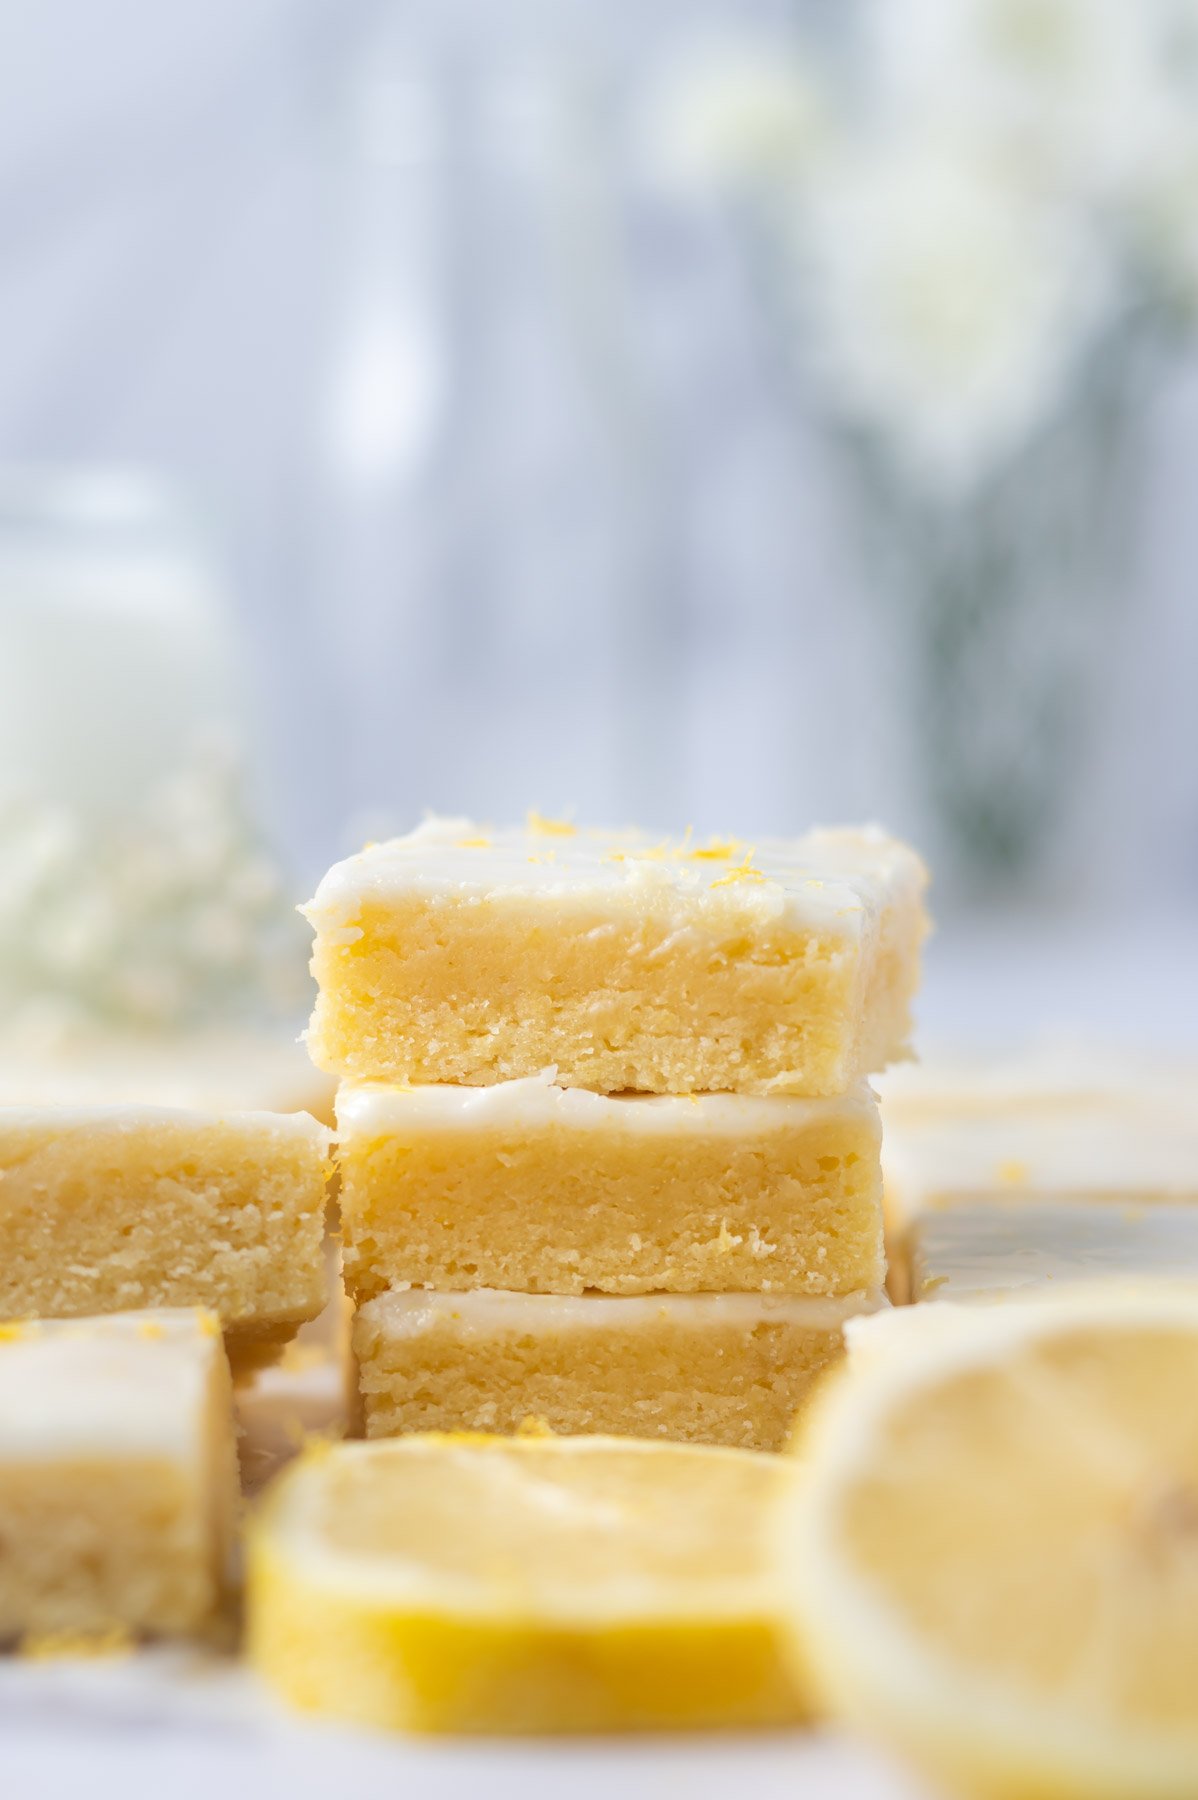
    [feast_advanced_jump_to]

    ๐Ÿ’— why you will love this St. Pattyโ€™s day sugar cookie recipe

    • Easy ~ the dough mixes in one bowl with no mixer needed.
    • Texture ~ these cookies have a soft centers and chewy edges.
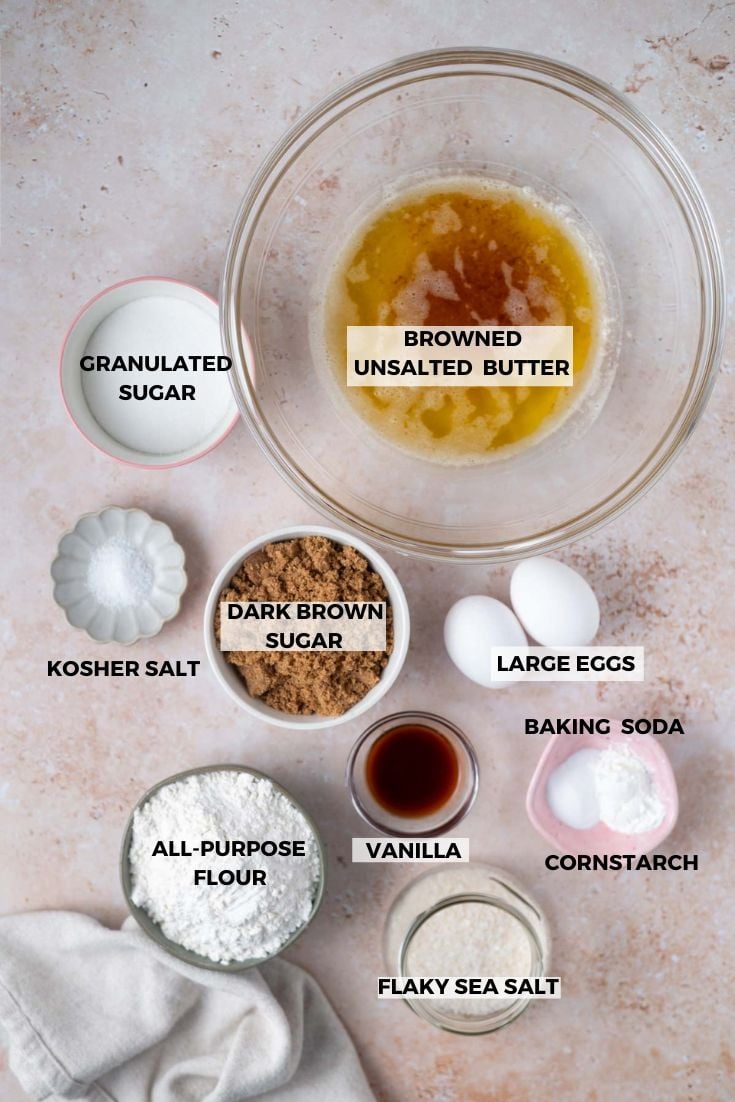
    • Flavor ~ with vanilla and a hint of mint, these cookies have that classic vanilla-mint aka shamrock shake taste. 
    • No waiting ~ these drop sugar cookies are made with melted butter and need no chill time. Meaning you'll be eating them in about 30 minutes!
    St Patrick's day sugar cookie on a counter with marshmallows around it

    ๐Ÿ’ญ where do I get green sugar?

    Many grocery stores or craft stores {like Michaelโ€™s or Hobby Lobby} sell colored sugar in the cake decorating/baking section.

    But I have good news for you, you can make your own colored sugar at home.  Itโ€™s super simple to do!! โ†’ place the sugar in a zip top bag and add a few drops of food coloring to the sugar {I use this Chefmaster gel coloring} and zip the bag closed. Then use your fingers to massage the food coloring into the sugar.  This will allow you to make the sugar the perfect color shade of your liking!

    ๐Ÿ›’ ingredients and substitutions

    Please scroll to the printable recipe card at the end of this post for the full list of ingredients and baking directions.
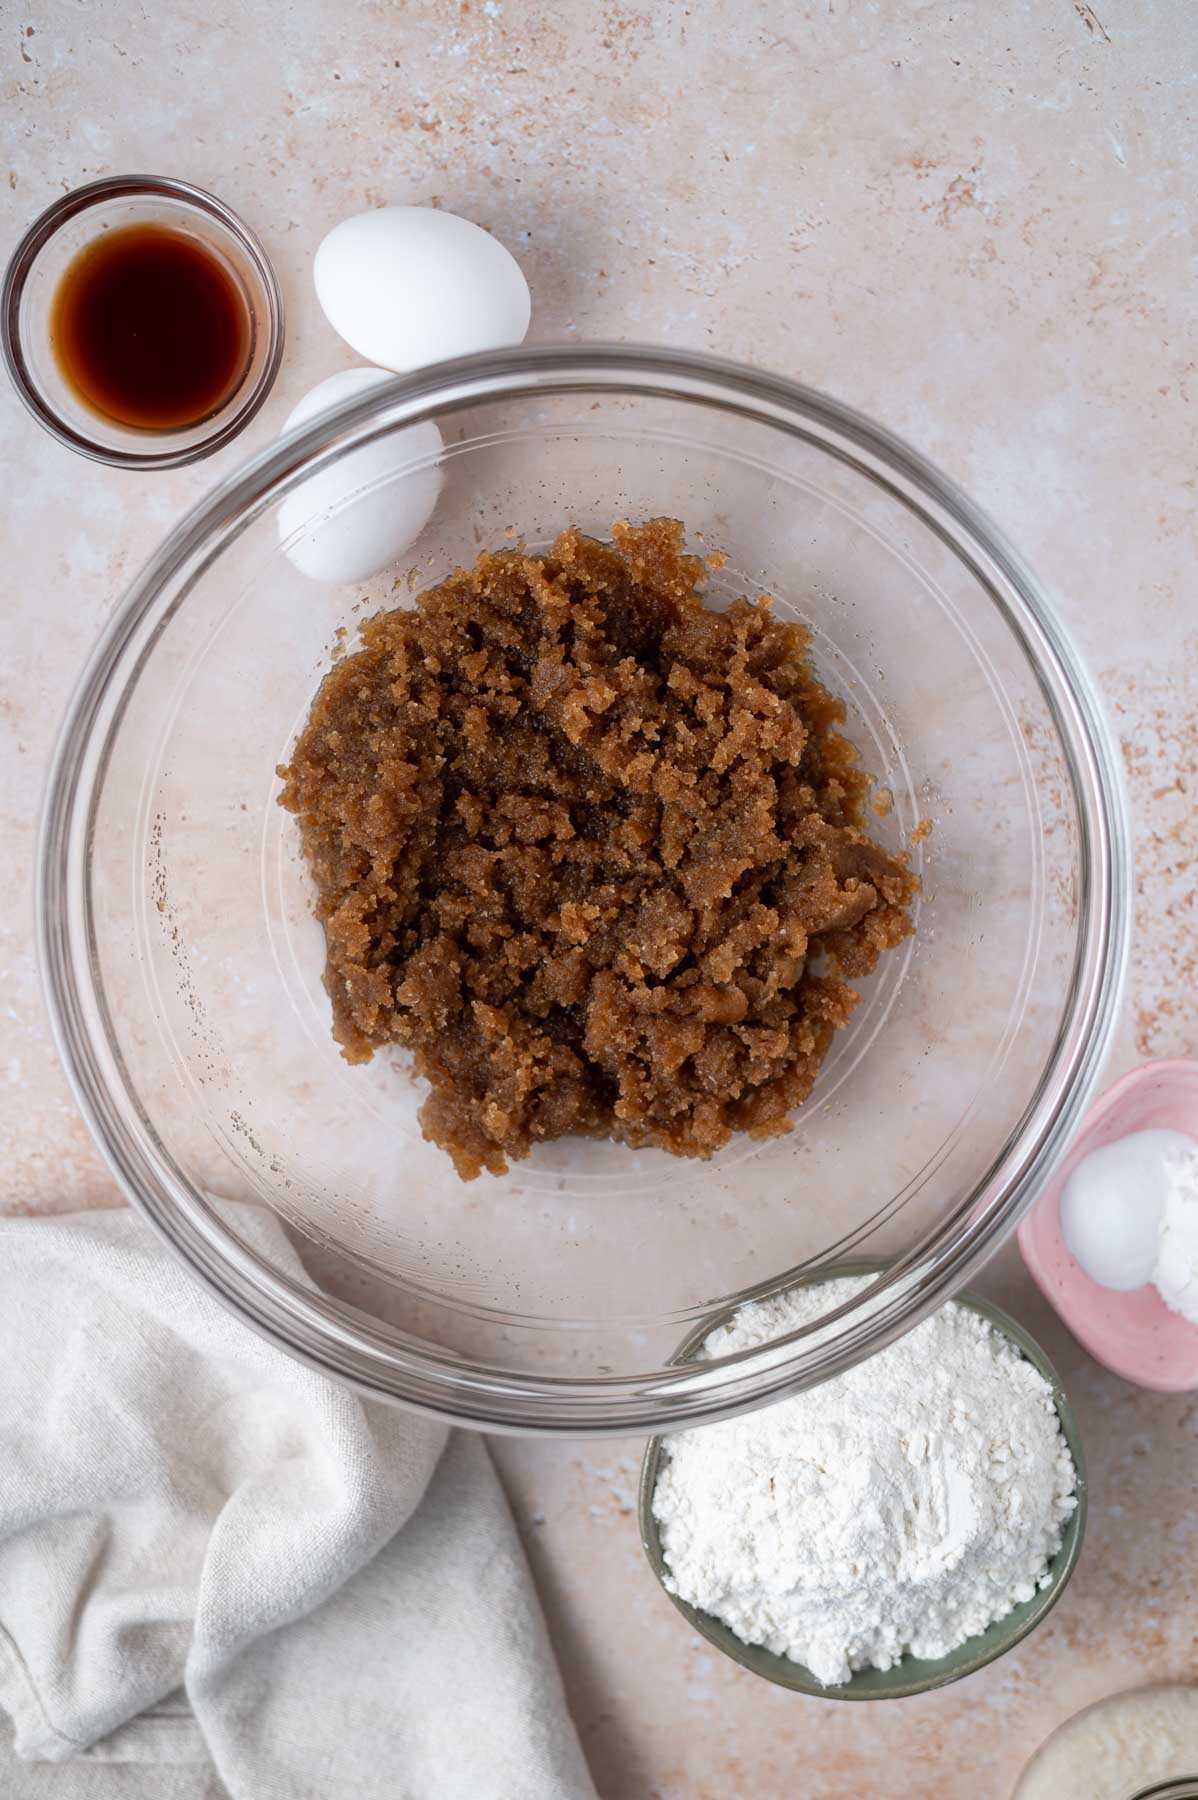
    st patrick's day sugar cookie ingredients
    • Granulated sugar ~ granulated {or white} sugar brings that classic sugar cookie flavor. Used in the cookie dough and to roll the cookies in before baking.
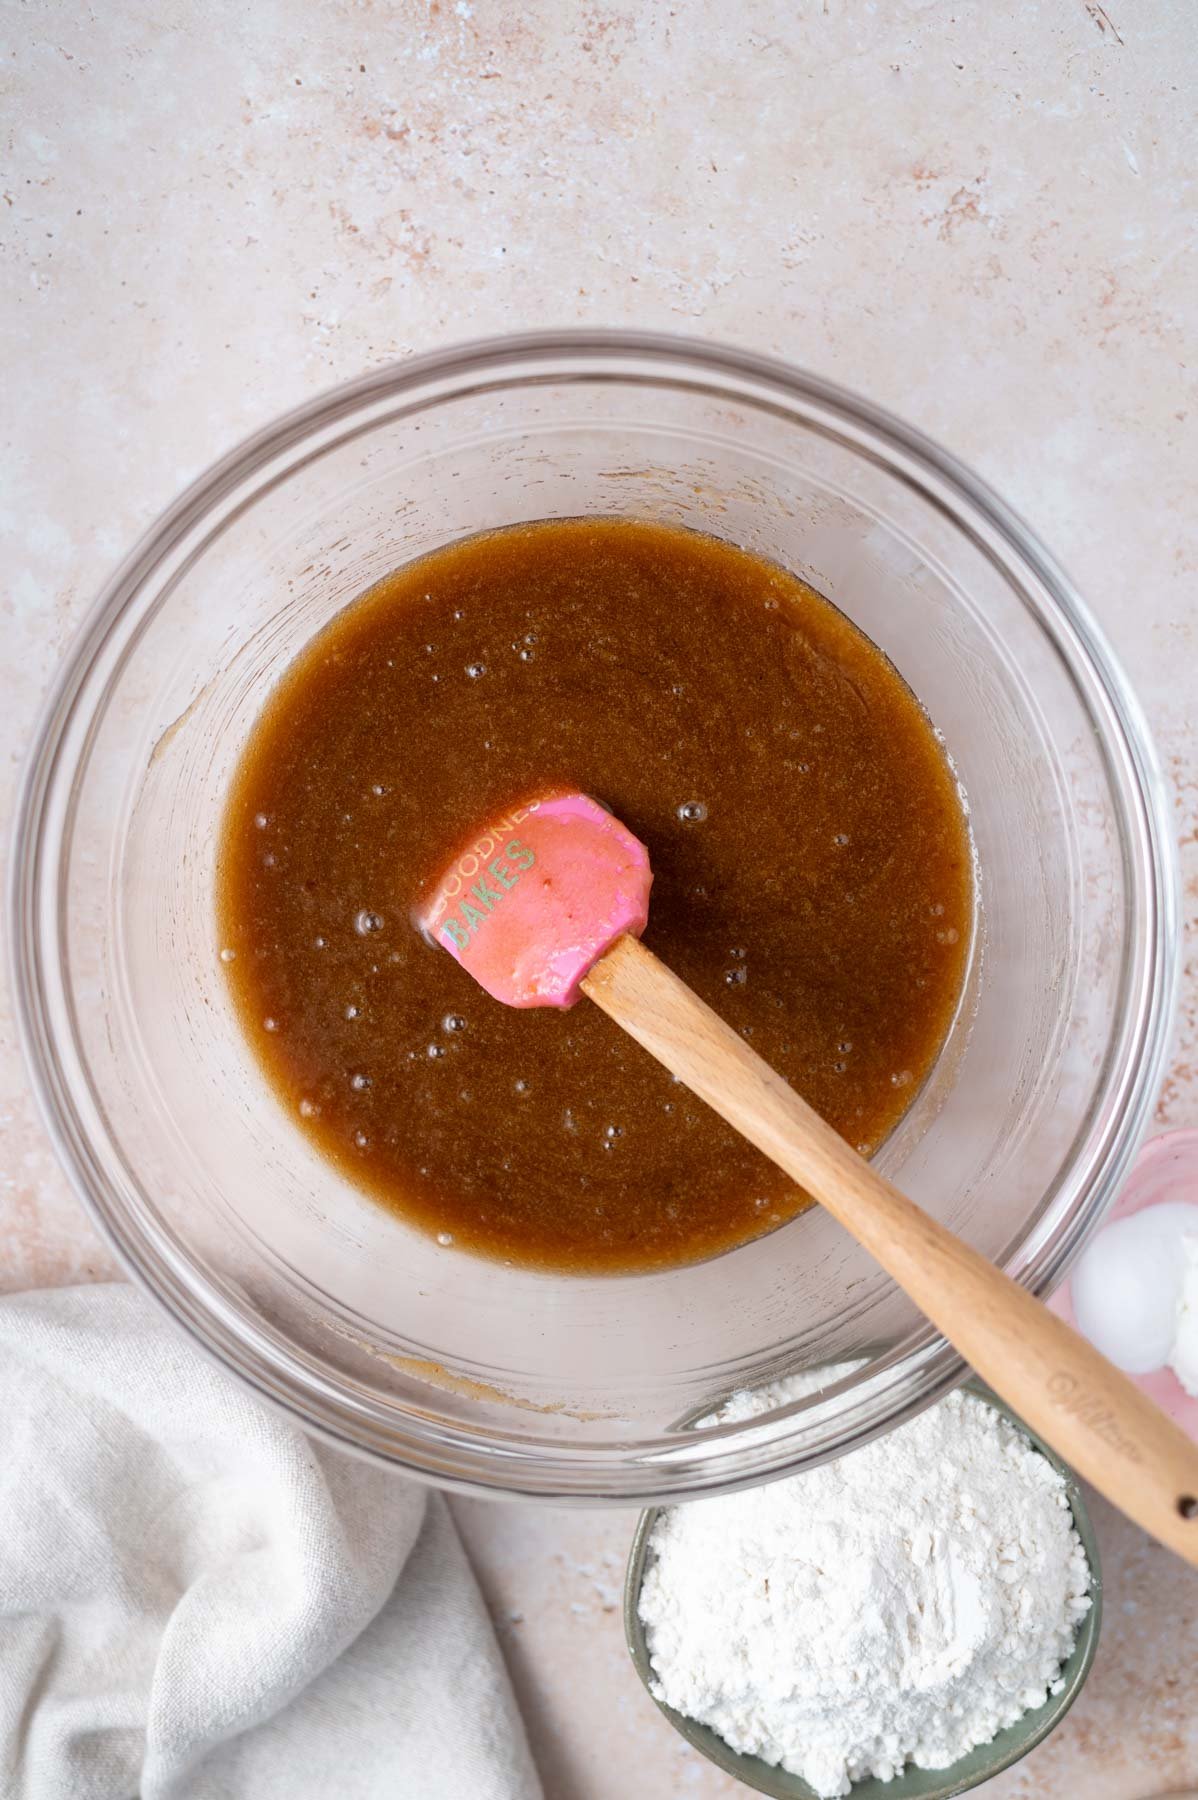
    • Unsalted butter ~ gets melted, so no planning ahead. If you only have salted butter, eliminate the salt in the recipe.
    • Kosher salt ~ just a touch to balance the flavors. If you only have table salt, use half the amount.
    • Large egg yolks ~ provides structure and brings the sugar cookie dough together. Save the whites for an egg white omelette or to make meringue cookies.
    • Vanilla ~ adds the classic sugar cookie flavor. You can use vanilla bean paste as a substitute.
    • Mint extract ~ just a touch of peppermint extract gives the cookies a little something special in flavor; it reminds me of the Shamrock shake flavor. If you aren't a fan of or donโ€™t have mint extract you can leave it out with no other changes.
    • Baking powder ~ helps to create thick and chewy holiday sugar cookies. I recommend an aluminum free baking powder.
    • All-purpose flour ~ for structure. If you don't use a scale for measuring {this is the scale I use and love}, make sure to use the spoon and level method to ensure you don't have too much flour. {Fluff the flour in the container, then spoon it into your measuring cup and level it off with the back of a knife}.
    • Dehydrated cereal marshmallows ~ the tiny marshmallows are used for decorating the cookies. My local market carries the dehydrated marshmallows, but you can also buy them online. If you are more patient than me, you could also pick them out of a box of Lucky Charms cereal.

    ๐Ÿฅฃ how to make no chill sugar cookies

    Preheat the oven to 350ยฐF and line a baking sheet with parchment paper or a silicone baking mat.

    melted butter and sugar mixed in a bowl

    In a medium bowl, add the granulated sugar, melted butter and kosher salt and stir until well combined.

    melted butter, sugar, eggs and extracts mixed together in a glass bowl

    Now stir in the egg yolks, vanilla and mint extracts, making sure everything is very well combined.

    sugar cookie dough in a bowl with cereal marshmallows and green sugar in nearby bowls

    Next add the baking powder and mix to combine. Finally stir in the flour until just combined.

    cookies rolled in green sugar and topped with cereal marshmallows on a parchment lined baking pan

    Take roughly 2 tablespoons of dough {I use a 30 scoop, about 48g dough per cookie} and roll it into a ball, then roll in the green sugar, roll in your hands again and roll a second time in the sugar. Place on the prepared baking pans, spacing 2 inches apart. Then lightly flatten each cookie with a flat bottomed cup and top with the colored marshmallows.

    Bake for 10-12 minutes, the edges will be set and the centers may still look a little soft.

    โ€œScootโ€ the cookies with a biscuit cutter or cup when they are hot out of the oven, if desired.

    cookies with colored cereal marshmallows for decoration piled on a cooling rack

    ๐Ÿงฐ recommended equipment

    Mixing bowl and spatula ~ I'm a big fan of these glass nesting bowls, but also love a stainless set of nesting bowls I've had since my wedding.

    Kitchen scale ~ for the most accurate measuring of your ingredients. I use this OXO scale, but if you are looking for a more economical option this Escali digital scale is also a great one.

    Light colored baking pans ~ lighter colored pans help cookies to bake more gently, which equals a softer cookie.

    Parchment paper ~ I'm a big fan of parchment paper for baking. It helps the drop sugar cookies bake more evenly, helps to keep the cookies from spreading and sticking and makes for easy clean up. King Arthur makes some great precut parchment sheets.

    Good cookie spatula ~ I love, love, love using a fish spatula to remove cookies from the baking pan!

    Cooling rack ~ allows for air to circulate around the baked cookies, which helps them cool and firm up.

    Remember to pin this recipe to Pinterest! Use the button on the recipe card or the share buttons on the side or bottom of this page.

    ๐Ÿ’ฌ frequently asked questions

    can you decorate these easy sugar cookies with buttercream?

    Yes! If you'd like a frosted sugar cookie, frost with my favorite American buttercream.  I would bake the cookies without the dehydrated marshmallow and press them into the buttercream frosting once itโ€™s on the cookie.

    You can also use the above frosting for decorating with piping tips. This sugar cookie recipe makes drop cookies, so you will be decorating a round cookie.

    can I make this small batch recipe?

    Absolutely! Just halve the ingredients.

    how long do sugar cookies stay fresh?

    These St. Pattyโ€™s Day sugar cookies will stay fresh in an airtight container at room temperature for 3-4 days.  To keep them the freshest, make sure your container seals tightly.  Adding a slice of bread to the container can help to keep them soft as the bread will release itโ€™s moisture, which helps the cookies stay hydrated and not dry out.

    The cookies will stay fresh for a few months if stored in the freezer.  See the โ€œhow to storeโ€ section below for how to freeze cookies.

    can I make this cookie dough with sprinkles?

    Yes, add ยฝ cup of sprinkles with the flour!

    ๐Ÿ‘ฉ๐Ÿปโ€๐Ÿณ expert tips for the best drop cookies

    • Weigh your ingredients ~ I know I say this all the time, but weighing your ingredients is the most accurate and will give the best results. This is the scale I use in my kitchen.ย  If you need a more economical kitchen scale, this Escali scale is also a great option.
    • Use real butter, not margarine for the best tasting cookies; sugar cookie recipes are a good time to splurge on a premium butter like Plugrร  or Kerrygold.
    • Do not grease your cookie pans, which can make your cookies spread more. Use parchment paper or silicone baking mats instead.
    • Bake on lighter colored baking pans as the St. Patrickโ€™s Day sugar cookies will bake more gently, which equals a softer cookie {these USA Pans are my favorite}.
    • Don't over bake the cookies. In my opinion, this is the number one reason home baker's cookies don't come out like bakery cookies. To keep the cookies soft and chewy we want the centers slightly underdone. They will continue cooking as they cool and the centers will firm up.  Please remember your oven is different than mine and baking times may vary slightly.
    • When adding the dehydrated cereal marshmallows, lightly press them into the cookie dough.  You may need to lightly press them back in after the sugar cookies bake as well.
    • "Scoot" the cookies when they come out of the oven with a large round cookie cutter {I use this Ateco cutter set} or glass if you want perfectly round cookies. Scooting the cookies also helps to make them a bit thicker.

    ๐Ÿซ™ how to store

    Cookies can be stored at room temperature in an airtight container for 3 - 4 days.

    You can also freeze the baked cookies once they have completely cooled. This is by far my favorite way to store cookies! The no chill sugar cookies can go in a zip top bag or an airtight container; they will stay fresh in the freezer for up to 3 months {often longer}.

    Allow to defrost at room temperature, this takes about 15 minutes.

    st pattys day sugar cookies on a cooling rack with a glass of milk

    Remember to snap a picture and tag me on Instagram if you make these Soft St. Patrickโ€™s Day Sugar Cookies. It warms my heart to see you bring these recipes to life! Thank you for being here and happy baking!

    more decorated cookie ideas

    • Lemon Sugar Cookies
    • Homemade Animal Graham Crackers
    • How to Decorate Sweater Cookies

    If you make this recipe {or any recipe!} from two sugar bugsย please come back and leave a review and a โญ๏ธโญ๏ธโญ๏ธโญ๏ธโญ๏ธ star rating.ย  I read every comment, and I LOVE hearing from you!

    ๐Ÿ“– recipe

    stack of st patrick's day sugar cookies with colored cereal marshmallows
    Print Recipe
    5 from 1 vote

    Easy St. Patrick's Day Sugar Cookies

    Soft St. Patrickโ€™s Day sugar cookies are rolled in green sugar, topped with cereal marshmallows and have a nostalgic Shamrock Shake flavor.
    Prep Time15 minutes mins
    Cook Time12 minutes mins
    Total Time27 minutes mins
    Course: Cookies
    Cuisine: American
    Keyword: drop cookies, st patrick's day, st patty's day cookies, sugar cookies, vanilla mint
    Servings: 19 cookies
    Calories: 217kcal
    Author: Tasia Harper

    Ingredients

    • 1 ยฝ cups granulated sugar (300g)
    • 1 cup unsalted butter melted (226g)
    • ยฝ teaspoon kosher salt
    • 2 large egg yolks
    • 2 teaspoons pure vanilla extract
    • ยฝ teaspoon peppermint extract
    • ยฝ teaspoon baking powder
    • 2 โ…“ cups all-purpose flour (292g)
    • โ…“ cup green granulated sugar * for rolling (67g)
    • Green food coloring if making your own colored sugar
    • Dehydrated colored marshmallows if desired

    Instructions

    • *If making your own green sanding sugar, add โ…“ cup granulated sugar/67g to a zip-top bag and add a few drops of green food coloring (I use a gel based color from Chefmaster). Close the bag and then massage the coloring into the sugar until it's evenly distributed and the shade of green you like. This can be done up to a couple of days prior to baking the cookies.
    • Preheat the oven to 350ยฐF and line two baking sheets with parchment paper or silicone baking mats.
    • In a medium bowl, add the granulated sugar (1 ยฝ cups/300g), the melted butter (1 cup/226g) and kosher salt and whisk until well combined. Now whisk in the egg yolks (2 large), vanilla (2 teaspoons) and peppermint extract (ยฝ teaspoon), making sure everything is very well combined.
    • Next add the baking powder (ยฝ teaspoon) and mix to combine. Finally stir in the flour (2 โ…“ cups/292g) with a spatula until combined.
    • Take roughly 2 tablespoons of dough (I use a 30 scoop/48g dough per cookie) and roll it into a ball, then roll in green sanding sugar, roll in your hands again and roll a second time in the sugar mixture. Place on the prepared baking pans, spacing 2 inches apart. Then lightly flatten each cookie with a flat bottomed cup. ย (The dough can be quite soft. If you are having trouble working with it, let it rest 2-3 minutes and it should be easier to work with). Top the middle of each cookie with 4-5 colored marshmallows, if desired, lightly pressing them into the dough.
    • Bake for 9-12 minutes, the edges will be set and the centers may still look a little soft.
    • Cookies can cool completely on the baking sheet or can be moved to a wire cooling rack after 5 minutes.ย ย 

    Notes

    Cookies can cool completely on the baking sheet or can be moved to a wire cooling rack after 5 minutes.ย ย 
    St. Patrick's Day sugar cookies can be stored at room temperature in an airtight container for 3-4 days or in the freezer for up to 3 months. If frozen, they should defrost at room temperature in 10-20 minutes.

    Nutrition

    Serving: 1 cookie | Calories: 217kcal | Carbohydrates: 31g | Protein: 2g | Fat: 10g | Saturated Fat: 6g | Polyunsaturated Fat: 0.4g | Monounsaturated Fat: 3g | Trans Fat: 0.4g | Cholesterol: 26mg | Sodium: 74mg | Potassium: 20mg | Fiber: 0.4g | Sugar: 19g | Vitamin A: 299IU | Calcium: 12mg | Iron: 1mg
    • « Previous Page
    • 1
    • …
    • 5
    • 6
    • 7
    • 8
    • 9
    • …
    • 39
    • Next Page »
    welcome graphic

    Hi, I'm Tasia, a self-taught baker and enthusiastic home cook with over 25 years experience in the kitchen! I'm here to inspire you to have fun while creating food from scratch. I make approachable and nostalgic recipes for busy bakers that you will want to make again and again. The recipes you find here will mostly be sweet and sometimes savory.

    More about me โ†’

    https://thefeedfeed.com/

    Reader Favorite Recipes

    • stack of cookies with the sun hitting them
      Espresso Brown Butter Toffee Cookies
    • buttercream sugar cookie with sprinkles
      Buttercream Sugar Cookies
    • cookies and sprinkles on a cooling rack
      Sprinkle Cookies
    • slice of cookie butter cake on a plate with a fork
      Moist Cookie Butter Cake

    ยฉtwo sugar bugs.ย  All images and content are copyright protected.ย  Please do not use our images without prior permission.ย  If you would like to republish a two sugar bugs recipe, please rewrite the recipe in your own words and link back to the blog post and one to the home page. ย See my privacy policyย for full details.

    Footer

    โ†‘ back to top

    About

    • Meet Tasia
    • Privacy Policy
    • Comment Policy
    • Terms & Conditions
    • Disclosure

    Shop

    • My favorite kitchen supplies via my Amazon Store

    Contact

    • Work with Me
    • Come Say hello
    • Sign Up! for emails and updates

    All images and content are copyright protected.  Please do not use our images without prior permission. 

    ยฉ 2026 two sugar bugs. All rights reserved.