two sugar bugs

  • About
  • Recipes
  • Coffee Talk
  • come say hello
    • Contact
    • Privacy Policy
menu icon
go to homepage
  • About
  • Recipes
  • Coffee Talk
  • Come say hello
  • Work With Me
    • Instagram
    • Pinterest
    • YouTube
  • subscribe
    search icon
    Homepage link
    • About
    • Recipes
    • Coffee Talk
    • Come say hello
    • Work With Me
    • Instagram
    • Pinterest
    • YouTube
  • ร—
    Home

    Lemon Raspberry Bars Recipe

    inside slice of lemon raspberry bars

    No bake lemon raspberry bars are a twist on the classic Australian lemon slice. Tart lemon squares made with sweetened condensed milk and graham crackers are topped with a sweet raspberry lemon buttercream.
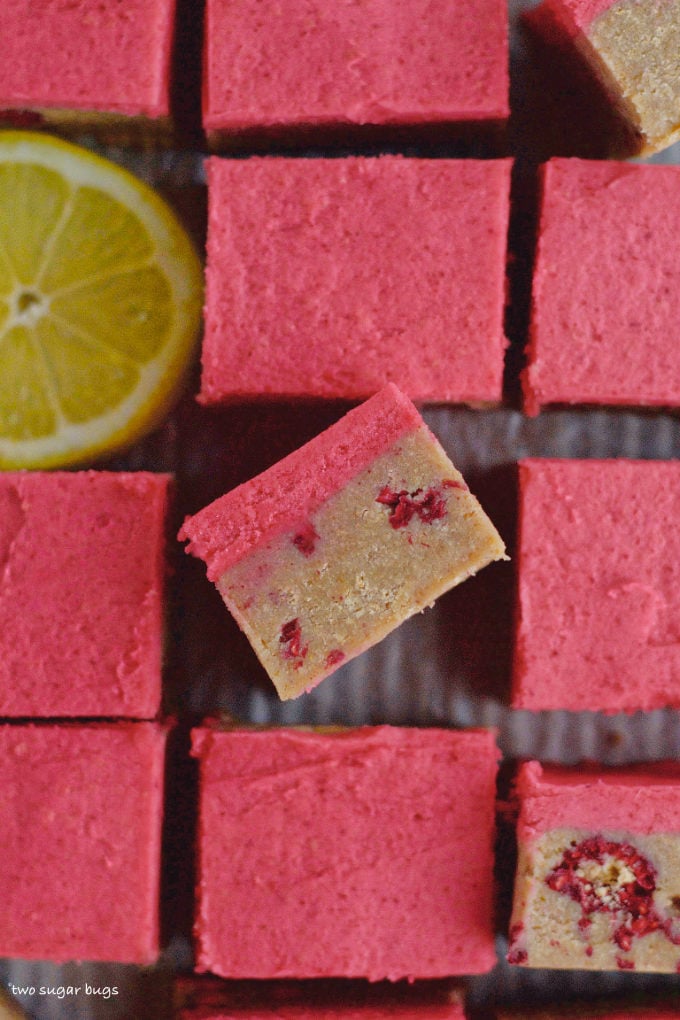
    inside view of a lemon raspberry bar

    Disclosure | This post may contain affiliate links. As an Amazon Associate I earn from qualifying purchases.

    Lemon raspberry bars are sure to become a family favorite. They are a no bake dessert, are easy to make and are positively delightful to eat! This bright and fruity dessert would be perfect for Easter, Mother's Day, birthdays or any celebration or gathering.

    stack of two no bake lemon raspberry bars

    what are no bake lemon raspberry bars?

    The inspiration for this recipe comes from my blogging friend, Marie, at Sugar Salt Magic. Marie has a coconut lemon slice recipe on her blog and after one bite, I knew a variation with raspberries would be dreamy!

    Marie believes that the lemon slice recipe originally hailed from a sweetened condensed milk brand, but it's since become an Aussie classic dessert. The squares are dense and almost fudge-like; made from ground graham crackers {the Aussie's use biscuits} and sweetened condensed milk.

    I make this an easy lemon raspberry dessert by adding freeze dried raspberries to both the lemon base and a raspberry lemon buttercream.

    what ingredients do I need?

    Please scroll to the printable recipe card at the end of this post for the full list of ingredients and baking directions.

    ingredients for lemon raspberry bars
    • Graham crackers ~ if graham crackers are not available where you live, digestive biscuits are a good substitute. The finer you crush the crackers, the more fudge-like the bars will be.
    • Unsalted butter ~ used in both the lemon raspberry layer and for the raspberry lemon buttercream.
    • Sweetened condensed milk ~ acts as the binder of the bars and gives them their fudgy texture {I like Eagle Brand}
    • Lemon juice and lemon zest ~ zest the lemons first, then squeeze them for their juice. You will need 2 medium to large lemons. {this is the zester and juicer that I have}
    • Freeze dried raspberries ~ used in both the layers. You will need one 1.25oz {35g} bag, which will be divided between the base layer and buttercream. I bought mine at Target.
    • Confectioners' sugar ~ also known as powdered sugar or icing sugar is needed for the buttercream.
    • Heavy whipping cream ~ for the buttercream. You can substitute whipping cream or half and half, if needed.
    • Kosher salt {not pictured} ~ just a pinch needed for the buttercream to help balance the sweetness.
    cut squares on a baking pan with lemons

    Remember to pin this recipe to Pinterest! Use the button on the recipe card or the share buttons on the side or bottom of this page.

    how to make the lemon raspberry bar layer

    Start by lining an 8x8 baking pan with parchment paper {a 9x9 will also work}. Then crush the graham cracker crumbs. I use my food processor to make the crushing process quick, but you can also crush the graham crackers in a zip-top bag with a rolling pin.

    Then mix the graham cracker crumbs, 25 grams of the freeze dried raspberries {about ยพ of the bag} and lemon zest in a large mixing bowl.

    graham cracker crumbs, lemon zest and freeze dried raspberries in a bowl

    In a small sauce pan, heat the sweetened condensed milk and butter over low heat until the butter melts. The idea is not to cook this mixture, but just to combine the two ingredients. Once the butter is melted, remove the pan from the heat and stir in the lemon juice. Then add the sweetened condensed milk mixture to the graham crackers and mix it all together. Finally, press the mixture into the prepared baking pan and chill it while you make the raspberry lemon buttercream.

    sweetened condensed milk and butter in a saucepan
    the mixed dough in a glass bowl
    lemon raspberry layer in a baking pan

    let's make raspberry lemon buttercream!

    Start by beating the room temperature butter, lemon zest and a pinch of salt in a stand mixer or in a mixing bowl with a hand held mixer; beat until it's very light and fluffy. Then add the confectioners' sugar, crushed and strained freeze dried raspberries, heavy cream and lemon juice and beat together until smooth and creamy.

    raspberry buttercream ingredients in a bowl

    Take the buttercream and create an even layer of buttercream over the top of the raspberry lemon bars. Then chill bars for 1-2 hours, until the buttercream sets.

    smoothed raspberry buttercream layer in a baking pan

    Use the parchment overhang to pull the chilled bars from the baking pan and place them on a cutting surface. Cut the bars into the size you desire with a sharp knife and enjoy!

    lemon raspberry bar with a bite out of it on a plate

    where do you buy freeze dried raspberries?

    I most often buy freeze dried raspberries at Trader Joe's or Target. I also find that many grocery stores and some drug stores carry freeze dried fruit. Freeze dried raspberries are also available to purchase on Amazon.

    how do you remove the seeds from the freeze dried raspberries?

    I crush the freeze dried raspberries in a food processor {my mini prep works great for this task}. Then I place the crushed berries through a fine mesh sieve to separate the berries from the seeds.

    how to store no bake raspberry lemon bars

    Any leftover bars should be stored covered in the refrigerator. They will stay fresh for 4-5 days. The bars can also be frozen in an airtight container for up to 2 months. Let them thaw overnight in the refrigerator or on the counter, if your kitchen isn't too hot.

    sliced bars on a baking pan

    Remember to snap a picture and tag me on Instagram if you make these Lemon Raspberry Bars. It warms my heart to see you bring these recipes to life! Thank you for being here and happy baking!

    more lemon and raspberry recipes to try!

    • Homemade Raspberry Cake
    • Lemon Cut-Out Sugar Cookies
    • Homemade Lemon Cupcakes
    • Lemon Almond Cookie Bars with Dark Chocolate
    • Mom's Lemon Bars
    • Raspberry Hazelnut Cookies
    • Lemon White Chocolate Cookie Ice Cream

    If you make this recipe {or any recipe!} from two sugar bugsย please come back and leave a review and a โญ๏ธโญ๏ธโญ๏ธโญ๏ธโญ๏ธ star rating.ย  I read every comment, and I LOVE hearing from you!
    inside view of a lemon raspberry bar
    Print Recipe
    5 from 6 votes

    Lemon Raspberry Bars

    Tart lemon squares made with sweetened condensed milk and graham crackers are topped with a sweet raspberry lemon buttercream. This no bake lemon raspberry treat is sure to become a family favorite!
    Prep Time20 minutes mins
    Chill Time2 hours hrs
    Total Time2 hours hrs 20 minutes mins
    Course: Bars and Brownies
    Cuisine: Australian
    Keyword: Aussie classic dessert, easy dessert, lemon raspberry, lemon slice, no bake dessert
    Servings: 20 bars
    Calories: 257kcal
    Author: Tasia Harper

    Ingredients

    Lemon raspberry layer

    • 1 - 14.4 ounce box graham crackers crushed to fine crumbs* 408g
    • 1 tablespoon lemon zest
    • 1 cup freeze dried raspberries** 35g
    • ยฝ cup unsalted butter cut into cubes 113g
    • 1 - 14 ounce can sweetened condensed milk 396g
    • 3 tablespoons fresh lemon juice 45mL

    raspberry lemon buttercream

    • ยฝ cup unsalted butter room temperature 113g
    • ยผ teaspoon kosher salt
    • 1 tablespoon lemon zest
    • 1 ยฝ cups confectionersโ€™ sugar 180g
    • ยฝ cup freeze dried raspberries** crushed and sifted 10g
    • 3 tablespoons heavy whipping cream 45mL
    • 1 tablespoon fresh lemon juice 15mL

    Instructions

    for the lemon raspberry layer

    • Line an 8x8 baking pan with parchment paper, being sure to leave a little overhang. {a 9x9 pan will also work}
    • Crush your graham crackers (one 14.4 ounce/408g box) into crumbs. I like to use my food processor for this job. You can also crush them in a zip-top bag with a rolling pin. Add the graham cracker crumbs to a large bowl. Mix in the lemon zest (1 tablespoon) and 25g of the freeze dried raspberries {about 1 cup}. Set aside.
    • In a small saucepan, heat the unsalted butter (ยฝ cup/113g) and sweetened condensed milk (one 14 ounce/396g can) over low heat until the butter is melted. The idea is not to cook this mixture, but rather to melt the butter and combine the two ingredients. Remove the pan from the heat and mix in the lemon juice (3 tablespoons/45mL). Pour the sweetened condensed milk mixture over the graham crackers. Mix until well combined.
    • Press the dough into the prepared baking pan and chill while you make the buttercream.

    for the raspberry lemon buttercream

    • Crush the remaining raspberries using the food processor and sift them through a mesh strainer to remove the seeds.
    • Using a stand mixer with the paddle attachment or a hand held mixer, beat the butter (ยฝ cup/113g), kosher salt (ยผ teaspoon) and lemon zest (1 tablespoon/15mL) on medium high until light and fluffy, about 5 minutes. Scrape up and down the bowl, then add the confectionersโ€™ sugar (1 ยฝ cups/180g), sifted and crushed freeze dried raspberries, heavy whipping cream (3 tablespoons/45mL) and lemon juice (1 tablespoon/15mL). Mix on low until the sugar is incorporated, then beat on medium high for another 3-5 minutes until the buttercream is smooth and creamy.
    • Spread the buttercream over the chilled lemon layer in an even layer. Chill 1-2 hours {for the buttercream to set} before slicing and serving.
    Notes

    * If graham crackers are not available where you live, digestive biscuits are a good substitute.
    ** The cup measurements for the freeze dried raspberries do not need to be perfect measurements. You will use about ยพ of the 1.25 ounce bag for the bars and the remaining ยผ for the buttercream.
    Store any leftovers well covered in the refrigerator for 4-5 days. You can freeze for up to 2 months {in an airtight container} as well.
    Recipe adapted from Sugar Salt Magic's Coconut Lemon Slice

    Nutrition

    Serving: 1 bar | Calories: 257kcal | Carbohydrates: 25g | Protein: 3g | Fat: 17g | Saturated Fat: 11g | Polyunsaturated Fat: 6g | Cholesterol: 48mg | Sodium: 67mg | Fiber: 1g | Sugar: 23g

    Frangipane Tart Recipe

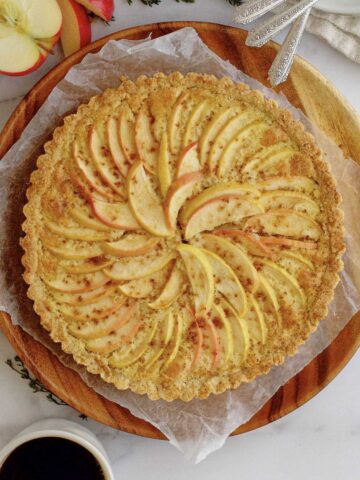
    frangipane tart on a wood plate

    This frangipane tart recipe is gluten free and simple to prepare. A classic apple tart made with an almond oat crust, apples and frangipane {a sweet almond filling}. Perfect for Sunday dinner or a holiday meal!

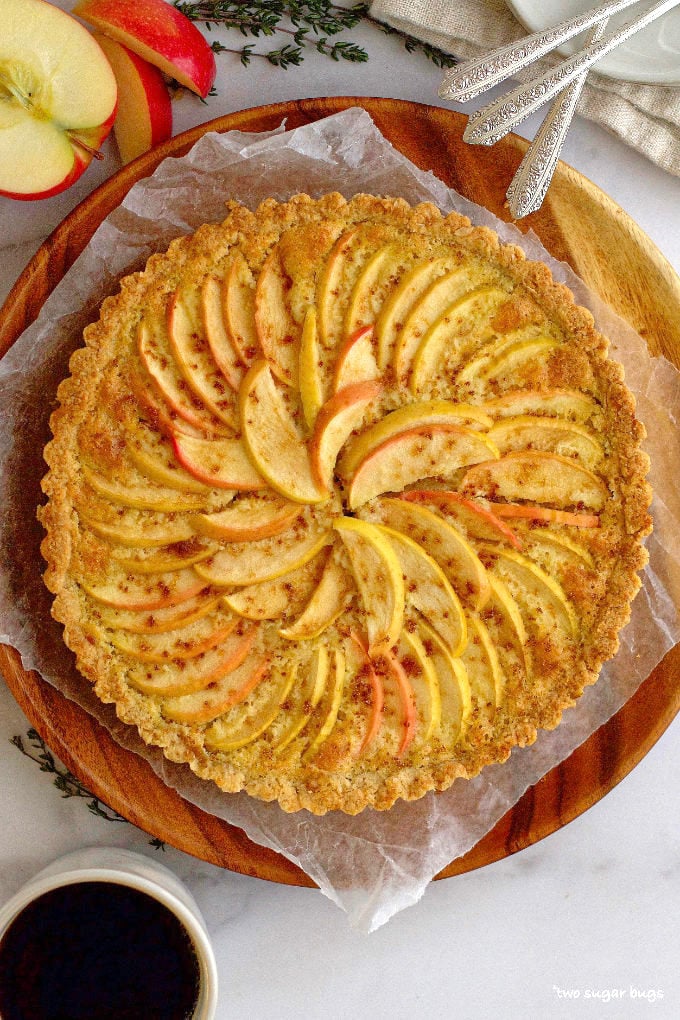
    baked apple frangipane tart on a wood plate

    Disclosure | This post may contain affiliate links. As an Amazon Associate I earn from qualifying purchases.

    This apple frangipane tart falls into the rustic and elegant dessert category that always seems to steal my heart. It looks impressive, but is so easy to create!

    two slices of apple tart on plates with forks

    The almond and oat crust is a cinch to prepare and makes a wonderful vehicle for the sweet nutty taste of the frangipane. The thinly sliced apples on top add a pop of fresh fruit and make this easy-to-make tart perfect for any event.

    what is frangipane?

    Frangipane is a sweet almond filling, usually made with butter, eggs, ground almonds, sugar and flour. In this recipe the flour is replaced with oat flour, making this recipe gluten free. If you are gluten sensitive, make sure your oats are gluten free!

    Frangipane tastes like sweet almonds and has slightly dense, but very soft and creamy texture to it.

    side view of sliced frangipane tart

    what ingredients do I need for this tart recipe?

    Please scroll to the printable recipe card at the end of this post for the full list of ingredients and baking directions.

    ingredients for frangipane tart recipe
    • Almond flour ~ used in both the tart crust and the frangipane {I use Bob's Red Mill}.
    • Ground oats ~ old fashioned oats or quick oats can be used {I use Flahavan's Quick Cooking Oatmeal}. I blitz them in the food processor until they are a flour like consistency. If you need gluten free oats, I suggest Bob's Red Mill.
    • Confectioners' sugar ~ also known as powdered sugar or icing sugar.
    • Melted unsalted butter ~ used in both the tart crust and the frangipane.
    • Kosher salt
    • Granulated sugar ~ adds sweetness to the frangipane.
    • Eggs ~ provide structure and leavening to the frangipane.
    • Almond extract ~ to enhance the almond flavor {I use Cook's Pure Almond Extract}.
    • Apples {not shown} ~ you could substitute with pears or plums.
    • Brown sugar {not shown} ~ for dusting over the top of the apples before baking.
    • Water, lemon or lime juice {not shown} ~ for making the citrus bath for the apples.

    let's make the almond oat tart crust!

    Start by combining the almond flour, ground oats, kosher salt and confectioners' sugar in a bowl. Then add the melted butter and stir it all together with a fork. Press the mixture into the bottom and sides of a 9-inch tart pan with a removable bottom. Then place the prepared crust into the freezer for 20 minutes.

    almond flour, oat flour and confectioners' sugar mixed together in a bowl
    melted butter being mixed into almond and oat flours
    unfilled almond oat tart crust

    how to prepare apples for the tart

    Apples like to brown when they are cut. To keep the apple slices looking pretty for the top of the tart, they are going to have a citrus bath for a few minutes.

    Place cold water, lemon or lime juice and granulated sugar in a medium bowl and stir it all together.

    Then slice the apples thinly and place the slices into the citrus bath. Allow them to soak while you prepare the frangipane.

    sliced apples in a citrus bath

    how to make the frangipane filling

    Start by combining the almond flour, ground oats and granulated sugar in a bowl. Then add the melted butter and stir with a fork until combined. Finally, add the eggs and almond extract and stir until incorporated.

    almond flour, oats and sugar in a mixing bowl
    eggs added to filling in a mixing bowl

    Let's put this apple Frangipane Tart together!

    Pour the frangipane into the prepared and chilled almond oat tart crust. Then remove a few apples at a time and lightly pat them dry. Create an overlapping pattern with the apples over the filling, starting on the outside of the pan and working your way to the middle.

    almond oat tart shell filled with frangipane
    apple slices being fanned on top of Frangipane filling

    When the apple slices have completely covered the tart, sprinkle with a little brown sugar.

    unbaked tart ready for the oven

    Finally, bake the tart for about 30 minutes or until the tart crust is golden. Allow to cool on a wire rack before slicing and serving.

    a slice of frangipane tart on a plate with a fork

    We love this tart for Sunday dinner, but it would also be beautiful for a birthday or the holidays, such as Easter or Christmas. I typically use apples {Pink Lady is our favorite, but I've also used Honeycrisp}. Pears and plums are also quite nice with the frangipane.

    Remember to snap a picture and tag me on Instagram if you make this Frangipane Tart Recipe. It warms my heart to see you bring these recipes to life! Thank you for being here and happy baking!

    more easy entertaining recipes for Sunday dinner or celebrations ~

    • Biscoff Caramel Tart
    • Almond Berry Mascarpone Tart
    • Coconut Pecan Tart
    • Crumbly Almond Cake

    If you make this recipe {or any recipe!} from two sugar bugsย please come back and leave a review and a โญ๏ธโญ๏ธโญ๏ธโญ๏ธโญ๏ธ star rating.ย  I read every comment, and I LOVE hearing from you!

    baked apple frangipane tart on a wood plate
    Print Recipe
    5 from 5 votes

    Frangipane Tart Recipe {Gluten Free}

    This frangipane tart recipe is a classic apple tart made with an almond oat crust, apples and frangipane {a sweet almond filling}.
    Prep Time30 minutes mins
    Cook Time30 minutes mins
    Chill Time20 minutes mins
    Total Time1 hour hr 20 minutes mins
    Course: Pies and Tarts
    Cuisine: French
    Keyword: apple tart, frangipane, Frangipane recipe, frangipane tart, gluten free
    Servings: 10 - 12 slices
    Calories: 326kcal
    Author: Tasia Harper

    Ingredients

    almond oat tart crust

    • 1 cup almond flour lightly packed 112g
    • ยพ cup oat flour* 75g
    • ยผ teaspoon kosher salt
    • ยผ cup confectionersโ€™ sugar 30g
    • 6 tablespoons unsalted butter melted 84g

    Apples

    • 1 cup cold water 240mL
    • 3 tablespoons lemon or lime juice 45mL
    • 2 tablespoons granulated sugar 25g
    • 2 medium apples** pears or plums*** would also work

    Frangipane filling

    • ยฝ cup granulated sugar 100g
    • ยฝ cup almond flour 56g
    • โ…“ cup oat flour* 32g
    • ยฝ cup unsalted butter melted 113g
    • 2 large eggs
    • 1 teaspoon almond extract
    • brown sugar for dusting over the sliced apples

    Instructions

    for the almond oat tart crust

    • Blend the almond flour (1 cup/112g), oat flour (ยพ cup/75g), kosher salt (ยผ teaspoon) and confectionersโ€™ sugar (ยผ cup/30g) in a bowl. Pour in the melted butter (6 tablespoons/ 84g) and mix with a fork until the dough comes together. Press into the bottom and sides of a non-greased 9-inch tart pan with a removable bottom. Place in the freezer for 20 minutes.
    • Preheat the oven to 350ยฐF.

    for the apples

    • Prepare a citrus bath by combining water (1 cup/240mL), lemon or lime juice (3 tablespoons/45mL) and granulated sugar (2 tablespoons/25g) in a bowl. Then thinly slice the apples (2 medium) and place them in the citrus bath while you make the frangipane filling.

    for the frangipane filling

    • Mix the sugar (ยฝ cup/100g), almond flour (ยฝ cup/56g), and oat flour(โ…“ cup/32g) in a bowl. Then add in the melted butter (ยฝ cup/113g) and stir until combined. Add the eggs (2 large) and almond extract (1 teaspoon) and stir until incorporated.

    to assemble the tart

    • Remove the tart crust from the freezer and pour the frangipane filling into the crust. Remove a few apple slices from the citrus bath at a time and lightly pat them dry before fanning them over the frangipane filling. Start on the outside edge of the tart and overlap the slices over each other until youโ€™ve covered the entire top of the tart.
      Sprinkle with some brown sugar and then bake for about 30 minutes, until the tart crust is golden. If using the toothpick test, the toothpick should not be dry, which would indicate an over baked frangipane tart; instead it should have thick (not runny) frangipane stuck to it. Allow to cool on a wire rack before serving.

    Notes

    *I used rolled oats and blitzed them in the food processor
    **I used school boy size pink lady apples
    ***If using plums, you can skip the citrus bath
    Store any leftover tart covered in the refrigerator for up to 5 days.

    Nutrition

    Serving: 1 slice | Calories: 326kcal | Carbohydrates: 29g | Protein: 6g | Fat: 22g | Saturated Fat: 9g | Polyunsaturated Fat: 12g | Cholesterol: 67mg | Sodium: 61mg | Fiber: 4g | Sugar: 19g

    Lemon Almond Cookie Bars with Dark Chocolate

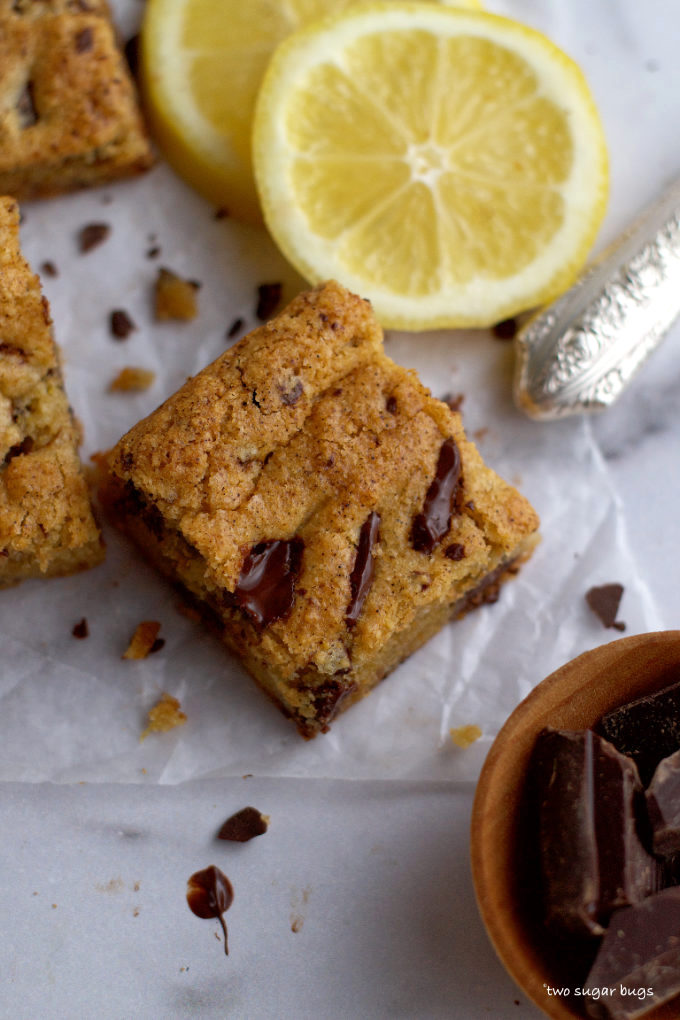
    single lemon almond cookie bar on parchment paper with lemon slices

    Lemon almond cookie bars are so soft and chewy {and they are gluten free!} This easy cookie recipe creates a bright flavor profile with the lemon and almond flour, which pairs irresistibly with dark chocolate.

    single lemon almond cookie bar on parchment paper with lemon slices

    Disclosure | This post may contain affiliate links. As an Amazon Associate I earn from qualifying purchases.

    I know you think I've gone and lost my marbles! Lemon, almond and dark chocolate?? Can this be any good?? Well if you haven't paired lemon with dark chocolate before, you are in for a serious treat!

    cookie bars on parchment with a lemon

    When I think about spring and baking, lemon is the flavor that immediately comes to mind. There's something about lemon sugar cookies, lemon bars, or lemon cupcakes that just brings a smile and sunshine to my day {even when the weather isn't cooperating}.

    Do lemon and dark chocolate go together?

    Yes! They absolutely do. The brightness of the lemon helps to balance and enhance the dark chocolate flavor. I personally feel like the lemon also tempers some of the bitterness that I find in dark chocolate.

    Those who know me well know that I am not typically a fan of dark chocolate. I give the craziest facial expressions showing my lack of love for it. But, I can.not.stop.eating these cookie bars!! They might just be my current food crush.

    What ingredients do I need for these cookie bars?

    Please scroll to the printable recipe card at the end of this post for the full list of ingredients and baking directions.

    ingredients for lemon almond cookie bars

    Many of the usual baking suspects are here. For this easy lemon dessert, the recipe uses melted butter, so it's easy-peasy to prepare. Oh yeah, and it only uses one bowl for mixing, #lessdishesforthewin!

    • Unsalted butter ~ melted to give the cookie bars extra chewiness.
    • Granulated sugar ~ for some sweetness.
    • Brown sugar ~ I like to use dark brown sugar, but light brown will also work.
    • Lemon zest ~ this zester is my favorite!
    • Vanilla extract ~ for flavor.
    • Almond extract ~ for flavor.
    • Egg ~ for added moisture and some leavening.
    • Kosher salt ~ to enhance the flavors.
    • Baking powder ~ for leavening.
    • Almond flour ~ Bob's Red Mill makes my favorite almond flour.
    • Dark chocolate bar ~ Use the best quality chocolate that you can afford; the recipe calls for 3 ounces. Most baking bars come in 4 ounce portions; you could also use Trader Joe's Pound Plus dark chocolate and just measure out 3 ounces.

    If you absolutely cannot bring yourself to try pairing dark chocolate with the lemon and almond, white chocolate would be a good substitute.

    side view of cookie bars sitting on parchment paper

    Remember to pin this recipe to Pinterest! Use the button on the recipe card or the share buttons on the side or bottom of this page.

    let's make these easy, chewy, gluten free cookie bars!

    Start by preheating the oven and lining an 8x8 baking pan with parchment paper.

    Next, melt the butter and mix in the sugars and lemon zest. Once they are combined, whisk in the extracts and egg.

    Then add the almond flour and top with the kosher salt and baking powder. Give the dry ingredients a little toss together and then mix them into the dry ingredients with a spatula.

    melted butter, sugars and lemon zest in a bowl
    egg, almond and vanilla added to wet ingredients in a bowl
    almond flour, salt and baking powder added to wet ingredients

    Finally, add the dark chocolate to the cookie dough, spread it into the prepared pan and bake.

    dark chocolate added to lemon almond cookie dough
    lemon almond cookie bars with dark chocolate in a baking pan

    The lemon almond cookie bars are done when the edges have set and slightly browned. The middle may be a little soft, but it will firm up as it cools. Remember that your oven is different from mine and the baking time may vary slightly.

    unclose look at baked lemon almond cookie bars

    how should lemon almond cookie bars be stored?

    Any leftovers should be stored in an airtight container in the refrigerator for 5-7 days. The bars can also be frozen for up to 2-3 months. They taste fantastic cold or at room temperature.

    These gluten free lemon almond dark chocolate cookie bars will be perfect for your Easter brunch or dessert table. They also make a fun spring time lemon dessert. Think you will give them a go?

    stack of lemon almond cookie bars with lemon slices

    Remember to snap a picture and tag me on Instagram if you make these Lemon Almond Cookie Bars with Dark Chocolate. It warms my heart to see you bring these recipes to life! Thank you for being here and happy baking!

    more cookie bar recipes to try ~

    • Salted Caramel Espresso Bars
    • Peanut Butter White Chocolate Blondies
    • Double Chocolate Oat Bottom Brownies
    • Sugar Cookie Bars

    If you make this recipe {or any recipe!} from two sugar bugsย please come back and leave a review and a โญ๏ธโญ๏ธโญ๏ธโญ๏ธโญ๏ธ star rating.ย  I read every comment, and I LOVE hearing from you!

    single lemon almond cookie bar on parchment paper with lemon slices
    Print Recipe
    5 from 6 votes

    Lemon Almond Cookie Bars with Dark Chocolate

    This easy cookie recipe creates a bright flavor profile with the lemon and almond flour; which pairs irresistibly with dark chocolate.
    Prep Time15 minutes mins
    Cook Time25 minutes mins
    Total Time40 minutes mins
    Course: Bars and Brownies
    Cuisine: American
    Keyword: almond, bar cookies, dark chocolate, gluten free cookies, lemon
    Servings: 16 cookie bars
    Calories: 178kcal
    Author: Tasia Harper

    Ingredients

    • ยฝ cup unsalted butter melted 113g
    • ยฝ cup granulated sugar packed 100g
    • ยผ cup brown sugar 50g
    • 2 tablespoons lemon zest not packed, 2 lemons
    • 1 large egg
    • ยฝ teaspoon almond extract
    • ยฝ teaspoon pure vanilla extract
    • 2 cups almond flour 200g
    • 1 teaspoon baking powder
    • ยฝ teaspoon kosher salt
    • 3 ounces dark chocolate baking bar chopped 85g

    Instructions

    • Preheat oven to 350ยฐF and prepare an 8x8 baking pan with parchment paper.
    • In a medium to large bowl, melt the butter (ยฝ cup/113g), you can do this on the stove or microwave. Allow it to cool for about a minute. Add the granulated sugar (ยฝ cup/100g) and brown sugar (packed ยผ cup/50g) and lemon zest (2 tablespoons) and whisk until fully combined, then whisk in the egg (1 large), almond (ยฝ teaspoon) and vanilla (ยฝ teaspoon) extracts.
    • Add the almond flour (2 cups/200g) to the wet ingredients, followed by the baking powder (1 teaspoon) and kosher salt (ยฝ teaspoon). Lightly stir/toss the dry ingredients on top of the wet ingredients. Then mix it all together with a spatula until combined. Save a small amount of chocolate aside and fold in the remaining chopped chocolate (3 ounces/85g).
    • Scoop the cookie dough into the prepared pan and spread it evenly in the pan. The cookie will spread, so it doesnโ€™t have to go all the way to the edges. Use the remaining chocolate to press pieces into the top of the cookie dough.
    • Bake for about 25 minutes, until the edges have slightly browned and are firm. The middle of the cookie may still be very slightly jiggly. Allow the cookie to cool in the pan before cutting and serving.

    Notes

    Any leftovers should be stored in an airtight container in the refrigerator for 5-7 days. The bars can also be frozen for up to 2-3 months.

    Nutrition

    Serving: 1 cookie bar | Calories: 178kcal | Carbohydrates: 24g | Protein: 2g | Fat: 8g | Saturated Fat: 5g | Polyunsaturated Fat: 3g | Cholesterol: 27mg | Sodium: 104mg | Fiber: 1g | Sugar: 12g

    Small Batch Chocolate Cupcakes {with sprinkles}

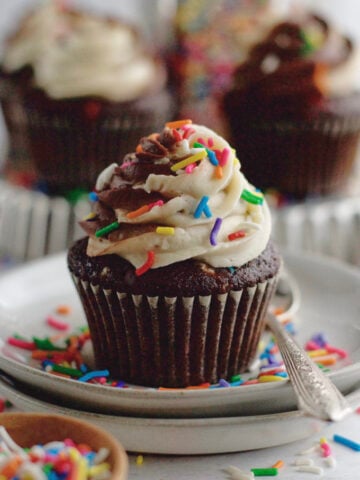
    small batch chocolate cupcake on a plate

    This small batch chocolate cupcakes recipe is so easy and made from scratch. It rewards you with seven moist and chocolatey sprinkle filled cupcakes.

    small batch chocolate cupcake on a plate

    Disclosure | This post may contain affiliate links. As an Amazon Associate I earn from qualifying purchases.

    Satisfy your cake cravings and enjoy moist chocolate cupcakes from this small batch recipe. Top them with a swirl of chocolate and vanilla buttercream and you'll have some happy treats!

    chocolate cupcakes with buttercream and sprinkles on a plate

    Today's recipe comes for one of my blog readers. A simple request asked if I could create a chocolate sprinkle cupcake recipe. Being that Big E is a huge chocolate cake fan, I figured she wouldn't mind helping me test some. So we got to work in the kitchen.

    do sprinkles actually work in chocolate cupcakes?

    I'm glad you asked!๐Ÿ˜‰. I wondered the same thing myself. I know how gorgeous sprinkles are on my chocolate confetti cookie recipe so I knew it couldn't hurt to try.

    Truth be told, sprinkles don't show up all that well on chocolate cupcakes. Shocker, right? B.u.t.... they do show a little and you know the chocolate cupcakes have a little something special to them.

    inside view of small batch chocolate cupcakes

    why small batch chocolate cupcakes?

    This past year has been strange. Right? Gone are the dinner parties where I am serving dessert for 8 to 10. Most meals have been for my family of four. So enter the small batch idea. This small batch recipe creates seven cupcakes, which means one for each of us and three for us to fight over the next day!

    what ingredients do I need?

    Please scroll to the printable recipe card at the end of this post for the full list of ingredients and baking directions.

    ingredients for small batch chocolate cupcakes
    • All-purpose flour ~ for structure.
    • Cocoa powder ~ I use Hershey's Cocoa 100% Cacao Natural Unsweetened
    • Granulated sugar ~ for sweetness and flavor.
    • Kosher salt ~ if using table salt, you may want to reduce the salt by half.
    • Baking powder ~ for a little leavening.
    • Baking soda ~ also adds leavening.
    • Buttermilk ~ adds depth and richness. {I highly suggest using true buttermilk versus homemade for the best results}
    • Vegetable oil ~ adds moisture.
    • Egg ~ adds structure.
    • Pure vanilla extract ~ for flavor balance.
    • Sprinkles ~ {you want to use jimmies sprinkles} for the fun factor!
    • Hot water ~ to help "bloom" the chocolate which creates a richer chocolate flavor.

    let's make easy chocolate cupcakes!

    This small batch chocolate cupcakes recipe mixes up in a bowl with a whisk and spatula. I have this set of Duralex mixing bowls and they get used every day.

    Start by preheating the oven and lining a muffin pan with seven liners. These parchment liners are my favorite for cupcakes and muffins.

    Next mix the dry ingredients in a medium size bowl. I use a whisk to make sure everything is mixed together well. Then whisk the wet ingredients {except the hot water} together in a small bowl.

    dry cupcake ingredients in a mixing bowl
    buttermilk, egg and vanilla in a bowl with a whisk

    Add the wet ingredients to the dry ingredients and whisk everything together. Then add the hot water and whisk until just combined. Finally add the sprinkles and mix in with a spatula.

    small batch chocolate cupcake batter in a bowl
    sprinkles added to batter in a mixing bowl

    Evenly divide the batter between the seven liners. I found 3 tablespoons of batter to be the perfect amount per cupcake. Then bake the cupcakes until the tops are set and a toothpick comes out clean or with just a few moist crumbs.

    Please remember that your oven is different from mine and baking times may vary slightly!

    cupcake batter in a baking pan
    close up of a baked chocolate cupcake in the baking pan

    Allow the cupcakes to cool before frosting. I place the pan on a wire cooling rack for 10 minutes before removing the cupcakes from the pan to cool completely.

    small batch chocolate cupcakes on a baking pan with milk and sprinkles

    Remember to pin this recipe to Pinterest! Use the button on the recipe card or the share buttons on the side or bottom of this page.

    chocolate and vanilla buttercream swirl on a small batch chocolate cupcake on a plate

    How to create a chocolate and vanilla buttercream swirl

    Start by making the vanilla buttercream. For this easy recipe, we start with my not-so-sweet American buttercream. A stand mixer with the paddle attachment or a hand held mixer both work for making the buttercream.

    Once the vanilla buttercream is finished, remove half the buttercream {it doesn't have to be a perfect half, just estimate} and place it on a sheet of plastic wrap. {see video below for how to create the two tone swirl} Add unsweetened cocoa powder to the remaining buttercream and beat another 1-2 minutes until it's well incorporated.

    how to store cupcakes

    Any leftover cupcakes can be covered and stored at room temperature for a few days. The cupcakes can also be frozen for up to three months in an airtight container. I often freeze decorated cupcakes; just allow them to come to room temperature before serving.
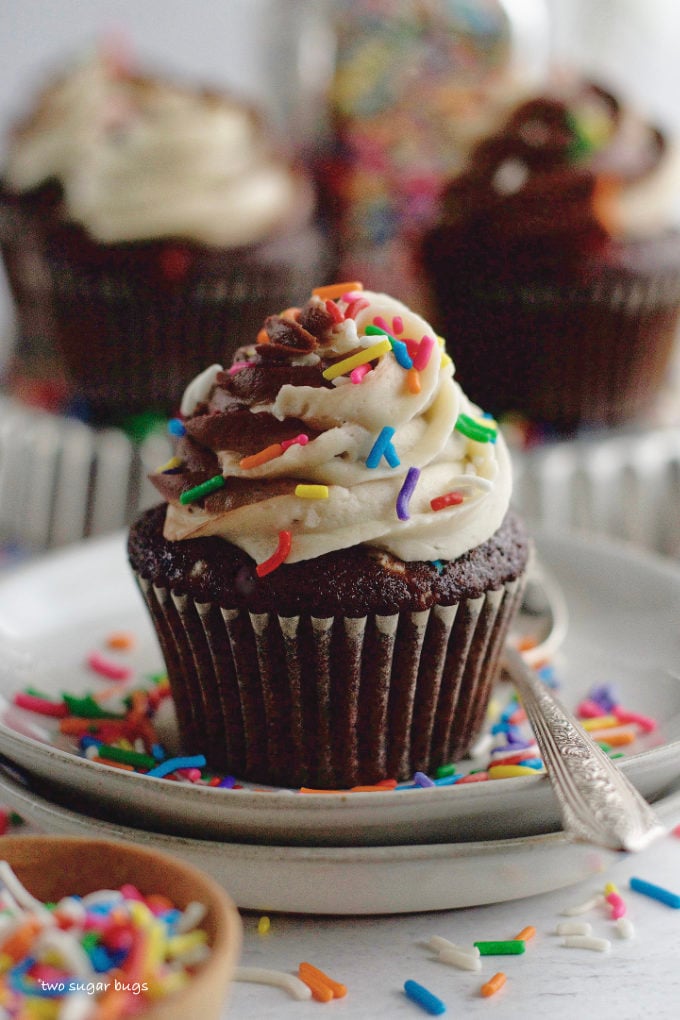
    small batch chocolate cupcakes with a bottle of sprinkles

    I hope you enjoy this super easy, moist and chocolatey sprinkle filled dessert! We sure had fun eating the test batches. Be sure to let me know if there are other recipes you'd like me to create!

    Remember to snap a picture and tag me on Instagram if you make these Small Batch Chocolate Cupcakes. It warms my heart to see you bring these recipes to life! Thank you for being here and happy baking!

    more chocolate recipes for you to enjoy!

    • Dairy Free Chocolate Cupcakes and Peanut Butter Frosting
    • Chocolate Confetti Cookies
    • Chocolate Malt Cake
    • Double Chocolate Oat Bottom Brownies
    • Double Chocolate Raspberry Rolls
    • Chocolate Cut-Out Sugar Cookies

    If you make this recipe {or any recipe!} from two sugar bugsย please come back and leave a review and a โญ๏ธโญ๏ธโญ๏ธโญ๏ธโญ๏ธ star rating.ย  I read every comment, and I LOVE hearing from you!

    small batch chocolate cupcake on a plate
    Print Recipe
    5 from 5 votes

    Small Batch Chocolate Cupcakes {with sprinkles}

    This small batch chocolate cupcakes recipe is easy and from scratch. It rewards you with seven moist and chocolatey sprinkle filled cupcakes.
    Prep Time20 minutes mins
    Cook Time20 minutes mins
    Cooling Time30 minutes mins
    Total Time1 hour hr 10 minutes mins
    Course: Cakes and Cupcakes
    Cuisine: American
    Keyword: chocolate, chocolate cupcakes, chocolate sprinkle cupcakes, cupcakes, moist cupcakes, small batch cupcakes
    Servings: 7 cupcakes
    Calories: 301kcal
    Author: Tasia Harper

    Ingredients

    Chocolate Cupcakes

    • ยฝ cup + 1 tablespoon all-purpose flour 71g
    • 3 tablespoons unsweetened cocoa powder 15g
    • ยฝ cup granulated sugar 100g
    • ยฝ teaspoon baking soda
    • ยผ teaspoon baking powder
    • ยผ teaspoon kosher salt
    • 1 large egg room temperature
    • 5 tablespoons buttermilk room temperature 75mL
    • 2 tablespoons vegetable oil 30mL
    • 1 teaspoon pure vanilla extract
    • 2 tablespoons hot water
    • ยผ cup jimmies sprinkles 45g

    Vanilla and Chocolate Buttercream

    • ยฝ cup unsalted butter room temperature 113g
    • ยผ teaspoon kosher salt
    • 1 cup + 2 tablespoons confectionersโ€™ sugar 135g
    • 2 tablespoons heavy cream 30mL
    • 1 teaspoon pure vanilla extract
    • 2 tablespoons unsweetened cocoa powder 10g

    Instructions

    for the chocolate cupcakes

    • Pre-heat oven to 350ยฐF and prepare muffin pan with 7 cupcake liners {I prefer to use the wells in the middle of the pan}. Set aside.
    • In a medium size bowl, whisk together the flour (ยฝ cup + 1 tablespoon/71g), cocoa powder (3 tablespoons/15g), sugar (ยฝ cup/100g), baking soda (ยฝ teaspoon), baking powder (ยฝ teaspoon) and kosher salt (ยผ teaspoon). In a small bowl, whisk together the egg (1 large), buttermilk (5 tablespoons/75mL), vegetable oil (2 tablespoons/30mL) and vanilla (1 teaspoon).
    • Add the wet ingredients to the dry and mix until combined. Then add the hot water and whisk until combined, then add the sprinkles (ยผ cup45g) and fold in gently with a spatula. Divide the batter between the 7 cupcake liners {3 tablespoons of batter per liner}.
    • Bake for 16-20 minutes, until a toothpick comes out with just a few moist crumbs. Allow cupcakes to cool in the muffin pan set on a wire rack.

    for the vanilla and chocolate buttercream*

    • In a stand mixer with the paddle attachment or with a hand held mixer, beat the butter (ยฝ cup/113g) and kosher salt (ยผ teaspoon) together on medium high for five minutes, stopping and scraping the bowl once or twice. Then add the confectionersโ€™ sugar (1 cup + 2 tablespoons/135g), heavy cream (2 tablespoons/30mL) and vanilla (1 teaspoon) and mix on low until combined. Scrape up and down the bowl and then beat on medium high for another 5 minutes. Remove half of the buttercream {no need to measure}, then add 2 tablespoons/10g of cocoa powder and beat another 1-2 minutes until the cocoa is fully incorporated.
    • Use a sheet of plastic wrap and lay the vanilla buttercream and chocolate buttercream side by side. Roll up the plastic wrap around the buttercream and twist the ends tightly. Cut off one end of the plastic wrap and drop the buttercream into a piping bag fitted with a Wilton 1M or piping tip of your choice. Swirl the buttercream on top of each cooled cupcake and top with more sprinkles if desired. {see video for how to prepare the piping bag}

    Notes

    *If you prefer all vanilla buttercream, just omit the cocoa powder. If you prefer all chocolate buttercream, use 3-4 tablespoons of cocoa powder.
    Cupcakes will keep covered at room temperature for 3-4 days. You can also freeze them for up to three months.

    Nutrition

    Serving: 1 cupcake | Calories: 301kcal | Carbohydrates: 25g | Protein: 2g | Fat: 22g | Saturated Fat: 10g | Polyunsaturated Fat: 10g | Cholesterol: 67mg | Sodium: 293mg | Fiber: 1g | Sugar: 21g

    Peanut Butter Caramel Pretzel Brownies

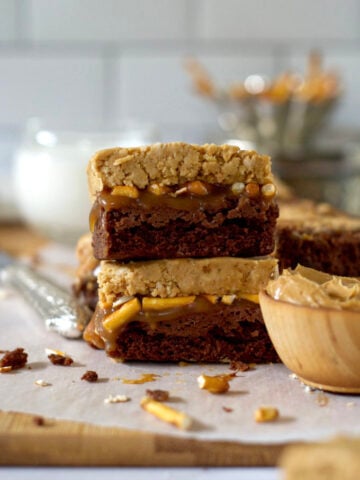
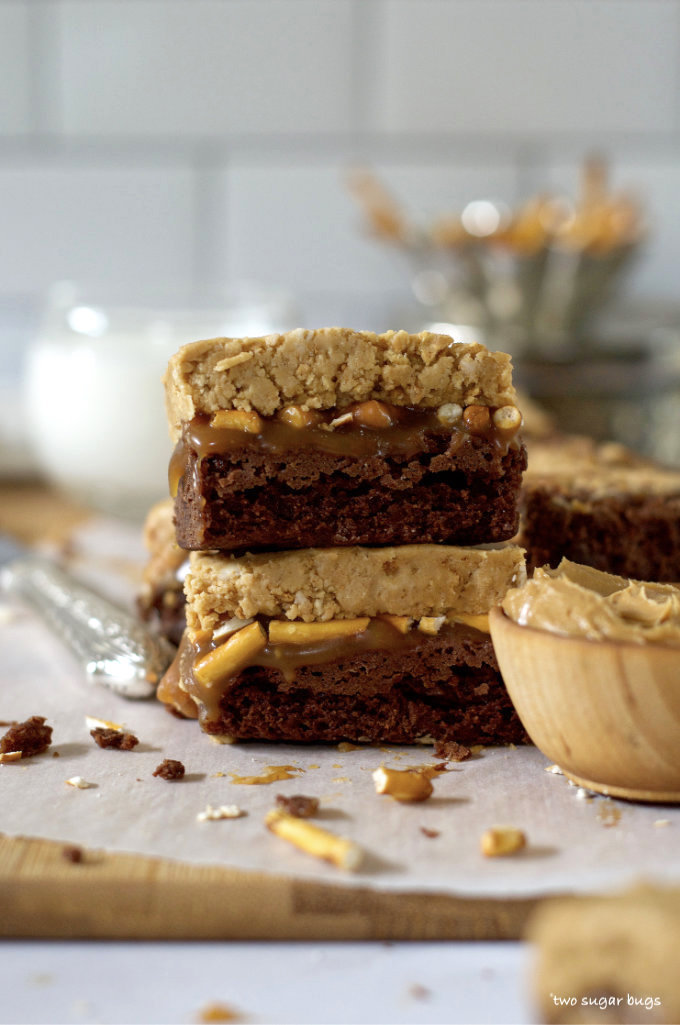
    two brownies stacked on the counter with a glass of milk in the background

    Peanut butter caramel pretzel brownies ~ three distinct layers come together into brownie bliss! They are 100% worth the three easy steps!!

    two brownies stacked on the counter with a glass of milk in the background

    Disclosure | This post may contain affiliate links. As an Amazon Associate I earn from qualifying purchases.

    This triple layer brownie recipe is a decadent dessert! A homemade caramel pretzel layer is sandwiched between a brownie and a peanut butter bar. And the combination is seriously incredible!!

    a stack of peanut butter caramel pretzel brownies

    You may have noticed that I have a thing with layered dessert bars. My mind is constantly thinking up ways to take several different complimentary flavors and textures and layer them together. This one is sweet, a little salty, crunchy and rich!

    This easy brownie recipe may seem daunting, but I promise you it is quite simple to make!

    how long does it take to make peanut butter caramel pretzel brownies?

    The hands on time is no more than 45 minutes total. Both the brownie layer and the caramel layer need to cool before adding the next layer, so total chill time is about an hour and a half.

    The first layer is the only one that needs to be baked. The brownie layer comes together quickly in one bowl! It bakes for 20-25 minutes and then needs to be mostly cool before adding the caramel pretzel middle.

    While the brownies cool, you make the homemade caramel sauce and chop the pretzels. {if making caramel sauce from scratch is too daunting, feel free to substitute a quality store bought caramel}.

    Finally, you make an easy peanut butter layer to put on the top.

    I mean, don't you just want to sink your teeth into this piece?? โฌ‡๏ธ

    a single peanut butter caramel pretzel brownie on a parchment lined cutting board

    Let's make the one-bowl brownies!

    Start by melting together the butter and chopped chocolate. I do this with a double boiler, but feel free to use the microwave if you are comfortable with that method.

    Once the chocolate and butter are melted and combined together, you will add the granulated sugar. The mixture should cool enough as the sugar is added that you can then follow with the egg and vanilla.

    chopped chocolate and butter in a glass bowl
    granulated sugar added to melted butter and chocolate in a bowl
    egg and vanilla added to brownie base in a glass bowl

    After the egg and vanilla are thoroughly mixed in, add the flour, cocoa powder, salt and baking powder. Give the dry ingredients a little toss on top and then mix them into the chocolate and butter mixture. When just a little flour is still showing, add in the milk and mix until everything is just combined.

    Then pour the brownie batter into an 8x8 baking pan lined with parchment paper and bake. Allow the brownie layer to cool before adding the caramel layer {you can speed up this process by placing the brownies in the refrigerator}.

    dry brownie ingredients added to wet in a mixing bowl
    dry ingredients mostly mixed into brownie batter
    milk added to brownie batter in a bowl

    prepare the caramel pretzel layer

    Homemade caramel sauce is one of my family's favorite things! If you want more detailed photos on how to make the caramel, please see this post or this post.

    Once the caramel has cooled for about 30 minutes, pour half of it over the cooled brownie layer. Then add the chopped pretzels and add the second half of the caramel. Place the pan back into the refrigerator to allow the caramel to cool completely and firm up.

    pretzels layered on top of caramel on top of brownie layer
    caramel pretzel layer on top of brownies in a baking pan

    how to make the peanut butter layer

    The peanut butter layer is essentially the same layer that goes into my addictive peanut butter bars. I could seriously just eat this layer with a spoon and be one happy girl!

    Start by melting the butter and adding in the peanut butter; mix until fully combined. Then add graham cracker crumbs {I use my Cuisinart food processor to grind the crackers} and confectioners' sugar and stir it all together. The mixture is quite thick.

    Drop spoonfuls of the peanut butter mixture over the chilled caramel pretzel layer. Then use an off-set spatula or a knife to spread the peanut butter into an even layer. The bars can be cut and served at this point or can be chilled further.

    melted butter and peanut butter in a bowl with a spatula
    crushed graham crackers and confectioners' sugar in a bowl
    mixed peanut butter mixture in a bowl with a spatula
    peanut butter layer smoothed over caramel pretzel layer

    what is the best way to cut these decadent brownies?

    These triple layer brownies are easiest to cut when they are chilled. Use the parchment paper to pull the brownies from the baking pan and place them on a solid cutting surface.

    Use a sharp knife to cut the bars into your desired size. I like to wipe the knife clean with a towel in between each cut to keep the bars tidy.

    The combination of peanut butter, caramel, pretzels and brownies makes these bars quite indulgent. You may want to make small pieces. I would recommend cutting them into 16 or 25 bars.

    Can I make this brownie recipe in steps?

    Yes! You can bake the brownies up to a day ahead of time. I would store them covered in the refrigerator until you are ready to put on the caramel pretzel layer.

    The caramel sauce can be made a few days ahead of time and stored in the refrigerator. Allow the caramel to come to room temperature so you can pour it over the brownie layer.

    up close look at a single peanut butter caramel pretzel brownie

    what is the best way to store peanut butter caramel pretzel brownies?

    I like to store any left over brownies covered in the refrigerator. The caramel sauce will soften at room temperature making the bars more gooey. That being said, you can store them in an airtight container at room temperature if you prefer.

    side view of peanut butter caramel pretzel brownies in a baking pan

    Remember to snap a picture and tag me on Instagram if you make these Peanut Butter Caramel Pretzel Brownies. It warms my heart to see you bring these recipes to life! Thank you for being here and happy baking!

    more layered dessert bar recipes

    • Butterscotch Mixed Nut Bars
    • Double Chocolate Oat Bottom Brownies
    • White Chocolate Chai Brownies
    • SunButter Crunch Brownies

    If you make this recipe {or any recipe!} from two sugar bugsย please come back and leave a review and a โญ๏ธโญ๏ธโญ๏ธโญ๏ธโญ๏ธ star rating.ย  I read every comment, and I LOVE hearing from you!

    two brownies stacked on the counter with a glass of milk in the background
    Print Recipe
    5 from 6 votes

    Peanut Butter Caramel Pretzel Brownies

    Three distinct layers come together into brownie bliss! They are 100% worth the three easy steps!!
    Prep Time45 minutes mins
    Cook Time25 minutes mins
    Chill Time1 hour hr 30 minutes mins
    Total Time2 hours hrs 40 minutes mins
    Course: Bars and Brownies
    Cuisine: American
    Keyword: brownies, caramel, caramel brownies, layered brownies, peanut butter, peanut butter brownies
    Servings: 16 bars
    Calories: 386kcal
    Author: Tasia Harper

    Ingredients

    Brownie Layer

    • ยผ cup unsalted butter 57g
    • 4 ounces dark chocolate 112g
    • ยพ cup granulated sugar 150g
    • 1 large egg
    • 1 teaspoon pure vanilla extract
    • โ…” cup all-purpose flour 85g
    • 1 tablespoon unsweetened cocoa powder 5g
    • ยผ teaspoon baking powder
    • ยผ teaspoon kosher salt
    • ยผ cup milk 60mL

    Pretzel and Caramel Layer

    • 1 cup granulated sugar 200g
    • 5 tablespoons unsalted butter 70g
    • ยฝ cup heavy whipping cream 120mL
    • 1 teaspoon pure vanilla extract
    • ยฝ teaspoon kosher salt
    • 1 cup pretzels chopped 60g

    Peanut Butter Layer

    • ยพ cup peanut butter 192g
    • ยผ cup unsalted butter melted 57g
    • 4 full graham cracker sheets crushed to crumbs 64g
    • 1 cup confectionersโ€™ sugar 120g

    Instructions

    for the brownie layer

    • Preheat oven to 350ยฐF and line an 8x8 baking pan with parchment paper, leaving a little overhang. Lightly butter or grease the parchment paper.
      In a medium bowl, melt together the butter (ยผ cup/57g) and chocolate (4 ounces/112g) and stir until well combined. Then remove from the heat. {I like to chop the chocolate small so it melts faster. I use the double boiler method, but if you are comfortable doing this in the microwave, that also works}.
      Add the granulated sugar (ยพ cup/150g) and stir until well combined. Then stir in the egg (1 large) and vanilla (1 teaspoon).
      Add the flour (โ…” cup/85g), cocoa powder (1 tablespoon/5g), baking powder (ยผ teaspoon) and kosher salt (ยผ teaspoon) on top of the wet ingredients. Give the dry ingredients a little toss together and then stir into the chocolate mixture until incorporated, but still showing some larger areas of flour.
      Add the milk (ยผ cup/60mL) and then stir until everything is just combined.
      Pour or spoon the batter into the prepared baking pan and bake 20-25 minutes, until a tester comes out with just a few moist crumbs. Allow the brownies to cool in the baking pan set on a wire cooling rack.
      You can prepare this up to a day ahead of time, cover and store at room temperature or in the refrigerator. You can also speed up the cooling time by placing the brownies in the refrigerator.

    for the caramel pretzel layer

    • Add one cup of granulated sugar/200g to a medium saucepan and heat over medium, stirring constantly. Use a wooden spoon. The sugar will start to melt. Then it will clump together before melting into a thick amber colored liquid.
      When the sugar is fully melted {this takes about 10 minutes}, add the room temperature butter (5 tablespoons/70g). The butter will cause the sugar to bubble rapidly, so use caution in this step. Whisk the butter into the caramel until it is completely incorporated. I prefer using a whisk to keep the butter and sugar from separating, but your wooden spoon can work as well.
      When your butter and sugar are fully incorporated, slowly add the heavy cream (ยฝ cup/120mL) while continuing to whisk {or stir}. Again, the mixture will bubble rapidly, so use caution. Let the mixture boil for approximately one additional minute. Remove from the heat and stir in vanilla (1 teaspoon) and kosher salt (ยฝ teaspoon). Carefully pour caramel into a heatproof container and allow to cool down and slightly thicken before using {30 minutes or so}.
      While the caramel cools, use your {clean} hands or a knife to break/chop the pretzels (1 cup/60g) into small pieces. Pour about half the caramel over the brownie layer, then press the pretzels into the caramel and top with the remaining caramel sauce. Place the pan in the refrigerator to allow the caramel to cool and become firm. *You can substitute with a high quality storebought caramel sauce if desired. You will need one cup.

    for the peanut butter layer

    • In a medium bowl, mix together the peanut butter (ยพ cup/192g) and melted butter (ยผ cup/57g) until well blended. Then add in the crushed graham cracker crumbs (4 full cracker sheets/64g)and confectioners' sugar (1 cup/120g), mixing until well combined.
      Take spoonfuls of the peanut butter layer and place them on top of the chilled pretzel caramel layer. Use an off-set spatula or knife to smooth the peanut butter in an even layer over the top of the bars.
      Use the parchment paper to pull the bars out of the baking pan and cut into desired sizes. I find the bars are easiest to cut when they are chilled. The caramel layer will soften at room temperature and makes them much messier to slice.

    Notes

    I have only tested this recipe with a commercial peanut butter such as Jif or Skippy.
    If graham crackers are not available, try digestive biscuits.
    Cover and store any leftover bars in the refrigerator for up to one week. They may also be stored in an airtight container at room temperature for up to five days.

    Nutrition

    Serving: 1 bar | Calories: 386kcal | Carbohydrates: 46g | Protein: 5g | Fat: 21g | Saturated Fat: 10g | Polyunsaturated Fat: 9g | Cholesterol: 46mg | Sodium: 232mg | Fiber: 2g | Sugar: 34g

    Lemon Cut-Out Sugar Cookies

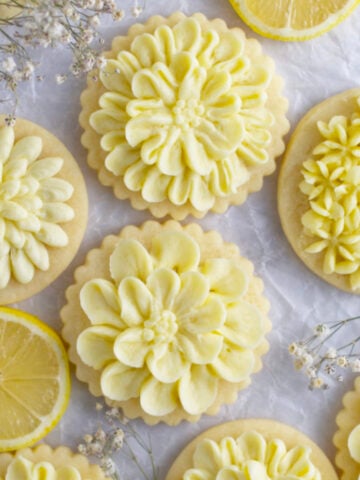
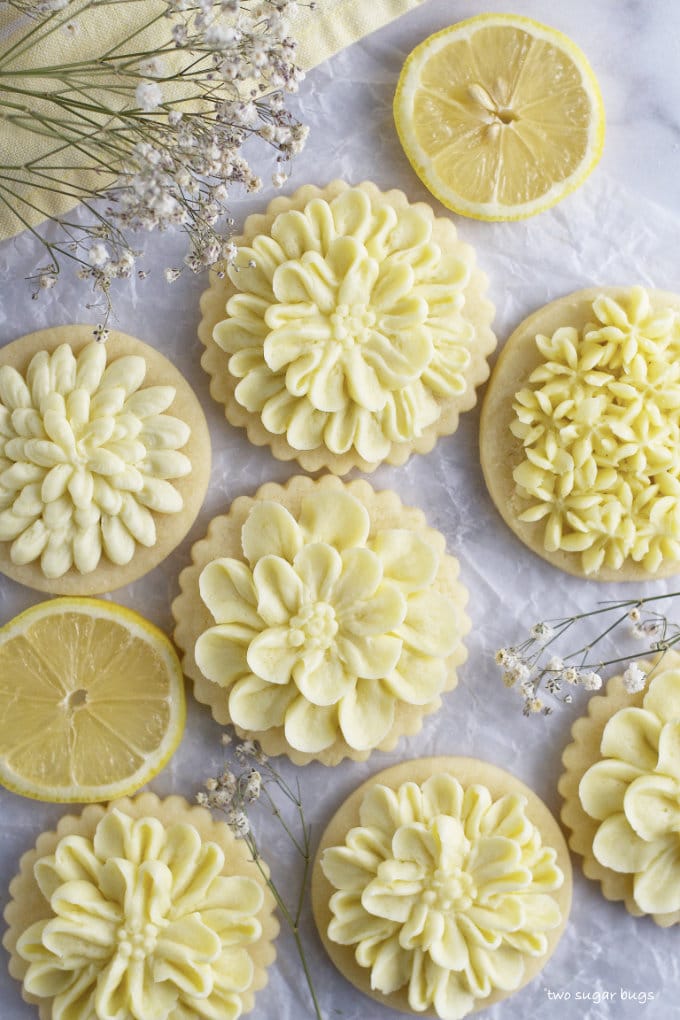
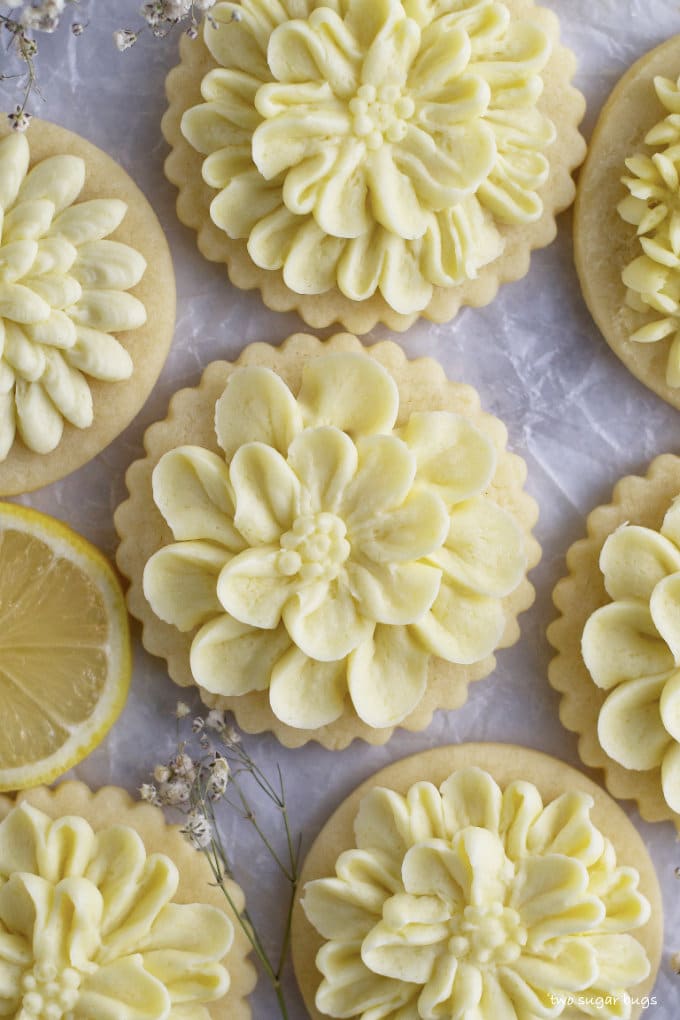
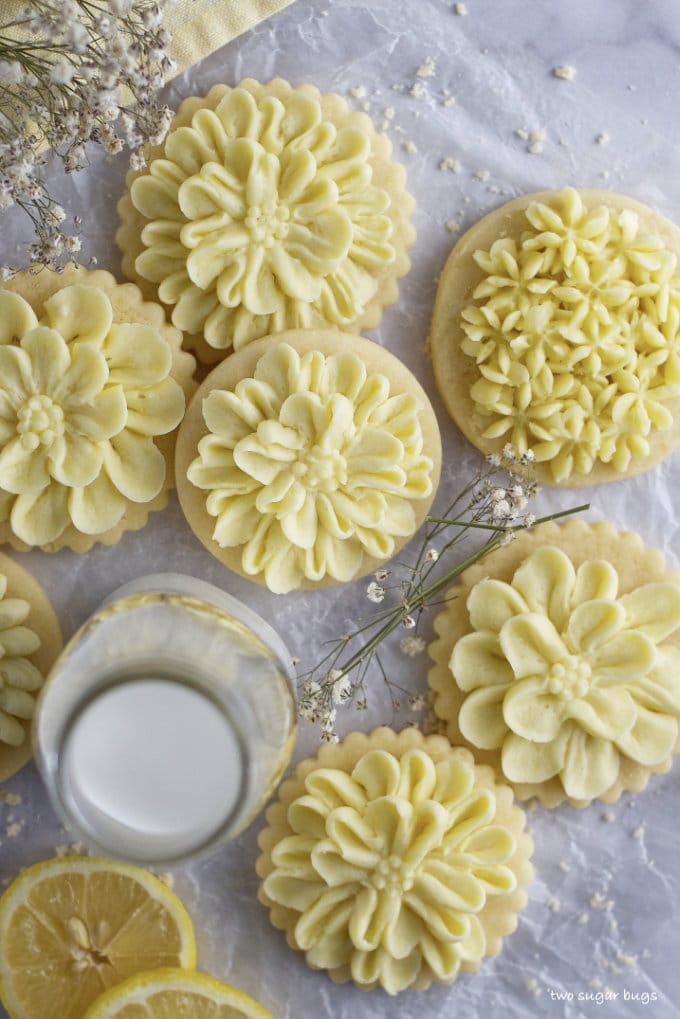
    decorated lemon sugar cookies on parchment paper

    Lemon cut-out sugar cookies are soft and thick and perfect for decorating {although they are amazing undecorated as well}! Top them with an easy lemon buttercream for the ultimate lemon buttercream sugar cookie!

    lemon cut out sugar cookies on parchment paper with lemon slices

    Disclosure | This post may contain affiliate links. As an Amazon Associate I earn from qualifying purchases.

    If I could have only one dessert for the rest of my life, I think it would be sugar cookies. Thick, soft, and chewy buttercream sugar cookies. And with winter in full force this year, I'm definitely dreaming of spring.

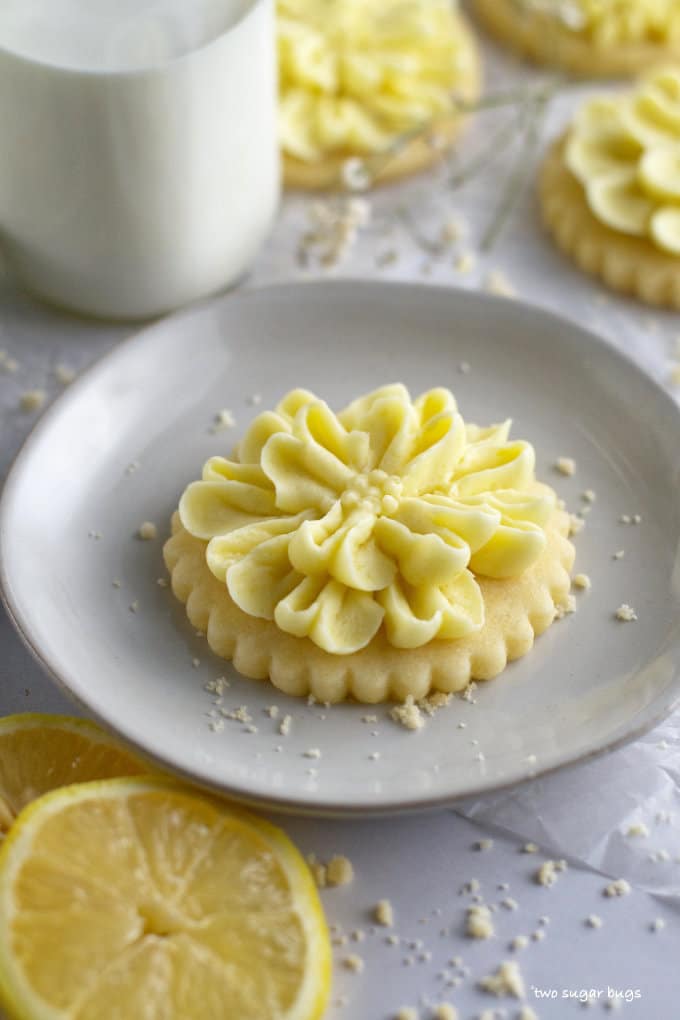
    decorated cookie on a plate

    The flavor of lemon always reminds me of warmer days and sunshine. So today I'm transporting us to the thought of short sleeves, the warmth of the sun on our skin and brighter days ahead. In cookie form, of course!

    how do you make lemon cookies from scratch?

    This lemon sugar cookie recipe is a variation of my tried and true always perfect sugar cookies. Lemon juice replaces the vanilla and the addition of lemon zest {this Microplane is my favorite zester} gives the cookies another burst of lemon flavor.

    The recipe follows a traditional cookie preparation; cream butter and sugar, add egg and flavoring, followed by the dry ingredients. The dough needs a short rest {30 minutes or up to five days} in the refrigerator and then it's ready to roll, cut and bake.

    let's make lemon sugar cookies!

    Start by gathering your ingredients. The butter and egg work best when at room temperature. In most cases, letting these ingredients sit out for 1-2 hours will be sufficient.

    Please scroll to the printable recipe card at the end of this post for the full list of ingredients and baking directions.

    ingredients for lemon cut-out sugar cookies

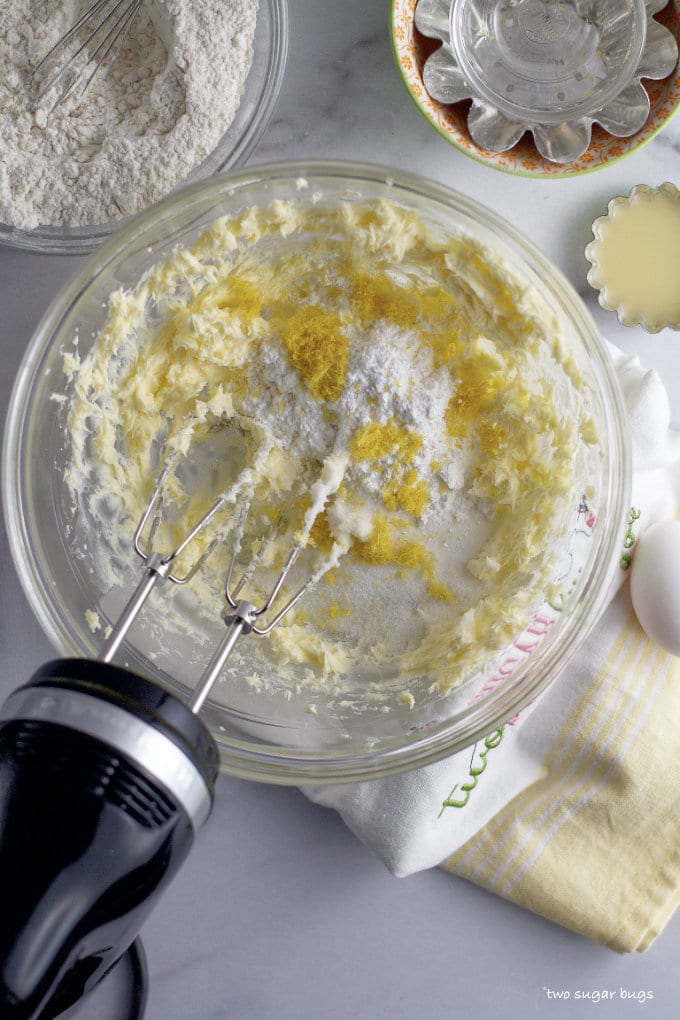
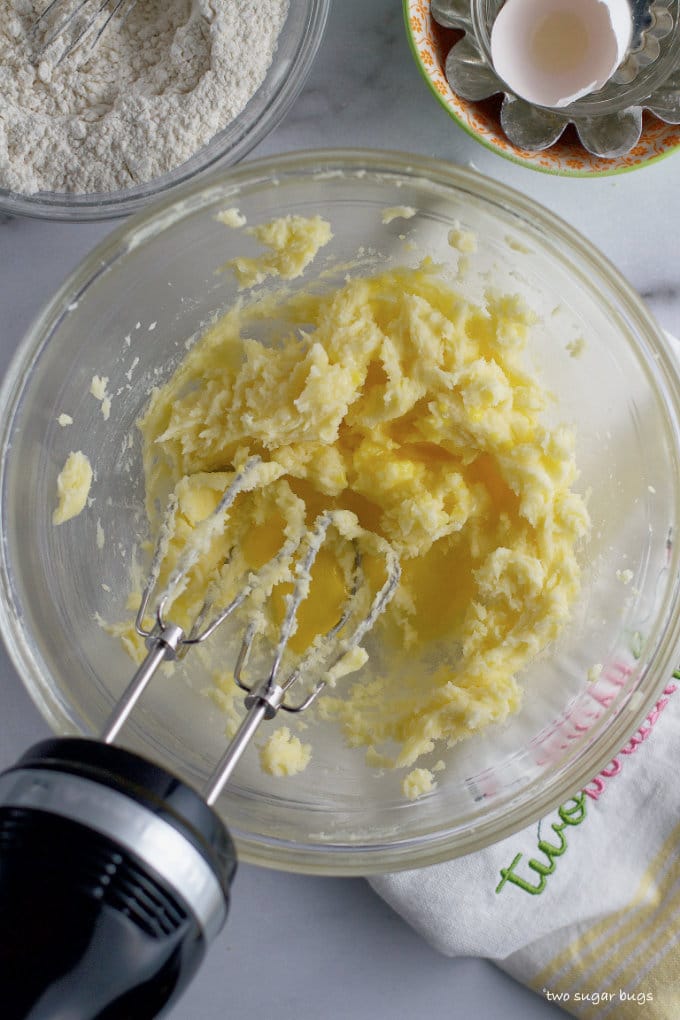
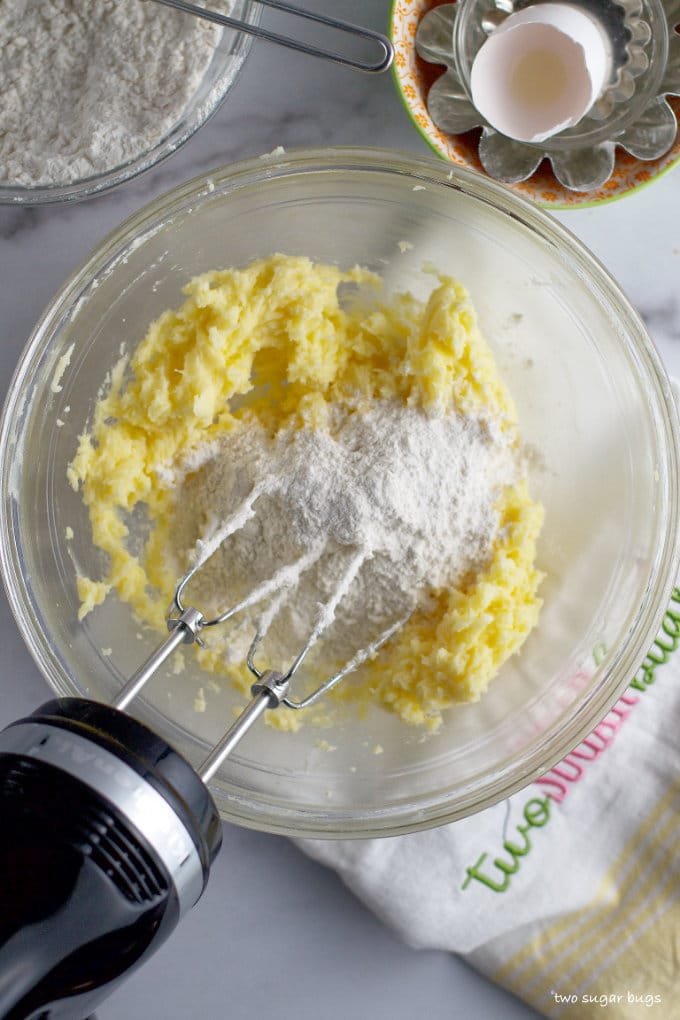
    First whisk the all-purpose flour and baking powder together. Doing this helps to ensure that the baking powder is equally dispersed throughout the finished dough. Set this aside while you cream together the butter, salt, sugars and lemon zest. Then add in the egg and lemon juice.

    sugars and zest added to creamed butter in a mixing bowl
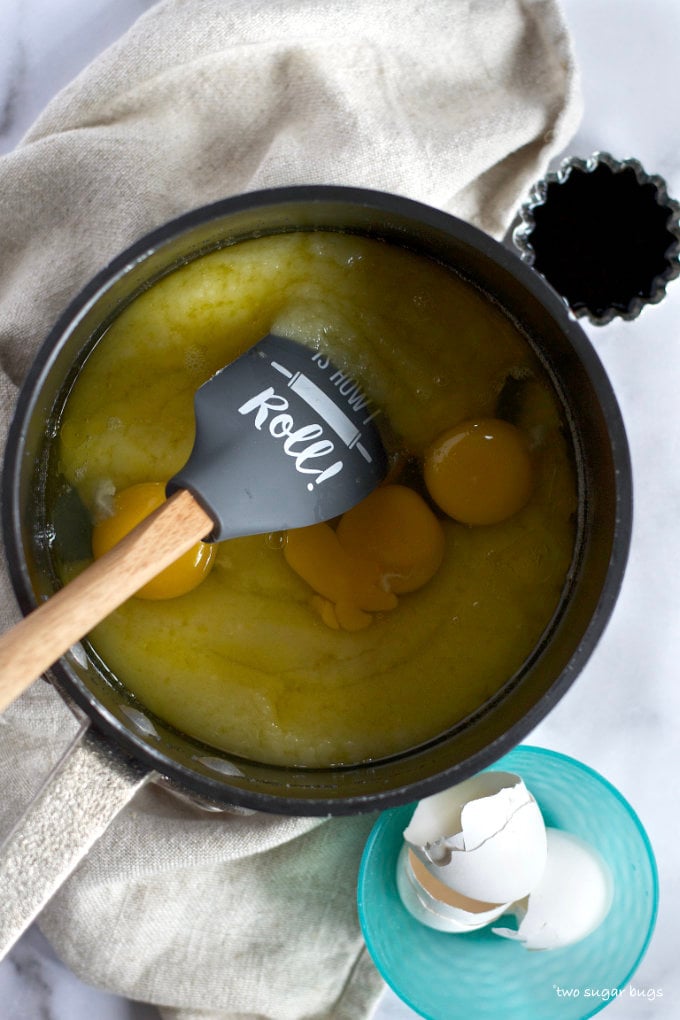
    egg and lemon juice added to lemon sugar cookie dough

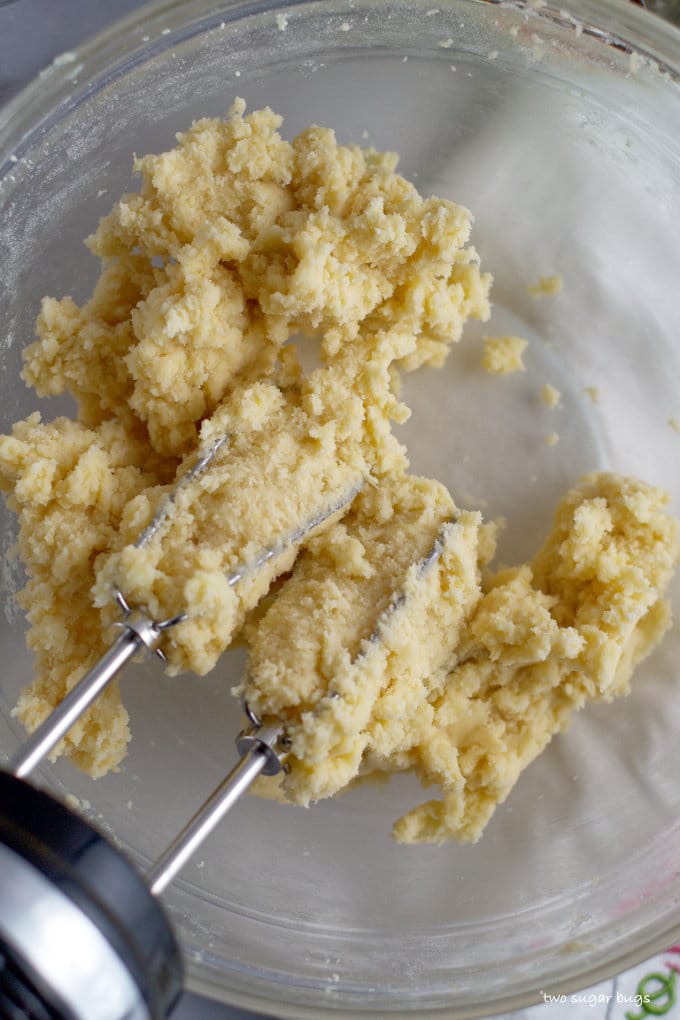
    Next, add the flour mixture in 3-4 additions with the mixer on low. The dough will be finished when it starts to gather on the mixing beaters or paddle. The dough will be soft, but shouldn't be too sticky.

    flour added to mixing bowl
    finished lemon sugar cookie dough in a mixing bowl

    Gather the lemon sugar cookie dough into a ball, wrap in plastic and press into about a 1-inch disk. Place the wrapped dough in the refrigerator for 30 minutes before rolling out.

    how to roll your sugar cookie dough

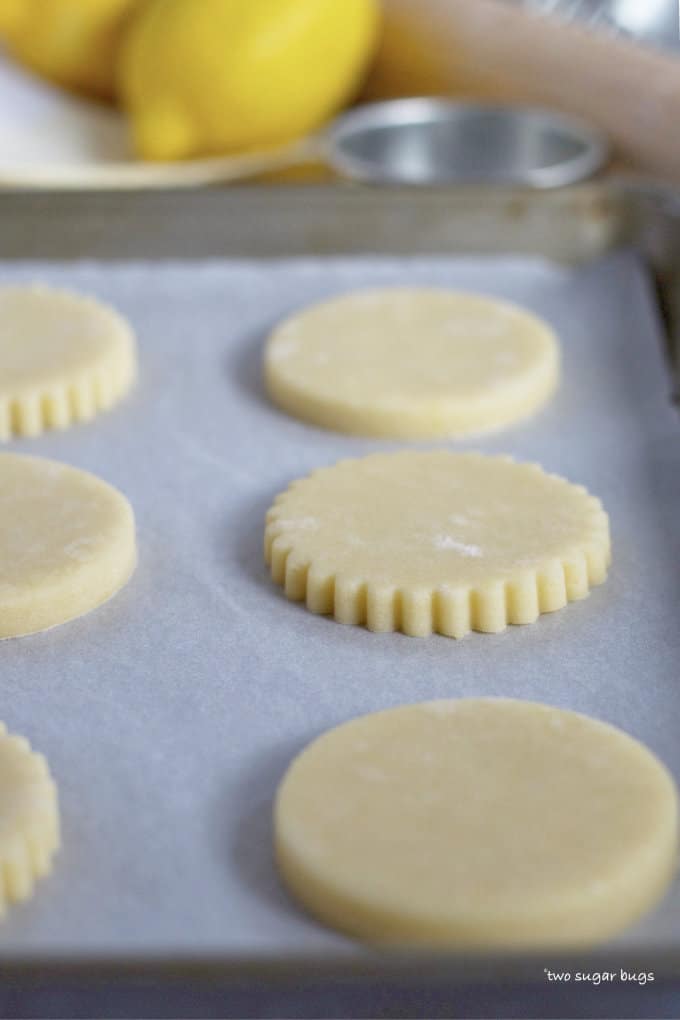
    The trick to getting thick, soft and chewy sugar cookies is not rolling the dough too thin. I prefer about a ยผ inch thick. I use a traditional rolling pin and just eye-ball the thickness {I love this one my mom bought me from Williams Sonoma}. Many of my cookie friends swear by this rolling pin for getting evenly rolled cookie dough.

    unbaked cookies on a baking sheet

    how do I know when my sugar cookies are done?

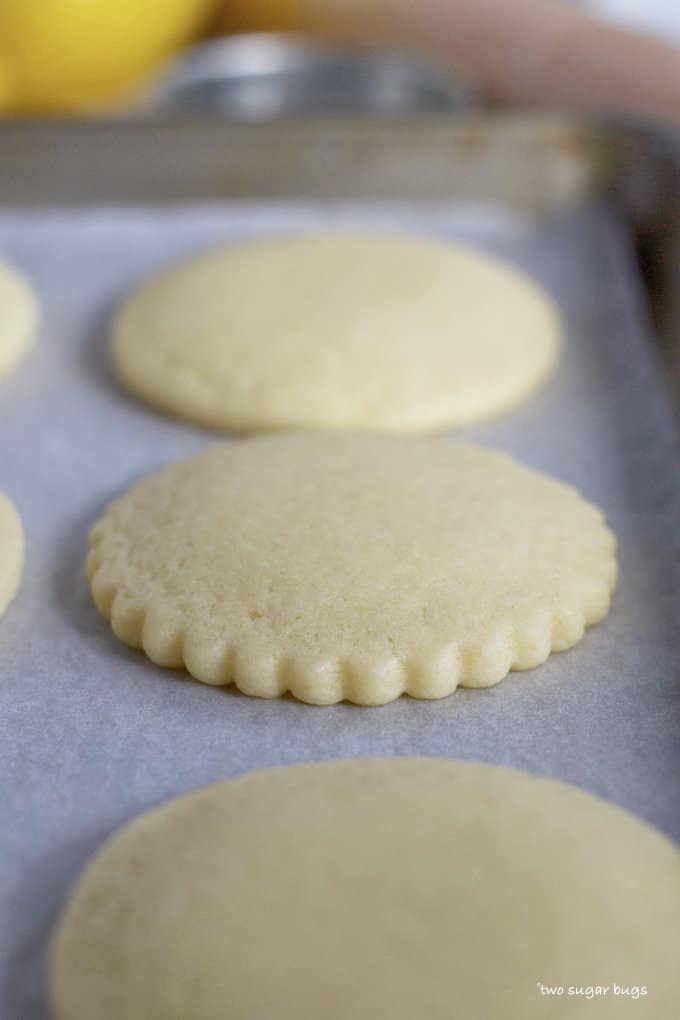
    Another trick to soft and chewy sugar cookies is not over baking them. The bake time is quick on lemon cut-out sugar cookies; only 7-8 minutes in a 375ยฐF oven.

    They are done baking when the edges are set and the middle of the cookies have a slightly puffy center. {I use these Ateco fluted cutters and round biscuit cutters}.

    puffy top on baked cookie just out of the oven

    The cookies will rest on the hot baking pan for 2 minutes, which helps to finish cooking the dough. After 2 minutes, remove the cookies to a wire rack to cool completely before decorating.

    decorated lemon cut out sugar cookie
    I used a Wilton 104 and 4 for piping these cookies.

    what buttercream frosting is best for lemon cut-out cookies?

    I've paired this cookie recipe with my easy lemon buttercream frosting. The frosting is the perfect balance of sweet and tart and really gives these lemon sugar cookies an extra pop of lemon! If you prefer a more subtle combination, my favorite American buttercream is another great option.

    what is the best way to store buttercream sugar cookies?

    The cookies should stay fresh in an air tight container at room temperature for 2-3 days. You can also store them in the refrigerator in an air tight container for up to a week. To keep the cookies the absolute freshest, I would freeze them in an air tight container. They defrost at room temperature in about 30 minutes.

    lemon cut out sugar cookies with milk

    Remember to snap a picture and tag me on Instagram if you make these Lemon Cut-Out Sugar Cookies. It warms my heart to see you bring these recipes to life! Thank you for being here and happy baking!

    more sugar cookie recipes ~

    • Orange Sugar Cookies
    • Always Perfect Sugar Cookies
    • Sprinkle Cookies
    • Cinnamon Cut-Out Sugar Cookies
    • Chocolate Sugar Cookies
    • Easy and Fast Soft Drop Sugar Cookies
    • Soft Gingerbread Sugar Cookies
    • Red Velvet Sugar Cookies
    • White Chocolate Sugar Cookies

    If you make this recipe {or any recipe!} from two sugar bugsย please come back and leave a review and a โญ๏ธโญ๏ธโญ๏ธโญ๏ธโญ๏ธ star rating.ย  I read every comment, and I LOVE hearing from you!

    decorated lemon sugar cookies on parchment paper
    Print Recipe
    4.92 from 12 votes

    Lemon Cut-Out Sugar Cookies

    Lemon sugar cookies are soft and thick and perfect for decorating {although they taste amazing left plain as well}! This easy recipe makes cookies that hold their shape and freeze beautifully!
    Prep Time10 minutes mins
    Cook Time8 minutes mins
    Chill Time30 minutes mins
    Total Time48 minutes mins
    Course: Cookies
    Cuisine: American
    Keyword: cookie recipe, cut-out cookies, lemon cookies, lemon sugar cookies, sugar cookies
    Servings: 24 Cookies *depending on size of cookies
    Calories: 163kcal
    Author: Tasia Harper

    Ingredients

    • 3 cups all-purpose flour 375g
    • 2 teaspoons aluminum-free baking powder
    • 1 cup unsalted butter room temperature 226g
    • ยฝ teaspoon kosher salt
    • ยพ cup granulated sugar 150g
    • ยฝ cup confectionersโ€™ sugar 60g
    • 1 tablespoon lemon zest about 2 lemons*
    • 1 large egg preferably room temperature
    • 1 tablespoon lemon juice 15mL

    Instructions

    • In a medium bowl, combine flour (3 cups/375g) and baking powder (2 teaspoons) with a whisk.ย  Set aside.
    • Using a hand mixer or a stand mixer fitted with the paddle attachment, beat the butter (1 cup/226g) and kosher salt (ยฝ teaspoon) on medium speed until combined, about 1 minute.ย  Add in the granulated sugar (ยพ cup/150g), confectioners' sugar (ยฝ cup/60g) and lemon zest (1 tablespoon, about 2 lemons) and beat until smooth, about 1 ยฝ minutes.ย Beat in egg (1 large ) and lemon juice (1 tablespoon/15mL) and mix until well combined, about 1 minute.ย  Scrape up and down the sides of the bowl.
    • With the mixer on low, add the flour mixture a little at a time, occasionally stopping to scrape your bowl.ย  The dough should form a ball around the paddle when the mixing is finished.ย The dough should be soft, but not sticky.
    • Wrap the dough in plastic wrap and press into a 1 inch thick disk.ย  Chill for a minimum of 30 minutes before rolling and for up to five days.
    • Preheat the oven to 375ยฐF and prepare baking sheets with silicone baking mats or parchment paper. ย 
    • On lightly floured surface, roll the dough to about a ยผ inch thickness, use additional flour as needed to prevent sticking. Cut into shapes with cookie cutters. Re-roll the remaining dough and continue cutting until all the dough is used.
    • Arrange cookies on baking sheets about 1 inch apart. Bake one sheet at a time in the middle of the oven, about 7-8 minutes, until slightly puffy. Allow the cookies to rest for 2 minutes on the pan and then transfer to a wire rack to cool completely.**
    • Decorate as desired. Lemon Buttercream Frosting or Favorite American Buttercream are my favorites for this cookie recipe.

    Notes

    *My testing found this amount of lemon zest and lemon juice to be the right balance of sweet and tart. If you like an extra punch of lemon, you can increase the lemon zest and/or add ยผ -ยฝ teaspoon of lemon extract.
    **I like to freeze the cookies once they have completely cooled, I think it adds to the softness of the cookies. I typically bake the cookies at least a day prior to decorating them (or bake in the evening and freeze overnight). You can also bake the cookies and freeze them for up to 2-3 months before decorating.
    Cookies will stay fresh in an air tight container at room temperature for 2-3 days or in the refrigerator for up to 1 week. They also freeze well for up to 3 months. If freezing decorated cookies, chill the cookies in a single layer. The cookies can then be stacked and frozen in an airtight container. When you take the frozen cookies out of the freezer, be sure to unstack them before they thaw or the buttercream will stick the cookies together. They defrost quickly; about 30 minutes at room temperature.

    Nutrition

    Serving: 1 cookie | Calories: 163kcal | Carbohydrates: 21g | Protein: 2g | Fat: 8g | Saturated Fat: 5g | Polyunsaturated Fat: 3g | Cholesterol: 28mg | Sodium: 89mg | Fiber: 1g | Sugar: 9g

    Espresso Brown Butter Toffee Cookies

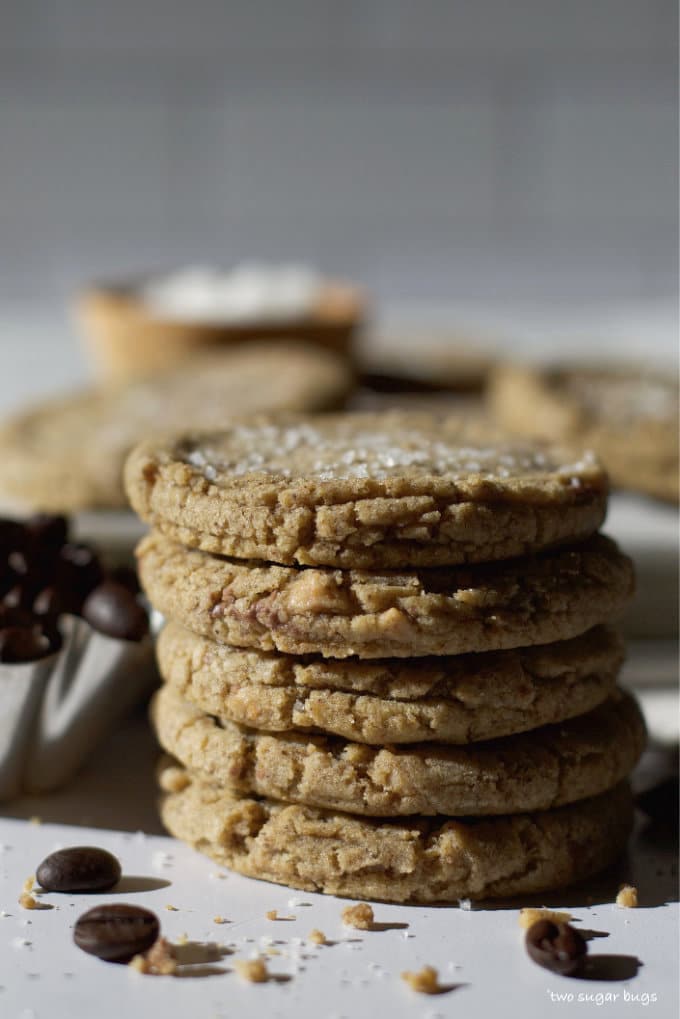
    stack of cookies with the sun hitting them

    Espresso brown butter toffee cookies have lightly crisp edges and soft and chewy centers with a rich and decadent flavor from the espresso and brown butter. The toffee bits add the perfect amount of sweetness!

    stack of cookies with the sun hitting them

    Disclosure | This post may contain affiliate links. As an Amazon Associate I earn from qualifying purchases.

    This recipe gives an upgrade to my family's favorite chocolate chipper recipe by using brown butter and espresso powder. Coffee and cookie fans are going to go crazy for this cookie!

    close up photo of cookies on a baking sheet

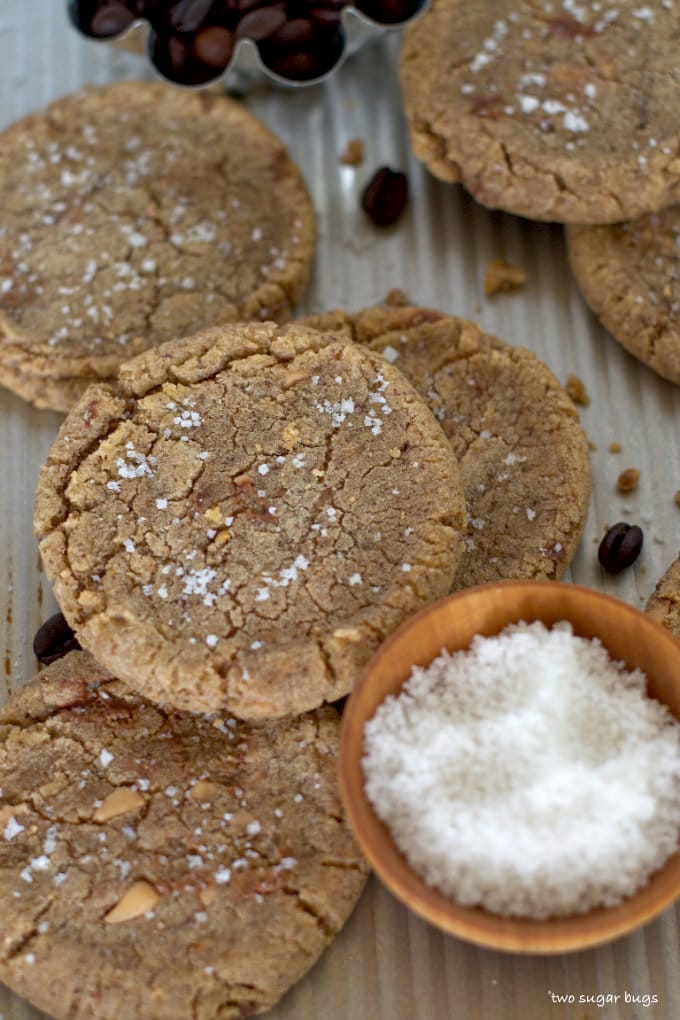
    You get the nutty and caramelized flavor from the brown butter, which is perfectly accented by the espresso. Then we add in some sweetness in the way of toffee bits {although homemade toffee would be phenomenal here as well!}. The finishing touch is a light sprinkle of flakey sea salt and what you get is cookie nirvana!

    what does brown butter do to cookies?

    Brown butter adds richness and extra flavor to cookies. By browning the butter, it creates a whole other depth to the cookie's taste. The butter is no longer just a background ingredient, but instead takes on a leading role.

    If you have never baked with brown butter, you are in for a treat! Your house will smell amazing and your taste buds are going to love the nutty taste!

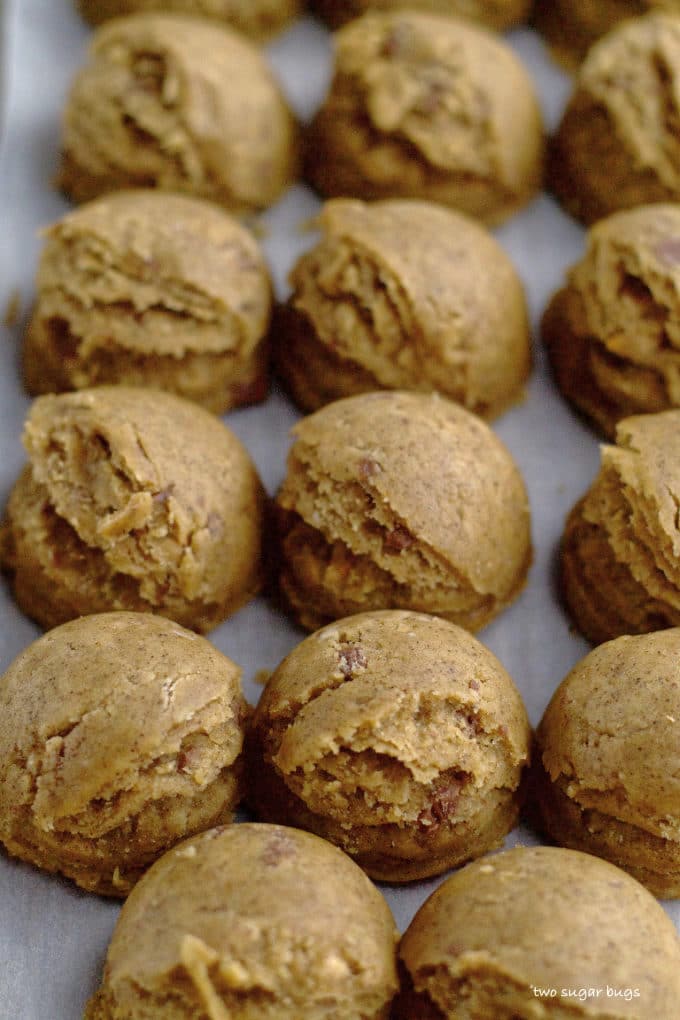
    espresso brown butter toffee cookie dough scoops on a baking sheet

    do I need special ingredients for espresso brown butter toffee cookies?

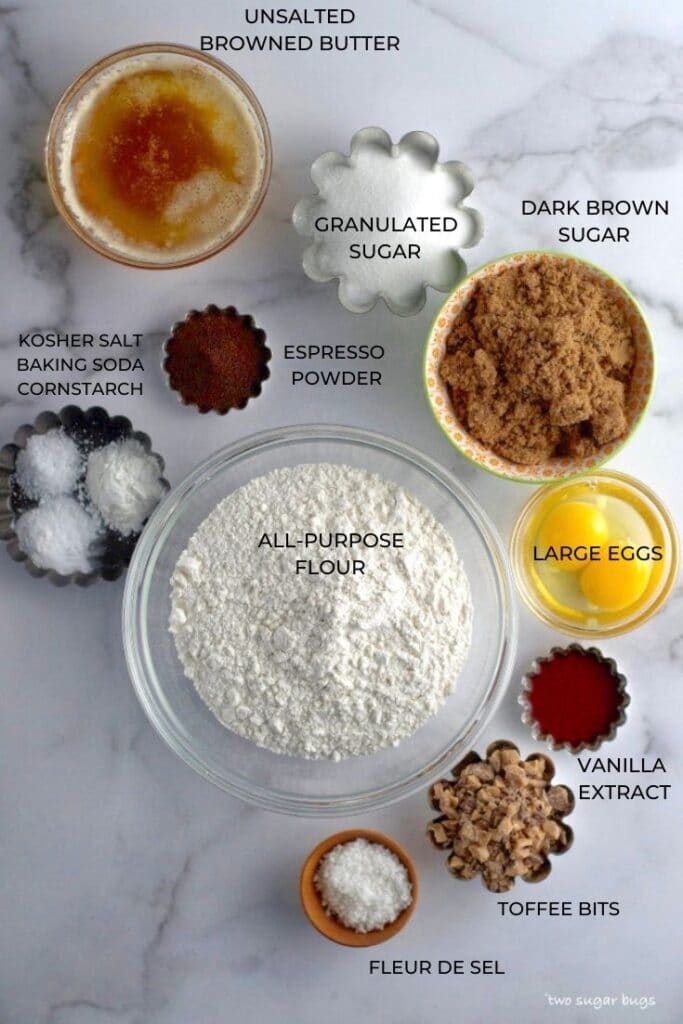
    Yes, this cookie recipe gets the espresso flavor from instant espresso powder. Instant espresso powder is readily available in most supermarkets in the coffee aisle. It can also be ordered online.

    You also need toffee bits, which can be purchased in the baking aisle of most markets. I used Heath Milk Chocolate Toffee Bits and purchased them from Target. You could also chop a Heath bar or a Hershey's Skor candy bar, if you have trouble finding the baking bits.

    ingredients for espresso brown butter toffee cookies

    let's bake cookies!

    The first thing you need to do is brown the butter and allow it to solidify. I find it takes about an hour to firm back up at room temperature. The process can be sped along in the refrigerator, but the brown butter should be room temperature before using it. I have more detailed directions on how to brown butter in this brown butter blondie post.

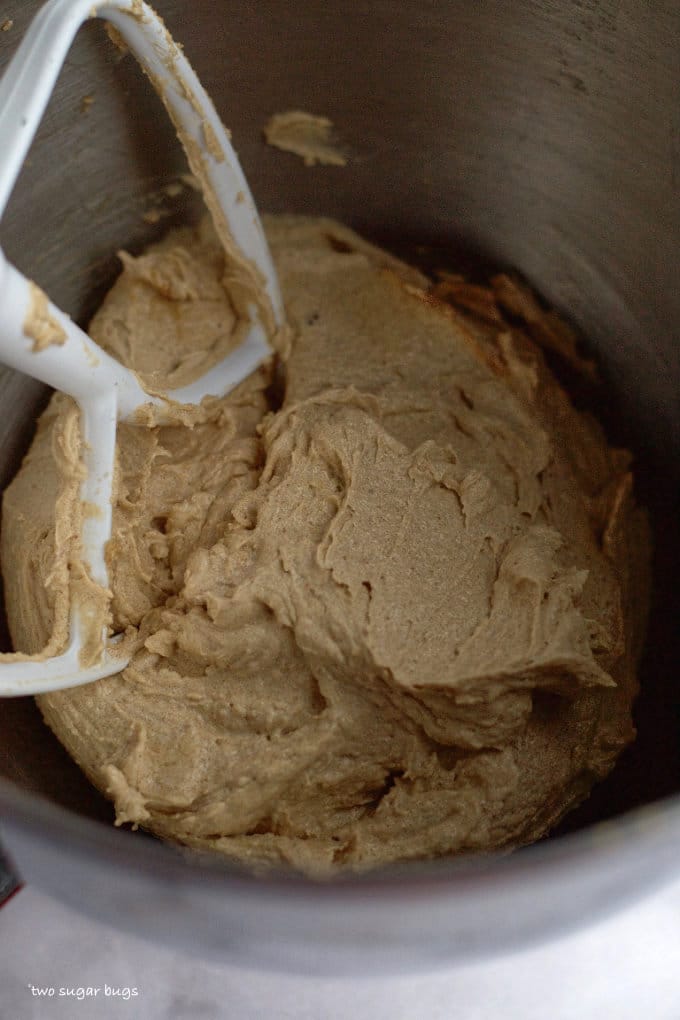
    Once the brown butter is solid and room temperature, add it to your mixer bowl with the granulated and brown sugars. Cream these three ingredients together for 4-5 minutes. No skimping on this step, okay??

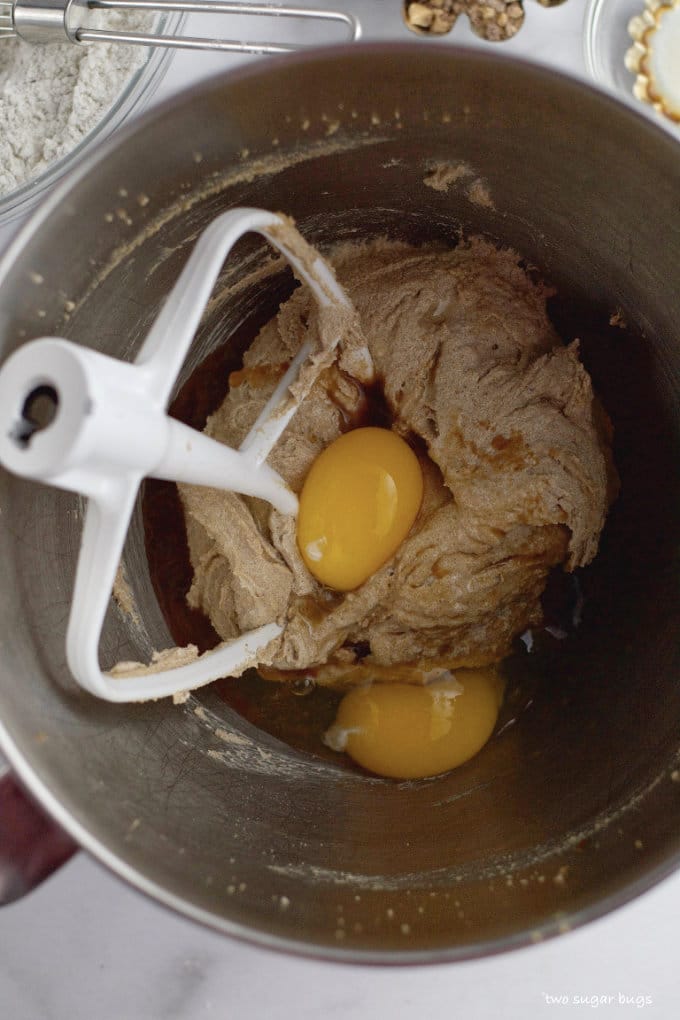
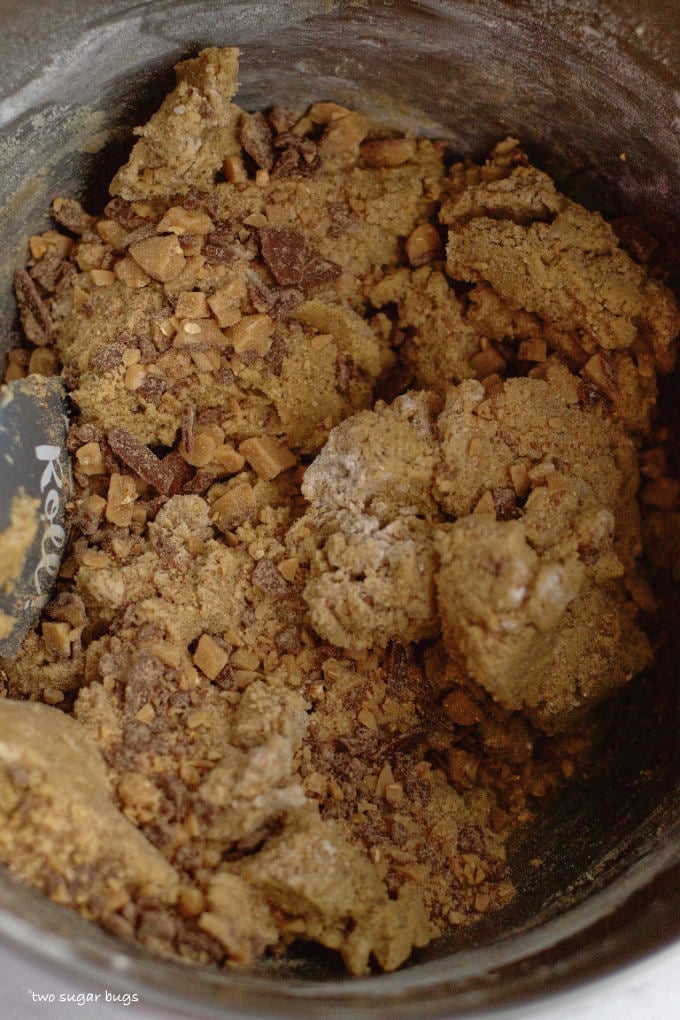
    While the butter and sugars are creaming, add the dry ingredients to a bowl and whisk them all together. Next, you will add the eggs and vanilla {after testing this recipe several times, I like adding the eggs one at a time}. Followed by the dry ingredients {in three additions}. Stop mixing when the flour in the cookie dough is still showing just a few streaks. Then use a spatula to fold in the toffee bits.

    creamed butter and sugars in a mixing bowl with eggs and vanilla
    creamed butter, sugars, eggs and vanilla in a mixing bowl
    cookie dough with toffee bits being folded in

    how to prepare the cookies for baking

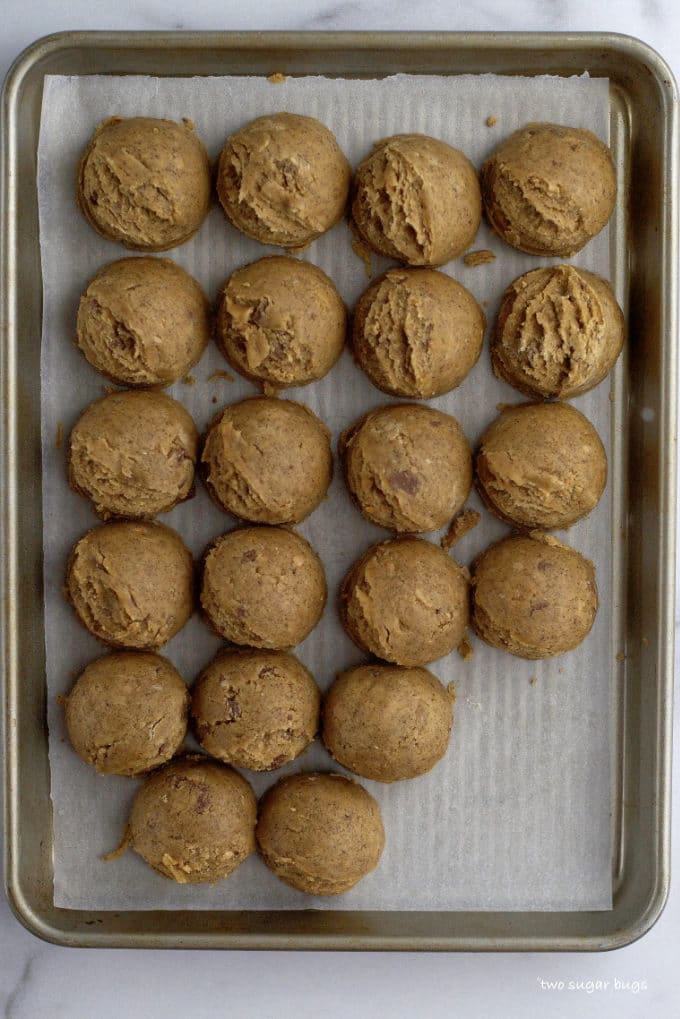
    Scoop the completed dough into 24 equal portions. I use a size 30 scoop, which is just a little over two tablespoons. Chill the portioned dough for one hour.

    cookie dough scoops on a parchment lined baking sheet
    A few cookie dough scoops may have been lost to cookie dough bandits!

    Preheat the oven after the dough portions are chilled and bake the cookies. When you remove the cookies from the oven, drop them hard on the counter one time to help give the crinkly edges. Then sprinkle the tops with a flakey sea salt and allow the cookies to cool on the pan for 2 minutes before removing to a wire cooling rack to cool completely.

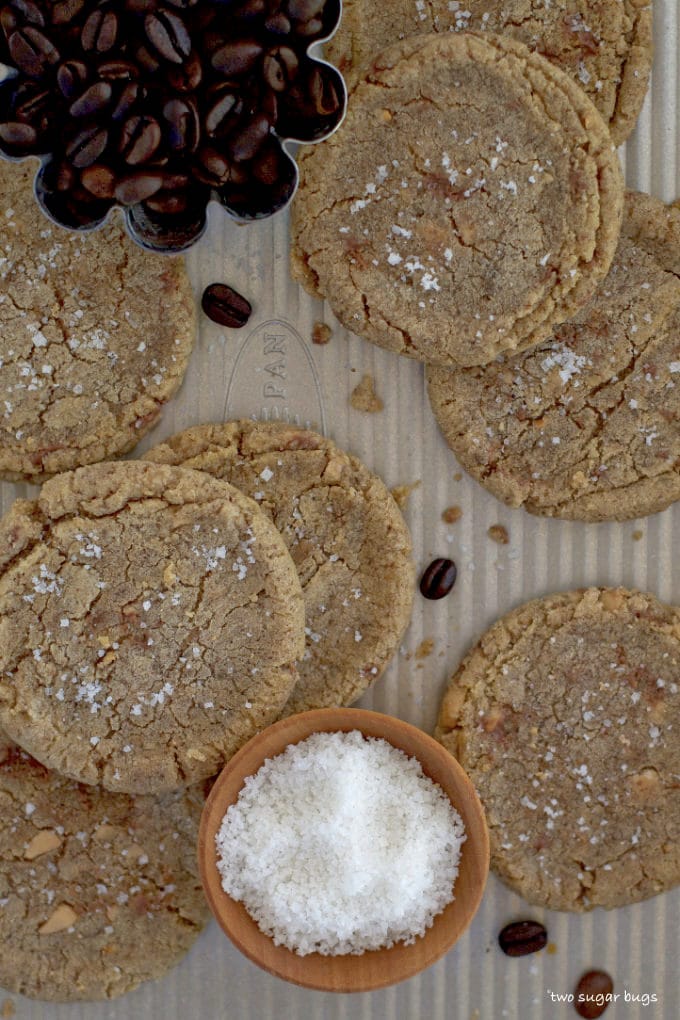
    espresso brown butter toffee cookies on a baking sheet with salt and coffee beans

    Remember to pin this recipe to Pinterest! Use the button on the recipe card or the share buttons on the side or bottom of this page.

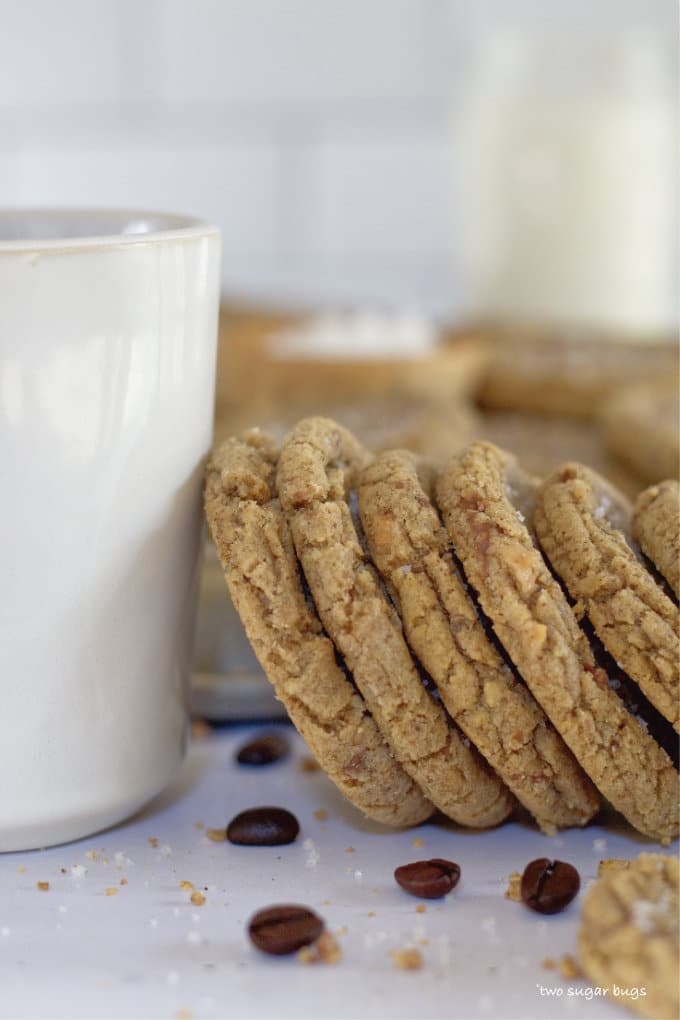
    espresso brown butter toffee cookies leaning against a coffee cup

    Remember to snap a picture and tag me on Instagram if you make these Espresso Brown Butter Toffee Cookies. It warms my heart to see you bring these recipes to life! Thank you for being here and happy baking!

    more coffee and brown butter desserts to try ~

    • Browned Butter Cupcakes with Salted Caramel Frosting
    • Espresso Cheesecake
    • Brown Butter Peppermint Blossoms
    • No Bake Mini Peanut Butter Espresso Cheesecakes
    • Salted Caramel Espresso Bars

    If you make this recipe {or any recipe!} from two sugar bugsย please come back and leave a review and a โญ๏ธโญ๏ธโญ๏ธโญ๏ธโญ๏ธ star rating.ย  I read every comment, and I LOVE hearing from you!

    stack of cookies with the sun hitting them
    Print Recipe
    4.97 from 27 votes

    Espresso Brown Butter Toffee Cookies

    Lightly crisp edges and soft and chewy centers with a rich and decadent flavor from the espresso and brown butter. The toffee bits add the perfect amount of sweetness!
    Prep Time20 minutes mins
    Cook Time10 minutes mins
    Additional Time1 hour hr
    Total Time1 hour hr 30 minutes mins
    Course: Cookies
    Cuisine: American
    Keyword: brown butter, brown butter cookies, Cookies, espresso, espresso cookies, toffee, toffee cookies
    Servings: 24 cookies
    Calories: 179kcal
    Author: Tasia Harper

    Ingredients

    • ยพ cup unsalted butter 170g, browned and returned to room temperature {solidified}
    • 2 ยฝ cups all-purpose flour 312g
    • 1 teaspoon baking soda
    • 2 teaspoons cornstarch
    • 4 teaspoons instant espresso powder
    • ยฝ teaspoon kosher salt
    • 1 cup dark brown sugar* 200g
    • ยฝ cup granulated sugar 100g
    • 2 large eggs room temperature
    • 2 teaspoons pure vanilla extract
    • ยฝ cup toffee bits** 85g
    • Flakey sea salt optional for sprinkling on finished cookies

    Instructions

    to brown the butter

    • Place the unsalted butter (ยพ cup/170g) in a saucepan over low heat and let it cook until small brown flakes form. You will want to stir or swirl the pan frequently to keep it from burning. The butter will foam and bubble up along the process, just keep stirring/swirling and move the foam aside from time to time to check the color. The butter will turn an amber/brown color and will smell nutty and toasted when itโ€™s ready {about 7-10 minutes}. Pour melted butter and all the browned bits into a heat proof bowl to cool and solidify back to room temperature {about 1 hour}.
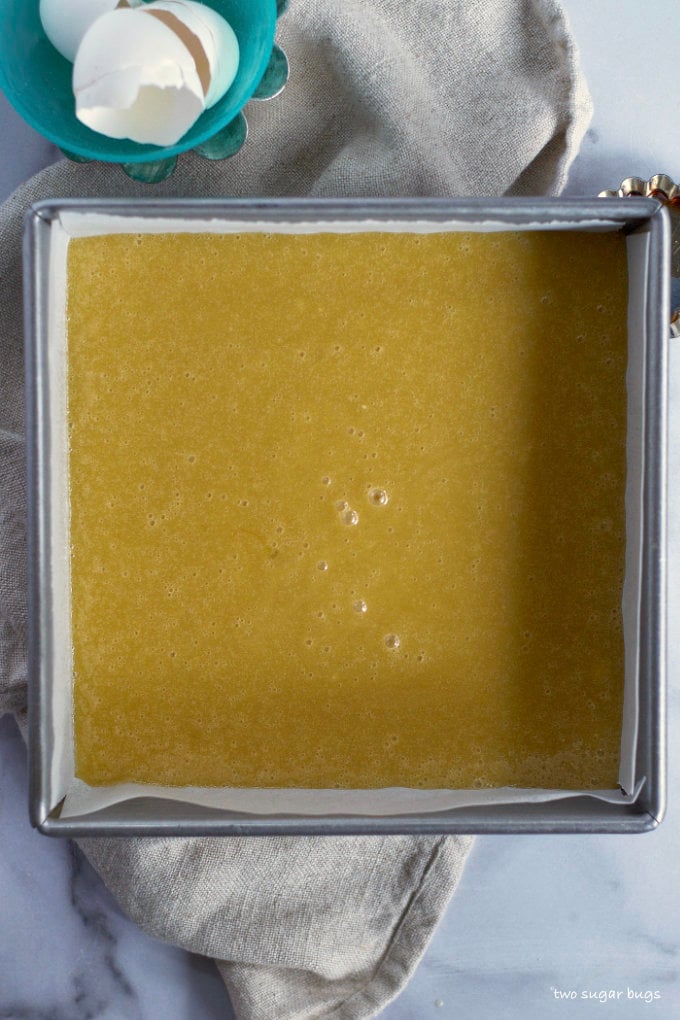
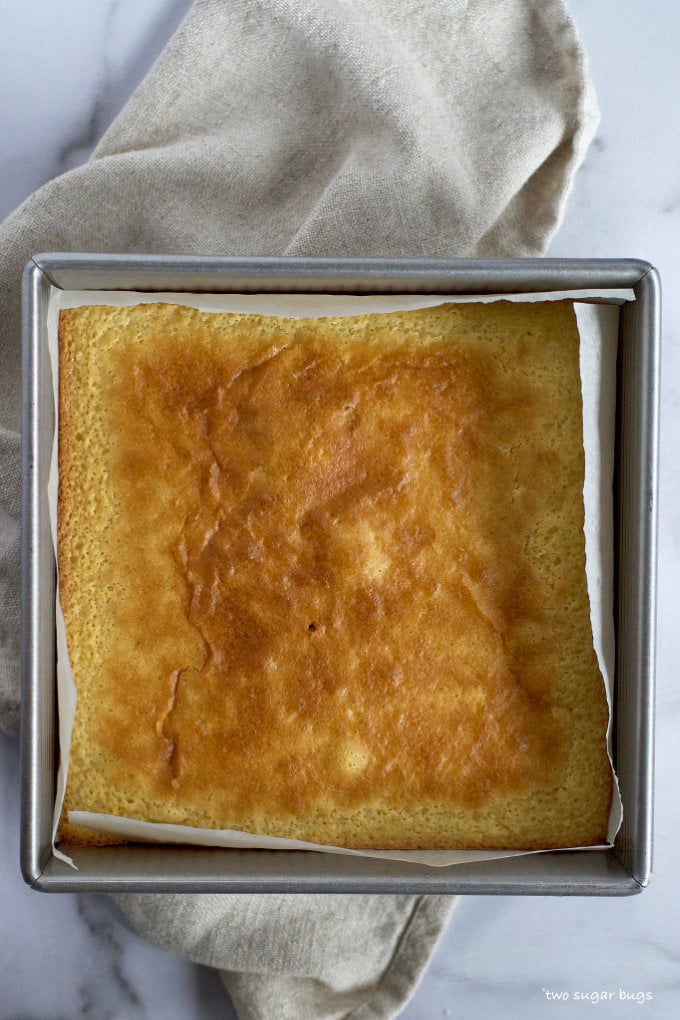
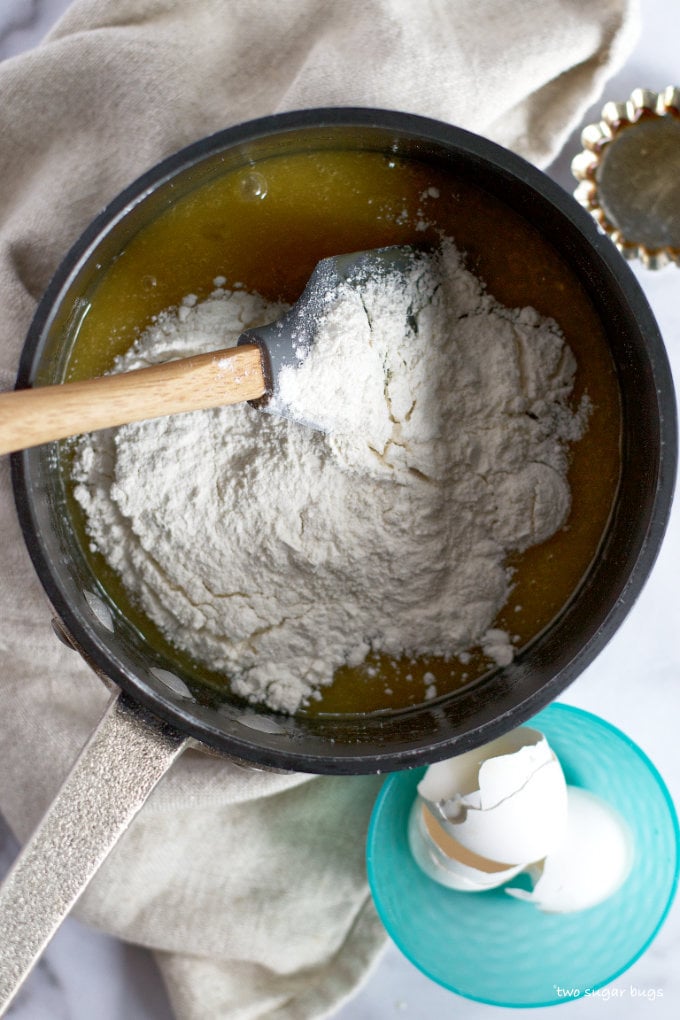
    • In a medium size bowl, whisk flour (2 ยฝ cups/312g), baking soda (1 teaspoon), cornstarch (2 teaspoons), espresso powder (4 teaspoons) and kosher salt (ยฝ teaspoon). Set aside.
    • Cream the brown butter, brown sugar (packed 1 cup/200g) and granulated sugar (ยฝ cup/100g) on medium high with a stand mixer fitted with the paddle attachment (6 on a Kitchen Aid), or a hand mixer, until light and fluffy. Go for 4-5 minutes.
    • Scrape down your bowl and add one large egg and vanilla (2 teaspoons). Mix until well combined, 30-60 seconds. Scrape up and down the bowl and add the remaining large egg and mix another 30-60 seconds or until well combined.
    • With the mixer on low, add the flour mixture in three additions, scraping up and down the bowl before the last amount of flour is added. Blend until just a few streaks of flour remain.
    • Fold in the toffee bits (ยฝ cup/85g) with a spatula.
    • Use a size 30 scoop {just a little over 2 tablespoons} and portion the dough into 24 equal scoops. Chill the dough for one hour.
    • Preheat oven to 350ยฐF and line baking sheets with parchment paper or a silicone baking mat. Place cookie dough on prepared baking sheet, spacing about 2 inches apart. The cookies should not spread a lot and I can fit 12 on a half sheet pan.
    • Bake 8-10 minutes, until edges are lightly browned and crisped. They may look slightly underdone in the centers. Once the pan is removed from the oven, drop the pan hard on the counter one time. This helps to give the edges a little crinkle and deflates the cookie a little. If the cookies are more puffy than you would like, use the flat bottom of a cup to lightly press the cookies down. Sprinkle with flakey sea salt while still hot, if desired.
    • Allow to cool on the pan for 2 minutes and then transfer to a cooling rack to cool completely.

    Notes

    *I use dark brown sugar, but light brown will also work.
    **I used Heath Milk Chocolate Toffee Bits. If you have trouble finding them, you can also chop up a Heath or Skor candy bar. I haven't tested the recipe with homemade toffee, but I imagine it would be amazing!
    Cookies will remain fresh in an airtight container at room temperature for 4-5 days. They also freeze well for up to three months.

    Nutrition

    Serving: 1 cookie | Calories: 179kcal | Carbohydrates: 25g | Protein: 2g | Fat: 8g | Saturated Fat: 5g | Polyunsaturated Fat: 3g | Cholesterol: 36mg | Sodium: 113mg | Sugar: 15g

    Easy White Chocolate Brownies

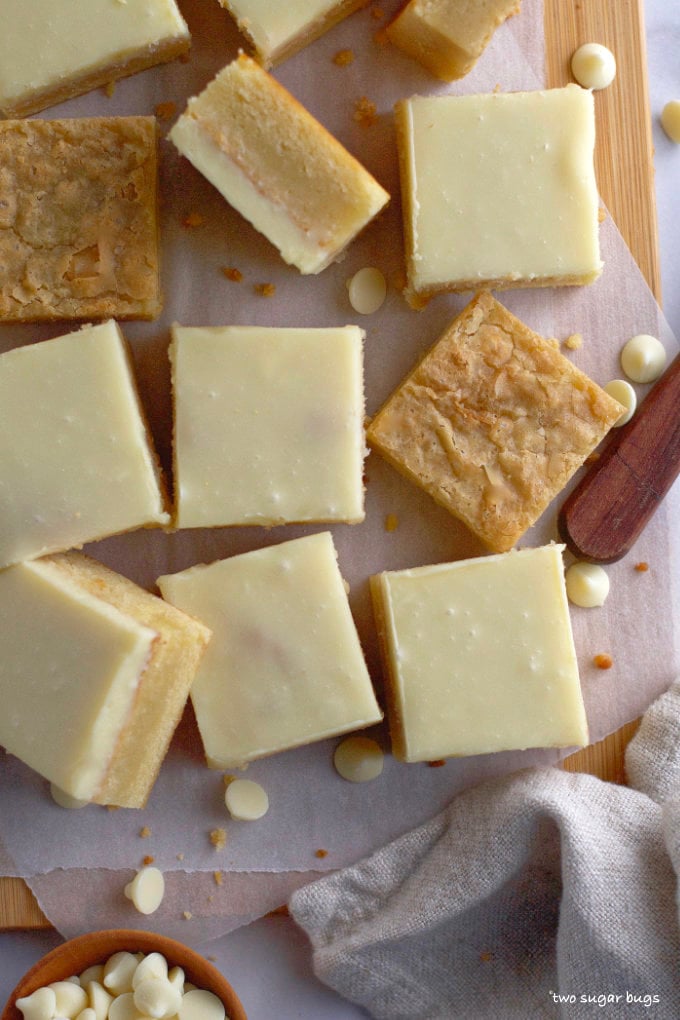
    white chocolate brownies, some with ganache, some without

    Easy homemade white chocolate brownies are rich, sweet and decadent! This stovetop recipe is made in one pot and bakes up in the oven; creating the best fudgy white chocolate brownies. Take it over the top with a white chocolate ganache, if you desire!

    white chocolate brownies, some with ganache, some without

    Disclosure | This post may contain affiliate links. As an Amazon Associate I earn from qualifying purchases.

    I've got an important question for you ~ team white chocolate or not? Me? Definitely #whitechocolateforlife. This easy brownie recipe just might change your mind if you tend to stay away from white chocolate. A quick and simple recipe that gives you moist, dense, and sweet brownies!

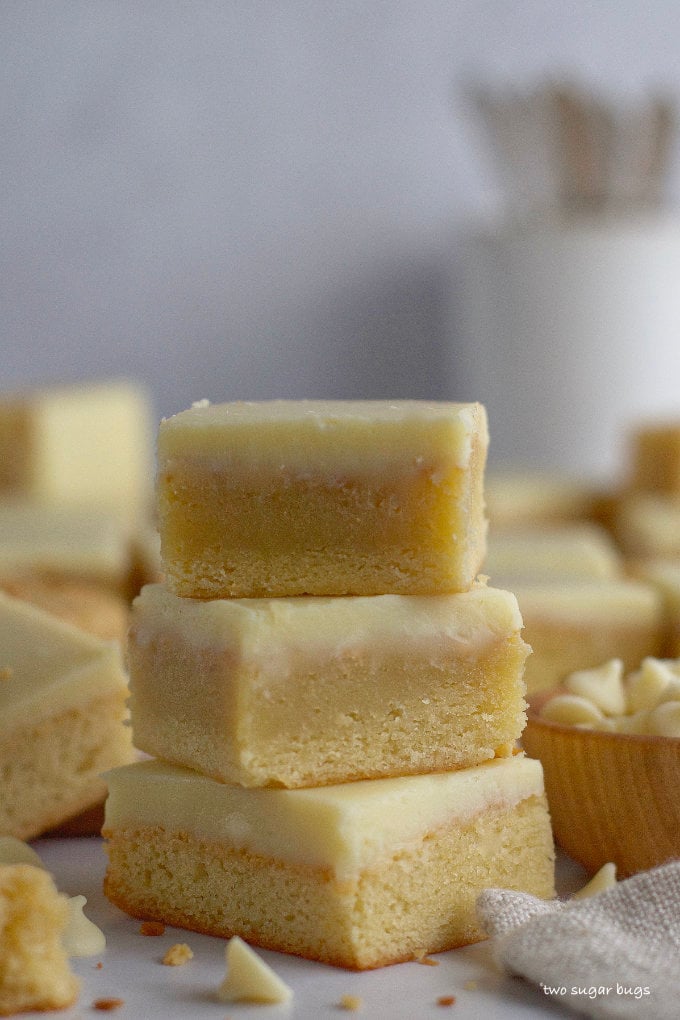
    stack of three easy white chocolate brownies

    Maybe it's already become clear, but white chocolate is my favorite of the chocolates! I know, I know, many chocolate aficionados will argue that white chocolate is not really chocolate, but I'm always going to be in the camp that it is. Hopefully we can still be friends!๐Ÿ˜‰

    what ingredients are needed for this easy brownie recipe?

    Please scroll to the printable recipe card at the end of this post for the full list of ingredients and baking directions.

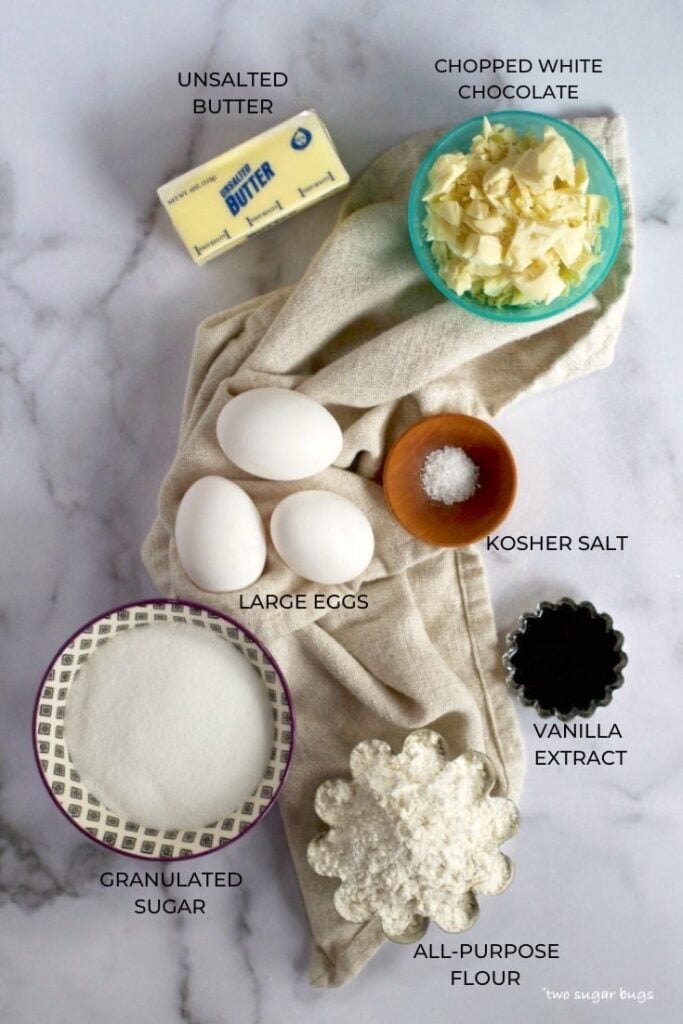
    ingredients needed for this easy recipe

    Seven ingredients, one stovetop pan and about 20 minutes of baking time in the oven is all that stands between you and these scrumptious brownies!

    You likely have all the ingredients in your kitchen as well. I encourage you to use the best white chocolate you can afford for this recipe as it is the prominent flavor and we want it to shine. You want to use a high quality chocolate intended for melting and baking and not white chocolate chips. You'll need 4 ounces for the brownies and an additional 7 ounces if you choose to make the white chocolate ganache {although you could use chips here, if needed}. I like Callebaut, Lindt, Ghirardelli or Bakers.

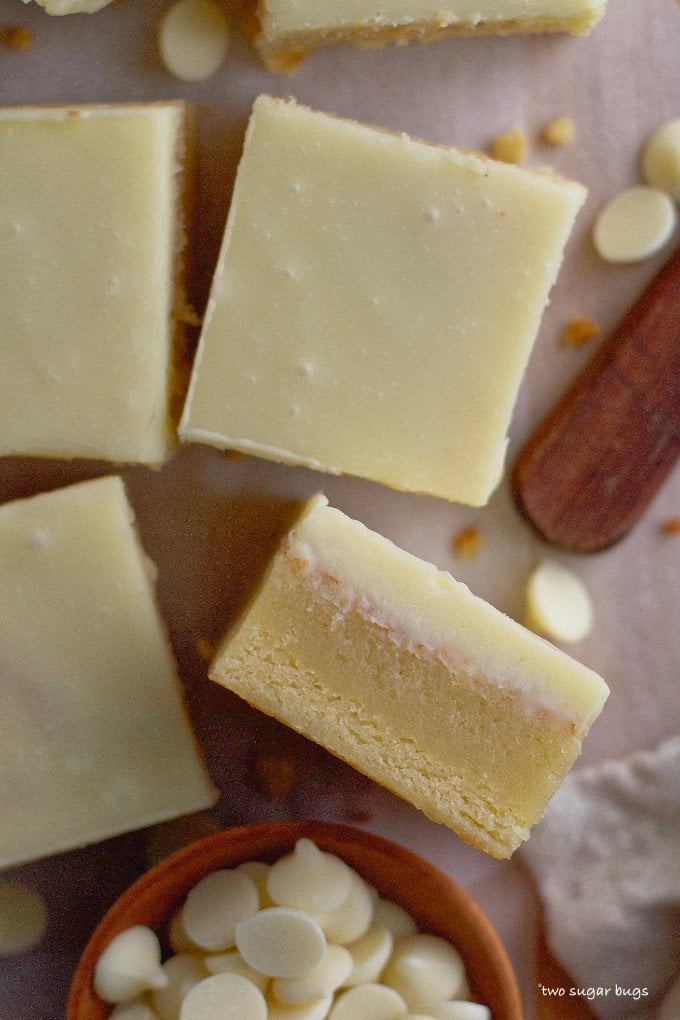
    side view of a cut brownie

    how do you make easy white chocolate brownies from scratch?

    This recipe is quick and easy and uses one saucepan on the stovetop to start. First, preheat the oven and line an 8x8 baking pan with parchment paper and lightly butter or spray with nonstick spray.

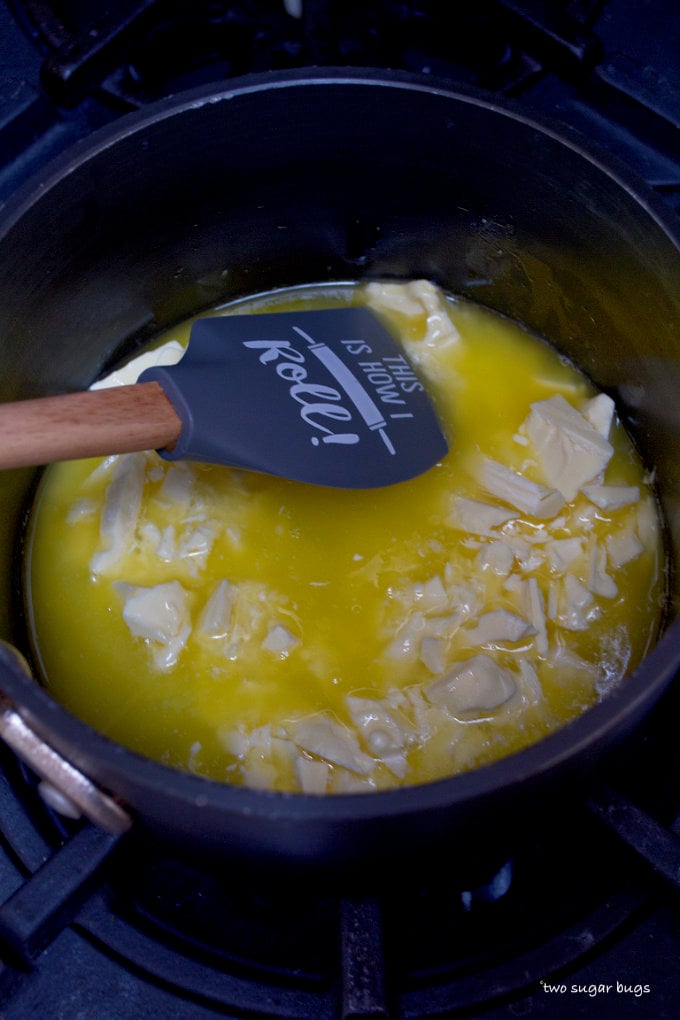
    Then melt the butter in a heavy bottom saucepan over low heat. When the butter is mostly melted, add the white chocolate. Stir until both the butter and chocolate are melted together, working quickly as to not burn the white chocolate.

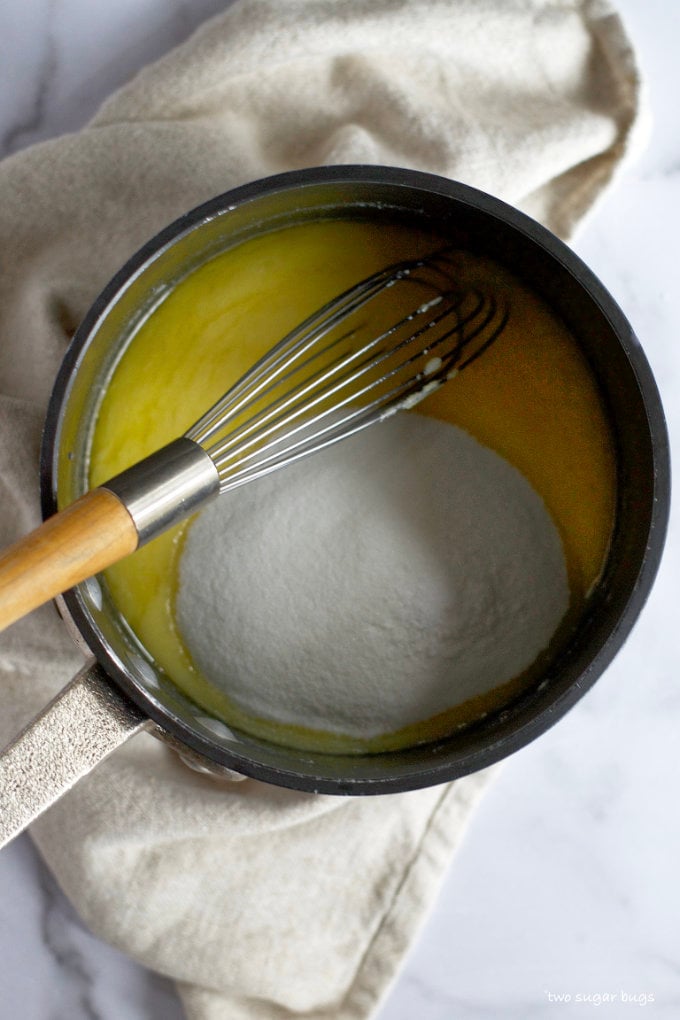
    Next, remove the pan from the heat and add the granulated sugar and kosher salt, whisking or stirring until fully incorporated. Now add the eggs and vanilla and fully mix those in as well.

    melting butter and white chocolate in a saucepan
    melted butter and white chocolate in a sauce pan with granulated sugar and a whisk
    melted butter, white chocolate, sugar, eggs and vanilla in a saucepan

    Finally, stir in the flour until just combined and pour into the prepared baking pan. Then bake for 20-25 minutes, lightly covering the top of the pan with aluminum foil after 10-15 minutes. You may notice in the photo below, I covered this batch at 15 minutes into baking and the tops got quite brown.

    flour added to wet white chocolate brownie batter
    white chocolate brownie batter in a baking pan
    baked white chocolate brownies in pan

    The white chocolate brownies need to cool in the pan before cutting. You can speed this process up by placing the pan in the refrigerator.

    Remember to pin this recipe to Pinterest! Use the button on the recipe card or the share buttons on the side or bottom of this page.

    how do you make white chocolate ganache?

    This brownie recipe is perfectly delish left all on it's own, buuuutttt, if you want to take it over the top, add some white chocolate ganache.

    White chocolate ganache is super easy to prepare. You can use white chocolate chips, if you need to. But remember you want the best tasting chocolate for these so go with Ghirardelli or Guittard if using chips.

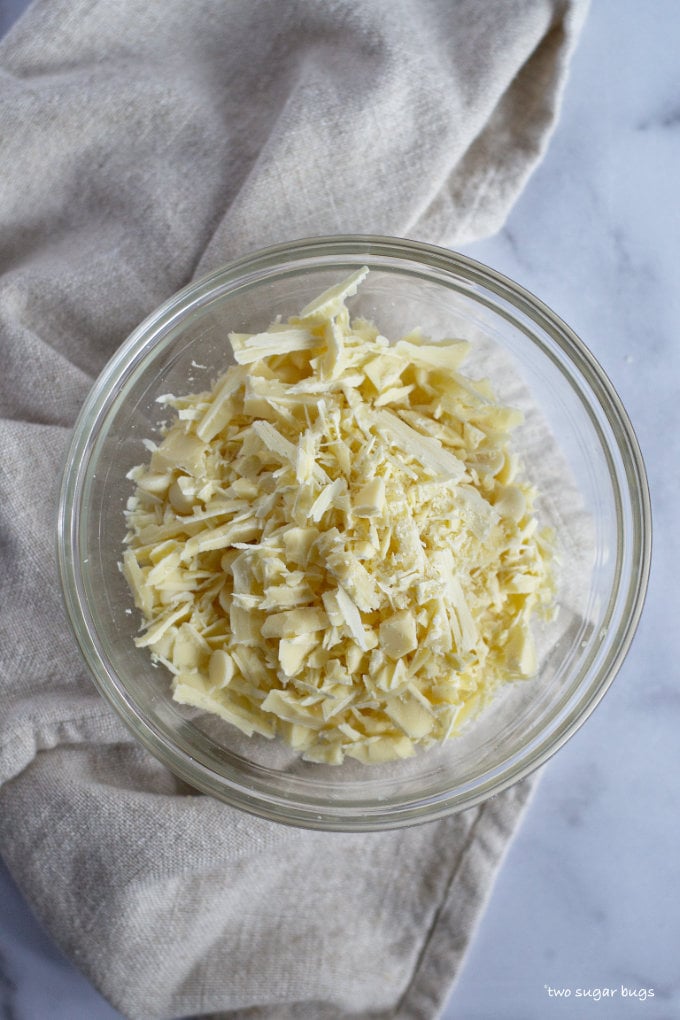
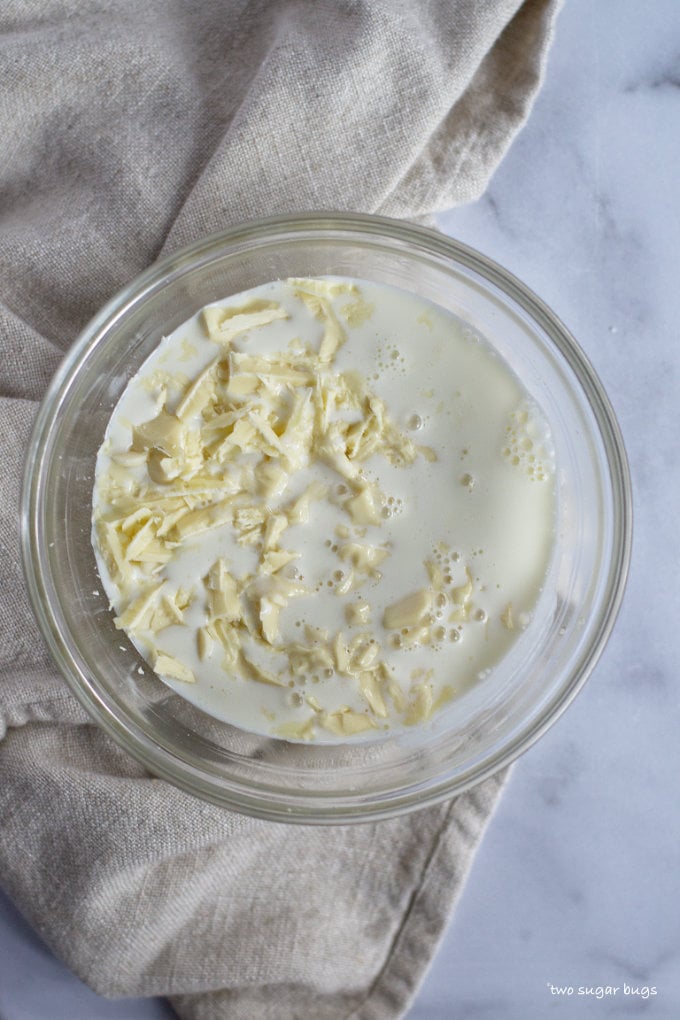
    Start by chopping the white chocolate into small pieces and place in a heat proof bowl {this set is seriously my favorite!}. Then heat the heavy whipping cream over low heat until it is bubbling at the edges and hot. Pour the hot cream over the chocolate and let sit 2-3 minutes before stirring until smooth.

    chopped white chocolate in a bowl
    white chocolate and heavy cream in a bowl
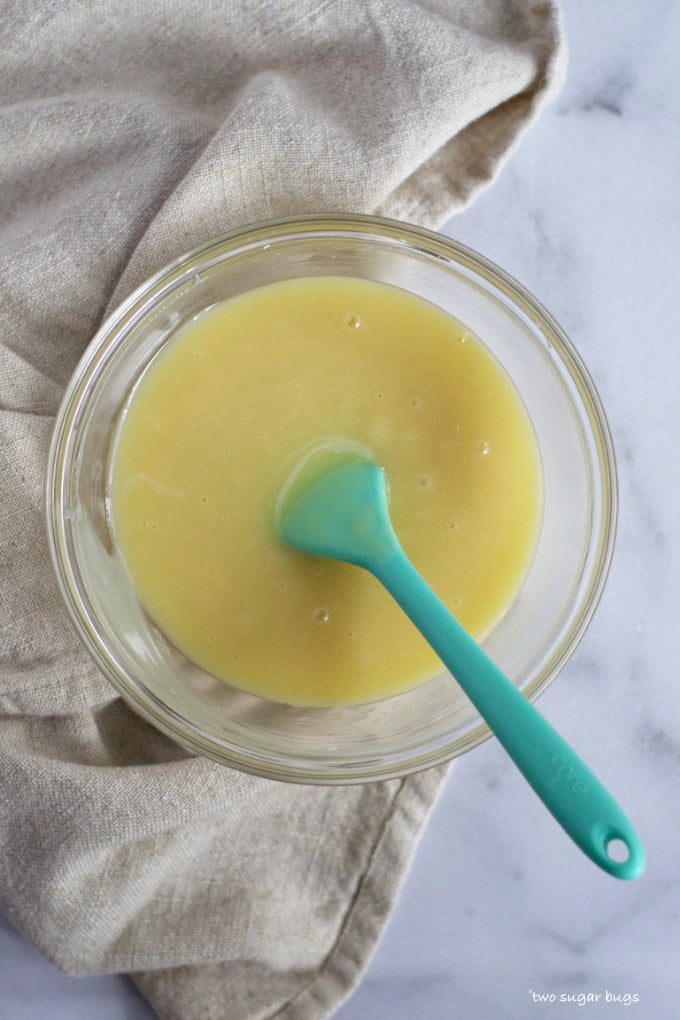
    white chocolate ganache in a bowl with a spatula

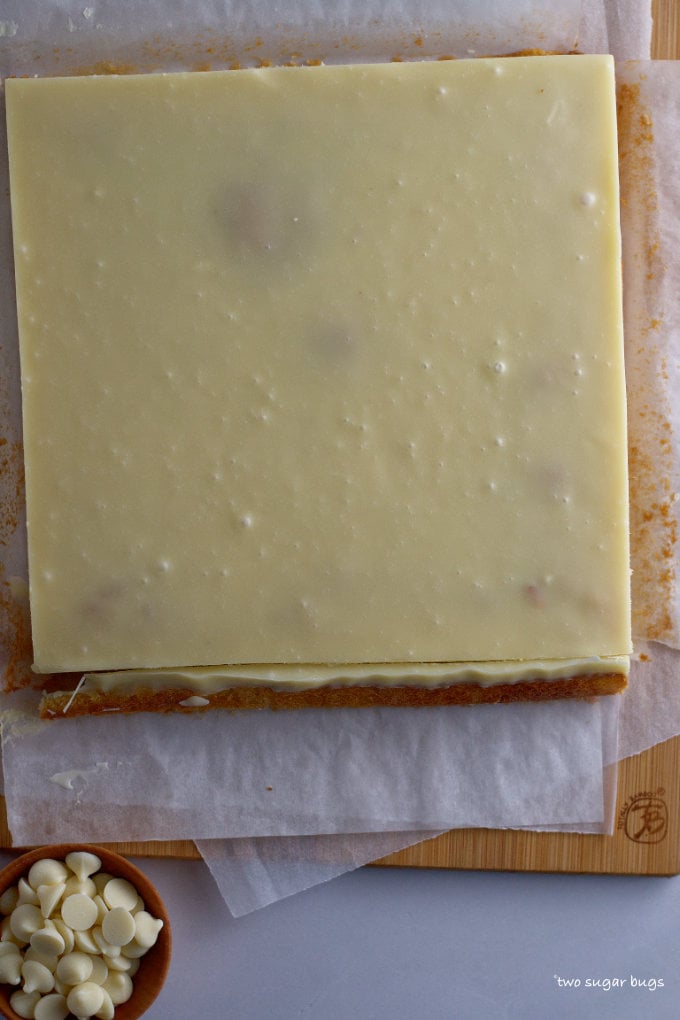
    Finally, pour the white chocolate ganache over the top of the brownies and allow to set until firm. This takes about 2 hours at room temperature and can be sped up in the refrigerator.

    tips for getting clean cuts on your brownies

    brownies showing just the very edge being trimmed off
    • Use parchment paper {or aluminum foil will also work} to line the baking pan. This allows you to lift the bars out of the pan to cut them.
    • Chilled brownies will slice with cleaner cuts.
    • If I am serving the brownies {or any bar cookie for that matter} to others, I like to clean up the edges before cutting them into squares. I use a sharp knife and trim just the very edge off of each side first {see above photo}. This also gives you a chance to test the treats to make sure they are safe to eat!๐Ÿ˜‰๐Ÿ˜‰. My sugar bugs always seem to appear in the kitchen for a preview taste!
    • Then use a sharp knife to cut the bars into desired sizes. Wipe the knife clean in between each cut to keep the brownies neat and tidy.
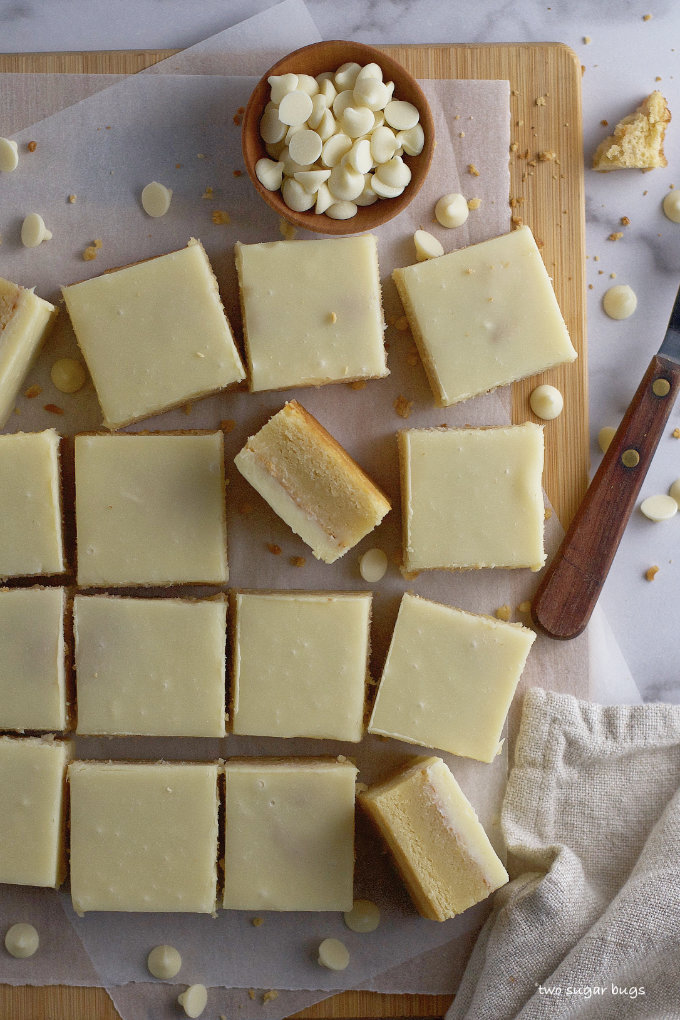
    cut brownies on a parchment lined cutting board

    Remember to snap a picture and tag me on Instagram if you make these Easy White Chocolate Brownies. It warms my heart to see you bring these recipes to life! Thank you for being here and happy baking!

    more white chocolate recipes to try

    • White Chocolate Sugar Cookies
    • Cinnamon White Chocolate Pound Cake
    • White Chocolate Chai Brownies
    • Peanut Butter White Chocolate Blondies
    • Lemon White Chocolate Cookie Ice Cream

    If you make this recipe {or any recipe!} from two sugar bugsย please come back and leave a review and a โญ๏ธโญ๏ธโญ๏ธโญ๏ธโญ๏ธ star rating.ย  I read every comment, and I LOVE hearing from you!

    white chocolate brownies, some with ganache, some without
    Print Recipe
    5 from 6 votes

    Easy White Chocolate Brownies

    Easy homemade white chocolate brownies are rich, sweet and decadent! This stovetop recipe is made in one pot and bakes up in the oven.
    Prep Time10 minutes mins
    Cook Time25 minutes mins
    Cooling Time2 hours hrs
    Total Time2 hours hrs 35 minutes mins
    Course: Bars and Brownies
    Cuisine: American
    Keyword: brownies, easy brownie recipe, one pan brownies, stovetop brownies, white chocolate, white chocolate brownies
    Servings: 16 brownies
    Calories: 257kcal
    Author: Tasia Harper

    Ingredients

    • ยฝ cup unsalted butter 113g
    • 4 ounces white chocolate chopped 114g
    • 1 cup granulated sugar 200g
    • ยผ teaspoon kosher salt
    • 3 large eggs
    • 2 teaspoons pure vanilla extract
    • ยพ cup all-purpose flour 94g

    White chocolate ganache {optional}

    • 7 ounces white chocolate chopped 200g
    • โ…“ cup heavy whipping cream 80mL

    Instructions

    • Preheat the oven to 350ยฐF and line an 8x8 baking pan with parchment paper and lightly butter or grease with non-stick spray.
    • In a medium saucepan, melt butter (ยฝ cup/113g) over low heat. When butter is mostly melted, add the white chocolate (4 ounces/114g) and stir until both the butter and white chocolate are fully melted and incorporated. Stir continuously as to not burn the white chocolate and remove from the heat as soon as melted.
    • Add the granulated sugar (1 cup/200g) and kosher salt (ยผ teaspoon) and stir or whisk until fully incorporated, then add the eggs (3 large) and vanilla (2 teaspoons) and stir until combined. Add the flour (ยพ cup/94g) and stir until just fully mixed.
    • Pour the white chocolate brownie batter into the prepared pan and bake for 10-15 minutes, then lightly cover with aluminum foil and continue baking another 5-10 minutes {20-25 total} until the edges have darkened and a toothpick comes out mostly clean. Try not to over bake the brownies, especially if you prefer them on the fudgy side.
    • Allow to cool in the pan. You can speed this process up by placing them in the refrigerator.
    • To make the white chocolate ganache {optional}: Chop the white chocolate (7 ounces/200g) into small, fine pieces and place in a heat proof bowl. Heat the heavy cream (โ…“ cup/80mL) in a small saucepan over low heat until itโ€™s bubbling at the edges and is hot.
    • Pour the hot cream over the white chocolate and let it sit about two minutes before stirring it into a smooth ganache.
    • Pour the ganache over the cooled white chocolate brownies and allow it to set completely, about 2 hours. You can place the brownies in the refrigerator to speed up the setting the process. I also find chilled brownies cut into nicer slices.
    • Cut into desired size and enjoy!

    Notes

    White chocolate brownies can be stored covered at room temperature for a couple days or in the refrigerator for up to one week. They also freeze well for up to three months.

    Nutrition

    Serving: 1 brownie | Calories: 257kcal | Carbohydrates: 29g | Protein: 3g | Fat: 15g | Saturated Fat: 9g | Polyunsaturated Fat: 5g | Cholesterol: 60mg | Sodium: 66mg | Sugar: 24g

    Red Velvet Sugar Cookies

    close up of red velvet sugar cookies on parchment paper

    You will love how easy it is to make these red velvet sugar cookies! This one-bowl, NO CHILL, melted butter recipe creates soft, flavorful cookies with crinkly tops.

    close up of red velvet sugar cookies on parchment paper

    Disclosure | This post may contain affiliate links. As an Amazon Associate I earn from qualifying purchases.

    My continual quest to make fast, easy and no chill cookies continues with this recipe. Is it just me who feels like red velvet is a festive flavor for Valentine's Day or Christmas? In reality, they are delicious any time of the year! Red velvet brownies or red velvet snack cake are perfect for those holidays or the 4th of July too.

    Since ya'll are busy bakers, like me, here are some other no chill cookie recipes. Cherry almond cookies, orange creamsicle cookies and white chocolate raspberry cookies.

    pile of cookies on a baking pan

    This easy cookie recipe comes together in about 10 minutes and takes 10 minutes to bake. That means only about 20 minutes stands between you and these scrumptious cookies! It's a spin on my popular sprinkle cookies recipe, but doesn't require a food processor. Oh, and did I mention that you only need ONE BOWL to mix them up?? Yay for less dishes to wash!

    what are red velvet sugar cookies?

    This red velvet sugar cookie recipe is a soft and chewy sugar cookie with a touch of cocoa powder, a decent amount of vanilla and some red coloring. It's not as rich as a chocolate cookie, but has a light chocolate taste. My taste testers found them to be irresistible!

    what ingredients are needed for red velvet cookies?

    Please scroll to the printable recipe card at the end of this post for the full list of ingredients and baking directions.

    ingredients for red velvet sugar cookies
    • Unsalted butter ~ we are using it melted to make this recipe even faster to make. The melted butter also gives the cookies a chewier texture.
    • Granulated sugar ~ for sweetness and flavor.
    • Confectioners' sugar ~ also known as powdered sugar or icing sugar. Adds extra softness to the finished cookies.
    • Red food coloring ~ I use gel coloring and specifically like the Wilton Color Right red for this recipe. The gel coloring is more concentrated so you use less of it. {food coloring can be omitted, if you choose}
    • Pure vanilla extract ~ for flavor.
    • Large egg yolks ~ save the whites to make meringues, a Swiss meringue buttercream {my vanilla version is my fave!!} or an egg white scramble.
    • All-purpose flour ~ for structure.
    • Cocoa powder ~ I use Hershey's Cocoa 100% Cacao Natural Unsweetened
    • Baking soda ~ for a little leavening.
    • Kosher salt ~ I only use kosher salt, if using table salt you may want to reduce the salt by half.

    let's make cookies!

    Start by preheating the oven and preparing your baking sheet pans with parchment paper or silicone baking mats.

    Then melt the butter and add the granulated sugar and confectioners' sugar and mix well. Next add the red food coloring, egg yolks and vanilla extract.

    melted butter, granulated and confectioners' sugar in a bowl
    butter, sugars, vanilla, egg yolk and red food coloring in a mixing bowl

    Once the wet ingredients are well combined, add the flour, cocoa powder, baking soda and kosher salt. Give the dry ingredients a little toss together on top of the wet ingredients. Then stir until just combined.

    dry ingredients on top of wet ingredients in a glass mixing bowl

    how to roll the red velvet cookies

    Scoop roughly 2 tablespoons of dough {I use a size 30 cookie scoop} and roll it between your hands until it forms a ball. Then roll the cookie dough ball into a bowl of granulated sugar until it's fully coated. Then re-roll the ball between your hands and roll in the granulated sugar a second time. This helps to give the cookies a somewhat *sparkly* appearance.

    cookie dough balls rolled in granulated sugar

    how do you get the crinkly tops on the cookies?

    This cookie recipe takes 9-10 minutes to bake. Please remember your oven is different from mine and may vary slightly in baking time! I use this oven thermometer to ensure my oven is baking at the temperature I think it is.

    To get the crinkly top, let the cookies bake for 8 minutes. Then pull the pan out of the oven {use caution as it's hot!} and use the flat bottom of a cup to lightly press down the tops of the cookies. Then place back in the oven to bake 1-2 minutes more.

    baked cookies on a parchment lined baking sheet

    The cookies can cool completely on the baking sheet pan or you can let them rest 5 minutes and then move to a wire cooling rack. I didn't find any difference in the finished cookies between those two cooling methods.

    inside look at the texture of red velvet sugar cookies

    tips for success

    This one-bowl, melted butter and no chill cookie recipe is so easy that you may find yourself baking this recipe a lot!๐Ÿ˜‰

    • Gel food coloring is going to give you the best results with the least amount of food coloring {I use Wilton Color Right red for this recipe}. Liquid food coloring also works, but you will need at least double the amount. Many people also have success with using beet root powder as a natural alternative, but I have not used it myself. You can also omit the food coloring if you don't want red cookies.
    • Use a cookie scoop to ensure uniform cookies.
    • The dough can be quite soft. If you are having trouble working with it, let it rest 2-3 minutes and it should be easier to work with.
    • This recipe can be easily halved if you are looking for a small batch of cookies.
    stack of red velvet sugar cookies on a baking sheet pan

    Remember to snap a picture and tag me on Instagram if you make these Red Velvet Sugar Cookies. It warms my heart to see you bring these recipes to life! Thank you for being here and happy baking!

    more easy, no chill cookie recipes to try!

    • Sprinkle Cookies
    • Chocolate Sprinkle Cookies
    • Easy German Chocolate Cookies
    • Almond Flour Skillet Cookie

    If you make this recipe {or any recipe!} from two sugar bugsย please come back and leave a review and a โญ๏ธโญ๏ธโญ๏ธโญ๏ธโญ๏ธ star rating.ย  I read every comment, and I LOVE hearing from you!

    close up of red velvet sugar cookies on parchment paper
    Print Recipe
    5 from 4 votes

    Red Velvet Sugar Cookies

    This one-bowl, NO CHILL, melted butter recipe creates soft, flavorful cookies with crinkly tops.
    Prep Time10 minutes mins
    Cook Time10 minutes mins
    Total Time20 minutes mins
    Course: Cookies
    Cuisine: American
    Keyword: Cookies, easy cookies, no chill cookies, red velvet, red velvet cookies, sugar cookies
    Servings: 18 cookies
    Calories: 233kcal
    Author: Tasia Harper

    Ingredients

    • 1 cup unsalted butter melted 226g
    • 1 cup granulated sugar 200g
    • ยฝ cup confectionersโ€™ sugar 60g
    • 2 large egg yolks
    • 2 teaspoons pure vanilla extract
    • 12 drops red gel food coloring* I use Wiltonโ€™s Color Right red
    • 2 ยผ cups all-purpose flour 281g
    • ยผ cup unsweetened cocoa powder 20g
    • ยฝ teaspoon baking soda
    • ยฝ teaspoon kosher salt
    • โ…“ cup granulated sugar 67g, for rolling the cookies before baking

    Instructions

    • Preheat oven to 350ยฐF and line two baking sheets with parchment paper or a silicone baking mat.
    • In a medium bowl, stir granulated sugar (1 cup/200g) and confectionerโ€™s sugar (ยฝ cup/60g) into the melted butter (1 cup/226g). Stir until well combined.
    • Then stir in the egg yolks (2 large), vanilla (2 teaspoons) and red gel food coloring making sure everything is very well combined.
    • Next, add the all-purpose flour (2 ยผ cups/281g), cocoa powder (ยผ cup/20g), baking soda (ยฝ teaspoon) and kosher salt (ยฝ teaspoon). Give it a little mix together and then stir the dry ingredients in until just combined.
    • Take roughly 2 tablespoons of dough (I use a 30 scoop) and roll it into a ball, then roll in granulated sugar (โ…“ cup/67g), roll in your hands again and roll a second time in the granulated sugar. Place on the prepared baking pans, spacing 2 inches apart. {the dough can be quite soft. If you are having trouble working with it, let it rest 2-3 minutes and it should be easier to work with}.
    • Bake for 9-10 minutes total; at the 8 minute mark, pull the cookies from the oven and lightly press them down with the flat bottom of a cup, then place back in the oven for 1-2 more minutes. {you can see me do this in the recipe video}
    • Cookies can cool completely on the baking sheet or can be moved to a wire cooling rack after 5 minutes.

    Notes

    *If not using Wilton Color Right red, you will need ยฝ-1 teaspoon of gel food coloring. If using liquid food coloring, you will need more. Food coloring can also be eliminated if you don't want red cookies.
    Cookies can be stored at room temperature in an airtight container for up to 5 days or in the freezer for up to 3 months.

    Nutrition

    Serving: 1 cookie | Calories: 233kcal | Carbohydrates: 31g | Protein: 3g | Fat: 11g | Saturated Fat: 7g | Polyunsaturated Fat: 4g | Cholesterol: 58mg | Sodium: 83mg | Fiber: 1g | Sugar: 18g

    Cookie Butter Brigadeiros

    brigadeiro in parchment cups

    This cookie butter brigadeiros recipe is a variation of the staple Brazilian dessert. This fudgy treat is easy to make with just five ingredients!

    brigadeiro in parchment cups

    Disclosure | This post may contain affiliate links. As an Amazon Associate I earn from qualifying purchases.

    Have you ever eaten a brigadeiro? From what I understand, they are a birthday staple in Brazil and I'm putting a cookie butter twist on them. That doesn't surprise you though, does it?

    rows of cookie butter truffles on a baking pan

    I learned about brigaderios from my friend, Camila, over at Pies and Tacos. Camila is always posting different variations on her Instagram feed and they always make my mouth water!

    what are cookie butter brigadeiros?

    Brigadeiros are created by cooking sweetened condensed milk, butter and flavoring until you get a thick fudge-like consistency. The mixture is then chilled until cold and rolled into bite size balls. This cookie butter version uses cookie butter in the mixture and crushed Biscoff cookies for coating the outside.

    what ingredients do I need for this easy brigadeiros recipe?

    Please scroll to the printable recipe card at the end of this post for the full list of ingredients and baking directions.

    ingredients for cookie butter brigadeiro
    • Sweetened condensed milk ~ you will use one full can.
    • Unsalted butter
    • Cookie butter ~ for flavoring.
    • Biscoff cookies ~ for coating the outside of each fudge ball.
    • Kosher salt ~ just a pinch to help balance out the sweet!

    how to cook the fudge

    Start by pouring one full can of sweetened condensed milk into a small to medium sized saucepan. Then add the butter, cookie butter and a pinch of salt. Bring the mixture to a boil over medium-low heat and cook {stirring constantly} for 10-15 minutes until thick and fudgy.

    sweetened condensed milk, cookie butter and butter in a saucepan
    brigadeiro ingredients boiling in a sauce pan

    The mixture will thicken as it cooks and darken a little in color. The cooking is done when the fudge becomes thick and the bottom of the pan stays visible when you run a spatula or wooden spoon over it. {Camila says it should take about 5 seconds for the mixture to come back together when the cooking is finished}.

    brigadeiro mixture in initial cooking stage
    brigadeiro mixture getting closer to finished in sauce pan
    spatula running through mixture in sauce pan showing cooking is finished

    Remove the cookie butter fudge from the heat and pour into a buttered bowl. Allow to cool completely in the refrigerator, this takes about two hours.

    how to roll cookie butter brigadeiros

    Start by crushing the Biscoff cookies. A Cuisinart mini prep works great, as does putting the cookies in a zip-top bag and smashing them with a rolling pin.

    Then scoop some brigaderio and roll it between your hands to form a ball {I used my size 70 scoop}. Most recipes recommend lightly buttering your hands for this process. I have done it both with buttered hands and without and don't find that one works all that much better than the other. Once the ball is formed, roll into the crushed cookies to coat the outside.

    chilled cookie butter brigaderio in a bowl with a measuring scoop
    uncoated brigadeiro ball in bowl of crushed biscoff cookies

    Keep scooping and rolling until all the fudge is used up. I consistently get 18, but it will depend on how large or small you roll the balls.

    showing texture of cookie butter brigadeiro

    I used mini cupcake liners to hold each finished brigadeiro.

    overhead look at four cookie butter brigadeiro

    do you refrigerate brigadeiros?

    Yes, store them in the refrigerator for up to 2 weeks. They can also be frozen for up to 2 months if stored in an airtight container.

    brigadeiro sitting on counter top with cookie crumbs

    Remember to snap a picture and tag me @twosugarbugs on Instagram if you make these Cookie Butter Brigadeiros. It warms my heart to see you bring these recipes to life! Thank you for being here and happy baking!

    more candy recipes to try ~

    • Homemade Caramels
    • Easy Homemade Marshmallows
    • Strawberry Coconut Chocolate Bars
    • Chocolate Caramel Slice Bars
    • Cookie Butter White Chocolate Bark
    • Classic Brigadeiro Recipe {and many more variations!} from Camila at Pies and Tacos
    brigadeiro in parchment cups
    Print Recipe
    5 from 4 votes

    Cookie Butter Brigadeiros

    Cookie butter brigadeiros is a variation of the staple Brazilian dessert. This fudgy treat is easy to make with just five ingredients!
    Prep Time15 minutes mins
    Cook Time10 minutes mins
    Chill Time2 hours hrs
    Total Time2 hours hrs 25 minutes mins
    Course: Candies
    Cuisine: Brazilian
    Keyword: brigadeiros, cookie butter, fudge, truffles
    Servings: 18 brigadeiros
    Calories: 124kcal
    Author: Tasia Harper

    Ingredients

    • 1 - 14 ounce can sweetened condensed milk 396g
    • 3 tablespoons cookie butter spread 45g
    • 1 tablespoon unsalted butter 14g, plus more for rolling
    • 4 Biscoff cookies crushed 31g
    • Pinch of kosher salt

    Instructions

    • Grease the inside of a small to medium bowl with butter and set aside.
    • In a medium saucepan, combine sweetened condensed milk (one 14-ounce/396g can), cookie butter (3 tablespoons/45g) and butter (1 tablespoon/14g) and a pinch of kosher salt. Stir constantly while bringing to a low boil over medium-low to medium heat. Cook for about 10 minutes, until the mixture has thickened and you can see the bottom of the pan when you run a spoon along it. The mixture should be thick enough that when you run the spoon through the middle of the pan, it takes about 5 seconds before the mixture comes back together.
    • Pour the mixture into the prepared bowl and place in the refrigerator to cool completely, about 2 hours. Can chill for up to 24 hours.
    • When ready to roll the brigadeiros, crush the Biscoff cookies (4 cookies/31g) using a food processor or in a zip- top bag with a rolling pin.
    • Lightly butter your hands, then use a tablespoon or small scoop to get the chilled brigadeiro out of the bowl. Roll into a ball. Then roll the ball into the crushed Biscoff cookies and place in a small paper cup, such as a mini cupcake liner.

    Notes

    Store in an airtight container in the refrigerator for up to 2 week or in the freezer for up to 2 months.
    Recipe adapted from Camila at Pies and Tacos

    Nutrition

    Serving: 1 brigadeiros | Calories: 124kcal | Carbohydrates: 19g | Protein: 3g | Fat: 5g | Saturated Fat: 2g | Polyunsaturated Fat: 2g | Cholesterol: 12mg | Sodium: 58mg | Sugar: 17g
    • « Previous Page
    • 1
    • …
    • 28
    • 29
    • 30
    • 31
    • 32
    • …
    • 41
    • Next Page »
    welcome graphic

    Hi, I'm Tasia, a self-taught baker and enthusiastic home cook with over 25 years experience in the kitchen! I'm here to inspire you to have fun while creating food from scratch. I make approachable and nostalgic recipes for busy bakers that you will want to make again and again. The recipes you find here will mostly be sweet and sometimes savory.

    More about me โ†’

    https://thefeedfeed.com/

    Reader Favorite Recipes

    • stack of cookies with the sun hitting them
      Espresso Brown Butter Toffee Cookies
    • buttercream sugar cookie with sprinkles
      Buttercream Sugar Cookies
    • cookies and sprinkles on a cooling rack
      Sprinkle Cookies
    • slice of cookie butter cake on a plate with a fork
      Moist Cookie Butter Cake

    ยฉtwo sugar bugs.ย  All images and content are copyright protected.ย  Please do not use our images without prior permission.ย  If you would like to republish a two sugar bugs recipe, please rewrite the recipe in your own words and link back to the blog post and one to the home page. ย See my privacy policyย for full details.

    Footer

    โ†‘ back to top

    About

    • Meet Tasia
    • Privacy Policy
    • Comment Policy
    • Terms & Conditions
    • Disclosure

    Shop

    • My favorite kitchen supplies via my Amazon Store

    Contact

    • Work with Me
    • Come Say hello
    • Sign Up! for emails and updates

    All images and content are copyright protected.  Please do not use our images without prior permission. 

    ยฉ 2026 two sugar bugs. All rights reserved.