two sugar bugs

  • About
  • Recipes
  • Coffee Talk
  • come say hello
    • Contact
    • Privacy Policy
menu icon
go to homepage
  • About
  • Recipes
  • Coffee Talk
  • Come say hello
  • Work With Me
    • Instagram
    • Pinterest
    • YouTube
  • subscribe
    search icon
    Homepage link
    • About
    • Recipes
    • Coffee Talk
    • Come say hello
    • Work With Me
    • Instagram
    • Pinterest
    • YouTube
  • ×
    Home

    Almond and Berry Mascarpone Tart

    close up of almond and berry mascarpone tart

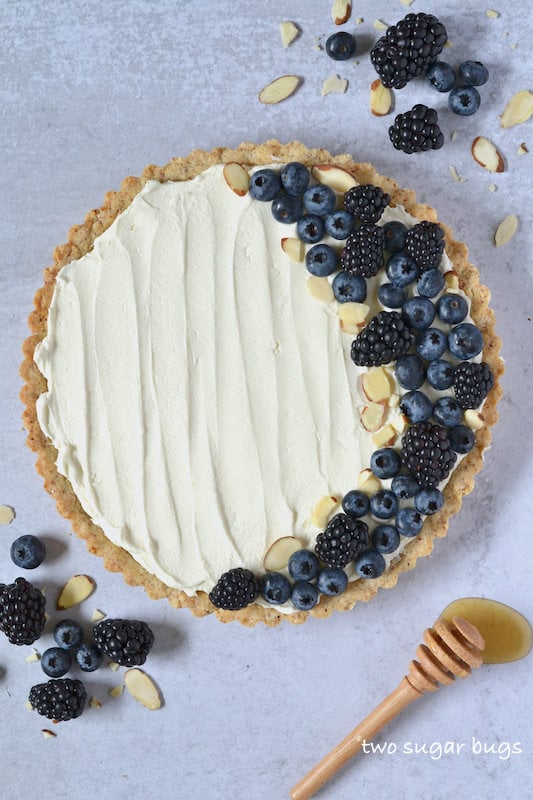
    This almond and berry mascarpone tart is a creamy and light amaretto mascarpone filling in an almond shortbread crust. Top with fresh berries for an easy, but elegant dessert.

    mascarpone tart with berries and a honey spoon

    Today's recipe is one that I love to prepare for Sunday dinner or when entertaining. It is not a fussy dessert and can be prepared ahead, which is always a win when entertaining guests.

    The mascarpone filling is a bit lighter in texture than a cheesecake, but not as light as a mousse. The filling is creamy and smooth and not overly sweet. It's the perfect ending to a meal or for any celebration.

    [Read more...]

    Baked Donuts with Two Glazes

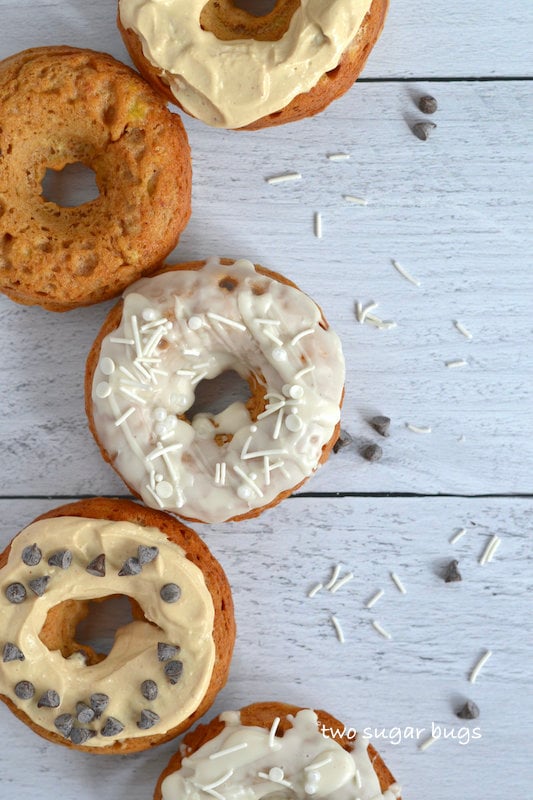
    five donuts on shiplap

    This easy recipe for baked donuts yields healthier homemade donuts; sweetened with banana and grape nectar. Glazed with a protein rich peanut butter glaze or a not-so-healthy powdered sugar glaze. Either way, they are sure to be gobbled up!

    five donuts on shiplap

    If you've followed me for a bit, you know I LOVE a good sweet treat! You likely also know that I love a breakfast recipe that seems like a treat, but has some more nutritional value ~ how about donuts with just 3g of sugar and 7g of protein?? This baked donuts recipe is going to deliver just that!

    [Read more...]

    Strawberry Coconut Chocolate Bars

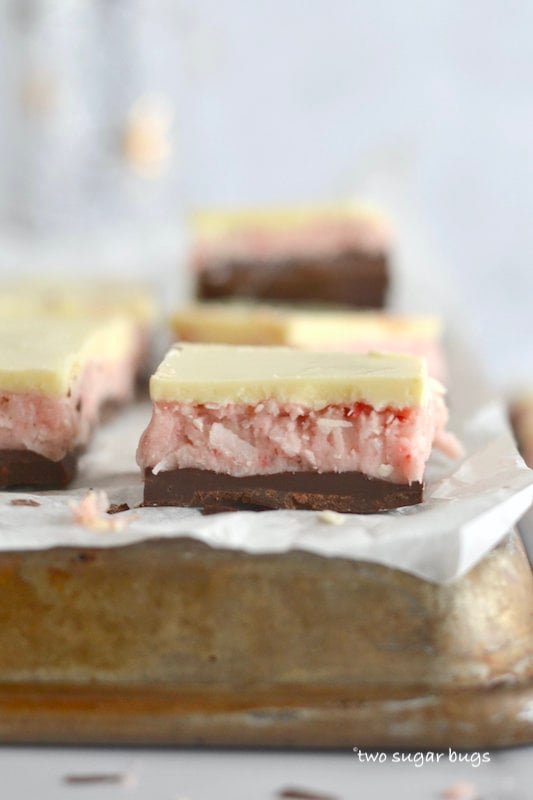
    strawberry coconut chocolate bar sitting on a baking sheet pan

    Indulgent strawberry coconut chocolate bars! A sweet strawberry and coconut candy filling; layered between white and dark chocolate. A perfect no bake treat!

    strawberry coconut chocolate bar sitting on a baking sheet pan

    If you haven't noticed by now, I kind of have a thing for coconut. From chocolate coconut bites to perfect coconut cake to oatmeal coconut chocolate chip cookies. I just can't get enough of coconut!!

    Coconut, raspberry and white chocolate is one of my favorite sweet combinations. I wanted to bring these flavors together in an easy recipe, but I only had freeze dried strawberries in my pantry when I initially tested this recipe. Turns out strawberry coconut chocolate bars are pretty darn amazing! Maybe even better than the coconut raspberry version.😉

    [Read more...]

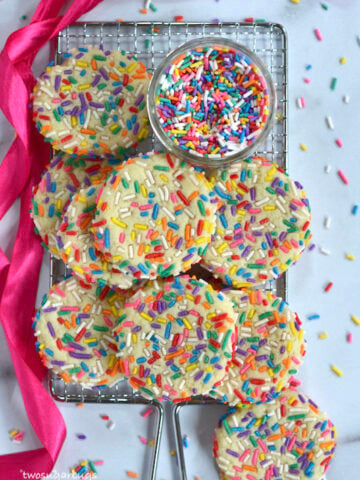
    Sprinkle Cookies

    cookies and sprinkles on a cooling rack

    This EASY sprinkle cookies recipe creates soft, chewy, sprinkle covered sugar cookies!! Better than any bakery cookie and ready in about 30 minutes!

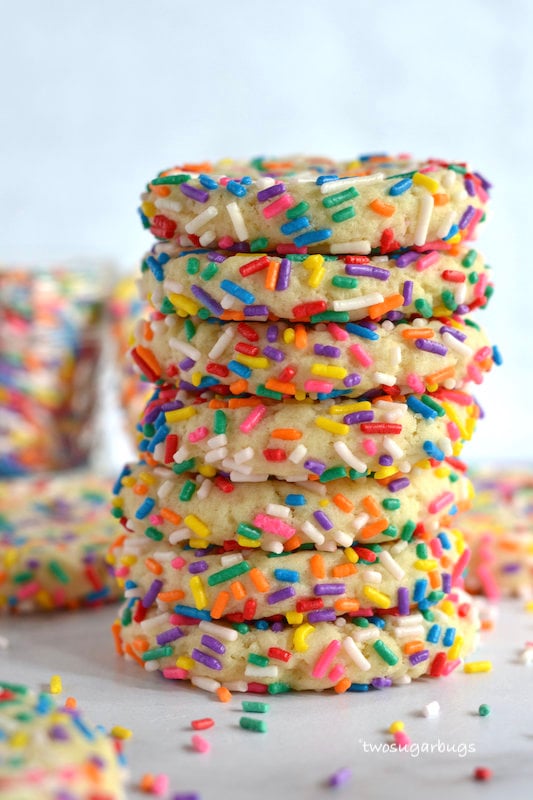
    stack of cookies

    My love for sugar cookies runs far and deep. Give me a buttercream sugar cookie and I am one happy camper. Hand me one of these sprinkle cookies and my inner child is jumping for joy!

    Perfect for any occasion; just change the sprinkle colors and you have a cookie ready for game day, baby showers, Valentine's Day, Easter or Christmas. The possibilities are endless!

    [Read more...]

    Peanut Butter Oat Banana Bread

    A hand lifting a slice of banana bread

    The BEST peanut butter oat banana bread! This easy recipe creates a super moist and healthy banana bread. The addition of powdered peanut butter and oats add a nice nutrition boost!

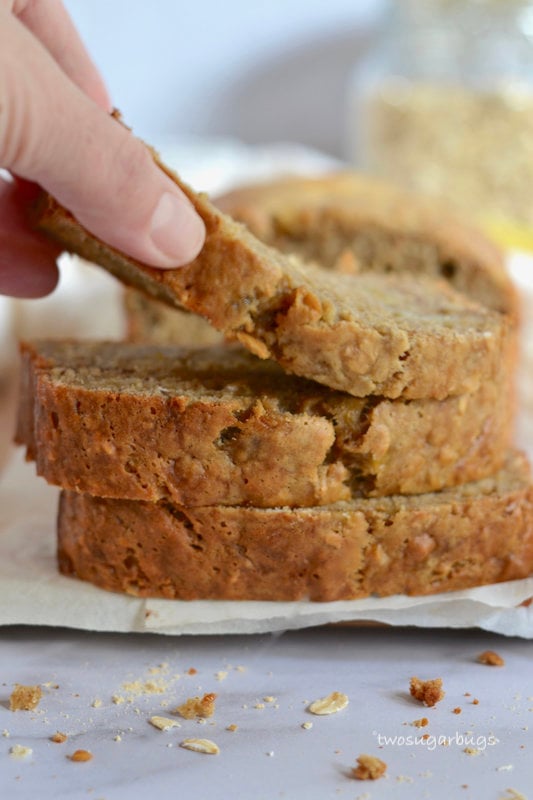
    A hand lifting a slice of banana bread

    Happy New Year! Welcome to a new decade! Have you heard people referring to 2020 as "the roaring 20's" ? What do you think? I think I like it!

    We had a wonderful Christmas; filled with family, lots of good food and lazy days. As the last of the cookies and candy disappear, I find myself craving something healthy.

    [Read more...]

    Ruby Red Grapefruit Poppy Seed Cake

    slice of cake on a plate

    This tender grapefruit poppy seed cake is bright and light. It is bursting with sweet and tart fresh grapefruit juice and is topped with a silky grapefruit Swiss meringue buttercream.

    slice of grapefruit poppy seed cake on a plate

    I have been sitting on this recipe for almost a year now. Mr. two sugar bugs is a gigantic grapefruit fan and asked me to create a cake highlighting this sweet and some what sour fruit. By the time this recipe was ready to share, grapefruit had gone out of season. I am so excited to share this cake today!

    [Read more...]

    Biscoff Glazed Gingerbread Scones

    Gingerbread scones on parchment paper with a spoonful of Biscoff spread on the side

    Gingerbread scones with a Biscoff {cookie butter} glaze are easy to prepare and make a cozy recipe with the ultimate winter flavor. Perfect for Christmas or a cold winter morning!

    Gingerbread scones on parchment paper with a spoonful of Biscoff spread on the side

    Three days until Christmas! Yikes! I am feeling mostly prepared, how about you?

    Let me take a moment to thank you for visiting and supporting two sugar bugs in 2019. I have loved getting to connect with some of you and look forward to sharing more recipes in 2020. I also hope to get to know all of you better. Sending warm wishes for a wonderful Christmas and holiday season!

    [Read more...]

    Shortbread Peppermint Bark

    Cookies piled on a parchment lined cutting board

    This easy bar cookie recipe combines an addictive shortbread cookie base with a peppermint bark topping.

    Cookies piled on a parchment lined cutting board

    If you only make one cookie this Christmas season, it should be THIS cookie!

    Why, you ask?

    #1. It's an incredibly easy recipe.

    #2. The cookie is a simple shortbread. No rolling or chilling required.

    #3. The topping is peppermint bark; comprised of melted chocolate chips and candy canes.

    #4. The buttery shortbread marries perfectly with the chocolate and peppermint; creating a cookie that everyone is going to be fighting for!

    A stack of shortbread peppermint bark

    Disclosure | This post may contain affiliate links. As an Amazon Associate I earn from qualifying purchases.

    This cookie joined my Christmas cookie list in 2009. I was not yet a mom and had invited my niece and nephew over to bake Christmas cookies. We had finished what I had planned and had a little bit of time left before my sister was coming to pick them up. My Bon Appetit magazine was sitting out and I asked if we should try and sneak in one more cookie. My nephew, who is a huge peppermint and chocolate fan, responded with a resounding YES!

    I'm so glad we gave this recipe a try. Shortbread peppermint bark is neck and neck with coconut jam thumbprint cookies as my favorite Christmas cookie!! They also top Big E's list. I just know that you are going to LOVE them too.❤️

    cut pieces of shortbread peppermint park with one on it's side to show the layers

    WHAT IS PEPPERMINT BARK?

    Peppermint bark is a chocolate treat. Typically comprised of layers of white and dark chocolate with peppermint candy pieces, such as candy canes. It tends to be quite popular during the Christmas season.

    HOW TO MAKE SHORTBREAD PEPPERMINT BARK

    Nine ingredients are all you need to make this easy recipe. My photo isn't showing the unsalted butter or salt.

    Ingredients for the cookies

    Start by preheating the oven to 350ºF.

    Then prepare a 9x13 baking pan by lining it with parchment paper. Be sure to leave a little bit of overhang so you can easily pull the finished cookies out of the pan by the parchment paper.

    Next, whisk together the flour and salt and set aside.

    Then use a stand mixer with the paddle attachment (love my SideSwipe Blade!) or a hand-held mixer and beat the butter until creamy. Slowly add in sugar and beat until mixture is light and fluffy. Stop and scrape up and down the sides of the bowl, then beat in the egg yolk and vanilla until well combined. With the mixer on low, add the flour mixture and beat until just combined.

    Use moistened fingertips to press the dough into an even layer on the bottom of the prepared baking pan. The dough is sticky and can be a challenge to work with. Keeping my fingers damp helps the most.

    Use a fork and pierce all over the dough. Bake for 20-25 minutes. The edges will be very lightly brown and be starting to pull away from the edges of the pan.

    shortbread cookie dough in prepared pan with fork piercings

    HOW TO PREPARE THE CRUSHED CANDY CANES

    While the cookie base bakes, prepare the candy canes. I tend to buy the mini candy canes as I find them easier to work with.

    meat hammer crushing a candy cane

    I find crushing the candy canes in their individual wrappers works most effectively. It also seems to be the cleanest way to accomplish this task. Just a couple of whacks with a meat hammer seems to do the trick. You can also place the unwrapped candy canes in a zip top bag and crush with a rolling pin or meat hammer. I find this method to be messier as the candy canes get sharp and create holes in the bag.

    MAKING THE MELTED CHOCOLATE LAYER

    Once the shortbread cookie layer has baked, immediately move it to a wire cooling rack and sprinkle the chocolate chips evenly over the hot cookie base.

    baked cookie base with softened chocolate chips being spread with an offset spatula

    Allow the chips to sit for about 3 minutes, which will start to melt and soften them. Then using an offset spatula, spread the chocolate in an even layer over the cookie and immediately top with the crushed candy canes.

    crushed candy canes on top of melted chocolate layer

    Finally melt the white chocolate using your preferred method and drizzle it over the chocolate and candy canes. This doesn't have to be fancy! Just use a spoon or spatula and have fun flinging the white chocolate over the candy canes. Allow the white chocolate to set by chilling for 30 minutes in the refrigerator.

    white chocolate drizzled over the chocolate and candy canes

    HOW TO CUT AND STORE THE COOKIES

    Use the edges of the parchment paper to lift the chilled cookie out of the baking pan and transfer to a work surface. Then using a sharp knife, cut the cookie into various sizes and shapes. This gives the cookies the iconic peppermint bark look.

    Cookies can be stored covered at room temperature for 3-4 days or in the refrigerator for up to one week. They also freeze well for up to 3 months.

    hand taking a cookie off the top of a stack of shortbread peppermint bark

    WANT MORE COOKIE RECIPES?

    • Always Perfect Sugar Cookies
    • Chocolate Shortbread
    • Brown Butter Peppermint Blossoms
    • Coconut Jam Thumbprint Cookies
    • Peanut Butter Snickers Cookies {Santa Surprises}
    • Peppermint Hot Cocoa Cookies
    • Iced Molasses Cookies

    To pin this recipe, you can use the button on the recipe card or the share buttons on the side or bottom of the page. Come follow me on Pinterest and Instagram to see all the things that inspire me. Thank you for being here and happy baking!

    If you make this recipe {or any recipe!} from two sugar bugs please come back and leave a review and a ⭐️⭐️⭐️⭐️⭐️ star rating.  I read every comment, and I LOVE hearing from you!

    Yield: Approximately 30 cookies

    Shortbread Peppermint Bark

    shortbread peppermint bark piled on parchment paper

    A delicious shortbread cookie topped with melted chocolate and candy canes! Super easy to make and perfect for the holidays!

    Prep Time 15 minutes
    Cook Time 30 minutes
    Cooking Time 30 minutes
    Total Time 1 hour 15 minutes

    Ingredients

    • 2 cups all-purpose flour
    • ¼ teaspoon salt
    • 1 cup unsalted butter, room temperature
    • 1 cup granulated sugar
    • 1 teaspoon pure vanilla extract
    • 1 large egg yolk
    • 6 ounces semi-sweet chocolate chips
    • 14-16 mini candy canes, finely chopped
    • 2 ounces white chocolate, melted

    Instructions

      1. Preheat oven to 350° F.
      2. Prepare a 9x13 in baking pan by lining it with parchment paper, leaving some overhang.
      3. In a medium size bowl, whisk together the flour and salt and set aside.
      4. Using a stand mixer with the paddle attachment or a hand-held mixer, beat butter until creamy, about 2 minutes. Slowly add in sugar and beat until mixture is light and fluffy, about 3 minutes. Stop and scrape up and down the sides of the bowl, then beat in the egg yolk and vanilla until well combined. With the mixer on low, add the flour mixture and beat until just combined.
      5. Roughly divide the dough into six portions and drop into the prepared baking pan, spacing evenly. Use moistened fingertips to press the dough into an even layer on the bottom of the pan. The dough is sticky and can be challenging to work with. Damp fingertips seem to help the most. Use a fork and pierce all over the dough.
      6. Bake the cookie base until lightly golden and the edges begin to pull away from the sides of the pan, about 20-25 minutes.
      7. While the cookie base bakes, crush the candy canes. I use 14-16 mini candy canes and find crushing them in their individual wrappers works most effectively. You can also place the unwrapped candy canes in a zip top bag and crush with a rolling pin or meat hammer.
      8. Place the baking pan on a rack and immediately sprinkle with the chocolate chips, doing your best to keep them in a single layer and evenly dispersed over the baked cookie. Let the chocolate chips sit about 3 minutes, until they start to melt and soften. Then using an off set spatula, spread the chocolate in an even layer over the cookie. Immediately top with chopped candy canes.
      9. Melt the white chocolate with your preferred method and then drizzle the white chocolate all over the chocolate candy cane topped cookie. Chill until the white chocolate sets, about 30 minutes.
      10. Pull the cookie out of the pan using the parchment paper. Using a sharp knife, cut into irregular shaped pieces.

    Notes

    Store cookies covered at room temperature for 3-4 days or in the refrigerator for up to one week. Cookies also freeze in an airtight container for up to three months.

    Recipe slightly adapted from Bon Appetit

    Recommended Products

    As an Amazon Associate and member of other affiliate programs, I earn from qualifying purchases.

    • Ultra Cuisine 100% Stainless Steel Wire Cooling Rack for Baking fits Half Sheet Pans Cool Cookies, Cakes, Breads - Oven Safe for Cooking, Roasting, Grilling - Heavy Duty Commercial Quality
      Ultra Cuisine 100% Stainless Steel Wire Cooling Rack for Baking fits Half Sheet Pans Cool Cookies, Cakes, Breads - Oven Safe for Cooking, Roasting, Grilling - Heavy Duty Commercial Quality
    • KitchenAid KSM150PSER Artisan Tilt-Head Stand Mixer with Pouring Shield, 5-Quart, Empire Red
      KitchenAid KSM150PSER Artisan Tilt-Head Stand Mixer with Pouring Shield, 5-Quart, Empire Red
    • PaperChef Parchment Paper for Baking: Multipurpose Nonstick Parchment Sheets, Oven Safe, No Grease or Butter Needed, Ideal for Cooking and Roasting, Biodegradable, Kosher-Certified (205 sq ft roll)
      PaperChef Parchment Paper for Baking: Multipurpose Nonstick Parchment Sheets, Oven Safe, No Grease or Butter Needed, Ideal for Cooking and Roasting, Biodegradable, Kosher-Certified (205 sq ft roll)
    • USA Pan Bakeware Rectangular Cake Pan, 9 x 13 inch, Nonstick & Quick Release Coating, Made in the USA from Aluminized Steel
      USA Pan Bakeware Rectangular Cake Pan, 9 x 13 inch, Nonstick & Quick Release Coating, Made in the USA from Aluminized Steel

    Nutrition Information:

    Yield:

    30

    Serving Size:

    1

    Amount Per Serving: Calories: 182Total Fat: 9gSaturated Fat: 5gTrans Fat: 0gUnsaturated Fat: 3gCholesterol: 29mgSodium: 27mgCarbohydrates: 25gFiber: 1gSugar: 16gProtein: 2g

    The nutrition information is an estimate and may not be entirely accurate.
    Did you make this recipe?

    Please make my day and PIN to Pinterest and share a photo on Instagram ~ making sure to tag @twosugarbugs! THANK YOU!!

    © Tasia
    Category: Cookies

    Homemade Caramels

    cut homemade caramels on a parchment lined cutting board

    An easy and favorite old-fashioned holiday candy. This simple homemade caramels recipe uses only 5 ingredients and creates chewy, buttery, melt-in-your-mouth caramels!

    wrapped and unwrapped caramels

    Homemade caramels are a truly indulgent and nostalgic treat. Today we are going to satisfy our candy cravings with caramels made from scratch.

    I know making homemade candy seems intimidating. If you can stand at the stove and stir a pot, you are all set to rock this recipe!

    cut and uncut homemade caramels on a parchment lined cutting board

    Disclosure | This post may contain affiliate links. As an Amazon Associate I earn from qualifying purchases.

    My love for caramel runs deep as evidenced shortbread caramel bars, biscoff caramel tart and caramel chocolate chip cookies.

    This is a tried and true recipe. I make these caramels at Christmas every year. I only allow myself to make them once a year as they are SO good that I can eat an entire batch all by myself.

    WHAT TOOLS ARE NEEDED TO MAKE HOMEMADE CARAMELS?

    You will want to use a quality heavy bottomed saucepan. Cheaper and thinner saucepans won't distribute the heat as evenly and increase the chance of you scorching or burning the candy as it cooks.

    A candy thermometer is also highly recommended. The thermometer is your friend in this recipe as it tells you when the candy is ready. I have a no-frills thermometer, but wouldn't mind a digital version. Hint, hint Santa.😉

    CAN I MAKE CARAMELS WITHOUT A CANDY THERMOMETER?

    Yes, you can use the cold water test if you do not have a candy thermometer. Fill a small cup with cold water. After the caramel has been boiling for 15 minutes or so, drizzle a little caramel into the cold water. You should be able to form the caramel into a ball with your fingers. It should be soft and pliable and a little sticky.

    wrapped and unwrapped caramels on parchment paper

    STEP BY STEP PHOTOS OF MAKING HOMEMADE CARAMELS

    Start by lining a 9x9 baking pan with parchment paper and greasing the paper with butter. You can also use aluminum foil, but I tend to have the best luck with parchment paper.

    Next melt the butter in a heavy bottomed saucepan. Once the butter has melted add the brown sugar and light corn syrup and cook over medium-low heat until the sugar is dissolved. Then add the sweetened condensed milk and stir to combine.

    melted butter and brown sugar in a saucepan
    butter, brown sugar, corn syrup and sweetened condensed milk in a saucepan
    homemade caramel mixture at a low boil in a saucepan
    caramel mixture in a saucepan
    candy thermometer in saucepan showing caramels at the correct temperature

    Increase the heat to medium and cook, stirring constantly, until the mixture reaches between 238° and 240° on a candy thermometer. This takes about 20-30 minutes. I typically add the candy thermometer after the mixture has been at a low boil for 8-10 minutes.

    Start watching the candy thermometer closely once it reaches 230°. It can quickly move those last few degrees!

    The mixture may bubble up slightly as you add the vanilla extract. Be sure to use caution pouring the extremely hot caramels into your prepared baking pan.

    Allow the caramels to cool at room temperature for 3-4 hours (or overnight) until cool and set. You do not have to cover them.

    HOW TO CUT AND WRAP CARAMELS

    Remove the caramels from the pan by lifting out the parchment paper. Use a sharp knife to cut the caramels into your desired size.

    knife cutting homemade caramels

    I like to cut ten rows and then individually cut each row into 10 or 11 pieces.

    To wrap the caramels, either cut wax paper into 4x5 inch rectangles, or use candy wrappers. Place a caramel in the center of the rectangle.

    caramel centered on wax paper rectangle

    Then wrap the long sides of the paper over the caramel.

    wax paper wrapping a homemade caramel

    Finally, twist both sides of the waxed paper to seal in the caramel.

    hand holding a wrapped caramel

    HOW TO STORE HOMEMADE CARAMELS

    Wrapped caramels will stay fresh at room temperature for 1-2 weeks. You can also store them in the refrigerator, but I would allow them to come to room temperature before serving.

    To pin this recipe, you can use the button on the recipe card or the share buttons on the side or bottom of the page. Come follow me on Pinterest and Instagram to see all the things that inspire me. Thank you for being here and happy baking!

    Yield: 100 candies

    Homemade Caramels

    cut homemade caramels on a parchment lined cutting board

    An easy and favorite old-fashioned holiday candy. This simple homemade caramels recipe uses only 5 ingredients and creates chewy, buttery, melt-in-your-mouth caramels!

    Prep Time 5 minutes
    Cook Time 30 minutes
    Cooling Time 4 hours
    Total Time 4 hours 35 minutes

    Ingredients

    • 1 cup unsalted butter
    • 2 ¼ cups dark brown sugar*, firmly packed
    • 1 cup light corn syrup
    • 1 14 ounce can sweetened condensed milk
    • 2 teaspoons pure vanilla extract

    Instructions

      1. Line a 9x9 inch baking pan with parchment paper and butter well. Set aside.
      2. In a large, heavy saucepan, melt the butter. Add the brown sugar and mix until incorporated. Stir in the corn syrup. Cook over medium-low heat until the sugar is dissolved and the mixture is well blended, about 3 minutes.
      3. Stir in the sweetened condensed milk and increase the temperature to medium. Cook, stirring constantly, until the mixture reaches between 238° and 240° on a candy thermometer. This takes about 20-30 minutes.
      4. Remove the pan from the heat and stir in the vanilla. Pour the mixture into the prepared pan.
      5. Cool to room temperature, about 3-4 hours, or until completely set. There is no need to cover the caramels.
      6. Use the parchment paper to remove the caramels from the baking pan. Use a sharp knife to cut the caramels into your desired size. Wrap the individual caramels in waxed paper.

    Notes

    For optimal freshness store wrapped caramels at room temperature for 1-2 weeks or in the refrigerator for up to one month.

    *You can use light brown sugar

    Recommended Products

    As an Amazon Associate and member of other affiliate programs, I earn from qualifying purchases.

    • LorAnn Oils 100 Count Twisting Wax Paper
      LorAnn Oils 100 Count Twisting Wax Paper
    • Taylor Precision Products Candy/Deep Fry Stainless Steel Thermometer
      Taylor Precision Products Candy/Deep Fry Stainless Steel Thermometer
    • Calphalon 1932455 Classic Nonstick Sauce Pan with Cover, 3.5 quart, Grey
      Calphalon 1932455 Classic Nonstick Sauce Pan with Cover, 3.5 quart, Grey
    • PaperChef Parchment Paper for Baking: Multipurpose Nonstick Parchment Sheets, Oven Safe, No Grease or Butter Needed, Ideal for Cooking and Roasting, Biodegradable, Kosher-Certified (205 sq ft roll)
      PaperChef Parchment Paper for Baking: Multipurpose Nonstick Parchment Sheets, Oven Safe, No Grease or Butter Needed, Ideal for Cooking and Roasting, Biodegradable, Kosher-Certified (205 sq ft roll)
    • USA Pan Bakeware Square Cake Pan, 9 inch, Nonstick & Quick Release Coating, Made in the USA from Aluminized Steel
      USA Pan Bakeware Square Cake Pan, 9 inch, Nonstick & Quick Release Coating, Made in the USA from Aluminized Steel

    Nutrition Information:

    Yield:

    100 candies

    Serving Size:

    1

    Amount Per Serving: Calories: 59Total Fat: 2gSaturated Fat: 1gTrans Fat: 0gUnsaturated Fat: 1gCholesterol: 7mgSodium: 10mgCarbohydrates: 10gFiber: 0gSugar: 10gProtein: 0g

    The nutrition information is an estimate and may not be entirely accurate.
    Did you make this recipe?

    Please make my day and PIN to Pinterest and share a photo on Instagram ~ making sure to tag @twosugarbugs! THANK YOU!!

    © Tasia
    Category: Sweets

    Peanut Butter Snickers Cookies {Santa Surprises}

    cookies and milk sitting on parchment paper

    A soft and chewy peanut butter cookie stuffed with a Snickers miniature and drizzled in chocolate! We call them Santa Surprises. They are perfect for holiday cookie platters or anytime that peanut butter and chocolate craving hits!

    cookies and milk sitting on parchment paper

    Fifteen years. I've been making these cookies for at least 15 years now. And I'm pretty sure someone would disown me if I didn't make them for Christmas every year.

    Peanut butter Snickers cookies are good. Not just good, they are phenomenal. I mean, what's not to love? A soft and chewy peanut butter cookie. A slightly melted Snickers miniature inside. Finished with a drizzle of melted chocolate. Pretty much heaven in a cookie!

    [Read more...]
    • « Previous Page
    • 1
    • …
    • 32
    • 33
    • 34
    • 35
    • 36
    • …
    • 39
    • Next Page »
    welcome graphic

    Hi, I'm Tasia, a self-taught baker and enthusiastic home cook with over 25 years experience in the kitchen! I'm here to inspire you to have fun while creating food from scratch. I make approachable and nostalgic recipes for busy bakers that you will want to make again and again. The recipes you find here will mostly be sweet and sometimes savory.

    More about me →

    https://thefeedfeed.com/

    Reader Favorite Recipes

    • stack of cookies with the sun hitting them
      Espresso Brown Butter Toffee Cookies
    • buttercream sugar cookie with sprinkles
      Buttercream Sugar Cookies
    • cookies and sprinkles on a cooling rack
      Sprinkle Cookies
    • slice of cookie butter cake on a plate with a fork
      Moist Cookie Butter Cake

    ©two sugar bugs.  All images and content are copyright protected.  Please do not use our images without prior permission.  If you would like to republish a two sugar bugs recipe, please rewrite the recipe in your own words and link back to the blog post and one to the home page.  See my privacy policy for full details.

    Footer

    ↑ back to top

    About

    • Meet Tasia
    • Privacy Policy
    • Comment Policy
    • Terms & Conditions
    • Disclosure

    Shop

    • My favorite kitchen supplies via my Amazon Store

    Contact

    • Work with Me
    • Come Say hello
    • Sign Up! for emails and updates

    All images and content are copyright protected.  Please do not use our images without prior permission. 

    © 2026 two sugar bugs. All rights reserved.