two sugar bugs

  • About
  • Recipes
  • Coffee Talk
  • come say hello
    • Contact
    • Privacy Policy
menu icon
go to homepage
  • About
  • Recipes
  • Coffee Talk
  • Come say hello
  • Work With Me
    • Instagram
    • Pinterest
    • YouTube
  • subscribe
    search icon
    Homepage link
    • About
    • Recipes
    • Coffee Talk
    • Come say hello
    • Work With Me
    • Instagram
    • Pinterest
    • YouTube
  • ร—
    Home

    Almond Cookie Bars (with Coconut)

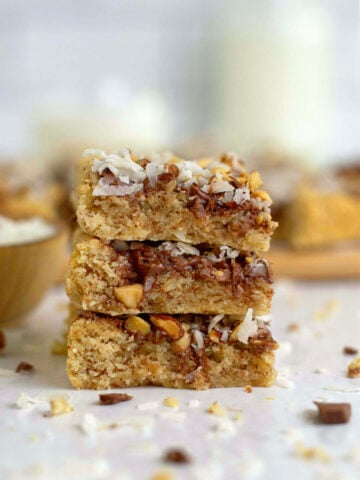
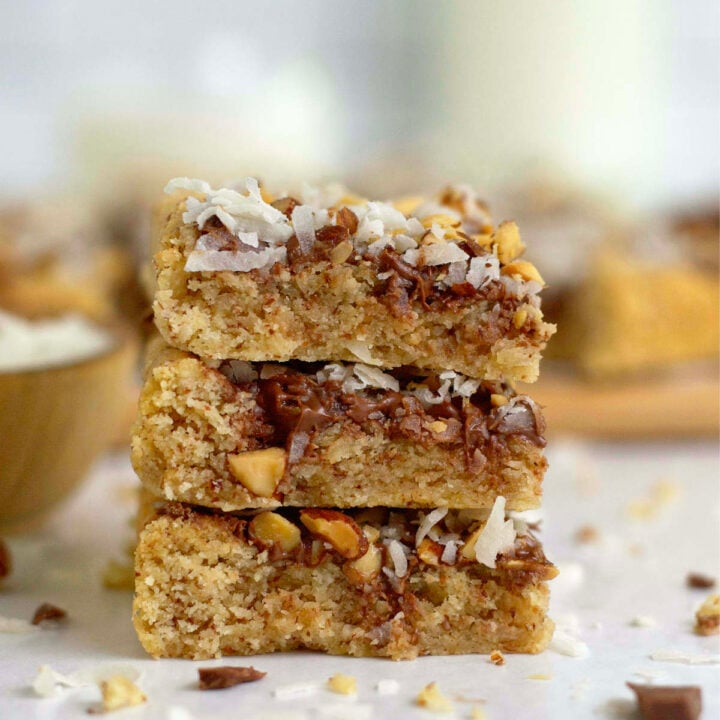
    stack of three cookie bars

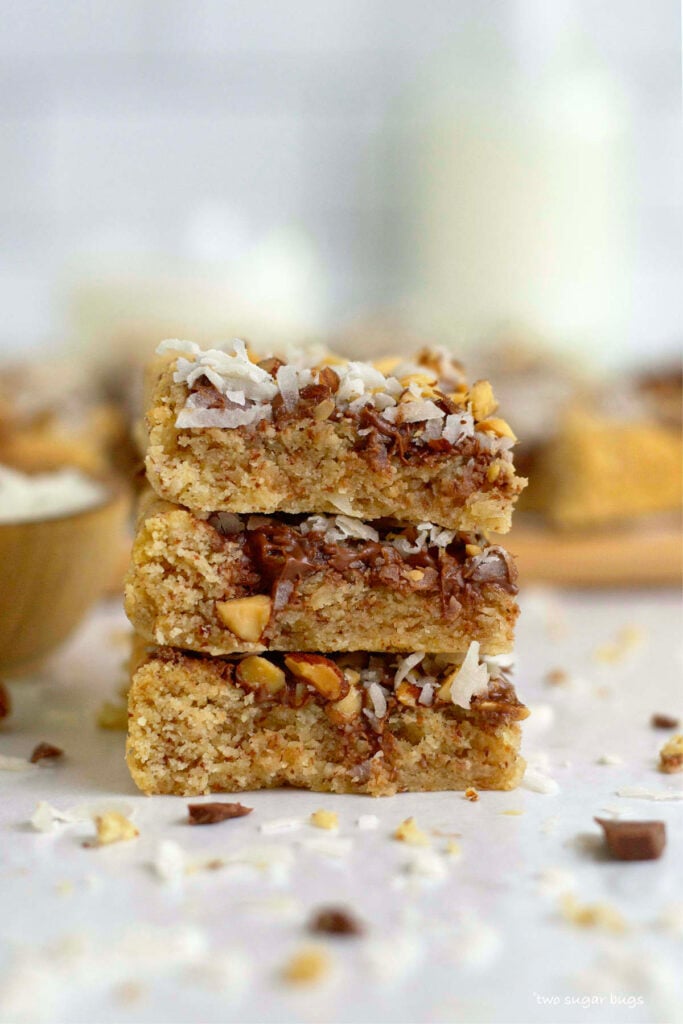
    Buttery almond cookie bars are EASY, gluten free and are made with just seven ingredients!

    stack of three cookie bars

    Disclosure | This post may contain affiliate links. As an Amazon Associate I earn from qualifying purchases.

    Easy recipes are my jam and cookie bars just fit that bill so perfectly! I don't know about you, but in the summer months I just want EASY {okay, I really want this all the time}! I don't want to be slaving over dessert recipes, but I do want them to taste delicious.

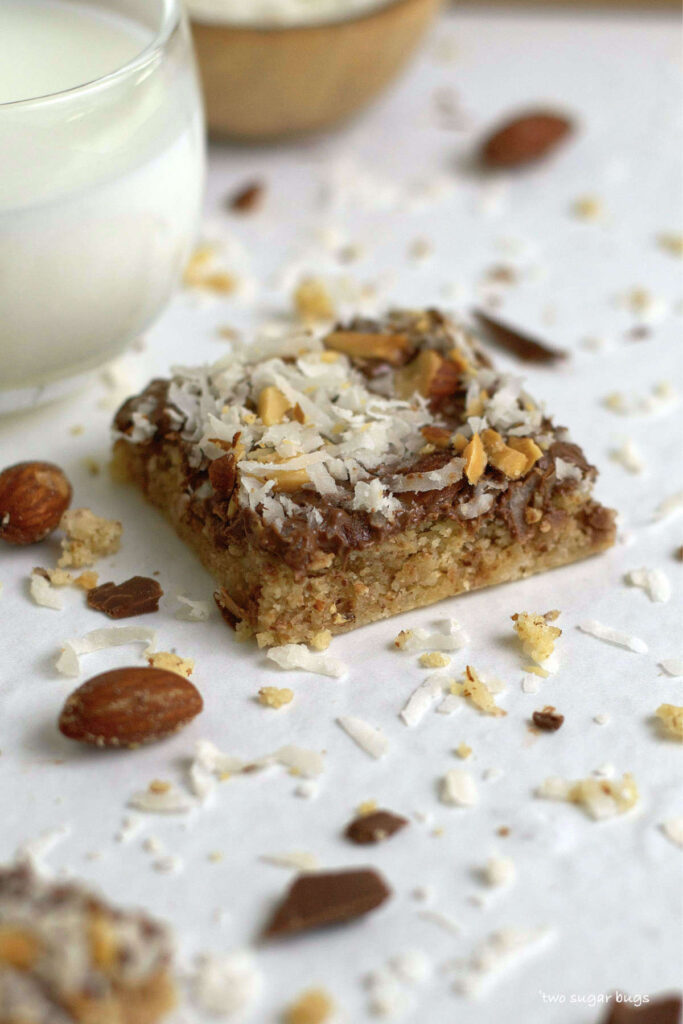
    This cookie recipe is made without flour, making it gluten free. It's not quite an almond joy {make my almond joy pie for that}, but it's made with almond flour, coconut, chocolate and more chopped almonds and coconut.

    single cookie bar with a glass of milk

    how to make cookie bars with almond flour

    This buttery cookie is made much like shortbread. Except we are using almond flour instead of all-purpose flour. Bob's Red Mill Super-Fine Almond Flour is my favorite {not sponsored, just a big fan}.

    Baking with almond flour is very common in gluten free baking. You use it much like regular flour, but the two can't usually be swapped for one another without making additional recipe changes. Almond flour is made of finely ground almonds so it reacts differently from regular flour made of wheat.

    a look at the chewy inside texture of almond cookie bars

    Remember to pin this recipe to Pinterest! Use the button on the recipe card or the share buttons on the side or bottom of this page.

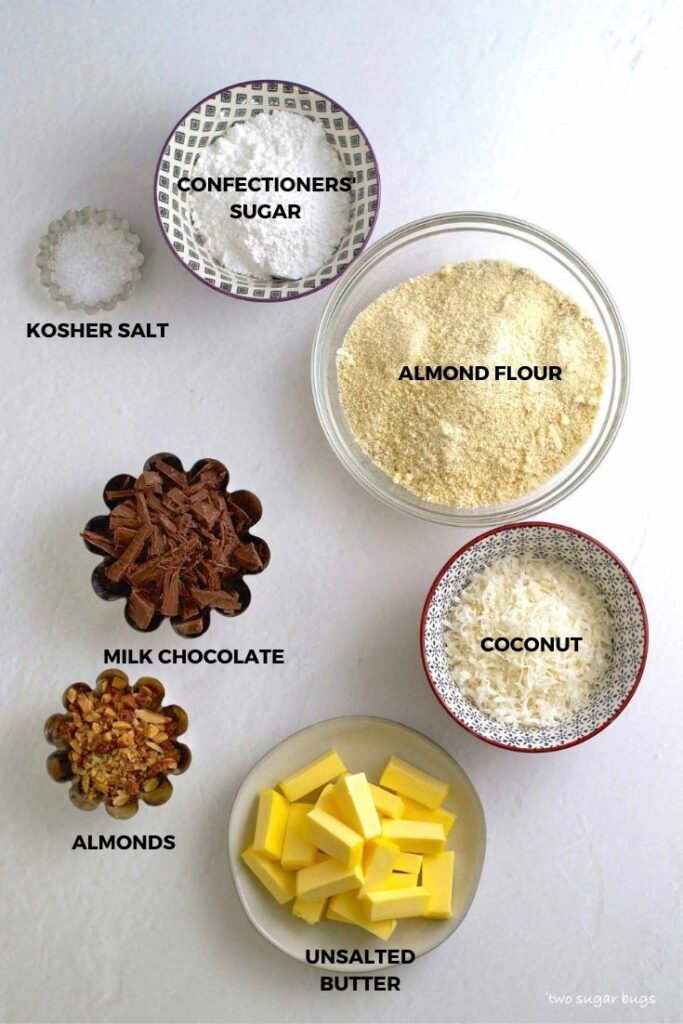
    ingredients for this gluten free recipe

    ingredients for almond cookie bars with coconut
    • Almond flour ~ I used Bob's Red Mill Super-Fine Almond Flour
    • Confectioners' sugar ~ adds softness and some sweetness
    • Kosher salt ~ if using table salt, use a little less
    • Coconut ~ use flaked or shredded, the kind that looks like shredded cheese. If you don't want long strands in the cookie bars, give it a little chop before adding to the recipe.
    • Unsalted butter ~ because this is a shortbread like base, I recommend a good quality European butter such as Plugra or Kerrygold.
    • Chocolate ~ I used a chopped milk chocolate bar {I always have Trader Joe's Pound Plus bars in my baking cabinet}, but you could use chocolate chips and dark chocolate, if preferred.
    • Almonds ~ dry roasted almonds were chopped for the topping, but you could also use sliced or slivered almonds.

    how to make almond cookie bars with coconut and chocolate

    Start by preparing an 8x8 baking pan with parchment paper. This is the USA Pan that I use and love.

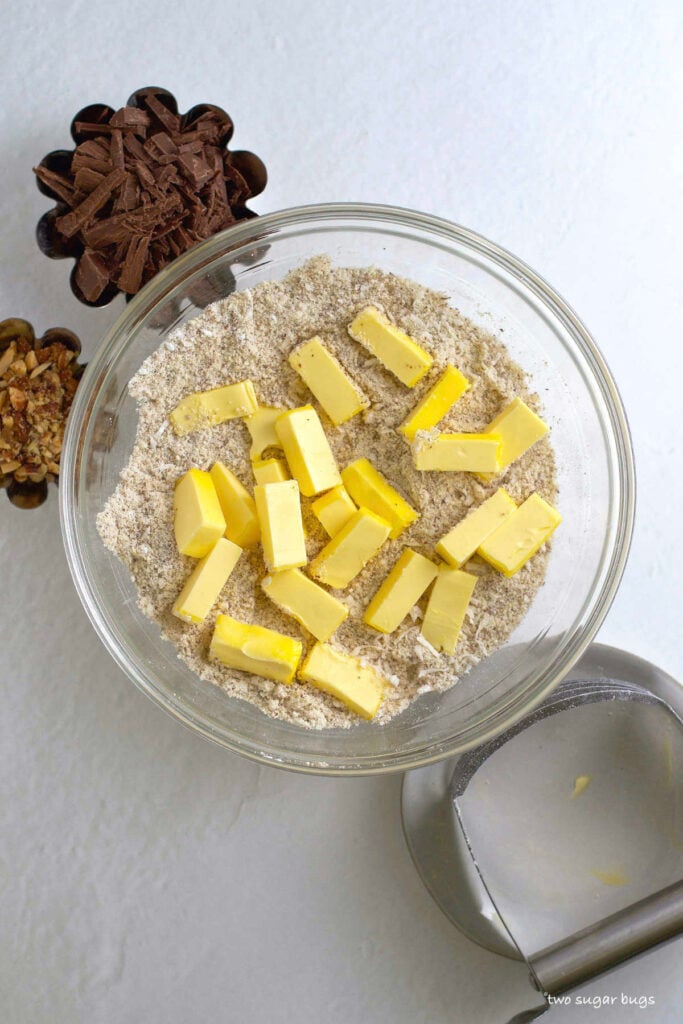
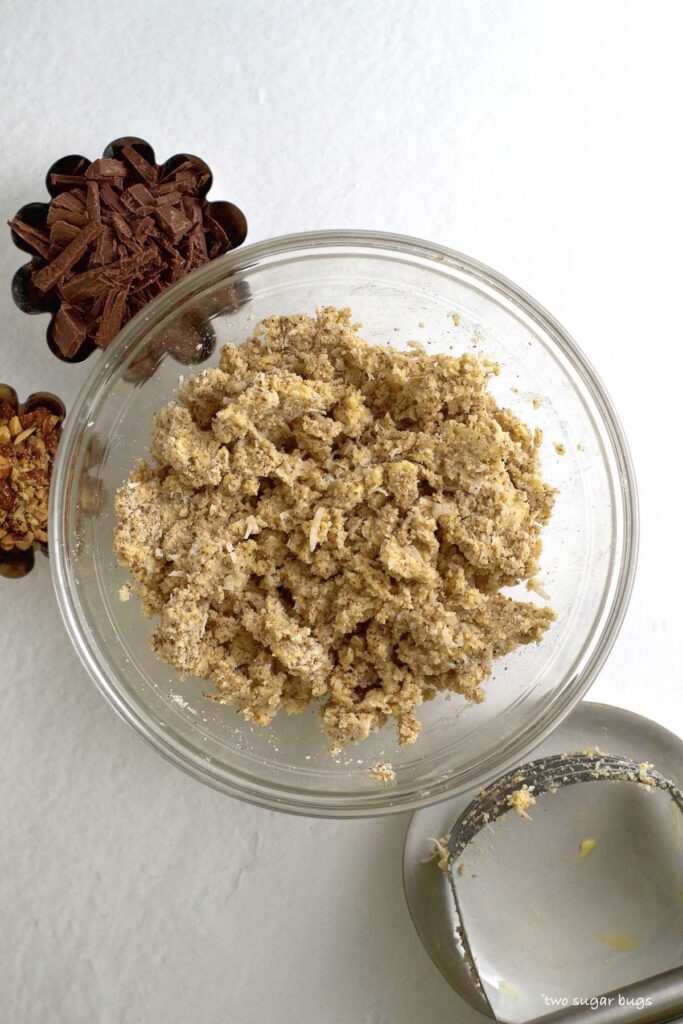
    Then add the almond flour, confectioners' sugar, coconut and kosher salt in a bowl and mix to combine. I use my pastry cutter for this {less dishes to wash!}. Next add the unsalted butter and use a pastry cutter or fork to cut the butter into the dry ingredients until a soft dough forms.

    • butter on top of dry ingredients in a glass bowl
    • cookie bar dough in a bowl

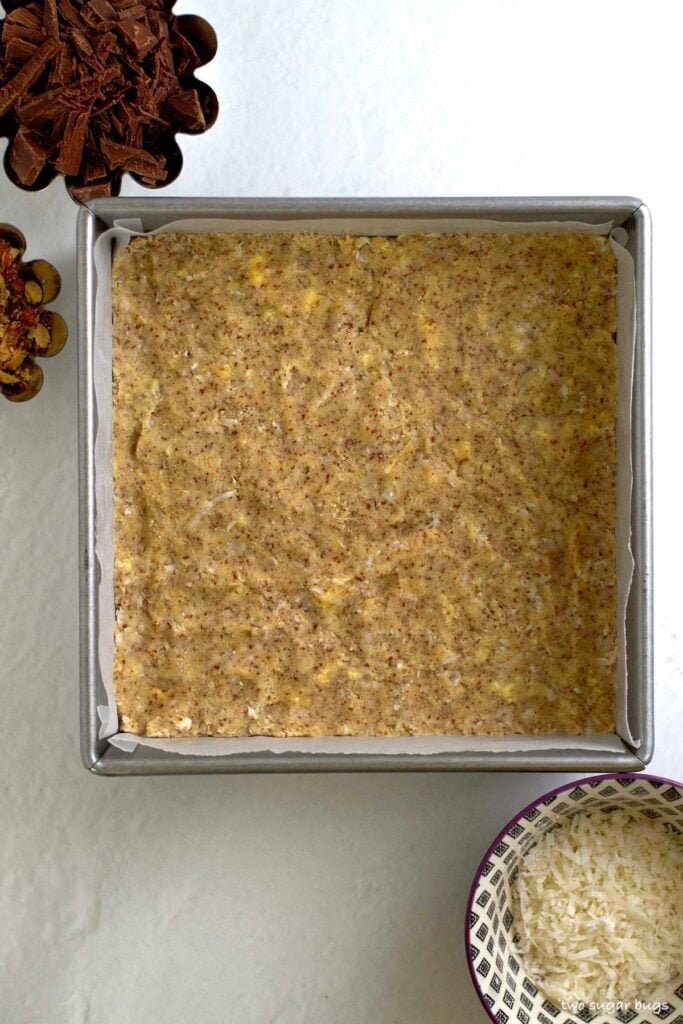
    Now press the cookie dough evenly into the prepared baking pan. Bake for 12 minutes, until the edges are set and lightly browned. Remember your oven is different than mine and our baking times might be slightly different.

    unbaked buttery almond flour base in baking pan

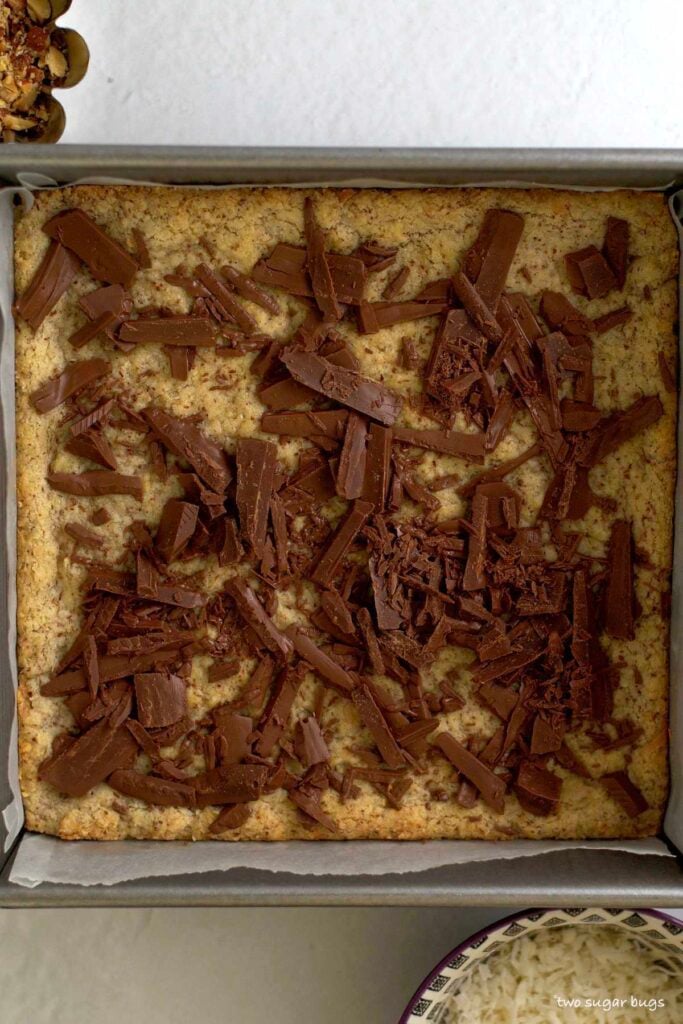
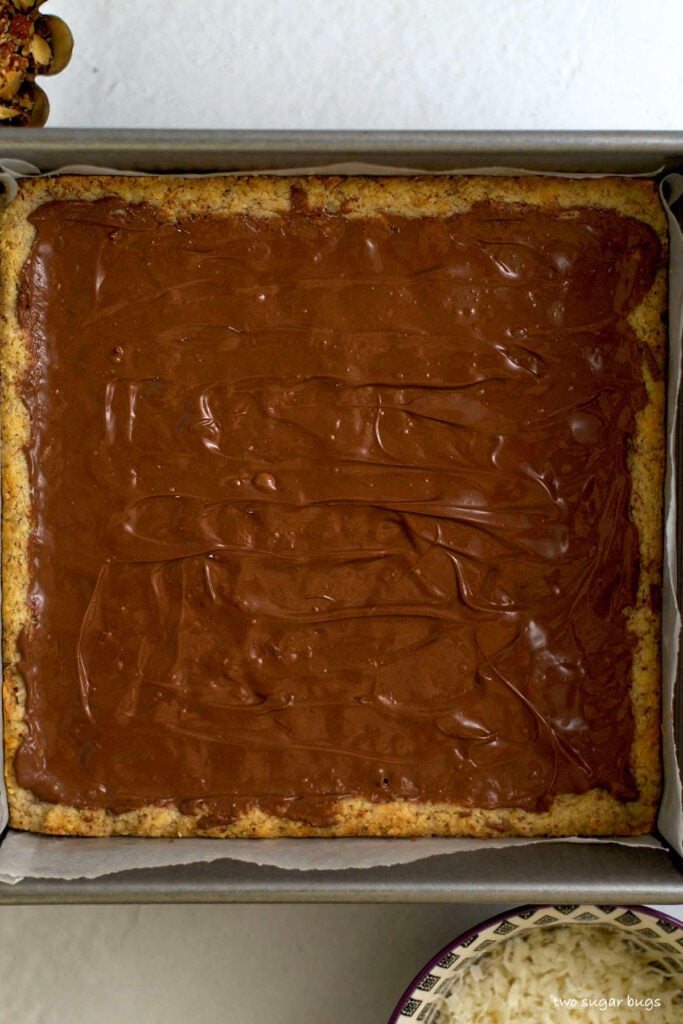
    When the cookie is baked, remove it from the oven and immediately sprinkle the chocolate over the hot bars. Allow it to sit for three minutes, then use an off-set spatula to smooth the melted chocolate over the almond cookie.

    • chopped chocolate melting over almond flour cookie base
    • chocolate layer spread over buttery almond base

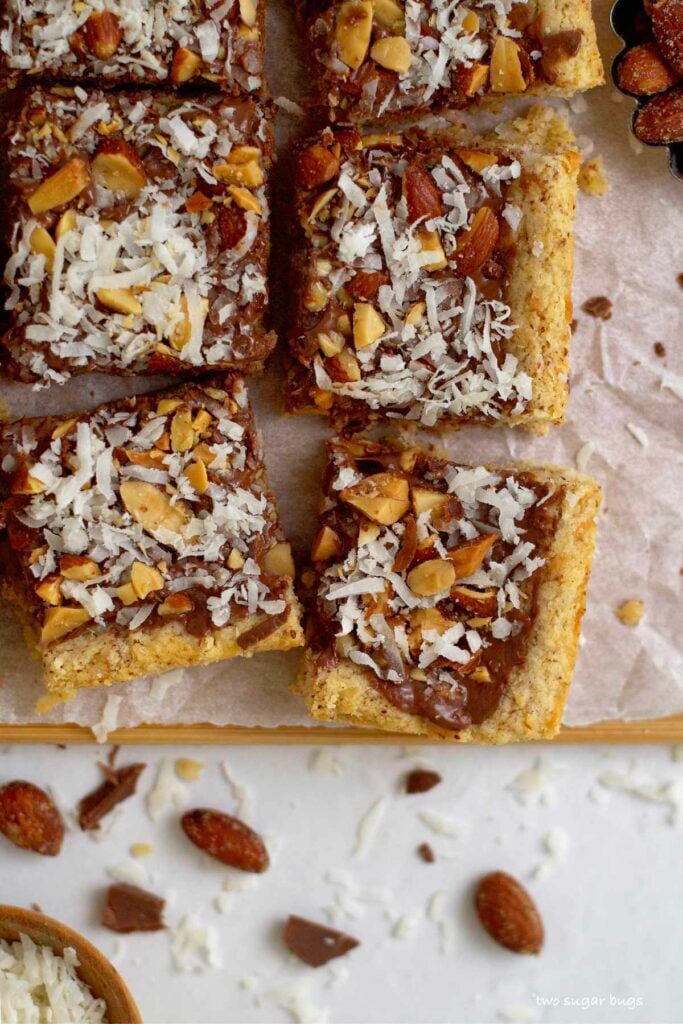
    Sprinkle coconut and chopped almonds over the top of the melted chocolate. Then use clean hands to lightly press the coconut and almonds in to the melted chocolate.

    Now comes the hard part, waiting for them to cool! It takes about an hour for the cookies to be cool enough to slice them into bars without them falling apart. You can speed this process up by placing the pan in the refrigerator once it is cool enough to handle with bare hands.

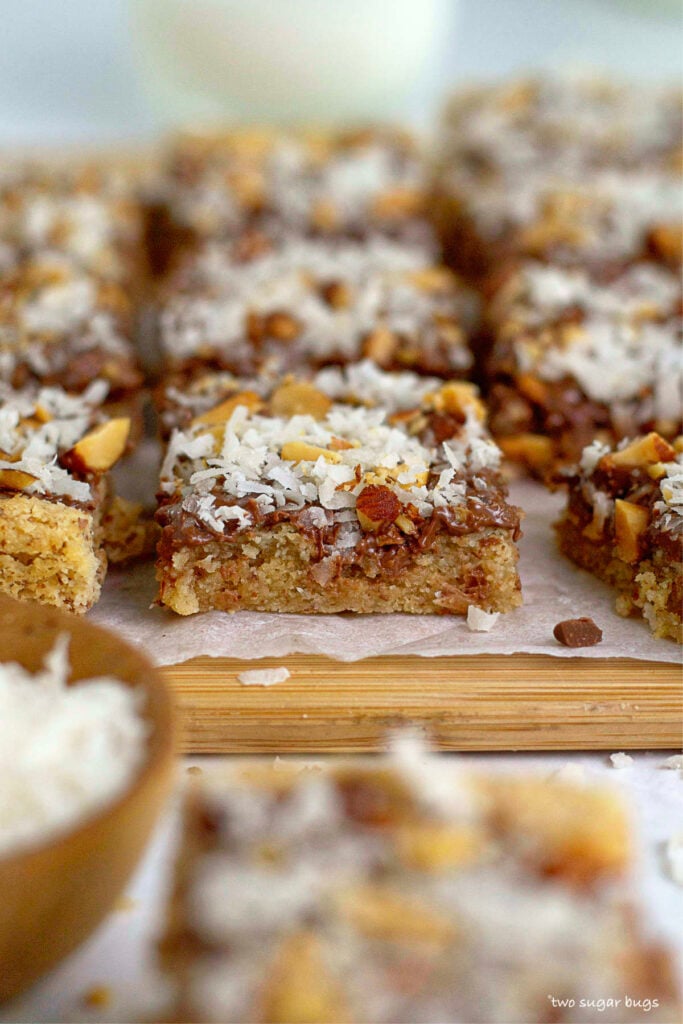
    overhead look at cut cookie bars on a parchment lined cutting board

    why you will love this cookie bar recipe

    • It's EASY! Active time is 10-15 minutes.
    • No chill time.
    • Uses cold butter.
    • Creates soft and chewy almond cookie bars, with almond joy like flavors.
    • A great cookie bar for those needing a dessert without flour.
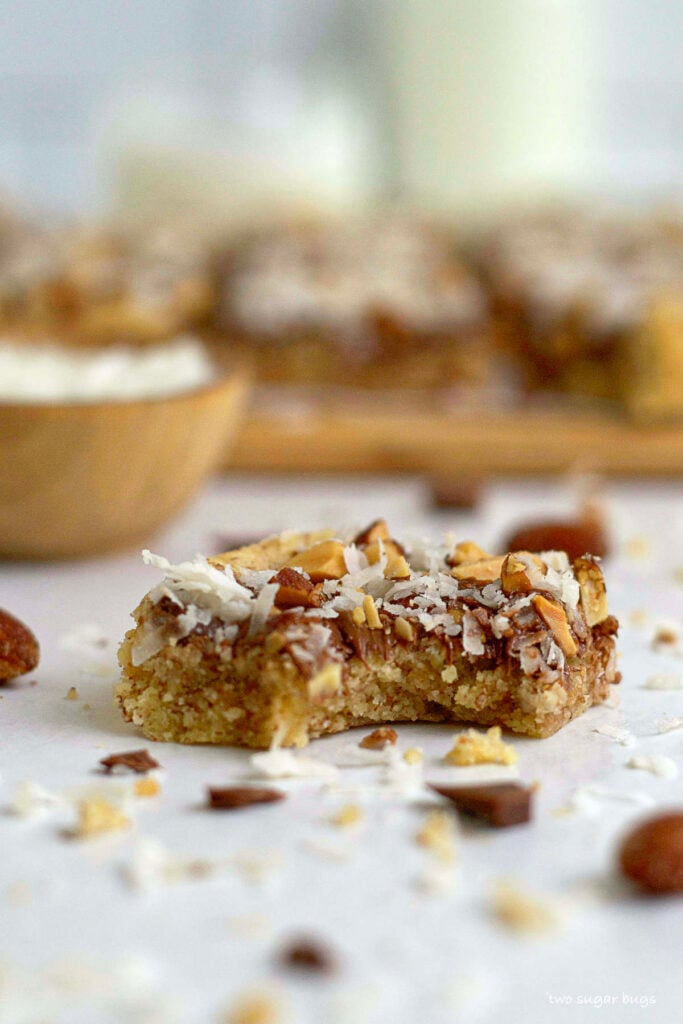
    cookie bars with a bite out of it and bowl of coconut in the background
    Just look at that soft and chewy texture!

    Remember to snap a picture and tag me on Instagram if you make these Almond Cookie Bars with Coconut. It warms my heart to see you bring these recipes to life! Thank you for being here and happy baking!

    more gluten free dessert recipes

    • Almond Flour Skillet Cookie
    • Lemon Almond Cookie Bars
    • Soft Amaretti Cookies
    • Flourless Monster Cookies
    • Raspberry Hazelnut Cookies

    If you make this recipe {or any recipe!} from two sugar bugsย please come back and leave a review and a โญ๏ธโญ๏ธโญ๏ธโญ๏ธโญ๏ธ star rating.ย  I read every comment, and I LOVE hearing from you!

    Yield: 16 cookie bars

    Almond Cookie Bars (with Coconut)

    stack of three cookie bars

    These buttery almond bars are EASY, gluten free and are made with just seven ingredients!

    Prep Time 10 minutes
    Cook Time 12 minutes
    Cooling Time 1 hour
    Total Time 1 hour 22 minutes

    Ingredients

    • 2 cups almond flour (200g)
    • 1 cup confectionersโ€™ sugar (120g)
    • ยฝ cup shredded coconut*, packed (50g)
    • ยฝ teaspoon kosher salt
    • ยฝ cup unsalted butter, cubed** (113g)
    • 3 ounces milk chocolate baking bar, chopped small*** (86g)
    • ยผ cup almonds, chopped (30g)
    • ยผ cup sweetened shredded coconut*, packed (25g)

    Instructions

    1. Preheat oven to 375°F and line an 8x8 baking pan with parchment paper, leaving a little overhang.
    2. In a medium to large bowl, combine the almond flour, confectioners’ sugar, coconut and kosher salt. 
    3. Then using a pastry cutter (or fork), cut in the cold butter until a dough is formed.  Press the dough evenly into the bottom of the prepared pan.  Bake for about 12 minutes, until the edges have set and are lightly browned.
    4. Remove the bars from the oven and immediately spread the chopped chocolate over the hot cookie bars.  Allow to sit for 3 minutes, then use an off-set spatula to smooth the melted chocolate over the top of the cookie bars.  Sprinkle with the chopped almonds and coconut and allow to cool completely, about 1 hour.  You can speed this process up by letting the bars cool on a wire rack until the pan has cooled enough to pick it up, then place in the refrigerator.
    5. Cut into the desired size bars and enjoy!

    Notes

    *If you donโ€™t want long strands of coconut in the bars, chop the coconut into small pieces before using.

    **Use the best butter you can afford, I like using Plugra or Kerrygold for this recipe.

    ***I like using a milk chocolate baking bar, but chocolate chips will work here as well.

    Store cookie bars in an airtight container at room temperature for up to five days or covered in the refrigerator.ย  The bars also freeze well for up to three months.

    Nutrition Information:

    Yield:

    16

    Serving Size:

    1

    Amount Per Serving: Calories: 216Total Fat: 16gSaturated Fat: 6gTrans Fat: 0gUnsaturated Fat: 9gCholesterol: 16mgSodium: 65mgCarbohydrates: 16gFiber: 3gSugar: 12gProtein: 4g

    The nutrition information is an estimate and may not be entirely accurate.
    Did you make this recipe?

    Please make my day and PIN to Pinterest and share a photo on Instagram ~ making sure to tag @twosugarbugs! THANK YOU!!

    © Tasia
    Cuisine: American / Category: Bars and Brownies

    Sugar Cookie Bars (with Cream Cheese)

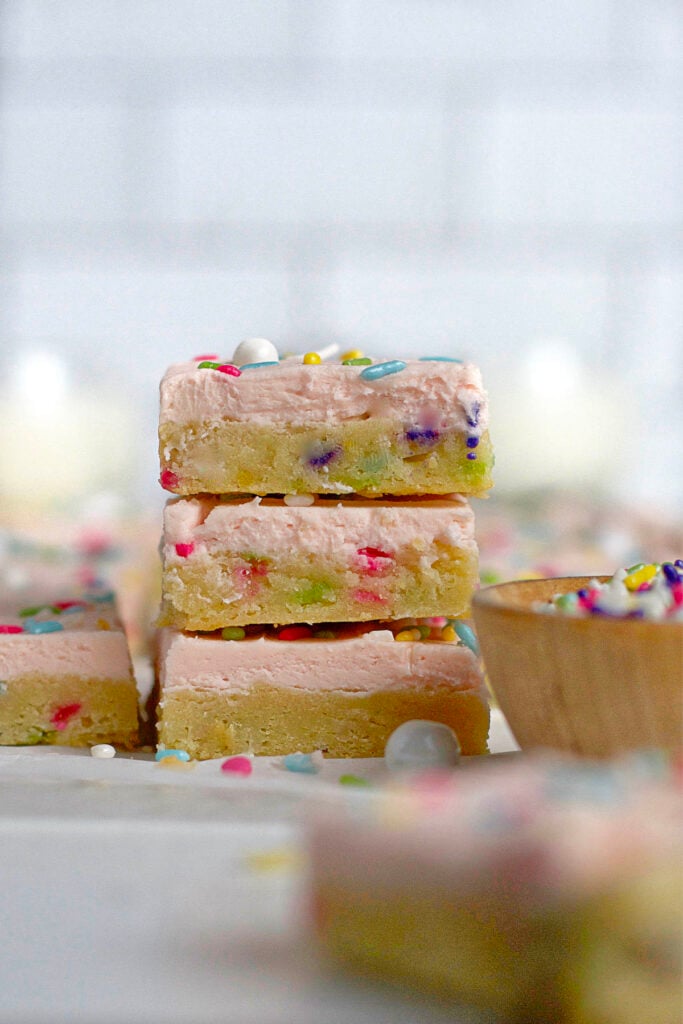
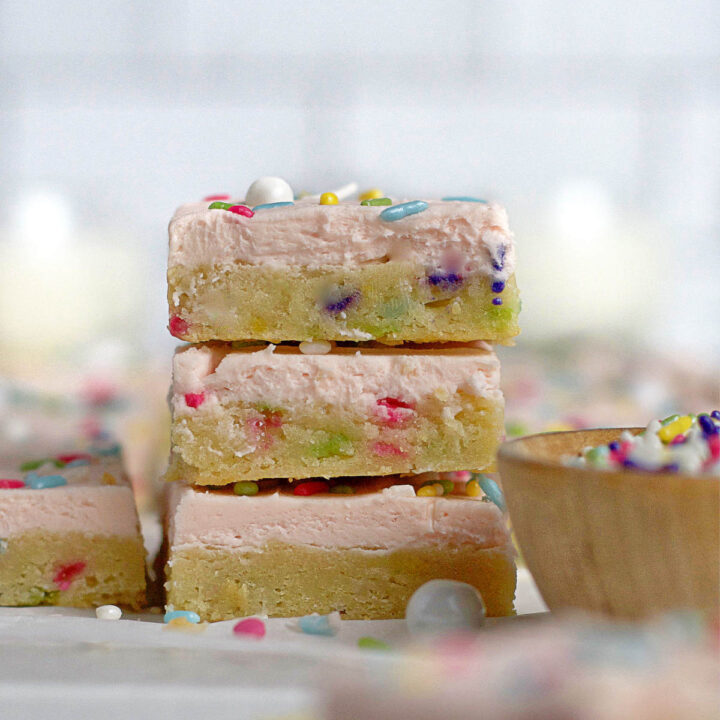
    stack of three sugar cookie bars with sprinkles

    The BEST sugar cookie bars! The cookie bars are filled with sprinkles, easy to make and are perfectly soft and chewy with a generous layer of buttercream!

    stack of three sugar cookie bars with sprinkles

    Disclosure | This post may contain affiliate links. As an Amazon Associate I earn from qualifying purchases.

    Sugar cookie bars are always a win in my book. Especially when they are quick and easy, thick and chewy and filled with sprinkles! Sugar cookies are my weakness, my kryptonite, they render me utterly defenseless. I can say no to a brownie. A chocolate chip cookie, no problem. A piece of cake, getting weaker.....but a sugar cookie? No way, I cannot pass one up!

    This post was originally published in September 2018 and has been updated with new photos and text. The recipe remains the same. Be sure to check out an original photo at the end of the post!

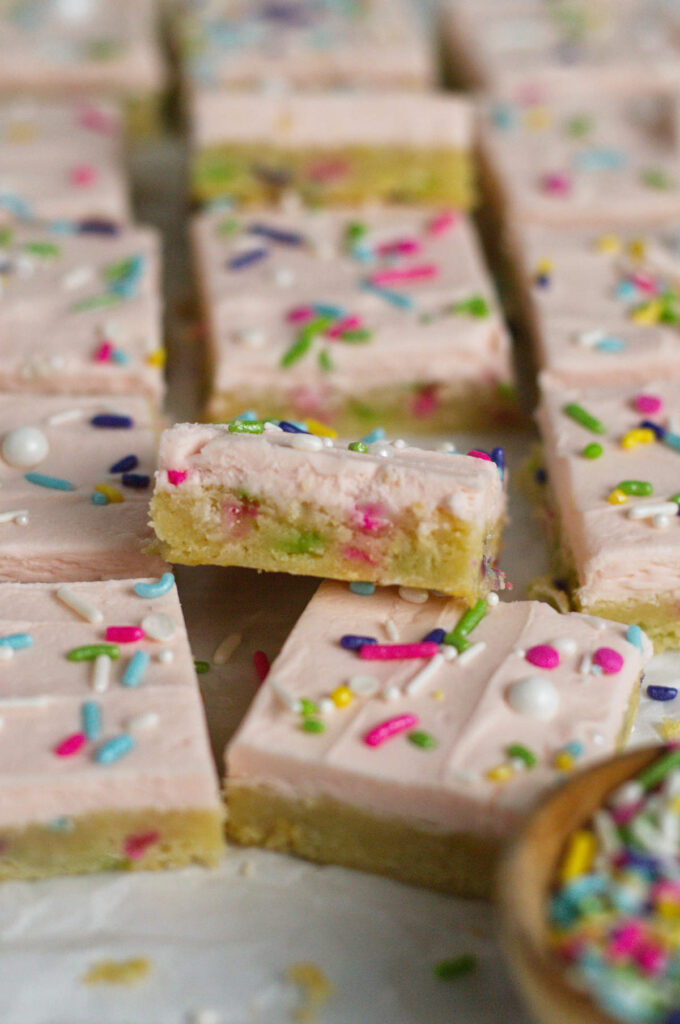
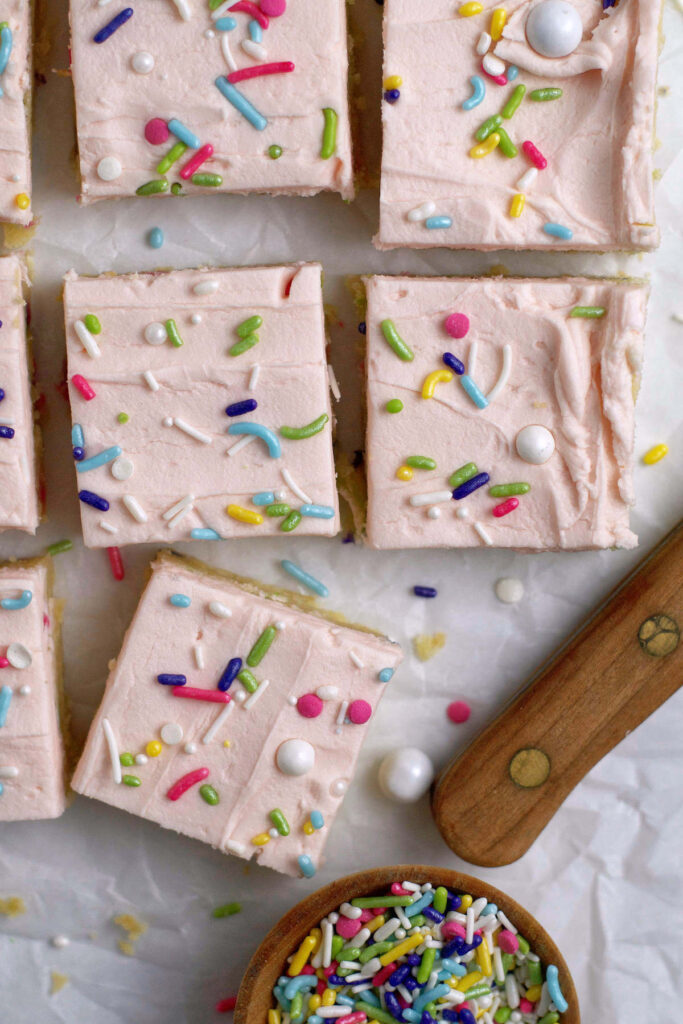
    buttercream sugar cookie bars with sprinkles on parchment paper

    why you will love this recipe

    • It is quick and easy!
    • No rolling of the dough and no chill time.
    • Yields enough cookie bars to serve a crowd.
    • Cream cheese adds a bit of tang and helps balance the sweetness.
    • Made with almond extract, which gives them a little something special.
    • Filled with sprinkles!
    • Easy to customize to any holiday or special event; use red and green for Christmas, pastel sprinkles for Easter, green and white for St. Patrick's Day, red/pink/white for Valentine's Day, your favorite team colors...you get the idea. Or leave them without sprinkles if that's more your thing!

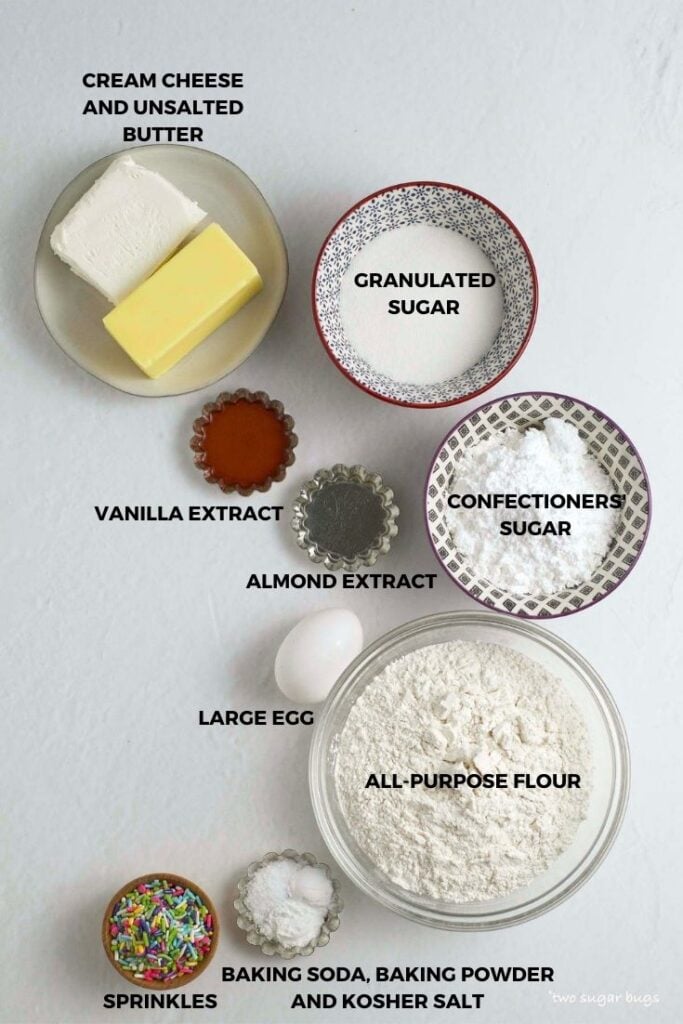
    ingredients needed for these cookie bars

    This recipe was inspired from a Lofthouse sugar cookie copycat recipe that a friend gave me. Her recipe used shortening, which I don't use much of in my kitchen. After tinkering with the recipe over the years, I found that the addition of cream cheese helps keep the sugar cookie bars super soft and chewy without shortening.

    butter, cream cheese, sugars, extracts, egg, sprinkles and leaveners

    tips for making soft and chewy sugar cookie bars

    • Be careful not to over bake these bars.ย  You are going to question yourself when you pull them out of the oven.ย  They are going to look a little underdone, but this is how you get a soft cookie bar versus a soft cake-like bar.
    • Allow the bars to cool completely before you frost them.
    • Use parchment paper or aluminum foil to line the pan. This makes it easier to pull the bars out of the pan for frosting and cutting.
    • To get the cleanest cuts; use a sharp knife that you wipe clean between each cut. Chilling the bars also helps with this.
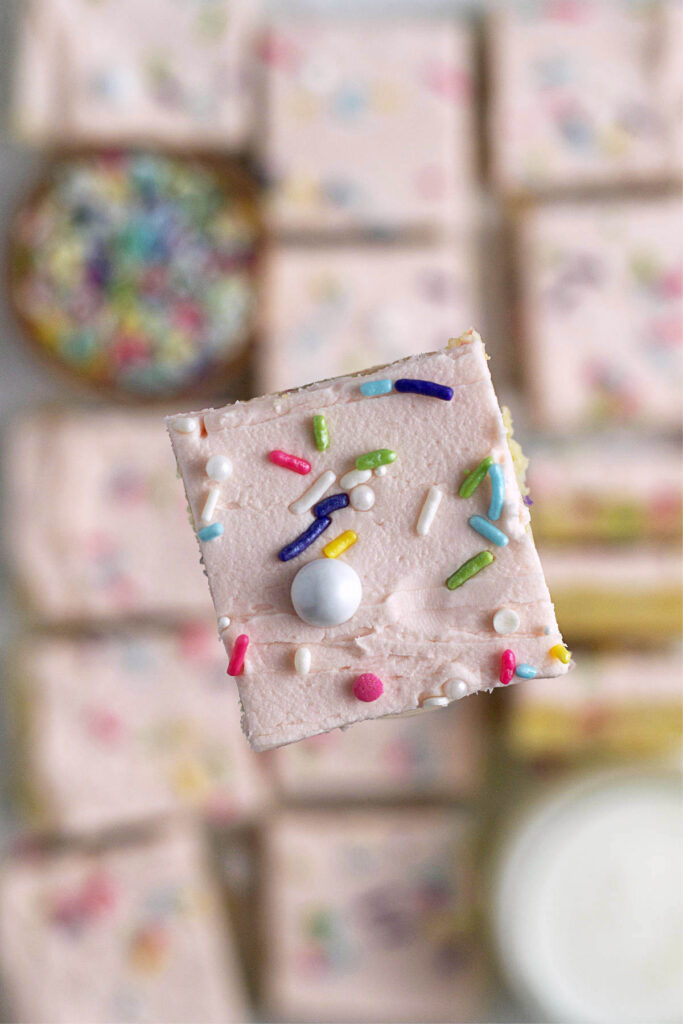
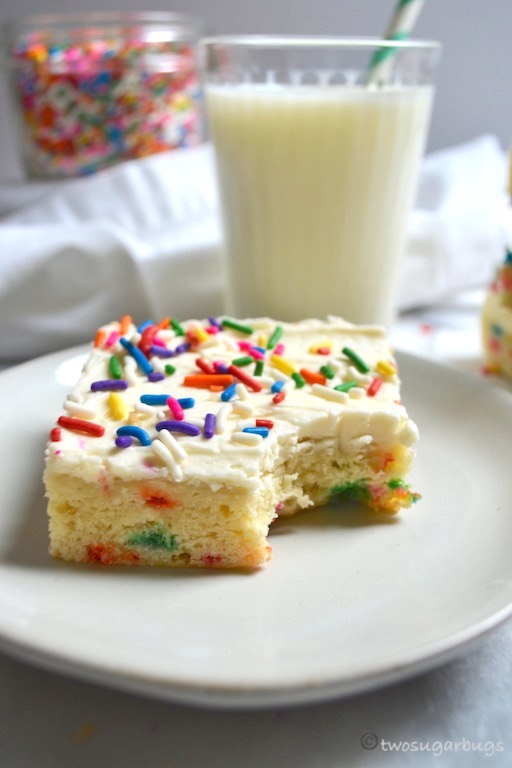
    a floating sugar cookie bar with milk and sprinkles blurred underneath

    let's bake these bars!

    To start, preheat your oven and prepare a 9x13 baking pan with parchment paper {or aluminum foil}, leaving a little overhang on the long sides. Then whisk together the dry ingredients and set aside.

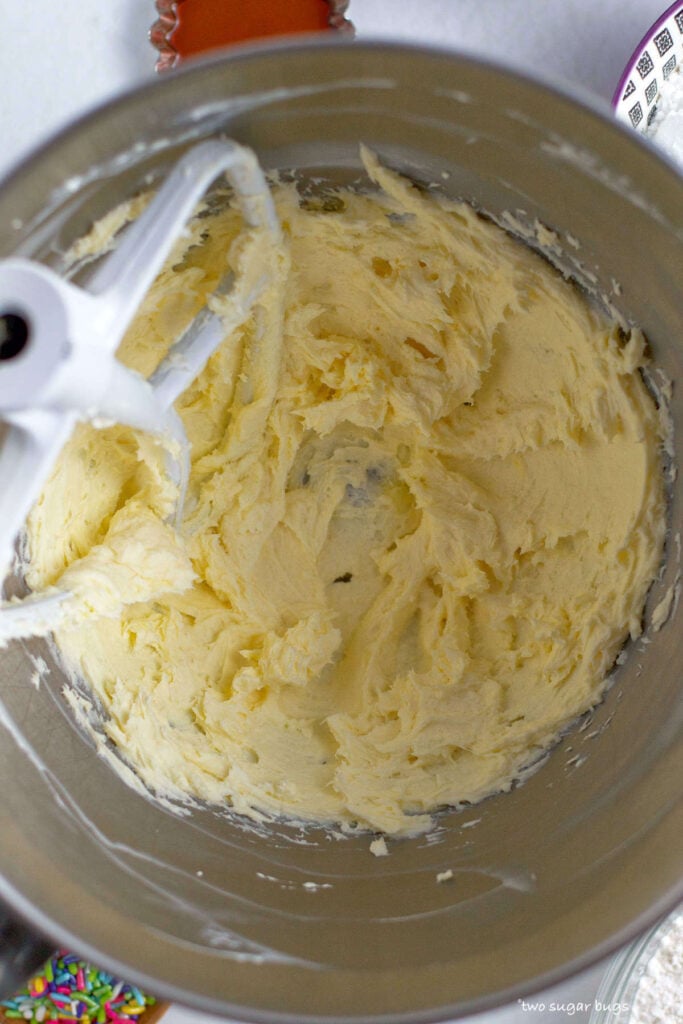
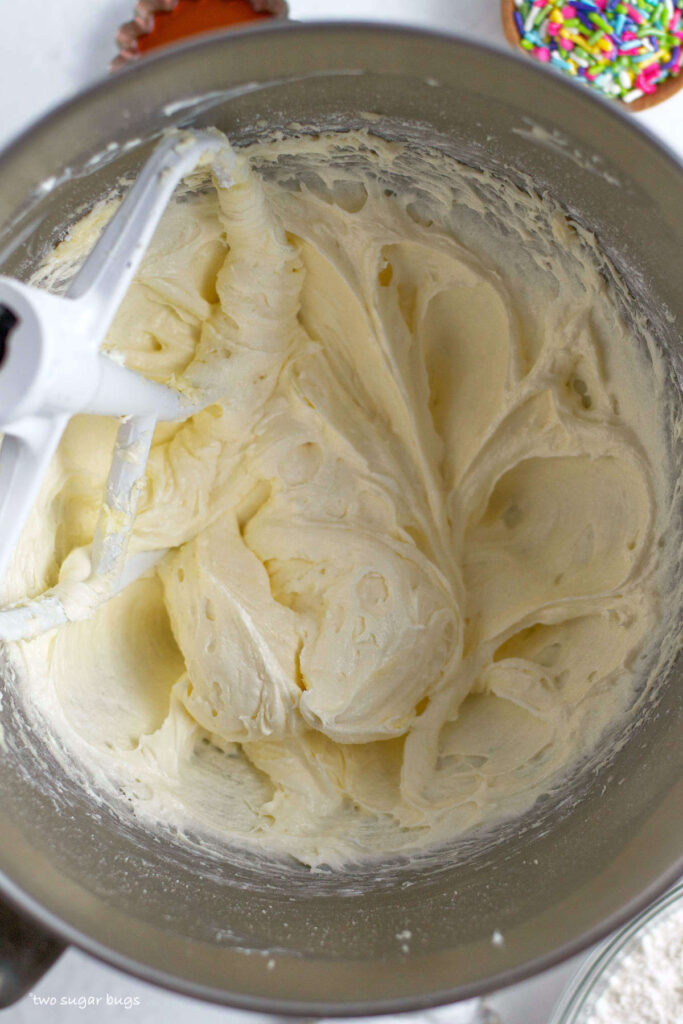
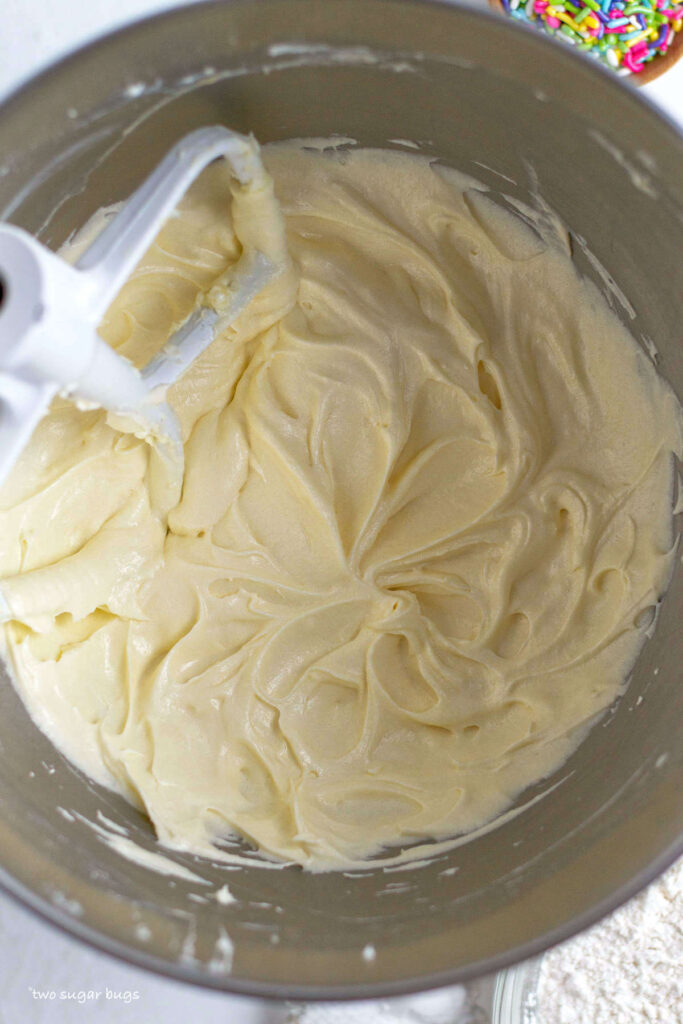
    Now you will cream together the room temperature butter and cream cheese until they are well blended {I use my KitchenAid stand mixer}. Next add the granulated and confectioners' sugar and beat for 4-5 minutes; until pale and fluffy. Then add the egg, vanilla and almond extracts and beat until well combined.

    • butter and cream cheese mixed together in a mixing bowl
    • fluffy texture of butter, cream cheese and sugars mixed together in the mixing bowl
    • butter, sugar, eggs and cream cheese mixed to a batter in the mixing bowl

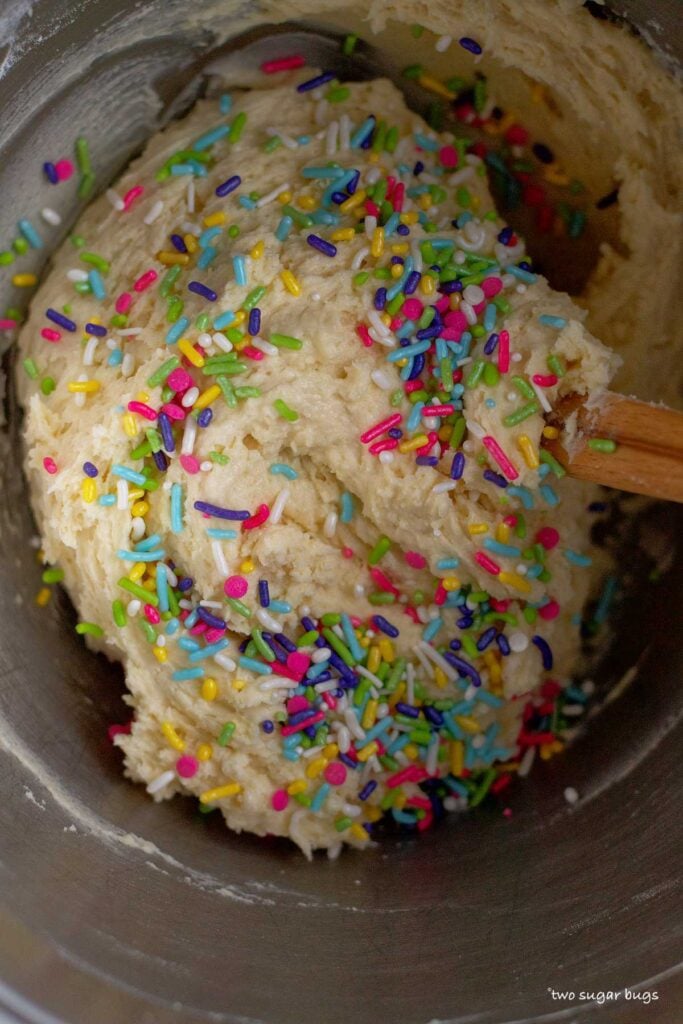
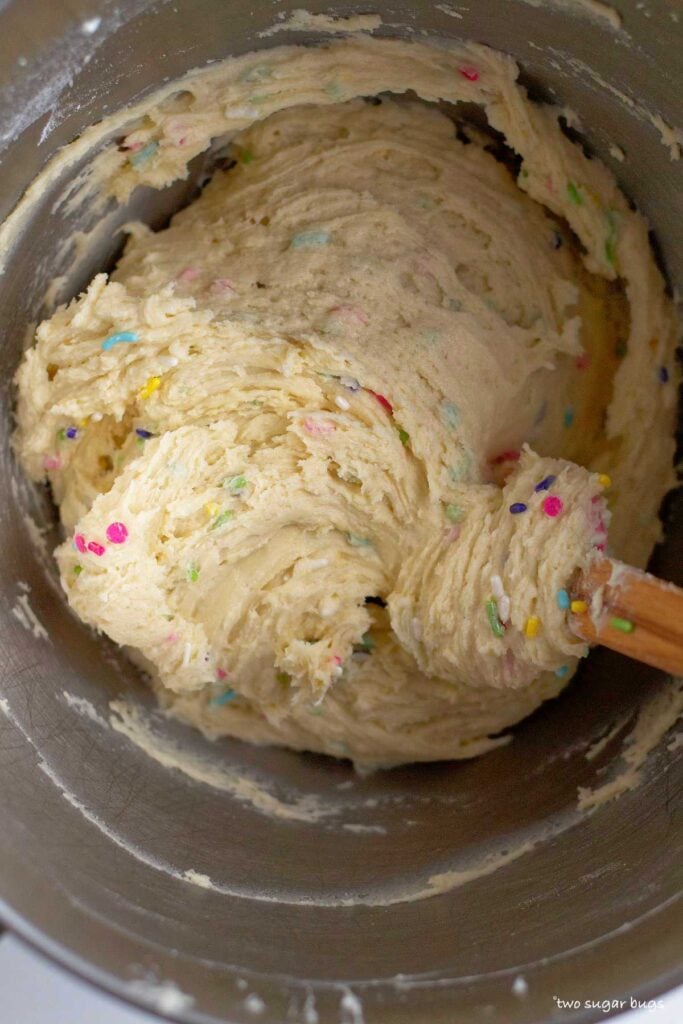
    With the mixer on low, add the flour mixture and blend until just combined. Fold in the sprinkles with a spatula, if using. Be sure to use the โ€œjimmiesโ€ for your sprinkles as the nonpareil type can bleed and turn your batter an unappetizing color.

    • sprinkles on top of sugar cookie bar dough
    • mixed sugar cookie bar dough in mixing bowl

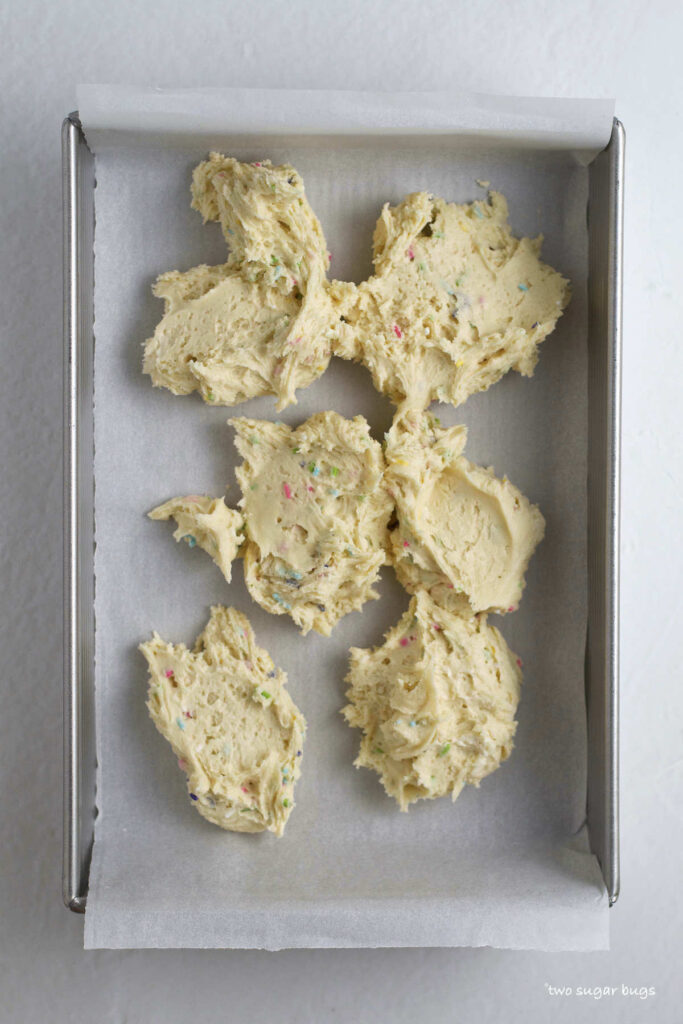
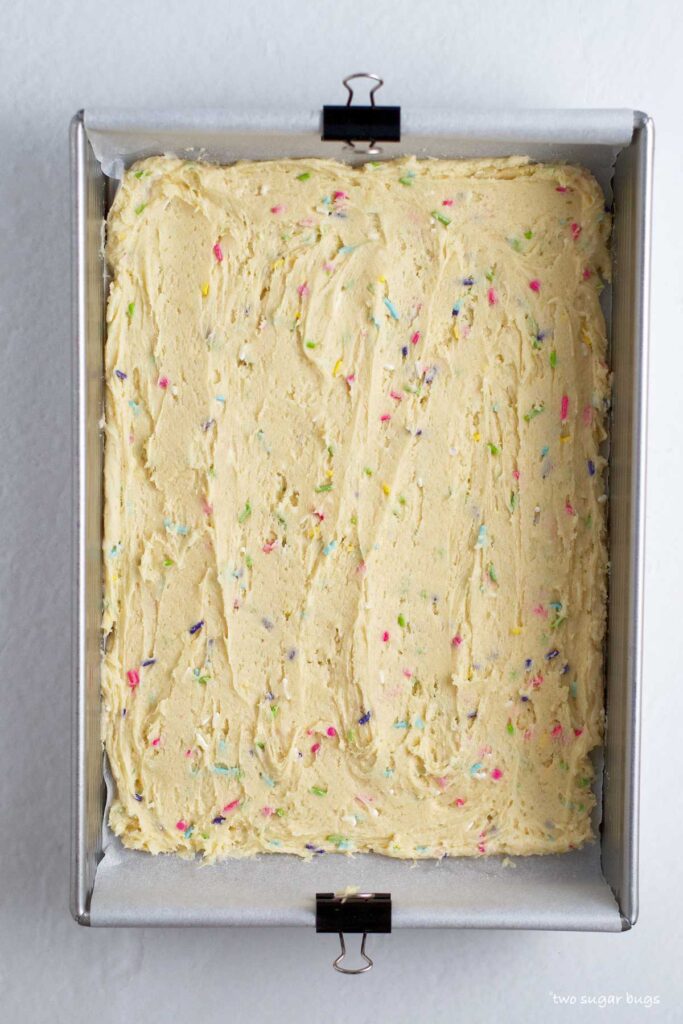
    Drop the dough into the prepared pan and press the dough into an even layer using a spatula or lightly moistened fingers. The dough will be thick and somewhat sticky. {I often use alligator clips to hold the parchment paper in place. Be sure to remove them before baking!}

    • sugar cookie batter dropped in large spoonfuls in parchment lined pan
    • sugar cookie batter spread out in parchment lined pan

    what is the ideal bake time?

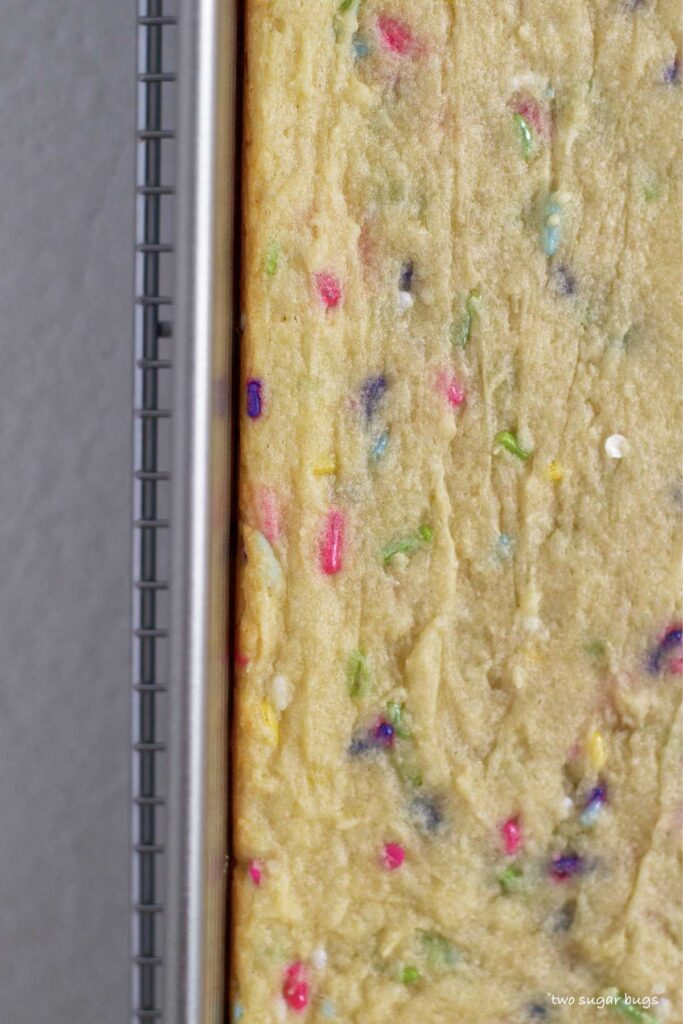
    To achieve a soft and chewy {not cakey} texture, you want to bake these bars until they are just set at the edges {very lightly browned} and the center no longer looks wet. This is typically around 14-15 minutes in my oven. Remember, my oven is different than yours and our baking times may be different. I would recommend doing your initial check at 12 minutes.

    If you prefer a more cake-like sugar cookie bar; bake for an additional 5-7 minutes.

    baked sugar cookie bars showing barely browned edges

    With frosting or no frosting?

    Not gonna lie, adding the buttercream frosting is part of why I love these cookie bars. I also know not everyone is #teamfrostingforlife like me.

    These sugar cookie bars are definitely sweet, although tempered by the addition of cream cheese. I add a pinch of kosher salt to the buttercream to also help balance the sweetness of the buttercream. But you do you, leave them without frosting if that's more your thing!

    cut sugar cookie bars on parchment paper with extra sprinkles

    how to store sugar cookie bars

    Sugar cookie bars can be stored in an airtight container at room temperature for up to 5 days. They also freeze very well for up to 3 months. I chill them first and then stack them in an airtight container. Eat them from frozen or allow them to come to room temperature.

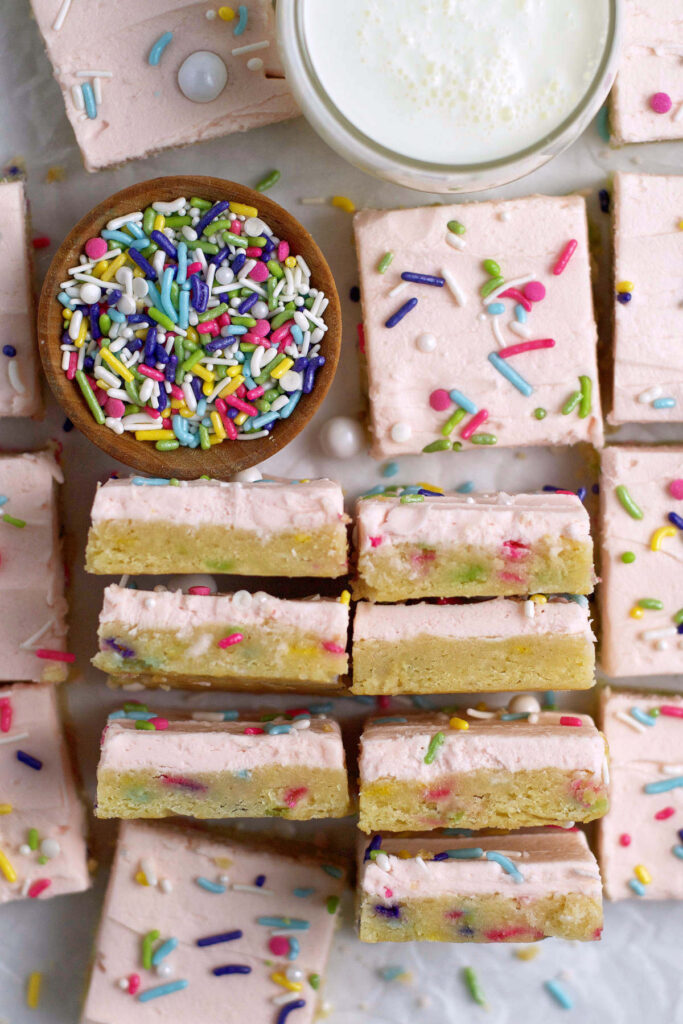
    over head look at sugar cookie bars with sprinkles and milk

    Remember to snap a picture and tag me on Instagram if you make these Sugar Cookie Bars with Cream Cheese. It warms my heart to see you bring these recipes to life! Thank you for being here and happy baking!

    more recipes with sprinkles to try

    • Sprinkle Cookies
    • Chocolate Confetti Cookies
    • Funfetti Cookies {from Scratch}
    • Small Batch Chocolate Cupcakes {with Sprinkles}
    • Funfetti Ice Cream

    If you make this recipe {or any recipe!} from two sugar bugsย please come back and leave a review and a โญ๏ธโญ๏ธโญ๏ธโญ๏ธโญ๏ธ star rating.ย  I read every comment, and I LOVE hearing from you!

    Yield: 20 - 24 cookie bars

    Sugar Cookie Bars (with Cream Cheese)

    stack of three sugar cookie bars with sprinkles

    The BEST sugar cookie bars with cream cheese. The cookie bars are so easy to make and are perfectly soft and chewy with sprinkles and a generous layer of buttercream on top!

    Prep Time 20 minutes
    Bake Time 16 minutes
    Total Time 36 minutes

    Ingredients

    sugar cookie bars

    • 2 ยฝ cups all purpose flour (315g)
    • ยฝ teaspoon baking soda
    • ยฝ teaspoon baking powder
    • ยฝ teaspoon kosher salt
    • ยฝ cup unsalted butter, room temperature (113g)
    • 4 ounces cream cheese, room temperature (114g)
    • ยฝ cup granulated sugar (100g)
    • ยพ cup confectioners' sugar (90g)
    • 1 large egg, room temperature
    • 1 teaspoon pure vanilla extract
    • 1 teaspoon almond extract (you can use all vanilla)
    • ยผ cup sprinkles jimmies, optional (40g)

    Buttercream frosting

    • ยฝ cup unsalted butter room temperature
    • 2 ยฝ cups confectioners' sugar (300g)
    • 1 teaspoon vanilla extract
    • 1 teaspoon almond extract (you can use all vanilla)
    • 1 tablespoon heavy cream or half and half (15mL)

    Instructions

      1. For the sugar cookie bars: Preheat oven to 350°F. Line 9x13 baking pan with parchment paper or aluminum foil, leaving a little extra overhang on the sides.
      2. In a medium size bowl, whisk flour, baking soda, baking powder and salt. Set aside.
      3. Using a stand mixer with a paddle attachment (or a hand held mixer), cream butter and cream cheese on medium speed (4 on a KitchenAid stand mixer) for about 2 minutes, until nice and creamy. Add the granulated and confectioners' sugars and mix until pale and fluffy, approximately 4-5 minutes (speed 6). Add the egg, vanilla and almond extracts and beat on medium speed (speed 4) until well combined, scraping down the sides as needed, about 30-60 seconds.
      4. With the mixer on the lowest setting, add the flour mixture and blend until just combined. Fold in the sprinkles with a spatula, if using. Be sure to use the “jimmies” for your sprinkles as the nonpareil type can bleed and turn your batter an unappetizing color.
      5. Drop the dough into the prepared pan and press the dough into an even layer using a spatula or lightly moistened fingers. The dough will be thick and somewhat sticky.
      6. Bake for 12-16 minutes or until edges are barely browned and they will look a little underdone. You do not want to over bake these bars or they will be more like a cake and less like a soft sugar cookie.
      7. Allow to cool completely in the pan placed on a wire rack.
      8. For the buttercream frosting: Using a stand mixer with the paddle attachment (or a hand held mixer) beat the butter on medium-high speed (speed 6) until smooth and creamy. Scrape down the sides of the bowl and add the confectioners' sugar, vanilla and almond extracts and heavy cream (or half and half). Mix on low speed until incorporated. Increase speed to medium-high and whip until light and fluffy, about 2-3 minutes, scraping sides of the bowl as needed. Add a pinch of salt if the frosting is too sweet. You can also add food coloring, if desired.
      9. Once cool, remove the bars from the pan using the parchment paper or aluminum foil and frost, adding additional sprinkles, if desired. Use a sharp knife to cut to your desired size. If you want nice, clean cuts, wipe your knife with a towel between cuts. Chilled cookie bars are easier to cut.

    Notes

    Store sugar cookie bars in an airtight container at room temperature for up to 5 days. Can also be frozen for up to 3 months.

    Nutrition Information:

    Yield:

    24

    Serving Size:

    1

    Amount Per Serving: Calories: 270Total Fat: 13gSaturated Fat: 7gTrans Fat: 0gUnsaturated Fat: 5gCholesterol: 41mgSodium: 147mgCarbohydrates: 37gFiber: 0gSugar: 24gProtein: 2g

    The nutrition information is an estimate and may not be entirely accurate.
    Did you make this recipe?

    Please make my day and PIN to Pinterest and share a photo on Instagram ~ making sure to tag @twosugarbugs! THANK YOU!!

    © Tasia
    Cuisine: American / Category: Bars and Brownies
    Cookie bar on a plate

    Recipe shared with Meal Plan Monday and Full Plate Thursday

    Funfetti Ice Cream Recipe (with no churn method)

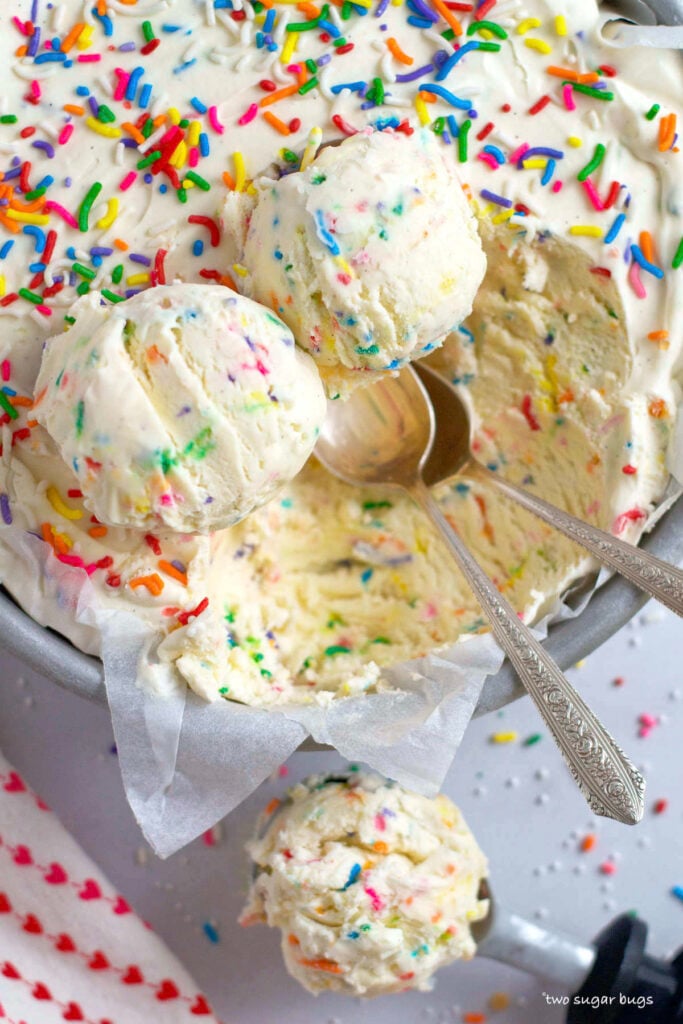
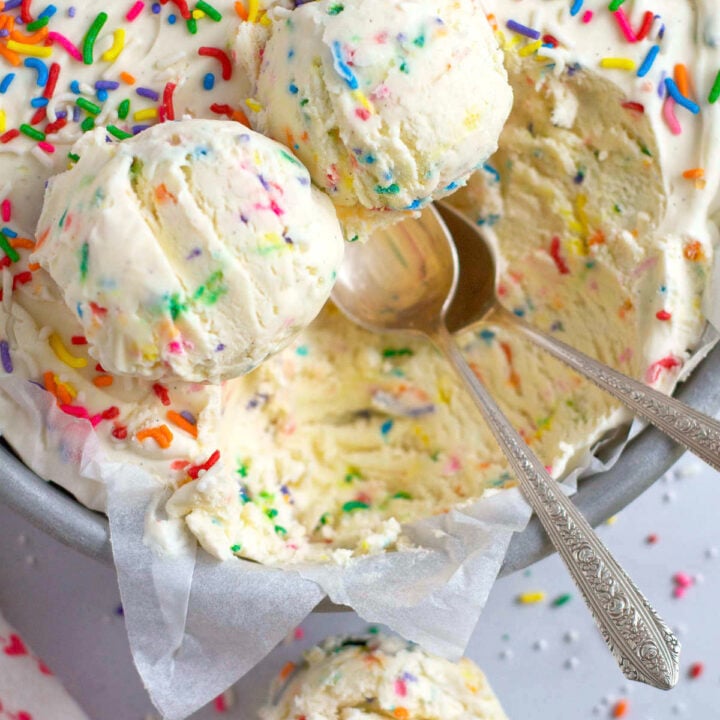
    three scoops of funfetti ice cream with two spoons

    An easy funfetti ice cream recipe! Colorful sprinkles bring the fun to this no-churn ice cream made with simple ingredients and a flavor reminiscent of funfetti birthday cake.

    three scoops of funfetti ice cream with two spoons

    Disclosure | This post may contain affiliate links. As an Amazon Associate I earn from qualifying purchases.

    July is National Ice Cream month, so it only seems fitting to share a new homemade ice cream recipe. This recipe is so quick and easy to put together and it requires no ice cream maker.

    what flavor is funfetti?

    Many people associate funfetti with cake batter flavor and sprinkles and often use a box cake mix to achieve the flavor. I describe funfetti as buttery, vanilla-y and sprinkle-y. This ice cream is made without a cake mix.

    In my easy one bowl funfetti cupcakes recipe I have you use a combination of vanilla, almond and butter extracts. In my funfetti cookies {from scratch} I use vanilla and almond extracts and white chocolate chips. Both of these combinations work perfectly for that sweet, cake batter-like flavor.

    For this funfetti ice cream, you will use a combination of melted butter and white chocolate with vanilla and almond extracts and sprinkles. It's sweet, creamy, nostalgic and sure to bring a smile to when you serve it!

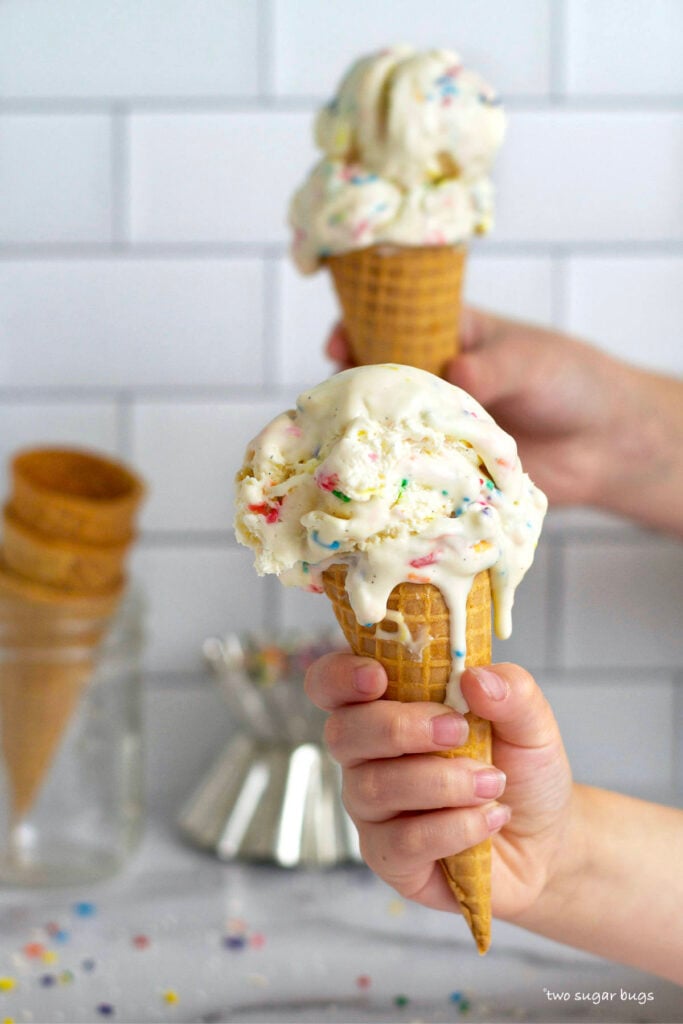
    two hands holding two melting ice cream cones

    let's make no churn ice cream!

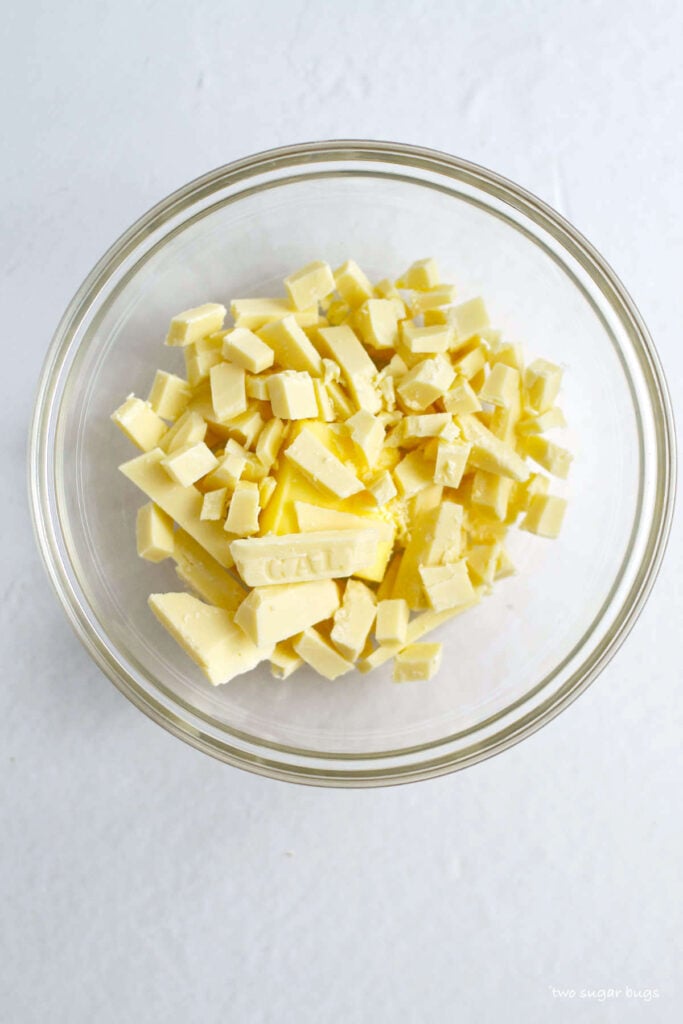
    Start by melting together butter and white chocolate. I highly recommend using a high quality white chocolate such as Callebaut, Ghirardelli, Lindt or Baker's. These can typically be found in the baking aisle near the chocolate chips. Then gather the rest of your ingredients.

    • chopped white chocolate and butter in a bowl
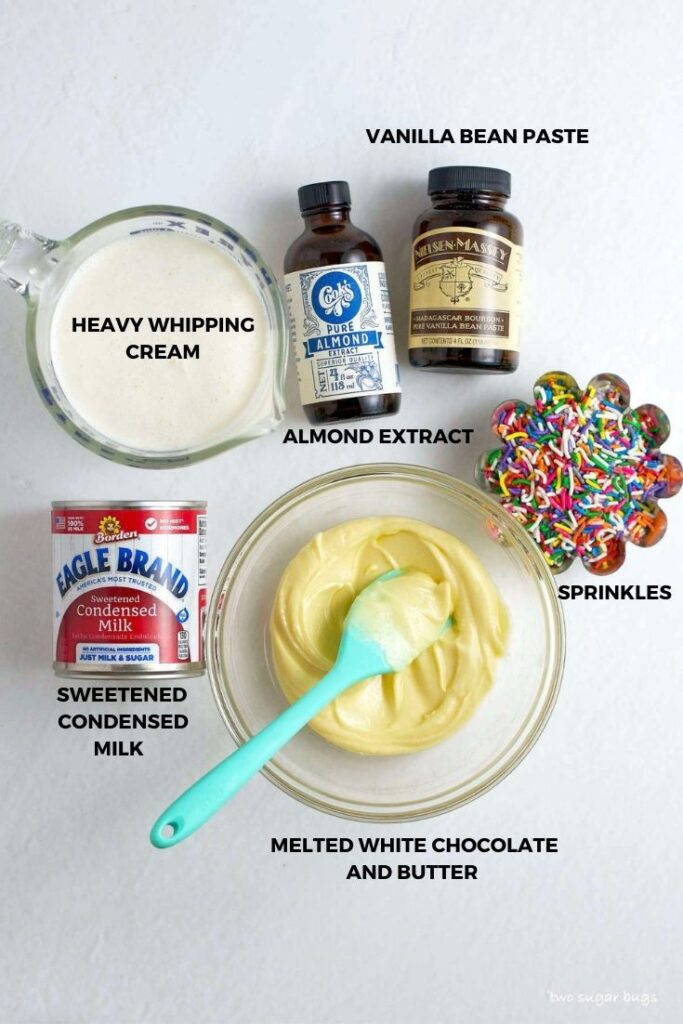
    • ingredients for funfetti ice cream recipe with no churn method

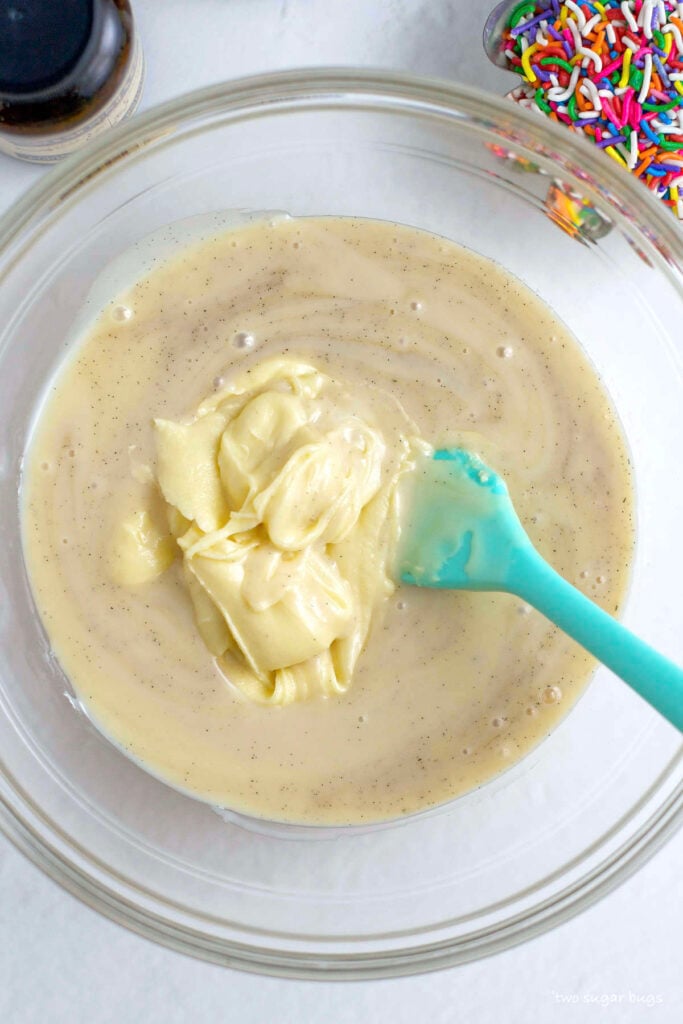
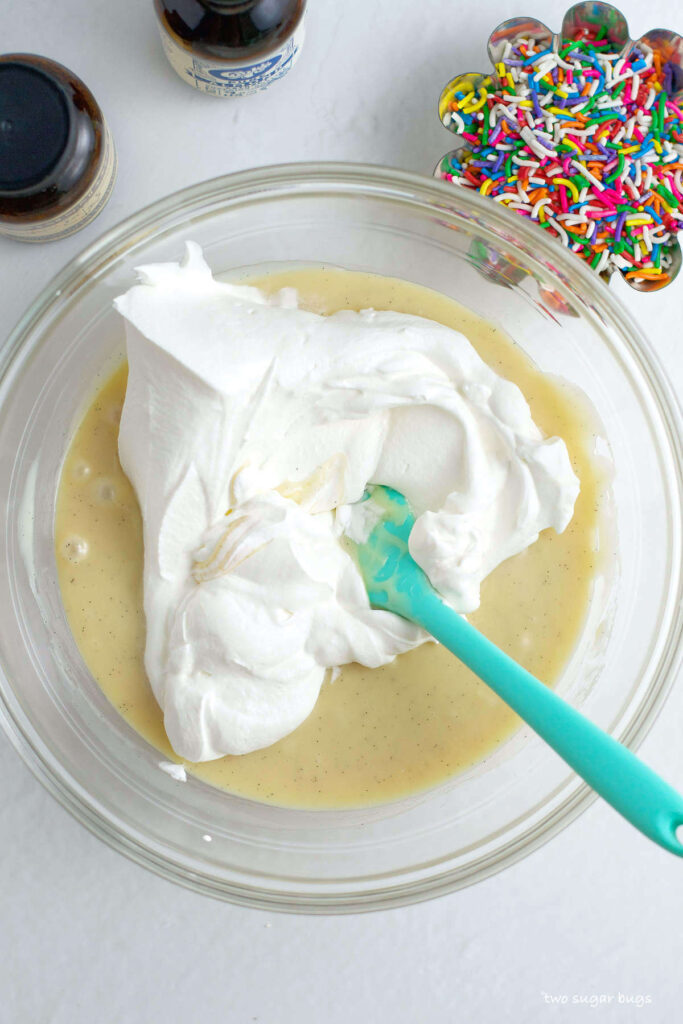
    Once the butter and white chocolate mixture has cooled, add the sweetened condensed milk, vanilla bean paste and almond extract to a medium to large mixing bowl. Mix to combine, then add the butter white chocolate and stir until well combined.

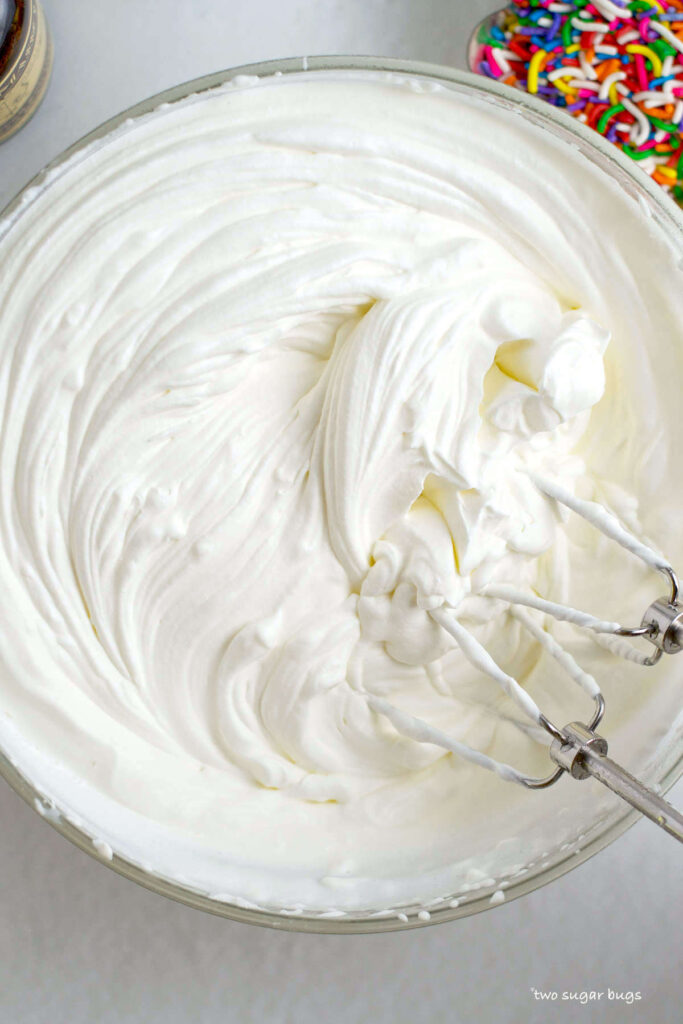
    In another bowl {or in a stand mixer}, whip the heavy whipping cream until stiff peaks with a handheld mixer.

    • sweetened condensed milk with melted white chocolate and butter being added
    • whipped cream in a bowl

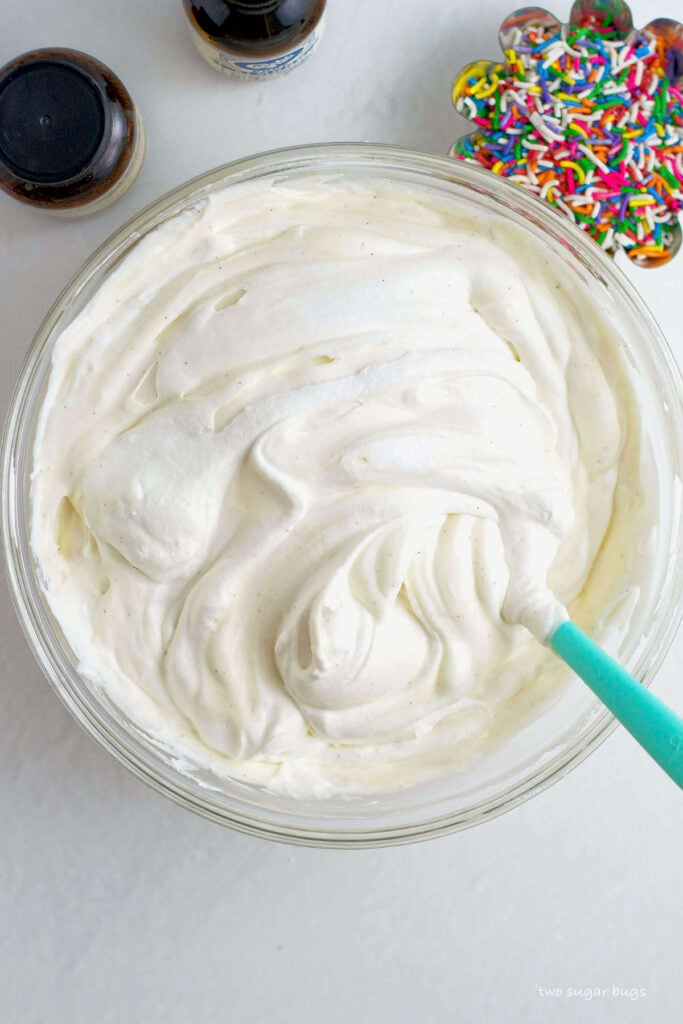
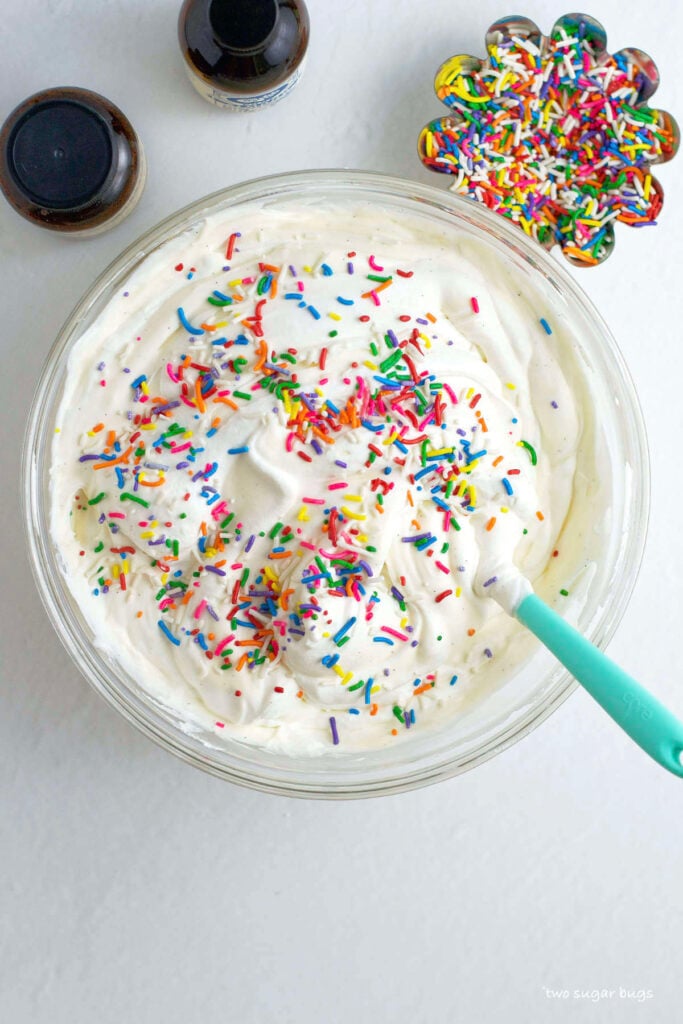
    Next, with a spatula, fold the whipped cream into the sweetened condensed milk mixture in two additions.  Be gentle as you donโ€™t want to completely deflate the whipped cream.  Then gently fold in the sprinkles {hold a tablespoon aside for garnishing the top of the finished ice cream}. 

    • whipped cream being folded into sweetened condensed milk
    • funfetti ice cream base folded together in a bowl
    • sprinkles added to funfetti ice cream

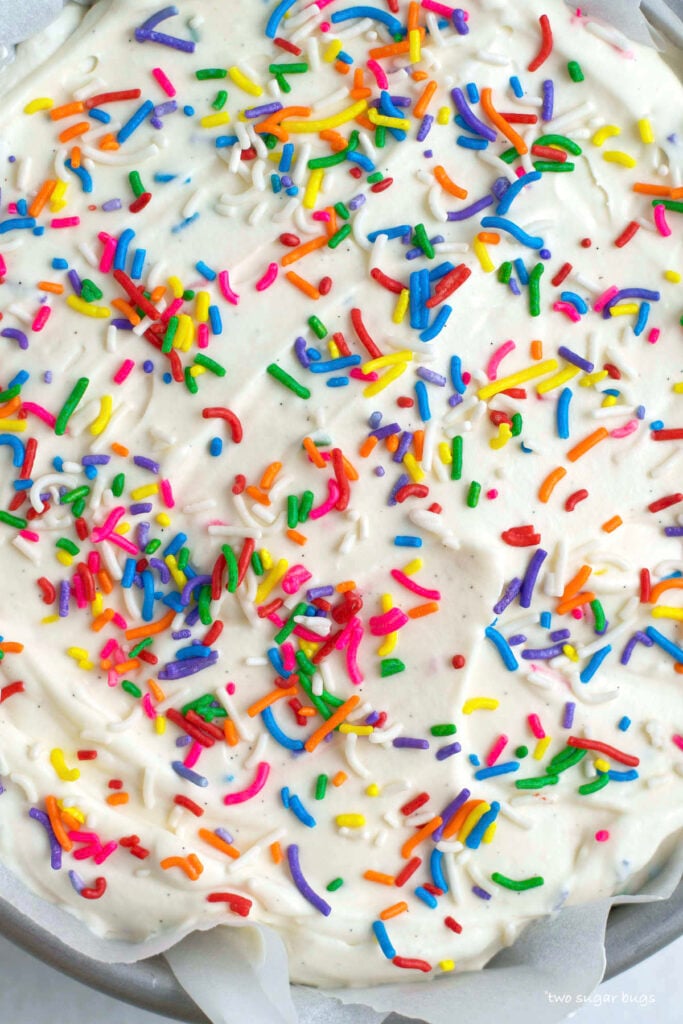
    Finally, spread the funfetti ice cream into a freezer safe container and top with the remaining sprinkles. Cover tightly and freeze until firm, about 4-6 hours. I used an 8-inch cake pan here, but a loaf pan or 8x8 baking pan also work. I also have airtight containers that I often use.

    up close look at finished funfetti ice cream

    what sprinkles should I use?

    Rainbow jimmies are the classic sprinkle choice for funfetti birthday cake, so they are the best choice for homemade ice cream too. My market sells them in the bulk section, but I will buy the Wilton brand if not buying in bulk. Non pariels have a tendency to bleed and could make your ice cream look unappetizing.

    why is it called funfetti?

    Pillsbury is credited with the funfetti name. They introduced the cake flavor in 1989. Their product is a boxed white cake with sprinkles and was to appeal to kids. The name is a blending of the words fun and confetti.

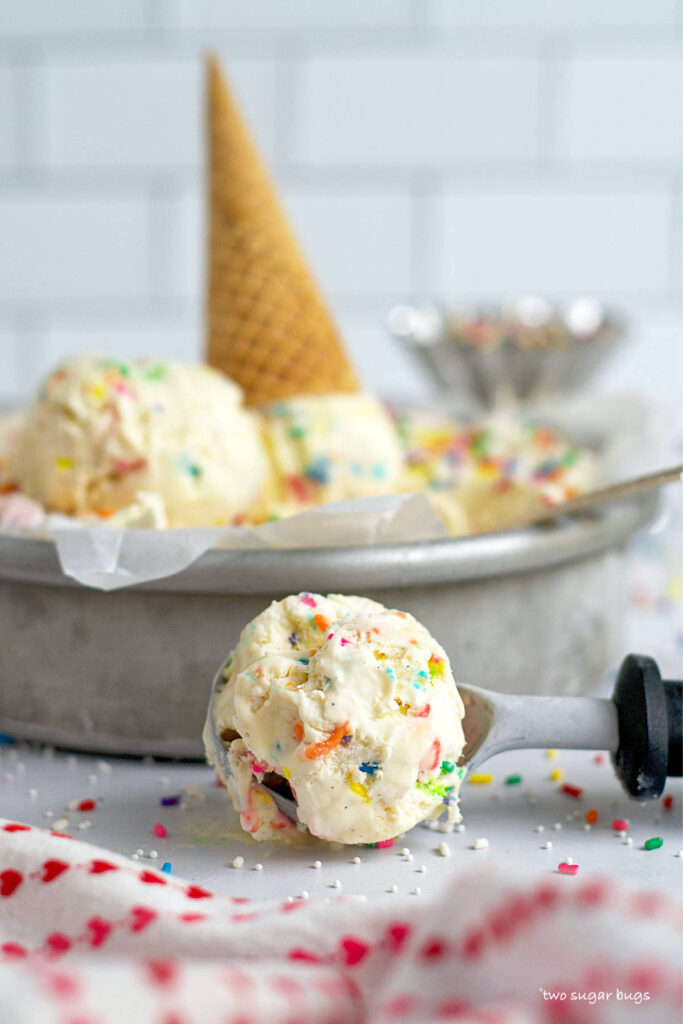
    scoop of ice cream sitting in front of an upside down ice cream cone

    I hope you enjoy this quick and easy, creamy and absolutely delicious funfetti ice cream recipe that you make from scratch with no ice cream maker.

    Remember to snap a picture and tag me on Instagram if you make this Funfetti Ice Cream Recipe. It warms my heart to see you bring these recipes to life! Thank you for being here and happy baking!

    more ice cream recipes to try

    • Homemade Cinnamon Ice Cream
    • Lemon White Chocolate Cookie Ice Cream
    • Homemade Cool Britannia Ice Cream
    • Cherry Bourbon Crumble No Churn Ice Cream

    If you make this recipe {or any recipe!} from two sugar bugsย please come back and leave a review and a โญ๏ธโญ๏ธโญ๏ธโญ๏ธโญ๏ธ star rating.ย  I read every comment, and I LOVE hearing from you!

    Yield: 8-10 servings

    Funfetti Ice Cream Recipe (with No-Churn Method)

    three scoops of funfetti ice cream with two spoons

    Colorful sprinkles bring the fun to this no-churn ice cream made with simple ingredients and a flavor reminiscent of funfetti birthday cake.

    Prep Time 20 minutes
    Chill Time 4 hours
    Total Time 4 hours 20 minutes

    Ingredients

    • 2 tablespoons unsalted butter (28g)
    • 3 ounces quality white chocolate (84g)
    • 1 ยฝ teaspoon vanilla bean paste*
    • ยฝ teaspoon pure almond extract
    • 14 ounce can of sweetened condensed milk (396g)
    • 2 cups heavy whipping cream (480g)
    • ยฝ cup jimmies sprinkles (90g)

    Instructions

      1. Using the double boiler method, melt together the unsalted butter and white chocolate.  Set aside to cool, about 20 minutes.
      2. In a medium bowl, mix together the sweetened condensed milk, vanilla bean paste, almond extract and the cooled butter white chocolate mixture**.
      3. Using a stand mixer with the whisk attachment or a hand-held mixer, beat the heavy cream on medium-high until stiff peaks form, about 4-5 minutes.  
      4. Next, with a spatula, fold the whipped cream into the sweetened condensed milk mixture in two additions.  Be gentle as you don’t want to completely deflate the whipped cream.  Then gently fold in the sprinkles {hold a tablespoon aside for garnishing the top of the finished ice cream}. 
      5. Spoon the ice cream into a loaf pan or freezer safe bowl {I like to line mine with parchment paper, but it isn’t a necessity} and sprinkle with the remaining tablespoon of sprinkles.  Cover and freeze until firm, about 4-6 hours.

    Notes

    *Vanilla bean paste can be substituted with pure vanilla extract

    **If you want to balance the sweetness, add ยผ teaspoon of kosher salt with the sweetened condensed milk mixture.

    Store ice cream, covered tightly, in the freezer for up to 2-3 weeks.

    Nutrition Information:

    Yield:

    10

    Serving Size:

    1

    Amount Per Serving: Calories: 435Total Fat: 29gSaturated Fat: 17gTrans Fat: 1gUnsaturated Fat: 10gCholesterol: 79mgSodium: 86mgCarbohydrates: 40gFiber: 0gSugar: 39gProtein: 6g

    The nutrition information is an estimate and may not be entirely accurate.
    Did you make this recipe?

    Please make my day and PIN to Pinterest and share a photo on Instagram ~ making sure to tag @twosugarbugs! THANK YOU!!

    © Tasia
    Cuisine: American / Category: Ice Cream

    Berry Crumble Bars (with frozen berries)

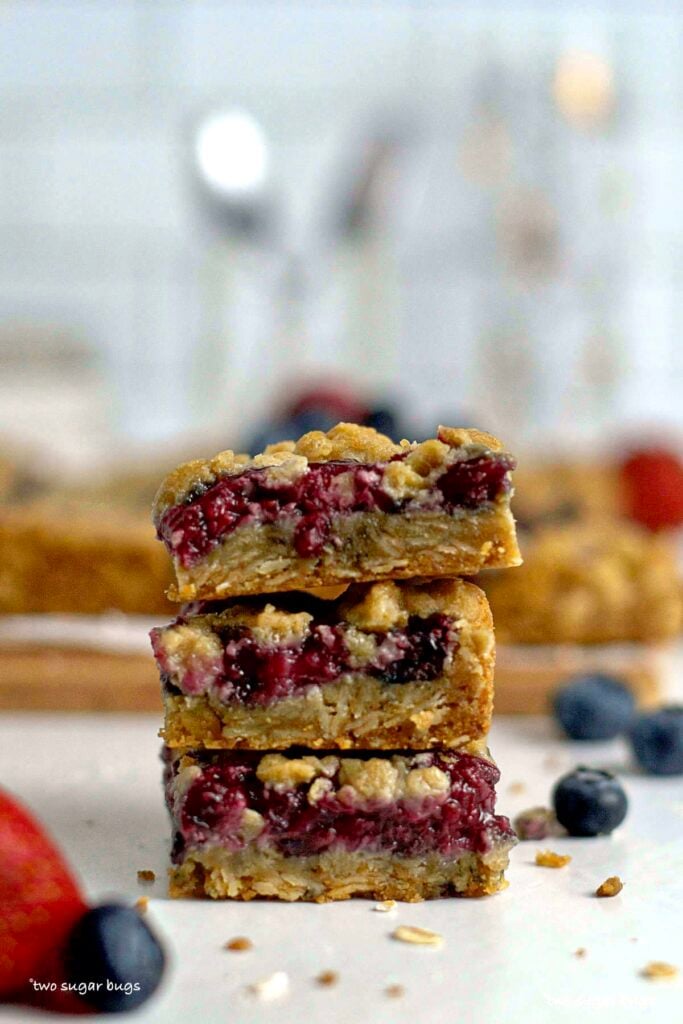
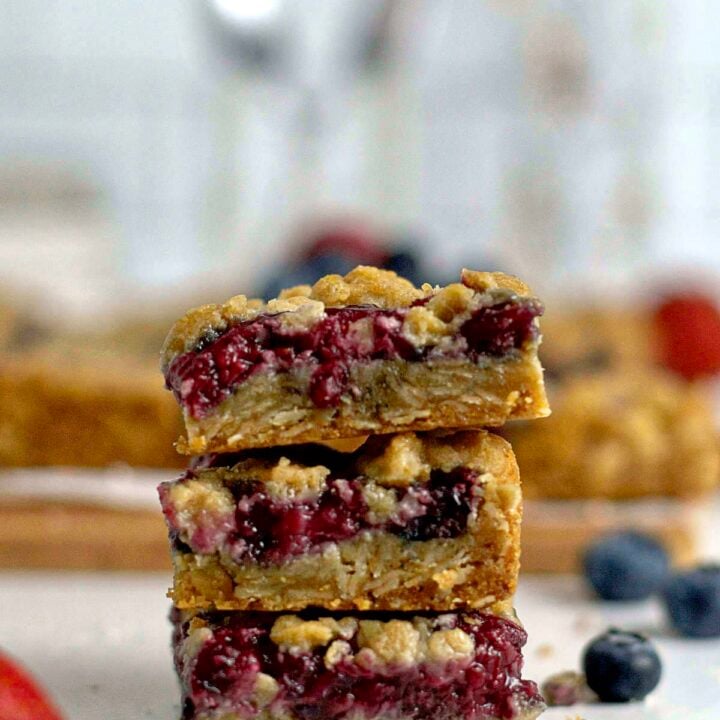
    stack of three cookie bars

    Berry crumble bars have a buttery oat crust that also doubles as the topping. The filling is made from frozen mixed berries that are complimented by vanilla and cardamom. It's like summer pie only much easier!

    stack of three cookie bars

    Disclosure | This post may contain affiliate links. As an Amazon Associate I earn from qualifying purchases.

    This easy cookie bar recipe is perfect for summer or anytime!

    what are berry crumble bars?

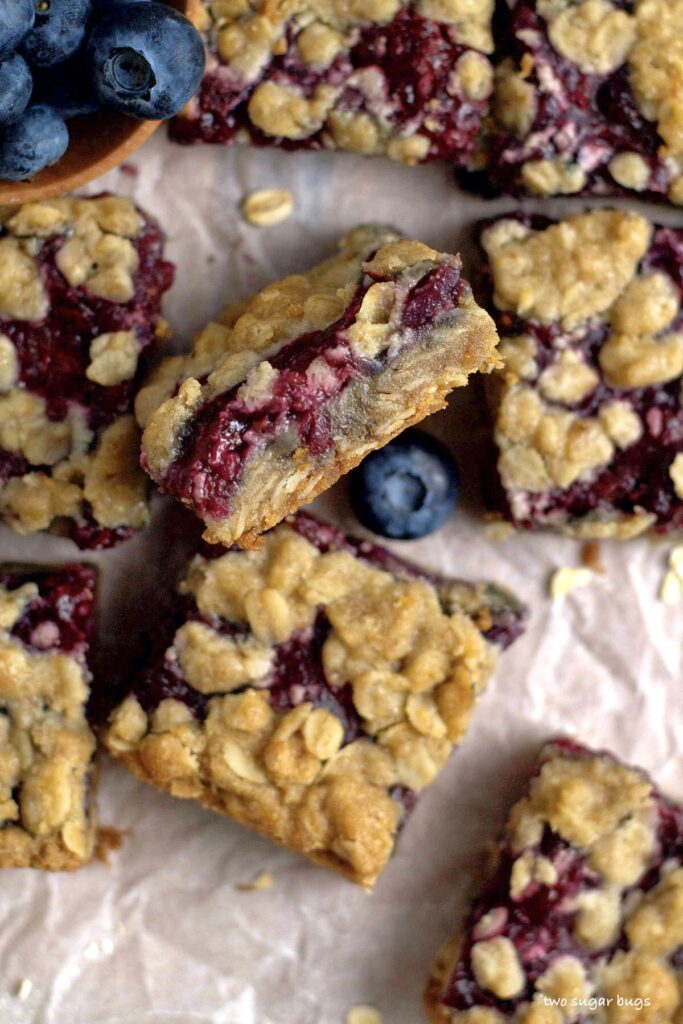
    Sweet frozen berries are cooked with vanilla and cardamom into a quick jam that is tucked between a buttery oatmeal crumble. An easy, no mixer recipe that's sure to become a favorite! The bars are soft, not too sweet and have a great chewy oatmeal texture.

    inside look at berry crumble bars

    how to make the jam filling with frozen berries, vanilla and cardamom

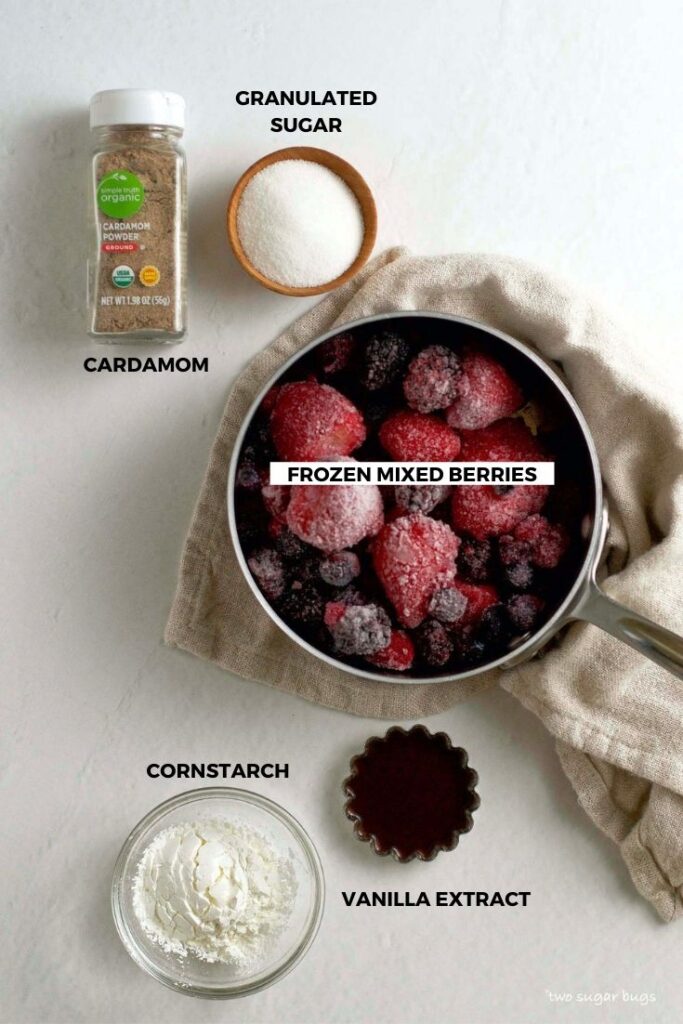
    This simple jam comes together on the stovetop and can be prepared up to a day ahead of time. Cornstarch thickens it while vanilla and cardamom compliment the berries.

    ingredients for mixed berry jam with vanilla and cardamom

    Start by placing the frozen berries in a small saucepan and warm over low heat until softened, about 5 minutes.

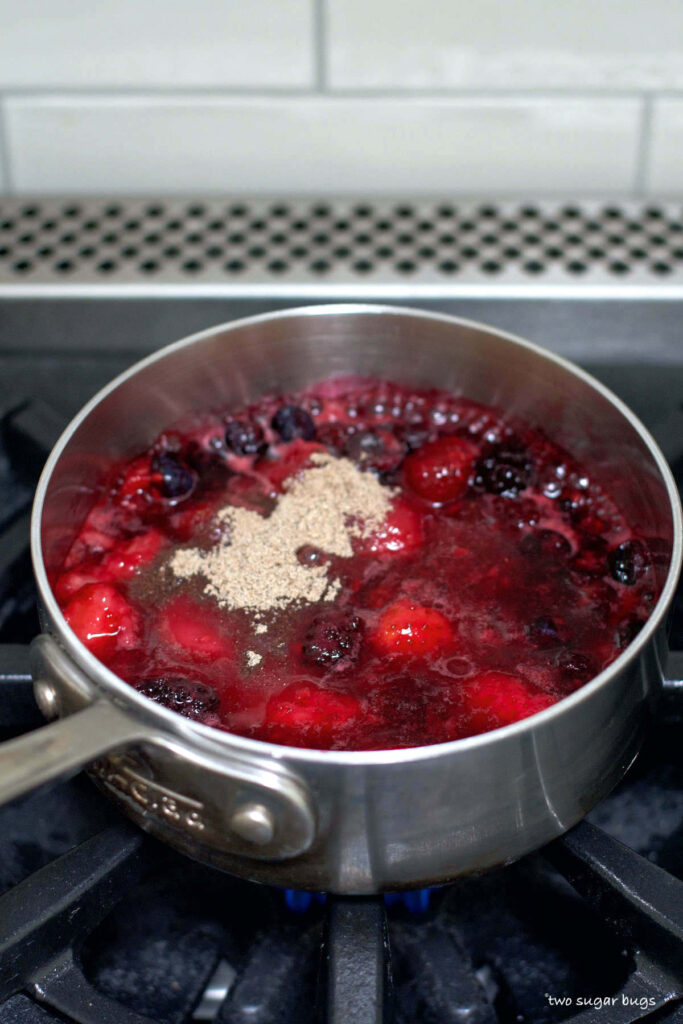
    Add the granulated sugar and cardamom and mix until combined. Use a fork to smush the berries a bit. {I used strawberries, blackberries and blueberries. Leave some of the blackberries and blueberries whole, but smush the strawberries so you don't have large chunks of them in the cookie bars}.

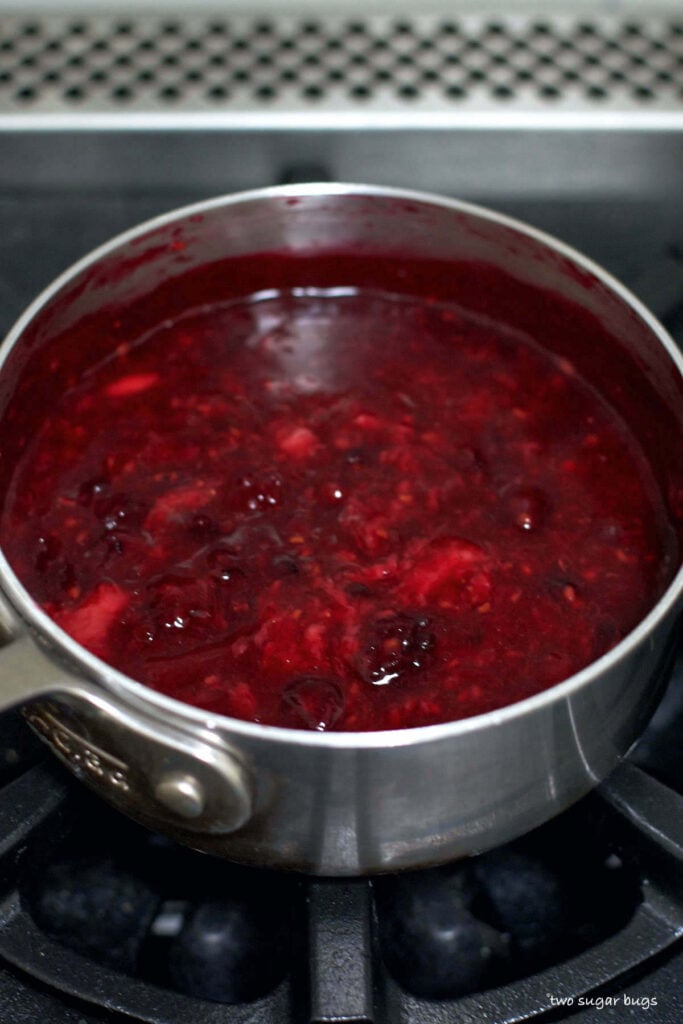
    Dissolve the cornstarch in the water, then add it and the vanilla to the mixed berries. Bring to a low boil and cook for 5-6 minutes until the mixture has thickened. Remove from the heat and allow to cool slightly while you prepare the oatmeal crumble.

    • cardamom on top of berries in a saucepan
    • mixed berries cooking in a saucepan

    what is cardamom and what does it taste like?

    Cardamom is a spice with a complex and distinct flavor. It's a little citrusy and spicy {it comes from the ginger family} and it pairs really nicely with berries and oats. In my opinion, it has an exotic taste and a little goes a long way.

    If you don't have cardamom, you can substitute it with equal parts cinnamon and nutmeg.

    let's make the one bowl oatmeal crumble

    This simple oatmeal crumble comes together in minutes with ingredients you likely already have in your pantry.

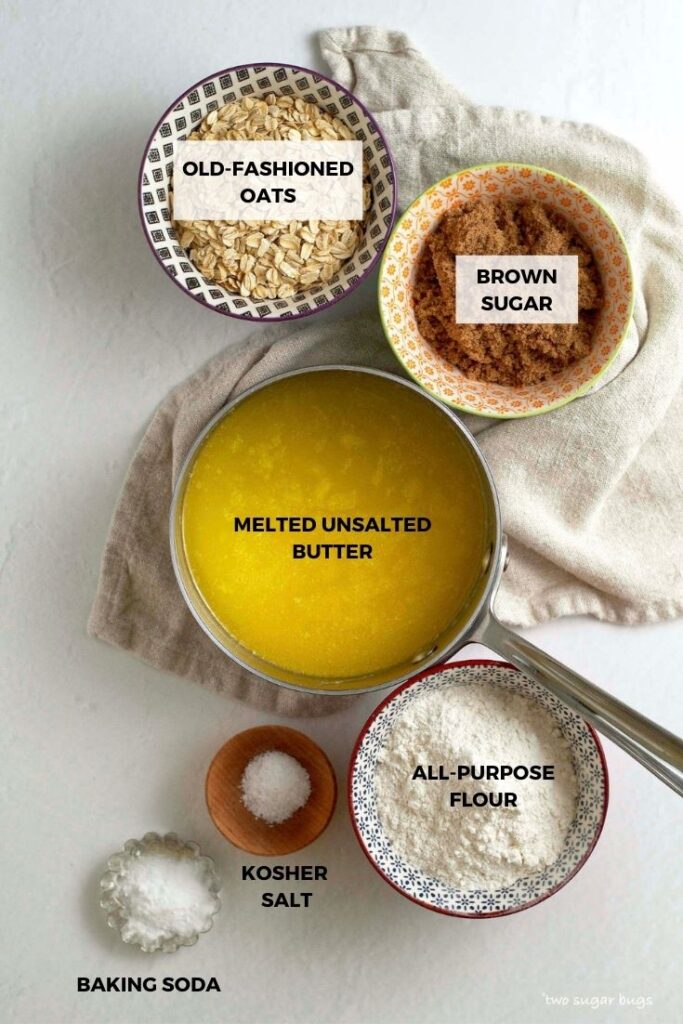
    ingredients for oatmeal crumble

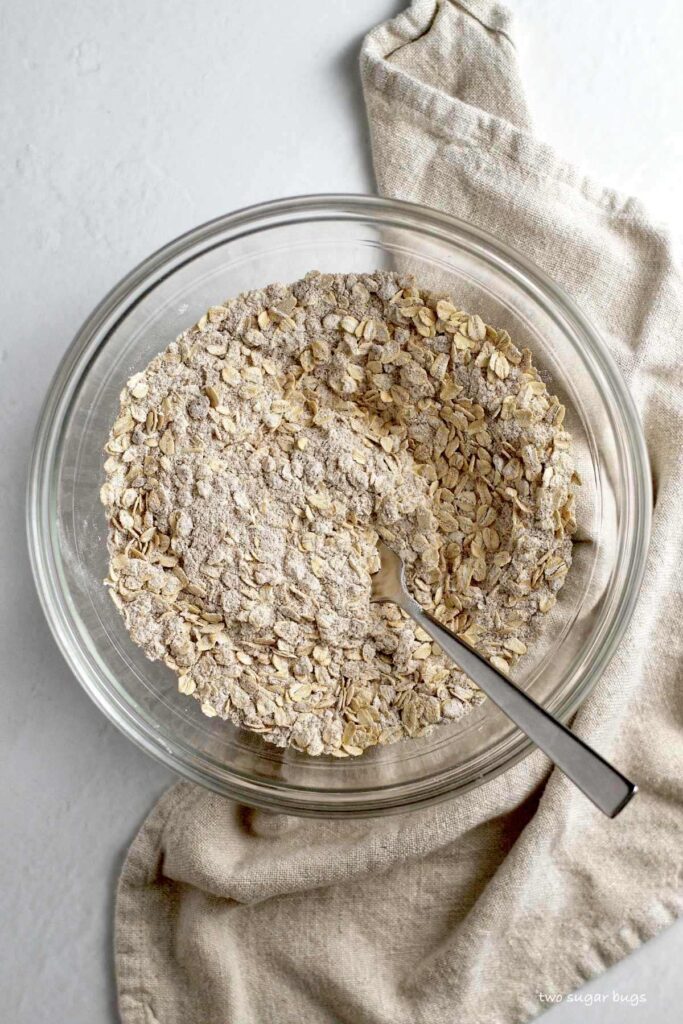
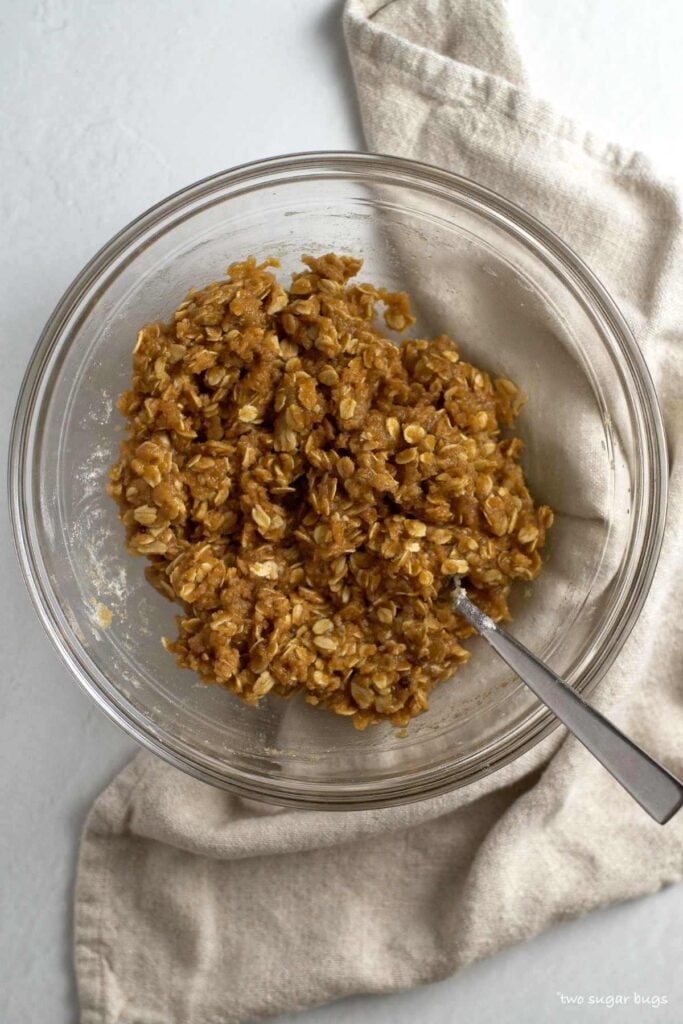
    In a medium bowl, combine the brown sugar, flour, oats, baking soda and salt. Add the melted butter and stir until combined. Save aside a ยฝ cup of the oat mixture.

    • oats, brown sugar, flour, baking soda and salt mixed in a bowl
    • buttery oatmeal crust mixed in a bowl

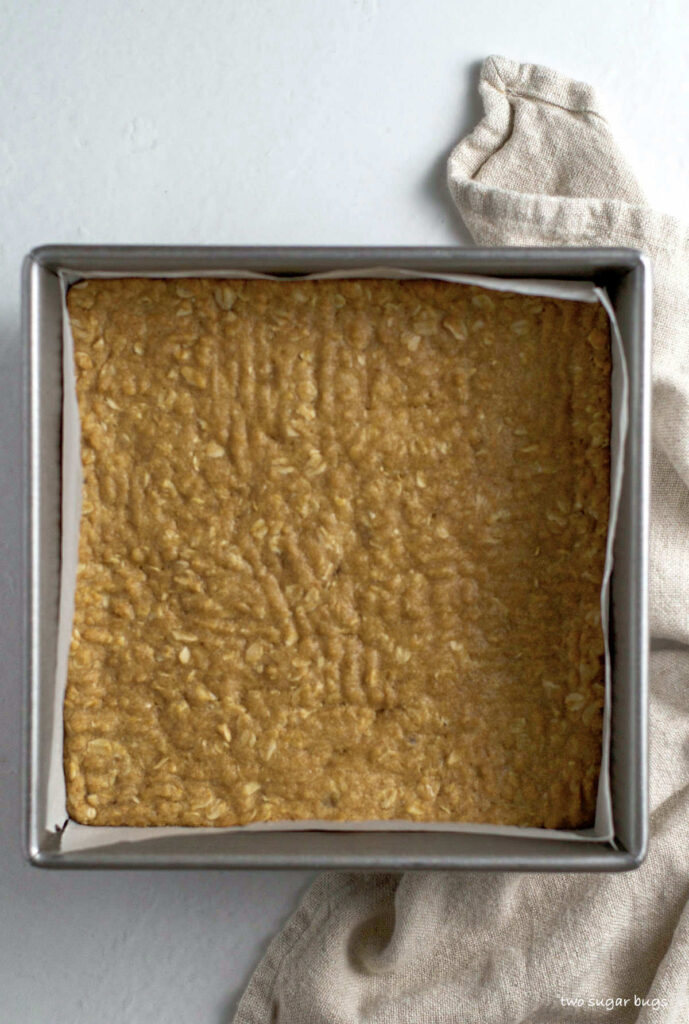
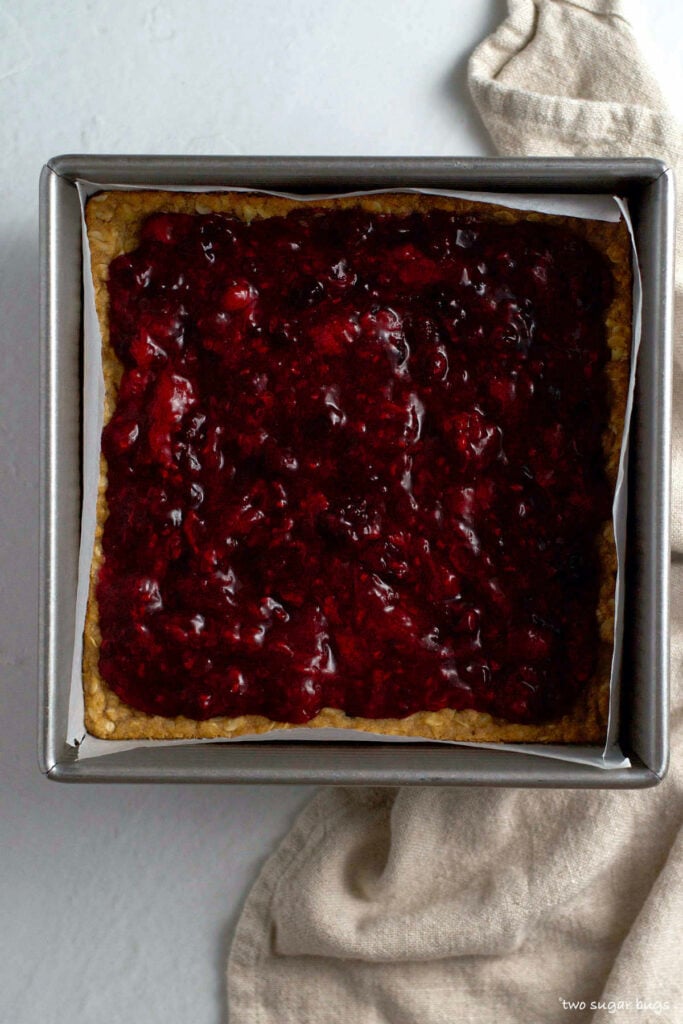
    Then press the remaining oatmeal mixture into the bottom of an 8x8 baking pan and bake for 10 minutes. Remove pan from oven and spread the mixed berry filling over crust, leaving a small border along the edges. The crust will sink a little when you add the mixed berry jam layer.

    • par baked oatmeal base for crumble bars
    • mixed berries layered on oatmeal base

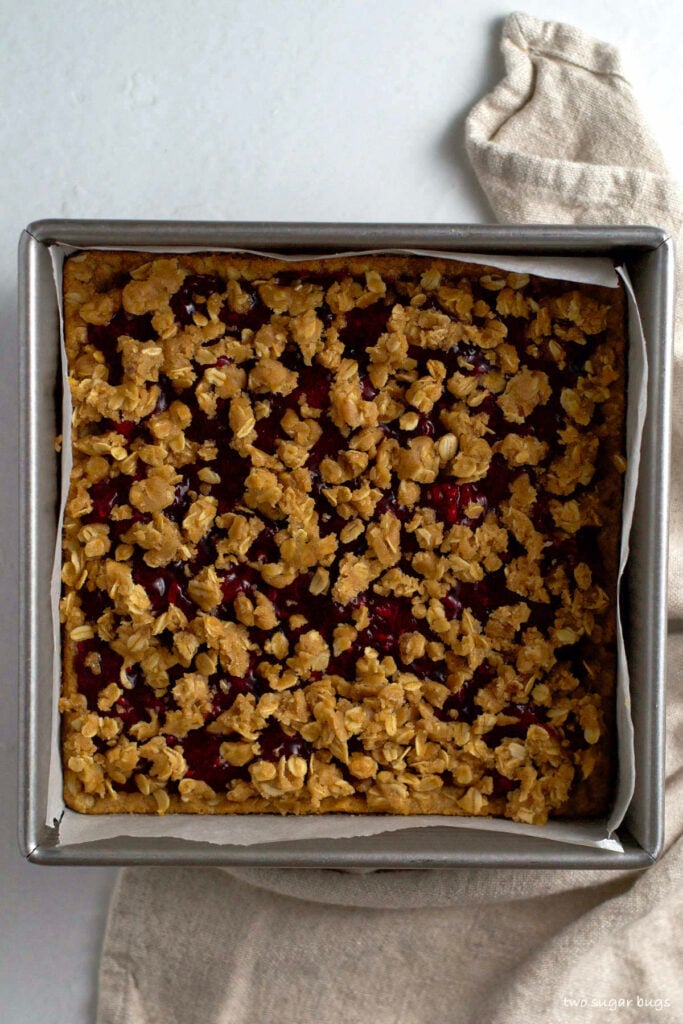
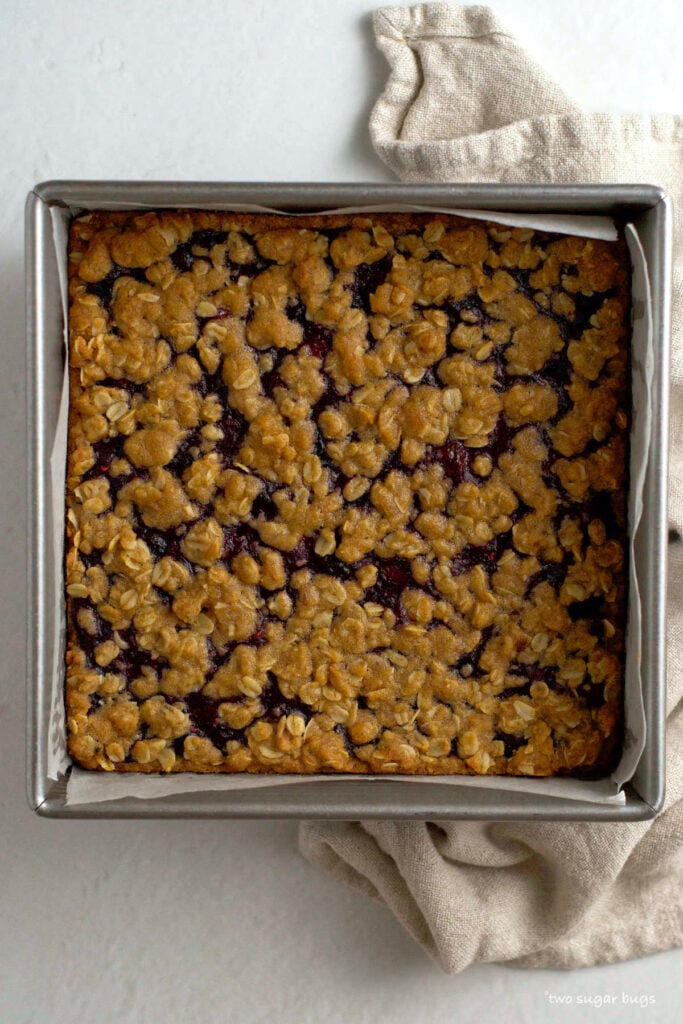
    Crumble the remaining oatmeal mixture over the mixed berries. Return the pan to oven and bake until the edges are lightly browned.

    • unbaked bars in the baking pan
    • baked berry crumble bars in the pan

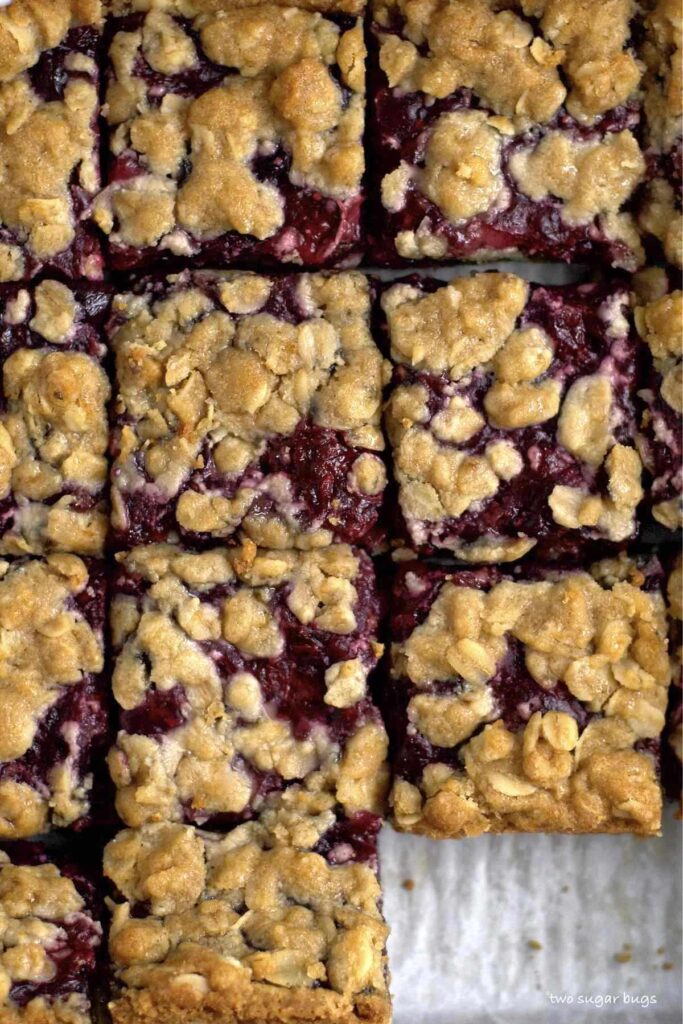
    Remove from the oven and allow to cool completely before cutting.

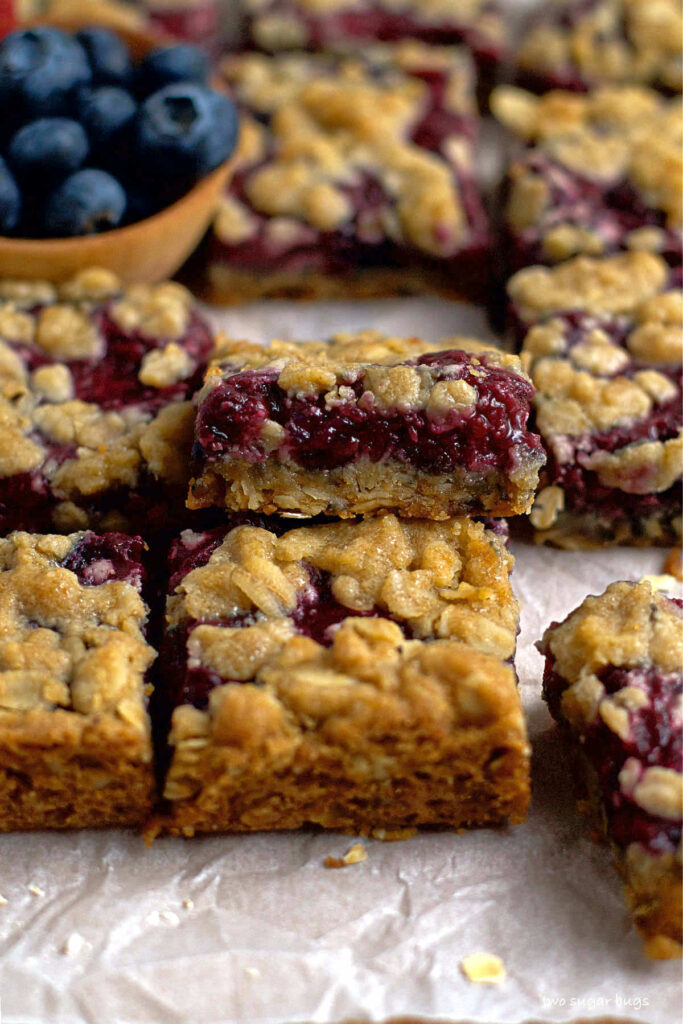
    cut cookie bars with oatmeal crumble on top

    tips for making berry crumble bars

    • Make the jam first to allow it to cool and thicken while you prepare the oatmeal crumble.
    • Use any mixture of frozen berries that you like. If you would prefer to use fresh berries, that works too!
    • Allow the bars to cool completely prior to cutting. I let them to cool at room temperature for a couple hours and then place them in the refrigerator. The chilled cookie bars cut much easier!
    • Use old-fashioned oats. Instant or quick cooking oats are too powdery and will not give the oatmeal crumble the right texture.
    • Serve with a big scoop of ice cream for an easy summer entertaining dessert. This cherry bourbon crumble ice cream is fantastic with them!
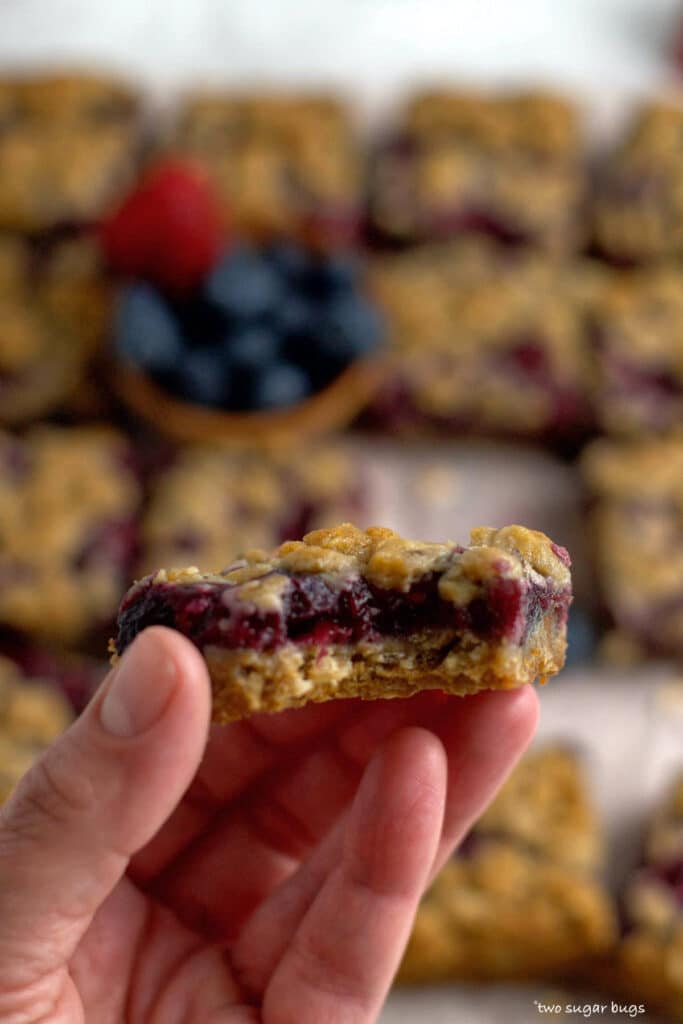
    hand holding a cookie bar with a bite missing

    can I double this recipe?

    Yes, simply double the ingredients and bake in a 9x13 baking pan.

    how to store these oatmeal crumble bars

    Store the bars covered in the refrigerator for up to 5 days.

    I did take these berry crumble bars to the beach one hot day this summer. They held up fine for the first hour or two. After about 3 hours, in a covered container in the hot sun, the bars became very soft. They still tasted great, but they fell apart quite easily.

    inside look at berry crumble bars

    Remember to snap a picture and tag me on Instagram if you make these Berry Crumble Bars. It warms my heart to see you bring these recipes to life! Thank you for being here and happy baking!

    more fruit desserts to enjoy

    • Blackberry Cherry Pie
    • Cherry Nectarine Crostata
    • Cinnamon Apple Crostata
    • Cherry Shortcake
    • No Bake Mascarpone Cheesecake with Strawberries and Mint

    If you make this recipe {or any recipe!} from two sugar bugsย please come back and leave a review and a โญ๏ธโญ๏ธโญ๏ธโญ๏ธโญ๏ธ star rating.ย  I read every comment, and I LOVE hearing from you!

    Yield: 16 cookie bars

    Berry Crumble Bars (with frozen berries)

    stack of three cookie bars

    Berry crumble cookie bars have a buttery oat crust that also doubles as the topping. The filling is made from frozen mixed berries that are complimented by vanilla and cardamom. It's like summer pie only much easier!

    Prep Time 20 minutes
    Bake Time 20 minutes
    Total Time 40 minutes

    Ingredients

    Mixed berry filling

    • 12 ounces frozen mixed berries (340g)
    • 2 tablespoons granulated sugar (25g)
    • ยพ teaspoon cardamom*
    • 2 tablespoons cornstarch (16g)
    • 2 tablespoons water (30mL)
    • 1 tablespoon pure vanilla extract (15mL)

    Oatmeal Crumble

    • ยพ cup butter, melted (170g)โ€จ
    • ยฝ cup brown sugar (100g)
    • 1 cup all-purpose flour (125g)
    • 1 cup old-fashioned rolled oats (95g)โ€จ
    • 1 teaspoon baking soda
    • ยฝ teaspoon kosher salt

    Instructions

    1. For the mixed berry filling: place the frozen berries in a saucepan and warm over low heat until softened, about 5 minutes. Add the granulated sugar and cardamom and mix until combined. Use a fork to smush the berries a bit. {If the frozen mixture has a lot of strawberries, be sure to smash them so they won’t be in large pieces in the crumble bars. Raspberries, blackberries and blueberries can have some of the pieces left whole.}
    2. Dissolve the cornstarch in the water, then add it and the vanilla to the mixed berries. Bring to a low boil and cook for 5-6 minutes until the mixture has thickened. Remove from the heat and allow to cool slightly while you prepare the oatmeal crumble. {can be prepared up to one day ahead, store covered in the refrigerator}
    3. For the oatmeal crumble: Preheat the oven to 350°F and prepare an 8x8 baking pan with parchment paper. Set aside.
    4. In a medium bowl, combine the brown sugar, flour, oats, baking soda and salt. Add the melted butter and stir until combined. Save aside a ยฝ cup of the oat mixture. Then press the remaining oatmeal mixture into the bottom of the prepared pan. Bake for 10 minutes.
    5. Remove pan from oven and spread the mixed berry filling over crust, leaving a small border along the edges {the crust will sink a little as you add the berry filling}. Crumble the remaining oatmeal mixture over the mixed berries. Return the pan to oven and bake an additional 15-20 minutes, until the edges are lightly browned. Remove from the oven and allow to cool completely before cutting.

    Notes

    *If you LOVE cardamom, you can increase this amount to 1 teaspoon. Several of my testers liked this amount of cardamom, but a few others felt it was too overpowering. ยฝ teaspoon is barely noticeable, so ยพ was determined to be the right balance. If you don't have cardamom, you can substitute it with half cinnamon and half nutmeg.

    Store and leftovers covered in the refrigerator for up to 5 days.

    Nutrition Information:

    Yield:

    16

    Serving Size:

    1

    Amount Per Serving: Calories: 168Total Fat: 9gSaturated Fat: 6gTrans Fat: 0gUnsaturated Fat: 3gCholesterol: 23mgSodium: 189mgCarbohydrates: 20gFiber: 2gSugar: 9gProtein: 2g

    The nutrition information is an estimate and may not be entirely accurate.
    Did you make this recipe?

    Please make my day and PIN to Pinterest and share a photo on Instagram ~ making sure to tag @twosugarbugs! THANK YOU!!

    © Tasia
    Cuisine: American / Category: Bars and Brownies

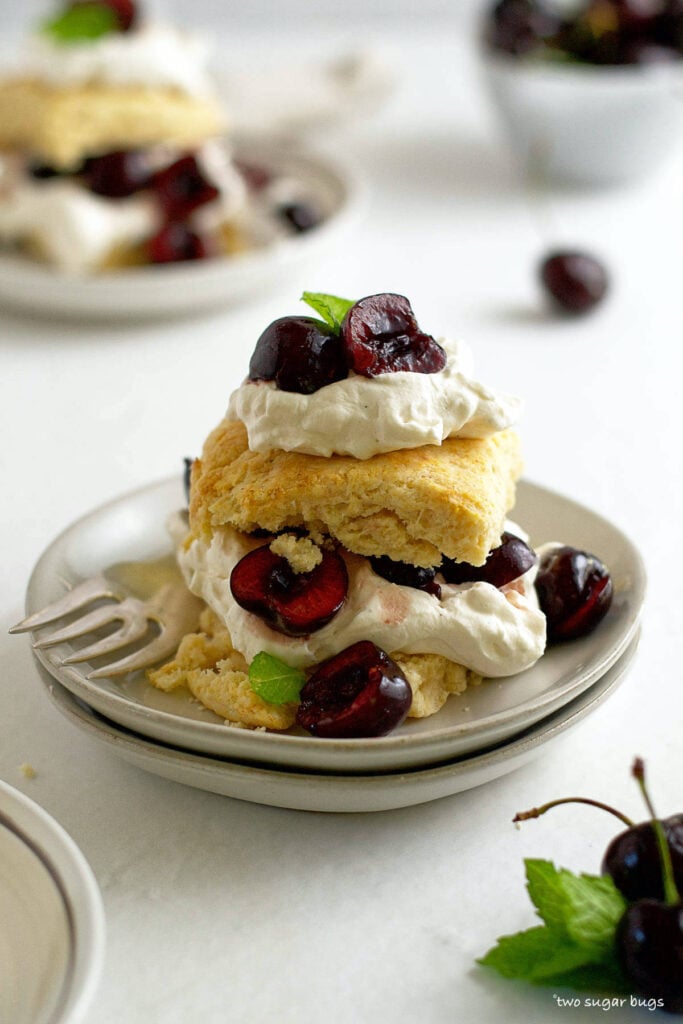
    Cherry Shortcake with Vanilla Biscuits (and Vanilla Whipped Cream)

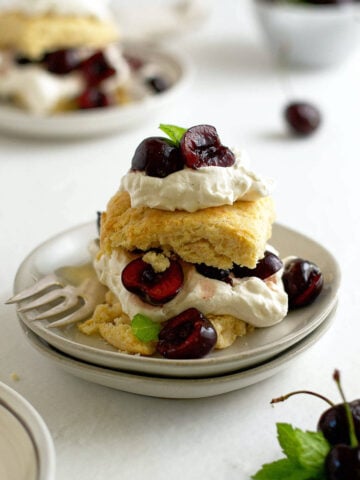
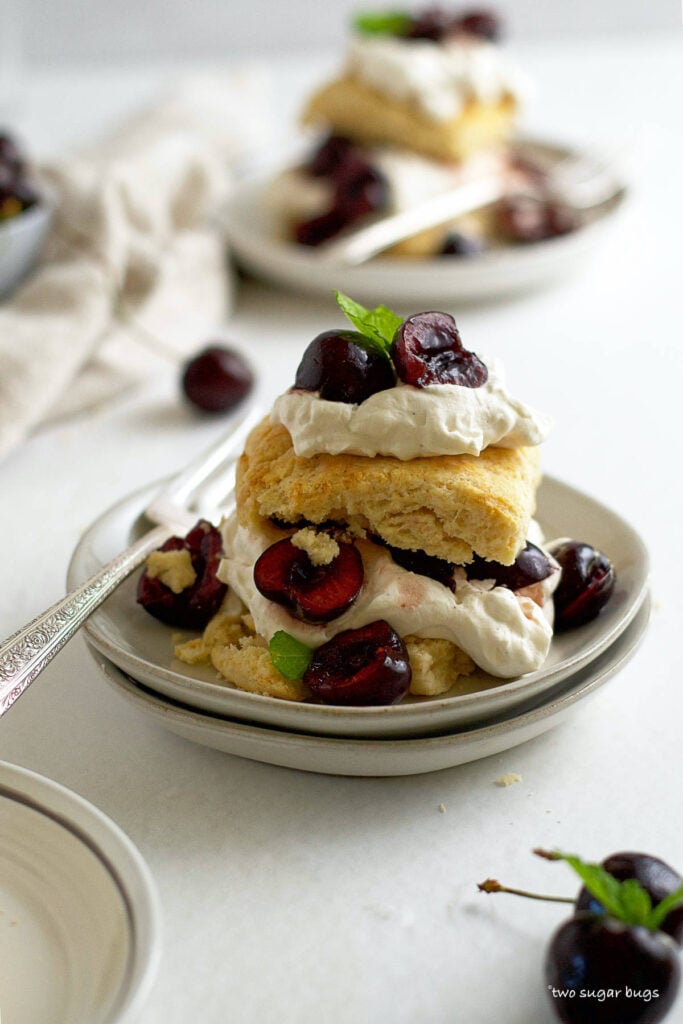
    unclose look at cherry shortcake with vanilla biscuits

    Cherry shortcake with vanilla biscuits combine an easy, flaky vanilla biscuit recipe with sweet cherries and vanilla whipped cream for this twist on a summer classic dessert.

    unclose look at cherry shortcake with vanilla biscuits

    Disclosure | This post may contain affiliate links. As an Amazon Associate I earn from qualifying purchases.

    Is there anything more classic than shortcake for a summer dessert? I know strawberry shortcake is the popular kid, but cherry shortcake is definitely a fun and delicious twist! Sweet cherries and homemade vanilla whipped cream are layered between flaky vanilla biscuits.  Truly perfect for summer time! 

    This recipe starts with quick and easy vanilla biscuits. They take about five minutes to put together and bake in about 15 minutes and I'm guessing you likely have all the ingredients on hand.

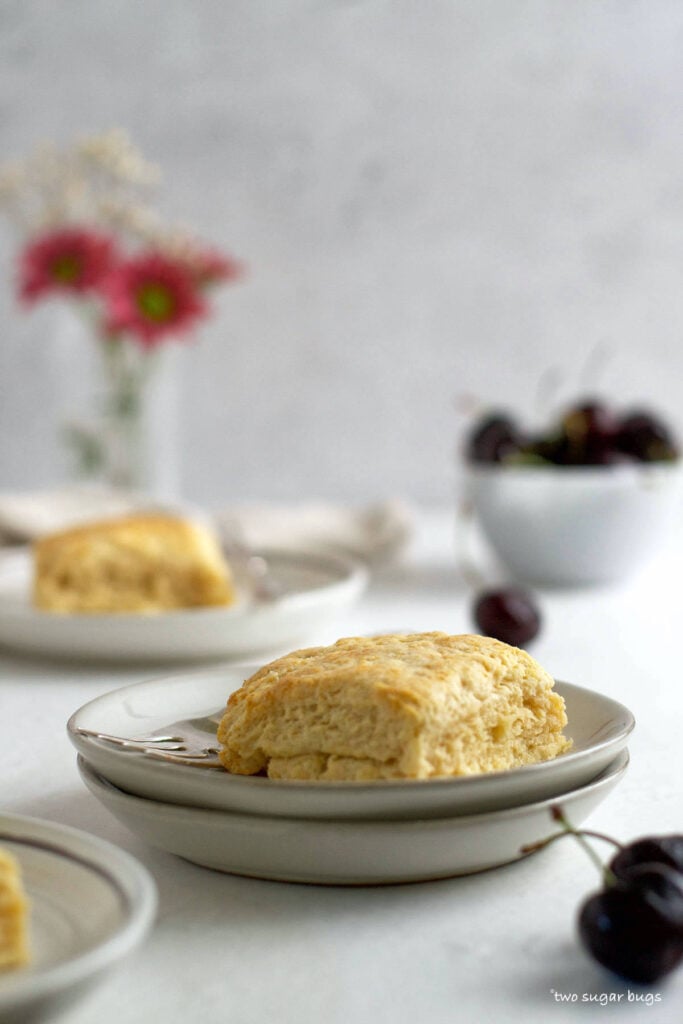
    single vanilla biscuit on a plate with a bowl of cherries in the background

    Then fresh cherries are macerated with some vanilla and sugar. The sweet cherries are layered with a homemade vanilla whipped cream and ta-da! dessert is served.

    how to make these quick and easy vanilla biscuits

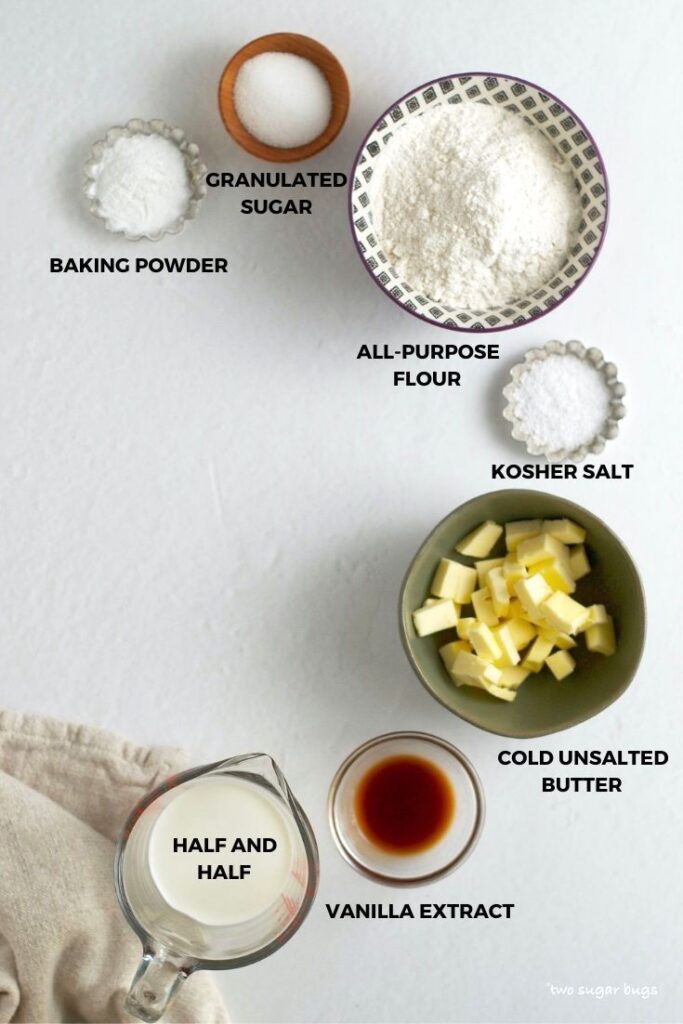
    ingredients for vanilla biscuits
    Ingredients for vanilla biscuits

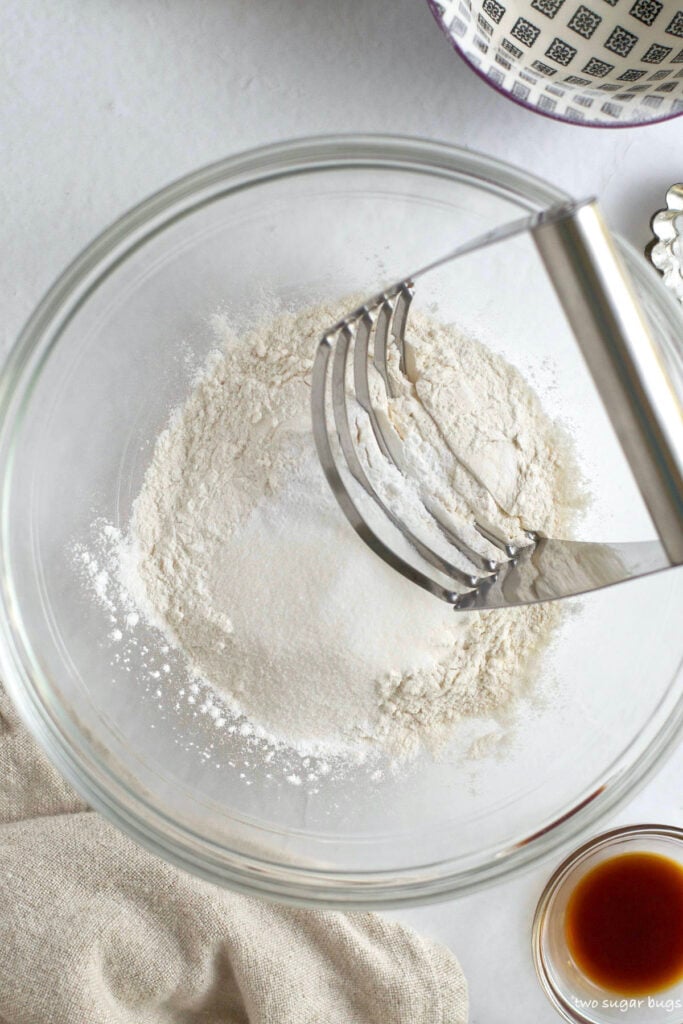
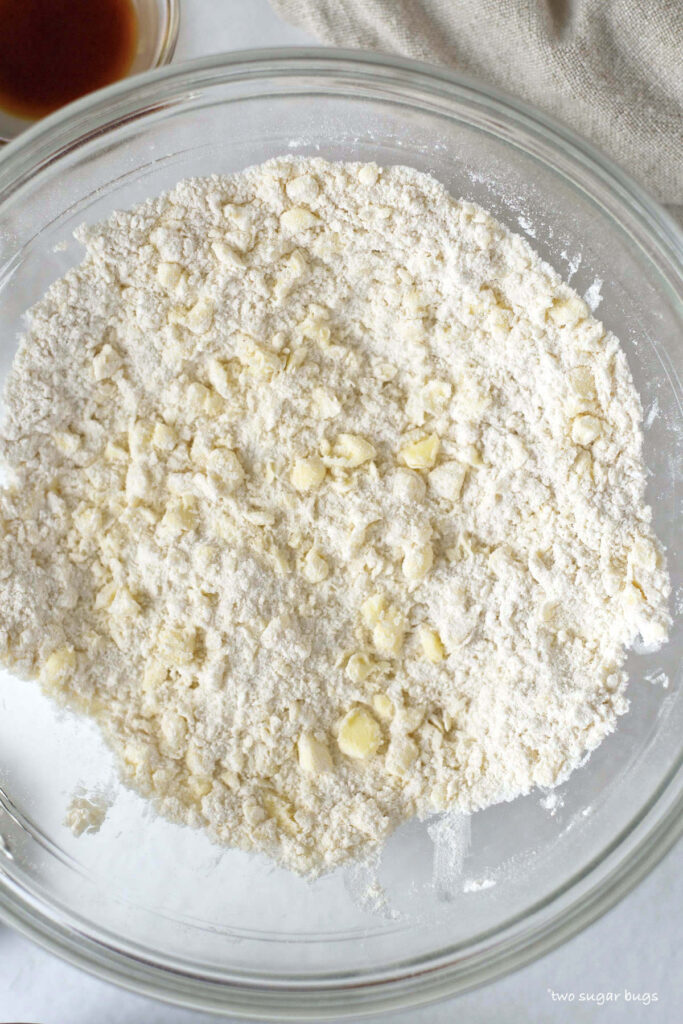
    Start by combining the flour, sugar, baking powder and salt in a medium size bowl. I use my pastry blender to mix everything together, but a whisk will also work. Then cut the butter into the dry ingredients until the mixture looks like coarse meal and some pea size pieces of butter remain.

    • flour, sugar, baking powder and kosher salt in a mixing bowl with a pastry blender
    • bowl with butter cut into dry ingredients showing a meal like texture

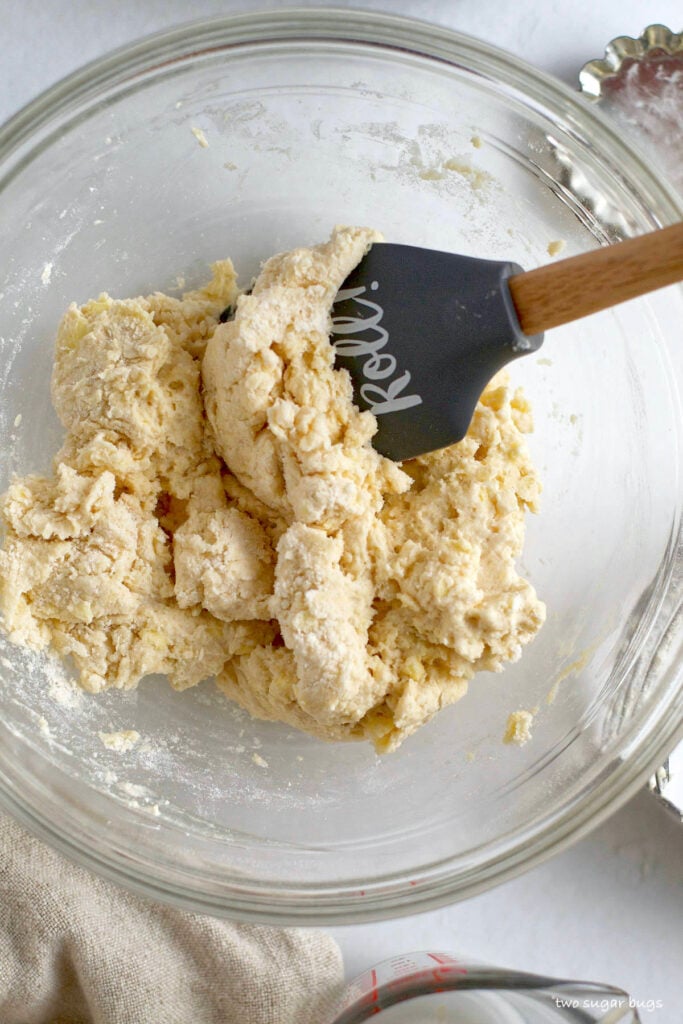
    Now add the vanilla to the half and half and pour it over the dry ingredients. Stir with a fork or spatula just until the dough comes roughly together.

    completed vanilla biscuit dough in a bowl prior to kneading

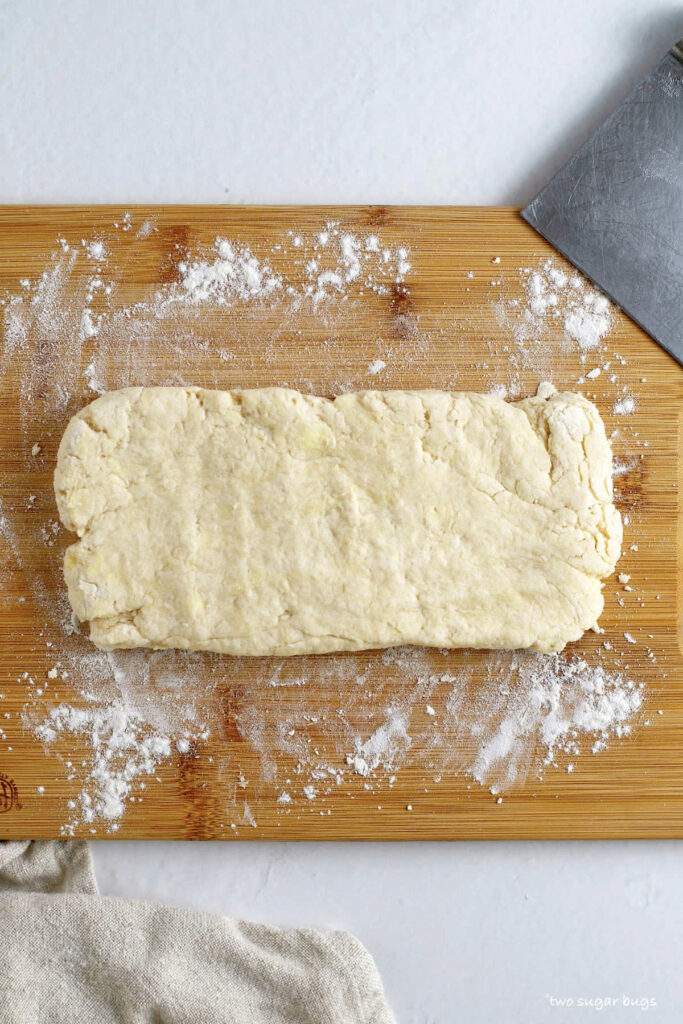
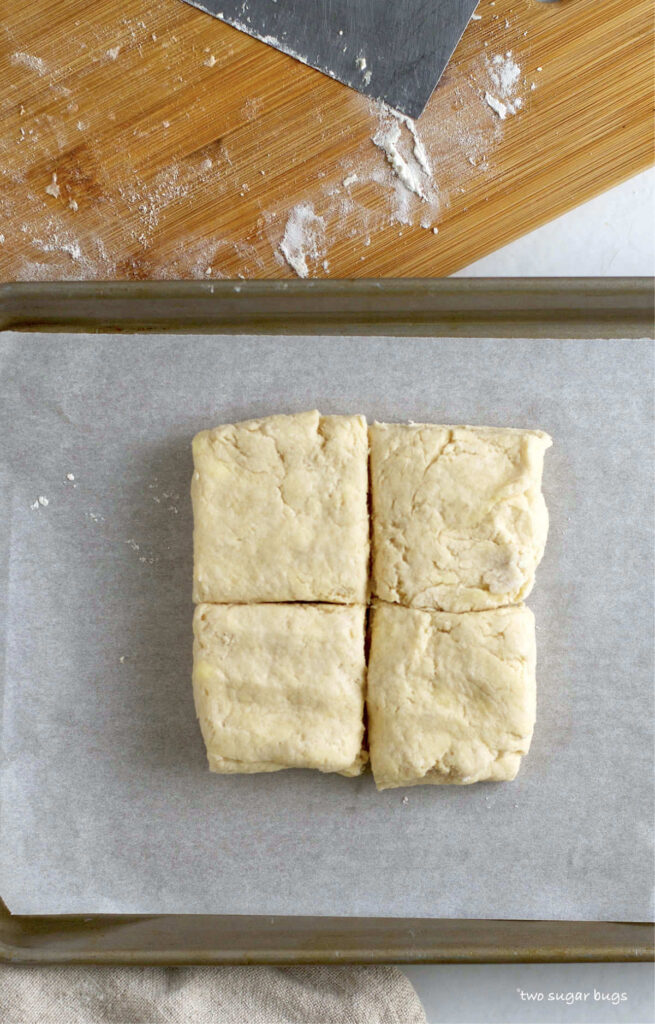
    Turn the dough onto a lightly floured surface and knead about 8-10 times until the dough roughly comes together.  Pat the dough {with your hands} into about and 8x4 rectangle.  Then using a bench scraper or sharp knife, slice the dough in half so you now have two 4x4 squares. 

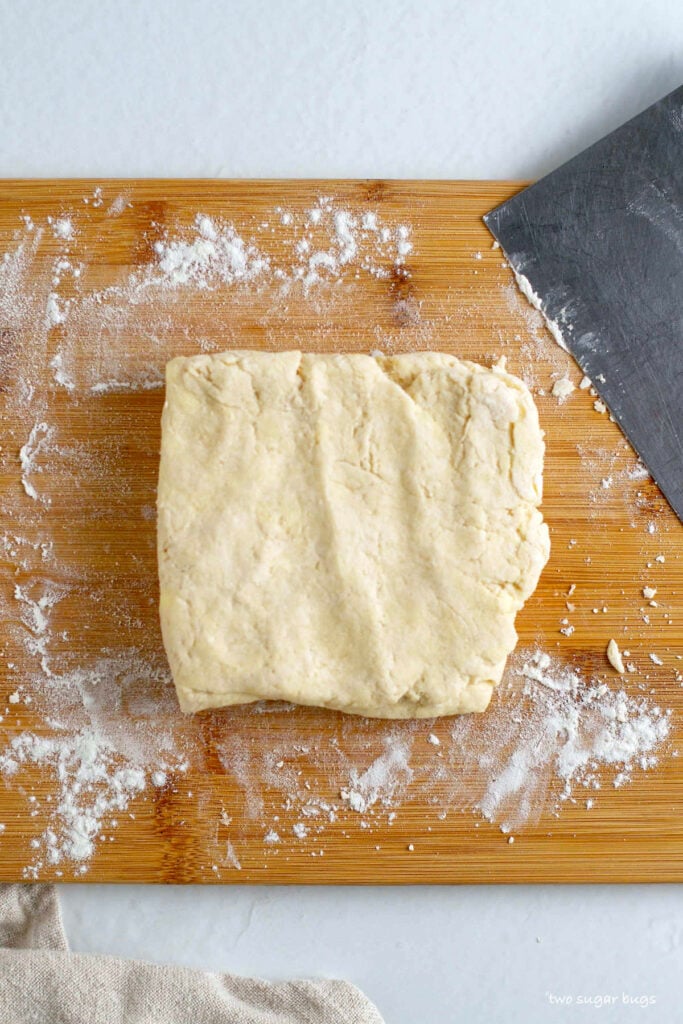
    Place one square on top of the other and lightly press them together, you should roughly have a 5x5 square now. Cut the dough into 4 equal squares and place them on the prepared baking pan, letting them touch each other.

    • vanilla biscuit dough after being kneaded into a rough rectangle on a cutting board
    • biscuit dough on a cutting board
    • unbaked biscuits on parchment lined baking pan

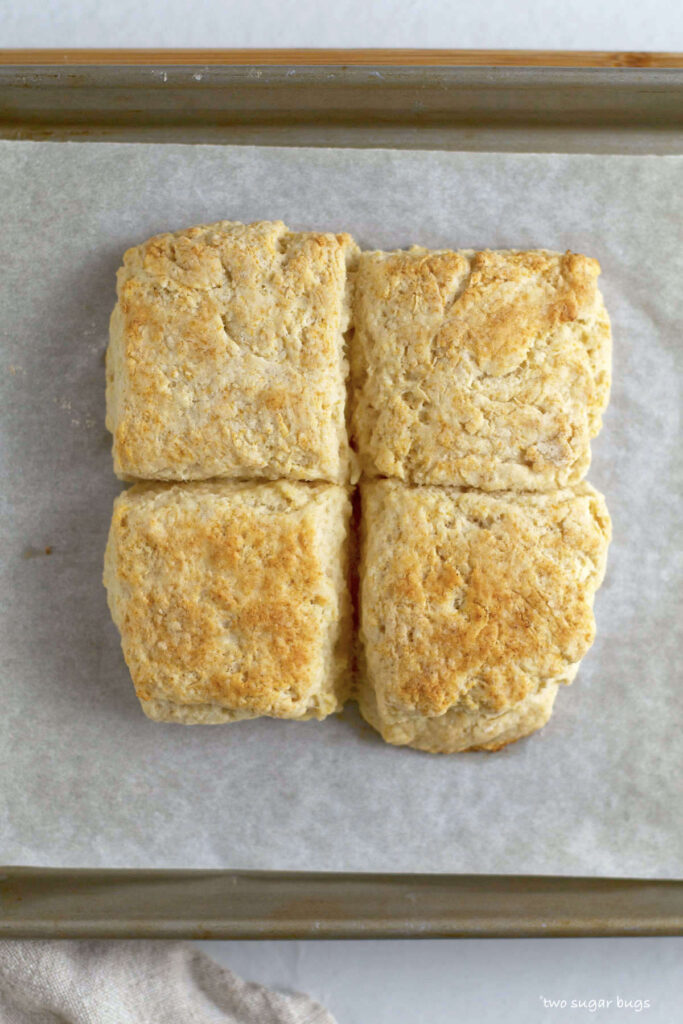
    Now bake the vanilla biscuits until the tops are golden, about 15 minutes. {Mine are usually done at about 12 minutes, but it could take up to 18 minutes. Remember your oven is different than mine and baking times can vary}. Then allow the biscuits to cool.

    baked vanilla biscuits on parchment lined baking pan

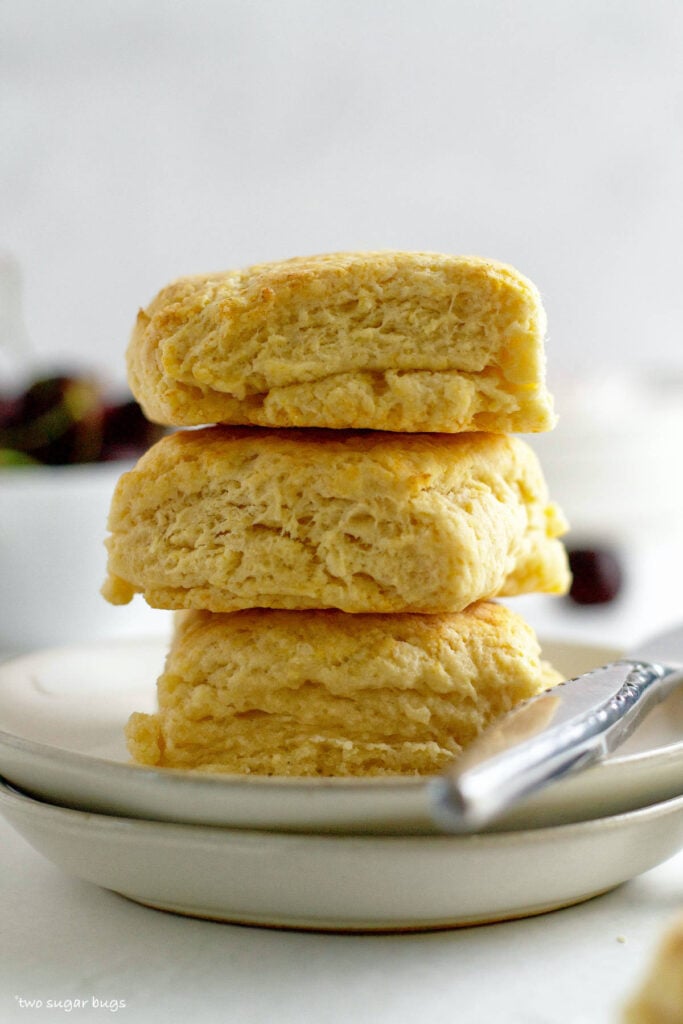
    Just look at those flaky layers!

    stack of vanilla biscuits on a plate

    how to prepare the fresh cherries

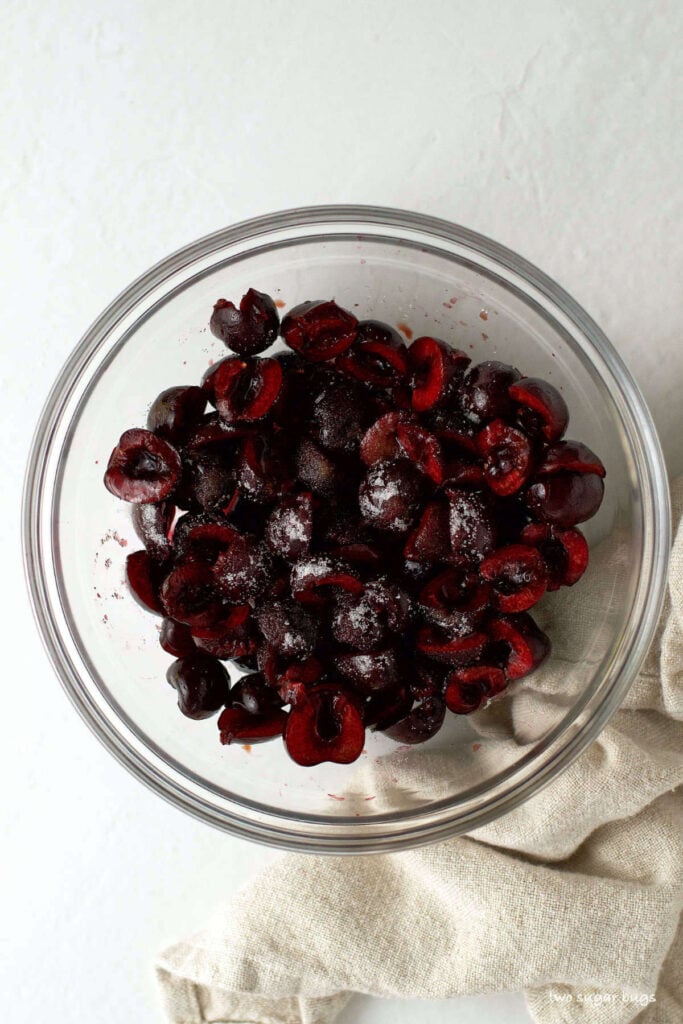
    Start by washing the cherries. Then pit them and slice them in half {a cherry pitter like the one I use is a great helper here}. Place the cherries in a bowl with granulated sugar and vanilla extract and allow them to macerate for about 30 minutes. You can start this ahead of the biscuits, if you want. The cherries can macerate on the counter, if using immediately, or in the refrigerator until ready to use.

    bowl of cherries with granulated sugar and vanilla

    tips for making the homemade vanilla whipped cream recipe

    • Heavy cream or heavy whipping cream is what I prefer when making homemade whipped cream. They have a higher fat content than whipping cream {no heavy in the title} and tend to hold their shape better.
    • 99.9% of the time I use my handheld mixer for making whipped cream, but a stand mixer also works. If you don't have either, a whisk will also do the trick (Mr. Two Sugar Bugs' preferred method), but be prepared for an arm workout!
    • Cold, cold, cold!! To ensure your cream whips nicely it needs to be COLD. You can also chill the bowl and whisk in the freezer for 10-15 minutes prior to making.
    • Granulated sugar or confectioners' sugar work interchangeably in this recipe, so use whichever you prefer. If you like a non-sweetened whipped cream, you can eliminate the sugar as well.
    • Vanilla bean paste {this is the paste I currently use} can be replaced with pure vanilla extract, but I love the little specks that the vanilla beans add to the look of the whipped cream.
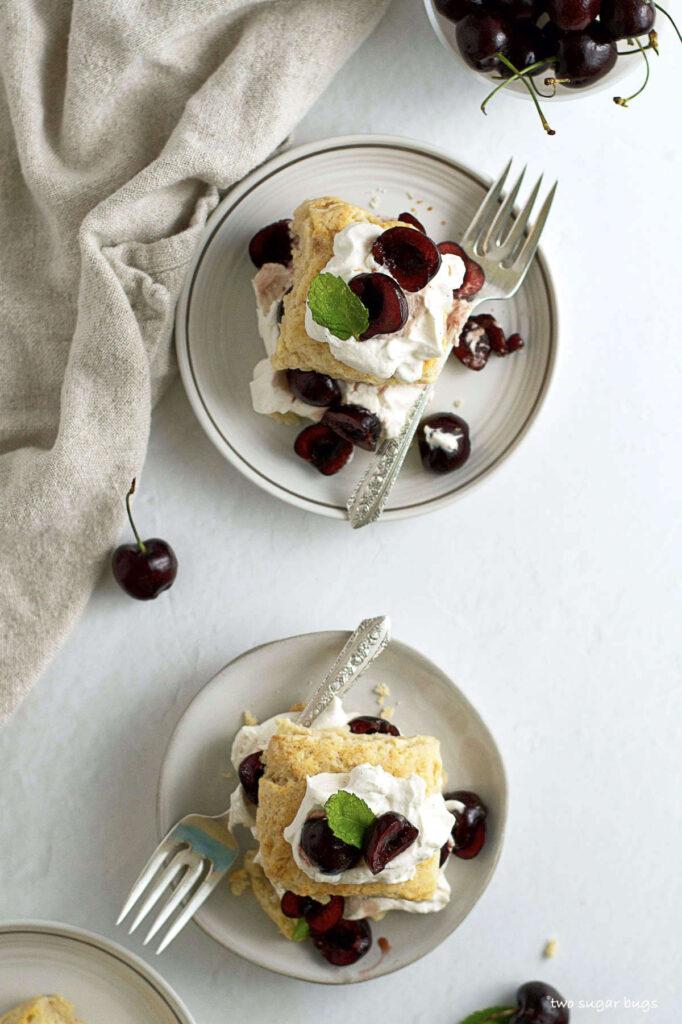
    overhead look at two plates with cherry shortbread

    how to assemble the cherry shortcake with vanilla whipped cream

    • Slice the vanilla biscuits in half and place one half on a plate cut side up. 
    • Place a dollop of vanilla whipped cream on top of the bottom biscuit, followed by a generous scoop of the cherries. 
    • Then top with the other half of the biscuit, cut side down, another dollop of whipped cream and a few more cherries on top.  Garnish with a sprig of mint, if desired, and serve immediately.
    • The order of the cherries and whipped cream isn't overly important ~ if you prefer to layer cherries and then the vanilla whipped cream, that's just fine!
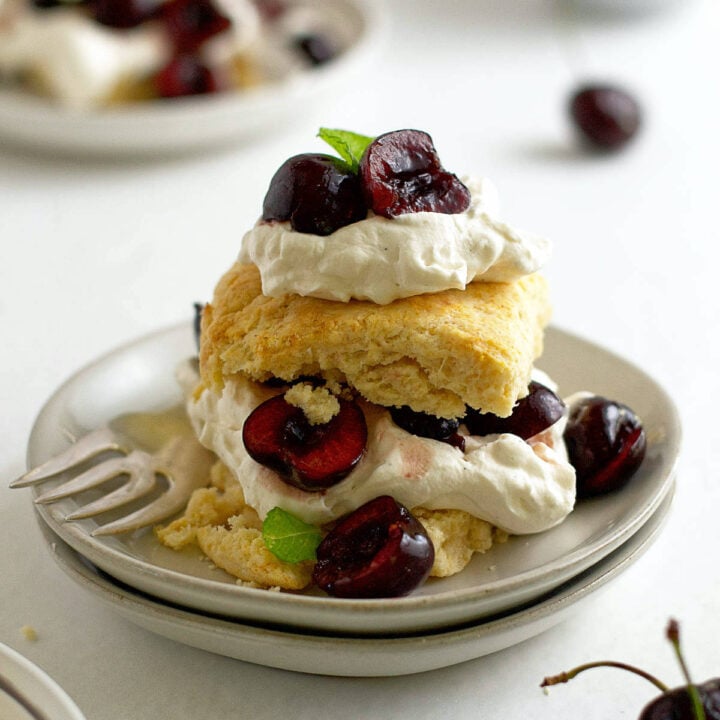
    cherry shortcake on a plate

    Remember to snap a picture and tag me on Instagram if you make these Cherry Shortcake with Vanilla Biscuits and Vanilla Whipped Cream. It warms my heart to see you bring these recipes to life! Thank you for being here and happy baking!

    more cherry dessert recipes to enjoy

    • Cherry Nectarine Crostata
    • Blackberry Cherry Pie
    • Cherry Almond Scones
    • Cherry Bourbon Crumble No Churn Ice Cream

    If you make this recipe {or any recipe!} from two sugar bugsย please come back and leave a review and a โญ๏ธโญ๏ธโญ๏ธโญ๏ธโญ๏ธ star rating.ย  I read every comment, and I LOVE hearing from you!

    Yield: 4 servings

    Cherry Shortcake with Vanilla Biscuits (and vanilla whipped cream)

    unclose look at cherry shortcake with vanilla biscuits

    An easy, flaky vanilla biscuit recipe with sweet cherries and vanilla whipped cream create this twist on a summer classic dessert.

    Prep Time 30 minutes
    Cook Time 15 minutes
    Total Time 45 minutes

    Ingredients

    Cherries

    • 2 ยฝ cups fresh cherries, pitted and halved{I used Bing cherries} (350g before pitted)
    • 1 tablespoon granulated sugar
    • 1 teaspoon pure vanilla extract

    Vanilla Biscuits

    • 1 cup all-purpose flour (125g)
    • 2 teaspoons baking powder
    • 1 tablespoon granulated sugar
    • ยฝ teaspoon kosher salt
    • ยผ cup unsalted butter, cold and cut in small pieces (58g)
    • โ…“ cup half and half (80mL)
    • 2 teaspoons pure vanilla extract

    Vanilla Whipped Cream

    • ยฝ cup heavy cream or heavy whipping cream (120mL)
    • 1 tablespoon granulated sugar*
    • 1 teaspoon pure vanilla extract
    • ยฝ teaspoon vanilla bean paste**
    • Fresh mint, optional for garnish

    Instructions

    1. For the cherries:  wash, pit and halve the cherries and place in a bowl.  Add the granulated sugar and vanilla and stir to combine.  Allow the cherries to macerate for about 30 minutes.
    2. For the vanilla biscuits:  Preheat oven to 400°F and prepare a sheet pan with parchment paper or aluminum foil sprayed with non-stick spray.  Set aside.
    3. In a medium bowl, combine flour, baking powder, sugar and salt.  Mix to combine.  Then using a pastry blender, fork or clean fingers, cut the butter into the dry ingredients until the mixture looks like coarse meal with some small pea size pieces of butter remaining.  Add the vanilla to the half and half and add the mixture to the blended flour and butter mixture.  Stir just until the dough comes together.
    4. Turn the dough onto a lightly floured surface and knead about 8-10 times until the dough roughly comes together.  Pat the dough {with your hands} into about and 8x4 rectangle.  Then using a bench scraper or sharp knife, slice the dough in half so you now have two 4x4 squares.  Place one square on top of the other and lightly press them together, you should roughly have a 5x5 square now. Cut the dough into 4 equal squares and place them on the prepared baking pan, letting them touch each other.
    5. Bake for 12-18 minutes, until the tops are lightly golden.  Remove from the oven and allow to cool.
    6. For the vanilla whipped cream:  Using a hand held mixer or stand mixer with the whisk attachment, beat the heavy cream, sugar, vanilla extract and vanilla bean paste on medium-high until stiff peaks, about 3-4 minutes.
    7. To assemble the shortcakes: slice the vanilla biscuits in half and place on half on a plate cut side up.  Place a dollop of vanilla whipped cream on top of the bottom biscuit, followed by a generous scoop of the cherries.  Then top with the other half of the biscuit, another dollop of whipped cream and a few more cherries on top.  Garnish with a sprig of mint, if desired, and serve immediately. The order of the cherries and whipped cream isn't overly important ~ if you prefer to layer cherries and then the vanilla whipped cream, that's just fine!

    Notes

    *Granulated or confectioners' sugar can be used {or you can eliminate the sugar altogether}. There is such a small amount that it won't make a difference in the recipe.

    **Can use all vanilla extract if you don't have vanilla bean paste

    I have prepared the cherry shortcake about 2 hours prior to serving and stored them uncovered in the refrigerator and they held up fine.

    This recipe easily scales up if you need to serve a larger crowd.

    All components can be made a day ahead ~ once the biscuits have cooled completely, wrap tightly and store at room temperature.ย  The cherries and whipped cream should be stored separately; cover and store in the refrigerator. ย Any leftovers should be stored the same way.

    Nutrition Information:

    Yield:

    4

    Serving Size:

    1

    Amount Per Serving: Calories: 451Total Fat: 25gSaturated Fat: 16gTrans Fat: 0gUnsaturated Fat: 8gCholesterol: 71mgSodium: 425mgCarbohydrates: 51gFiber: 3gSugar: 23gProtein: 6g

    The nutrition information is an estimate and may not be entirely accurate.
    Did you make this recipe?

    Please make my day and PIN to Pinterest and share a photo on Instagram ~ making sure to tag @twosugarbugs! THANK YOU!!

    © Tasia
    Cuisine: American / Category: Sweets

    No Bake Mascarpone Cheesecake (with Strawberries and Mint)

    side view of mascarpone cheesecake bars with mint and strawberries

    You will love these no bake mascarpone cheesecake bars ~ the filling is light, silky and creamy; not as light as a mousse, but not dense like a traditional cheesecake either. Tucked in a no bake vanilla graham cracker crust and given a hint of mint and fresh fruit, they are perfect for summer entertaining!

    no bake mascarpone cheesecake bars on a parchment lined cutting board

    Disclosure | This post may contain affiliate links. As an Amazon Associate I earn from qualifying purchases.

    Ready for a dreamy and EASY no bake dessert?

    The Pacific Northwest is on track to hit record shattering temperatures this coming week. The last forecast I saw is predicting a high of 106ยฐF for Monday. Considering the average June temperature is 69ยฐF, people around here are freaking out a bit! Personally, I am a sun and heat lover and I'm soaking it all in.โ˜€๏ธ

    What does that have to do with dessert you say? If there was ever a time for a quick and easy no bake recipe, this is definitely the time!

    bar on it's side to show the graham cracker layer, mascarpone layer and fresh strawberries

    what is mascarpone cheesecake?

    This is a no cream cheese cheesecake. A mascarpone cheese mixture is folded with whipped cream to create a light and airy filling. It's truly a silky, creamy and fluffy texture; not dense like a traditional cheesecake. Can you spy that almost ice cream like texture in the photo above?

    what's the difference between mascarpone and cream cheese?

    I talk about the differences and where to find mascarpone in my almond and berry mascarpone tart post. Basically, mascarpone is an Italian cheese with a higher butterfat content and a softer texture. While cream cheese is an American cheese with a firmer texture {lower butterfat} and more of a tang in flavor.

    how to make the no bake vanilla graham cracker crust

    ingredients for vanilla graham cracker crust

    Start by crushing the graham crackers to crumbs. This can be done in a food processor {this is the new version of my 20+ year old Cuisinart!} or by using a rolling pin to crush the crackers inside a zip-top bag.

    Then add brown sugar to the crumbs and mix to combine. Finally, add in melted butter and vanilla extract and stir until the mixture looks like wet crumbs. Then press into a parchment lined 8x8 baking pan {I also tested this in a 9-inch tart pan with a removable bottom, which worked great as well}. Now chill the graham cracker crust while you make the mascarpone filling.

    • vanilla graham cracker crust being mixed in a bowl with a fork
    • vanilla graham cracker crust pressed in a pan

    how to make this no bake cheesecake filling

    ingredients for mascarpone cheesecake with strawberries and mint

    First whip the whipping cream until stiff peaks.

    Then beat together the mascarpone cheese, confectioners' sugar, vanilla bean paste and mint extract. I typically use my hand held mixer for this filling, but a stand mixer would work fine as well.

    • whipped cream in a glass bowl
    • mascarpone in a glass bowl with a handmixer
    • whipped mascarpone in a glass bowl

    Finally, lightly fold the whipped cream into the mascarpone until fully combined. Then spread the mint mascarpone cheesecake filling onto the vanilla graham cracker crust.

    • whipped cream on top of whipped mascarpone cheese
    • mascarpone filling in a bowl
    • mascarpone layer being added to vanilla graham cracker crust

    Did you see how quick and easy this went?? It will take you about 15 minutes. Place the cheesecake bars into the refrigerator to chill until ready to serve.

    a fresh strawberry and mint topping

    I recommend waiting until you are almost ready to serve the bars before topping with the fresh fruit, as it will keep the fruit the freshest. I used strawberries, but blueberries or blackberries would also taste fantastic with the mint.

    Slice the strawberries and mix them with granulated sugar and fresh mint in a bowl. Allow to sit for about 30 minutes before placing on top of the cheesecake.

    fresh strawberry slices, sugar and mint in a bowl

    You will want to drain the berries from any accumulated juices before adding to the top of the soft and silky mascarpone layer. You will also get prettier slices if you slice the bars first and then add the berries, but it works either way.

    overhead look at no bake mascarpone cheesecake bars with fresh strawberries and mint

    can you freeze no bake mascarpone cheesecake?

    Yes! Just wait to add the berries until you are ready to serve. Wrap with several layers of plastic wrap and freeze for up to 2 months. I would serve the bars frozen versus allowing them to thaw. The mascarpone will soften quickly and will have a creamy ice cream like texture.

    side view of no bake mascarpone cheesecake square

    Remember to snap a picture and tag me on Instagram if you make this No Bake Mascarpone Cheesecake. It warms my heart to see you bring these recipes to life! Thank you for being here and happy baking!

    more no bake recipes to enjoy

    • Addictive Peanut Butter Bars
    • Lemon Raspberry Bars
    • No Bake Mini Peanut Butter Espresso Cheesecake
    • Malted Chocolate Ganache Tart
    • Peanut Butter Pie
    • 3 ingredient Biscoff Cookie Mousse

    If you make this recipe {or any recipe!} from two sugar bugsย please come back and leave a review and a โญ๏ธโญ๏ธโญ๏ธโญ๏ธโญ๏ธ star rating.ย  I read every comment, and I LOVE hearing from you!

    Yield: 12 cheesecake bars

    No Bake Mascarpone Cheesecake {with strawberries and mint}

    no bake mascarpone cheesecake bars on a parchment lined cutting board

    The filling is light, silky and creamy; not as light as a mousse, but not dense like a traditional cheesecake either. Tucked in a no bake vanilla graham cracker crust and given a hint of mint and fresh fruit!

    Prep Time 20 minutes
    Chill Time 2 hours
    Total Time 2 hours 20 minutes

    Ingredients

    Vanilla Graham Cracker Crust

    • 1 sleeve graham crackers, crushed (140g)
    • ยผ cup brown sugar (50g)
    • 6 tablespoons unsalted butter, melted (85g)
    • 1 teaspoon pure vanilla extract

    Mascarpone filling

    • ยฝ cup heavy whipping cream (120mL)
    • 8 ounces (1 container) mascarpone cheese* (227g)
    • ยผ cup confectioners' sugar (30g)
    • ยพ teaspoon peppermint extract
    • ยฝ teaspoon pure vanilla bean paste**

    Strawberry mint topping

    • 1 pint fresh strawberries, sliced (454g)
    • 2 tablespoons granulated sugar
    • 3-4 sprigs fresh mint, chopped small

    Instructions

      1. For the vanilla graham cracker crust: Crush the graham crackers in a food processor or in a zip top bag with a rolling pin. In a medium bowl combine the graham cracker crumbs and brown sugar, mix to combine. Then add the melted butter and vanilla and mix until well combined. Press firmly into the bottom of a parchment lined 8x8 baking pan. Then place in the refrigerator while you prepare the mascarpone filling.
      2. For the mascarpone filling: using a handheld mixer or a stand mixer with the whisk attachment, whip the whipping cream until stiff peaks, approximately 2-3 minutes. Set aside. In another bowl; whip the mascarpone cheese, confectioners' sugar, mint extract and vanilla bean paste on medium until well combined, about 1-2 minutes. Then using a spatula, fold in the whipped cream until fully combined. Spread the filling into the prepared graham cracker crust. Refrigerate until ready to serve {Ideally chill for 2 hours before seving}.
      3. For the strawberry mint topping: place the sliced strawberries in a bowl and top with the granulated sugar and fresh mint. Toss with a spoon and allow to sit and macerate for about 30 minutes.
      4. Lift the bars from the pan with the parchment paper. Slice into the desired size bars and then layer the sliced strawberries over the top of the mascarpone {be sure to drain the berries from any accumulated juices so they don't make the soft and silky cheesecake mushy}. To get the cleanest slices, wipe the knife clean between cuts. Alternately, you can layer the strawberries on first and then slice, but it's a bit messier to cut through the strawberries.

    Notes

    A 9 inch tart pan with a removable bottom or a springform pan can also be used.

    *the mascarpone should be straight from the refrigerator, there is no need to bring it to room temperature

    **can substitute pure vanilla extract

    Crust and filling can be prepared up to two days ahead, wait until ready to serve before topping with the strawberries {or fruit of your choice}.

    You can also freeze the mascarpone cheesecake {before adding the strawberries}. Wrap with several layers of plastic wrap and freeze for up to 2 months. I would serve the bars frozen versus allowing them to thaw. The mascarpone will soften quickly and will have a creamy ice cream like texture.

    Store any leftovers covered in the refrigerator.

    Recommended Products

    As an Amazon Associate and member of other affiliate programs, I earn from qualifying purchases.

    • PaperChef Parchment Paper for Baking: Multipurpose Nonstick Parchment Sheets, Oven Safe, No Grease or Butter Needed, Ideal for Cooking and Roasting, Biodegradable, Kosher-Certified (205 sq ft roll)
      PaperChef Parchment Paper for Baking: Multipurpose Nonstick Parchment Sheets, Oven Safe, No Grease or Butter Needed, Ideal for Cooking and Roasting, Biodegradable, Kosher-Certified (205 sq ft roll)
    • USA Pan Bakeware Square Cake Pan, 8 inch, Nonstick & Quick Release Coating, Made in the USA from Aluminized Steel
      USA Pan Bakeware Square Cake Pan, 8 inch, Nonstick & Quick Release Coating, Made in the USA from Aluminized Steel
    • KitchenAid KHM512BM 5 Speed Hand Mixer, Black Matte
      KitchenAid KHM512BM 5 Speed Hand Mixer, Black Matte
    • Duralex 100010 Made In France Lys Stackable 10-Piece Bowl Set
      Duralex 100010 Made In France Lys Stackable 10-Piece Bowl Set

    Nutrition Information:

    Yield:

    12

    Serving Size:

    1

    Amount Per Serving: Calories: 210Total Fat: 16gSaturated Fat: 9gTrans Fat: 0gUnsaturated Fat: 5gCholesterol: 45mgSodium: 134mgCarbohydrates: 13gFiber: 1gSugar: 10gProtein: 5g

    The nutrition information is an estimate and may not be entirely accurate.

    Did you make this recipe?

    Please make my day and PIN to Pinterest and share a photo on Instagram ~ making sure to tag @twosugarbugs! THANK YOU!!

    © Tasia
    Cuisine: American / Category: No Bake Desserts

    Easy Sweet Pull Apart Bread (from scratch)

    interior look at sweet pull apart bread

    Ready to make homemade bread? This easy, sweet pull apart bread recipe is made from scratch and is simpler to make than you think. Can easily be made savory with cheese and herbs. The possibilities are endless!

    interior look at sweet pull apart bread

    Disclosure | This post may contain affiliate links. As an Amazon Associate I earn from qualifying purchases.

    This is one of the most requested recipes from my family. And I think my first bread recipe with yeast on the blog. I've made this dough more times than I can tell you over the last five+ years and it's a very forgiving dough.

    My family loves it sweet with cinnamon sugar or vanilla sugar. But Big E always asks for a savory version with cheese and herbs. I've always called this type of bread loaf pull apart bread, but it's also known as bubble bread, tear and share bread or monkey bread. We are going to make this one from scratch and I know you will love how easy it is to make!

    a side view of a loaf of bread

    The bread dough comes together quickly and does two rises; the first for one hour and the second for 30-45 minutes. You choose how to make it ~ sweet or savory. Be sure to check out the comments in the recipe card with ideas for several different variations. Then dig into this soft, fluffy and flaky bread and watch it disappear before your eyes.

    what ingredients do I need?

    ingredients for easy sweet pull apart bread

    Seven simple ingredients are needed for the bread dough.

    • Granulated sugar
    • Dry active yeast
    • Milk {warmed}
    • All-purpose flour
    • Kosher salt
    • Large egg plus one large yolk
    • Vegetable oil

    What is the ideal temperature for milk when making bread?

    thermometer showing temperature of warm milk

    Ideally, you want the milk between 100-110ยฐF {1% milk is what I use}. I use my ThermoWorks Thermapen for a quick and easy temperature reading. Using a thermometer is the most accurate way to determine the temperature of your milk. Any thermometer that reads between 75ยฐ-135ยฐF will work.

    If the milk is too warm, you run the risk of killing the yeast. If the milk is too cold, the yeast won't activate and the bread may rise too slowly or not at all.

    let's make this bread dough!

    Is it just me? I find there is something about making bread with just a bowl and spoon. Then kneading it by hand. No fancy equipment needed.

    Start by placing the yeast and sugar in a bowl. Then add the warm milk and give it a stir together. Add the flour, kosher salt, egg and egg yolk and oil and mix until a shaggy, soft dough is created.

    yeast, sugar and milk in a glass bowl
    flour, eggs and oil in a bowl on top of milk, yeast and sugar

    Once the dough has come together, scrape the dough onto a floured surface and knead until smooth and elastic {you should achieve this in 8-10 minutes}. Place the kneaded dough back in the bowl {no need to clean it, but grease the bowl}. Then cover and place in a warm spot to rise about 1 hour, until doubled in size.

    bread dough after mixing the ingredients together
    bread dough in a bowl after kneading

    If your kitchen is on the cooler side {like mine}, you can create a warm environment in your oven for proofing the bread. I use our Breville toaster oven and preheat it to the lowest setting, which is 120ยฐF. Once it reaches temperature, I turn off the oven and leave the door closed. When the pull apart bread dough is ready to proof, place it in the slightly warm oven and close the door.

    time to put this tasty loaf together

    While the dough is in it's first rise, prepare the cinnamon sugar filling and the loaf pan.

    When the dough has doubled in size, remove the dough from the bowl. I like to use a soft, rounded plastic bench scraper to release it from my bowl. Next divide the dough into 12 pieces using the same bench scraper. They don't have to be perfectly uniform, but try to keep them mostly the same size.

    plastic wrap covered dough after first proof
    a dozen pull apart bread dough balls

    Use your hands to flatten each piece of dough into a circle about 4 inches in diameter. Then top with a heaping teaspoon of the cinnamon sugar mixture. Fold the dough in half and place the dough flat side down into the prepared loaf pan. Continue until all 12 pieces of dough have been added to the pan.

    ruler showing the diameter of a circle of bread dough
    bread dough circle with a layer of cinnamon sugar
    sweet pull apart bread dough folded over before placing in the loaf pan

    If you have any remaining cinnamon sugar mixture, you can dollop it over the top of the bread dough.

    Now place the dough back in a warm spot and let it rise a second time, about 30-45 minutes. The dough will be ready to bake once it reaches the top of the pan.

    folded bread dough in a loaf pan
    sweet cinnamon pull apart bread with cinnamon sugar over the top prior to baking
    proofed sweet pull apart bread before baking

    When the dough is close to the top of the pan, preheat the oven. If the dough is proofing in your oven, be sure to remove it before turning the oven on to preheat!

    how do I know when my pull apart bread is done?

    Bake until the loaf is golden brown and the bread is baked through. The internal temperature should be 190ยฐF, if you want to be sure it's done. {I check the bread about 15 minutes into baking and if the top is already browning quickly, lightly cover the top with a piece of foil}.

    Remember your oven is different than mine and baking times may vary slightly. If you don't have an oven thermometer, you may not be baking at the temperature you think you are. This is the thermometer I have in my oven.

    overhead look at the browned exterior of sweet pull apart bread

    how to serve this sweet pull apart bread

    You can serve this sweet bread as a breakfast item or a dessert. Or even a midnight snack. ๐Ÿ˜‰. The recipe has been tested on both adults and kids and it pleases everyone. If you are looking for other variations, see recipe card comments with ideas for other fillings.

    three slices of bread on plates

    Remember to snap a picture and tag me on Instagram if you make this Easy Sweet Pull Apart Bread. It warms my heart to see you bring these recipes to life! Thank you for being here and happy baking!

    more bread recipes to try

    • Black Pepper Focaccia
    • Blueberry Zucchini Bread
    • Peanut Butter Oat Banana Bread
    • Healthier Chocolate Zucchini Bread
    • Apple Cider Banana Bread
    • Cornbread Donuts

    If you make this recipe {or any recipe!} from two sugar bugsย please come back and leave a review and a โญ๏ธโญ๏ธโญ๏ธโญ๏ธโญ๏ธ star rating.ย  I read every comment, and I LOVE hearing from you!

    interior look at sweet pull apart bread
    Print Recipe

    Easy Sweet Pull Apart Bread (from scratch)

    This easy, sweet pull apart bread recipe is made from scratch and is much simpler to make than you think. Can easily be made savory with cheese and herbs.
    Prep Time25 minutes mins
    Cook Time25 minutes mins
    Rising Time1 hour hr 45 minutes mins
    Total Time2 hours hrs 35 minutes mins
    Course: Breads
    Cuisine: American
    Keyword: bread, easy bread recipe, pull apart bread, pull apart bread filling ideas, sweet pull apart bread
    Servings: 12 slices
    Calories: 208kcal
    Author: Tasia Harper

    Ingredients

    pull apart bread

    • 2 tablespoons granulated sugar (24g)
    • 2 teaspoons active dry yeast
    • ยพ cup warm milk 100-110ยฐF (180mL)
    • 3 cups all-purpose flour (375g) plus more for kneading
    • 1 teaspoon kosher salt
    • 1 large egg plus one large egg yolk
    • 2 tablespoons vegetable oil (30mL)

    cinnamon sugar filling*

    • ยผ cup unsalted butter extra soft butter (57g)
    • ยผ cup plus 2 tablespoons granulated sugar (75g)
    • 2 teaspoons ground cinnamon

    Instructions

    • {When my kitchen is cold, I like to turn on my Breville toaster oven to 120ยฐF while I am mixing and kneading the dough. Turn it off when it reaches temperature and keep the door closed. This creates a warm environment for letting the dough rise}
    • In a medium to large bowl add the sugar (2 tablespoons), yeast (two teaspoons) and warm milk (ยพ cup/180mL) and give it a little stir. Add the flour ( 3 cups/375g), salt, egg and egg yolk (1 large+1 large yolk) and oil (2 tablespoons/30mL) and mix until a soft dough is formed.
    • Scrape the dough onto a floured surface and knead until smooth and elastic, about 10 minutes. I prefer to do this by hand, but you can also use a stand mixer with the dough hook. Add flour as necessary, but try to add as little as possible.
    • Grease the bowl you mixed the dough in (no need to wash it) and place the dough in the bowl, cover and let rise about 1 hour (I place it in the barely warm toaster oven), or until double in size.
    • While the dough is rising, prepare the filling. Add extra soft butter (ยผ cup/57g)ยผto a small bowl and stir in the sugar (ยผ cup + 2 tablespoons/75g) and cinnamon (2 teaspoons) until well blended. Set aside.
    • Grease a loaf pan with butter or cooking spray and set aside. (A standard glass or metal pan works)
    • Remove the dough from the bowl and divide it into 12 pieces. They donโ€™t have to be perfect, but try to make the pieces fairly uniform in size. Using your hands, take a piece of dough and flatten it into a circle about 4 inches in diameter, then top with a heaping teaspoon of the cinnamon sugar filling, spreading it over the dough.
    • Then fold the dough in half, creating a semi-circle and place the dough flat side down into the prepared loaf pan (see photos in the post). Continue until all 12 pieces of dough have been added to the pan. If you have any remaining cinnamon sugar filling, you can dollop it over the top of the dough.
    • Place the dough back in your warm spot and allow it to rise a second time, about 30 to 45 minutes. You want the dough to rise to the top of the loaf pan. Keep an eye on it and when itโ€™s close to the top of the pan, preheat the oven to 350ยฐF.
    • Bake for about 30 minutes, until itโ€™s golden brown. If the top is browning too quickly, lightly tent the top of the bread with a piece of foil (I check about 15 minutes into the baking time).
    • When the bread is done, remove the loaf from the oven and place the pan on a wire cooling rack. After 10-15 minutes, remove the bread from the pan and serve.

    Notes

    Ideas for other fillings ~
    *Herb, garlic and cheese filling: use same amount of butter, but add ยผ-ยฝ teaspoon of dried herbs and garlic powder. Shred about โ…“ cup of parmesan cheese {or whatever cheese you desire} and sprinkle that over the top of the garlic herbed butter once spread on the dough circles.
    *Vanilla sugar filling: use the same amount of butter, ยผ cup plus 2 tablespoons of granulated sugar and 1 teaspoon vanilla bean paste {pure vanilla extract also works}.
    *Poppy seed with lemon cream cheese filling: add 3 tablespoons of poppy seeds when making the dough. For the filling, use ยผ cup brick cream cheese at room temperature, ยผ cup of granulated sugar and the zest from one lemon.
    Cover and store leftovers at room temperature for up to 2 days.
    Recipe adapted from The Semisweet Sisters Homemade Hot Dog Buns

    Nutrition

    Serving: 1 slice | Calories: 208kcal | Carbohydrates: 31g | Protein: 4g | Fat: 7g | Saturated Fat: 3g | Polyunsaturated Fat: 2g | Monounsaturated Fat: 2g | Trans Fat: 0.2g | Cholesterol: 26mg | Sodium: 206mg | Potassium: 69mg | Fiber: 1g | Sugar: 7g | Vitamin A: 164IU | Vitamin C: 0.01mg | Calcium: 30mg | Iron: 2mg

    Easy Almond Joy Pie

    slice of almond joy pie on a plate with a fork

    The BEST almond joy pie! A chocolate shortbread crust filled with a creamy coconut filling, topped with almonds and covered with a layer of milk chocolate ganache.

    slice of almond joy pie on a plate with a fork

    Disclosure | This post may contain affiliate links. As an Amazon Associate I earn from qualifying purchases.

    Where are my candy bar fans? Mr. two sugar bugs happens to LOVE coconut, almond and chocolate together. So I set out to make an almond joy recipe. And with Father's Day quickly approaching, it's the perfect time for an easy dessert recipe!

    almond joy pie cut into slices

    what is almond joy made of?

    Almond Joy's are made by Hershey's and consist of sweet shredded coconut and whole almond center, which is covered in milk chocolate.

    This recipe uses coconut in a creamy mascarpone cheese layer and sliced almonds, as they are easier to eat in a dessert. The whole pie is then topped with a soft milk chocolate ganache and a little toasted coconut. It's coconut and chocolate at it's finest!

    is this a no bake pie recipe?

    Not completely. The crust of the pie is a chocolate shortbread and it needs about 15-20 minutes in the oven. But the rest of the pie comes together with no baking.

    slice of pie on a plate with a fork

    Remember to pin this recipe to Pinterest! Use the button on the recipe card or the share buttons on the side or bottom of this page.

    what ingredients do I need?

    The chocolate shortbread crust comes together quickly with just some pantry staples. I use Hershey's Unsweetened Cocoa Powder.

    For the coconut filling, the only somewhat unusual ingredient is mascarpone cheese. If you are not familiar with mascarpone, you may want to check out my almond and berry mascarpone tart recipe for more information.

    I didn't include them in the above photos, but you will also need sliced almonds and a milk chocolate baking bar.

    how to make the chocolate shortbread crust

    In a medium bowl, combine the dry ingredients. I just use my pastry cutter, but a whisk or sifter would also work. Then add the room temperature butter and cut it in until a dough is formed.

    Next, press the dough into a 9-inch tart pan with a removable bottom. {If you don't have a tart pan, a 9-inch springform pan or 9-inch pie plate would also work} Once the dough is in an even layer, prick the bottom several times with a fork. Then bake for 15-20 minutes, until the edges are set.

    chocolate shortbread dough pressed into a tart pan and pricked with a fork

    If you have pie weights, you could use them here, but I tend to be too lazy to pull mine out. If the shell shrinks or puffs up, use a flat bottomed measuring cup to lightly press the dough back up the sides when just out of the oven. Use caution as the crust will be hot. Then set aside to cool completely before adding the coconut layer.

    let's make the quick and easy coconut filling!

    To start, whip the heavy cream until stiff peaks and set aside. I use my handheld mixer, but a stand mixer with the whisk attachment would also work.

    whipped cream in a glass bowl

    In another bowl, beat the mascarpone cheese, confectioners' sugar, almond extract and coconut extract until smooth {no need to wash the beaters in between!} Next add in the shredded coconut and mix until well combined. Then, using a spatula, fold in the whipped cream. Spread the creamy coconut layer into the completely cooled chocolate crust.

    • whipped cream being folded into coconut filling
    • coconut filling in chocolate shortbread crust

    Finally, lay down a layer of sliced almonds. Honestly, there is no reason to make it pretty! It just about killed me in patience to make them look this uniform for the photo.๐Ÿ˜‚

    almonds placed on top of coconut layer

    how to make the milk chocolate ganache

    At this point, pop the pie into the refrigerator to chill while you prepare the ganache.

    Use a milk chocolate baking bar, chop it into small pieces and place the chocolate in a heat proof bowl.

    chopped milk chocolate in a glass bowl

    Place the heavy cream into a small sauce pan and heat until warm and just starting to simmer at the edges. Pour the heavy cream over the chopped chocolate and let it sit for 2 minutes before stirring until a smooth ganache is formed.

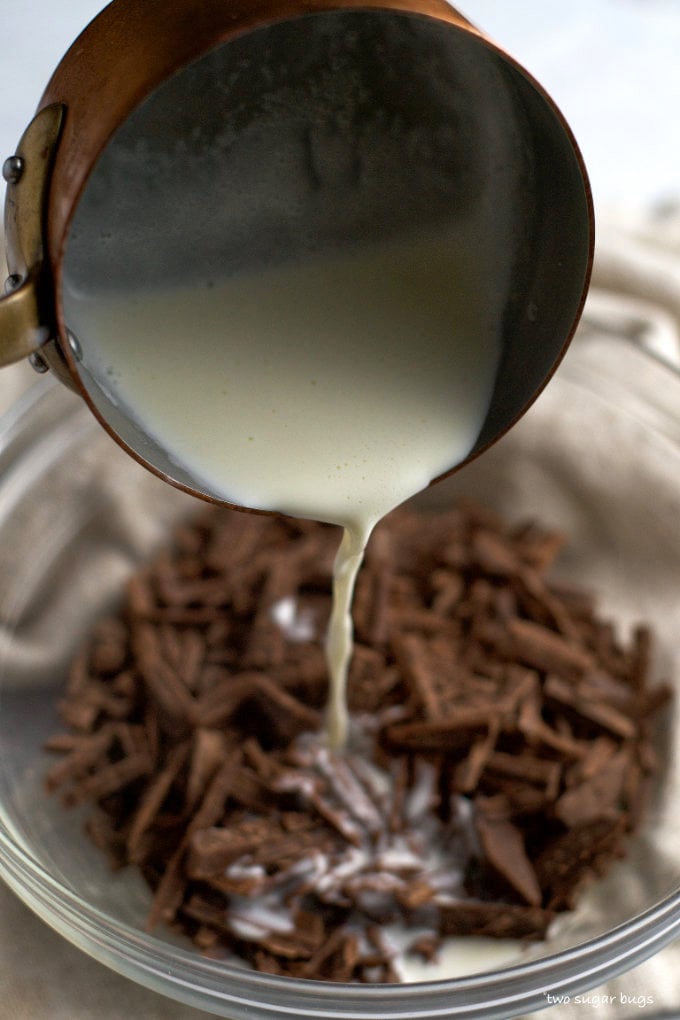
    heavy cream being poured over milk chocolate

    Let the milk chocolate ganache sit for a few minutes until it has cooled and has slightly thickened. Then pour the ganache over the top of the coconut almond layer. Use a spatula or an off set spatula to lightly smooth the ganache to the edges. Garnish with some toasted coconut, if desired.

    finished almond joy pie in the tart pan
    I just swirled my spatula in a circular pattern over the top of the ganache to create this look.

    And there you have it, almond joy pie!

    three slices of almond joy pie on plates

    can this almond joy pie be made ahead of time?

    Yes! You can prepare the pie up to 2 days before needing to serve it. Be sure to store the pie covered in the refrigerator. Leftovers can be covered and stored in the refrigerator for up to five days.

    side view of a slice of easy almond joy pie

    Remember to snap a picture and tag me on Instagram if you make this Easy Almond Joy Pie Recipe. It warms my heart to see you bring these recipes to life! Thank you for being here and happy baking!

    more coconut recipes to enjoy

    • Kona Coconut Loaf Cake
    • Perfect Coconut Cake
    • Strawberry Coconut Chocolate Bars
    • Chocolate Coconut Bites
    • Coconut Cream Pie
    • Rum Coconut Cupcakes

    If you make this recipe {or any recipe!} from two sugar bugsย please come back and leave a review and a โญ๏ธโญ๏ธโญ๏ธโญ๏ธโญ๏ธ star rating.ย  I read every comment, and I LOVE hearing from you!

    Yield: One 9" Pie ~ About 10 servings

    Almond Joy Pie

    slice of almond joy pie on a plate with a fork

    A chocolate shortbread crust filled with a creamy coconut filling, topped with almonds and covered with a layer of milk chocolate ganache.

    Prep Time 20 minutes
    Bake Time 20 minutes
    Chill Time 2 hours
    Total Time 2 hours 40 minutes

    Ingredients

    Chocolate Shortbread Crust

    • 1 cup all-purpose flour (125g)
    • ยผ cup unsweetened cocoa powder (20g)
    • 1 cup confectioners' sugar (120g)
    • ยฝ teaspoon kosher salt
    • ยพ cup unsalted butter, room temperature (170g)

    Almond Coconut Filling

    • ยฝ cup heavy whipping cream
    • 8 ounces (1 container) mascarpone cheese (227g)
    • ยผ cup confectioners' sugar (30g)
    • 1 teaspoon coconut extract
    • ยผ teaspoon almond extract
    • 1 ยผ cups sweetened shredded coconut, packed (125g)
    • ยผ cup sliced almonds (31g)

    Milk Chocolate Ganache

    • ยผ cup heavy whipping cream (60mL)
    • 4 ounces milk chocolate, chopped small (114g)
    • 2 tablespoons sweetened flaked coconut, toasted (15g)

    Instructions

    1. For the chocolate shortbread crust: Pre-heat the oven to 350°F. Blend the all-purpose flour, cocoa powder, confectioners' sugar and salt in a medium bowl. Then cut in the butter with a pastry cutter or fork until the dough comes together. Press the dough into the bottom and up the sides of a 9-inch tart pan with a removable bottom*, make as even as a layer as possible. Prick the dough with a fork a few times and bake for 15-20 minutes, until the edges are set. If the shell has shrunk or puffed up, use a flat bottomed measuring cup or glass to lightly press the dough back up the sides when just out of the oven. Use caution as the crust will be hot. Allow the crust to cool completely before adding the almond coconut filling.
    2. For the almond coconut filling: using a handheld mixer or a stand mixer with the whisk attachment, whip the whipping cream until stiff peaks, approximately 2-3 minutes. Set aside. In another bowl, whip the mascarpone cheese, confectioners' sugar, and coconut and almond extracts on medium until well combined, about 1-2 minutes. {start on low until the confectioners' sugar is blended it, then increase speed to medium}. Then add the shredded coconut and mix until it's evenly incorporated. Finally, using a spatula, fold in the whipped cream until fully combined. Evenly spread the filling into the cooled chocolate shortbread crust and add a layer of sliced almonds. Then chill in the refrigerator while you make the ganache.
    3. For the milk chocolate ganache: Add the chopped milk chocolate to a heatproof glass or metal bowl. Heat the cream on the stovetop until just simmering around the edges. Pour the cream over the chocolate, making sure it is completely submerged. Let the cream sit for 2 minutes without disturbing it. Gently stir the cream until it is fully combined with the milk chocolate and the result is a smooth ganache. Let the ganache sit for a few minutes until it's mostly cool and starts to slightly thicken. Pour the ganache over the top of the almond coconut layer, using a spatula to lightly smooth the chocolate to the edges of the pie. Garnish the top of the ganache with toasted coconut**, if desired.
    4. Chill for 1-2 hours until the pie is set. Slice and enjoy!

    Notes

    *A 9-inch tart pan with removable bottom can be replaced with a 9-inch springform pan or 9-inch pie plate.

    **For toasted coconut: Place coconut on a foil lined baking pan and bake at 350ยฐF for 4-7 minutes, tossing once or twice. Watch the coconut carefully as it can go from browned to burned very easily!

    Can be prepared up to 2 days ahead. Store covered in the refrigerator. Any leftovers should also be stored covered in the refrigerator for up to 5 days.

    Nutrition Information:

    Yield:

    10

    Serving Size:

    1

    Amount Per Serving: Calories: 549Total Fat: 39gSaturated Fat: 23gTrans Fat: 0gUnsaturated Fat: 14gCholesterol: 82mgSodium: 259mgCarbohydrates: 41gFiber: 3gSugar: 25gProtein: 11g

    The nutrition information is an estimate and may not be entirely accurate.
    Did you make this recipe?

    Please make my day and PIN to Pinterest and share a photo on Instagram ~ making sure to tag @twosugarbugs! THANK YOU!!

    © Tasia
    Cuisine: American / Category: Pies and Tarts

    Small Batch Chocolate Swiss Meringue Buttercream (with cocoa powder and melted chocolate)

    swirled chocolate swiss meringue buttercream in a glass cup

    This small batch chocolate Swiss meringue buttercream is silky, creamy, rich with chocolate and not overly sweet.

    top down look at piped chocolate swiss meringue buttercream in a glass

    Disclosure | This post may contain affiliate links. As an Amazon Associate I earn from qualifying purchases.

    Have you tried Swiss meringue buttercream {smbc}? It's the perfect frosting recipe for cakes and cupcakes! You will love this chocolate version; made with a brown sugar meringue and both melted chocolate and cocoa powder, it's sure to become a favorite!

    This post has lots of step-by-step photos to guide you through the process of making the best frosting recipe. And as always, feel free to leave a comment below or send me an email with any questions.๐Ÿ’—

    why you will love chocolate Swiss meringue buttercream

    • It has a rich chocolate flavor.
    • The frosting is less sweet than American buttercream.
    • It has a silky smooth, light and airy texture.
    • It is stable for piping and does not crust.

    what ingredients do I need?

    ingredients for small batch chocolate swiss meringue buttercream
    • Large egg whites ~ use fresh eggs, not egg whites from a carton. Eggs separate easier when they are cold. I recommend separating each egg into a small bowl before adding it to the mixing bowl. This way you won't contaminate the whole batch if you get a little yolk into one of the egg whites.
    • Brown sugar ~ the eggs and sugar create the meringue for this buttercream. The brown sugar adds another layer of flavor to chocolate buttercream.
    • Kosher salt ~ many Swiss meringue buttercream recipes do not call for salt. I like to add a small amount to help balance all the flavors.
    • Unsalted butter ~ the butter is what takes the meringue to buttercream. I prefer unsalted butter as you then have complete control over how salty the buttercream tastes. For smbc the butter needs to be on the cool side of room temperature. If the butter is too warm the buttercream will be softer or more soupy {don't worry, we can most likely fix it}. Depending on the temperature of your kitchen, the butter probably doesn't need more than 1 hour of time on the counter before beginning the recipe.
    • Unsweetened cocoa powder ~ adds depth to the chocolate flavor. I use Hershey's.
    • Pure vanilla extract ~ also adds to the overall flavor.
    • Dark chocolate ~ use a baking chocolate bar and not chocolate chips. I like Callebaut chocolate, Ghirardelli or Trader Joe's Pound Plus. The dark chocolate pairs really nice in this buttercream, but milk chocolate will also work. You will melt the chocolate before starting the meringue to allow it to cool before adding it to the buttercream.

    before you begin, make sure all your tools are grease free

    bottle of white vinegar and a mixer whisk

    Grease is smbc's biggest enemy! To help ensure your success with this frosting recipe, I suggest highly recommend wiping down all your tools prior to beginning.

    I use white vinegar {lemon juice also works} and wipe down the mixing bowl, any whisks being used and any measuring tools. Plastic tools are not recommended as they can hold onto residual grease.

    why is this a small batch recipe?

    This recipe creates about 2 ยฝ to 3 cups of buttercream, which is a great amount for decorating a dozen cupcakes. You could also use a semi-naked decorating technique on a two layer 8" cake or a three layer 6" cake.

    The recipe easily doubles to make enough to decorate a three layer 6" cake, like the photo below.

    cake decorated with chocolate swiss meringue buttercream

    how to make chocolate Swiss meringue buttercream

    Start by melting the chocolate. Be sure to use a baking chocolate and not chocolate chips.  I make a double boiler by placing chopped chocolate in a bowl placed over a saucepan of simmering water {about an inch of water}.  Make sure the bottom of your bowl isn't touching the water. Once the melted and smooth, remove the bowl, wipe the bottom dry and set aside to cool.

    Then add the egg whites, brown sugar and kosher salt to the bowl of your stand mixer and whisk it all together. Place this bowl over the simmering water and whisk until the mixture is hot to touch, sugar is fully dissolved {you should not feel any granules when rubbed between your clean fingers} and itโ€™s a bit frothy, approximately 3 minutes.  {If you want to use a thermometer, 160ยฐF is what you are going for}. I make mine without a thermometer.

    brown sugar meringue for chocolate swiss meringue buttercream base in it's initial stage of being cooked
    middle stage of brown sugar meringue cooking
    brown sugar meringue looking frothy in the bowl when the cooking is complete

    When the meringue passes the dissolved sugar test or has reached 160ยฐF, remove the bowl from the pot, wipe the bottom dry and place it on your stand mixer fitted with the whisk attachment. I set my Kitchen Aid to speed 8 {medium-high} and whisk until the mixture has cooled and the meringue holds a stiff peak. This takes about 10 minutes.

    the meringue when it's almost to stiff peaks
    This is about 7 minutes of whisking. Not quite stiff peaks, but getting close.

    The photo below is what you want your meringue to look like. No droopy meringue here! At most this should take 10-15 minutes in a stand mixer. If your meringue doesn't hold a stiff peak it was likely affected by yolk in your egg whites or grease on your equipment. Sadly, if this happens you will have to start over.

    mixer whisk showing how stiff your peaks should be for chocolate swiss meringue buttercream

    At this point, feel the outside of the mixing bowl. It should be much cooler than when you started, close to room temperature. I always like to stick a clean finger into the meringue as well to see how it feels. If it's still quite warm, wait a few minutes {I do any dishes that have piled up at this point} before adding the butter.

    Now, switch the mixer to the paddle attachment and start adding the butter a tablespoon at a time. The butter should be still cool to the touch and not super soft. You likely don't need it to sit out for more than an hour before making smbc. Let each tablespoon of butter fully incorporate before adding the next tablespoon. {this will take you 10 or so minutes}. I use my Kitchen Aid on speed 4 for this portion.

    the meringue before the butter is added
    butter being added to the mixer with a knife

    This is when you will start to get nervous... after about one third of the butter is added the meringue starts to look soupy.

    Have no fear! This is very normal and if you had good stiff peaks on your meringue, all is going to be okay.

    the meringue looking soupy after a third of the butter has been added

    Once the second third of butter has been added, you are really going to start worrying and be sure that you've done something wrong. The mixture starts to appear curdled. Again, have no fear!

    the meringue after two thirds of the butter has been added; it usually looks curdled

    After the final third of butter has been added, you might be ready to throw the whole thing in the bin and cry thinking "I've completely ruined it"! Mine always looks super clumpy and ugly at this point.

    the meringue after all the butter has been added, the mixture looks very curdled

    Now stop the mixer and scrape up and down the sides of the bowl. Then add the cocoa powder {I use a little tea strainer to sift it as I add it to the buttercream}, followed by the vanilla and the cooled and melted chocolate.

    Start by mixing on low for 30-60 seconds, until the cocoa powder has been incorporated. Then turn the mixer back up to medium-high {8 on a Kitchen Aid} and walk away for 4-5 minutes.

    cocoa powder being sifted into the chocolate swiss meringue buttercream
    melted chocolate being added to the meringue

    When you return, the chocolate Swiss meringue buttercream should look like the photo below. Soft, silky, light and creamy. Go ahead and sneak a taste!

    silky chocolate swiss meringue buttercream in the mixing bowl

    I always like to use a spatula to mix the buttercream for a few minutes to help eliminate any air bubbles. This is especially helpful if you are hoping to get smooth sides on a cake.

    why is my Swiss meringue buttercream runny?

    Most likely your meringue wasn't cool enough before the butter was added. Or the butter was too soft and warm. In either case, as long as your meringue had stiff peaks to start, you can fix it. Place the mixing bowl in the refrigerator for 15-20 minutes and then rewhip the buttercream.

    If I am decorating a cake, I sometimes find the chocolate buttercream gets extra soft in the piping bag. The warmth of your hands and the room can contribute to this. If this happens, pop the piping bag into the refrigerator for about 5 minutes. The butter will cool down and give you a stiffer smbc. Don't leave it in for too long though, because it will become hard quickly.

    a glass cup filled with piped chocolate swiss meringue buttercream

    how do you store Swiss meringue buttercream?

    Swiss meringue buttercream can be kept at room temperature for 1-2 days or kept in the refrigerator for up to one week. You can also freeze it for up to three months in an airtight container.

    If you have frosted cupcakes {this simply vanilla cupcake recipe is delicious with it!} or a cake {also amazing on this chocolate malt cake recipe!} with smbc; I typically store them in the refrigerator until an hour or two before they will be served. I have also frozen frosted cakes and cupcakes and just let them come to room temperature before serving.

    Because smbc has a higher butter to sugar ratio, it will get extremely hard when it is cold.

    If freezing the buttercream, allow it to thaw to room temperature on the counter, then rewhip it before using it.

    can you make smbc ahead of time?

    If you make your chocolate Swiss meringue buttercream a day before you need it, store it covered on the counter. It most likely will need to be rewhipped prior to using it. If the buttercream separates and looks curdled again it's because it is too cold. You can set the buttercream over a pot of simmering water until you just start to see the edges melt and then rewhip it. I have also heard of people using a hair dryer to warm the sides of the bowl. {If your kitchen is very warm, the smbc may be back to the soupy stage and it will need about a 15-20 minute trip to the refrigerator before rewhipping it}.

    piped chocolate swiss meringue buttercream on a piece of parchment paper

    I hope you have found this post helpful! The first time I made Swiss meringue buttercream, I didn't even realize that's what I was making. But, from my first taste, I haven't been able to look back. {I made a white chocolate Swiss meringue buttercream the first time}. This method of buttercream is by far my very favorite!!

    Remember to snap a picture and tag me on Instagram if you make this Small Batch Chocolate Swiss Meringue Buttercream. It warms my heart to see you bring these recipes to life! Thank you for being here and happy baking!

    more buttercream recipes to try

    • Cookie Butter Cake {with Cookie Butter Swiss Meringue Buttercream}
    • Homemade Raspberry Cake {with White Chocolate Swiss Meringue Buttercream}
    • Homemade Vanilla Snack Cake {with my less sweet American buttercream}
    • Pink Velvet Cake {with Vanilla Swiss Meringue Buttercream}
    • Perfect Coconut Cake {with Coconut Swiss Meringue Buttercream}
    • Homemade Lemon Cupcakes with Berry Swiss Meringue Buttercream

    If you make this recipe {or any recipe!} from two sugar bugsย please come back and leave a review and a โญ๏ธโญ๏ธโญ๏ธโญ๏ธโญ๏ธ star rating.ย  I read every comment, and I LOVE hearing from you!

    Yield: 2.5 to 3 cups

    Small Batch Chocolate Swiss Meringue Buttercream

    swirled chocolate swiss meringue buttercream in a glass cup

    Silky, creamy, rich with chocolate and not overly sweet. It's the perfect frosting recipe for cakes and cupcakes! Made with a brown sugar meringue and both melted chocolate and cocoa powder, it's sure to become a favorite!

    Prep Time 25 minutes
    Cook Time 10 minutes
    Total Time 35 minutes

    Ingredients

    • 4 ounces good quality chocolate*, melted and cooled (112g)
    • 3 large egg whites (approximately 90-100g)
    • ยพ cup brown sugar (150g)
    • ยฝ teaspoon kosher salt
    • 1 cup (2 sticks) unsalted butter, room temperature** (226g)
    • 2 tablespoons unsweetened cocoa powder (10g)
    • 1 teaspoon pure vanilla extract

    Instructions

      1. Wipe the bowl, the whisk of your stand mixer and the whisk you are using to mix with vinegar or lemon juice to make sure it is grease free or your egg whites may not stiffen.
      2. Melt the chocolate {I typically use dark chocolate, but milk chocolate also works}. Be sure to use a baking chocolate and not chocolate chips. I make a double boiler by placing chopped chocolate in a bowl placed over a saucepan of simmering water. Once melted and smooth, remove the bowl, wipe the bottom dry and set aside to cool.
      3. Whisk egg whites, brown sugar and salt in the bowl of your stand mixer. Whisk and heat mixture over saucepan of simmering water until hot to touch, sugar is fully dissolved {you should not feel any granules when rubbed between your fingers} and it’s a bit frothy, approximately 3 minutes. {If you want to use a thermometer, 160°F is what you are going for}.
      4. Remove the bowl from the saucepan and wipe the bottom dry. Place on your stand mixer and whisk on medium-high {I use speed 8 on my Kitchen Aid Mixer} until the mixture is cool and the meringue holds a stiff peak {the outside of your bowl should also be cool}, approximately 10 minutes. If the bowl and meringue still feel quite warm {more than room temperature}, wait a few minutes for it to cool down. If you add the butter with the mixture too warm, the butter will just melt.
      5. Switch to the paddle attachment and lower the speed to medium {I use speed 4 the majority of the time, but 6 also works} and add the butter, one tablespoon at a time, letting the butter fully incorporate before adding more. ***
      6. Once all butter is incorporated, scrape down sides of the bowl and add the cocoa powder {I sift it in}, vanilla and melted and cooled chocolate and whip until a thick, creamy whipped consistency is reached. Start on a low speed for about 1 minute, then stop and scrape up and down the bowl. Turn the mixer up to medium-high {I use speed 8} and whip for 4-5 minutes until the buttercream is silky and smooth.

    Notes

    * I typically use dark chocolate, but milk chocolate also works. Be sure to use baking bars and NOT chocolate chips.

    ** Your butter only needs about 1 hour of time (depending on temperature of your kitchen) to get to room temperature. You want the butter still slightly cool to the touch and not overly warm or soft. {If you are measuring, it should be around 60ยฐF}.

    *** At some point your buttercream may be a sloppy mess. It may even look curdled. Do not fear {if you had good stiff peaks to start}, just keep whipping and it will magically come together into a beautiful whipped frosting. If you feel it is too soupy, place the mixture in the refrigerator for 20 minutes and then re-whip

    Nutrition Information:

    Yield:

    12

    Serving Size:

    1

    Amount Per Serving: Calories: 111Total Fat: 4gSaturated Fat: 2gTrans Fat: 0gUnsaturated Fat: 1gCholesterol: 5mgSodium: 84mgCarbohydrates: 17gFiber: 0gSugar: 16gProtein: 2g

    The nutrition information is an estimate and may not be entirely accurate.
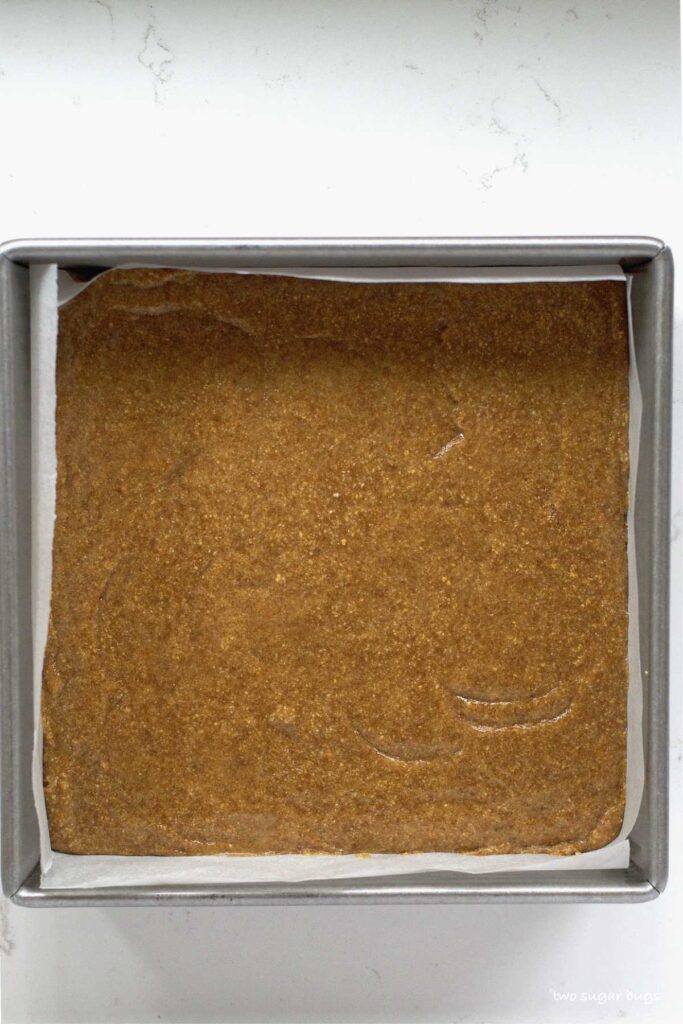
    Did you make this recipe?

    Please make my day and PIN to Pinterest and share a photo on Instagram ~ making sure to tag @twosugarbugs! THANK YOU!!

    © Tasia
    Cuisine: Swiss / Category: Frostings

    No Chill Malted Chocolate Chip Cookies with Melted Butter

    malted chocolate chip cookie sitting on top of a glass of milk

    You will love this easy and quick malted chocolate chip cookies recipe! It uses one bowl, melted butter and requires no chill time! Get ready to enjoy this simple recipe that creates soft and chewy cookies in about 20 minutes.

    chocolate chip cookie sitting on a glass of milk

    Disclosure | This post may contain affiliate links. As an Amazon Associate I earn from qualifying purchases.

    Guess what? I'm back with another quick and easy cookie recipe. While chilling cookie dough is still needed for some recipes {like my oatmeal peanut butter chocolate chip cookies}; I've created another one that's ready in about 20 minutes. And who doesn't love a simple chocolate chip cookie?

    you will love malted chocolate chip cookies because...

    • A one bowl recipe; less dishes for the win!
    • No waiting for ingredients to come to room temperature.
    • This recipe uses melted butter.
    • The addition of malted milk powder creates soft and chewy chocolate chip cookies.
    • No chill time!!!
    stack of cookies with a glass of milk

    what ingredients do I need?

    ingredients for malted chocolate chip cookies
    • Unsalted butter ~ no need to let it come to room temperature, we are going to melt it.
    • Granulated sugar ~ adds sweetness and some structure.
    • Brown sugar ~ either light or dark brown sugar work here. Although I prefer dark.
    • Egg ~ just one large.
    • Vinegar ~ helps to activate the baking soda. It also gives a little lift to the cookies and lets us bake them without chilling the dough.
    • Pure vanilla extract ~ adds flavor.
    • Baking soda ~ to add some thickness.
    • Kosher salt ~ to balance the sweet.
    • All-purpose flour ~ for structure.
    • Malted milk powder ~ adds flavor and softness to the cookies. I tested with both Carnation Original Malted Milk and Ovaltine Classic Malt. Both work, but the Ovaltine gives the cookies a slightly darker color.
    • Dark and milk chocolate ~ a combination of chocolate chips {Ghirardelli milk chocolate} and a chopped chocolate bar {semi-sweet or dark}. You could easily swap whatever chocolates you prefer and do all chips, but I really like the melty pools of chocolate you get with a chopped chocolate bar.

    video tutorial: how to make malted chocolate chip cookies

    let's make these quick cookies!

    Start by melting the butter. Then mix in both sugars until fully incorporated, it may take a few minutes for the butter and sugars to combine. Then add the egg, vanilla and vinegar; again mixing until combined.

    • melted butter in a bowl with a spatula
    • wet ingredients for malted chocolate chip cookies in a bowl with a spatula

    Next mix in the baking soda and kosher salt followed by the flour and malted milk powder.

    • baking soda and kosher salt on top of wet ingredients in a bowl
    • flour and malt powder added to cookie dough, mixed in and showing a few streaks of flour remaining

    When some streaks of flour are still showing, mix in the chocolate chips and chopped chocolate. The malted milk does make the texture of the dough a little different than traditional chocolate chip cookie dough. It will be thick, but shouldn't be sticky.

    Then use about 2 tablespoons of dough per cookie and place on a parchment or silicone lined baking sheet. I use my size 30 scoop. Bake for about 10-14 minutes, the edges will be set, but the centers may still look a little soft. This is what we want!

    • malted chocolate chip cookie dough on a parchment lined baking sheet
    • baked cookies cooling on a baking sheet pan

    Mr. two sugar bugs and I have come to love a sprinkle of flaky sea salt on top of our cookies. The girls prefer them without. If you want to try salt, sprinkle it on when the cookies are hot out of the oven. I like Maldon Sea Salt Flakes.

    Remember to pin this recipe to Pinterest! Use the button on the recipe card or the share buttons on the side or bottom of this page.

    malted chocolate chip cookies on a wire cooling rack

    how to make soft chocolate chip cookies

    In my experience, the number one reason cookies aren't soft is because they are over baked. Cookies will continue to bake even after you pull them out of the oven, so you want to pull them out even when they look a little under done in the middle.

    Brown sugar also lends a softer and more moist cookie, so I like a higher amount of brown sugar to granulated sugar.

    The malted milk powder also adds moistness. {If you need a crazy moist chocolate cake you must try my chocolate malt cake recipe}!

    is there such a thing as the best chocolate chip cookie?

    Yes, but guess what? My favorite cookie quite possibly will be different from yours. Simply said, the best chocolate chip cookies is the one YOU love best. My chocolate chippers recipe is one my whole family adores {and lots of friends too}! But this malted version with melted butter has been made on repeat for weeks now and may be inching it's way to the front of the line.

    If you love a cookie with a subtle crisp exterior and a soft and chewy center, this cookie is for you.

    pile of chocolate chip cookies on a wire cooling rack with a glass of milk

    Remember to snap a picture and tag me on Instagram if you make these No Chill Malted Chocolate Chip Cookies with Melted Butter. It warms my heart to see you bring these recipes to life! Thank you for being here and happy baking!

    more quick and easy cookie recipes to try

    • Sprinkle Cookies
    • Red Velvet Sugar Cookies
    • Butterscotch Pretzel Cookies
    • Chocolate Confetti Cookies
    • Easy German Chocolate Cookies

    If you make this recipe {or any recipe!} from two sugar bugsย please come back and leave a review and a โญ๏ธโญ๏ธโญ๏ธโญ๏ธโญ๏ธ star rating.ย  I read every comment, and I LOVE hearing from you!

    Yield: 16 cookies

    No Chill Chocolate Chip Cookies with Melted Butter

    malted chocolate chip cookie sitting on top of a glass of milk

    You will love this easy and quick malted chocolate chip cookie recipe! It uses one bowl, melted butter and requires no chill time! Get ready to enjoy this simple recipe that creates soft and chewy cookies in about 20 minutes.

    Prep Time 10 minutes
    Bake Time 14 minutes
    Total Time 24 minutes

    Ingredients

    • ยฝ cup unsalted butter, melted (113g)
    • ยฝ cup dark brown sugar (100g)
    • โ…“ cup granulated sugar (67g)
    • 1 large egg
    • 2 teaspoons pure vanilla extract
    • 1 teaspoon vinegar*
    • 1 teaspoon baking soda
    • ยฝ teaspoon kosher salt
    • 1 ยพ cups all-purpose flour (220g)
    • ยฝ cup malted milk powder (56g)
    • ยฝ cup semi-sweet/dark chocolate bar, chopped (90g)
    • ยฝ cup milk chocolate chips (90g)
    • Flaky sea salt, optional for sprinkling over the finished cookies

    Instructions

    1. Preheat oven to 350°F and prepare two sheet pans with parchment paper or a silicone baking mat and set aside.
    2. In a medium to large bowl, melt the butter. Add both sugars and mix until fully incorporated.
    3. Add the egg, vanilla and vinegar*. Stir until the mixture is combined and smooth.
    4. Sprinkle the baking soda and kosher salt over the mixture and stir well. Then add the flour and malted milk powder and stir until just a few streaks of flour remain. Fold in the both the chocolate chips and chopped chocolate. If desired, save aside a few of the chocolate chunks to press into the tops of the cookies before baking.
    5. Use about 2 tablespoons of dough per cookie {I like using a size 30 scoop} and place the dough onto the prepared baking sheets, spacing them about 2 inches apart. You should get about 16-18 cookies. Press the chocolate chunks you set aside into the tops of the cookie dough now, if desired.
    6. Bake the cookies for 10-14 minutes, until the edges are set. Allow the cookies to rest on the pan 2 minutes, then remove to a wire rack to cool completely. Sprinkle with sea salt now, if desired.

    Notes

    Store cookies in an airtight container at room temperature for 4-5 days. The cookies also freeze well for up to three months.

    *Iโ€™ve tested the recipe with both white vinegar and apple cider vinegar, they work interchangeably

    Nutrition Information:

    Yield:

    16

    Serving Size:

    1

    Amount Per Serving: Calories: 264Total Fat: 11gSaturated Fat: 6gTrans Fat: 0gUnsaturated Fat: 4gCholesterol: 29mgSodium: 193mgCarbohydrates: 38gFiber: 2gSugar: 23gProtein: 3g

    The nutrition information is an estimate and may not be entirely accurate.
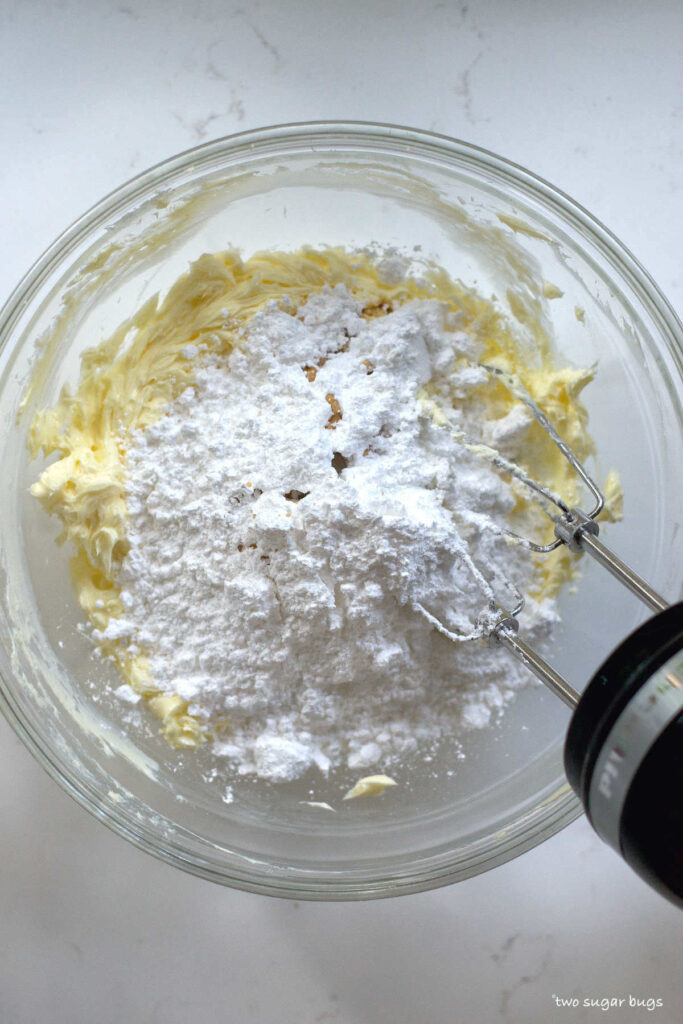
    Did you make this recipe?

    Please make my day and PIN to Pinterest and share a photo on Instagram ~ making sure to tag @twosugarbugs! THANK YOU!!

    © Tasia
    Cuisine: American / Category: Cookies
    • « Previous Page
    • 1
    • …
    • 24
    • 25
    • 26
    • 27
    • 28
    • …
    • 39
    • Next Page »
    welcome graphic

    Hi, I'm Tasia, a self-taught baker and enthusiastic home cook with over 25 years experience in the kitchen! I'm here to inspire you to have fun while creating food from scratch. I make approachable and nostalgic recipes for busy bakers that you will want to make again and again. The recipes you find here will mostly be sweet and sometimes savory.

    More about me โ†’

    https://thefeedfeed.com/

    Reader Favorite Recipes

    • stack of cookies with the sun hitting them
      Espresso Brown Butter Toffee Cookies
    • buttercream sugar cookie with sprinkles
      Buttercream Sugar Cookies
    • cookies and sprinkles on a cooling rack
      Sprinkle Cookies
    • slice of cookie butter cake on a plate with a fork
      Moist Cookie Butter Cake

    ยฉtwo sugar bugs.ย  All images and content are copyright protected.ย  Please do not use our images without prior permission.ย  If you would like to republish a two sugar bugs recipe, please rewrite the recipe in your own words and link back to the blog post and one to the home page. ย See my privacy policyย for full details.
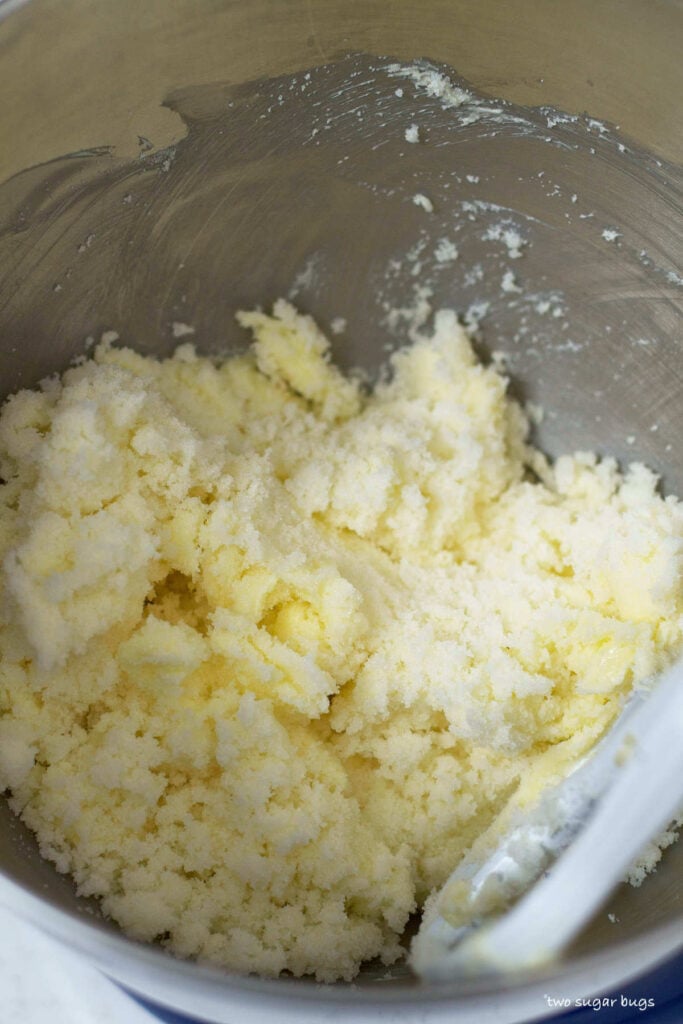
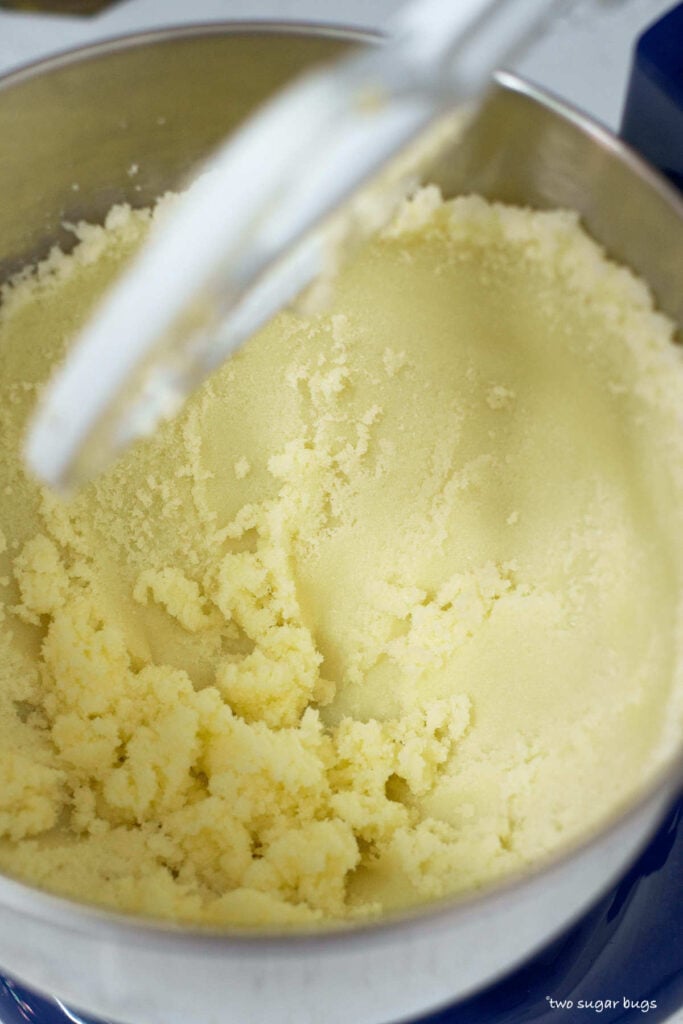
    Footer

    โ†‘ back to top

    About

    • Meet Tasia
    • Privacy Policy
    • Comment Policy
    • Terms & Conditions
    • Disclosure

    Shop

    • My favorite kitchen supplies via my Amazon Store

    Contact

    • Work with Me
    • Come Say hello
    • Sign Up! for emails and updates

    All images and content are copyright protected.  Please do not use our images without prior permission. 
    ยฉ 2026 two sugar bugs. All rights reserved.