

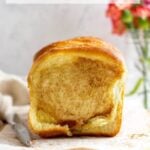
Ready to make homemade bread? This easy, sweet pull apart bread recipe is made from scratch and is simpler to make than you think. Can easily be made savory with cheese and herbs. The possibilities are endless!
Disclosure | This post may contain affiliate links. As an Amazon Associate I earn from qualifying purchases.
This is one of the most requested recipes from my family. And I think my first bread recipe with yeast on the blog. I've made this dough more times than I can tell you over the last five+ years and it's a very forgiving dough.
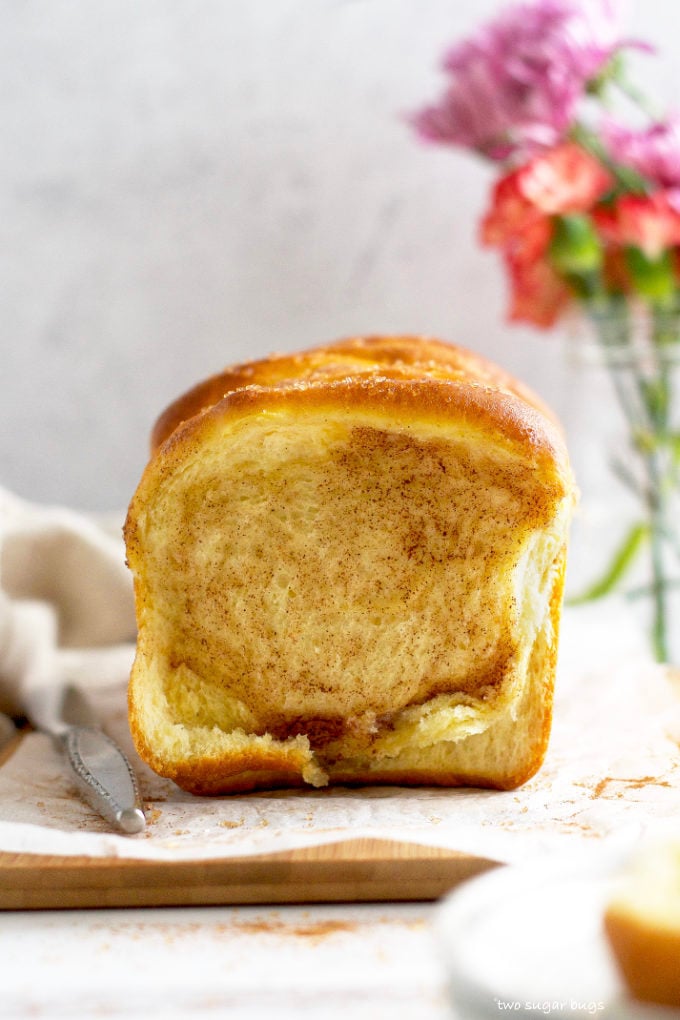
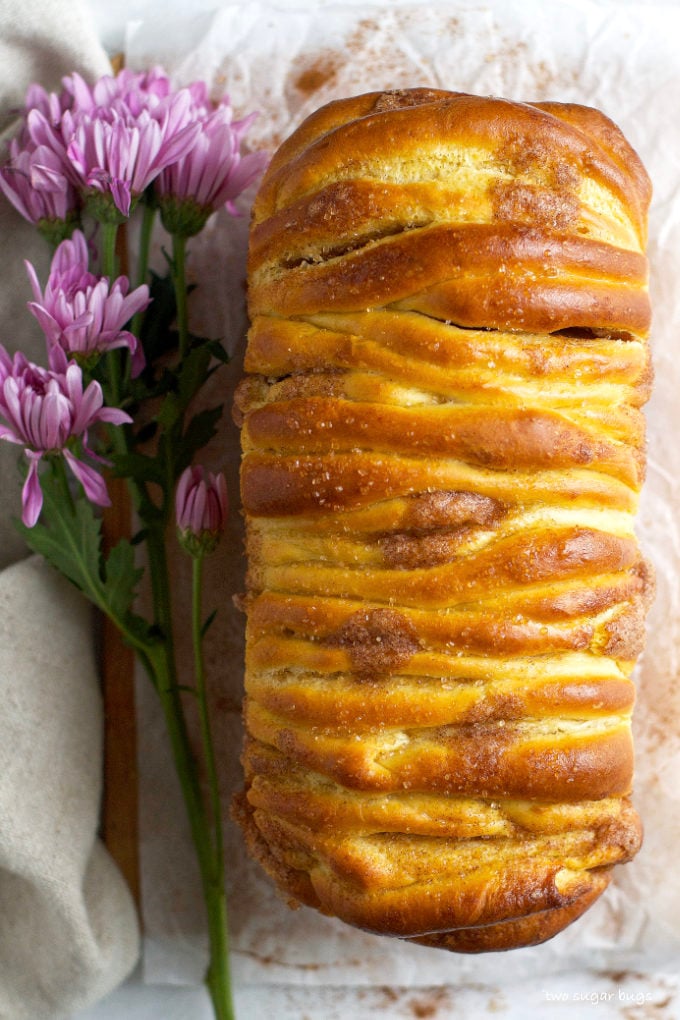
My family loves it sweet with cinnamon sugar or vanilla sugar. But Big E always asks for a savory version with cheese and herbs. I've always called this type of bread loaf pull apart bread, but it's also known as bubble bread, tear and share bread or monkey bread. We are going to make this one from scratch and I know you will love how easy it is to make!
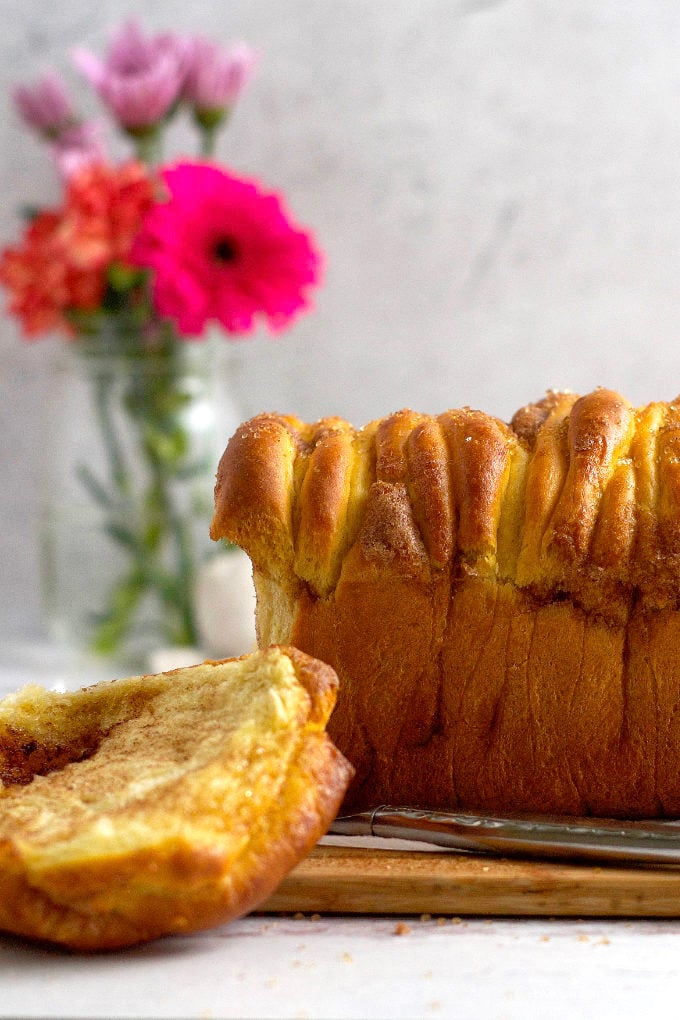
The bread dough comes together quickly and does two rises; the first for one hour and the second for 30-45 minutes. You choose how to make it ~ sweet or savory. Be sure to check out the comments in the recipe card with ideas for several different variations. Then dig into this soft, fluffy and flaky bread and watch it disappear before your eyes.
what ingredients do I need?
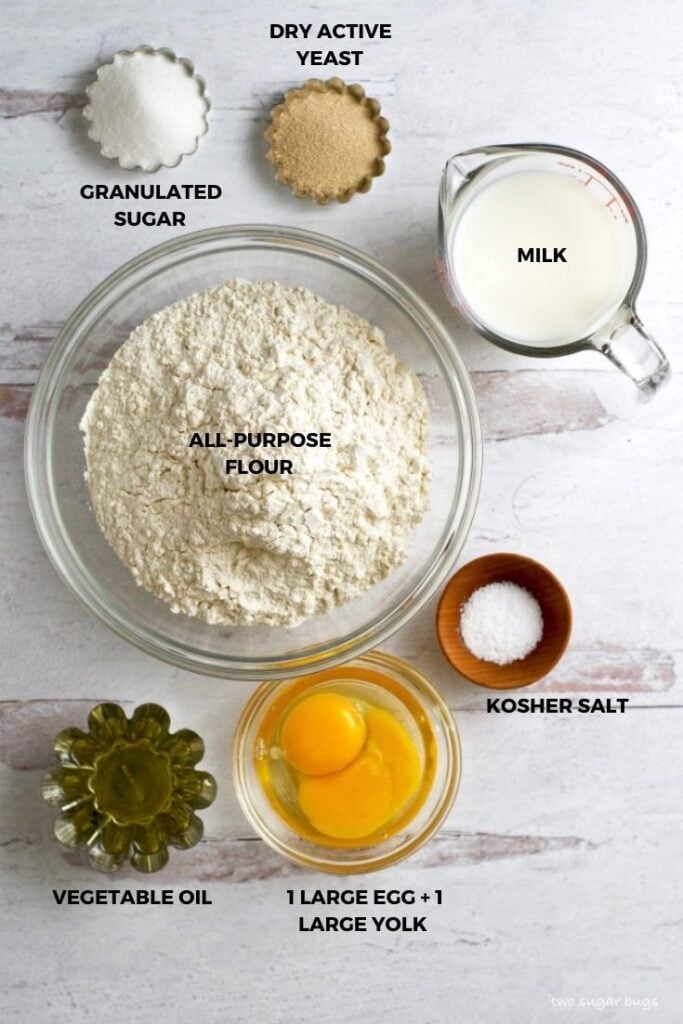
Seven simple ingredients are needed for the bread dough.
- Granulated sugar
- Dry active yeast
- Milk {warmed}
- All-purpose flour
- Kosher salt
- Large egg plus one large yolk
- Vegetable oil
What is the ideal temperature for milk when making bread?
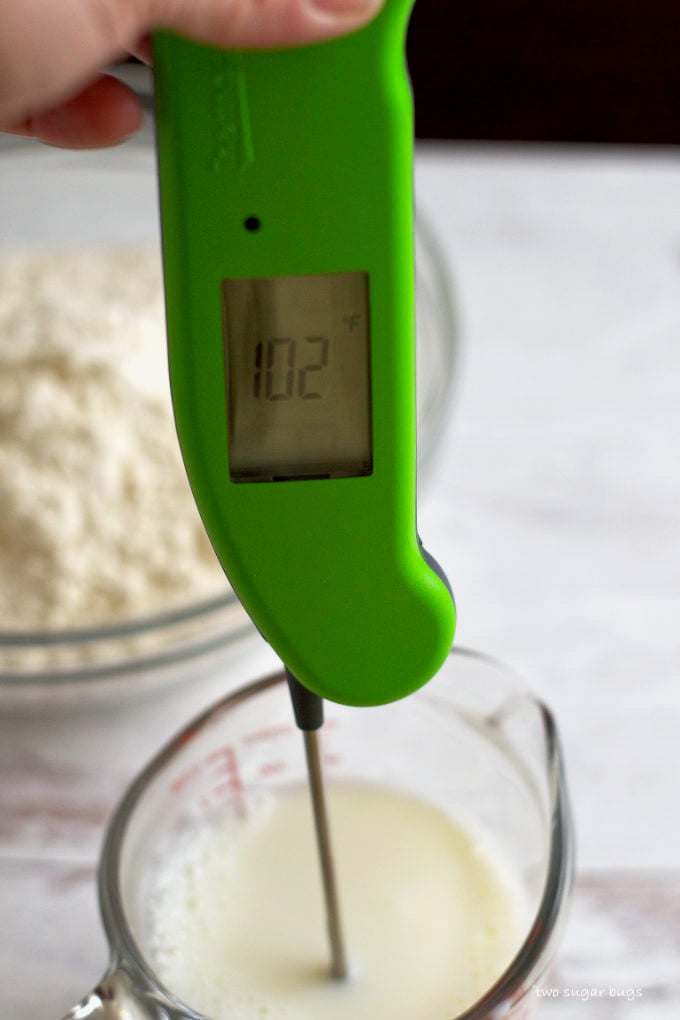
Ideally, you want the milk between 100-110°F {1% milk is what I use}. I use my ThermoWorks Thermapen for a quick and easy temperature reading. Using a thermometer is the most accurate way to determine the temperature of your milk. Any thermometer that reads between 75°-135°F will work.
If the milk is too warm, you run the risk of killing the yeast. If the milk is too cold, the yeast won't activate and the bread may rise too slowly or not at all.
let's make this bread dough!
Is it just me? I find there is something about making bread with just a bowl and spoon. Then kneading it by hand. No fancy equipment needed.
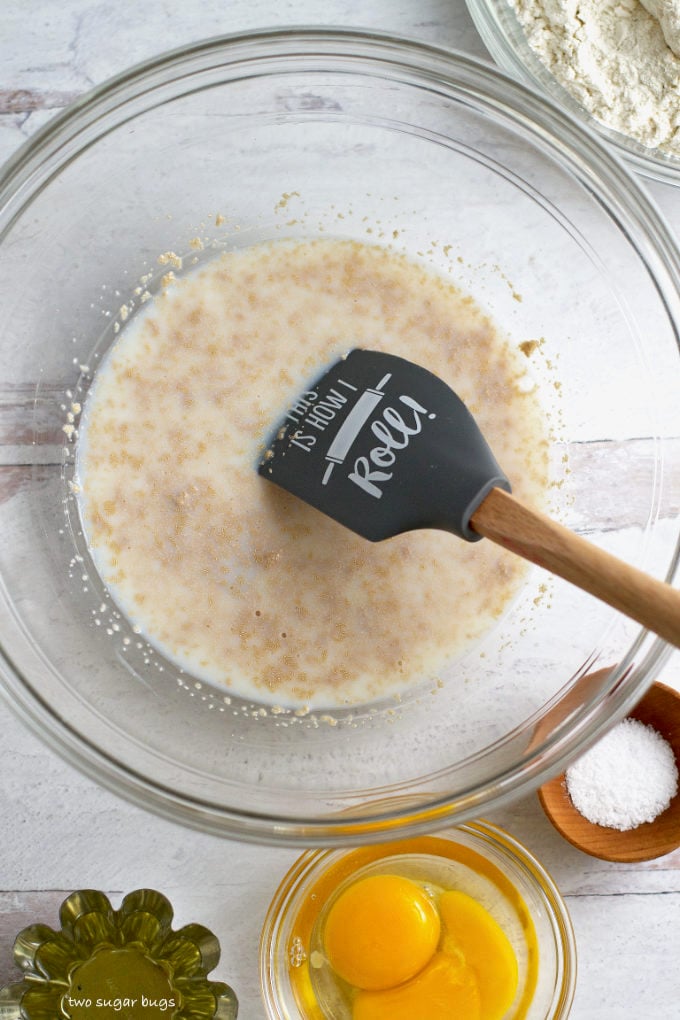
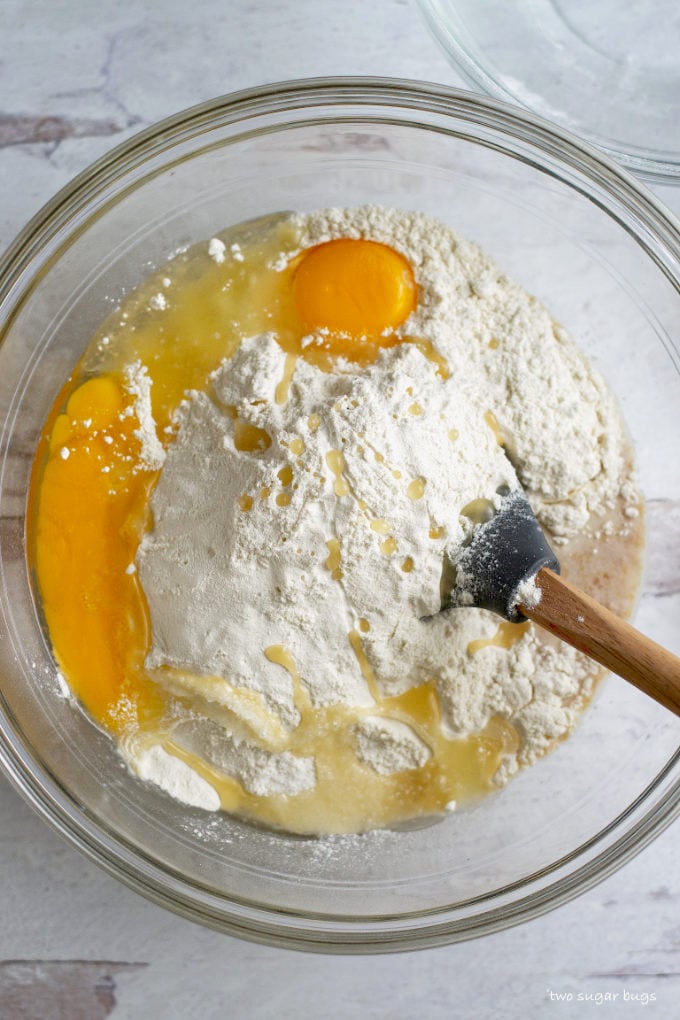
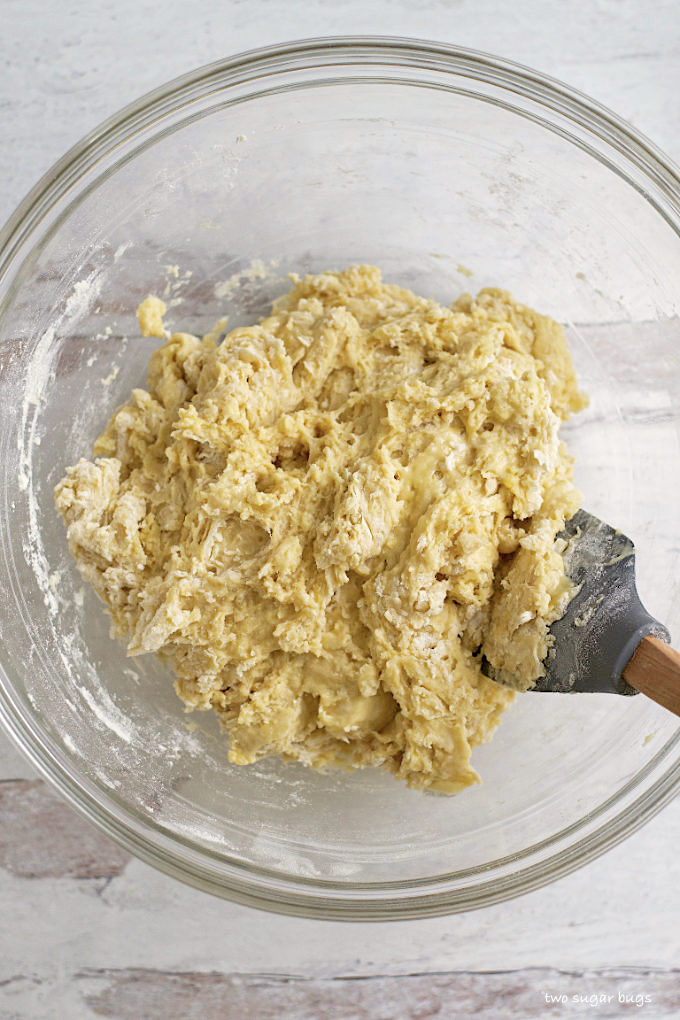
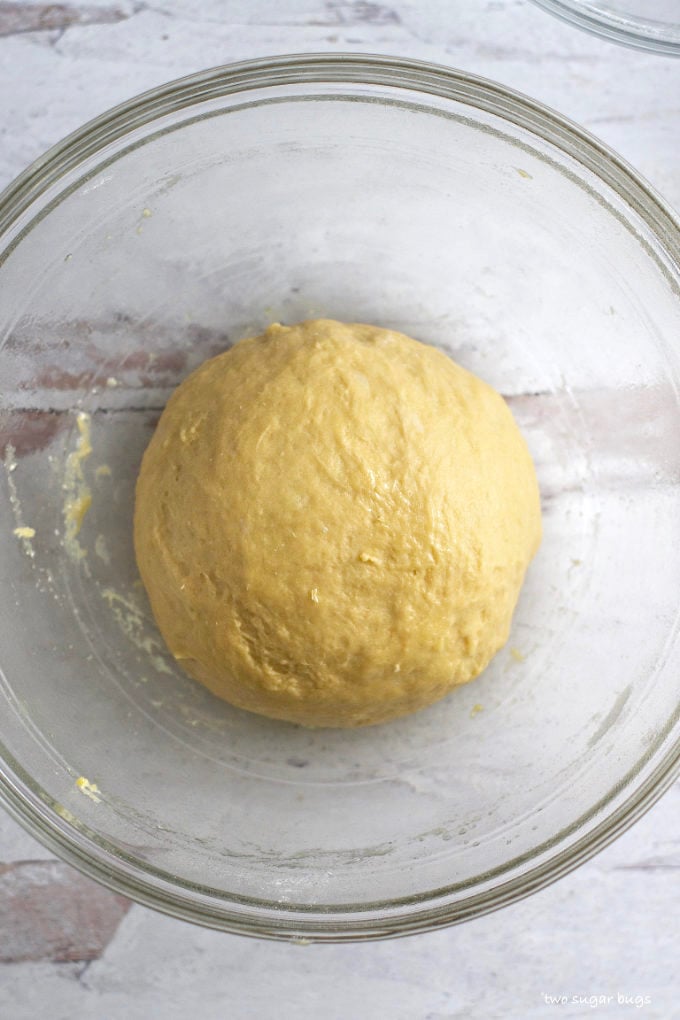
Start by placing the yeast and sugar in a bowl. Then add the warm milk and give it a stir together. Add the flour, kosher salt, egg and egg yolk and oil and mix until a shaggy, soft dough is created.
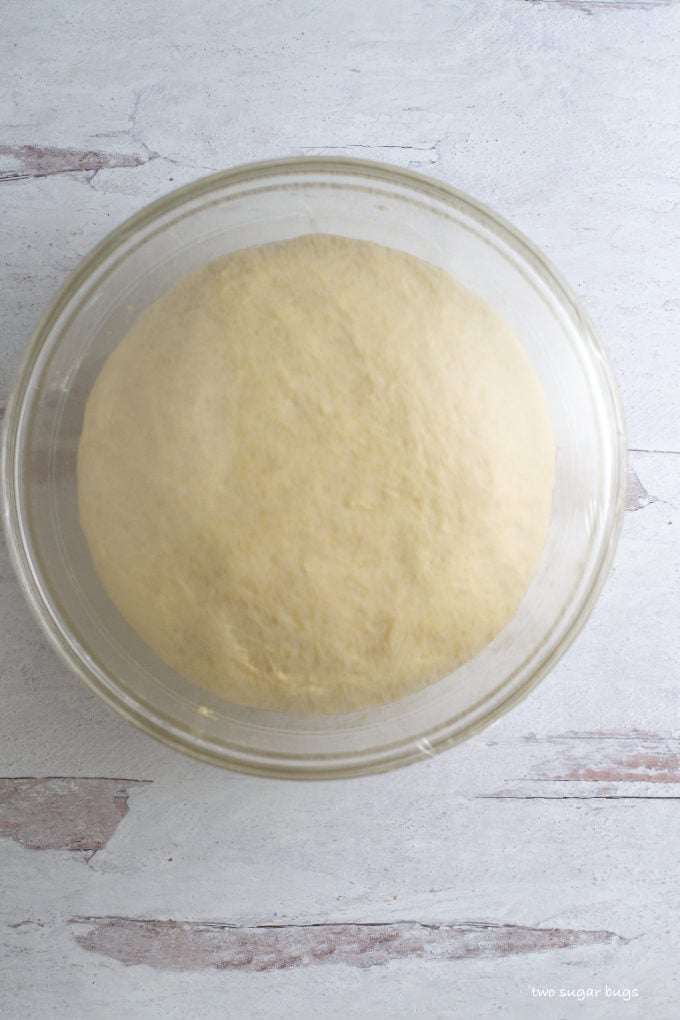
Once the dough has come together, scrape the dough onto a floured surface and knead until smooth and elastic {you should achieve this in 8-10 minutes}. Place the kneaded dough back in the bowl {no need to clean it, but grease the bowl}. Then cover and place in a warm spot to rise about 1 hour, until doubled in size.
If your kitchen is on the cooler side {like mine}, you can create a warm environment in your oven for proofing the bread. I use our Breville toaster oven and preheat it to the lowest setting, which is 120°F. Once it reaches temperature, I turn off the oven and leave the door closed. When the pull apart bread dough is ready to proof, place it in the slightly warm oven and close the door.
time to put this tasty loaf together
While the dough is in it's first rise, prepare the cinnamon sugar filling and the loaf pan.
When the dough has doubled in size, remove the dough from the bowl. I like to use a soft, rounded plastic bench scraper to release it from my bowl. Next divide the dough into 12 pieces using the same bench scraper. They don't have to be perfectly uniform, but try to keep them mostly the same size.
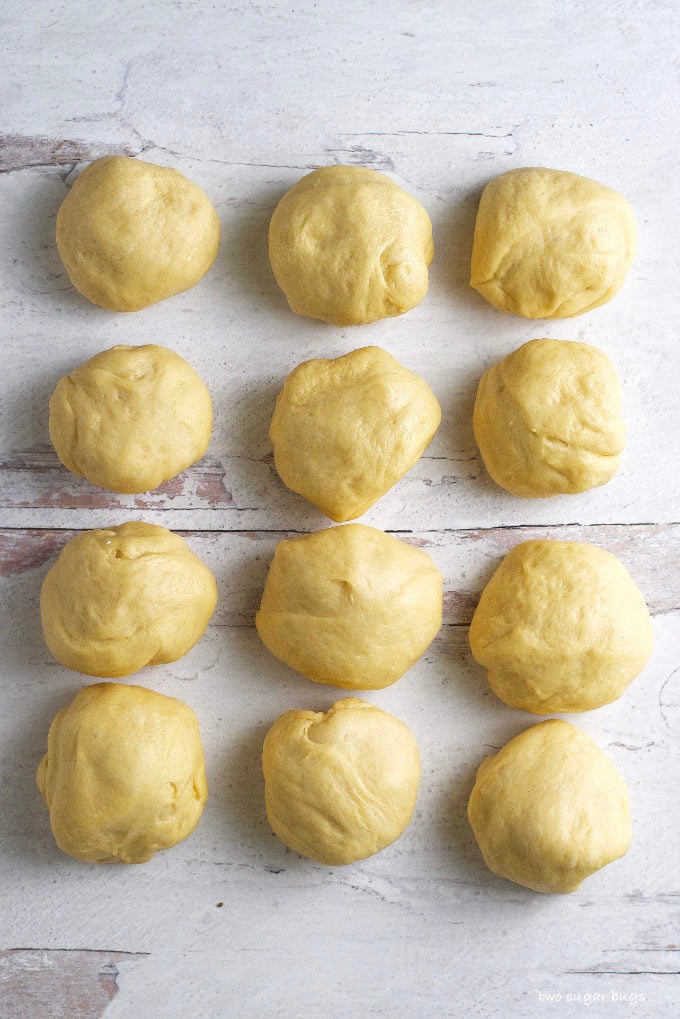
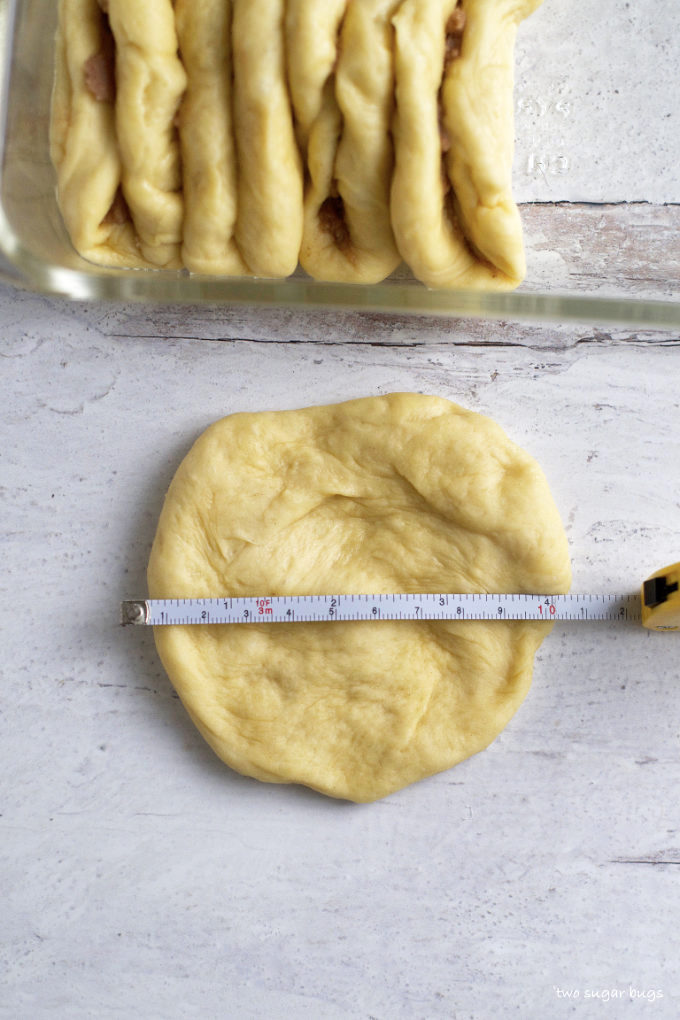
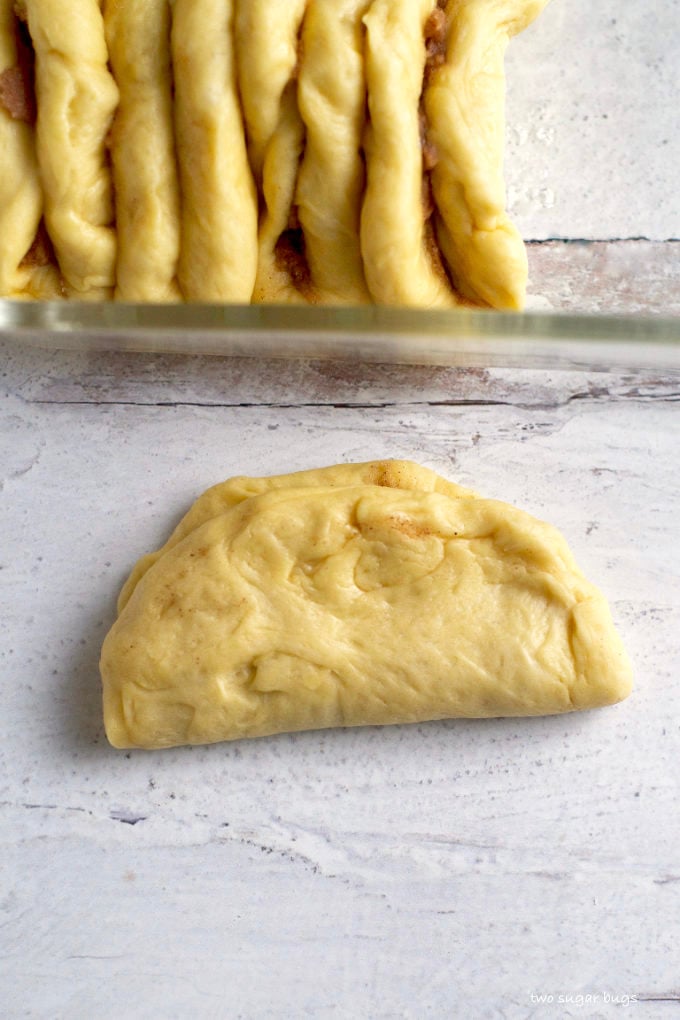
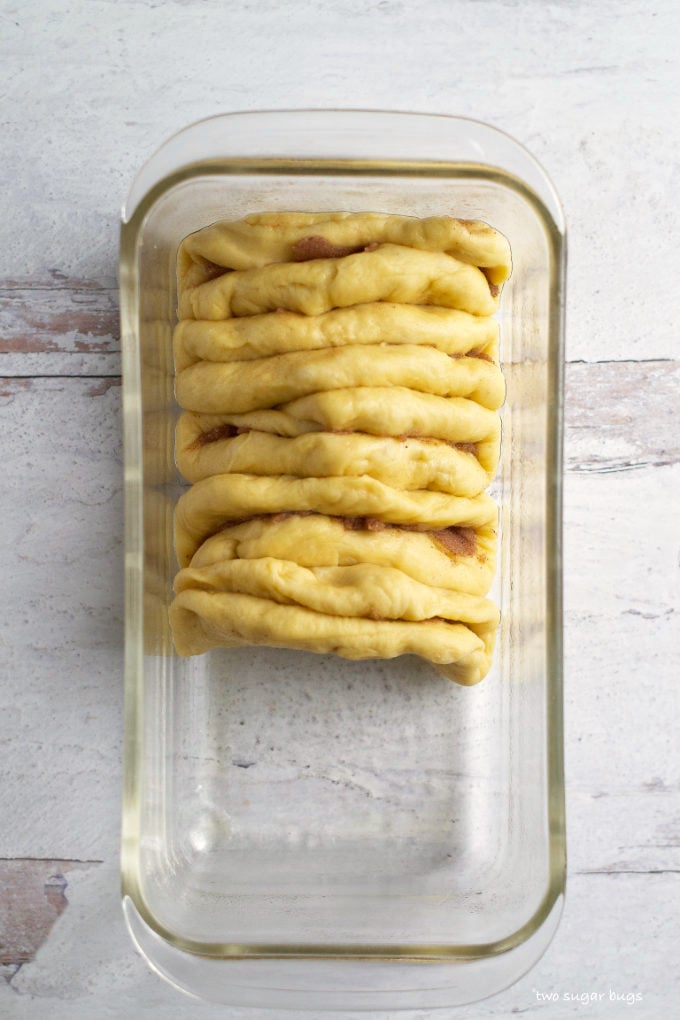
Use your hands to flatten each piece of dough into a circle about 4 inches in diameter. Then top with a heaping teaspoon of the cinnamon sugar mixture. Fold the dough in half and place the dough flat side down into the prepared loaf pan. Continue until all 12 pieces of dough have been added to the pan.

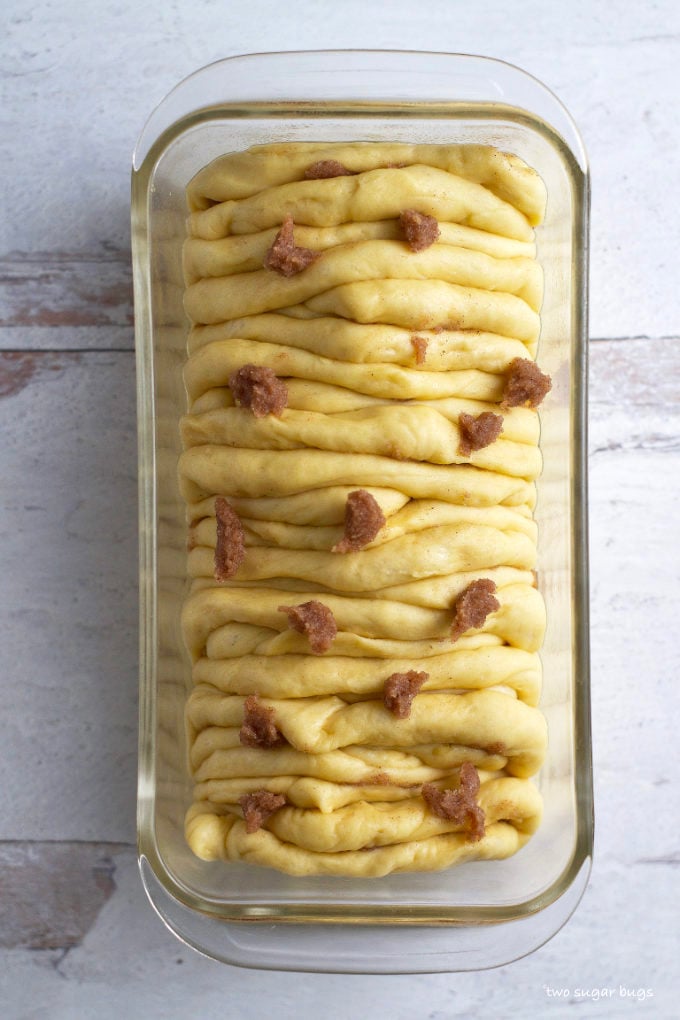
If you have any remaining cinnamon sugar mixture, you can dollop it over the top of the bread dough.
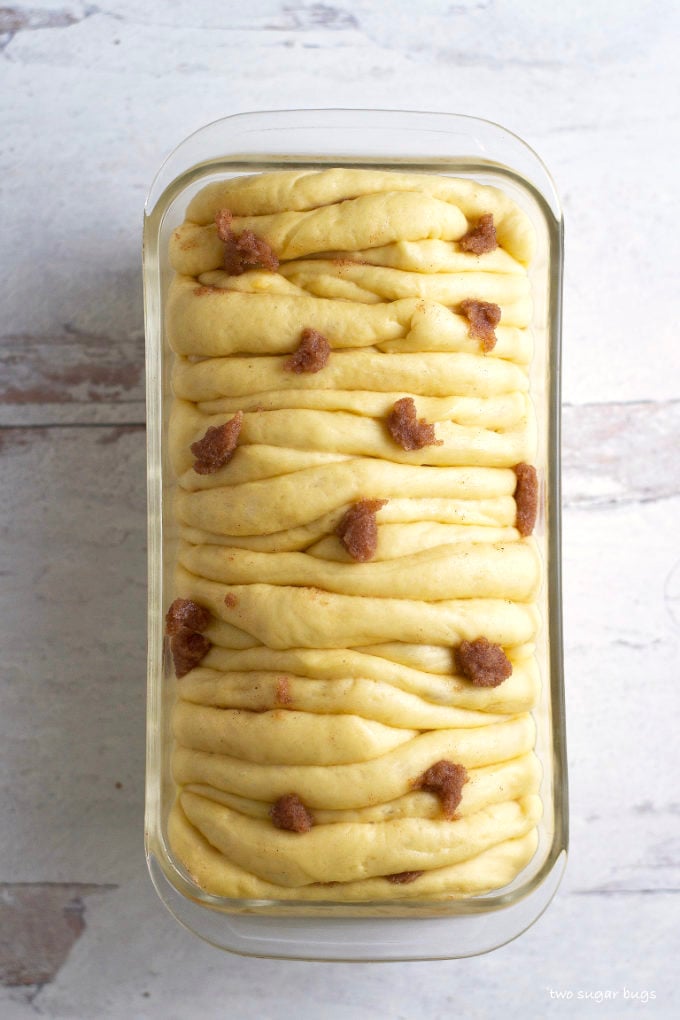
Now place the dough back in a warm spot and let it rise a second time, about 30-45 minutes. The dough will be ready to bake once it reaches the top of the pan.
When the dough is close to the top of the pan, preheat the oven. If the dough is proofing in your oven, be sure to remove it before turning the oven on to preheat!
how do I know when my pull apart bread is done?
Bake until the loaf is golden brown and the bread is baked through. The internal temperature should be 190°F, if you want to be sure it's done. {I check the bread about 15 minutes into baking and if the top is already browning quickly, lightly cover the top with a piece of foil}.
Remember your oven is different than mine and baking times may vary slightly. If you don't have an oven thermometer, you may not be baking at the temperature you think you are. This is the thermometer I have in my oven.
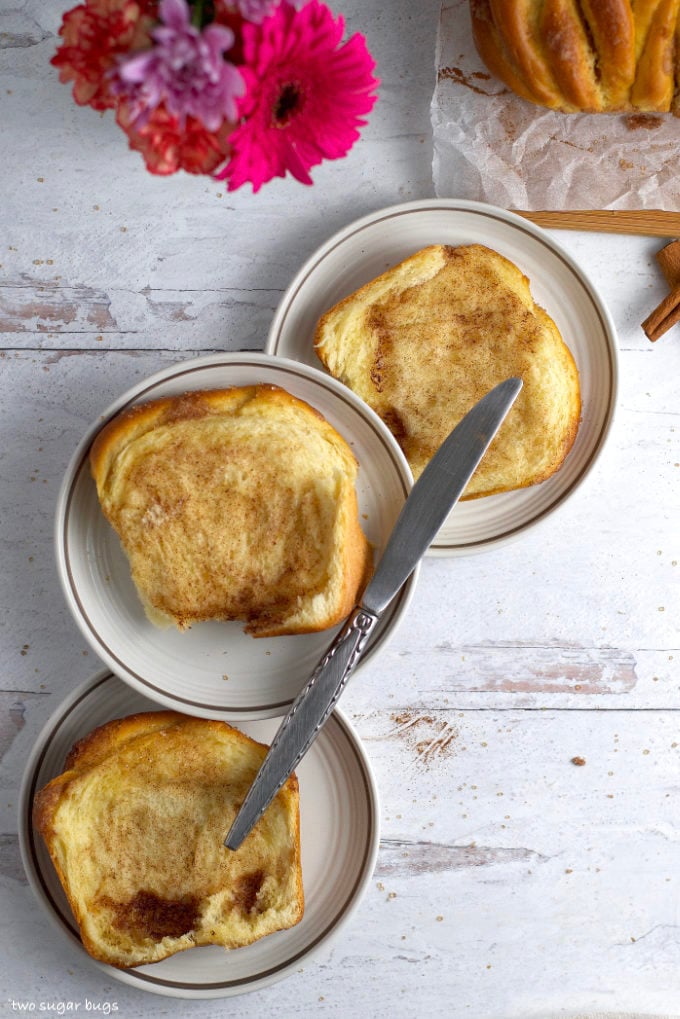
how to serve this sweet pull apart bread
You can serve this sweet bread as a breakfast item or a dessert. Or even a midnight snack. 😉. The recipe has been tested on both adults and kids and it pleases everyone. If you are looking for other variations, see recipe card comments with ideas for other fillings.
Remember to snap a picture and tag me on Instagram if you make this Easy Sweet Pull Apart Bread. It warms my heart to see you bring these recipes to life! Thank you for being here and happy baking!
more bread recipes to try
- Black Pepper Focaccia
- Blueberry Zucchini Bread
- Peanut Butter Oat Banana Bread
- Healthier Chocolate Zucchini Bread
- Apple Cider Banana Bread
- Cornbread Donuts
If you make this recipe {or any recipe!} from two sugar bugs please come back and leave a review and a ⭐️⭐️⭐️⭐️⭐️ star rating. I read every comment, and I LOVE hearing from you!
Easy Sweet Pull Apart Bread (from scratch)
recipe created and tested by:
I highly recommend using weight (metric) measurements when available for more accuracy and the best results.
Please note
When using 2x or 3x ingredients, the grams in parenthesis DO NOT adjust, you will have to manually do that.
Ingredients
pull apart bread
- 2 tablespoons granulated sugar (24g)
- 2 teaspoons active dry yeast
- ¾ cup warm milk 100-110°F (180mL)
- 3 cups all-purpose flour (375g) plus more for kneading
- 1 teaspoon kosher salt
- 1 large egg plus one large egg yolk
- 2 tablespoons vegetable oil (30mL)
cinnamon sugar filling*
- ¼ cup unsalted butter extra soft butter (57g)
- ¼ cup plus 2 tablespoons granulated sugar (75g)
- 2 teaspoons ground cinnamon
Instructions
- {When my kitchen is cold, I like to turn on my Breville toaster oven to 120°F while I am mixing and kneading the dough. Turn it off when it reaches temperature and keep the door closed. This creates a warm environment for letting the dough rise}
- In a medium to large bowl add the sugar (2 tablespoons), yeast (two teaspoons) and warm milk (¾ cup/180mL) and give it a little stir. Add the flour ( 3 cups/375g), salt, egg and egg yolk (1 large+1 large yolk) and oil (2 tablespoons/30mL) and mix until a soft dough is formed.
- Scrape the dough onto a floured surface and knead until smooth and elastic, about 10 minutes. I prefer to do this by hand, but you can also use a stand mixer with the dough hook. Add flour as necessary, but try to add as little as possible.
- Grease the bowl you mixed the dough in (no need to wash it) and place the dough in the bowl, cover and let rise about 1 hour (I place it in the barely warm toaster oven), or until double in size.
- While the dough is rising, prepare the filling. Add extra soft butter (¼ cup/57g)¼to a small bowl and stir in the sugar (¼ cup + 2 tablespoons/75g) and cinnamon (2 teaspoons) until well blended. Set aside.
- Grease a loaf pan with butter or cooking spray and set aside. (A standard glass or metal pan works)
- Remove the dough from the bowl and divide it into 12 pieces. They don’t have to be perfect, but try to make the pieces fairly uniform in size. Using your hands, take a piece of dough and flatten it into a circle about 4 inches in diameter, then top with a heaping teaspoon of the cinnamon sugar filling, spreading it over the dough.
- Then fold the dough in half, creating a semi-circle and place the dough flat side down into the prepared loaf pan (see photos in the post). Continue until all 12 pieces of dough have been added to the pan. If you have any remaining cinnamon sugar filling, you can dollop it over the top of the dough.
- Place the dough back in your warm spot and allow it to rise a second time, about 30 to 45 minutes. You want the dough to rise to the top of the loaf pan. Keep an eye on it and when it’s close to the top of the pan, preheat the oven to 350°F.
- Bake for about 30 minutes, until it’s golden brown. If the top is browning too quickly, lightly tent the top of the bread with a piece of foil (I check about 15 minutes into the baking time).
- When the bread is done, remove the loaf from the oven and place the pan on a wire cooling rack. After 10-15 minutes, remove the bread from the pan and serve.
Notes
*Vanilla sugar filling: use the same amount of butter, ¼ cup plus 2 tablespoons of granulated sugar and 1 teaspoon vanilla bean paste {pure vanilla extract also works}.
*Poppy seed with lemon cream cheese filling: add 3 tablespoons of poppy seeds when making the dough. For the filling, use ¼ cup brick cream cheese at room temperature, ¼ cup of granulated sugar and the zest from one lemon. Cover and store leftovers at room temperature for up to 2 days. Recipe adapted from The Semisweet Sisters Homemade Hot Dog Buns
Nutrition
The nutrition information is based on third-party calculations, is an estimate only and may not be entirely accurate. Actual nutritional values will vary based on brands used and portion sizes.


Kathleen Pope says
Mmmmm delicious, I cannot wait to try this delicious bread! Your step by step instructions make it feel super simple to make too!
Tasia says
Yay, thank you Kathleen. I'm happy to hear the process photos are helpful. I know your family will love this tasty, fluffy bread recipe!
Caitlin says
Giving this recipe a try...It's rising as I write this so I can't wait to see how it comes out!
Tasia says
Hi Caitlin, I hope you love this bread as much as I do. Thank you for making it!
Christie says
This pull apart bread looks so incredible Tasia! I would love to try making this one day. I love anything that is soft and fluffy.
Tasia says
Thank you, I hope you get a chance to try this recipe Christie! This bread is so pillowy soft on the inside!
Josiah - DIY Thrill says
This bread looks so yummy, I'll have to give this recipe a try!
Tasia says
Thank you Josiah! I know you will love this sweet bread as much as we do!
Ben | Havocinthekitchen says
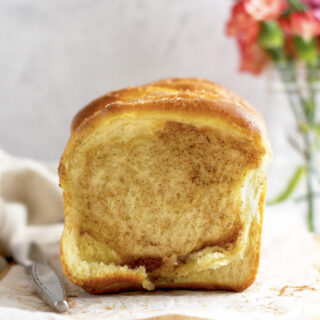
Oh this bread looks and sounds beautiful - so soft, pillowy, brioche-like. I wouldn't mind a few slices, toasted, buttered, and with a spoon of jam 🙂
Tasia says
Thank you Ben! It is definitely a dreamy bread and would be amazing with a spoon of jam!
Heidi | The Frugal Girls says
I really love the sweet version of this bread that you are sharing... the cinnamon sugar filling is so totally irresistible!
Tasia says
Thank you Heidi! I really enjoy this sweet cinnamon version, but the vanilla sugar variation is pretty delish too!
Katherine | Love In My Oven says
Mmmm I adore sweet, soft breads like this! Especially if you can pull it apart! Yum! PS I have the same Thermapen - isn't it great!?
Tasia says
Thanks Katherine! I think the pull apart part of the bread makes it even more irresistible! And yes, I adore my Thermapen!
Caitlin says
My loaf just came out of the oven and it’s perfect! I ended up doing the 2nd rise in the fridge overnight so I could pop it in the oven before everyone woke up in the morning.
I’ll definitely be making this one again!
Tasia says
Yay! Thank you for coming back to comment Caitlin! I'm so happy you love this as much as we do!
Danae says
hi there! could this recipe be made without the filling?
Tasia says
Hi Danae, I have never baked this as a loaf of bread without the filling, but I don't see why it wouldn't work. I often use this same dough and make it into buns for sandwiches. Please let me know how it goes!
Edith says
Can you leave the filling out and just make the balls and put them in a Bundt pan? Thinking of Thanksgiving rolls.
Tasia says
Hi Edith, I think that would work just fine!
Tim says
What a fantastic recipe. Turned out perfectly! Keep up the great work, Tasia!
Tasia says
Hi Tim, thank you for coming back to leave a review. Happy to hear you love this bread as much as we do!
Amanda says
Making this now. Just got it in the oven for baking. Even after just proofing it's already so tall and so gorgeous! I can't wait to see how it comes out. Made mine savory though. Thin sliced four sweet peppers and layered those in in the slices and made a compound butter with garlic, freshly ground rainbow pepper corns, and slap ya mama seasoning (think a spicier tony chacheres). If it comes apart and looks as lovely as the images, I could see this becoming a go to bread recipe. Thank you so much for posting.
Tasia says
Hi Amanda, your version sounds delicious! I make this one savory more often than sweet myself. Thank you for coming back to leave a comment, I hope you loved the bread!
Amanda Greathouse says
It was my first time baking with dry active yeast. It was a learning experience. I used too much yeast (bought a canister to stick in the freezer), and the bread dough got way too large for the pan, and I'm not sure if it was that or the egg replacer I used, but either way, it didn't rise correctly and evenly across it. Thank you so much for the response. I just got some egg and am about to go for round two, actually!
Tasia says
I have never tried an egg replacement in this recipe, so I don't have any experience to share. If your kitchen is on the warmer side, it may not take as long to rise. Happy baking!
K33 says
I add thin slices of peeled granny Smith apples and the sharpest cheddar cheese I can find .
Tasia says
That sounds delicious! Such a fun spin on this pull apart bread!
Luke Miller says
Just made this recipe and it was perfect! I didn't have any milk so I used slightly diluted half&half, and left out a small bit of the flour. I'm usually pretty terrible at baking but every step of this went perfectly. There are only three in my family and the whole loaf was gone in about 30 minutes.
Tasia says
Hi Luke, so happy you and your family loved this bread! It doesn't last long in my house either!
Tammi says
Just made this and it came out amazing!! Very simple and delicious
Tasia says
Hi Tammi, thank you for making it and coming back to leave a review. I'm so happy you love this bread!
Cat says
Tried this but did a blueberry compound butter and lemon icing drizzle instead. Toasting the slices after and adding a little butter on top was perfect. I also have been using the dough recipe by itself to make loaves of regular bread for my husband’s lunches and he loves it.
Tasia says
Hi Cat, this sounds like a delicious version, thank you for sharing! I also use this bread base for many different things, I am so happy to hear you love it!
Ellie Quindsland says
Can I double this recipe? I just made it and thought it was delicious
Tasia says
Hi Ellie, thank you for coming back to leave a review. I'm happy you loved this pull apart bread. I have not doubled this recipe, so I can't give you personal feedback. In reality you should be able to, this King Arthur article (https://www.kingarthurbaking.com/blog/2023/05/10/guide-to-baking-with-yeast#ive-heard-that-when-youre-doubling-a-recipe) has some good information about doubling bread recipes.
jackie says
I made this bread yesterday and it is almost gone!! It is fabulous. plan on making a couple loaves to bring on our family ski trip. Thanks for this great way to make pull apart bread!!
Tasia says
Hi Jackie, thank you for making this pull apart bread and coming back to leave a review. I am happy to hear your family loves it! Have a safe and fun ski adventure!