

The taste of homemade marshmallows far surpasses store bought! This recipe uses a handful of common ingredients and is simple to prepare. Perfect for the holiday season, for hot cocoa or for s'mores!
Are you ready to make EASY homemade marshmallows?? With the holiday season quickly approaching (hello Canadian Thanksgiving!) and the cold weather settling in; it's the perfect time to make marshmallows. Who doesn't love a light and fluffy, melt-in-your mouth marshmallow?

Disclosure | This post may contain affiliate links. As an Amazon Associate I earn from qualifying purchases.
The idea of making homemade marshmallows was seriously intimidating to me for more years than I care to admit. I don't know why I get frightened about some recipes and not others. The recipes that intimidate me all seem to to revolve around candy-type recipes and boiling sugar. Do you remember my fear of making homemade caramel??
I finally kicked this fear to the curb this summer when I entered Ghiradelli and the FeedFeed's summer s'mores contest. My photo was a finalist and while I didn't win, it was such an honor to be nominated.

WHAT MAKES THIS RECIPE EASY?
- Six ingredients (one of them being water) are all you need for this recipe. Gelatin is the one ingredient you may not have in your pantry. Knox is the gelatin I remember from childhood, but Great Lakes Gelatin is another fabulous brand.
- No candy thermometer needed!
- 15 minutes of hands on time.
WHY DO YOU NEED TO BLOOM THE GELATIN?
Blooming the gelatin ensures you will have a smooth texture to the marshmallows. Adding water to the gelatin softens it and allows the gelatin to dissolve evenly in the sugar mixture. Without this step, the marshmallows can have unappealing lumps of gelatin in them.
HOW DO YOU MAKE EASY HOMEMADE MARSHMALLOWS?
Start by putting ¼ cup of cold water into a small bowl. Add the gelatin and stir it all together. Let it sit about 5-10 minutes so the gelatin can "bloom."

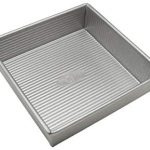
Next, prepare the 9x9 baking pan by lining it with parchment paper and lightly spraying it with cooking spray. Set it aside.
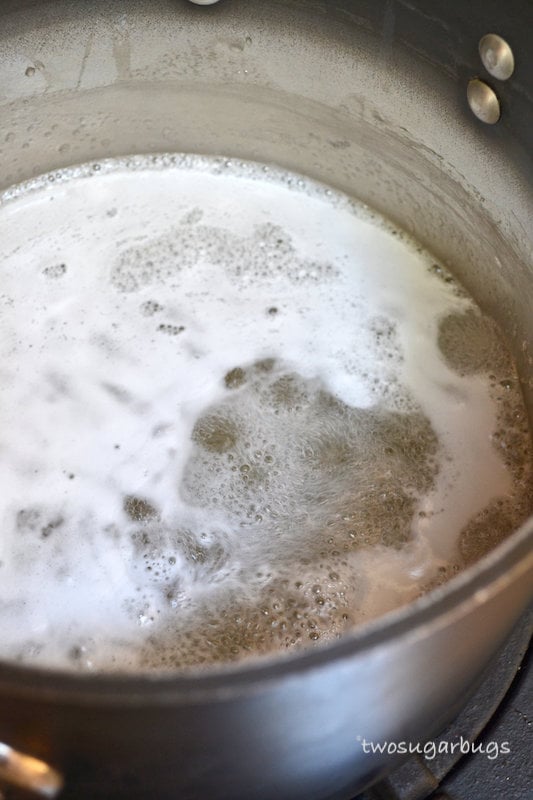
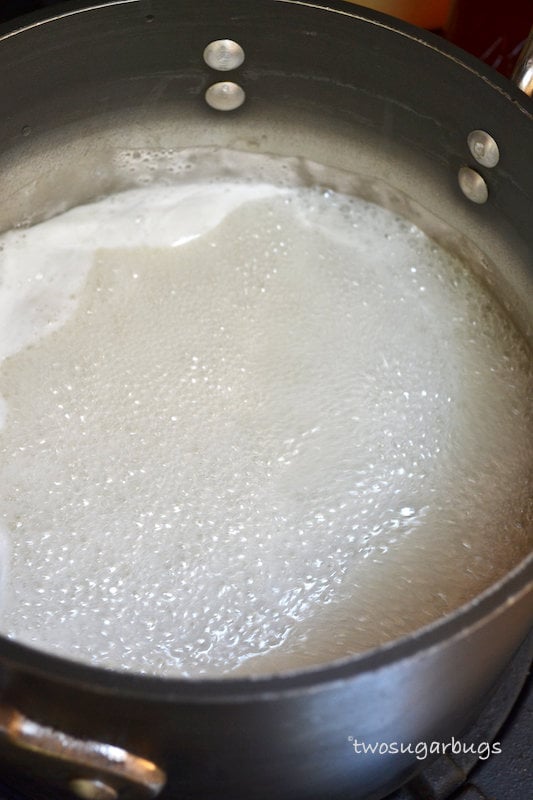
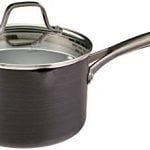
Then add the granulated sugar and water to a large saucepan. Heat over low until the sugar is fully dissolved. Add the bloomed gelatin and stir until fully melted into the sugar water mixture. STOP STIRRING AT THIS POINT.
Increase the temperature and bring the mixture to a low boil for 15 minutes. In my opinion, this is the trickiest part of the recipe. Stay with the mixture at the stove because you don't want the mixture to boil over. I find I have to slightly adjust the temperature up and down over the 15 minutes to maintain a low, but steady boil.

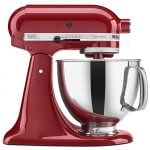
When the 15 minutes are up, pour the hot sugar and gelatin mixture into the bowl of your stand mixer. Attach the whisk and whip at a medium speed (4 or 6 on a KitchenAid mixer) for two minutes. Use caution as the mixture is extremely hot and and will be steaming when you start whipping it.
After 2 minutes, add the vanilla extract and turn the mixer up to high (8 or 10 on a KitchenAid). Whip the mixture until very thick and white. The mixture will also at least double in volume. This takes about 8-10 minutes.

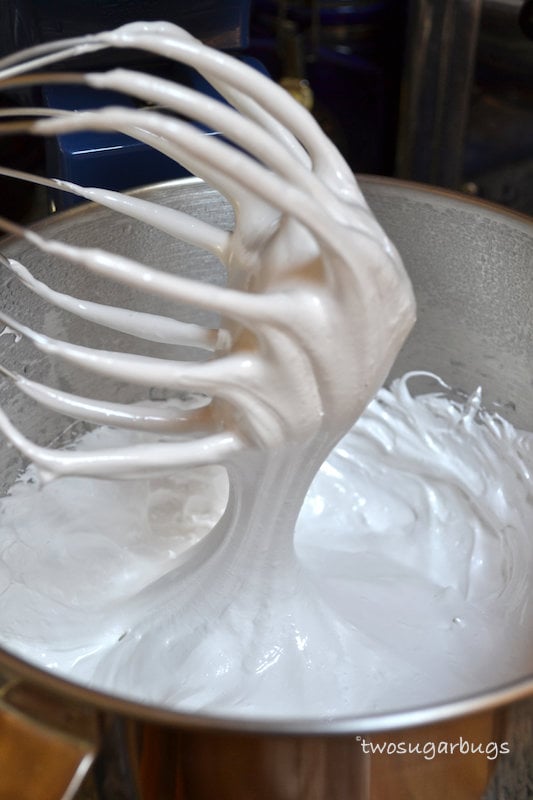
The first photo shows the mixture 5 minutes into whipping. The second photo shows the finished marshmallow mixture after 10 minutes of whipping.
Finally, pour the whipped marshmallow mixture into the prepared pan and smooth out using a spatula sprayed with cooking spray. The mixture is quite sticky and will start setting up so work quickly.
Allow the marshmallows to set up for a minimum of 2 hours. The marshmallows will be tacky to the touch.
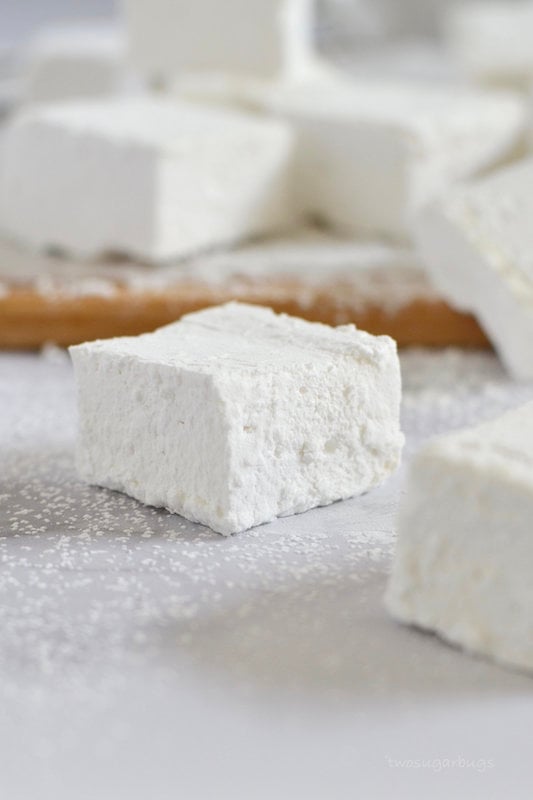
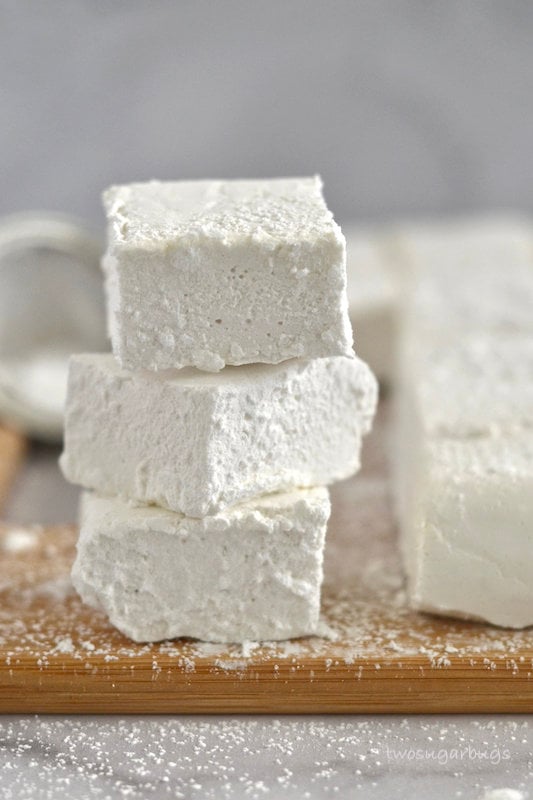
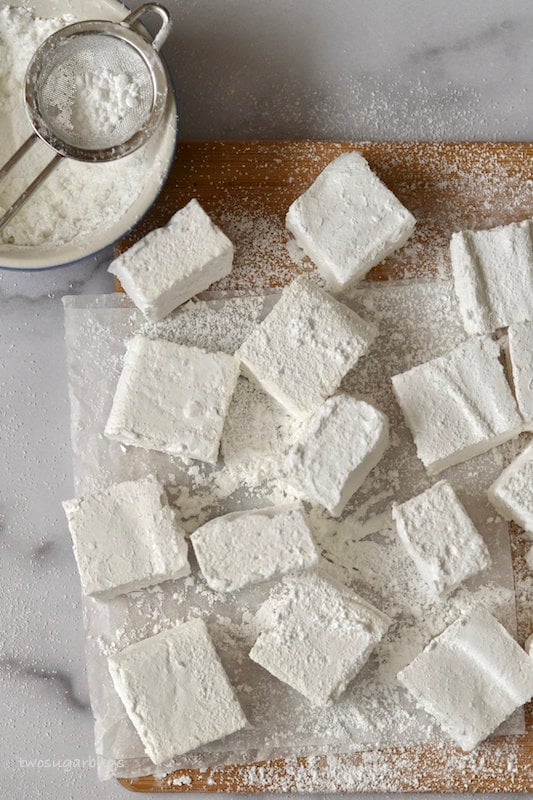
HOW DO YOU CUT HOMEMADE MARSHMALLOWS?
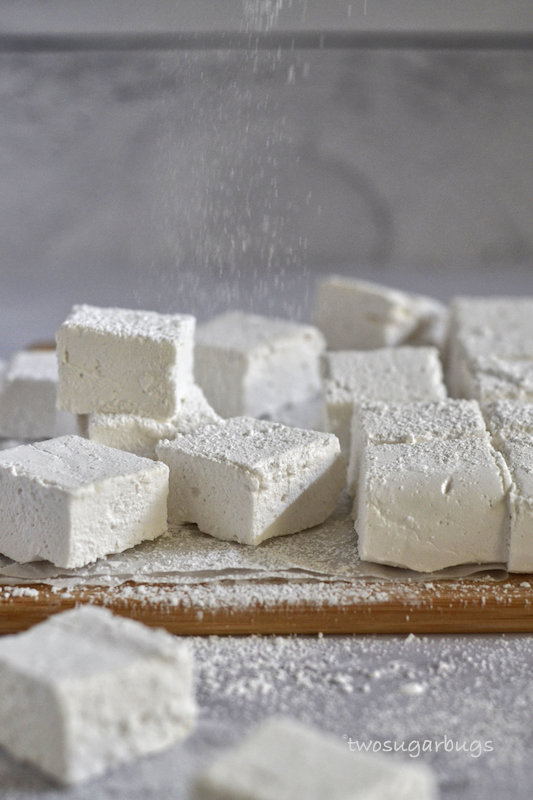
Mix the powdered sugar and cornstarch and lightly dust the top of the pan. Use the parchment paper to pull the marshmallows out of the pan and place on a cutting board dusted generously with powdered sugar and cornstarch. Using a sharp knife (you can lightly spray the knife with cooking spray), cut the marshmallows into the desired size. Continue to dust with the powdered sugar and cornstarch mixture to help decrease the stickiness.
HOW DO YOU STORE HOMEMADE MARSHMALLOWS?
Once the marshmallows are cut and tossed with the powdered sugar and cornstarch mixture they can be stored in an airtight container or zip-top bag at room temperature.
HOW LONG DO HOMEMADE MARSHMALLOWS LAST?
Homemade marshmallows last up to 2-3 weeks at room temperature. They do tend to dry out and get a little crunchy on the edges over time. Good luck getting them to last that long!
Recipe shared with Full Plate Thursday, Meal Plan Monday and Weekend Potluck
To pin this recipe, you can use the button on the recipe card or the share buttons on the side or bottom of the page. Come follow me on Pinterest and Instagram to see all the things that inspire me. Thank you for being here and happy baking!

Easy Homemade Marshmallows
recipe created and tested by:
I highly recommend using weight (metric) measurements when available for more accuracy and the best results.
Please note
When using 2x or 3x ingredients, the grams DO NOT adjust, you will have to manually do that.
Equipment
Ingredients
- 5 teaspoons unflavored gelatin powder
- ¼ cup cold water
- 2 cups granulated sugar
- 1 cup water
- 2 teaspoons pure vanilla extract
- ¼ cup powdered sugar
- 2 Tablespoons cornstarch
Instructions
- Pour gelatin into ¼ cup of cold water and stir together. Set aside and allow to “bloom," about 10 minutes. If using Knox pouches, use 2.
- Line a 9x9 inch baking pan with parchment paper and lightly spray with cooking spray. Set aside.
- In a large saucepan, dissolve granulated sugar in water over low heat. The mixture may start to come to a low boil. Add the bloomed gelatin and stir until dissolved. STOP STIRRING AT THIS POINT. Increase the temperature to medium and bring the mixture to a low boil. Boil for 15 minutes without stirring. Don’t walk away as the mixture can boil up easily, adjust the temperature as needed to keep the mixture at a low, but steady boil.
- When the 15 minutes have elapsed, remove the mixture from the heat and pour into a stand mixer bowl. The mixture is extremely hot and will be steaming. Whip with the whisk attachment at medium speed (4 or 6 on a KitchenAid Mixer) for 2 minutes. Then add the vanilla and turn up to high (8 or 10 on a KitchenAid) and whip until very thick and white. The mixture will also at least double in volume. This takes about 10 minutes.
- Pour the whipped marshmallow mixture into the prepared pan and smooth out using a spatula sprayed with cooking spray. The mixture is quite sticky and will start setting up so work quickly.
- Allow marshmallows to set up for a minimum of 2 hours, sitting at room temperature. The marshmallows will be tacky to the touch. Mix the powdered sugar and cornstarch and lightly dust the top of the pan. Use the parchment paper to pull the marshmallows out of the pan and place on a cutting board dusted generously with powdered sugar and cornstarch. Using a sharp knife (you can lightly spray the knife with cooking spray), cut the marshmallows into the desired size. Continue to dust with the powdered sugar and cornstarch mixture to help decrease the stickiness.
Notes
Nutrition
The nutrition information is based on third-party calculations, is an estimate only and may not be entirely accurate. Actual nutritional values will vary based on brands used and portion sizes.
Suzi says
These sound yummy! Can't wait to try them😊
Tasia says
I know you are going to love how delicious and easy they are!
Chelsea says
after pouring it out in the pan to sit up is it just sit on the countertop at room temperature does it need to be refrigerated or cover it or anything like that?
Tasia says
Hi Chelsea, the marshmallows can just sit on the counter to set up. I don't usually cover mine, but you can lightly cover with plastic wrap.
Leanne says
These look so soft and pillowy Tasia! So perfect for hot chocolate season. I've never tried making my own marshmallows but with your recipe and steps I may have to give it a try this winter!
Tasia says
Thank you Leanne! You will love how easy this recipe is and the fact that you know exactly what is in your soft and pillowy marshmallows!
Thea says
Hey!!! I’ve made this recipie so so many times and it’s always turned out right. But these past couple of times. The marshmallow fluff seems perfect, fluffy and delicious, but after the 2 hours, it hardens and gets crumbly and not tacky. I haven’t been doing anything different and I’m so confused.
Tasia says
Hi Thea, I'm so happy to hear this recipe has worked well for you. Making homemade candies can be so frustrating sometimes and I'm sorry it's been giving you trouble lately. It is always hard for me to troubleshoot from afar, but here are some thoughts. Did you change the pan you are using? I do find stainless steel pans tend to heat more quickly and can lend to an over cooked mixture, which will lead to a harder final product. Whipping them too long can also lead to the same results. I know the last batch I made I cooked at too high a temperature and mine were more crumbly too. The humidity of your kitchen could also create a difference in the final marshmallows. Crossing my fingers for you for the next time!
Holly says
I made these and they look great but when I heat them up (like to make a smore), the marshmallow completely liquifies. What did I do wrong?
Tasia says
Hi Holly, it sounds like maybe too high of heat is being used to toast them or they are being heated for too long. The gelatin that gives them their structure will break down when overly heated. I just made a batch for the 4th of July and used my toaster oven to heat the marshmallows for our s'mores - I start at 1 minute at 350°F (on our reheat setting) and give them a little more time if needed. When I want to "toast" them more like a campfire marshmallow, I use a kitchen torch.
Chelsea says
after pouring it out in the pan to sit up is it just sit on the countertop at room temperature does it need to be refrigerated or cover it or anything like that?
Tasia says
Hi Chelsea, let them set up at room temperature. You don't want to put homemade marshmallows in the refrigerator as it can make them extra sticky and change the texture.
Simon says
it burned in less than a minute after I turned the heat up and stopped stirring
Tasia says
Hi Simon, it sounds like your burner might be too hot or maybe your pan doesn't have a heavy of enough bottom. The mixture should come to a low boil, not a full rolling boil.
Katherine | Love In My Oven says
We love homemade marshmallows!!! Such a fun treat for the kids and they taste SO much better than the store-bought ones! These look fantastic Tasia! I bet your girls gobbled them up!
Tasia says
They are just the best! Thank you Katherine!
Kim says
Who knew making marshmallows could be so easy?! I love your process shots, they're so helpful. Keep the great recipes coming, Tasia!
Tasia says
Thank you Kim, they are surprisingly easy! I'm happy the process shots are helpful.
Jenna Barnard says
These look so creamy and fluffy! The perfect recipe!
Tasia says
Thank you Jenna!
Stacy Roman says
Hi, I'm visiting you from the full plate link party, I followed you on all forums, your site looks great. I would love for you to follow me back. These marshmallows look so good. I will be trying them for sure.https://WeDishItUp.com
Tasia says
Thank you Stacy! I hope you love them! I'll be sure to look you up. 😊
Nathan says
Hi Tasia, these look great and I am going to make them today! Just wondering, if we wanted to make these with flavours, would we need to exchange the water with a flavour of some sorts? Thanks!
Tasia says
Thank you Nathan. I guess it depends on what type of flavoring you intend to use. If you are using another extract or a liquor like bourbon or rum, you could just substitute it for the vanilla extract. I have not tested this recipe with adding other types of flavorings. Happy marshmallow making, let me know what flavor you end up with!
Nathan says
Thank you! I made a few different flavours and used the flavour liquid in place of the Vanilla. We did make one using the Vanilla and adding another flavour but they ended up too wet. You definitely need to exchange the liquid for the same amount you use for flavour.
We ended up making banana,orange, mint and unicorn. We used a liquid flavour and powder for colour. We added the colour at the end but we put the flavour in at the 2 minute mark as you would the vanilla. Sensational. Thanks for this recipe - love it!
Tasia says
Those flavors sound delicious Nathan! Thank you for coming back to tell me how it went; I'm glad you love the recipe! Now you have me wanting to experiment with more flavors!
Katy B. says
If I wanted to use these to make rice crispy treats could I use the pre-set mixture? Or do these melt once set?
Tried to find dairy AND soy free marshmallows with no luck so guess I will try making them.
Thank you!
Tasia says
Hi Katy! I've not tried making rice crispy treats with this recipe (but now you make me want to!). I would mix in the crispy rice cereal before the marshmallows set up. You'll need to work quickly and I would recommend greasing your spatula well (and maybe your hands too). Please let me know how it goes.
Kristin says
I wonder if swapping the vanilla extract out with orange extract would work to make them orange flavored marshmallows.
Tasia says
Hi Kristin, I think that substitute should work fine. I bet they will be delicious!
Kelley says
I always thought homemade marshmallows would be complicated to make. I was so wrong! I've just made this recipe and they came out beautifully. Thank you for sharing this recipe!
Tasia says
Thank you so much for returning to comment Kelley! I'm so happy to hear that you enjoyed this recipe!
Josie says
So.. I tried this recipe, and it flopped! Mixed and mixed for over 10 minutes and nothing happened.. I followed the recipe exactly! Is it because I used a vegan gelatin?
Tasia says
Oh no! I have not worked with vegan gelatin, but know most of them require extra steps in order to use them as a substitute. I would guess that is the culprit. I did a quick google search and found several vegan recipes, if that is what you need. Thank you for giving them a try and I'm sorry the substitute did not work out for you.
Debbie says
Is it possible to have these set up a bit quicker by refrigerating them? I teach some young children cooking classes but my time with them is only about 2 hours. The oldest has asked to make homemade Graham crackers & marshmallows to make s’mores from scratch. Just wondering if this would work.
Tasia says
Thank you for your question Debbie, I'm sorry I am just seeing this now. I would worry about refrigerating them; my fear is that they may get too hard and then get extra sticky when they come out. I love the idea of making homemade marshmallows the cooking class s'mores. 🙂
Karen says
The recipe was well written and easy to follow. The pictures were helpful, especially showing the mixture after five then ten minutes of being whipped. The marshmallows tasted amazing. I've never tried to make any before and had never tasted homemade before. This will be my go to recipe for sure. I immediately made another batch, this time of lemon. Instead of 2t vanilla extract, I used one vanilla and one lemon extract. I'm going to experiment with different flavors using this as the standard. Thank you!
Tiffany says
I tried making these and cannot get them to turn white and thick, I tried 3 times. Followed directions to a T! I want to make these work!
Tasia says
Hi Tiffany, I'm sorry to hear this recipe is giving you trouble. It's always challenging to trouble shoot from afar, but I'm going to try. I'm wondering if your mixture temperature is off. This recipe is designed to not need a candy thermometer, but you may want to give that a try. Ideally the mixture should be around 240°F before whipping {although this can vary based off your altitude - I'm at sea level}.
Laura says
These are delicious. I've made them twice and they were perfect both times! Very easy to follow directions.
Tasia says
Hi Laura, I'm so happy to hear you love this recipe and find the instructions helpful! Thank you for coming back to leave a comment.
K says
This is my second time making the recipe- and this time they did not hold up overnight. The texture is best described as spackling. They tasted amazing on day 1 both times. What could I be doing wrong?
Tasia says
Hi K, I'm trying to imagine what you mean by spackling. Do you mean they have dried out? Is it just the outside or all the way through? Mine tend to get a little dry along the edges after a few days, but are still soft in the center. If they are dry all the way through, it makes me wonder if they were slightly over cooked or over beaten. I also keep wondering about where you live and if humidity could be playing any part.
Dani says
Hi, I made these once before and they were wonderful. I’m about to make them again but want to double the batch. Can I simply double all the ingredients? I know sometimes ratios can get weird and I wasn’t sure about the gelatine. I can always make two separate batches instead of 1 large one if that would be better. Thank you.
Tasia Harper says
Hi Dani, I have never attempted to double this recipe and agree that sometimes things can go awry when doubling. If it were me, I would make two separate batches.
Elena says
Hi, I made marshmallows according to this recipe and well . . . it came out kind of hard and dense, and I wanted to know if there was any way you could make the marshmallow fluffier after you had already made them?
Tasia says
Hi Elena, it sounds like the mixture might have gotten a little too hot, which resulted in a drier marshmallow. I haven't ever tried softening them, so I don't have personal experience. I know you can soften store bought marshmallows by placing them in a zip-top bag and placing in a bowl of warm water; you could try and see if that helps.
Hadley Manning says
Hi, I love your recipe, it’s worked great every time. I’m interested in trying more natural sugars. I wonder if you’ve ever used honey or maple syrup to replace the sugar in this and if so, do you have any tips or measurements?
Tasia says
Aww, thank you Hadley. I am happy to hear you love this recipe! I have not done any testing with honey or maple syrup instead of sugar in homemade marshmallows, so I cannot give you any tips. I suspect it could work, but you will need to make adjustments. If I were testing this (a lot of my tests don't work out!), I would likely use honey and reduce the amount by half, but it will take some experimenting. If you give it a try, please let me know how it works out!
Cassidy says
Just made them and so excited to try. Just a few notes, you spelt bowl instead of boil once, and you don’t specify if the marshmallows should rest on the counter or in the fridge.
Tasia says
Hi Cassidy, thank you for the comment and finding that spelling error. I updated the recipe card to specify letting them set up at room temperature.
Simon Barton says
the mixture burns when I boil with the gelatin how do I fix this?
Tasia says
I would try using a lower temperature and a heavy bottom saucepan.
Chloe Williams says
I tried to make these but once I started mixing the mixture just went to powder 😭 can anyone help?
Tasia says
Hi Chloe, I suspect your mixture might have gotten too hot. I've never had the mixture turn to powder though, so I am not sure. Do you have a candy thermometer? If so, you want to aim for 230-235°F.
Brook Stunkard says
Hey have you ever made this and added like cookies on top, or flavors in like peanut butter or anything else!
Tasia says
Hi Brook, I have not added peanut butter or cookies. I have used other extracts to flavor them, but that is as far as I have experimented.
Katie Sierra says
I just tried to make this and used a candy thermometer. it took 45 minutes to come to 240 but apparently I did it wrong because as I'm whipping it it's super dry and hardening already after just 10 minutes
Tasia says
Hi Katie, it sounds to me like you over cooked the marshmallow base. 240F on a candy thermometer is the hard ball stage, which would make this recipe over cooked. The recipe was designed to make off the cooking time and not with a thermometer, but I do have in the notes to go to 230-235°F if wanting to use that route.
Cat says
I’d like to use this for rice crispy treats. Do I need to let sit or can I use right away
Tasia says
Hi Cat, I haven't done this myself (yet), but I would add the rice crispy cereal before adding it to the pan to set. I worry that they will not melt with butter the same way that processed marshmallows do. Let me know how it goes!
Emma says
I’m trying to make these rn with my 5 year old. Just so you know the materials say “medium sauce pan” but instructions say “large sauce pan” which made my neurodivergent mind look to match them and had to re read that they’re interchangeable? Lol but it was annoying that it didn’t match up
Tasia Harper says
Hi Emma, thanks for letting me know. I hope you and your little one enjoyed these marshmallows as much as my family does!